4. Connect answers and add useful checks
Properties are the settings of the control you selected. Some change how it looks, some change where its answer goes and some change when it can be used. Start with the business purpose before changing a setting.
Screenshot context: These figures show the fictional People Operations practice draft captured on 15 November 2026. Numbered marks identify the setting, result or recovery step. Each figure links to its full-size guide and unchanged original. Preview entries stay in the session; these screenshots show no submitted leave request or manager approval.
A label is the question people read. An input is a declared answer the form can work with. Store value in connects the control to that answer. A formula calculates something from available values; use one only when a fixed setting is not enough.
Before you start
Continue with the unpublished Leave request practice form from Arrange fields and sections, in People Operations. It already contains Leave details, two Date controls in Columns, and the original Reason for leave TextArea. Reason already stores its answer in inputs:reason; the two Date controls have no answer destination yet. Preserve that work.
Use the separate Leave request intake form for the record-generation lesson. Its generated field names and actions have a different purpose. These examples improve the small practice form; they do not replace generated fields, publish an application, save a leave record or send anything to a manager.
Repeating the lesson: inspect the actual inputs, bindings and controls first. Reuse matching answers and questions. Do not press Add input or insert another control just to repeat a screenshot. If an existing answer has another name, use that name consistently in the picker and formulas instead of silently adding a second destination.
Declare the form’s answers
- Open Inputs in the designer's right panel and inspect the existing names, types and purpose. Do not choose Add input yet.
- Inspect reason first. If it already exists as Text, keep it. Only when that answer is missing, choose Add input, set Name to reason, Type to Text and keep Single with Default empty.
- Check startDate and endDate separately. Retain each existing matching Date, Single answer. For each missing answer only, choose Add input, enter its Name and select Date.
- Check requestedDays as Integer, Single and coverageDetails as Text, Single. Retain each matching answer; use Add input only for a missing one. If an existing name has another purpose or type, stop and inspect its uses rather than overwriting it or adding a duplicate.
- Leave each Name field after editing it, for example with Tab, so the name is committed. Check five distinct names and correct types. Choose Save and wait for Saved remotely.
- Select the relevant control in Designer and return to Properties to connect it.
| Input name | Type | Meaning in this exercise |
|---|---|---|
| reason | Text, Single | The explanation typed in Reason for leave. |
| startDate | Date, Single | The first day requested. |
| endDate | Date, Single | The last day requested. |
| requestedDays | Integer, Single | The whole number of days entered for the visibility exercise. |
| coverageDetails | Text, Single | The extra coverage explanation for longer leave. |
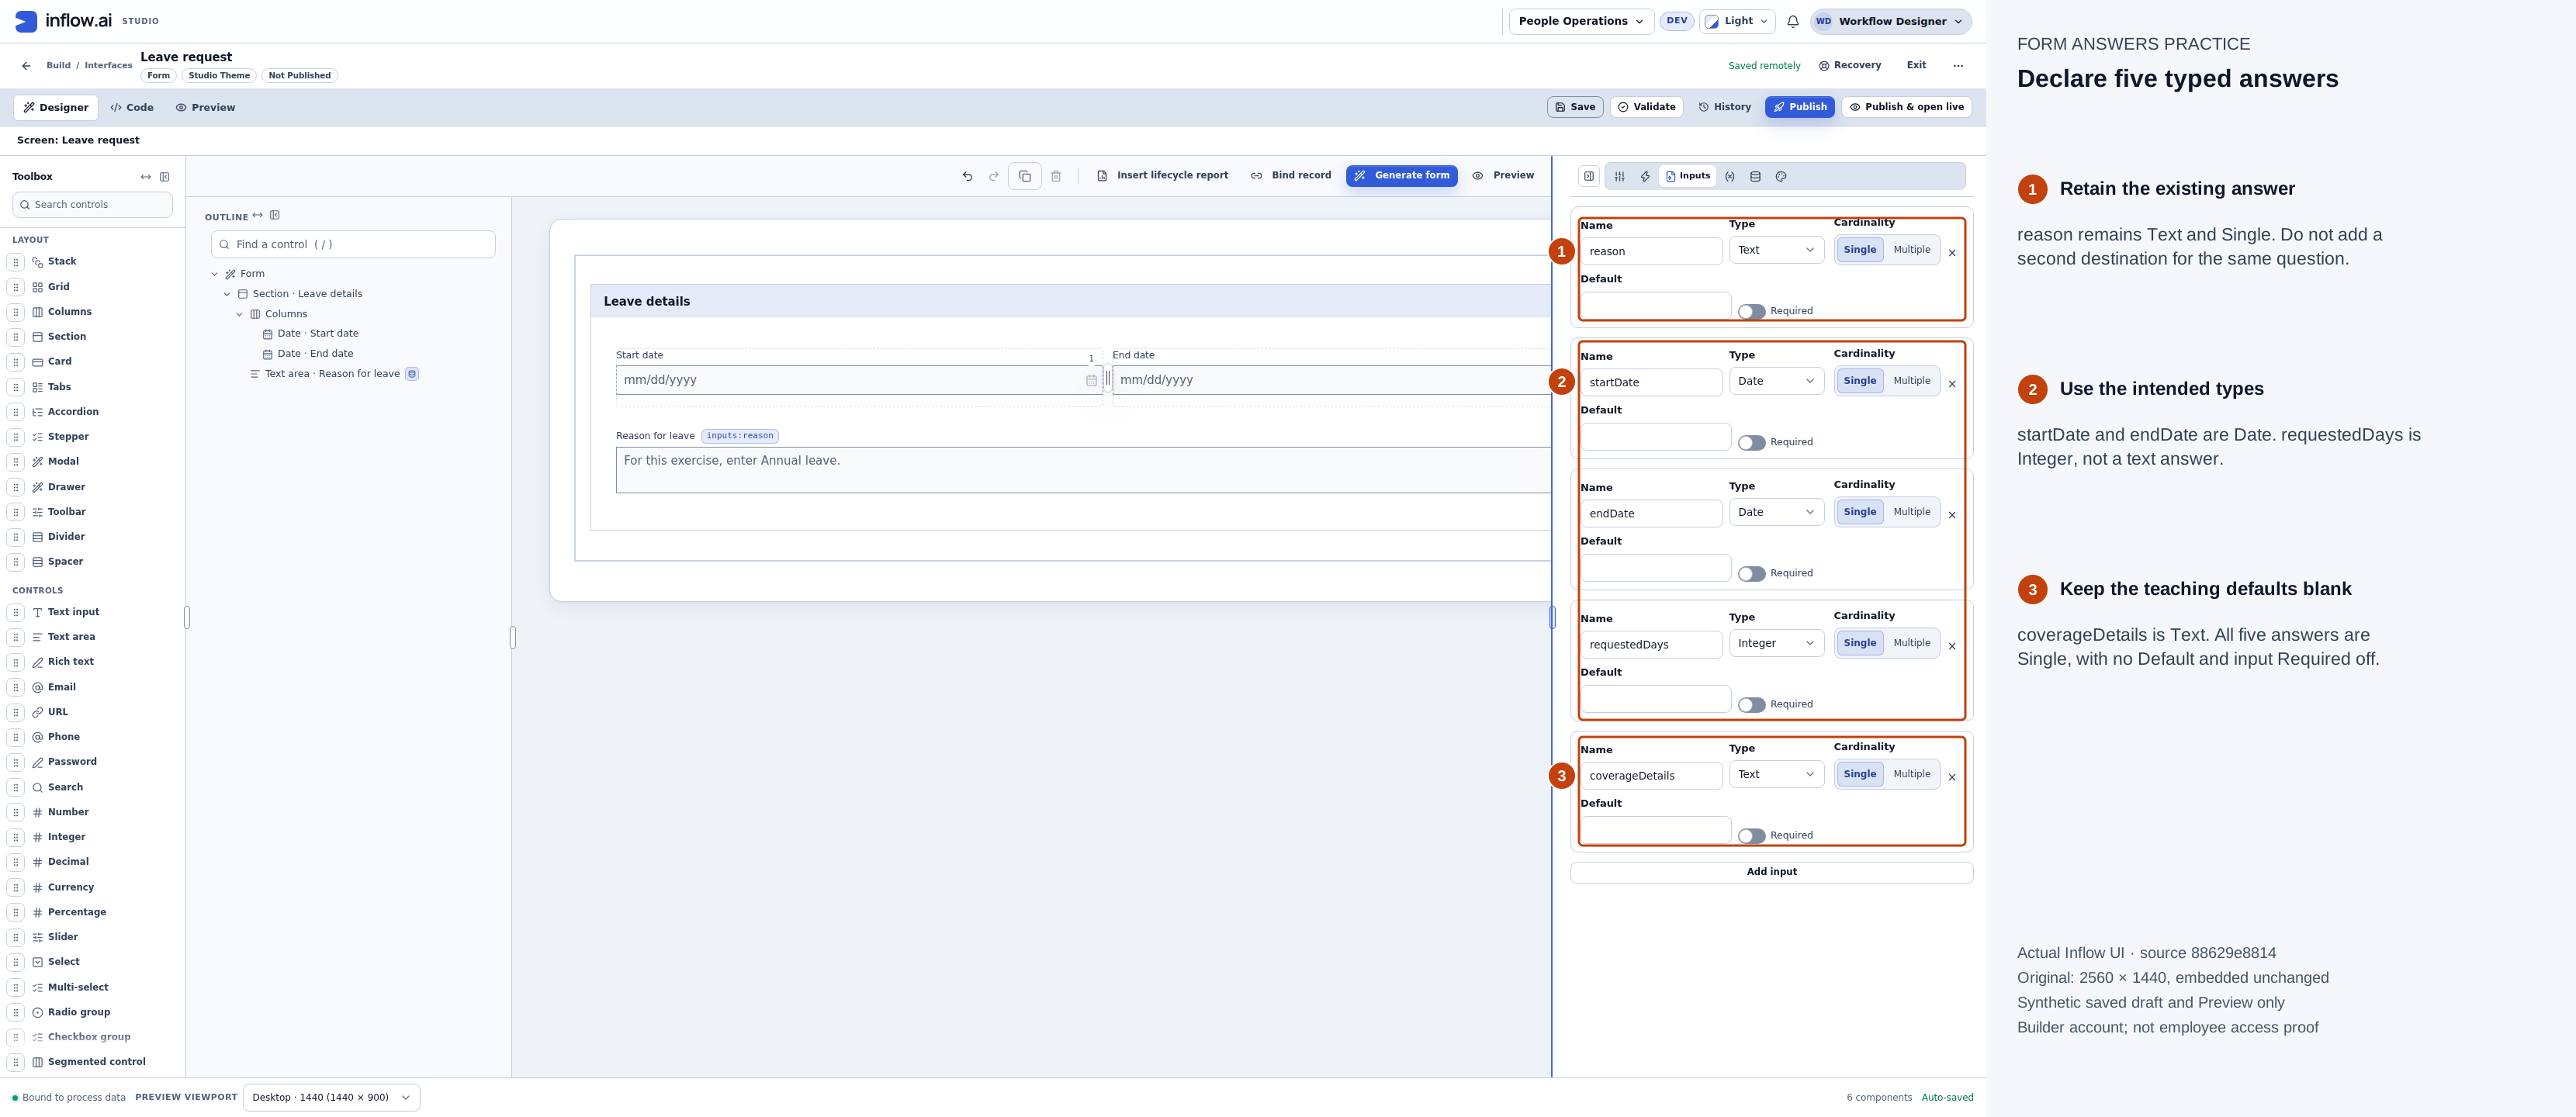
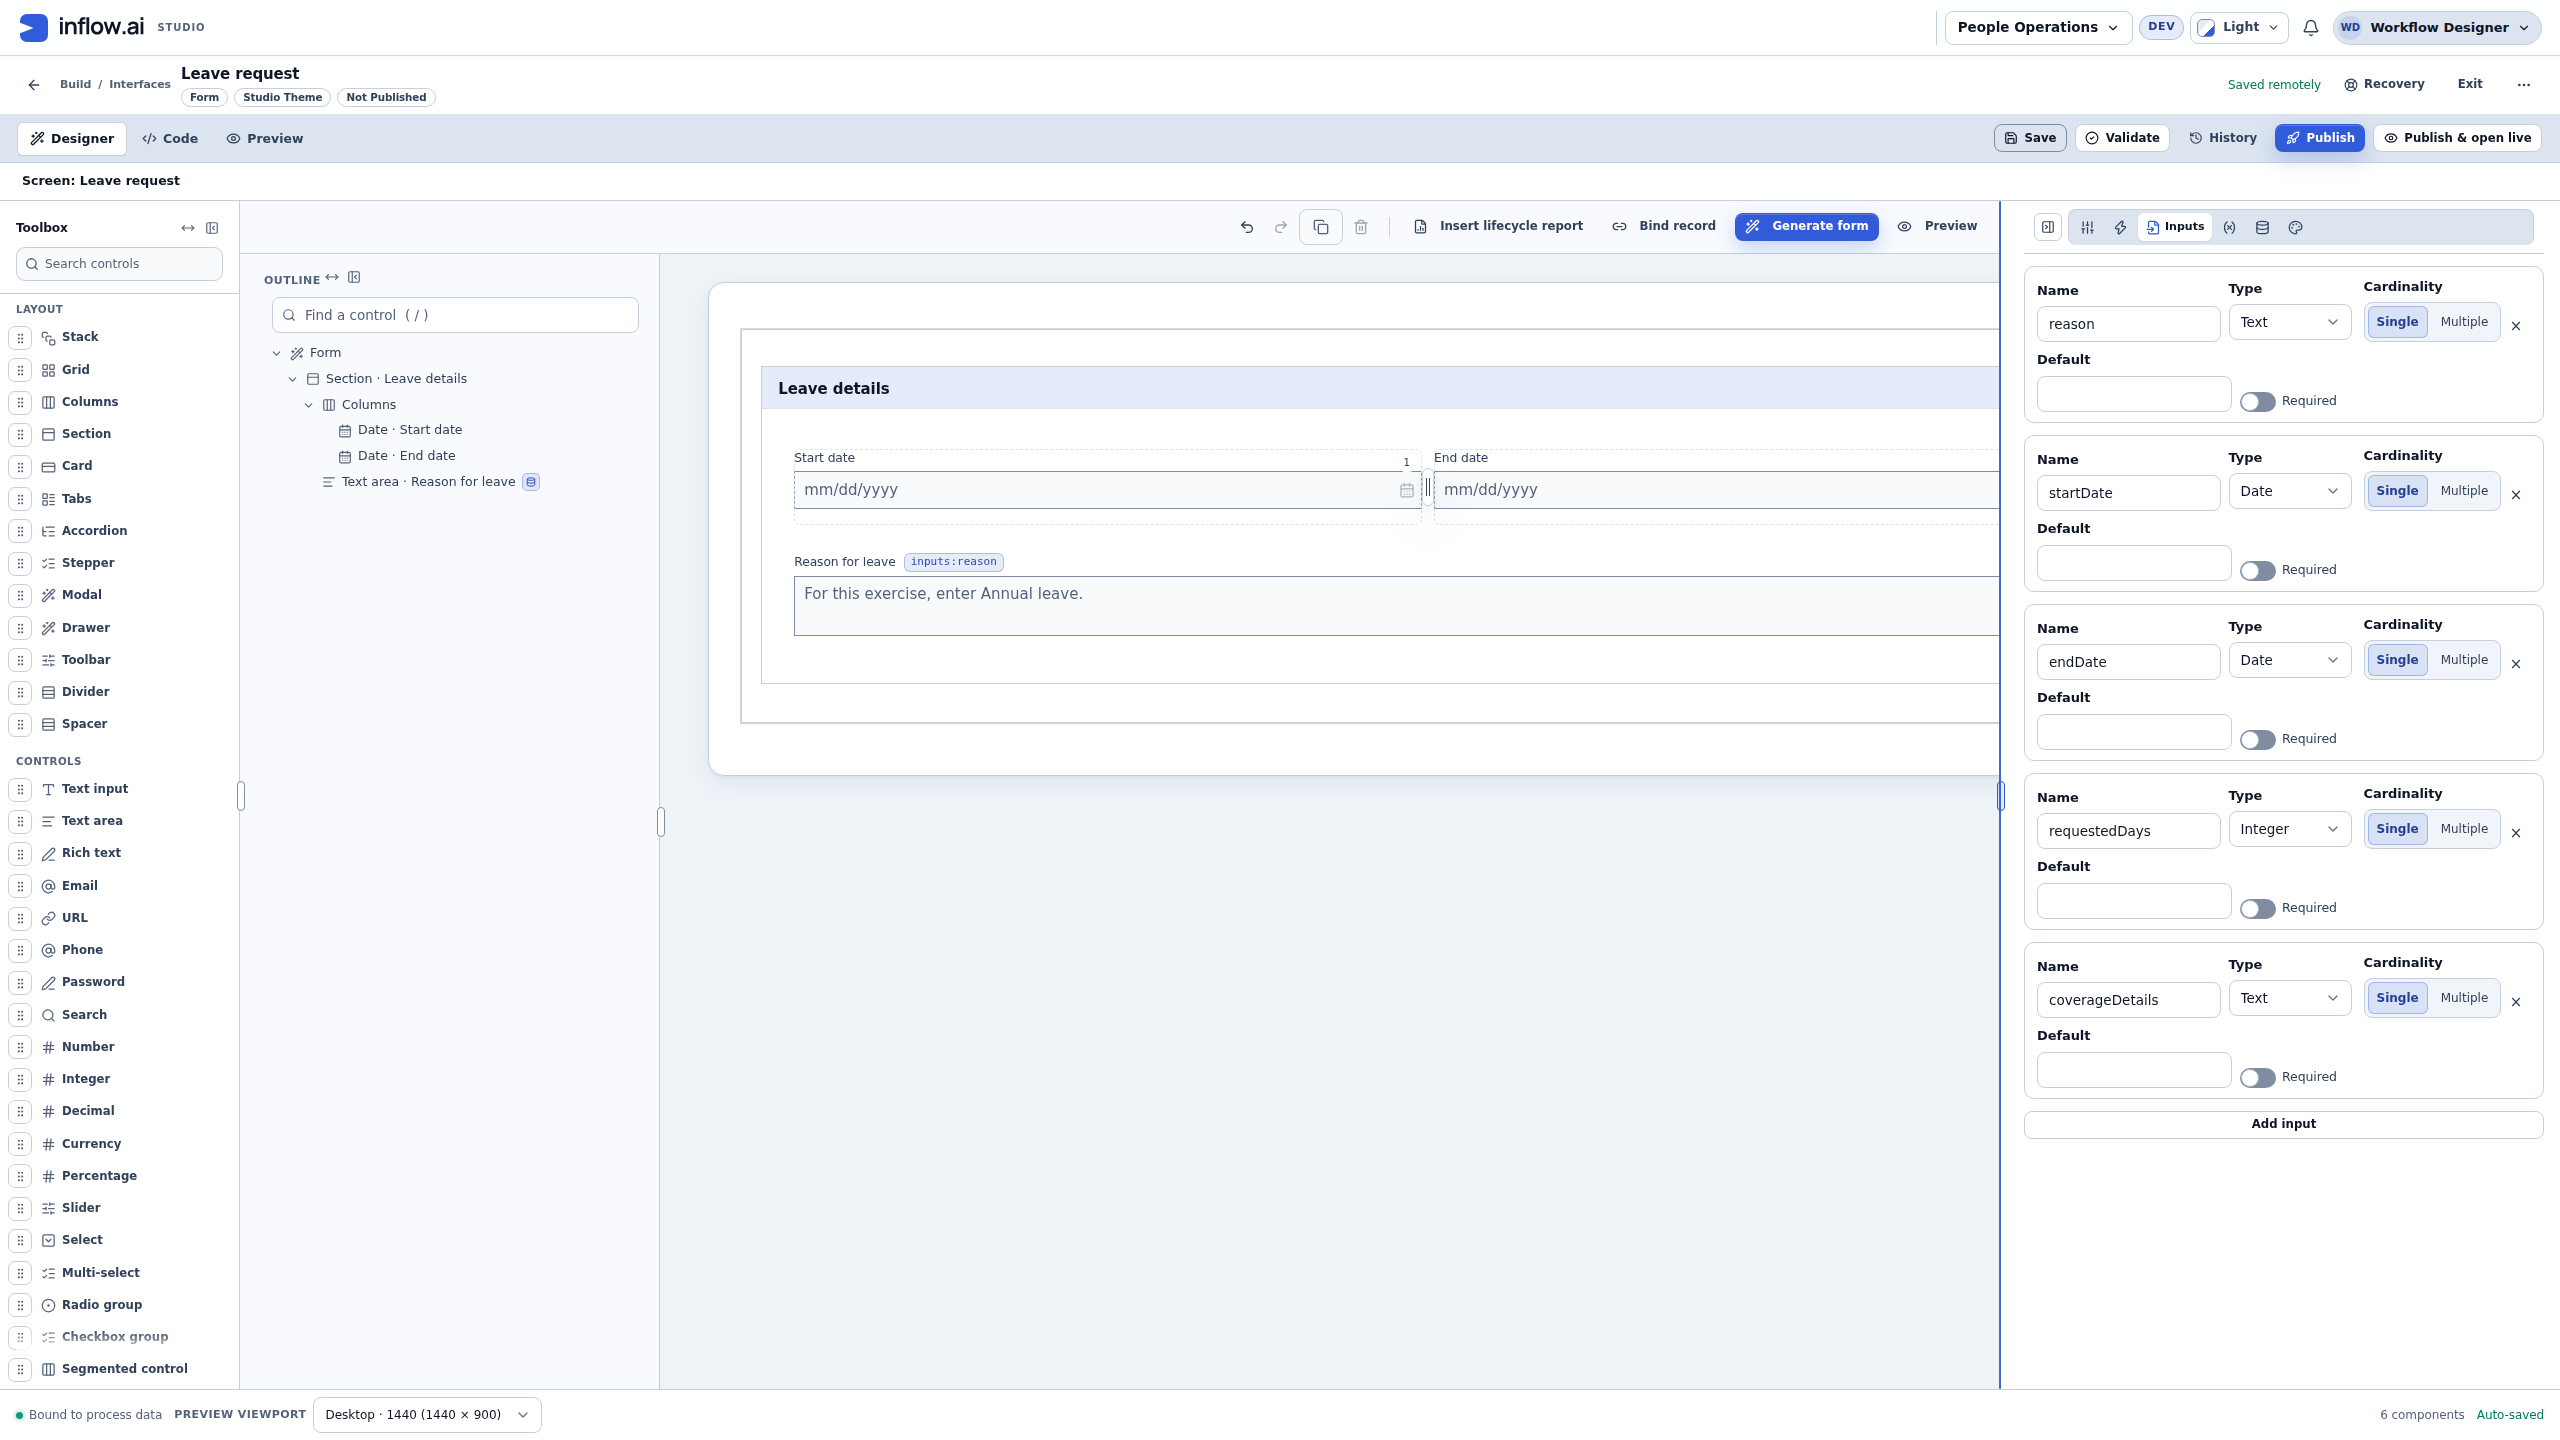
Five distinct answers have deliberate types and Single cardinality. Their Defaults remain blank and their input-level Required switches stay off. Retain the existing reason answer; input order may change after reopening. Full-size numbered guide · Unchanged original screenshot.
Single means one answer of that type. It does not mean “one character” or “one day.” Multiple is for several values and is not needed here. Default supplies an initial value; leave it empty so these tests begin with the person's actual entry. The input's Required switch describes an interface-input requirement. The control's Validation → Required setting, used below, checks the visible question. Do not treat these two settings as interchangeable.
An input Name, such as startDate, is the name selected by the picker and formulas. A control Label, such as Start date, is the wording people read. They may be similar without being identical. Adding a label to the canvas does not automatically declare an input.
If your existing form uses other names, select those actual inputs instead of adding a second answer with the same purpose. The examples below use reason, startDate, endDate, requestedDays and coverageDetails.
Example 1: connect Reason to its answer
- Select the Reason TextArea in Designer or Outline.
- Under General, set Label to Reason for leave. Use clear help appropriate to the exercise.
- Open Data Binding and use Store value in to choose the declared reason input.
- Open Value to inspect a default or placeholder if one is appropriate. A placeholder is a hint; it is not the person's saved answer.
- Open Validation → Required and choose Yes. This control is required in our exercise; leave the input declaration's separate Required switch as it was.
- Choose Save and wait for Saved remotely. Check the selected question still has Store value in → inputs:reason; a changed label must not disconnect the answer.
- Open the top Preview tab and keep Interactive selected. Leave Reason for leave empty and choose Check form. The preview reports 1 issue, highlights the question, and displays This field is required.
- Type Annual leave in Reason for leave and choose Check form again. Expect All checks pass.
- Open Form state. The local test state should show reason with the value Annual leave. Hide state closes that inspection without changing the answer.
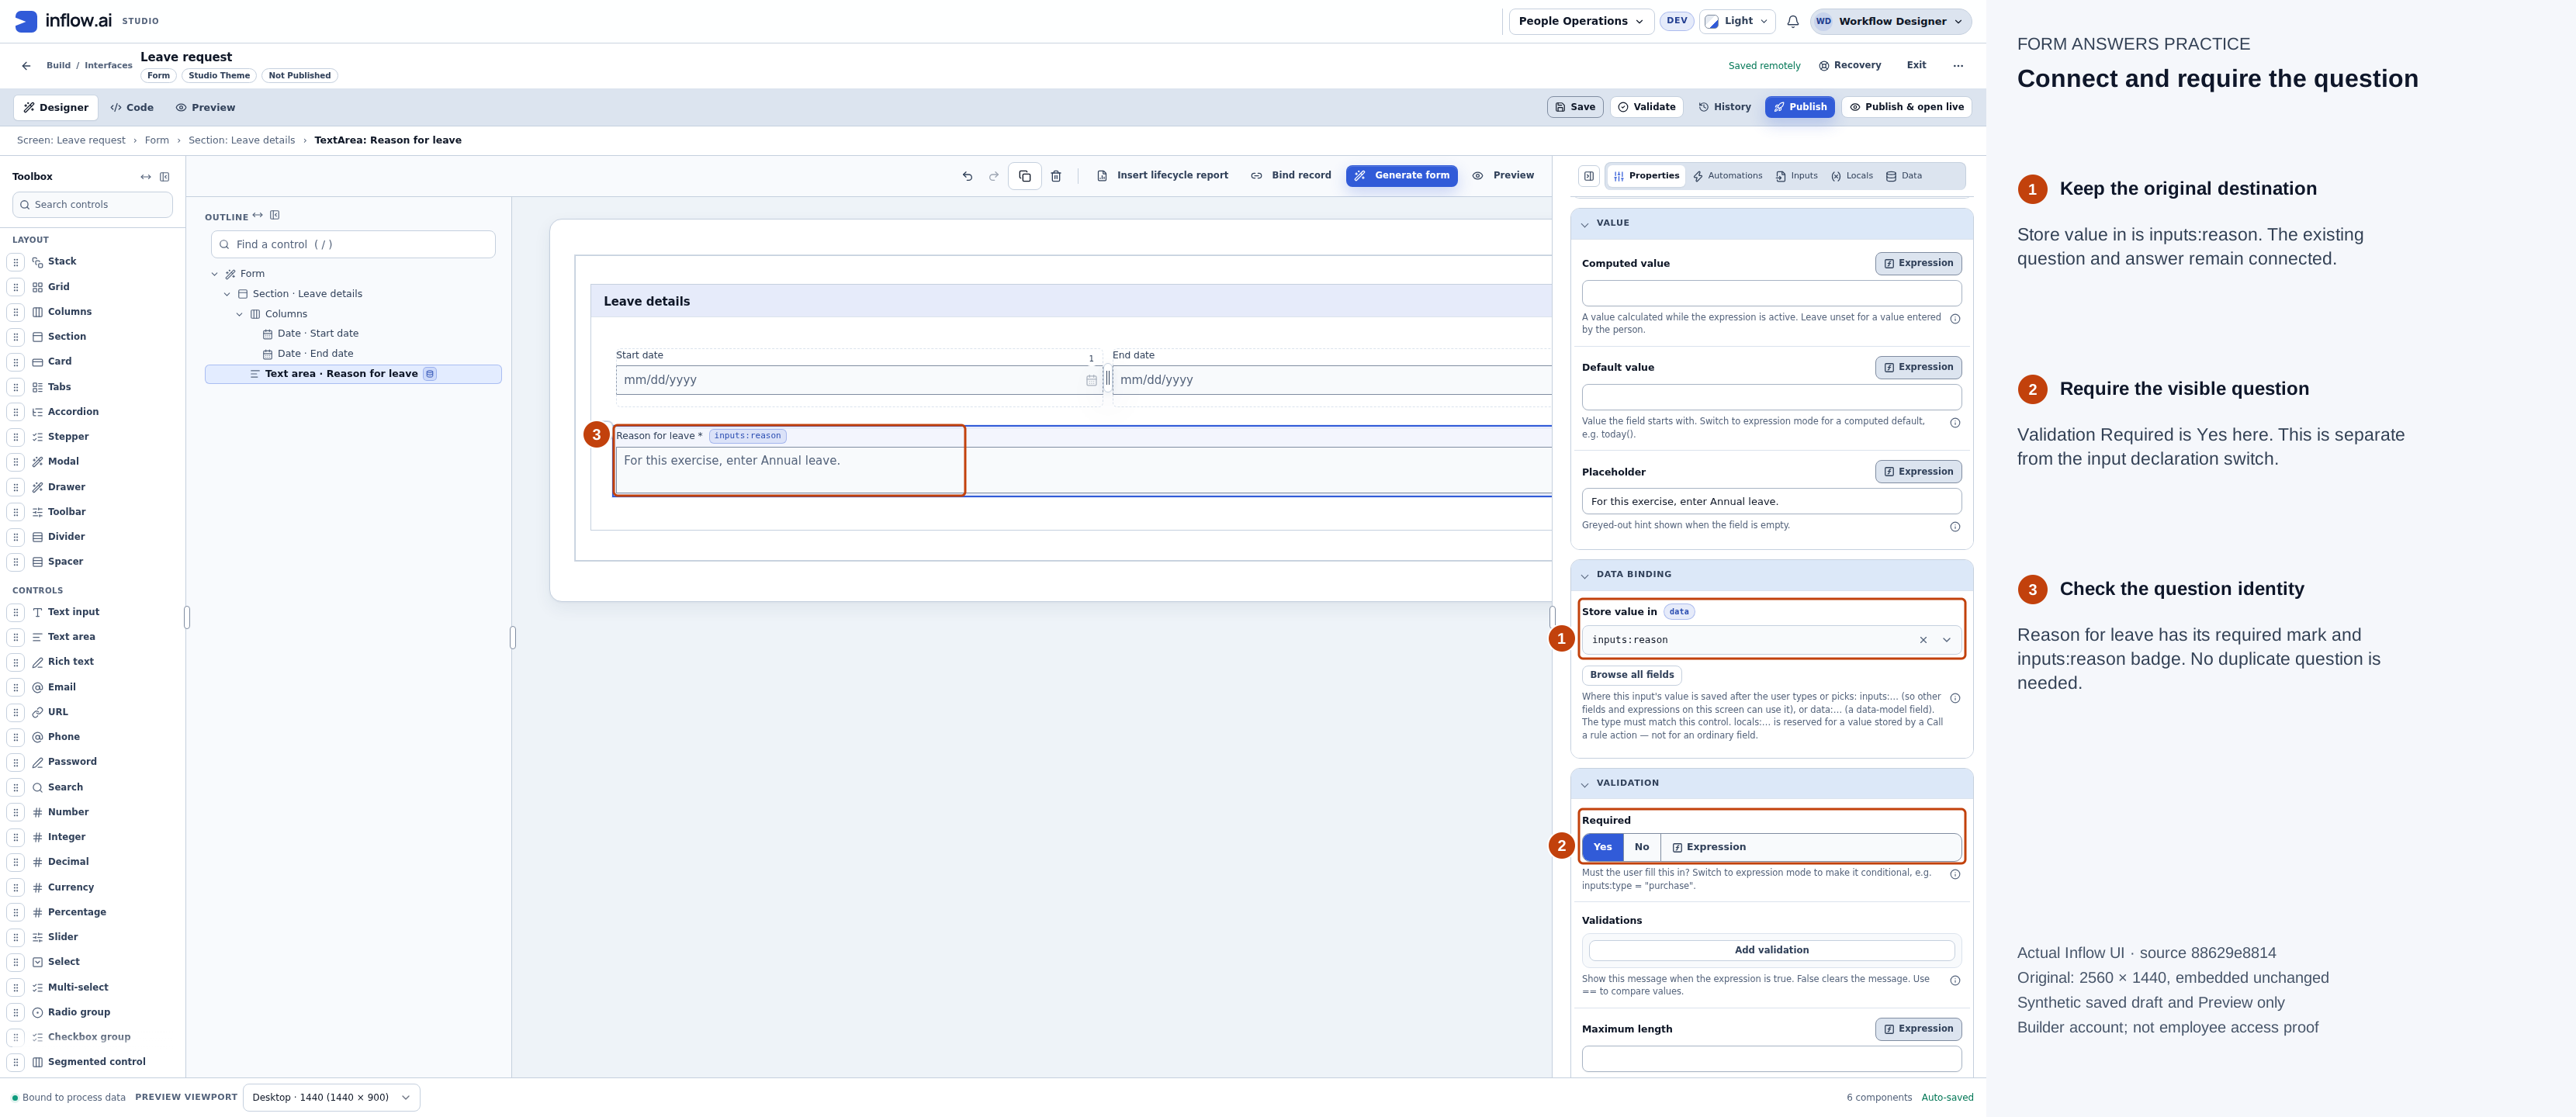
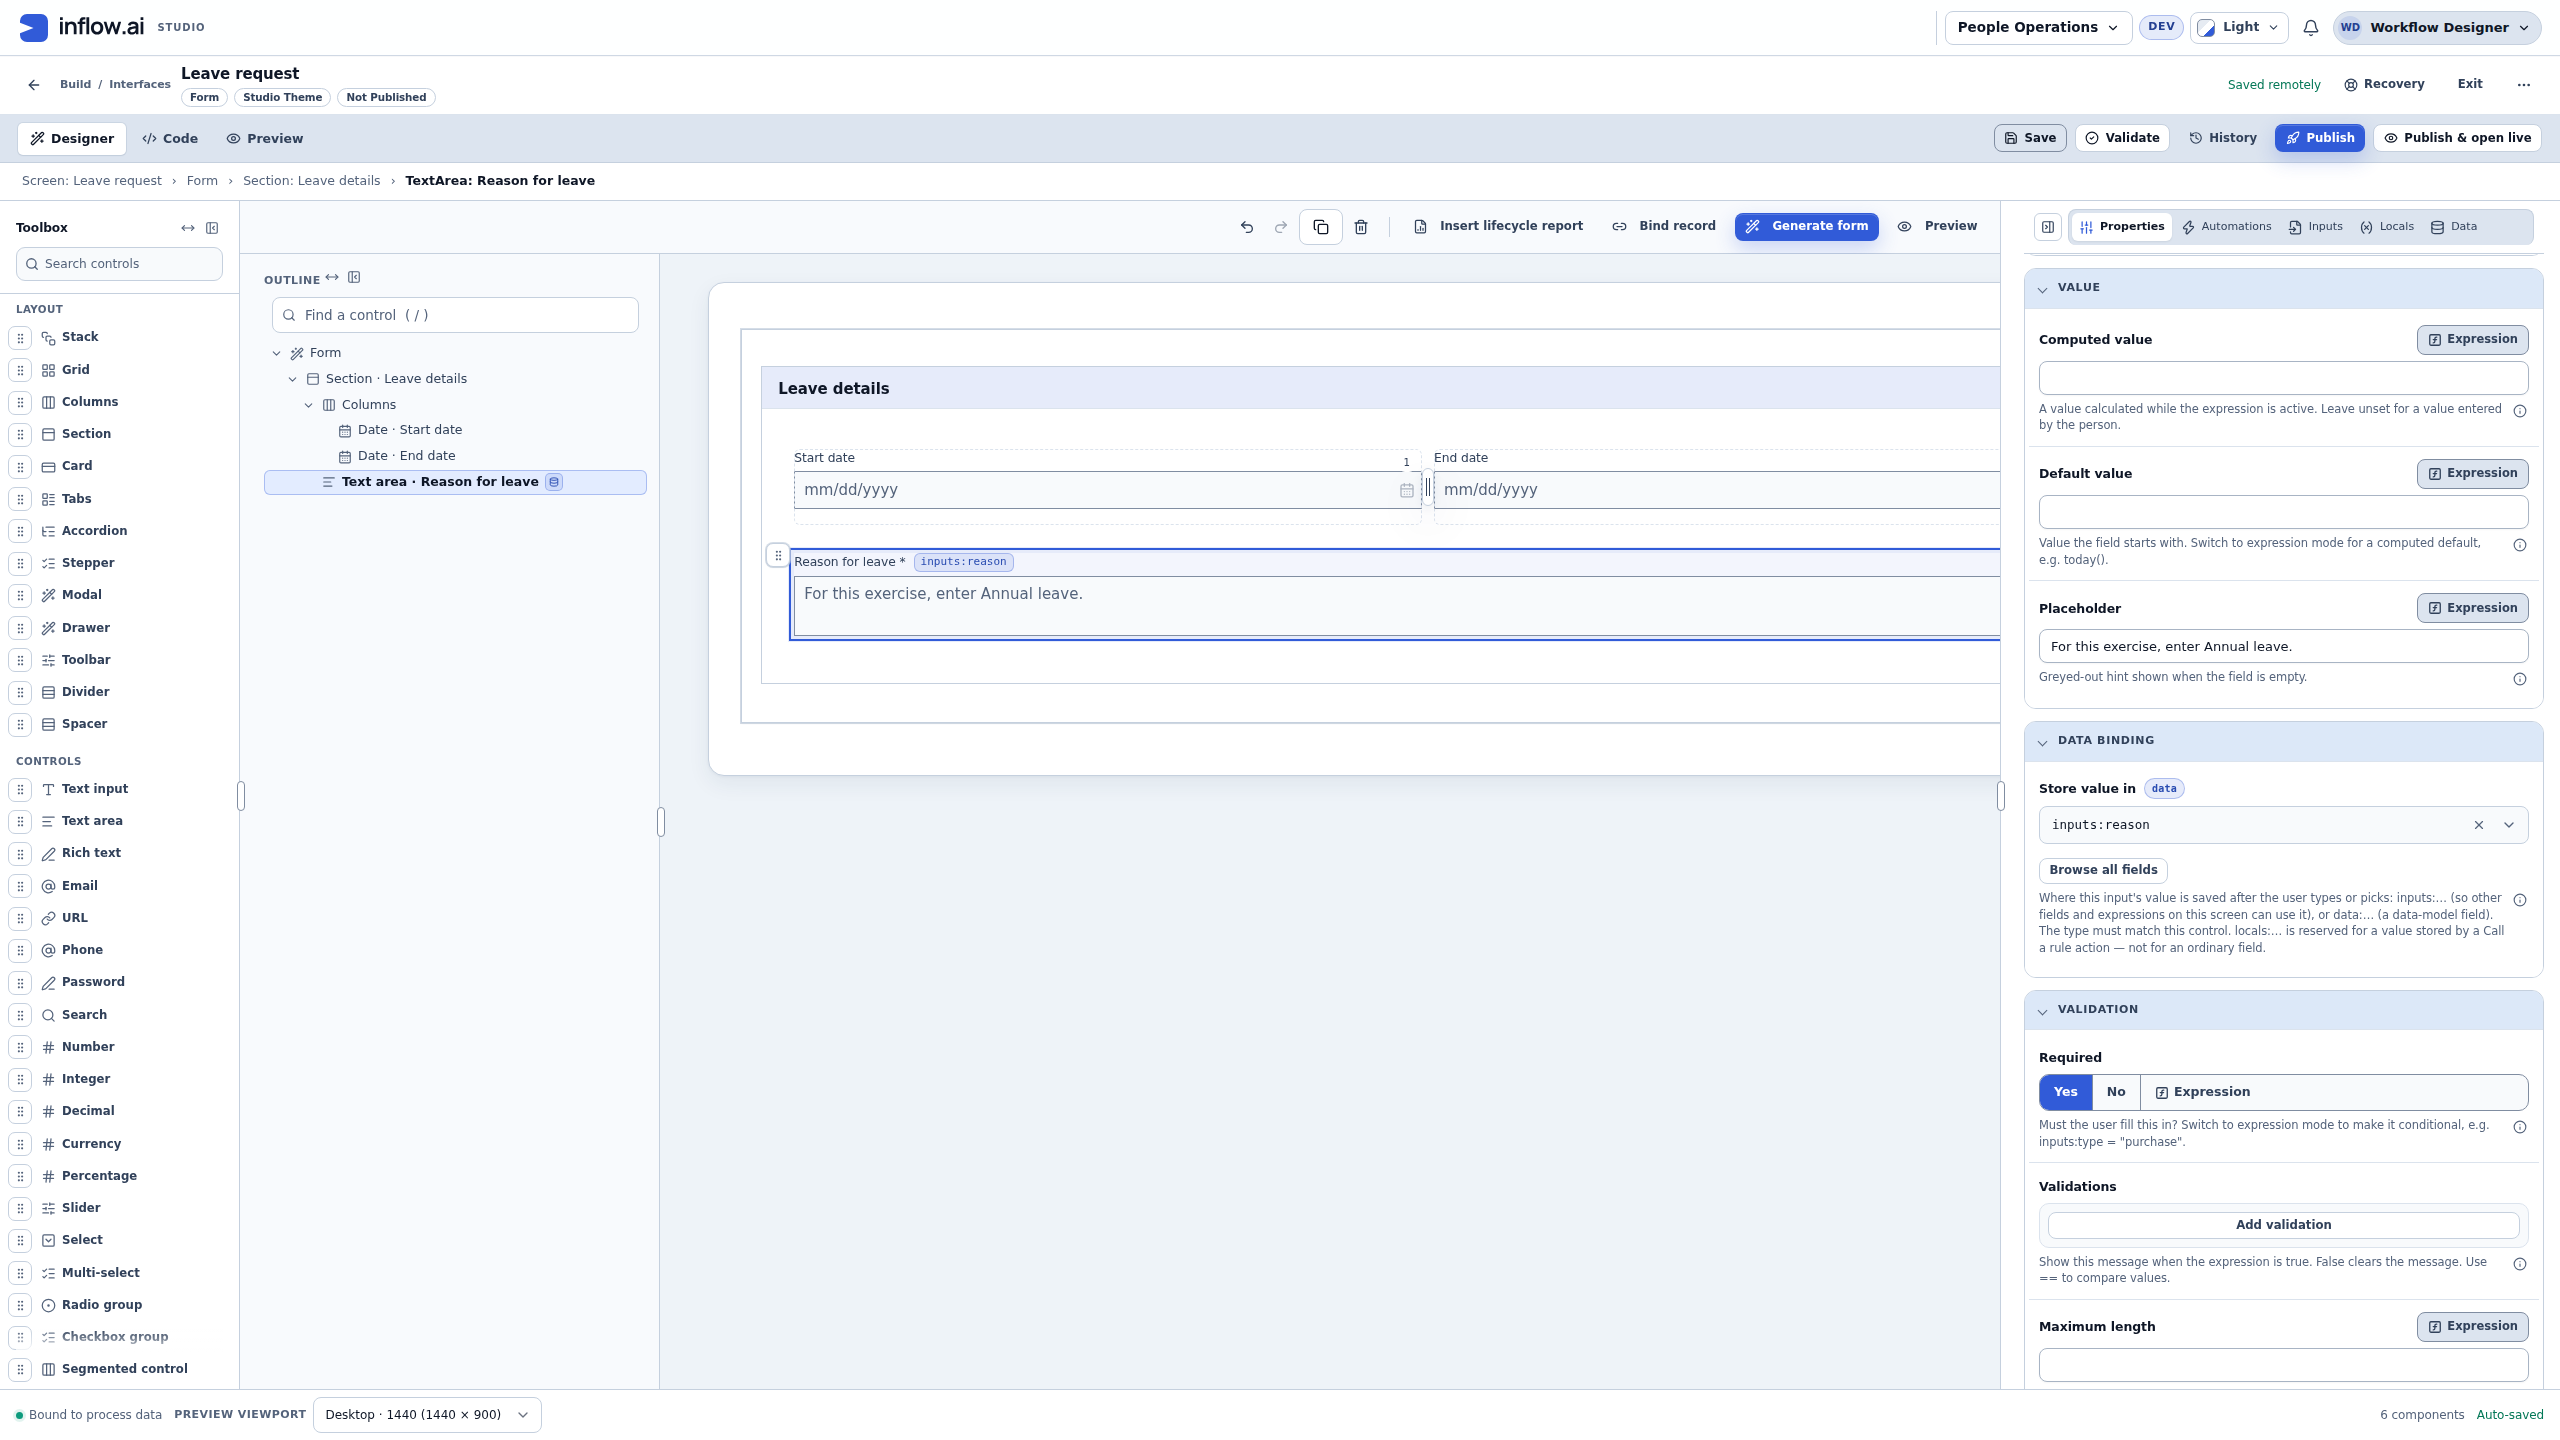
The original Reason for leave question remains connected to inputs:reason. Its control-level Validation Required setting is Yes. This checks the visible question; it does not change the separate declaration switch. Full-size numbered guide · Unchanged original screenshot.
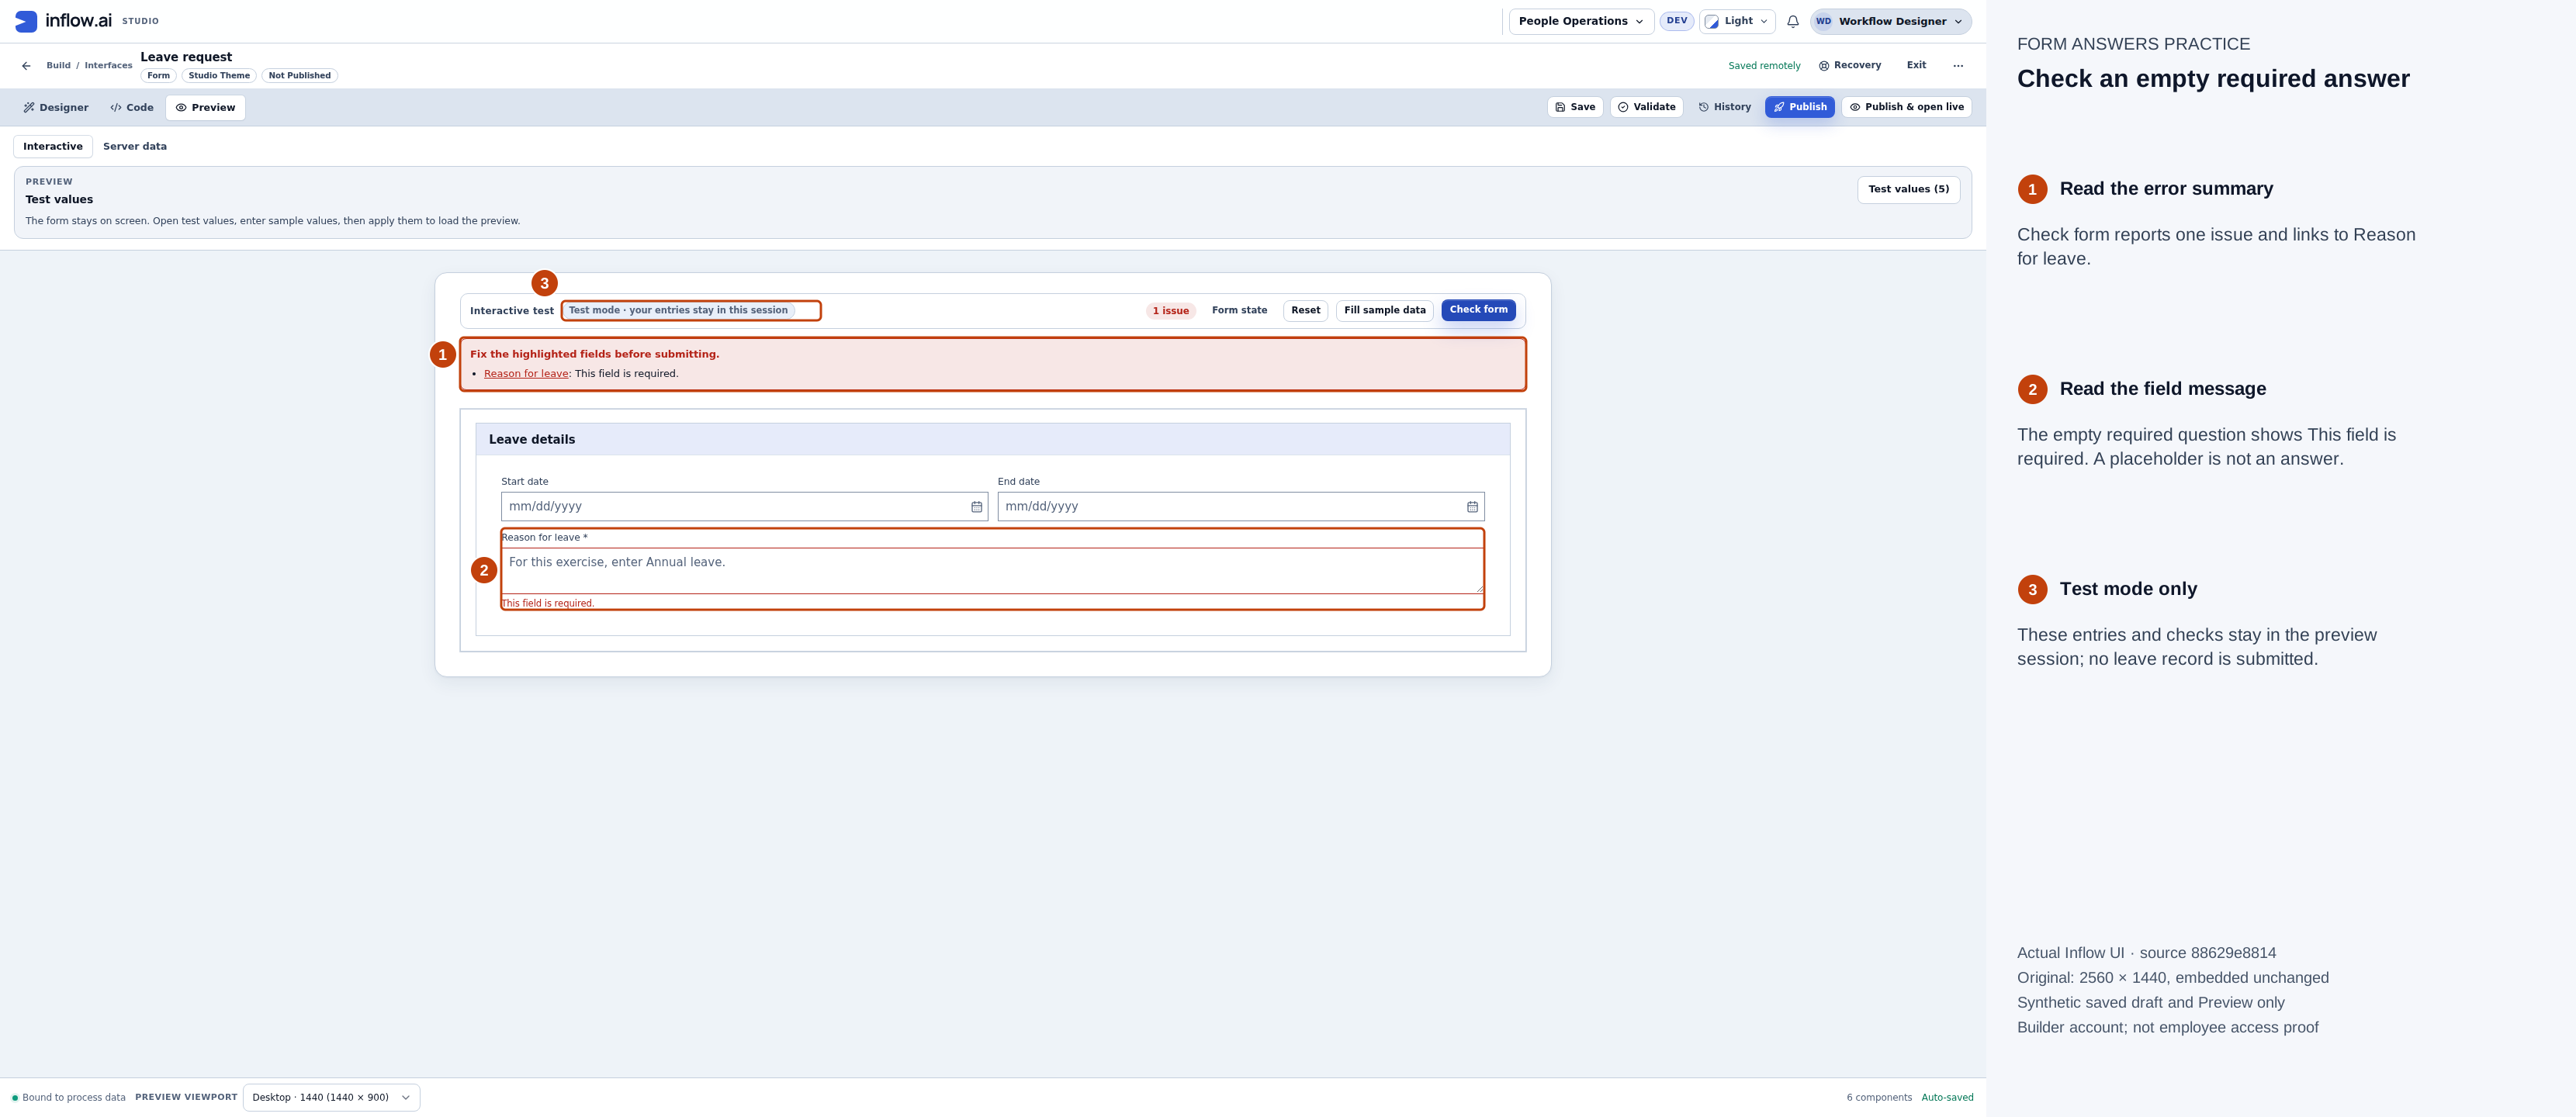
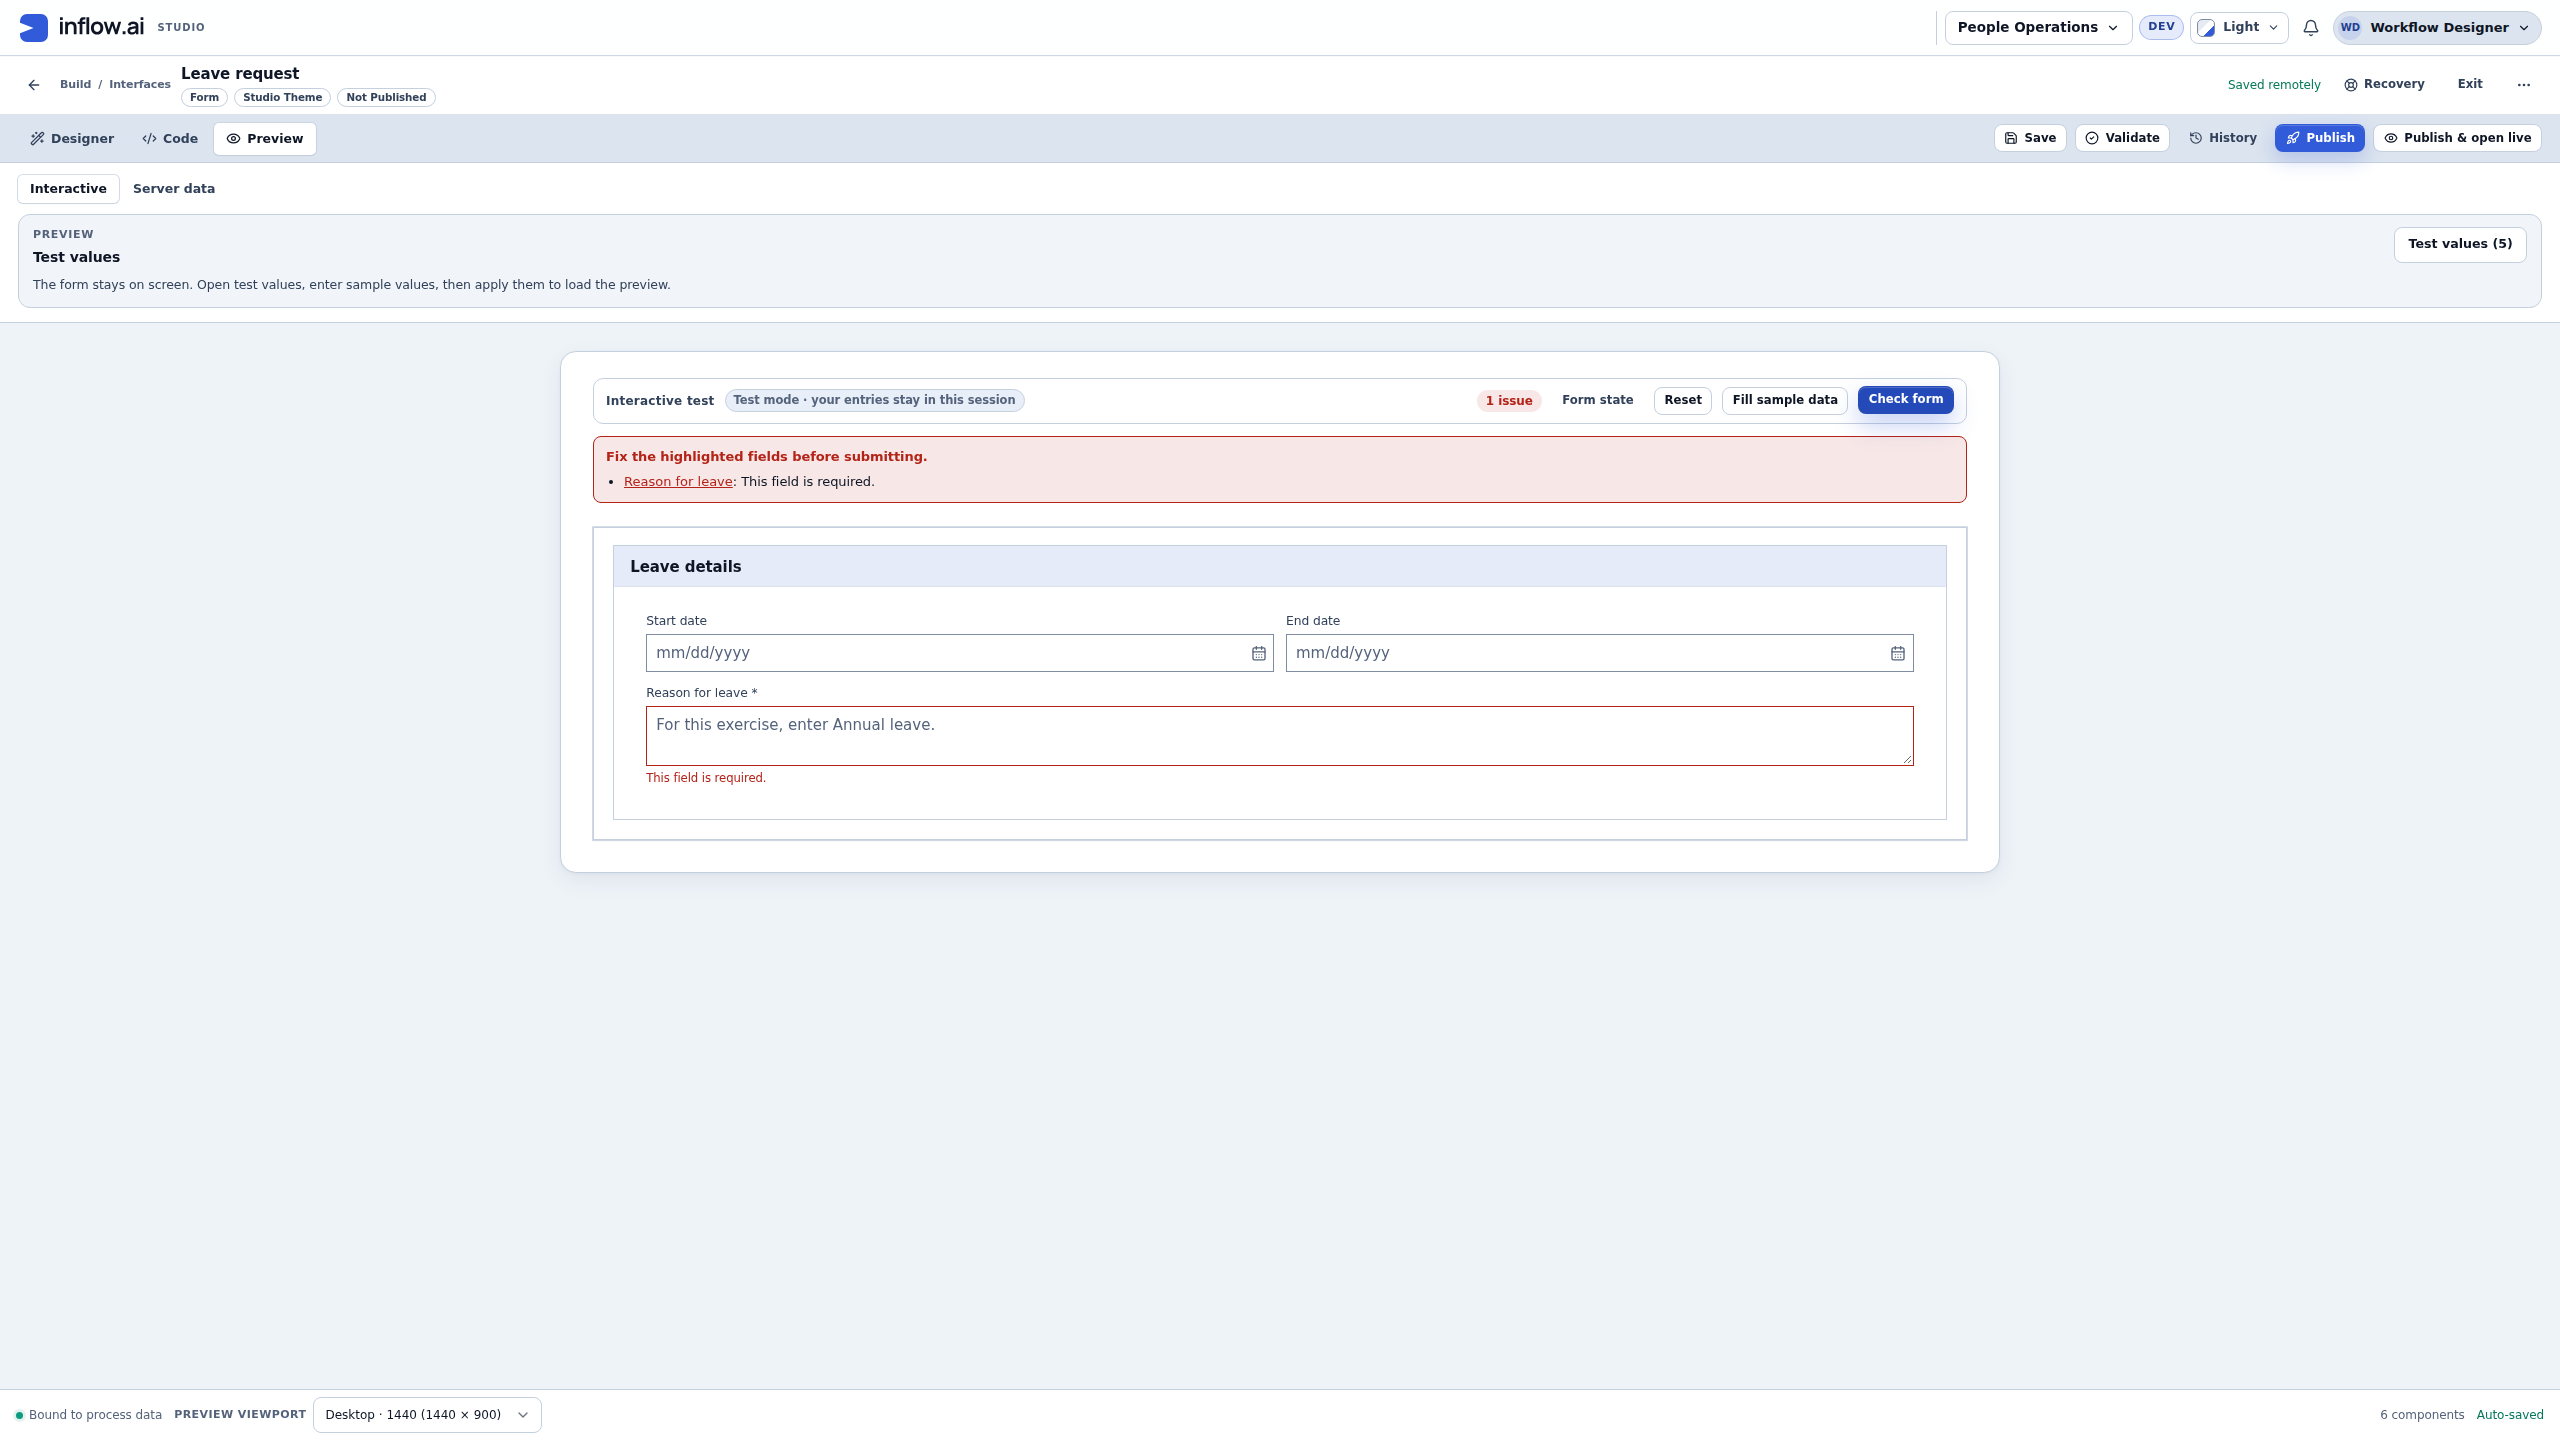
An actual Check form with Reason empty reports one issue, a linked summary and This field is required next to the question. The placeholder text does not satisfy Required. Full-size numbered guide · Unchanged original screenshot.
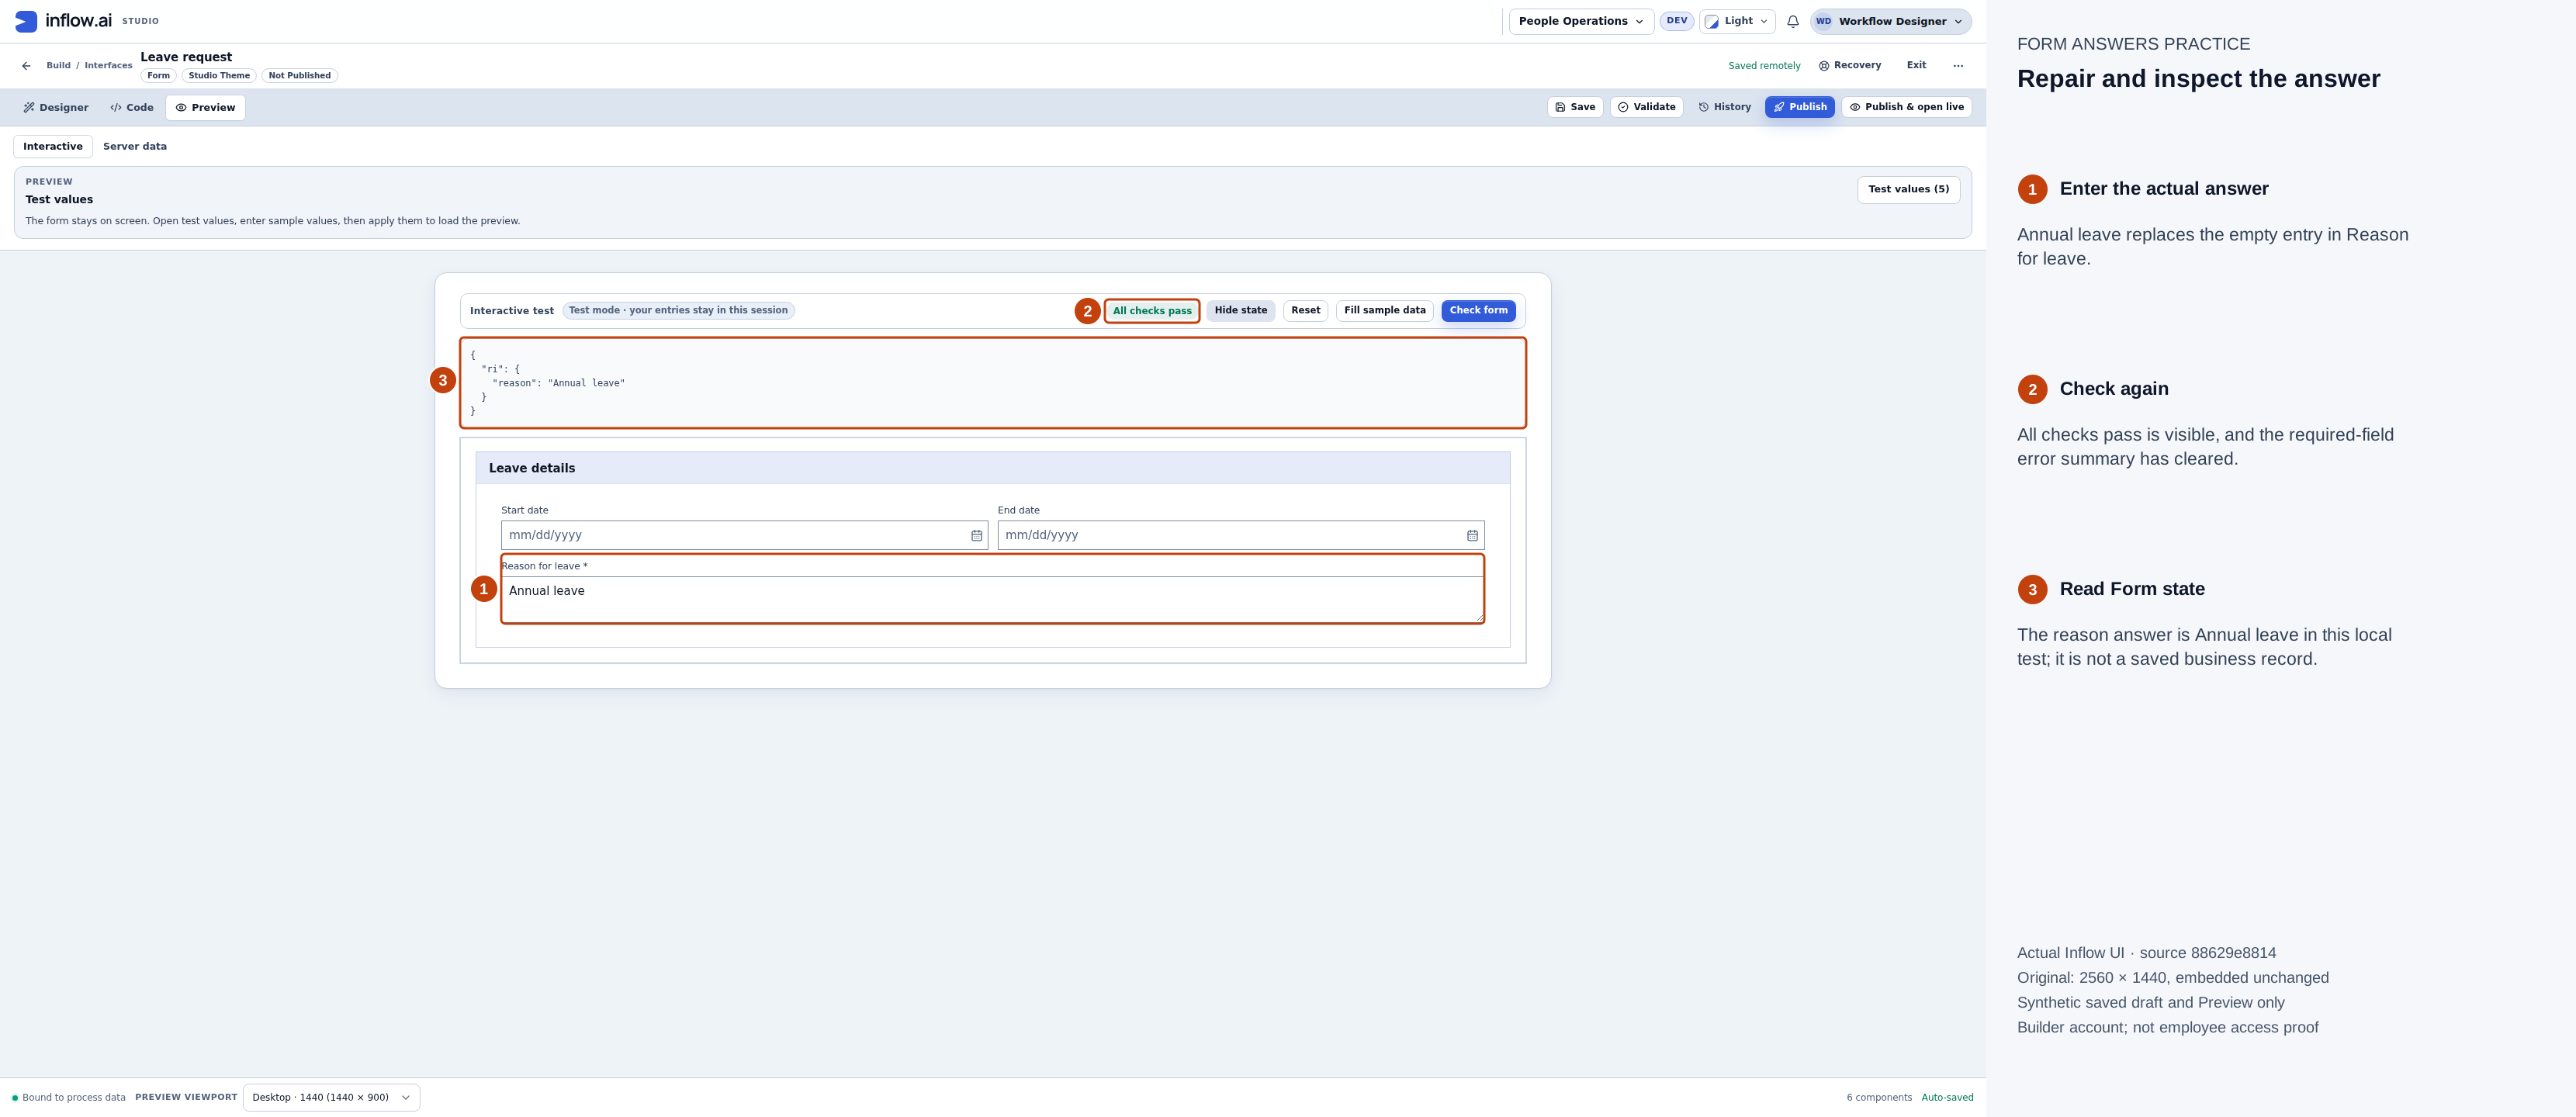
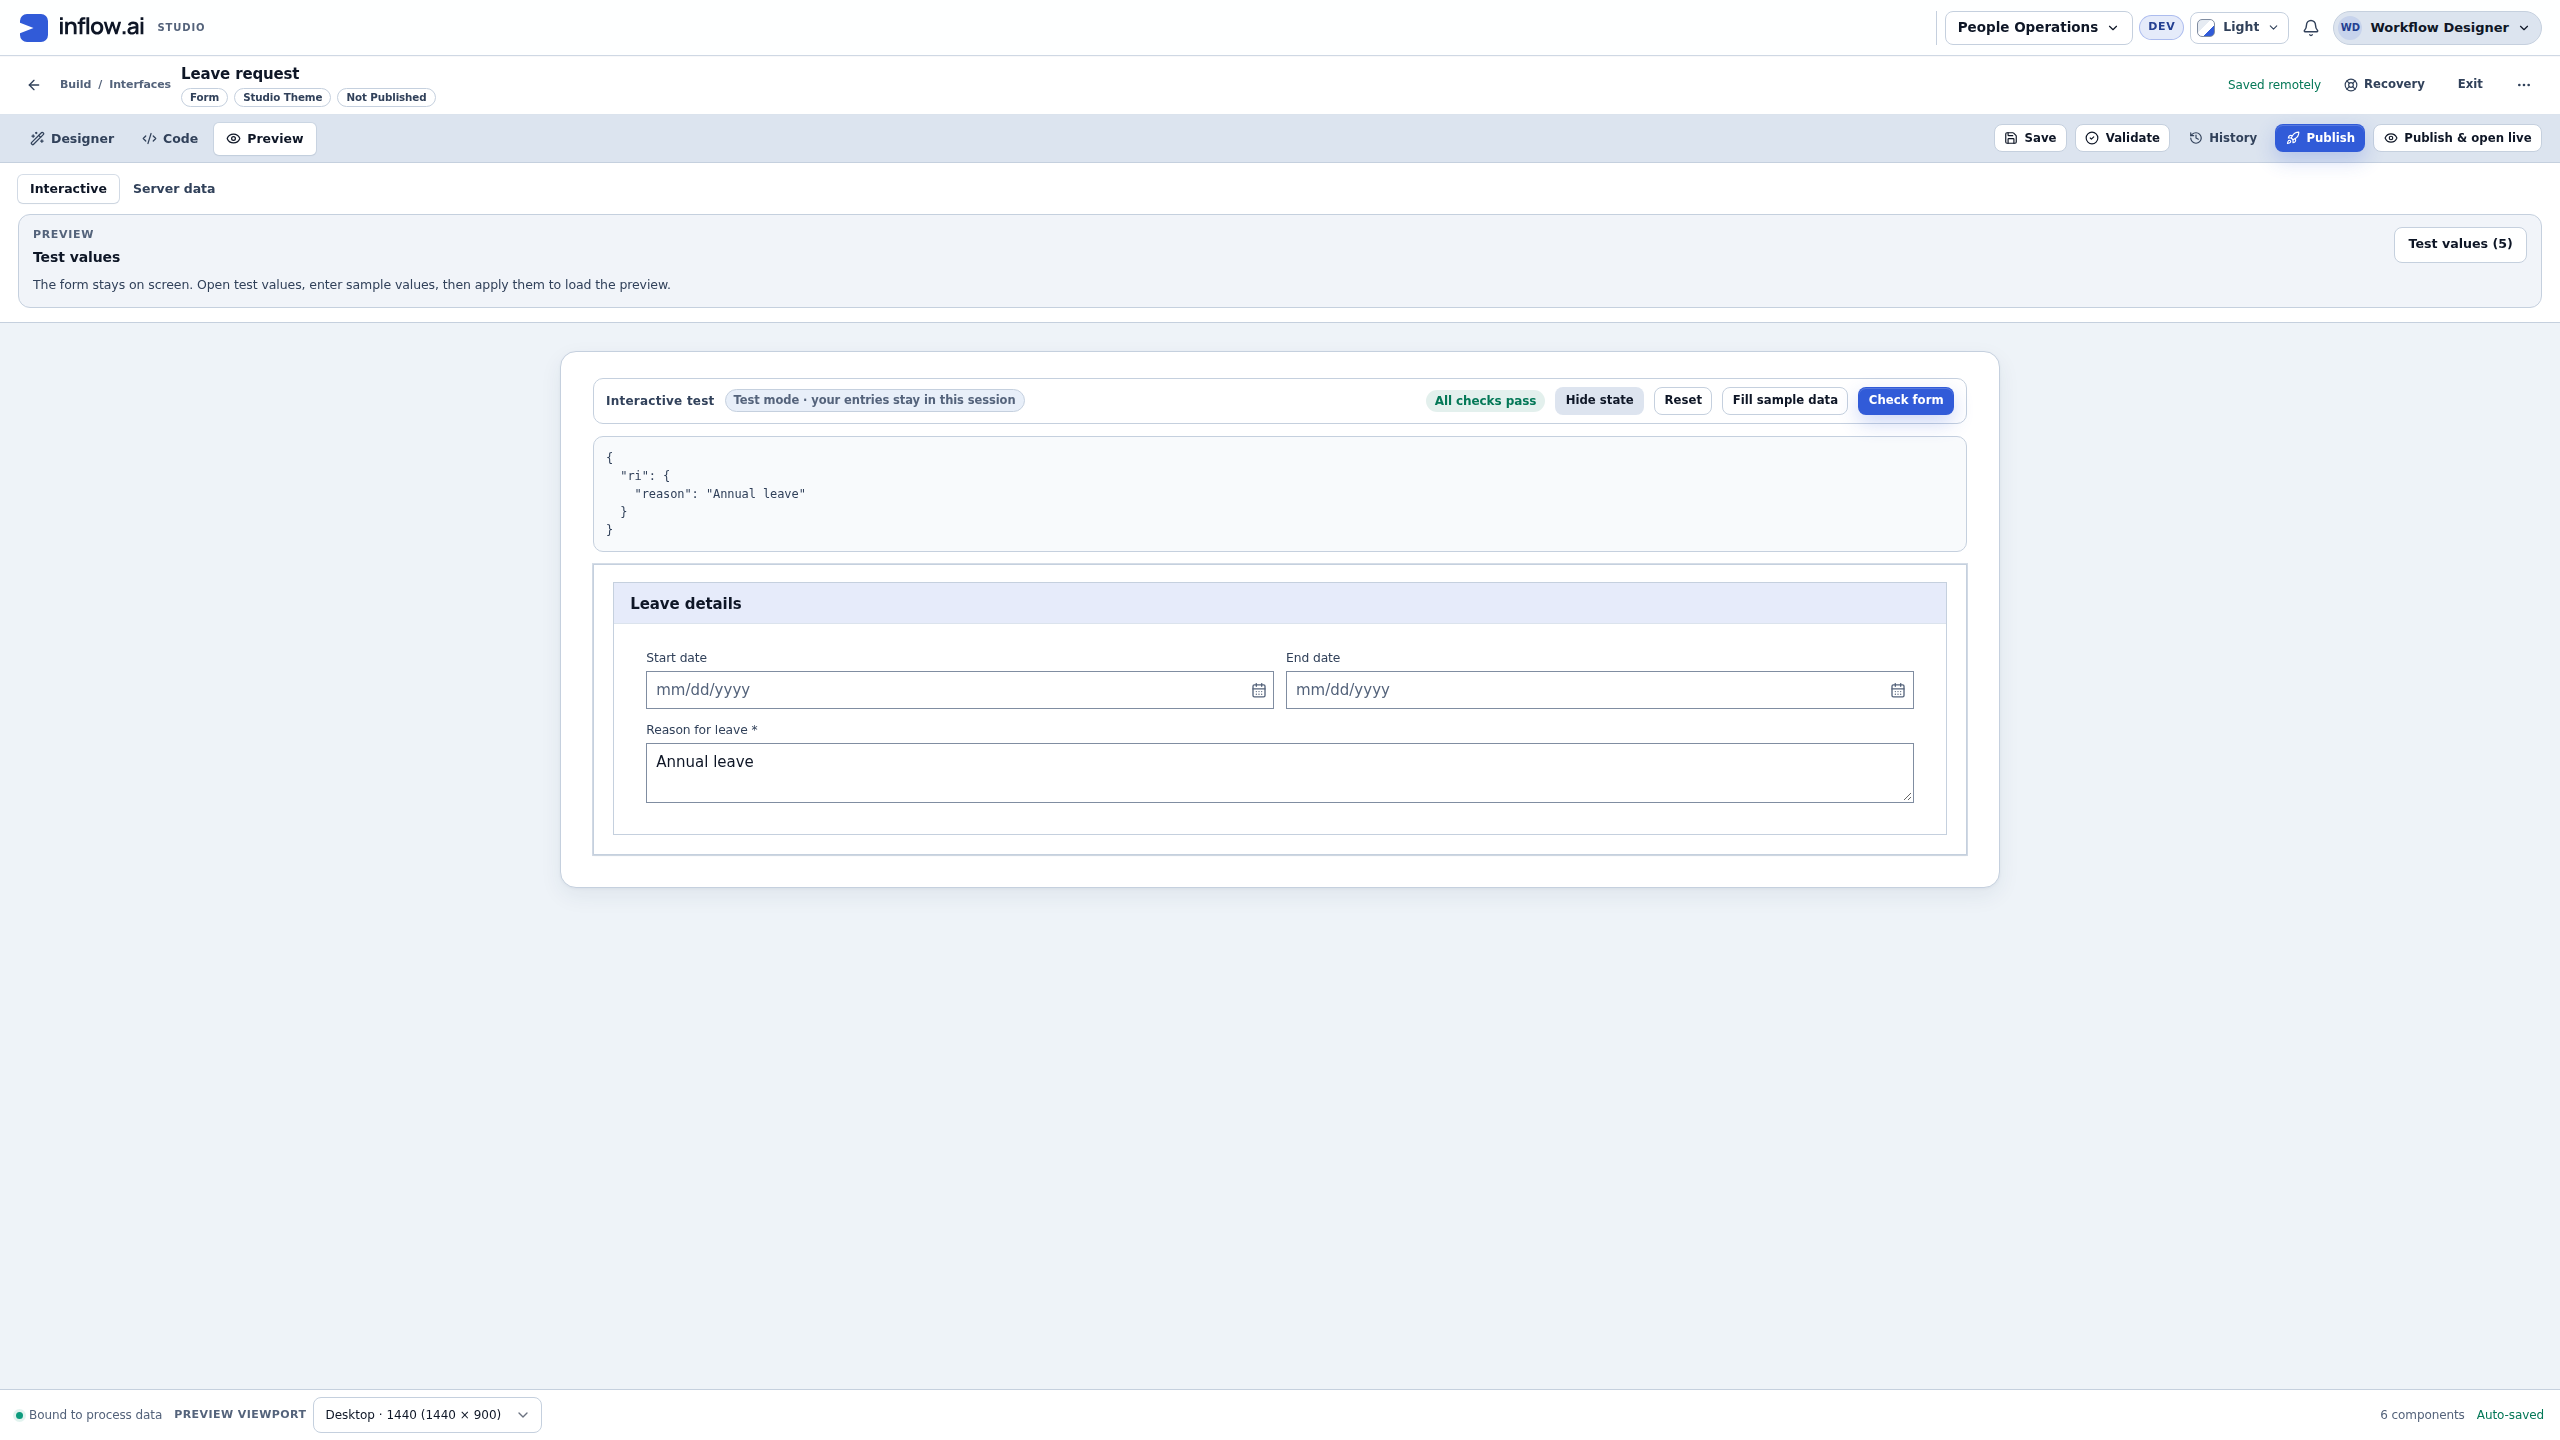
After entering Annual leave, Check form shows All checks pass and Form state contains that reason value. This is a local preview check, not a saved leave record. Full-size numbered guide · Unchanged original screenshot.
You should see a clear question connected to the intended Text answer. Do not put a formula into Store value in: it asks for a destination. Use the formula affordance only on properties that support a computed value or condition.
Connect the two existing Date questions
- Return to Designer. Select Start date in Outline; read the selected component path before changing its properties.
- Under Data Binding → Store value in, open the options. Select Start Date, whose destination is inputs:startDate and whose type is Date.
- Select End date and choose End Date → inputs:endDate. Do not bind both questions to the same answer.
- For the worked date-order exercise below, explicitly choose mm/dd/yyyy under Value → Display format on each Date control and keep Calendar → Gregorian. Read the actual Preview placeholder before entering dates; do not infer the typing order from an unset default.
- Save and inspect the two binding badges. Each label should point to its own destination.
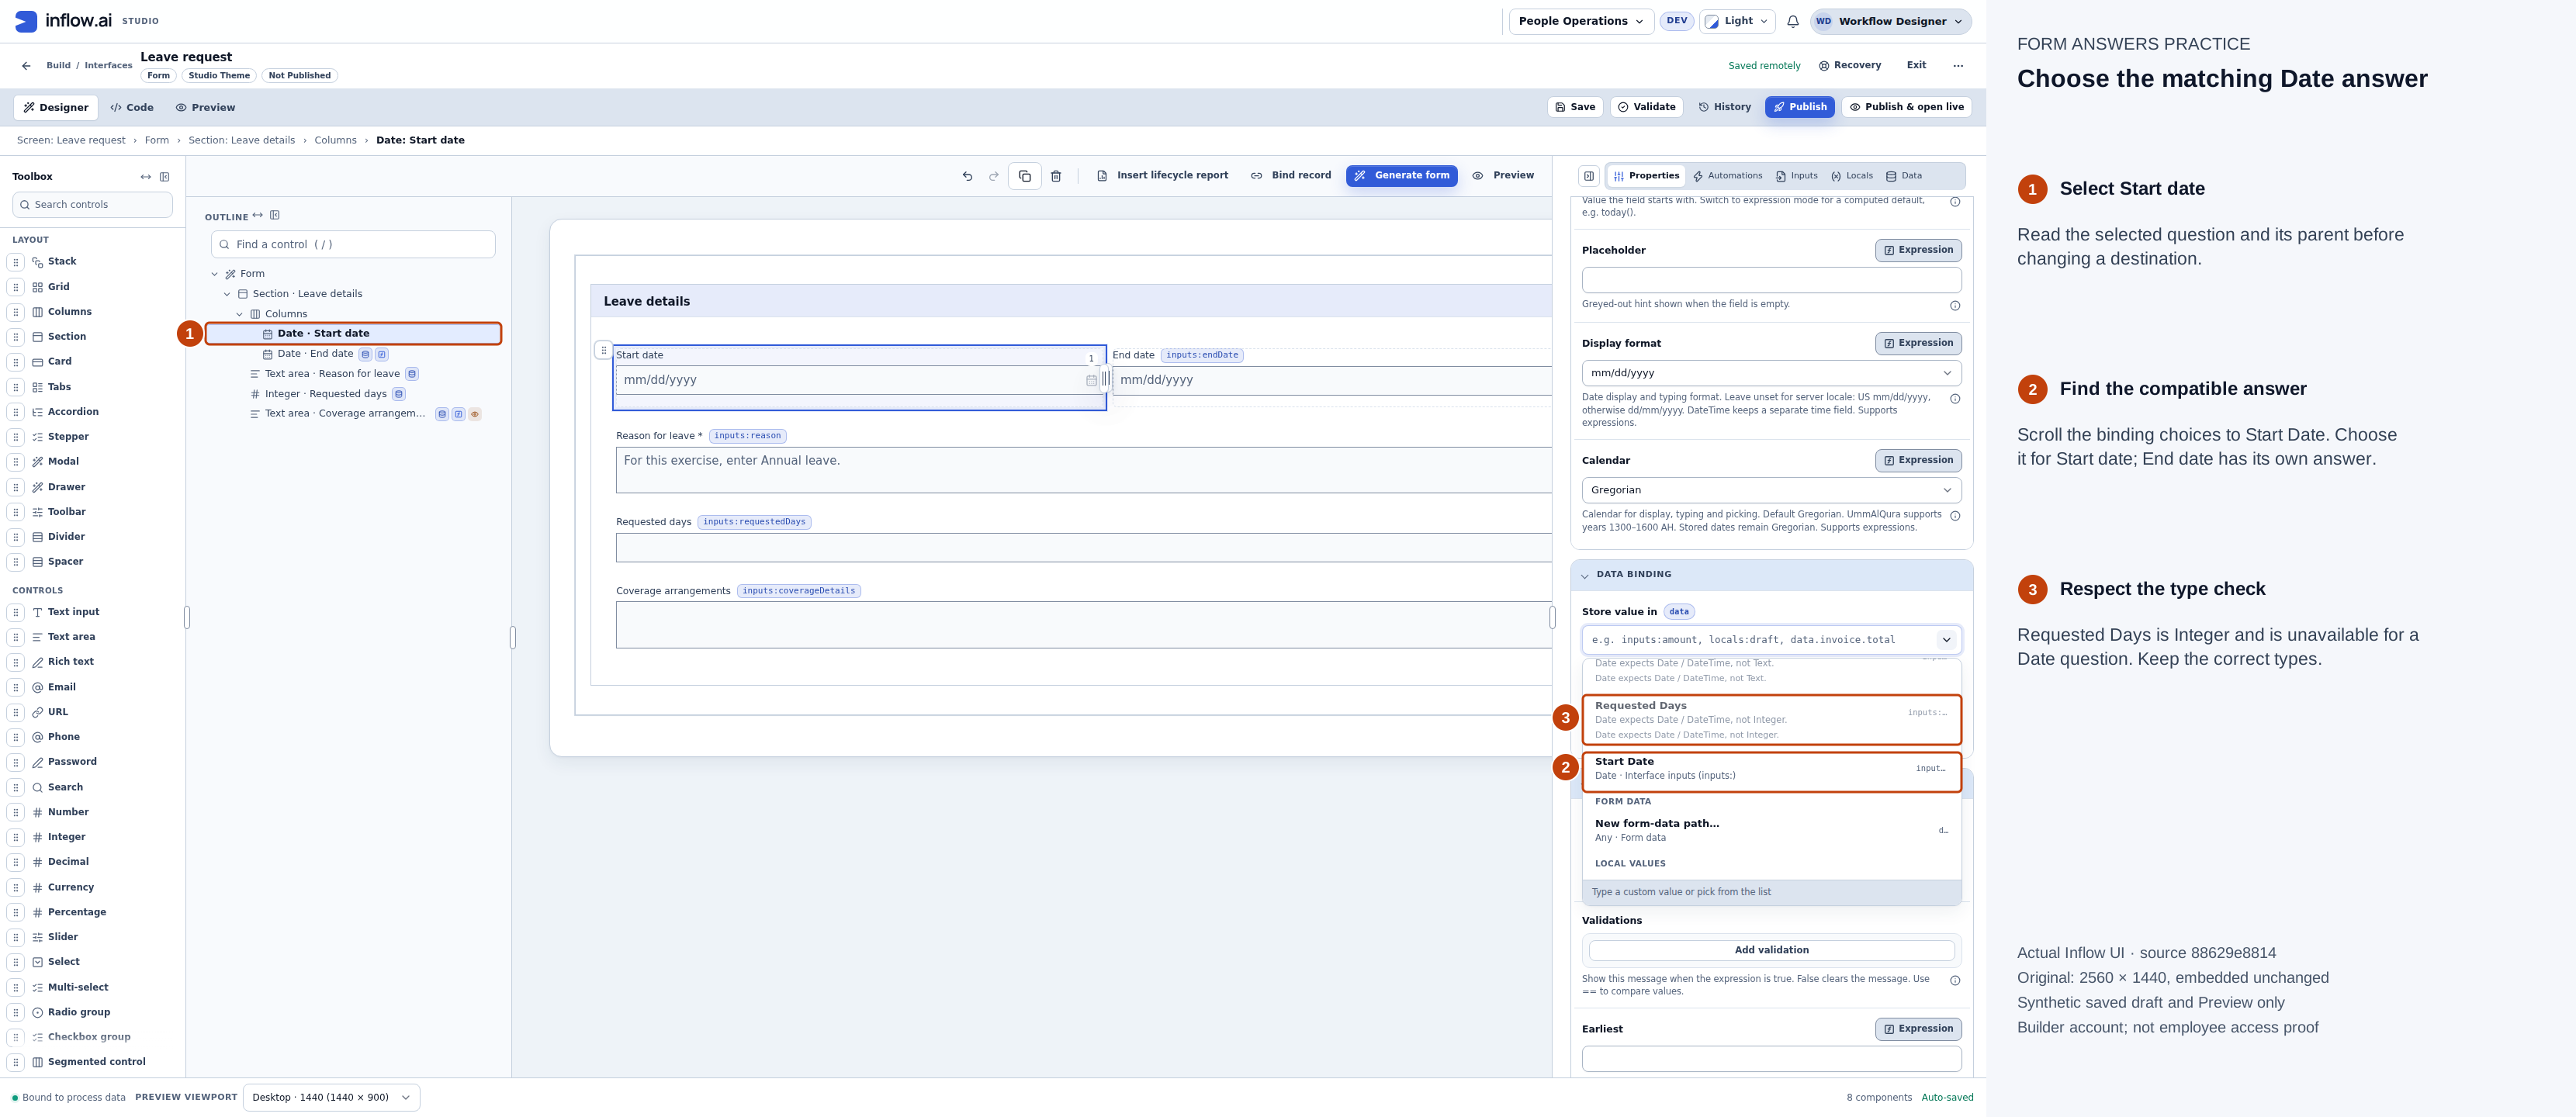
This picker was reopened on the saved exercise draft, where the later Requested days and Coverage questions are already present. Retain existing controls. Scroll the actual binding choices to Start Date for the selected Start date question. Requested Days is incompatible because it is Integer. Choose the matching Date answer, then give End date its own destination; matching types alone do not identify the right business answer. Full-size numbered guide · Unchanged original screenshot.
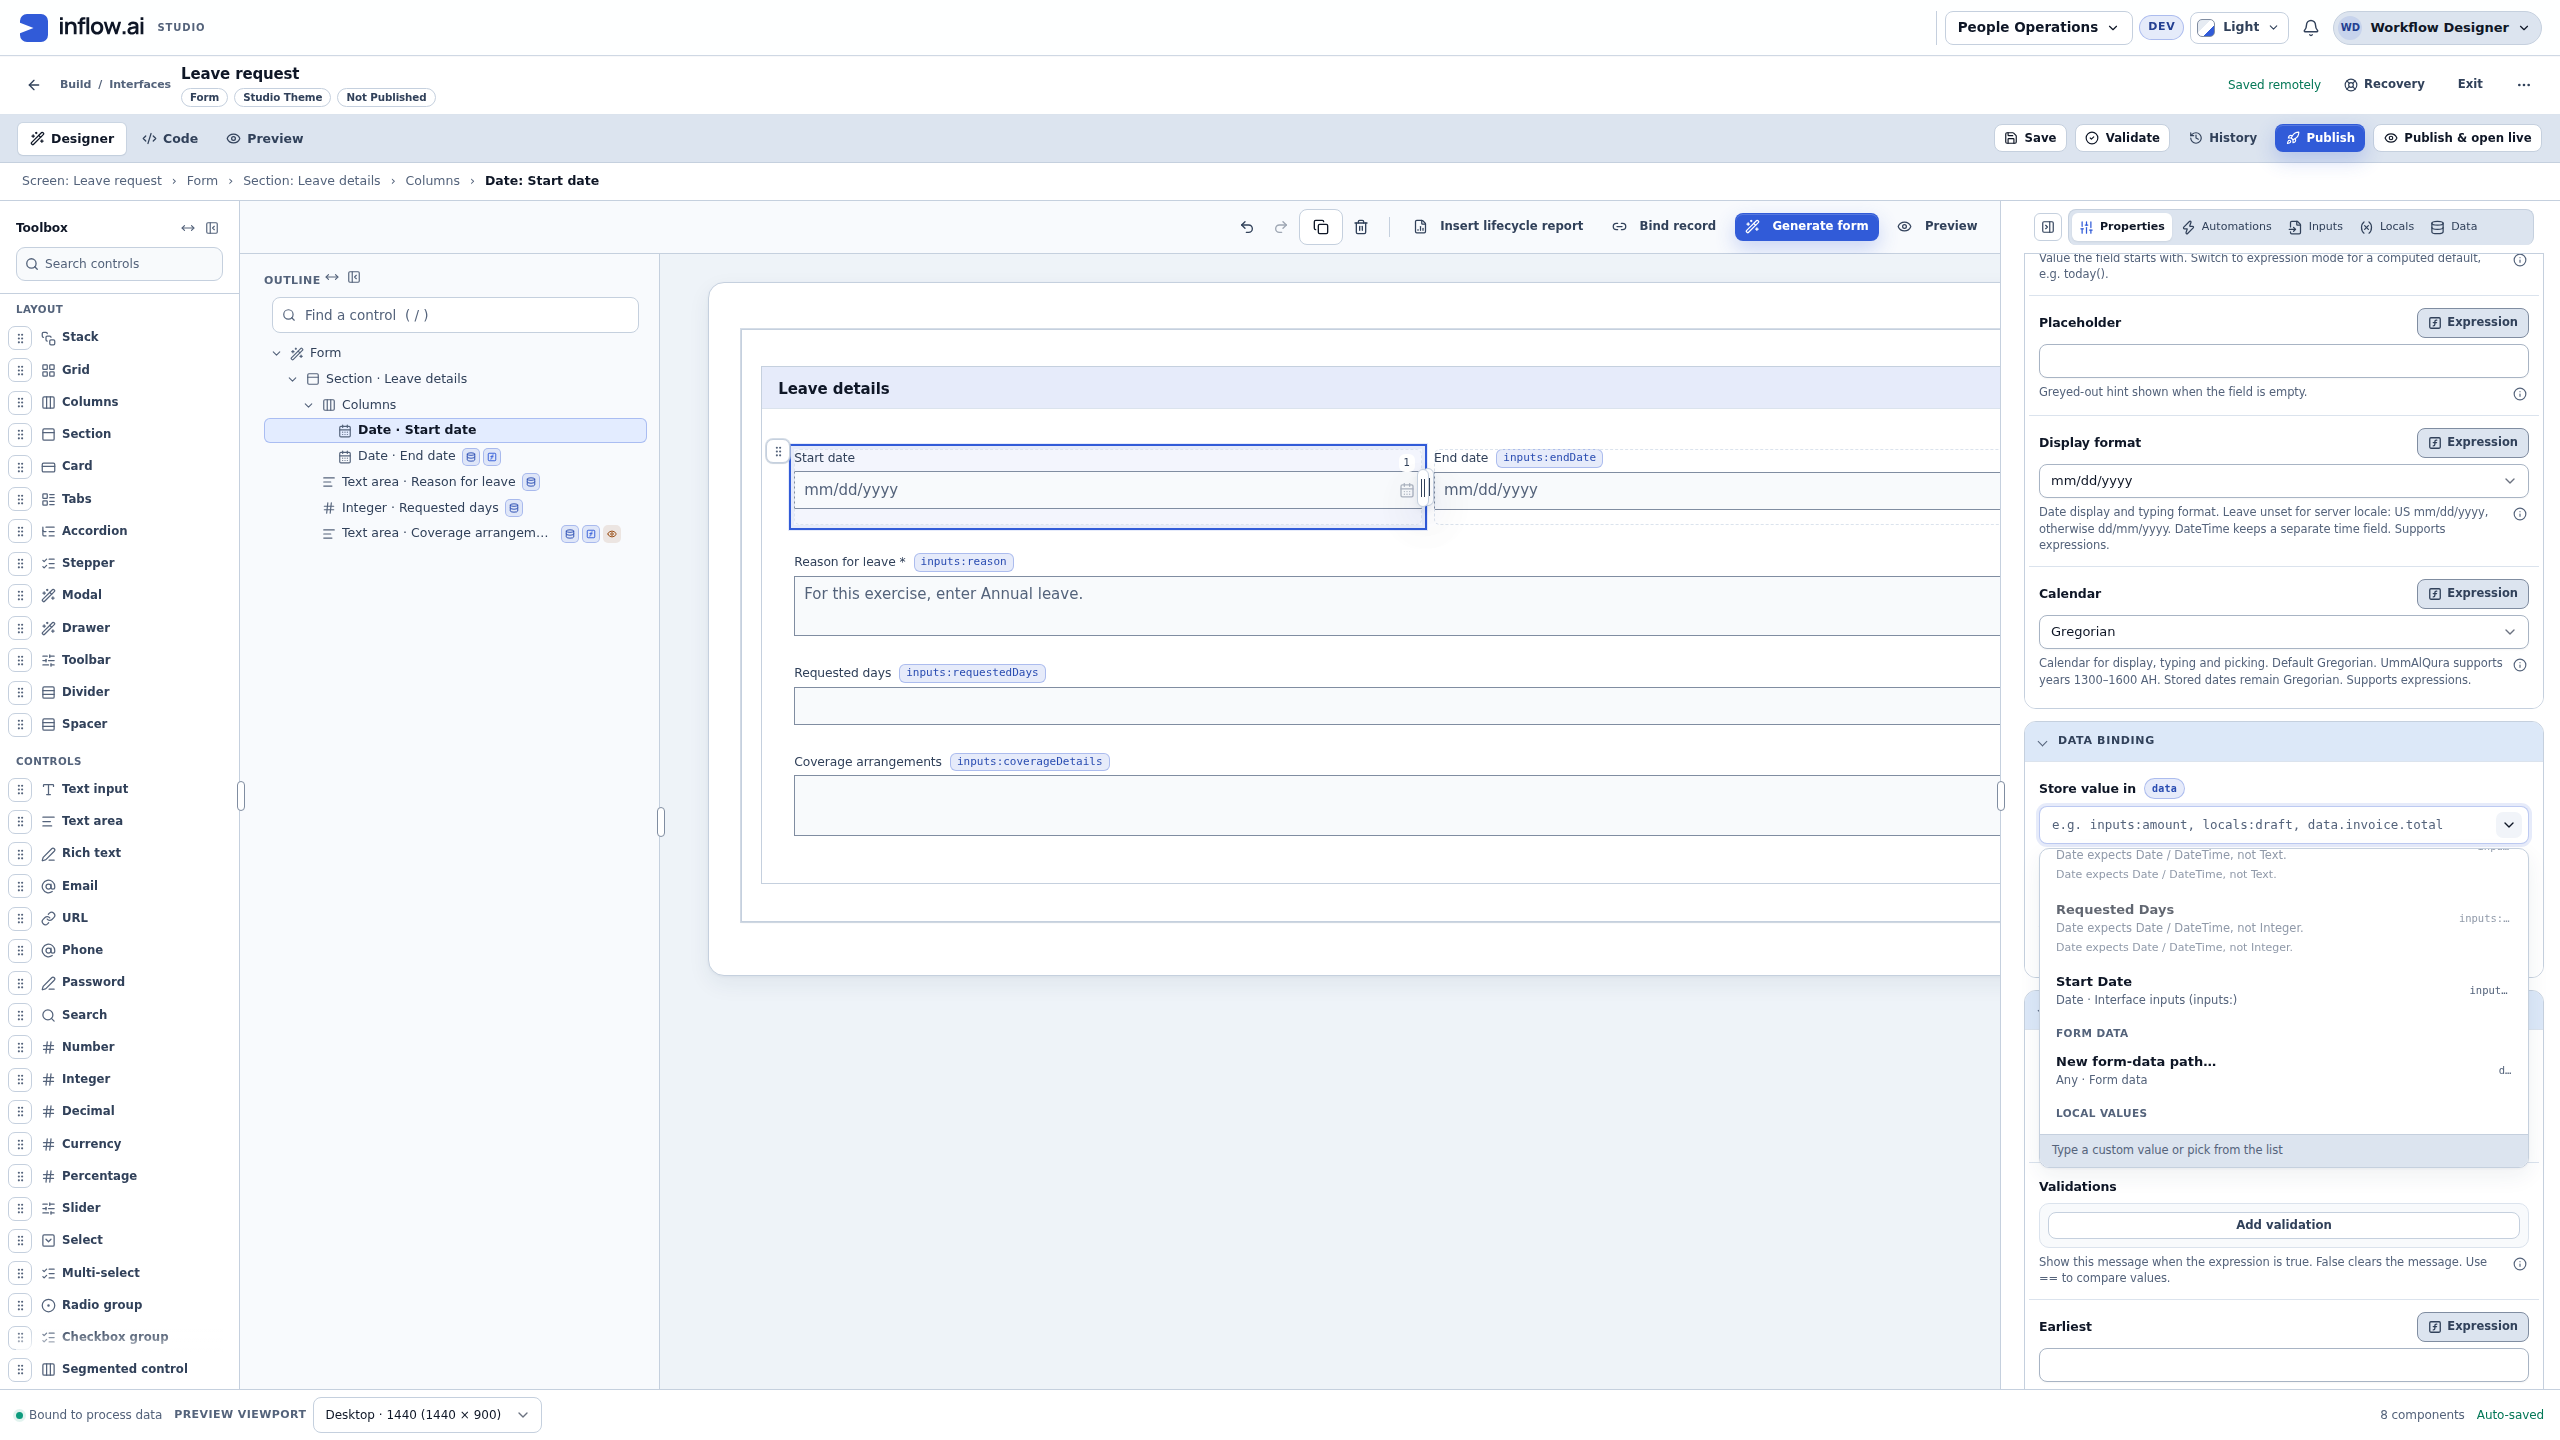
The same Date type does not guarantee the right business answer: both startDate and endDate are compatible, so you must still choose the correct one. A disabled Text or Integer option indicates a type mismatch here. Keep the deliberate input types and select the proper destination; do not turn dates into Text to make the mismatch disappear.
Know the important groups
| Group | Use it for |
|---|---|
| General | The name, label or title of the selected control. |
| Data Binding | Where an answer or selected value belongs, or the supported data connection. |
| Value | Defaults, computed values and control-specific value settings. |
| Validation | Required answers and checks/messages. |
| Visibility | Whether a question or section is shown for a condition. |
| Behavior | Read-only, disabled and other control-specific behavior. |
| Layout / Style | Arrangement and presentation. |
Different controls show different applicable groups. You do not need to fill every property for a useful form.
Example 2: show coverage details for longer leave
Suppose the business wants an extra explanation only for requests longer than five days. First provide a question where the person can enter that number.
- Inspect Outline for an existing Requested days question. If missing, select Section · Leave details and insert Integer from the toolbox. Its initial label may be Quantity; change Label to Requested days.
- Use Store value in to choose Requested Days → inputs:requestedDays. Leave the existing Minimum value and Step unchanged for this exercise. Entered days are a separate answer; this chapter does not calculate a working-day allowance from dates.
- Inspect for Coverage arrangements. If missing, select Leave details and insert a Text area. Set Label to Coverage arrangements and choose Coverage Details → inputs:coverageDetails as its destination.
- Confirm both questions are inside Leave details and the existing dates/reason are retained. The worked form now has eight components including its three layout components; do not add duplicates to force that count on a different form.
Keep Coverage arrangements optional here. The condition below determines whether it appears; it does not make an explanation mandatory. A business that needs a required explanation must configure and test that requirement separately.
- Select Coverage arrangements and find Visibility → Visible when.
- Choose the Expression affordance, then Open editor for Visible when.
- Enter
ri:requestedDays > 5. Choose Validate and check it returns Boolean, the true-or-false type a visibility condition needs. - Choose Test Expression and open Test if needed. Replace Sample values with
{"ri":{"requestedDays":2},"inputs":{"requestedDays":2}}, then choose Run Test. This supplies the fictional number in both input views used by the test panel. Expect Boolean false. Change both numbers from 2 to 5 and run again: expect false. Change both to 7 and run again: expect true. Keep the braces, quotes around names, and numbers without quotes. Sample test values do not fill the actual form. - Choose the dialog's Save, then save the form. Open Preview → Interactive.
- Enter Annual leave in the required Reason question. Enter 2 in Requested days and leave the field. Coverage arrangements should be absent. Change the number to 5 and check it is still absent.
- Change Requested days to 7. Coverage arrangements should appear. Confirm it is the intended extra question, not another copy of Reason.
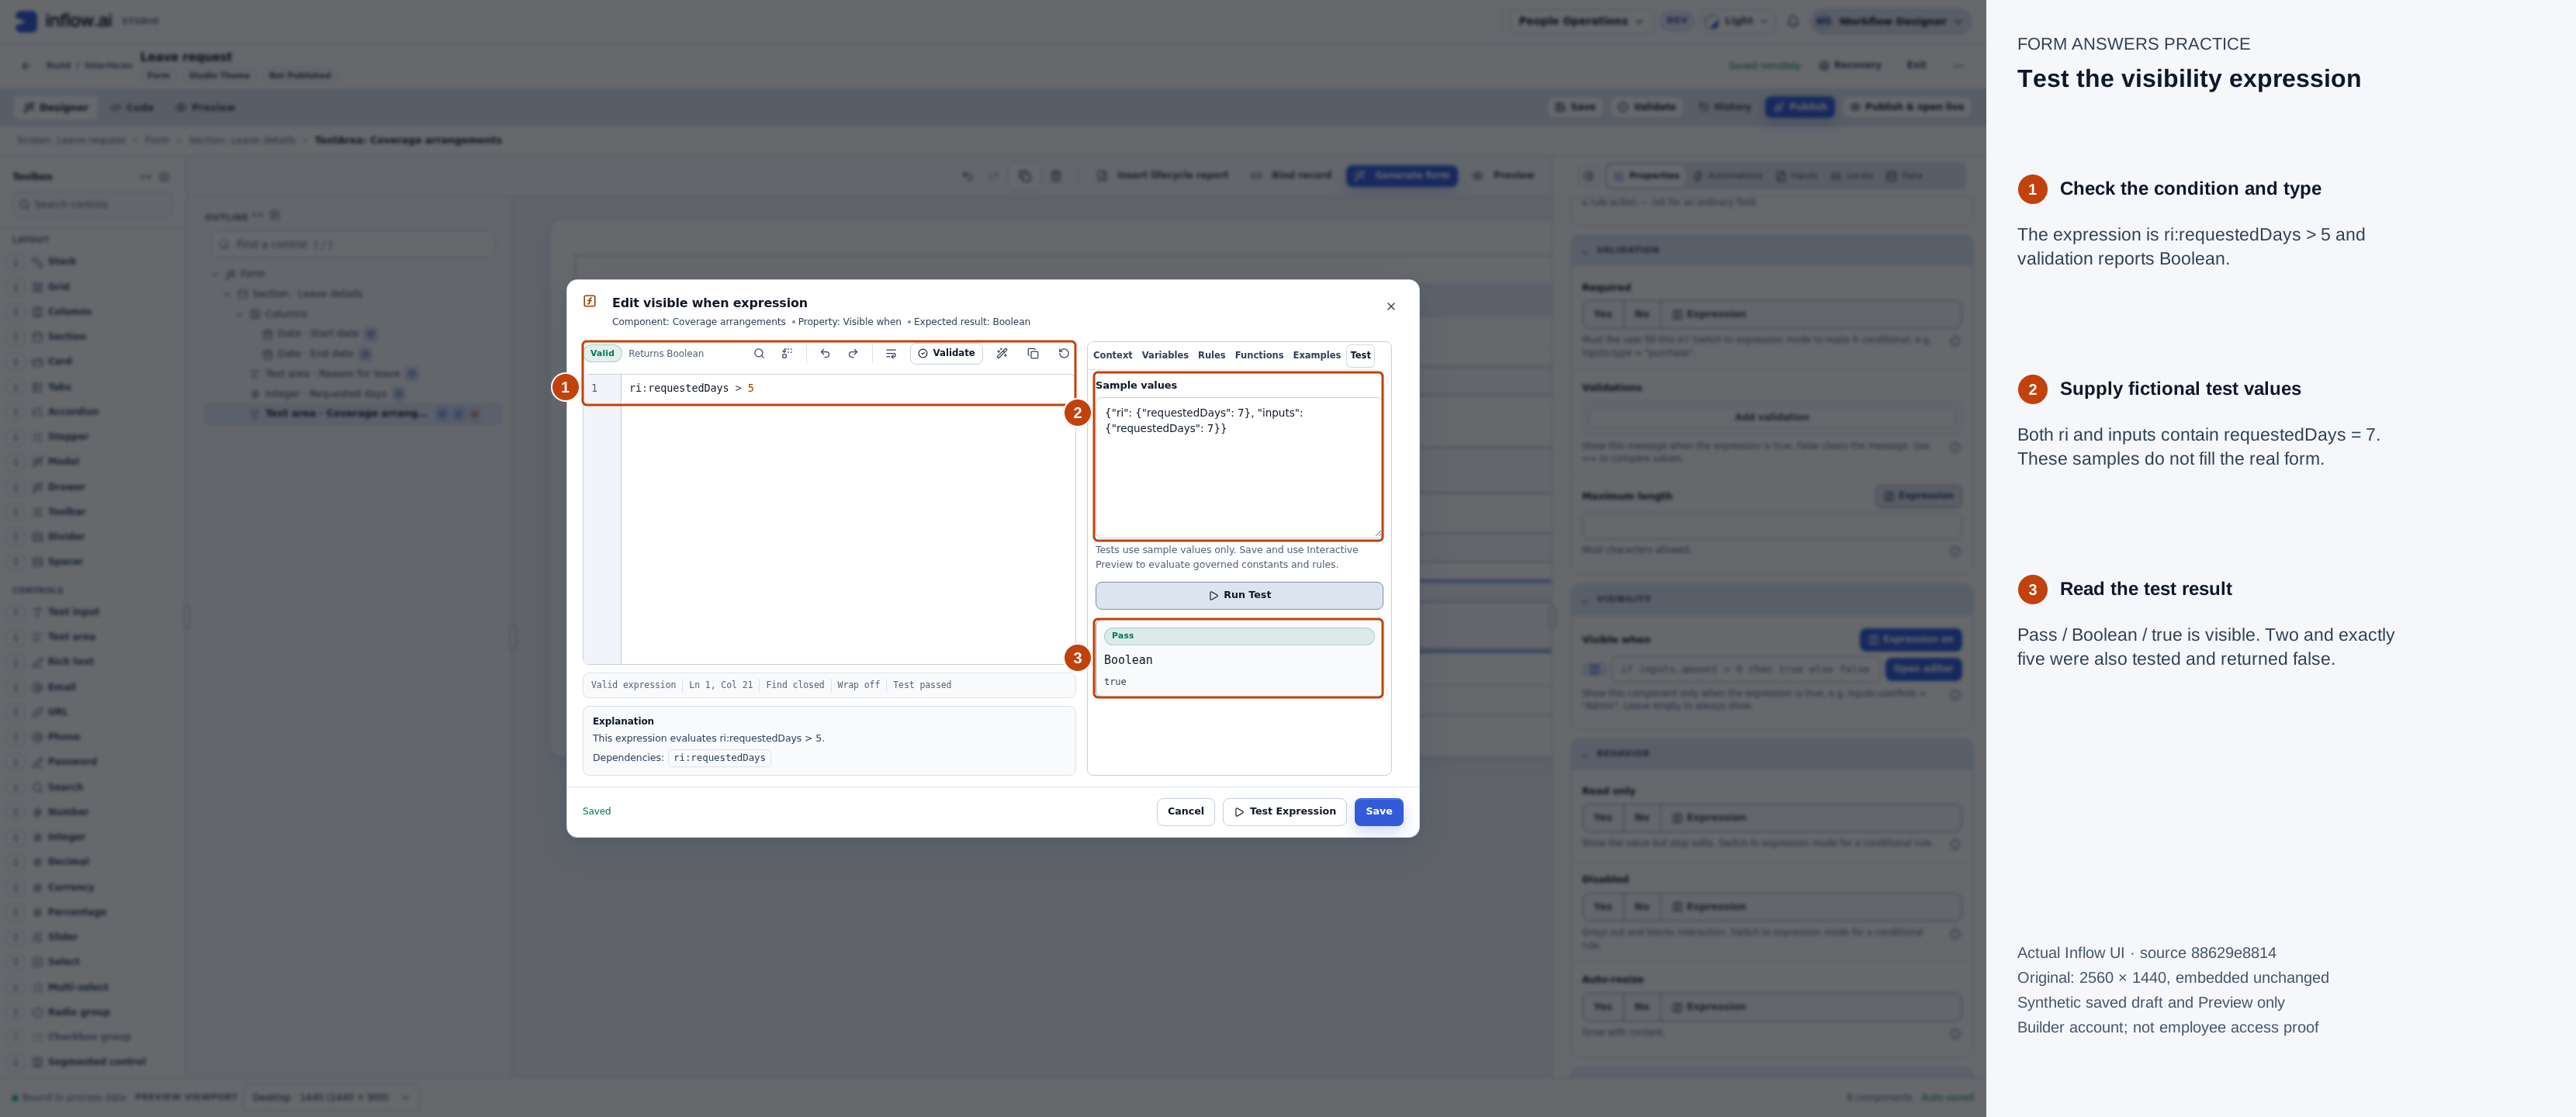
The actual editor validates a Boolean visibility expression and returns true for seven. Two and exactly five were also tested and returned false. Editor sample values do not fill the actual form; continue with Preview after saving. Full-size numbered guide · Unchanged original screenshot.
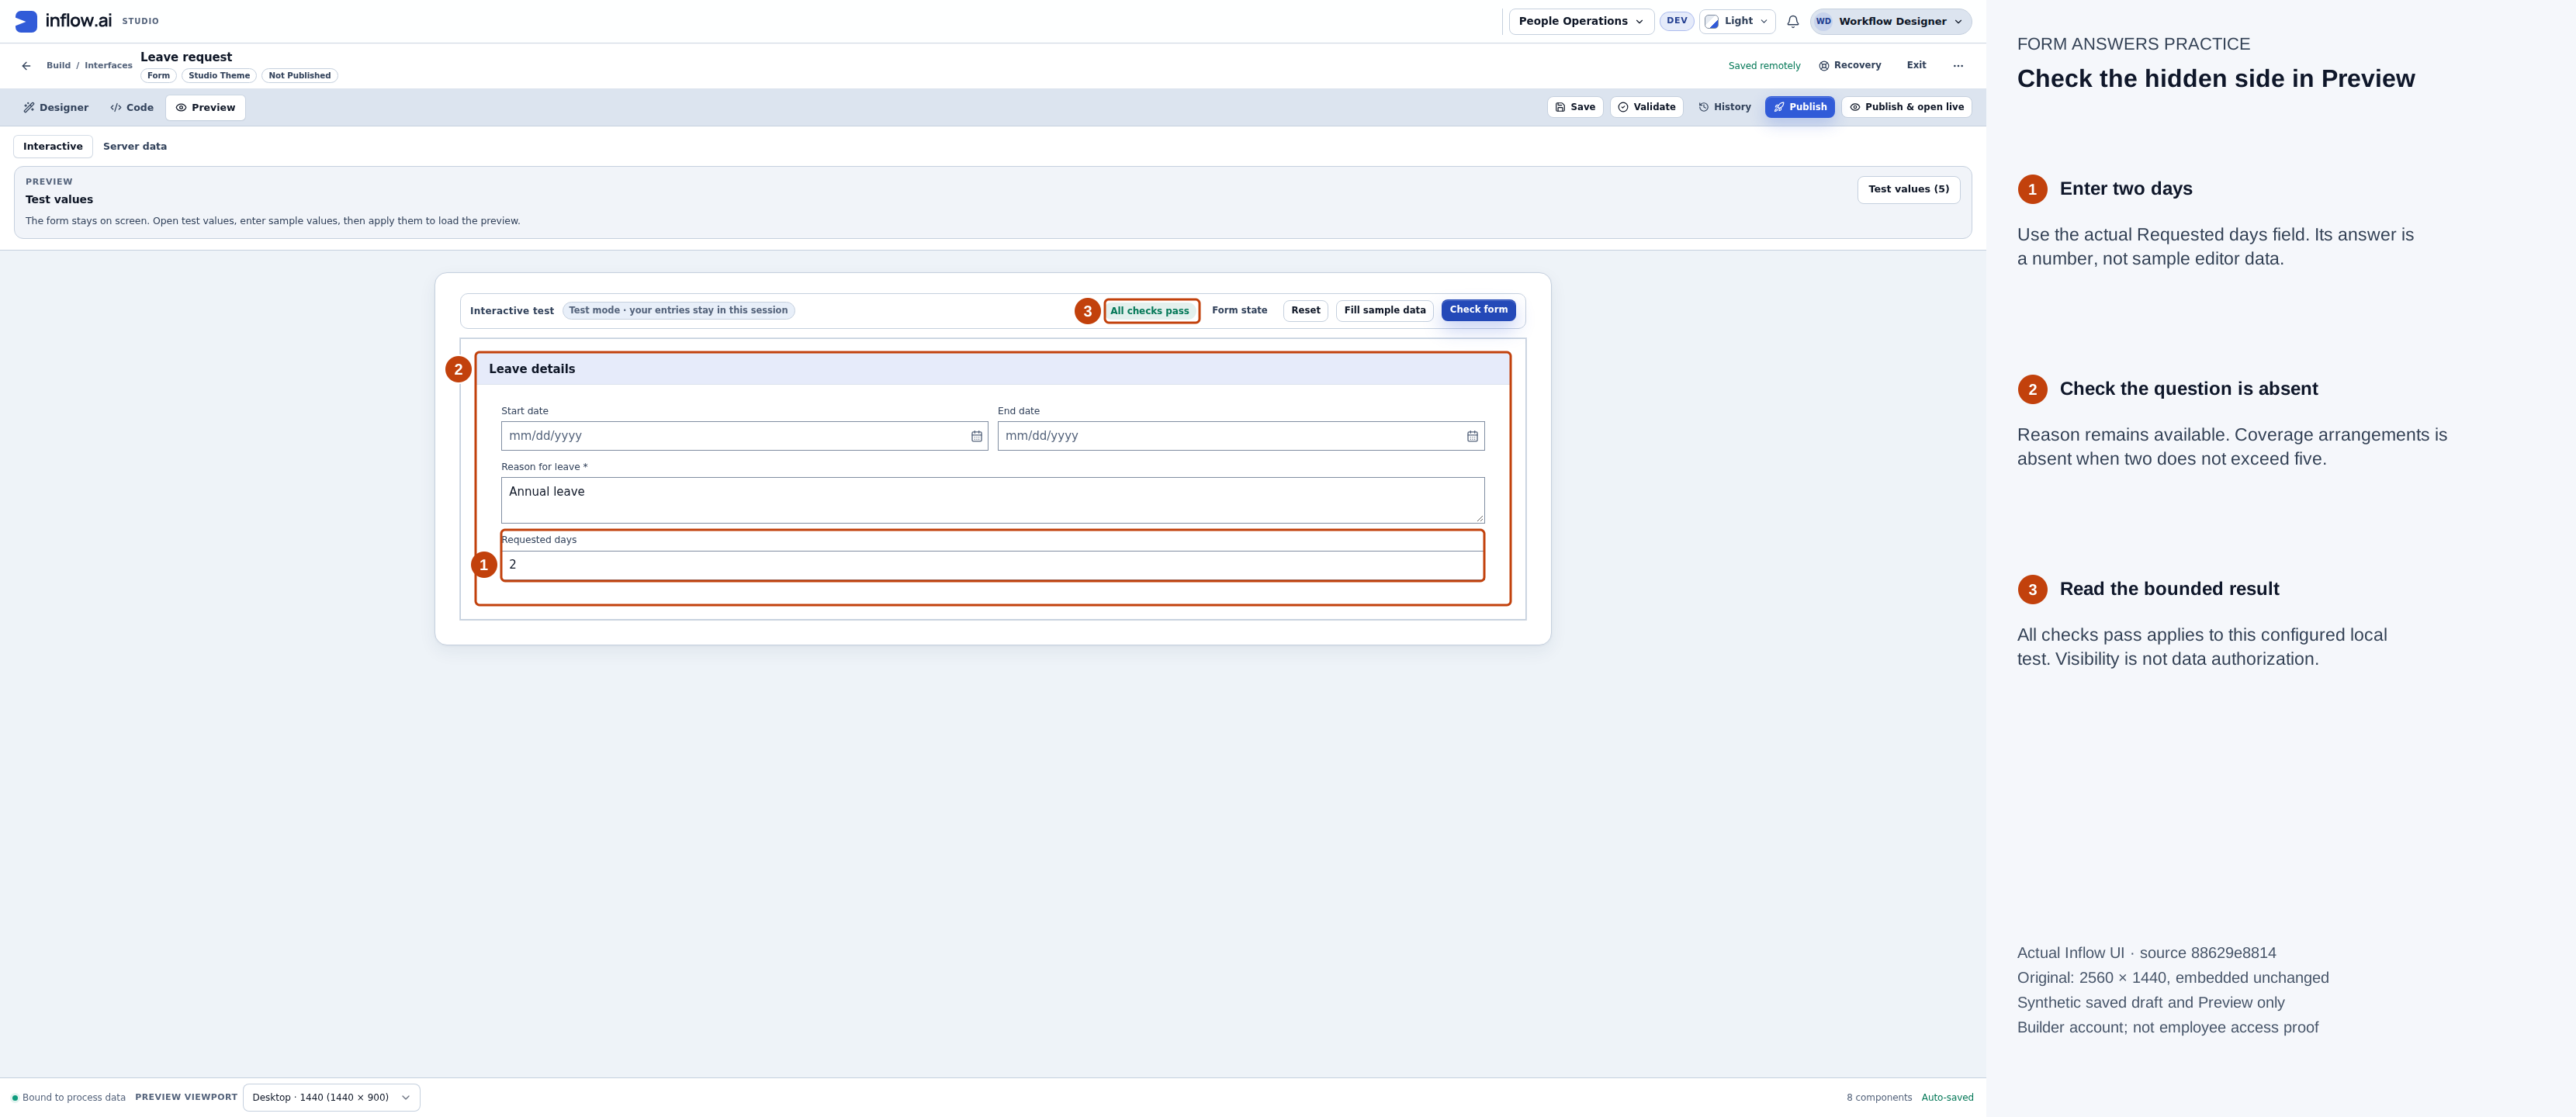
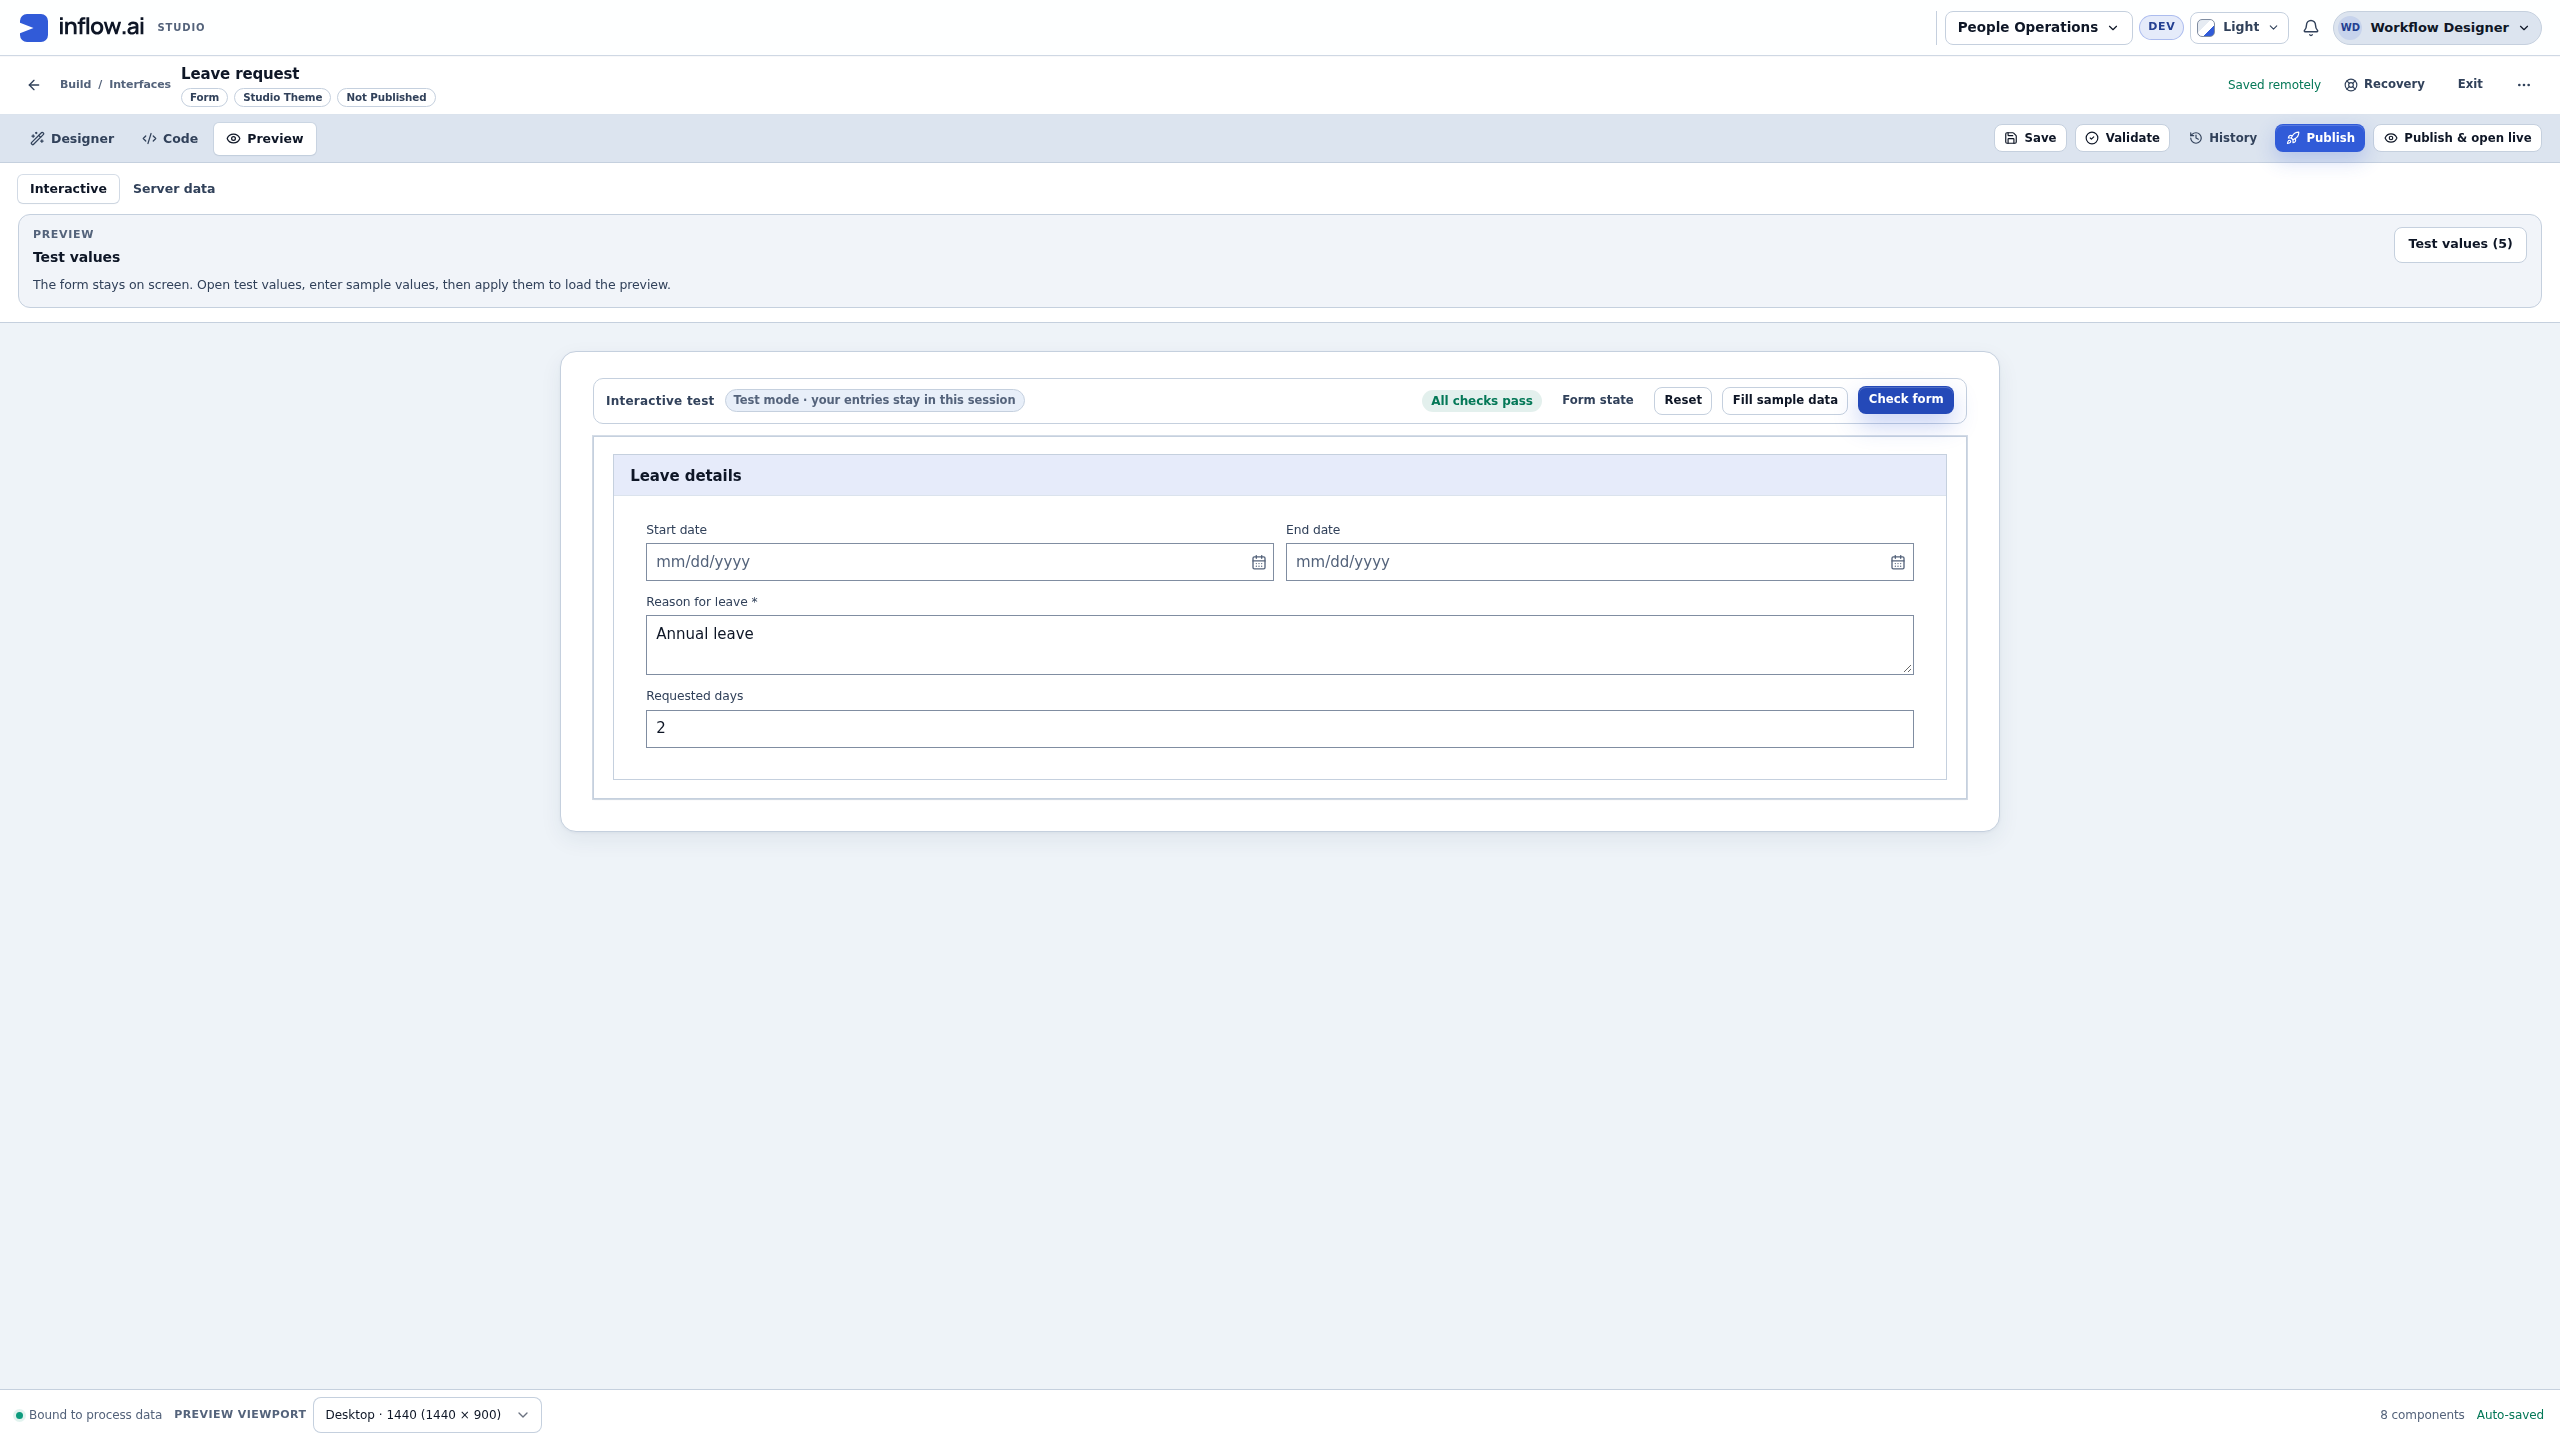
In actual Interactive Preview, Requested days is two and Coverage arrangements is absent. Reason remains available. Exactly five was separately checked and also kept coverage hidden; hiding a question does not authorize its data. Full-size numbered guide · Unchanged original screenshot.
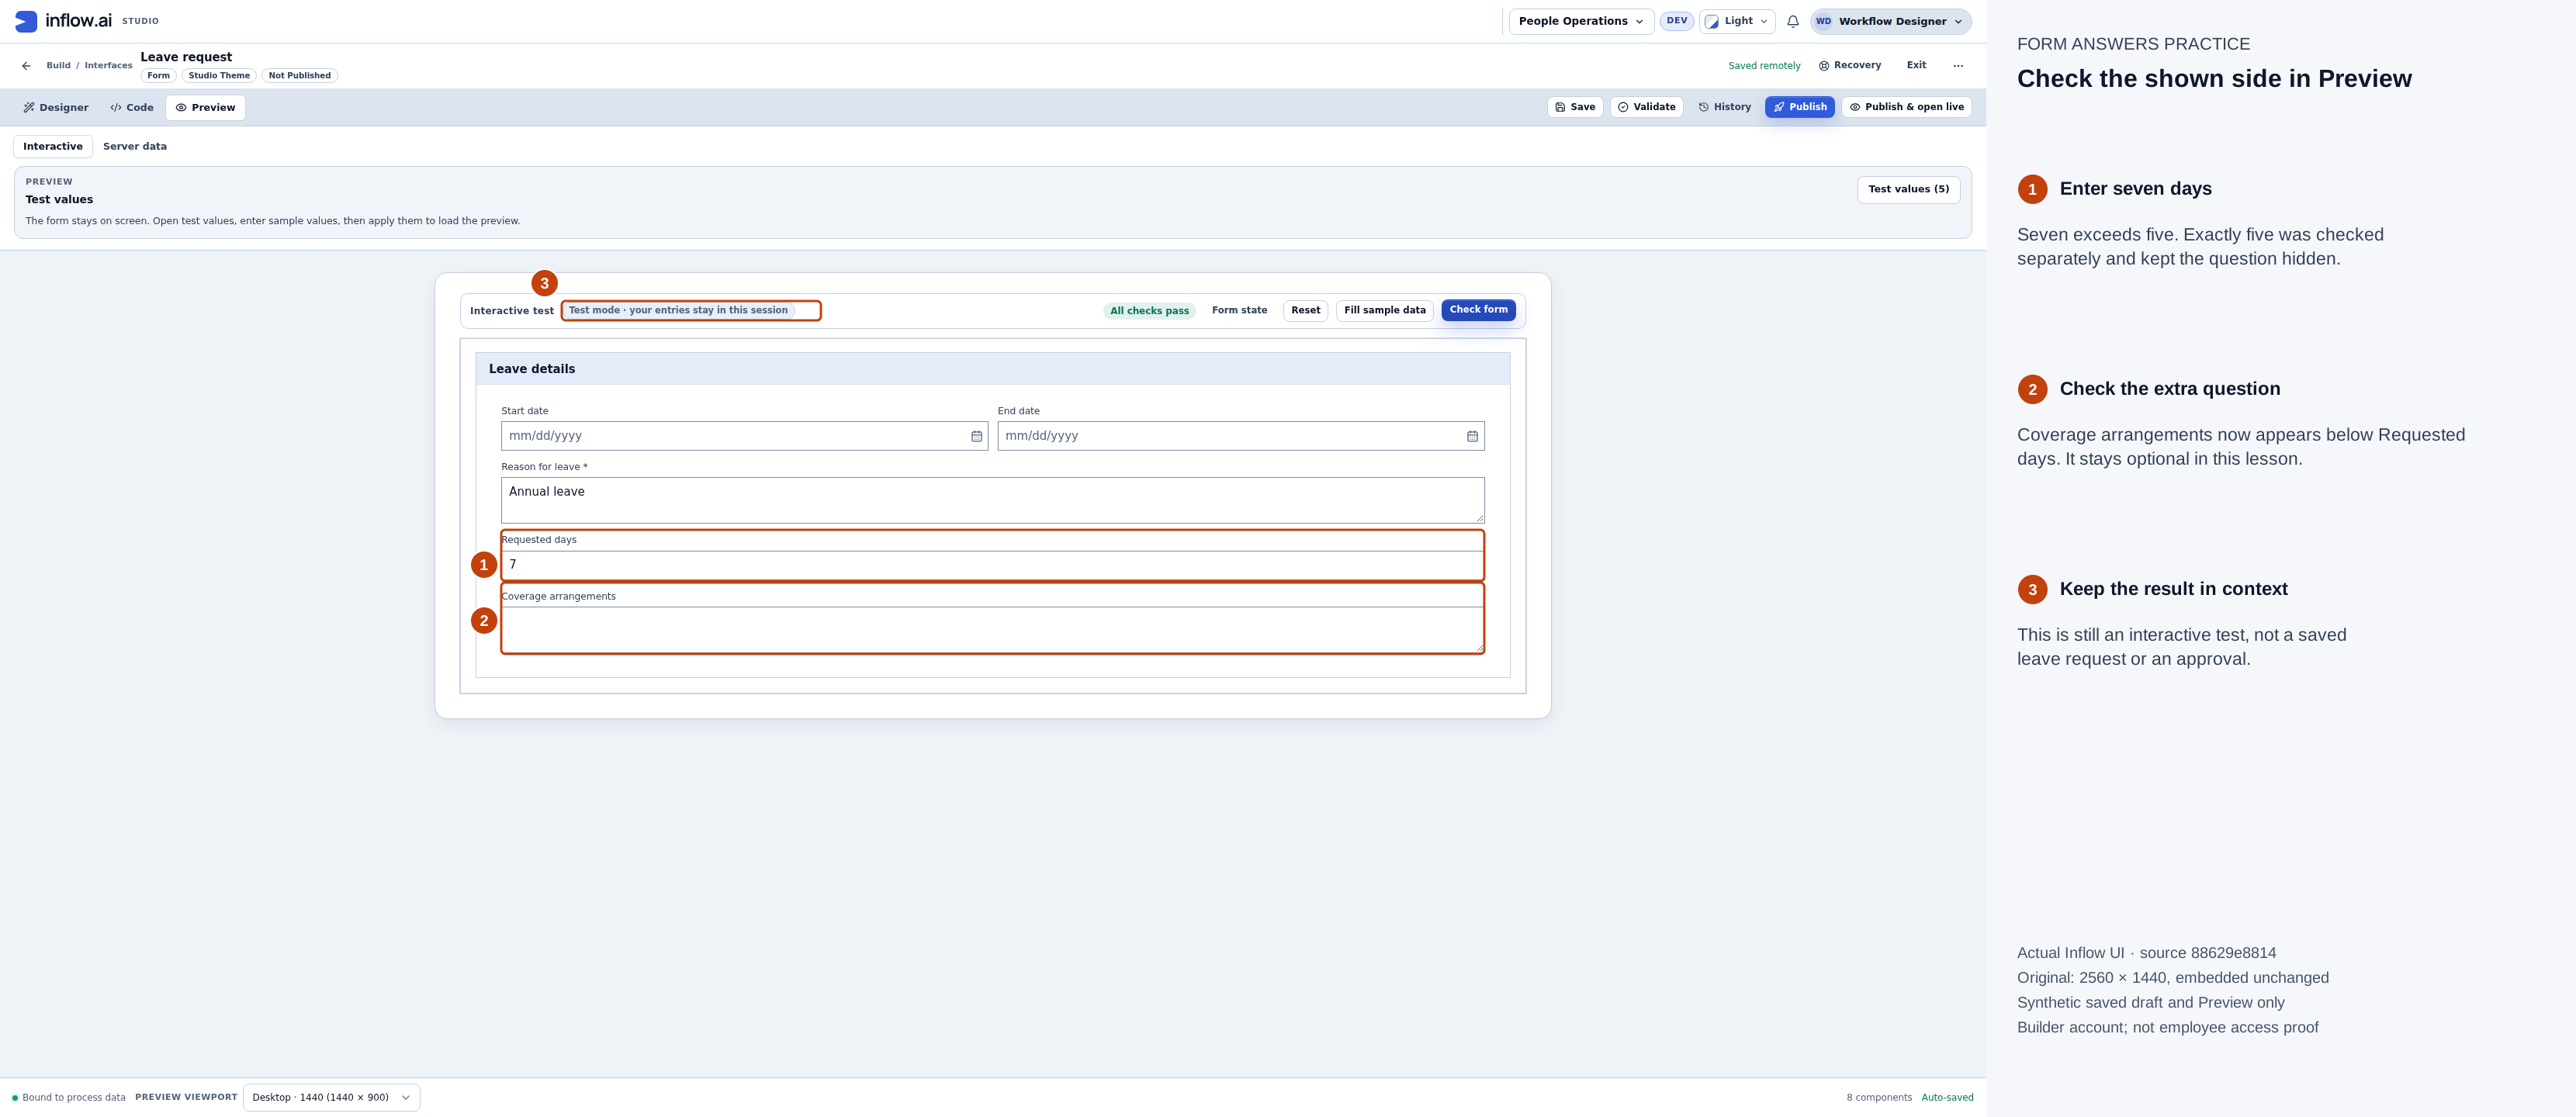
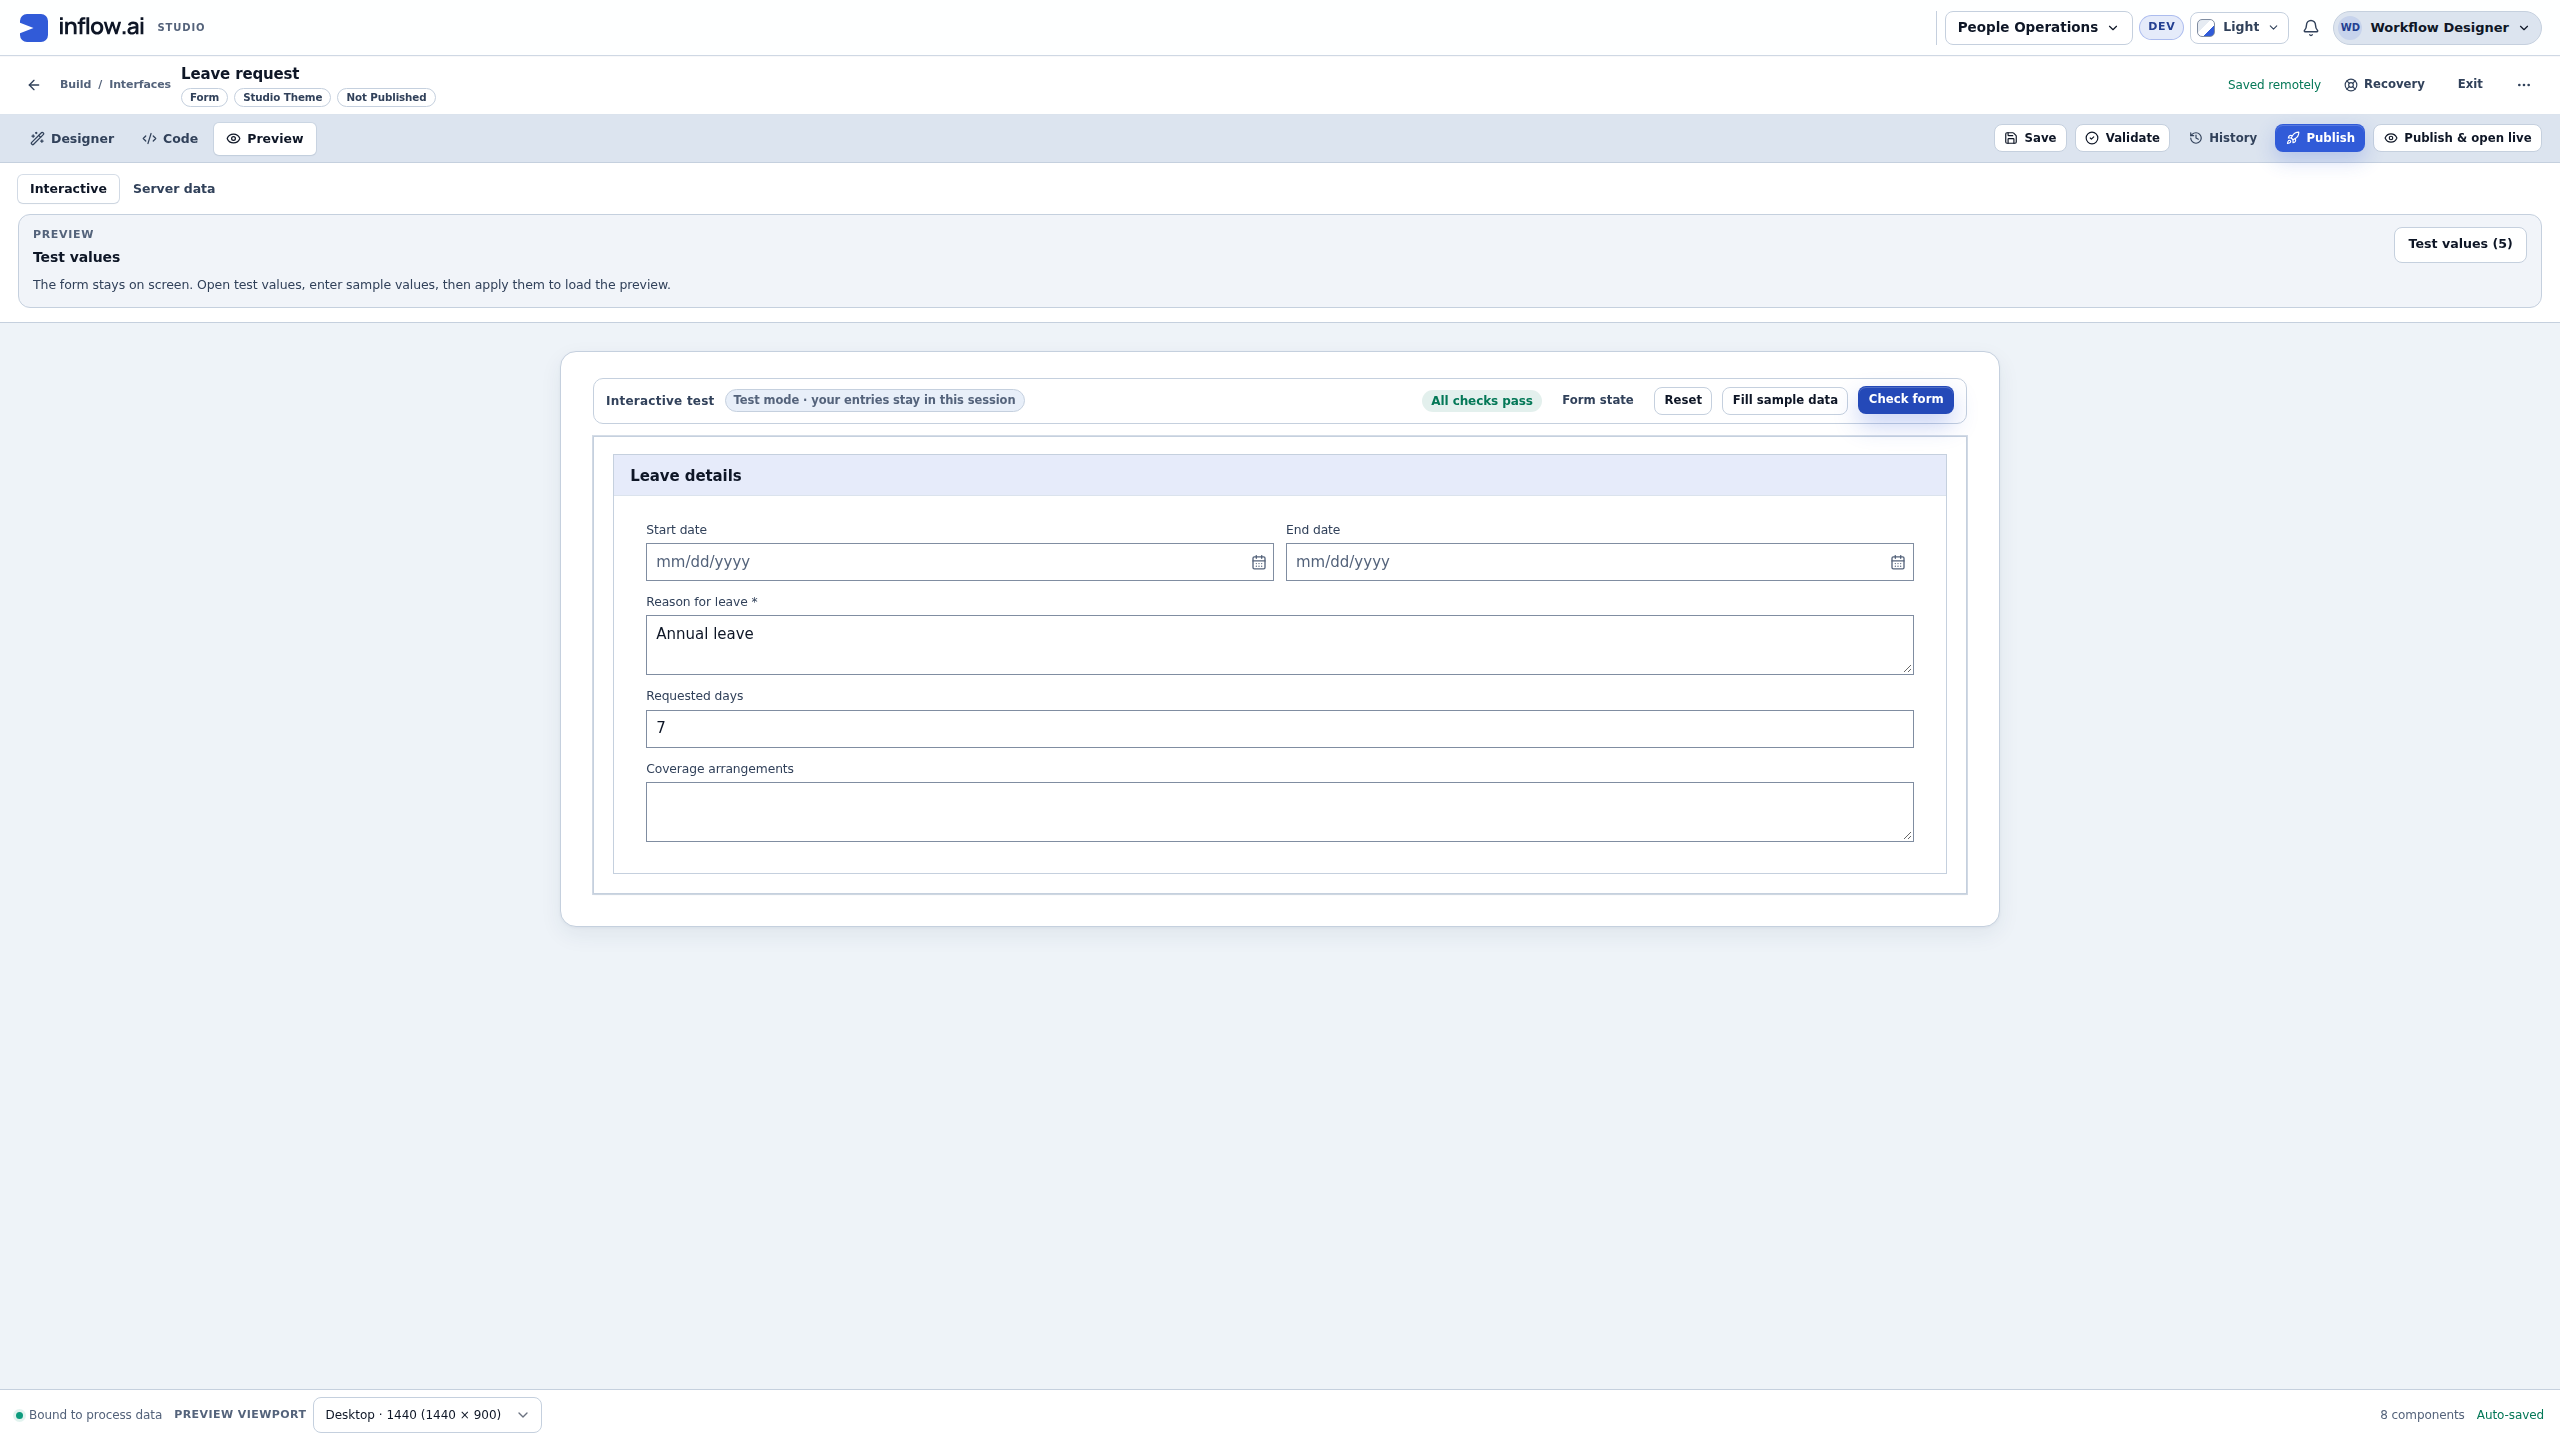
Changing the real Requested days answer to seven shows the optional Coverage arrangements question. It is an additional answer; the original required Reason question remains separate. Full-size numbered guide · Unchanged original screenshot.
After reopening, the visibility editor may show inputs.requestedDays > 5, the saved spelling of the same answer reference. Keep the input Name and the greater-than-five condition consistent, then repeat the Preview checks.
Read the formula in ordinary language: ri: identifies a form input; requestedDays names this particular input; > means greater than; 5 is the threshold. With 2 the condition is false, so the extra question is hidden. With 7 it is true, so the question appears. With exactly 5 it remains false.
Visibility controls presentation. It is not a rule granting access to employee information. Someone who must not access a record needs the application's proper permissions, not merely a hidden field.
Example 3: explain an invalid date order
- Select the field where a date-order message should be shown, such as End date.
- Under Validation → Validations, inspect existing checks first. If the same date-order check already exists, retain it. Otherwise choose Add validation. A new row initially offers a Built-in check; change Validation 1 kind to Expression. The row number may differ when other validations already exist.
- Read the Replace this validation configuration? confirmation. In this exercise you are replacing only the newly added default validation row. Choose Replace validation when that is correct; cancel if it would discard an existing business check.
- In the expression field, enter
ri:endDate < ri:startDate. In its message field, enter End date must not be before Start date. Save the form. - Open Preview → Interactive. Enter Annual leave as the reason, Start date 14 December 2026 and End date 13 December 2026. Follow the actual field's date placeholder or use its calendar. This exercise explicitly uses mm/dd/yyyy, so these are 12/14/2026 and 12/13/2026. Check the actual placeholder and Form state if your application uses another format.
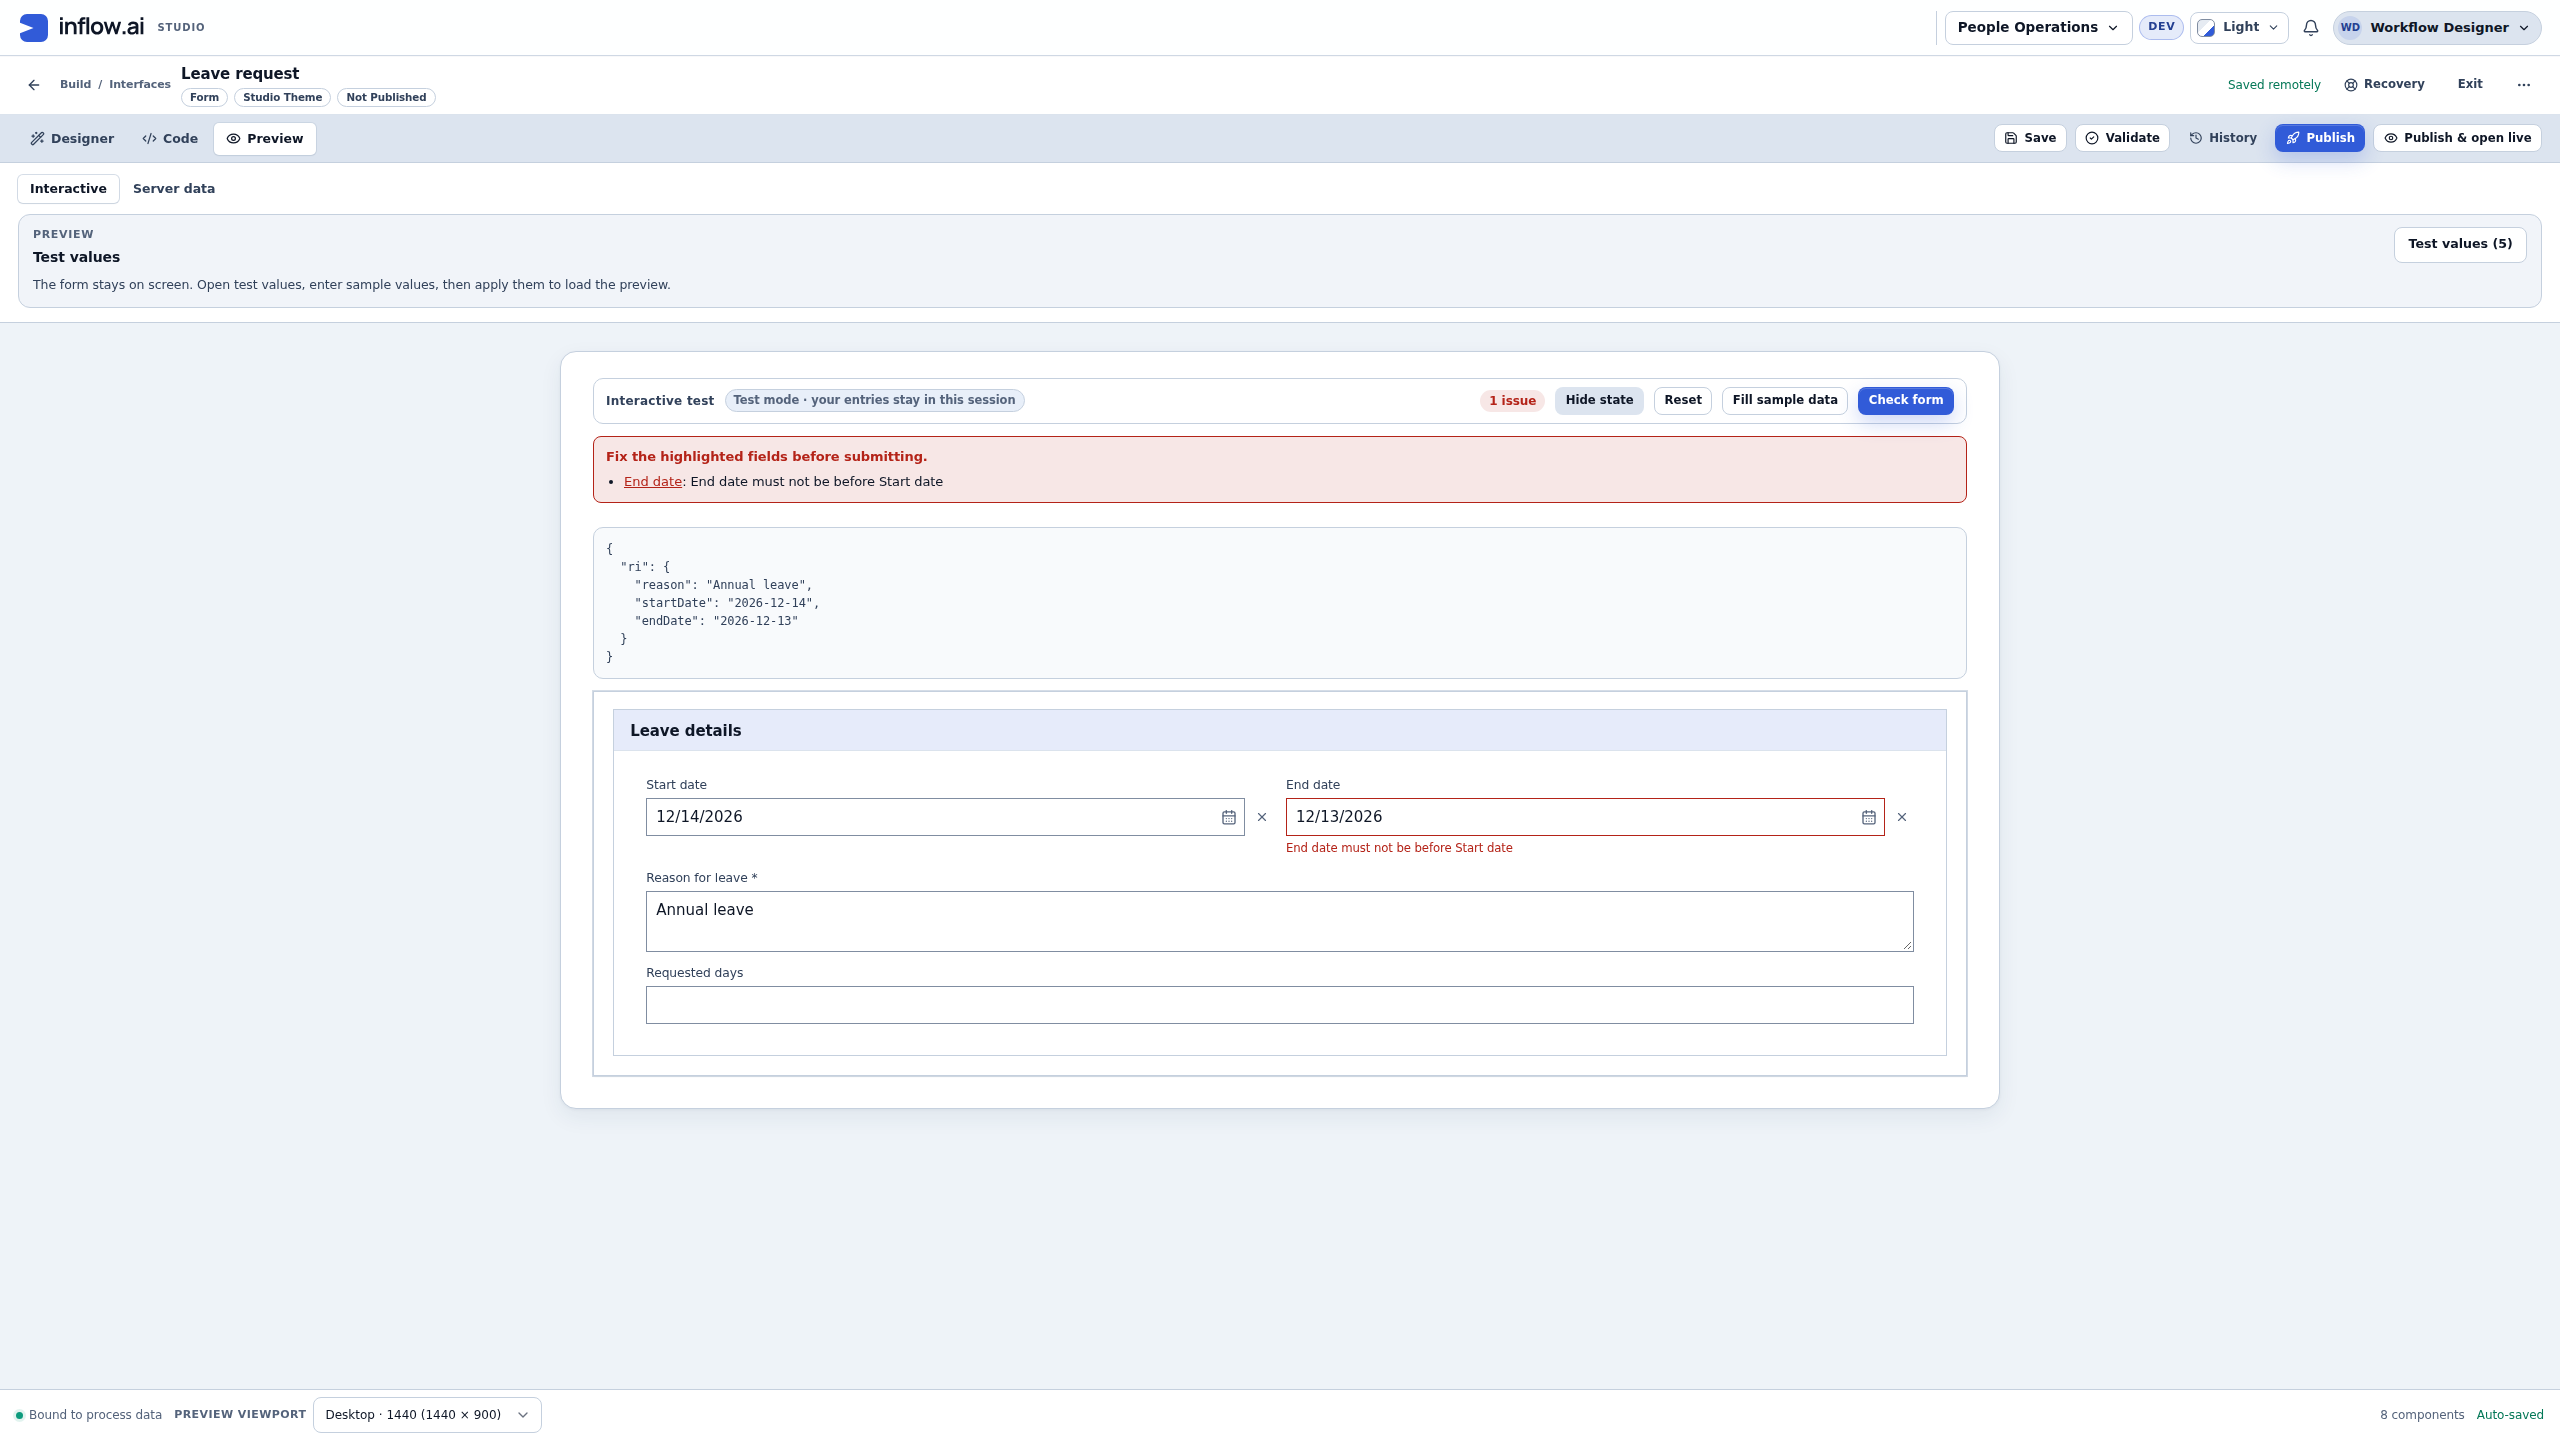
- Choose Check form. Expect the custom End date message both near the question and in the error summary. Open Form state to check startDate is 2026-12-14 and endDate is 2026-12-13. This helps distinguish a date-format mistake from the intended date-order check.
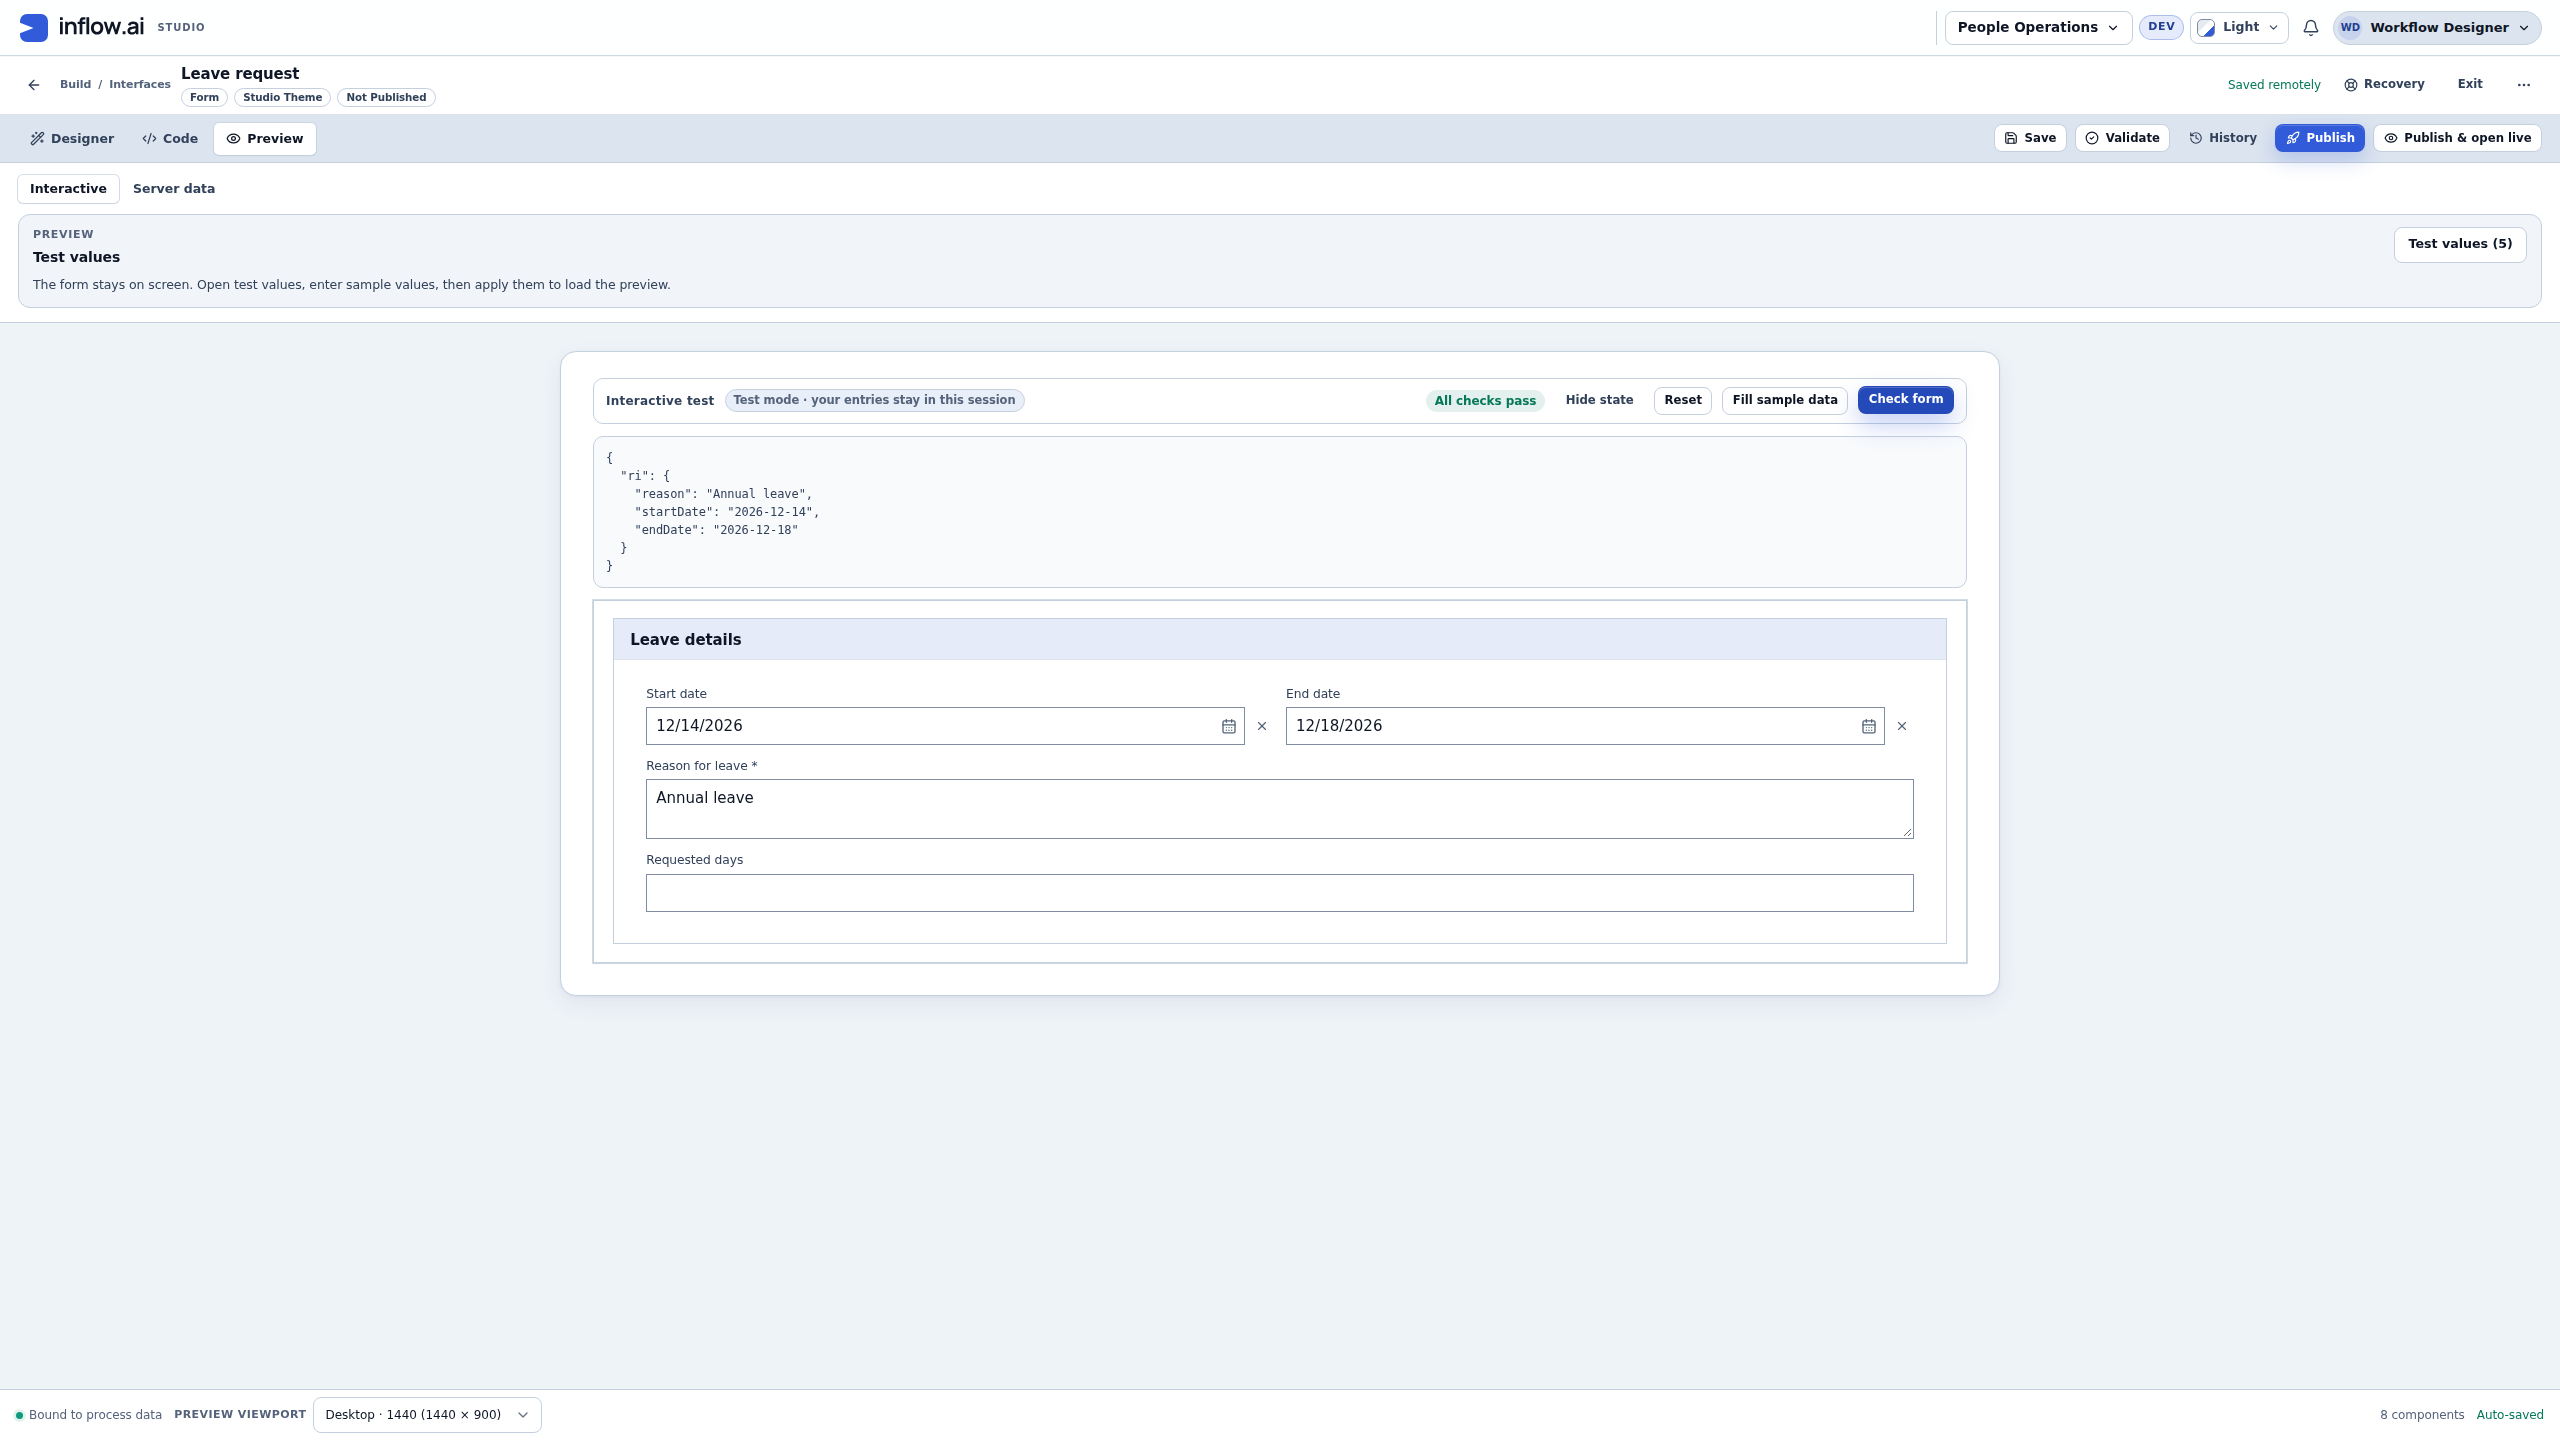
- Change only End date to 18 December 2026—12/18/2026 in that session—and choose Check form again. The date-order message should clear and the state should show endDate as 2026-12-18.
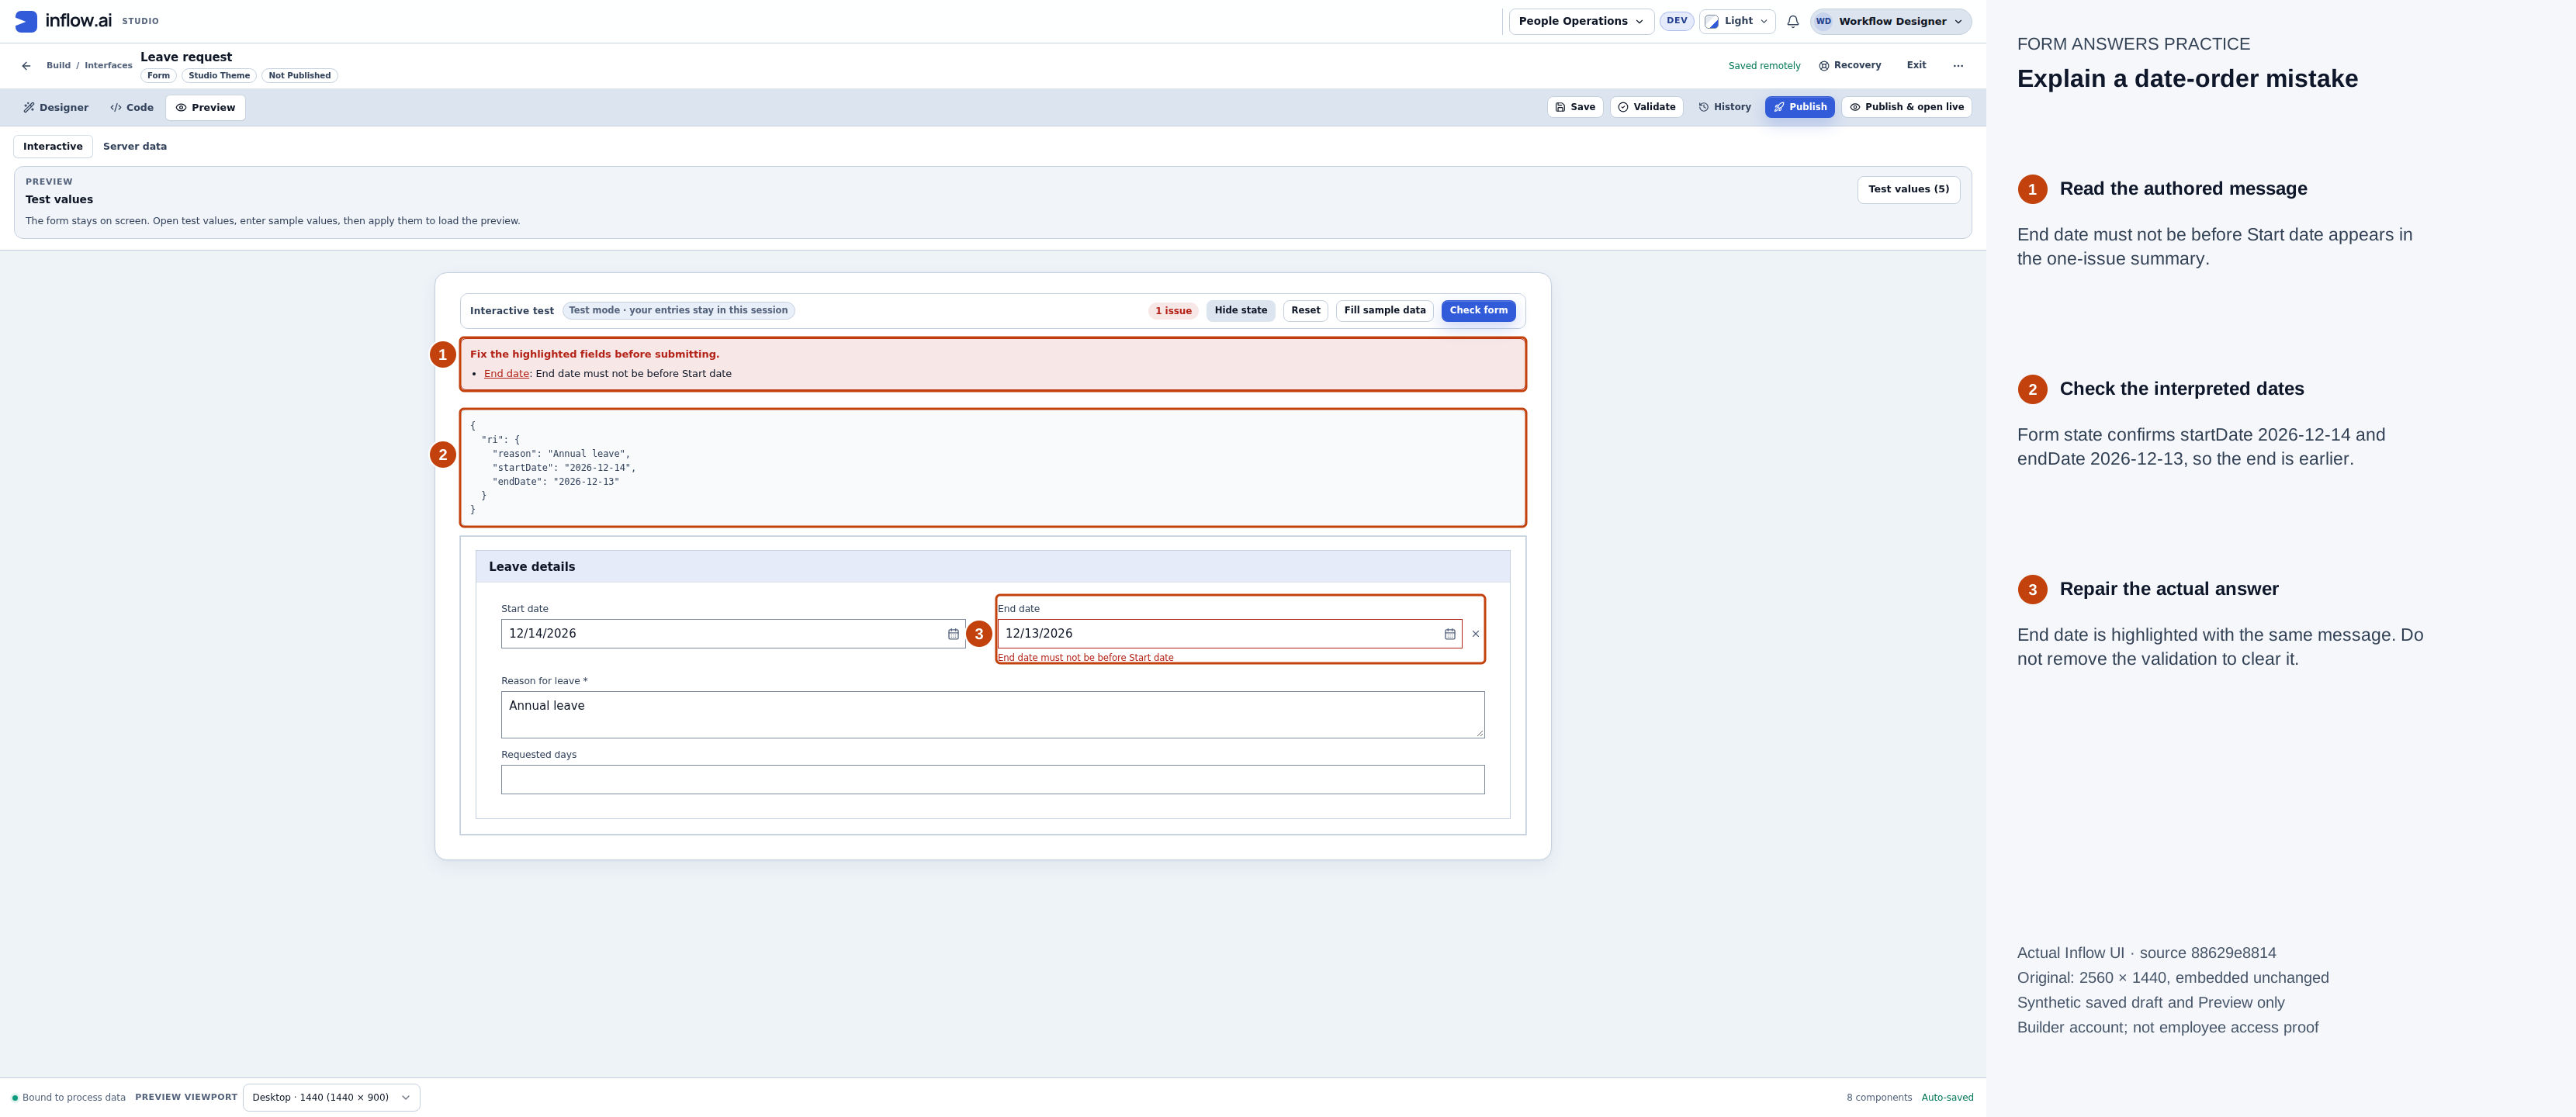
The actual date-order check shows the authored message in the summary and beside End date. Form state confirms startDate is 2026-12-14 and endDate is 2026-12-13, distinguishing the intended date-order mistake from a parsing mistake. Full-size numbered guide · Unchanged original screenshot.
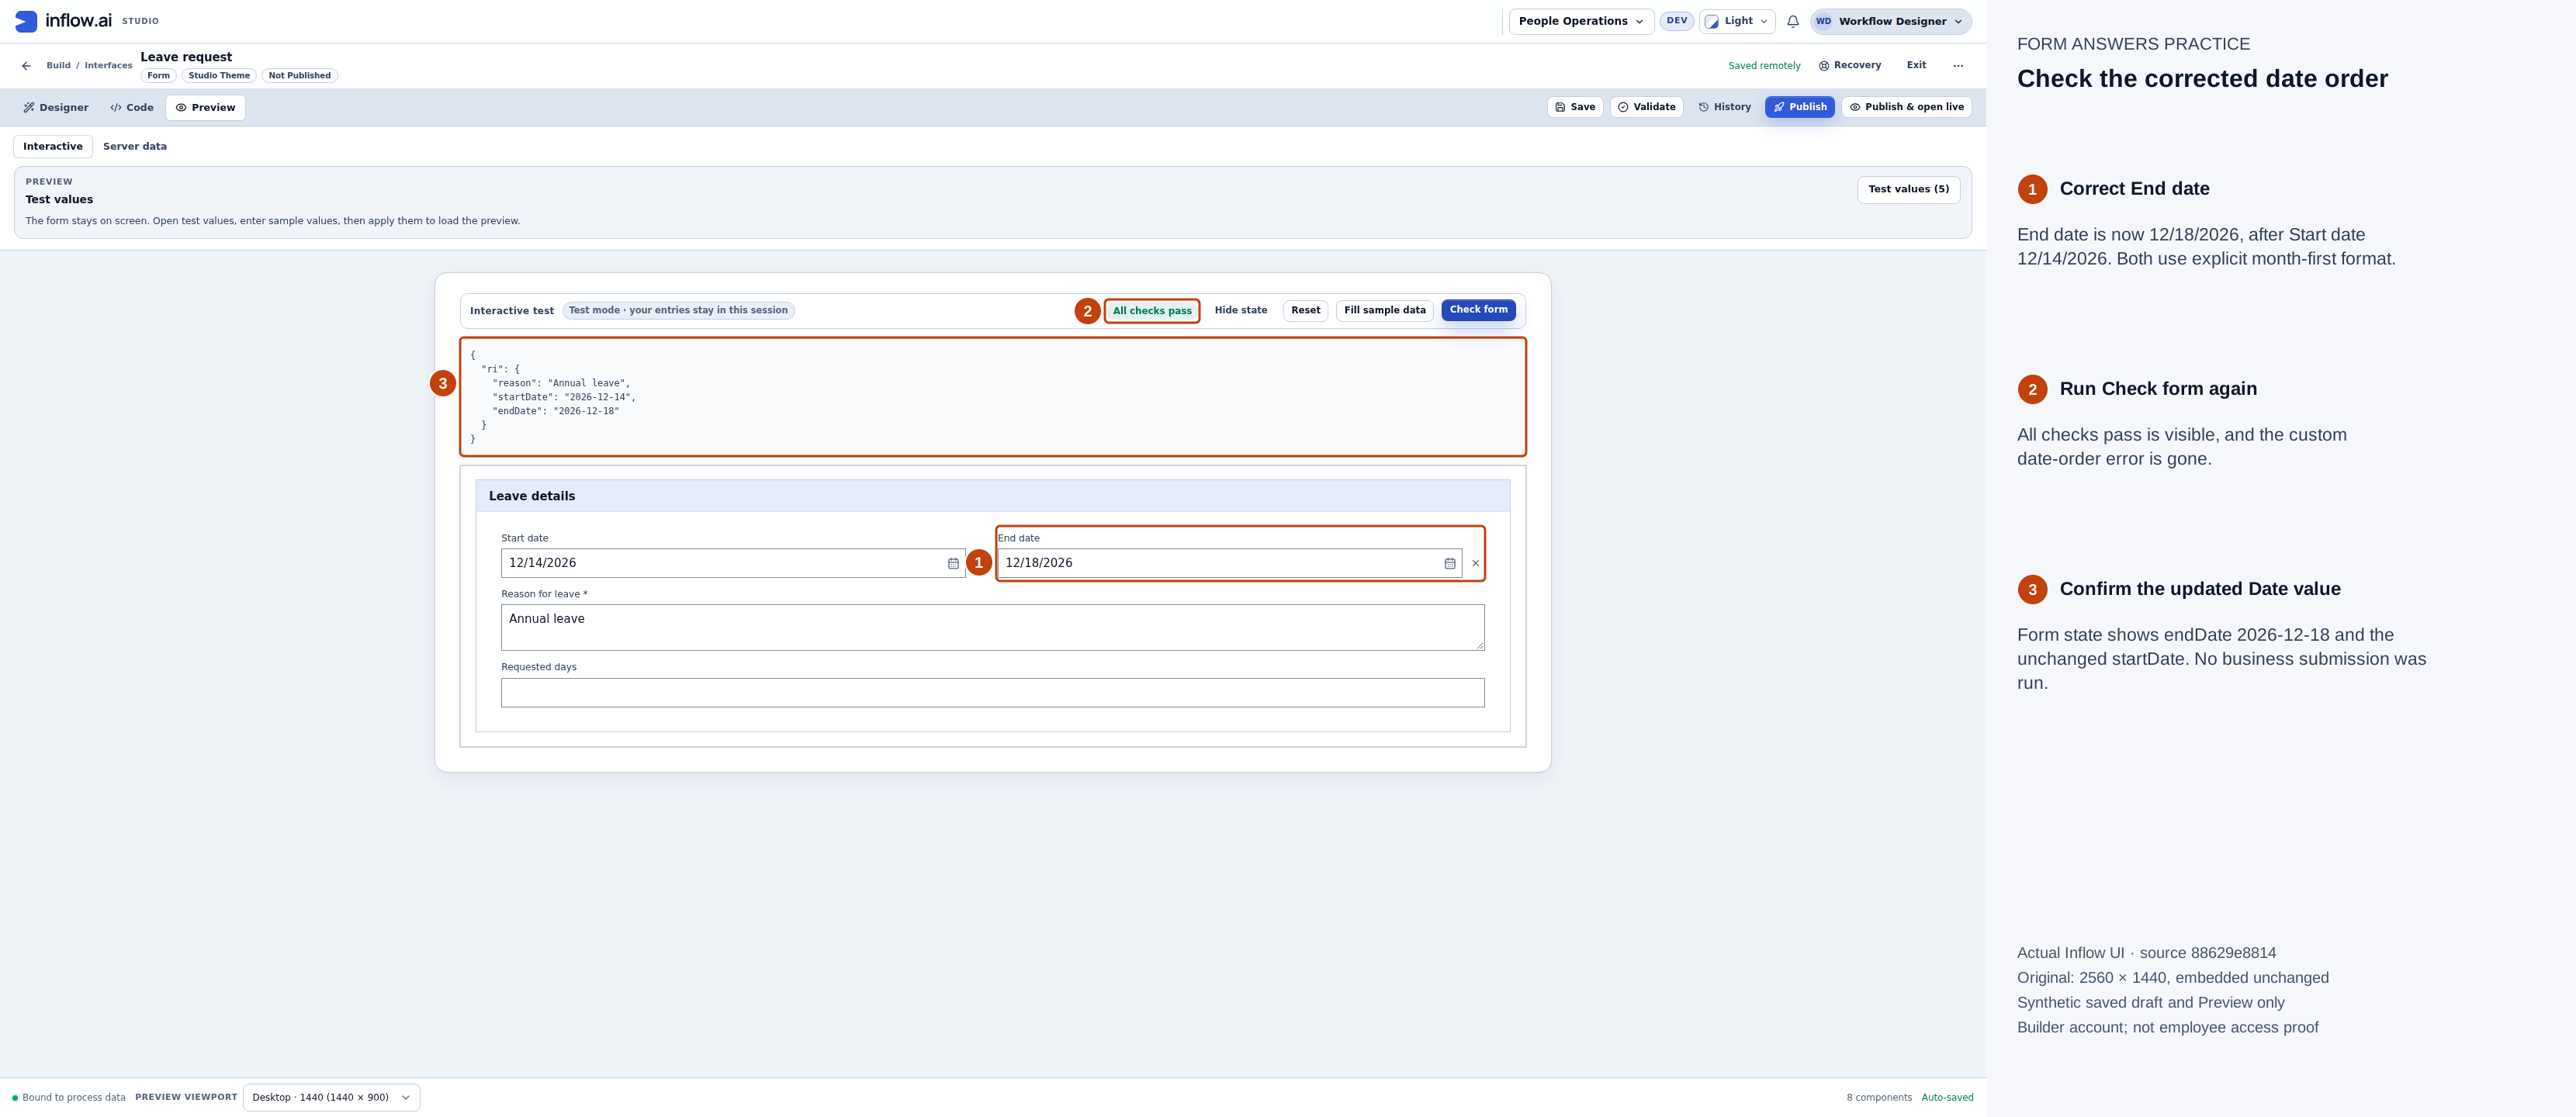
Correcting only End date to December eighteen clears the message, shows All checks pass and changes endDate to 2026-12-18 in Form state. The result applies to this local validation, not business submission or approval. Full-size numbered guide · Unchanged original screenshot.
In a validation condition, true means show that validation message. This differs from Visible when, where true means show the control. Do not reverse the date check just to remove an error. Consider missing dates separately with Required.
When a setting does not work
Check which control is selected, the input's name/type and whether you used a fixed value, a formula or a destination. Unknown names and wrong answer types need repair; do not convert every field to Text to make a formula stop complaining. If a protected source is unavailable, ask its owner.
Continue with Practical formulas for more explanation, then Check and publish. The optional technical properties chapter is for advanced investigation.