Interface Builder: a practical handbook
Build a screen people can understand, connect its answers to the right information and publish it as part of a useful application. This handbook is for consultants who configure business applications in Studio. It does not assume programming or server administration.
The illustrated learning path links the available screenshot examples across the handbook and application tutorials, with their capture-build status and limits. Each caption describes the state shown and what that image does not establish.
Meet the example
Nadia builds Leave requests in the People Operations workspace. Mohammad requests five days of leave, 14–18 December 2026. Sara reviews the request. The people and records in the lessons are fictional.
A form asks for information. A record stores business information, such as one leave request. A workflow case follows a request through its process. A task is work someone must perform, such as Sara's review. An App Shell is the application frame that holds pages and navigation. These parts work together, but creating one does not automatically create all the others.
Choose your starting point
You can use this book for a first practice form, a repair to an existing design, or the form part of a complete application. Choose the smallest route that answers your current question. A consultant learning where an answer goes does not need to begin by publishing a workflow; a manager who needs to perform a task should use the assigned application rather than the designer.
| Your starting point | A useful first outcome | Begin with |
|---|---|---|
| I have not built a form before. | A small saved practice with clear questions and deliberate answer destinations. | Create your first form, then arrange its fields. |
| I know what to ask, but not which control to use. | A compatible type and destination for each business answer. | Control lookup, then the relevant control lesson. |
| The form behaves differently from the intended policy. | A matching, nonmatching and boundary example with an observed result. | Practical formulas and repair examples. |
| The draft is ready for release. | A reviewed published version whose actual displayed content you have checked. | Check and publish. |
| The employee and manager need a complete request application. | The record, process, assignment, forms and access paths work together for the intended people. | The application stages after the introductory data and people setup. |
Use your intended workspace and a clearly named fictional practice. If a matching teaching form already exists, inspect it and its owner before creating another one. Following a lesson should leave you able to explain the design, not leave a collection of nearly identical drafts that nobody can identify.
Read the pictures with the steps
A numbered outline points to the control or result discussed in its matching legend. Some guides stack several clearly labeled detail crops from one original image so small property fields remain readable. Those detail crops are illustrations of the same captured state; they are not separate interactions or a new screen.
- Read the sentence introducing a picture to establish the form, mode and stage.
- Match the numbers to the legend. A number beside Required is explaining that setting, not telling you to click every highlighted field.
- Compare the value and message with the written example. A green status, a visible field and a saved draft can describe different outcomes.
- Open the full-size guide or unchanged original when you need the surrounding screen. The original preserves what was actually visible at native resolution.
- Follow the detailed linked lesson when configuring your own practice; do not infer an unshown action or result from a picture alone.
Captions identify historical or reused material. A current source-guided explanation may cover more behavior than an individual screenshot demonstrates. Keep that distinction when you hand the design to someone else.
Example 1: build a first form
- Read Create your first form and create a named teaching Form.
- Use Arrange fields and sections to make the questions readable.
- Choose suitable questions with the control guide.
- Connect the answers and add useful checks in Properties and answers.
- Follow Check and publish before handing the released form to someone else.
At the end you should be able to explain what the form collects and where each answer goes. A form that looks complete still needs its intended save or workflow action before it becomes a complete request application.
Follow one answer through a real illustrated example
This short route previews how the later chapters fit together. It uses the separate Coverage condition practice draft, not Mohammad's five-day request in the opening story. Its fictional training policy is: unpaid leave longer than five days needs a coverage explanation. The application owner must decide any real policy.
The three guides below reuse unchanged native 2560 × 1440 screenshots captured on 16 November 2026 for the full formula walkthrough. They retain that run's recorded build (a4ccd998c9), normal Designer account with Admin in People Operations Access Practice, and saved unpublished draft. They are new placements in this introduction, not new captures or evidence that an employee submitted a request.
1. Choose what each answer means
- Begin with three ordinary questions: how many whole days, whether the leave is unpaid, and what coverage is arranged.
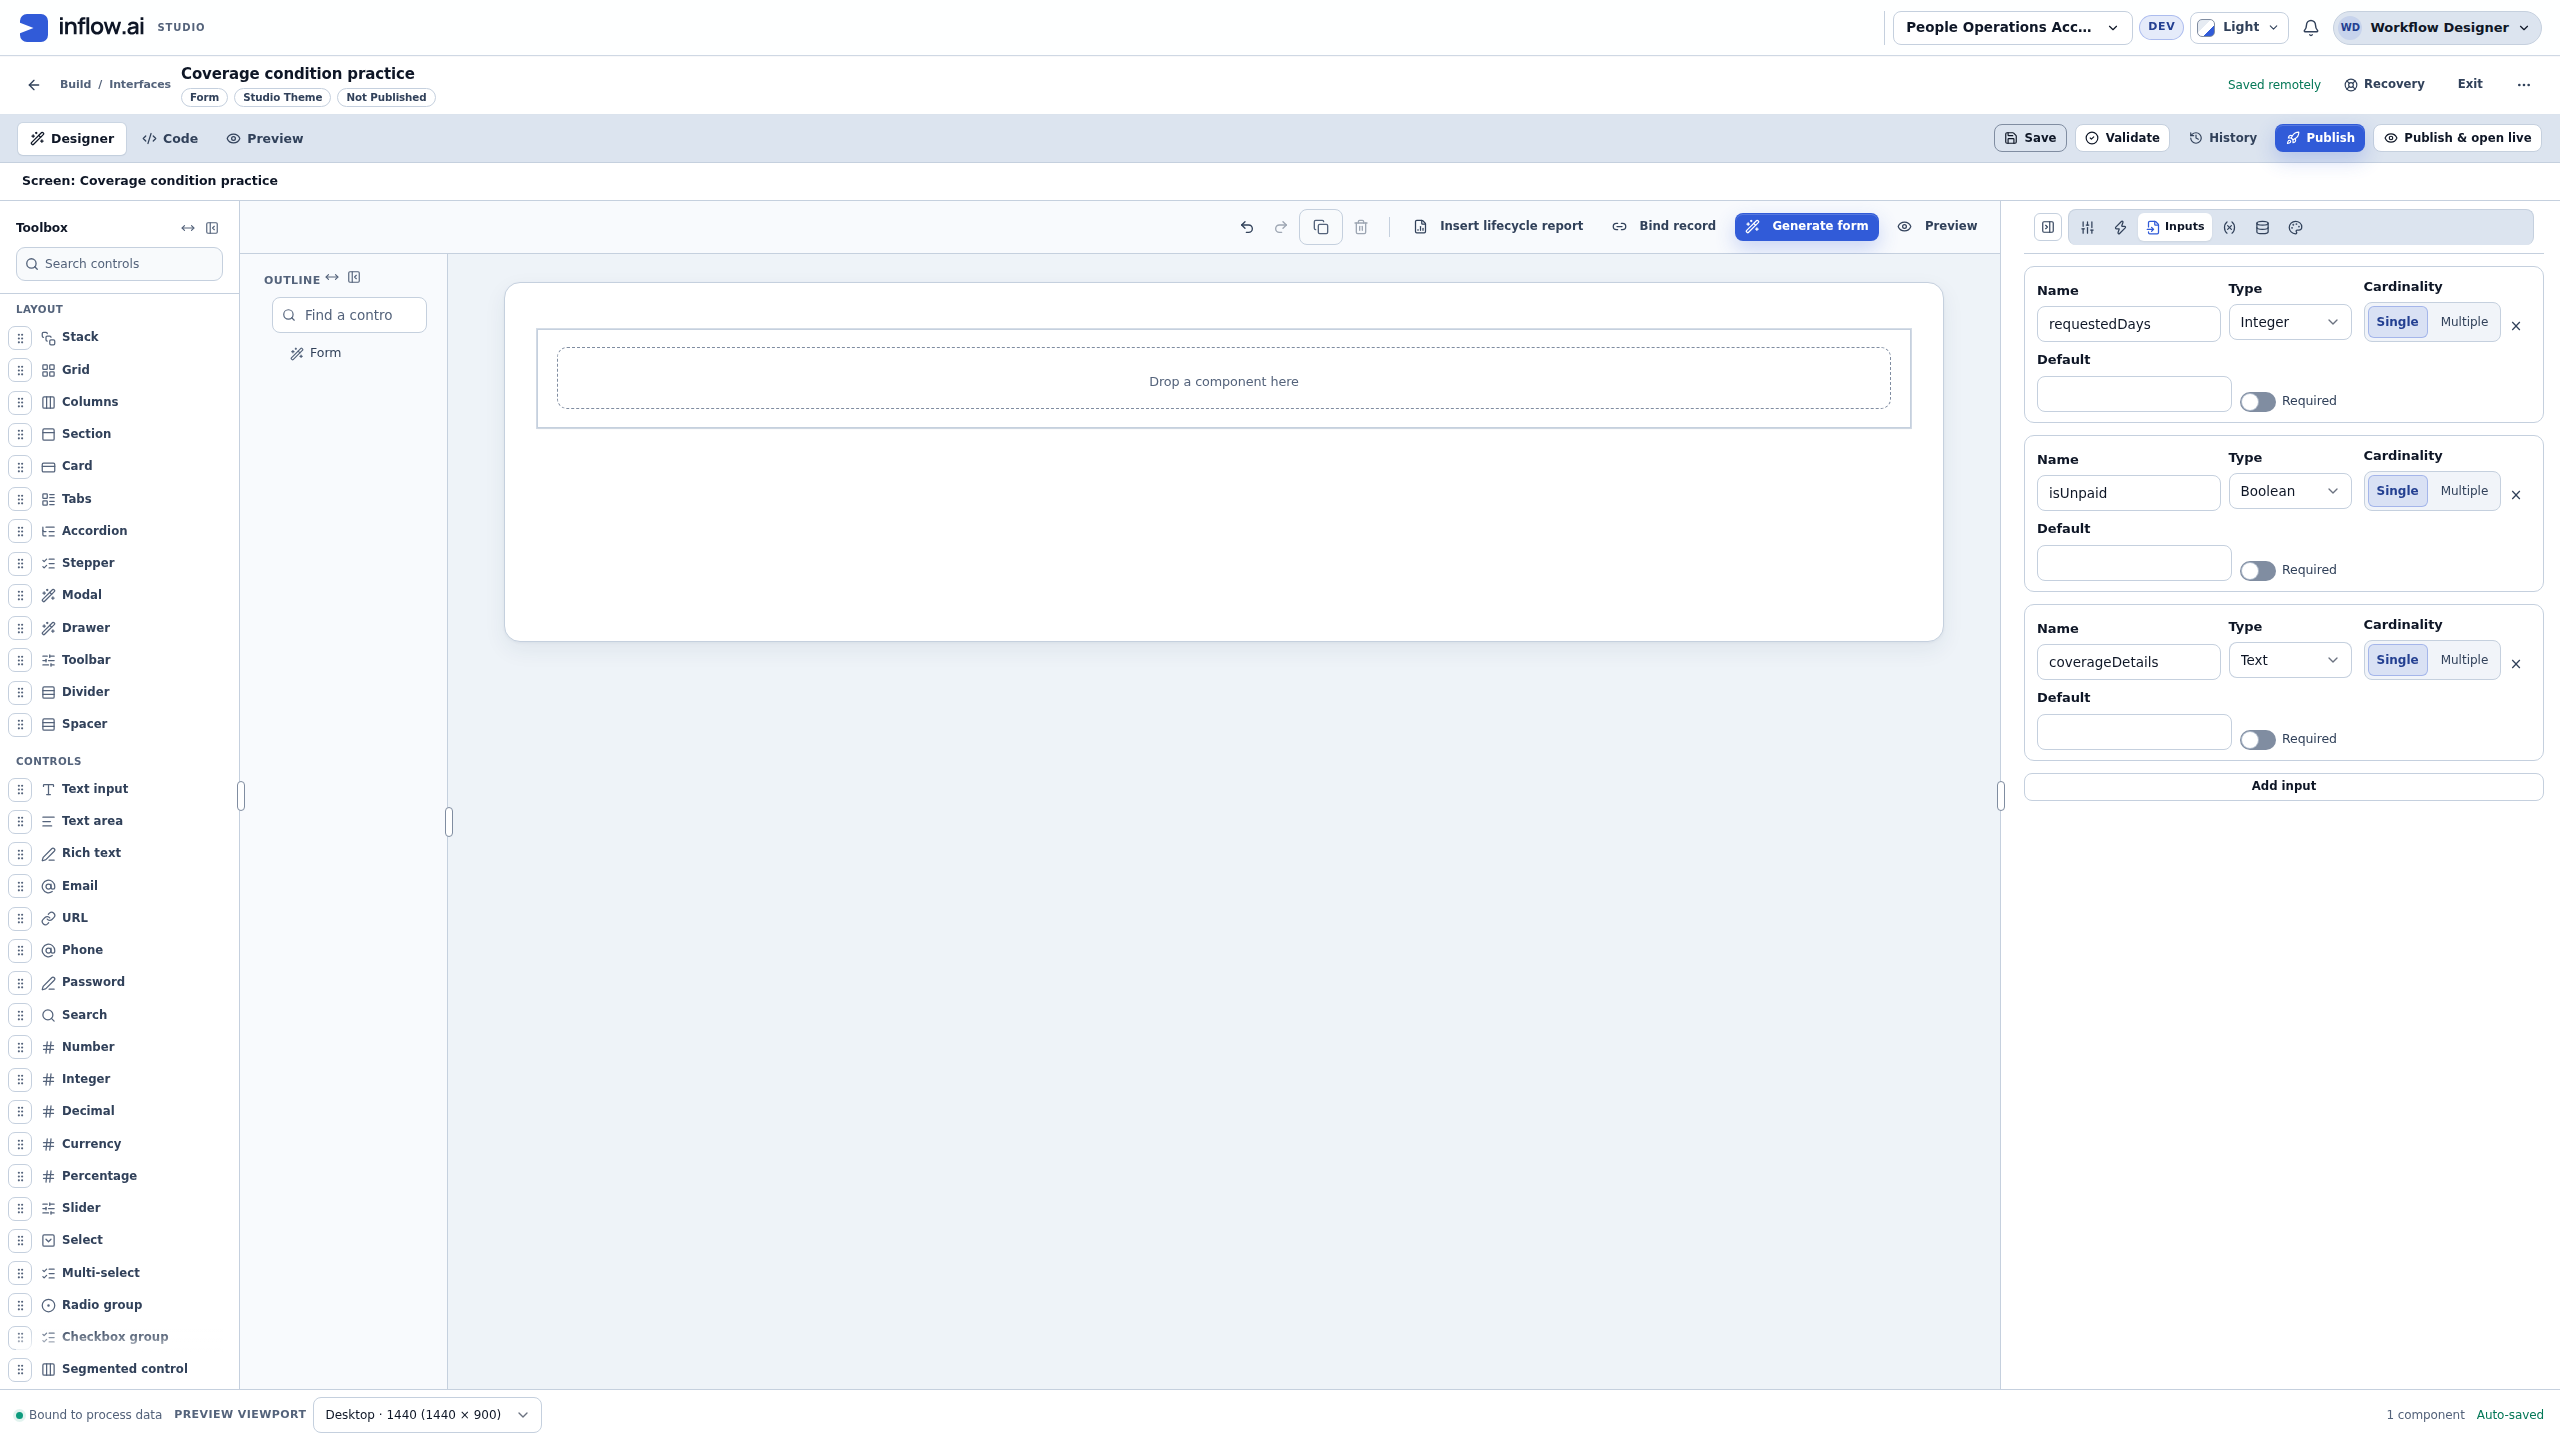
- Use the declared answers requestedDays — Integer, isUnpaid — Boolean and coverageDetails — Text for this practice. Keep their meanings distinct.
- Use an Integer, Checkbox and Text area as the corresponding questions, then choose their actual compatible destinations with the binding picker. The visible wording and the answer destination are separate settings.
- Save the draft and wait for Saved remotely. Follow the control-selection example for the complete sequence rather than changing an existing business form to match this image.
The input declarations in this example are Single, have blank Defaults and leave their separate Required switches off. The explanation question later receives its own conditional Required setting. The declaration switches do not demonstrate the final question requirement.
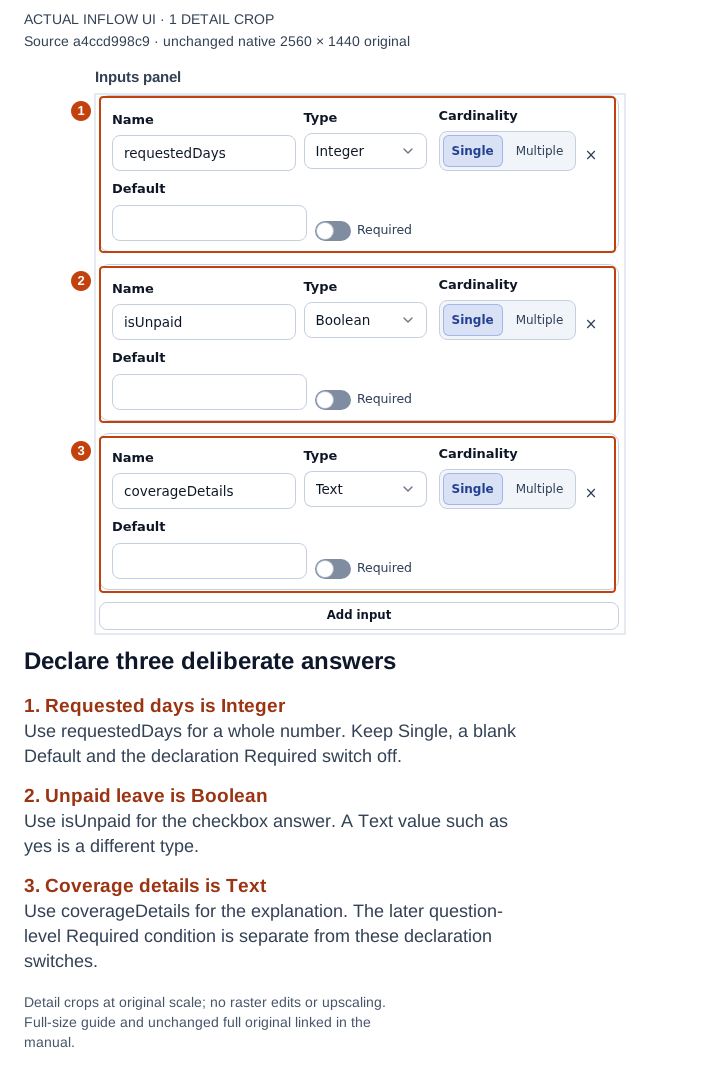
1–3: three distinct answers, with Integer, Boolean and Text types. Their names identify the destinations used by the questions; their Labels are the wording a person sees. Open the full-size numbered guide · Open the unchanged full 2560 × 1440 screenshot.
2. Test the policy with a deliberate missing answer
Nadia configures the same combined condition for Coverage arrangements Visible when and Required: unpaid leave must be true and requested days must be greater than five. Both facts matter. Exactly five days does not match this training rule.
- Read the full saved conditions in the focused editor and compare their intended meaning, using Practical formulas.
- Open Preview → Interactive and enter the few fictional answers directly for this exercise.
- Check the nonmatching cases before the matching case: eight days/unchecked hides the explanation, and five days/checked still hides it. In the captured run their local checks passed.
- Enter six days and check Unpaid leave, then leave Coverage arrangements empty.
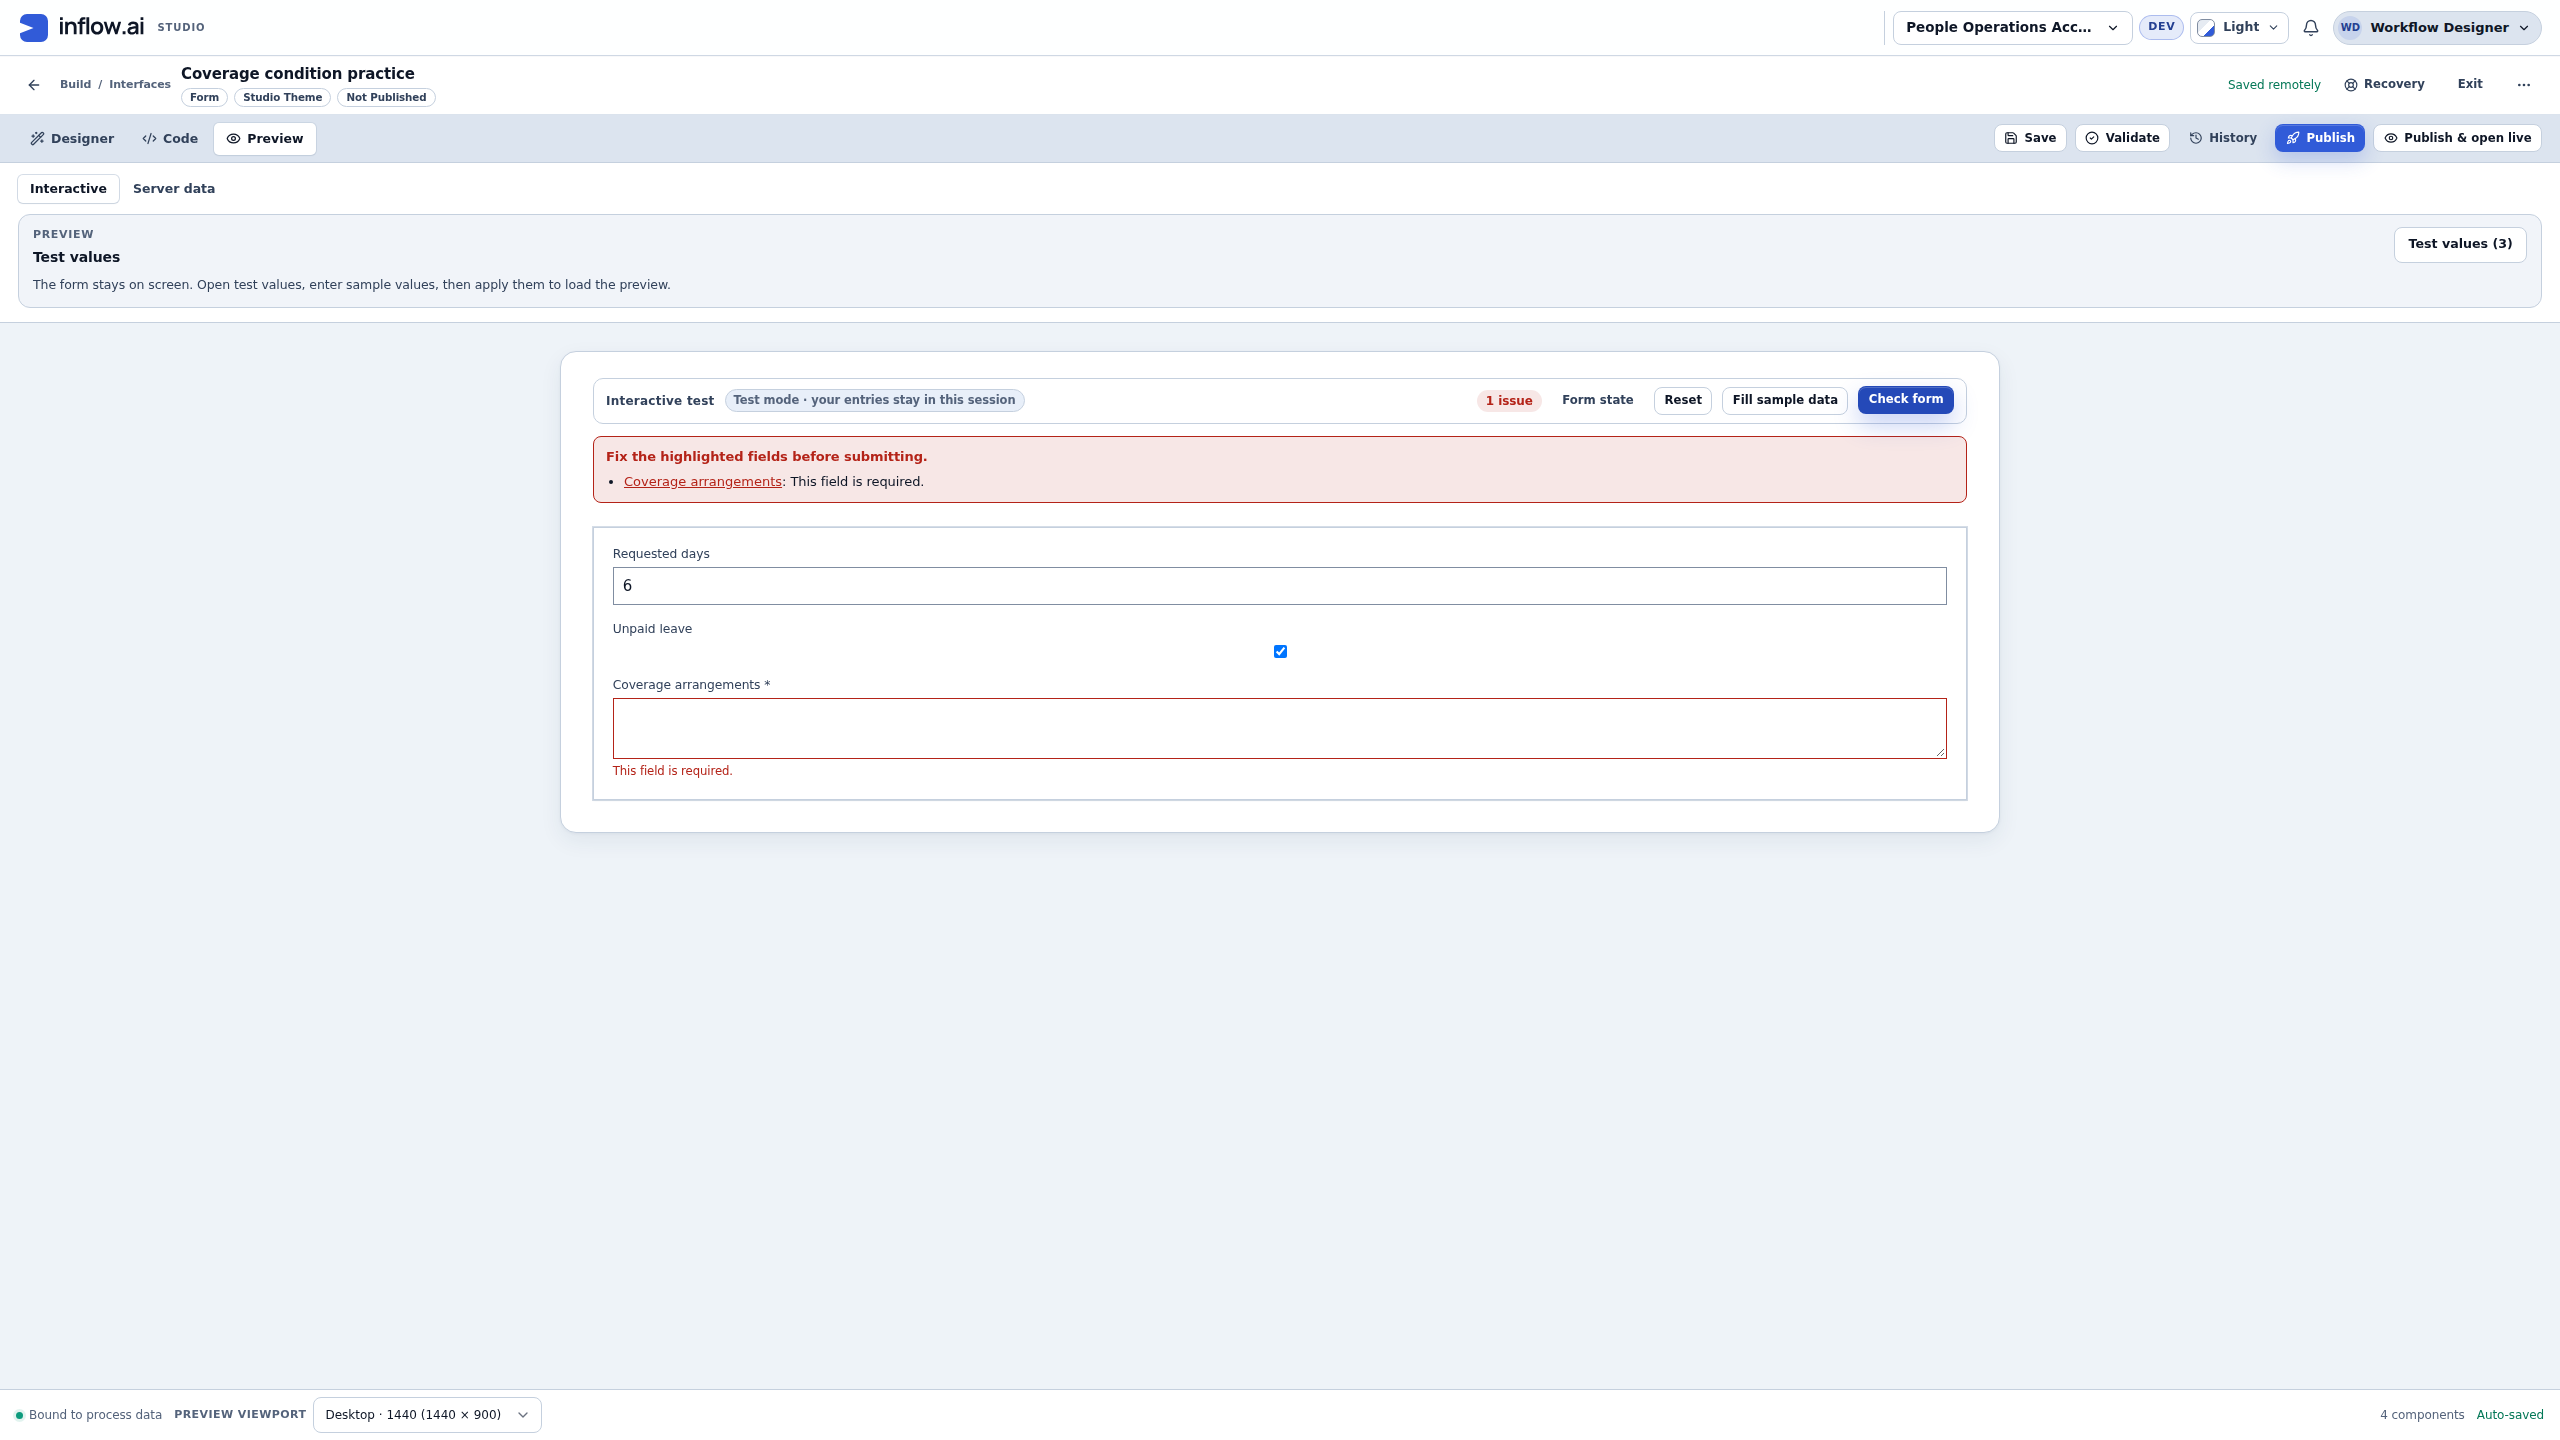
- Choose Check form. The captured result is 1 issue, with a linked Coverage arrangements entry and This field is required at the visible question.
This is useful test coverage: it shows the requirement when it should apply and avoids accidentally treating a long request alone, or exactly five days, as sufficient. The picture shows the matching missing-answer case; the linked chapter provides the separate false-case images and expression tests.
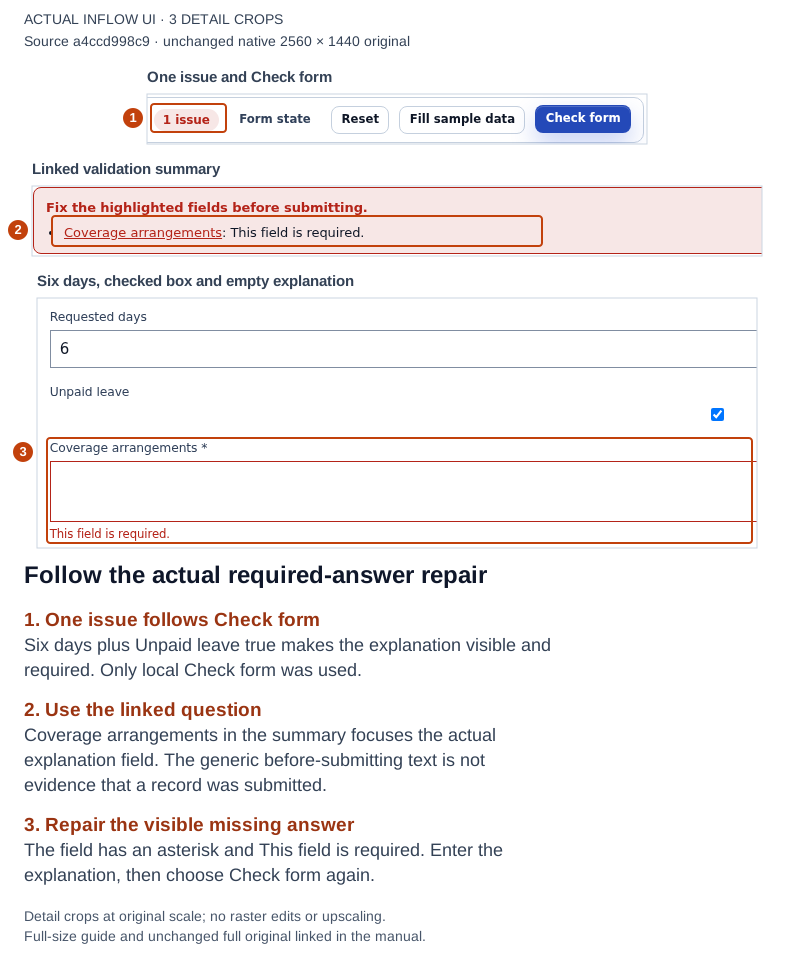
1–3: local Check form reports the issue, points to Coverage arrangements and marks its empty visible answer. The generic summary mentions submitting, but this practice has no Submit action or record destination. Open the full-size numbered guide · Open the unchanged full 2560 × 1440 screenshot.
3. Repair the named question and inspect the result
- Choose Coverage arrangements in the summary. In the captured run it focused the explanation field.
- Enter the fictional answer Team cover arranged with the duty coordinator.
- Choose Check form again and inspect All checks pass with the required message cleared.
- Open Form state. This run displays isUnpaid true, requestedDays 6 and the explanation as coverageDetails under its local
riobject. - Use Hide state when finished, then follow the Reset and saved-rule reload example if you want to repeat the check with controlled answers.
The ri display is the local state view, not an instruction to rename the declared inputs. All checks pass means the local form checks pass for those answers. In that captured run, the saved practice ended at draft revision15, unpublished, with no Submit action or business-record destination. It does not establish that staffing was arranged or a manager approved leave.
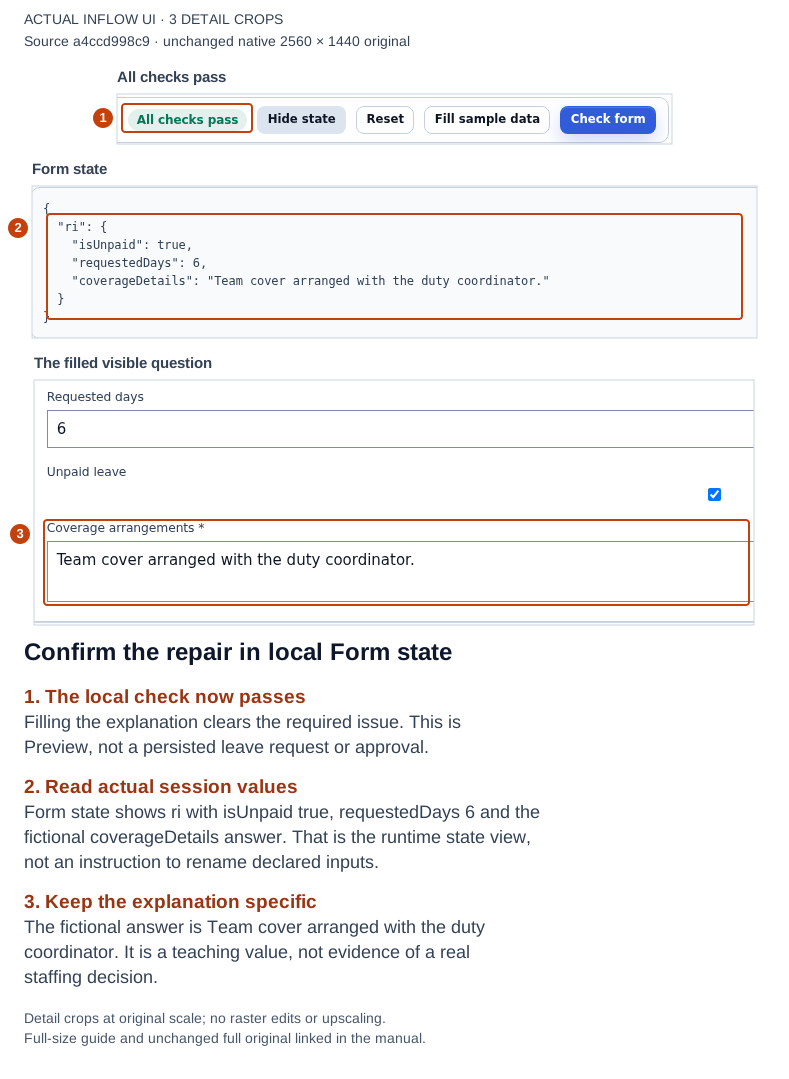
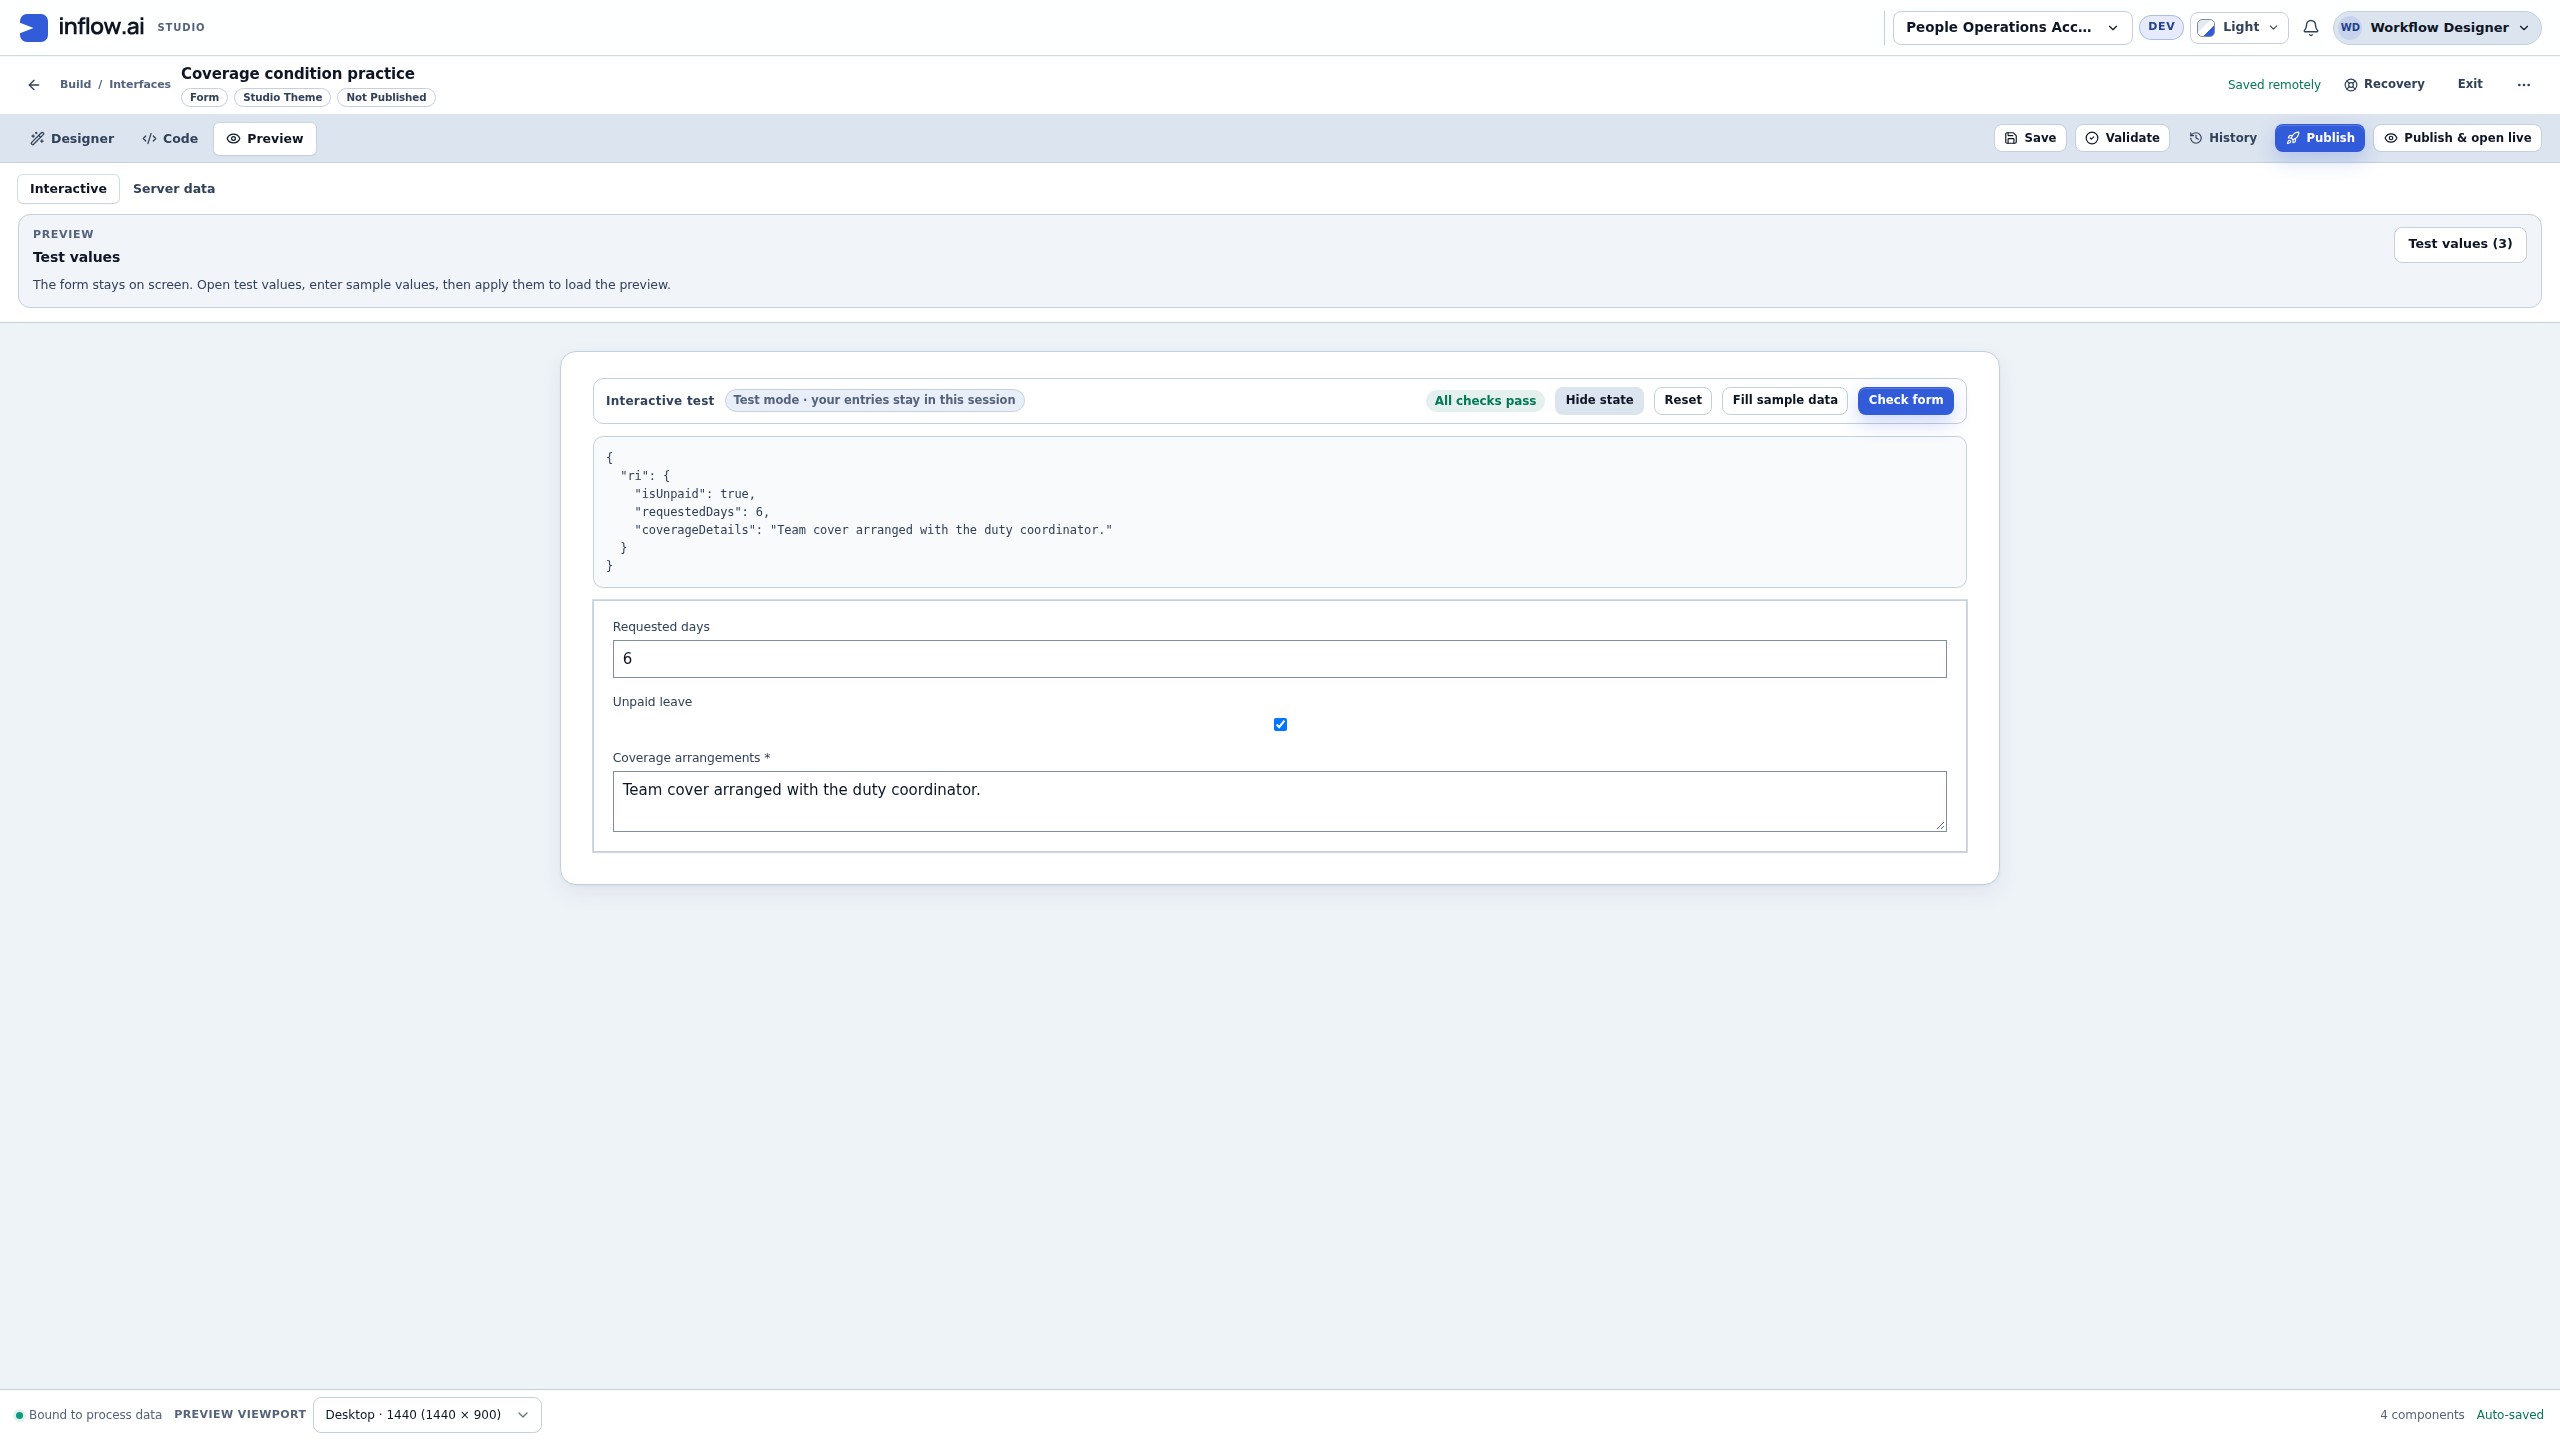
1–3: the repaired local check, its actual session values and the filled explanation. The answer reached the intended local destination; a business save, workflow task or approval is a separate result. Open the full-size numbered guide · Open the unchanged full 2560 × 1440 screenshot.
Explain what you finished before moving on
| What you observed | What you can explain | What to do next |
|---|---|---|
| The declarations and picker agree. | Which question supplies which typed answer. | Arrange and label the questions clearly. |
| The condition has a true and false result for deliberate samples. | Which policy the expression represents. | Check the saved condition in the visible form as well. |
| Local Check form reports and then clears the missing answer. | How the person finds and repairs that issue. | Save the intended design and review any release separately. |
| The desired released wording appears in the actual published page. | Which released version supplies that page. | Check the intended person's access and business flow. |
| The intended person saves or decides work and sees its normal confirmation. | That particular permitted business outcome. | Verify the resulting record/task through its documented route. |
The first three rows are the authoring/Preview story illustrated here. The last two are separate release and business-journey checks; these three images do not prove them. Use the appropriate chapter and actual account for each stage.
Example 2: improve an existing application
- Open the intended workspace and form; check that you are editing the right item.
- Decide on one business improvement, such as a clearer Reason question or a useful condition.
- Follow the relevant chapter, test a normal answer and a mistake, then save.
- Read the publish review and inspect the current published application afterward.
- Ask the application owner to check employee/manager access when the change affects who does the work.
Do not rebuild an existing app merely to follow the example. Preserve its records, pages and unfinished work. If a screen or action is not available to your role, involve the owner.
Choose a chapter
| You want to… | Read… |
|---|---|
| Find the designer and create a form | 1. Get started |
| Arrange questions and repair a move | 2. Build the layout |
| Choose the right question, list or task surface | 3. Choose controls |
| Connect answers and configure validation | 4. Properties and answers |
| Explain progress and responsibility | 5. Tracking controls |
| Test, save and publish | 6. Check and publish |
| Understand a useful formula | 7. Practical formulas |
| Find a control by its job | 8. Control lookup |
| Understand a term or repair a common issue | 9. Glossary and help |
Read an illustrated HTML chapter offline
Use the HTML handbook contents to choose a chapter. Each exported chapter includes its own screenshots, so you can download one chapter and read its lesson and pictures without a network connection.
For example, download Properties and answers as HTML when working through answer connections. Keep the manual folder and its chapter files together if you want to follow links between downloaded chapters. The embedded pictures remain visible in a standalone chapter, but links to a full-size guide or unchanged original also need the retained assets folder or the repository copy. The optional technical references remain separate repository documents; they are not bundled into an individual chapter download.
Build the complete example in stages
Use the Leave requests application tutorial after the introductory data/people setup. It explains when to build the employee and manager forms, when to publish the workflow and when to review application access. Following that order avoids needing a manager task before a workflow exists.
Choose where the assistant belongs
These assistant experiences serve different people and run in different places:
| Experience | Who uses it | Where it is configured | What it helps with |
|---|---|---|---|
| Ask Inflow | A consultant building or reviewing an application | In Studio, for the current design workspace | Understand the design and prepare a proposed authoring change. Review a proposal before applying it. |
| App Chat | An employee or manager using a released application | On that application's App Shell, by its publisher | Ask questions about sources the publisher connected, or review an allowed task/action in the signed-in person's scope. |
| AI Task | A person through a form action, or a workflow through a configured rule step | As a reusable rule, then connected to a form or workflow | Perform bounded work such as summarizing information supplied to that run. Its answer is not itself an approval or saved business result. |
For example, Mohammad can use Leave requests Chat in the published app to ask about his own permitted request. Sara can review a task assigned to her in her signed-in session. The chat can show permitted information or a task proposal, but it does not grant access to another person's records or replace the workflow's decision and result. The publisher chooses App Chat's sources and allowed operations on the App Shell; ordinary record, field and task permissions still apply.
Follow the App Shell tutorial's App Chat milestone to configure sources and actions, publish the shell and check the employee and manager experience. For consultant guidance on choosing between assistants, see Ask Inflow, App Chat, AI Tasks and integrations. For a reusable summary task, continue with Add a helpful AI summary; it shows a user-invoked form action and the separate manager task in the workflow.
The optional technical handbook reference contains the previous engineering detail. You can complete the consultant lessons without reading it.