Try an approval process safely in Simulation Studio
Simulation Studio has two different ways to work with simulated data. Interactive Token Sandbox and Monte Carlo Batch Analysis let you inspect or compare modeled journeys with teaching inputs. Inject simulated data is a separate, explicit operation that writes synthetic lifecycle cases, human tasks, documents and KPI data into the selected Inflow workspace. A synthetic task created by injection is still a physical task record in that workspace; it is not Sara's real leave request, but it can appear on operational screens. Read the physical-write warning before using that operation.
Use this guide when a diagram looks right but you want to answer a business question: “Does an approval take the approved path?”, “What happens without an answer?” or “Did my change alter a previously checked result?” Start with one understandable journey. A large batch is useful later, once the individual paths make sense.
Read the model before trusting a rehearsal
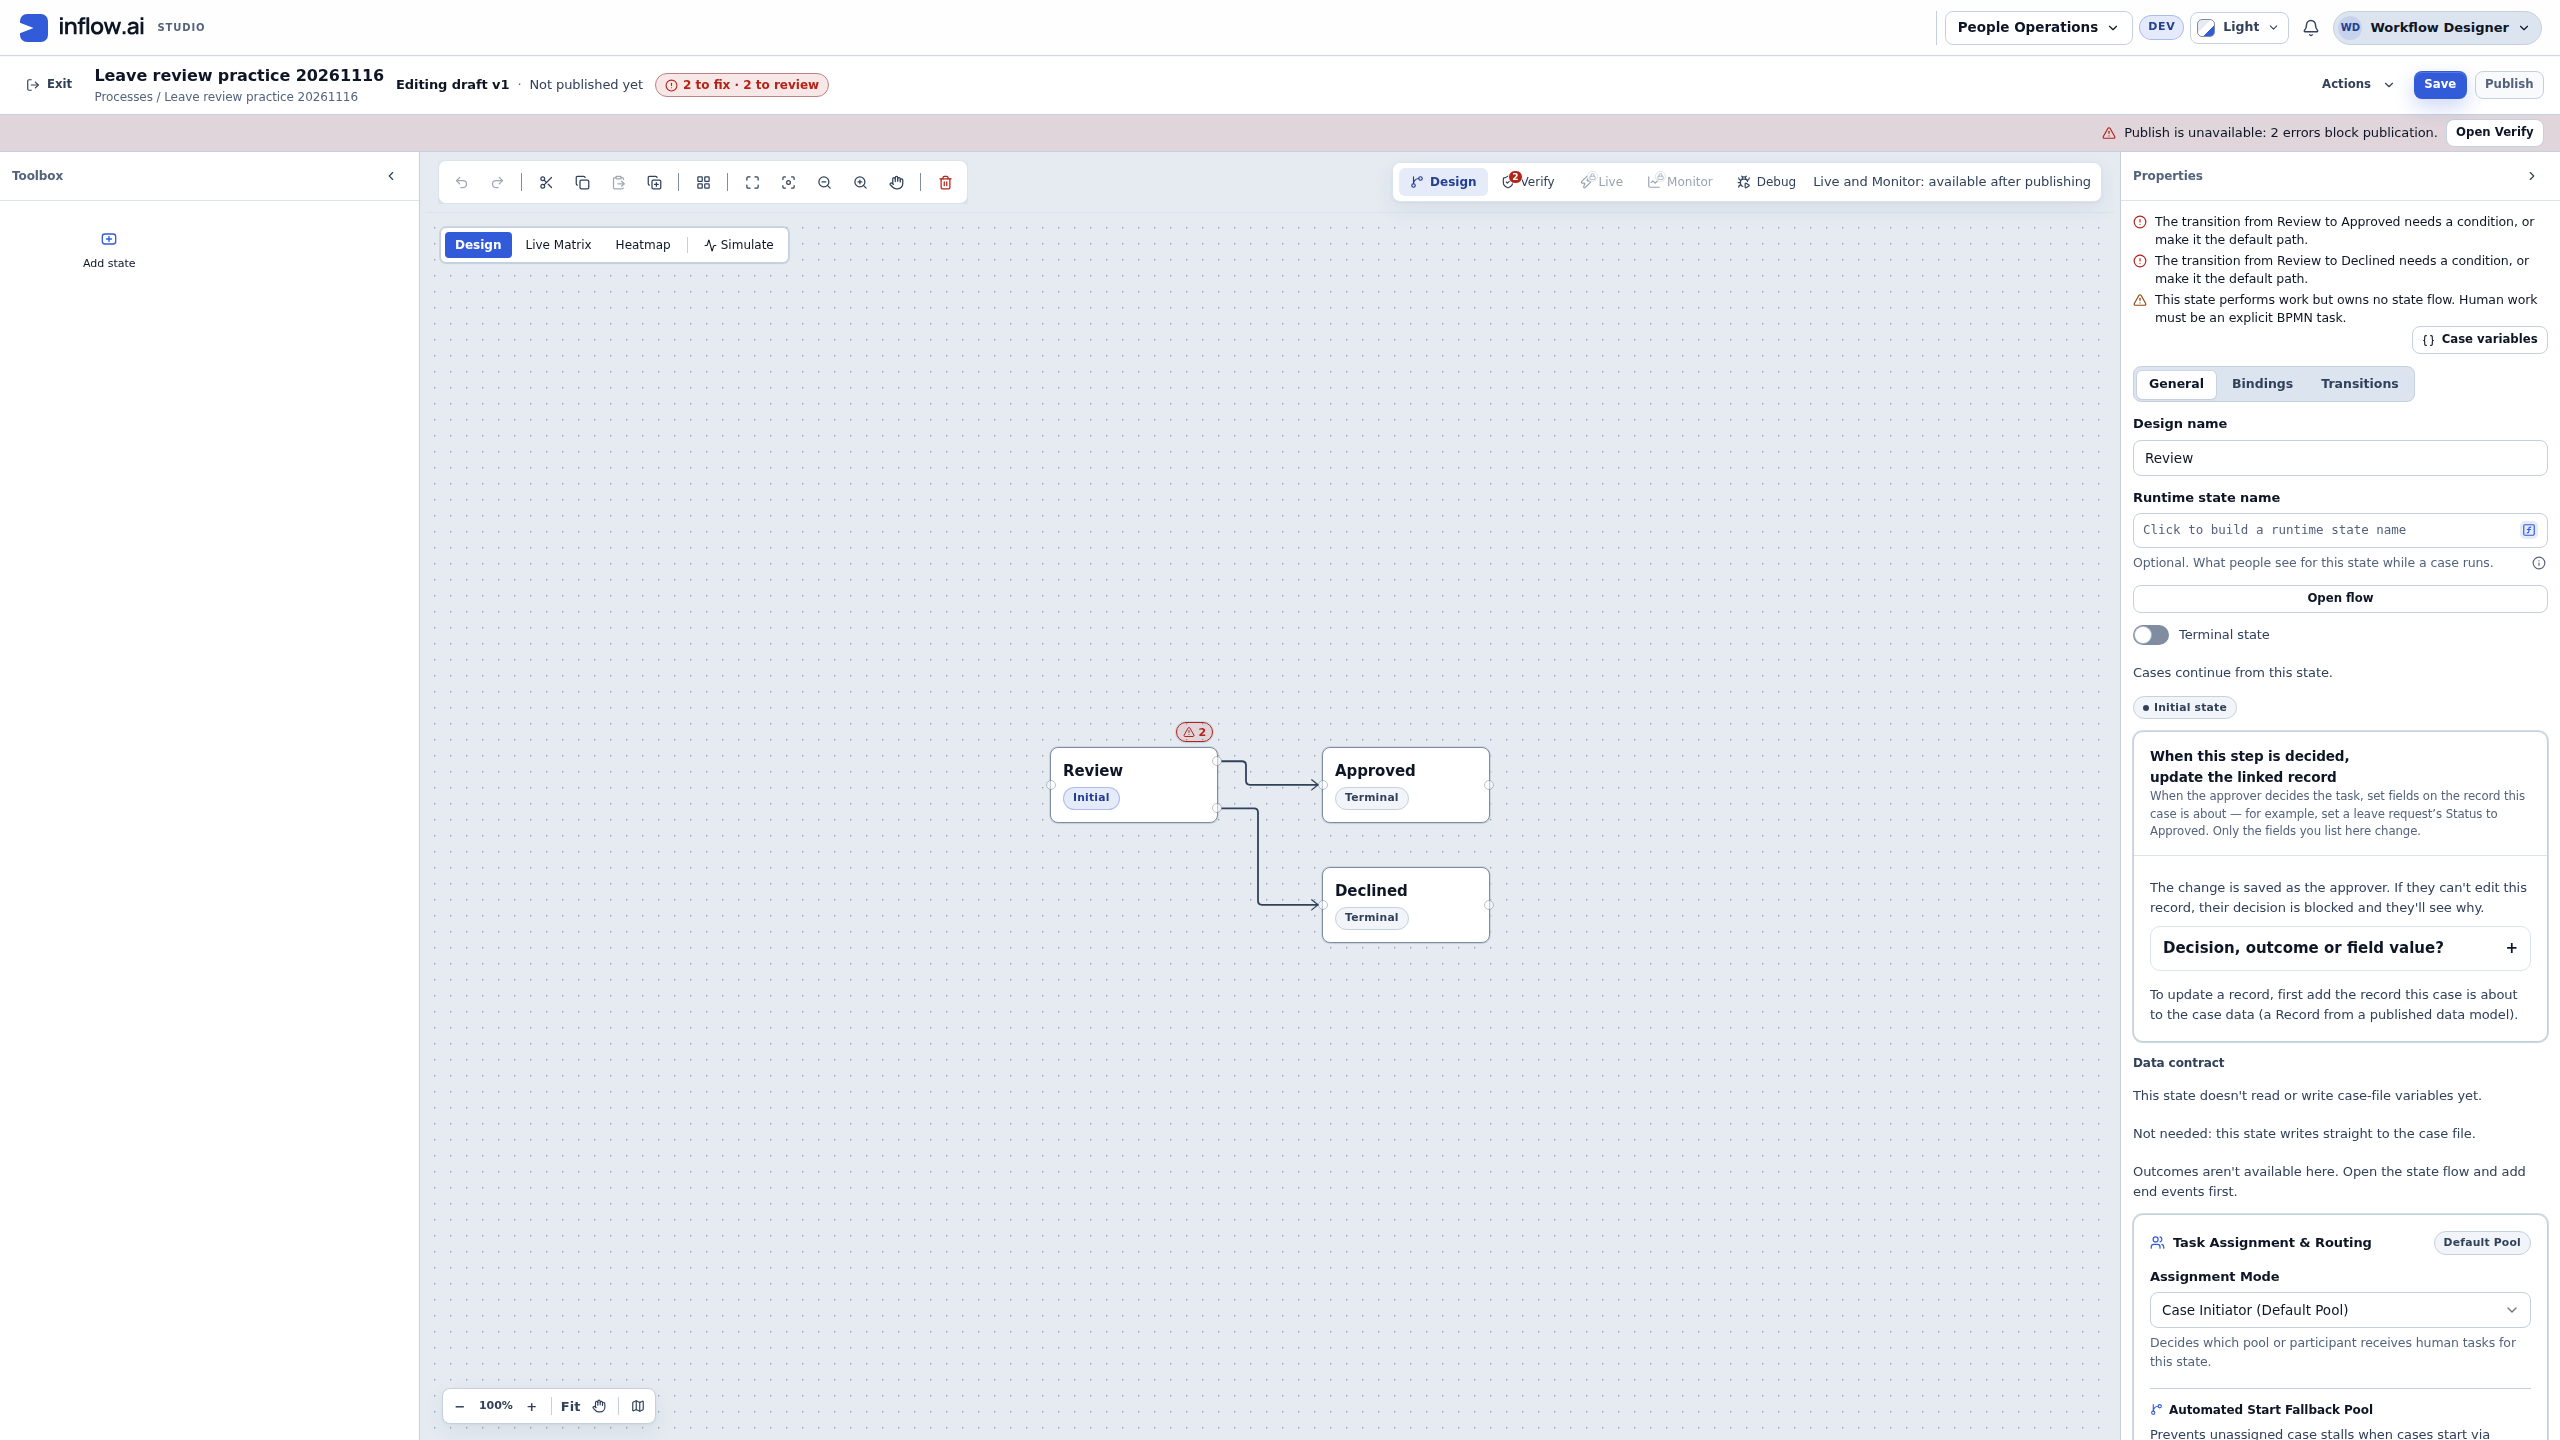
Nadia is preparing a leave-process lesson. The diagram below already has Review, Approved and Declined states, but it is an unfinished teaching draft. The header says Not published yet, the two outgoing transitions still need conditions or a default path, and Review has no state flow. Those are useful findings, not an approval test result. A state named Approved does not supply a manager form, save an approval answer or decide which route should run.
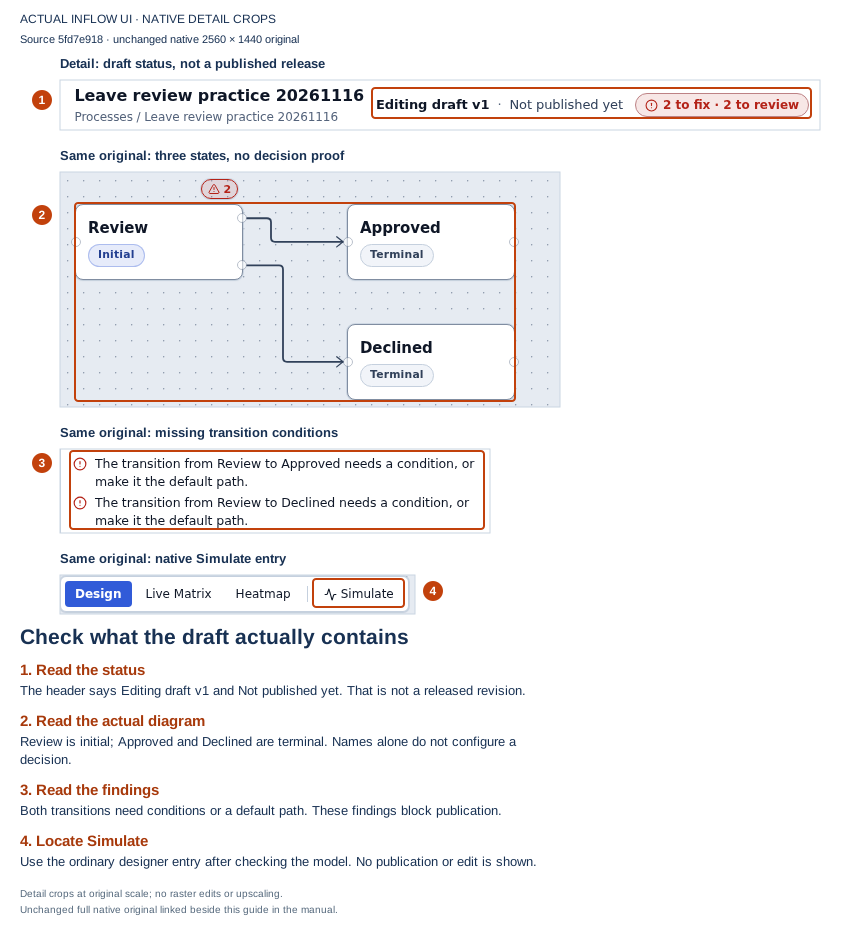
Follow the numbered guide: check the draft status, read the actual states and findings, then locate Simulate. Open the unchanged native 2K screenshot.
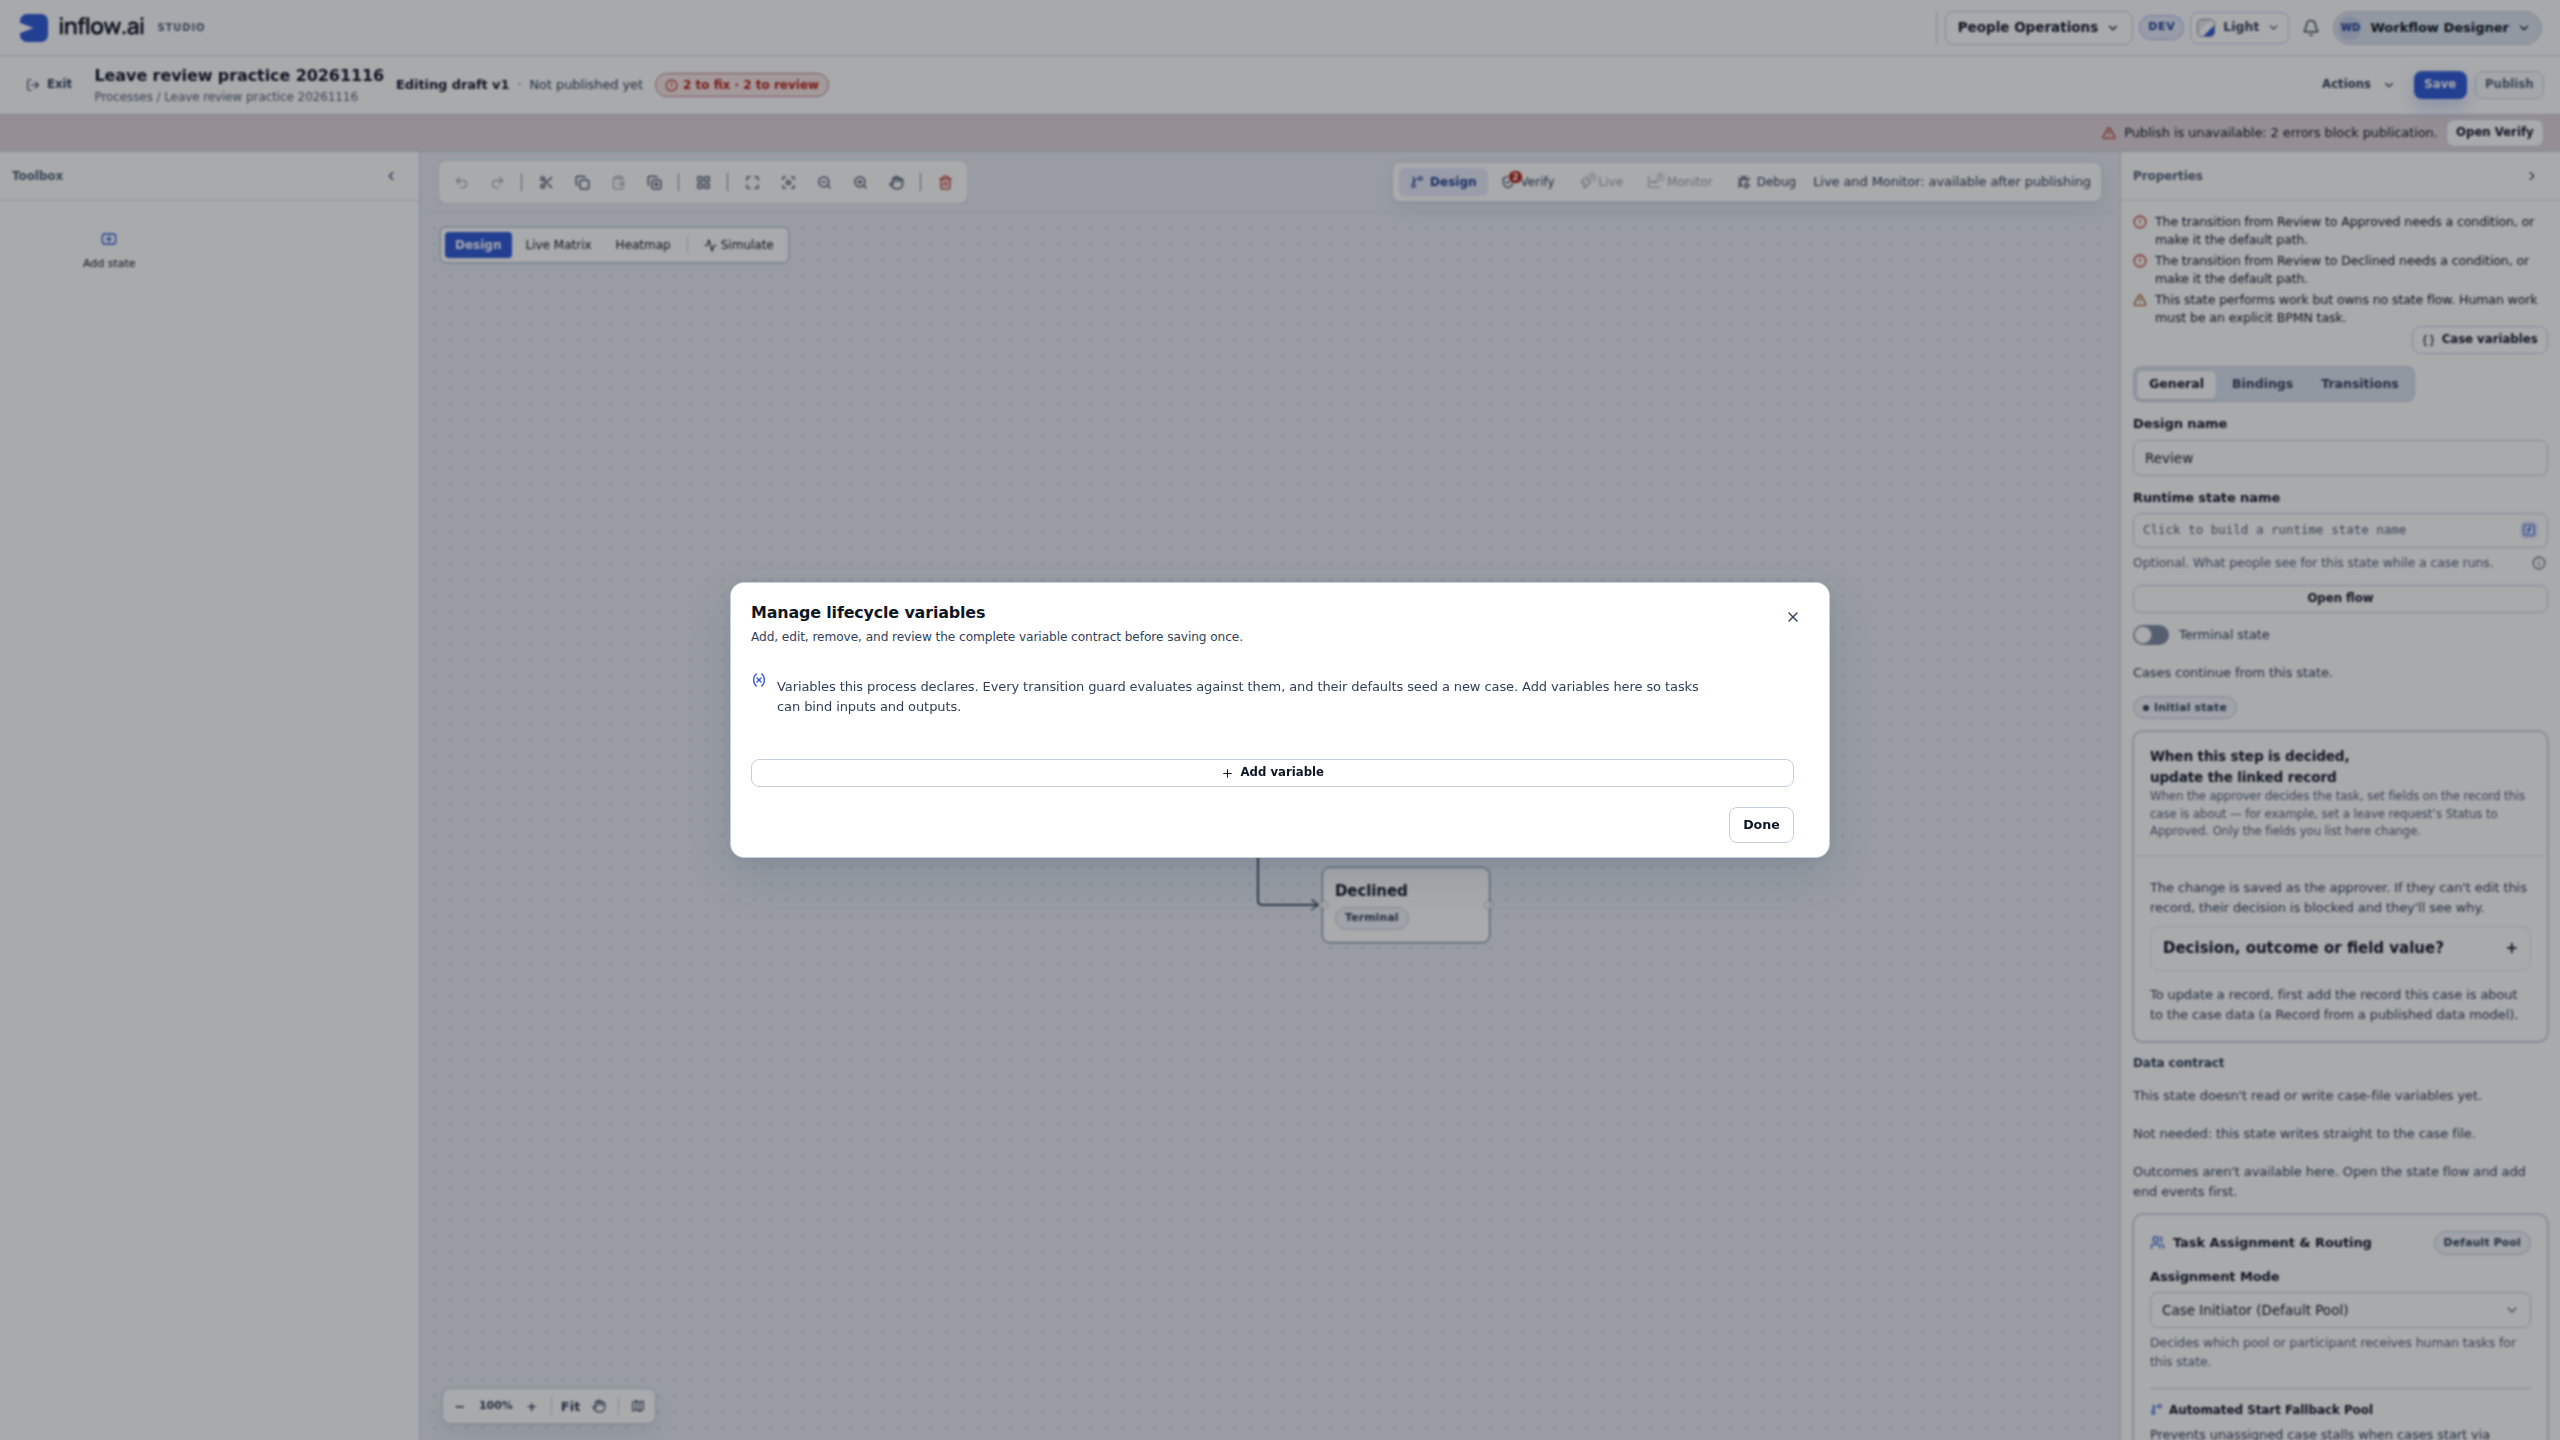
Before copying a sample input, open Case variables and read the declared fields. In this practice draft the dialog contains no variable rows. Nadia therefore cannot claim to have supplied requestedDays, approved or decisionComment to a configured approval process. She closes the dialog without adding anything and takes the missing configuration back to the process owner. In your own exercise, use the actual declared names and types; complete the linked workflow lesson if you need to build that contract.
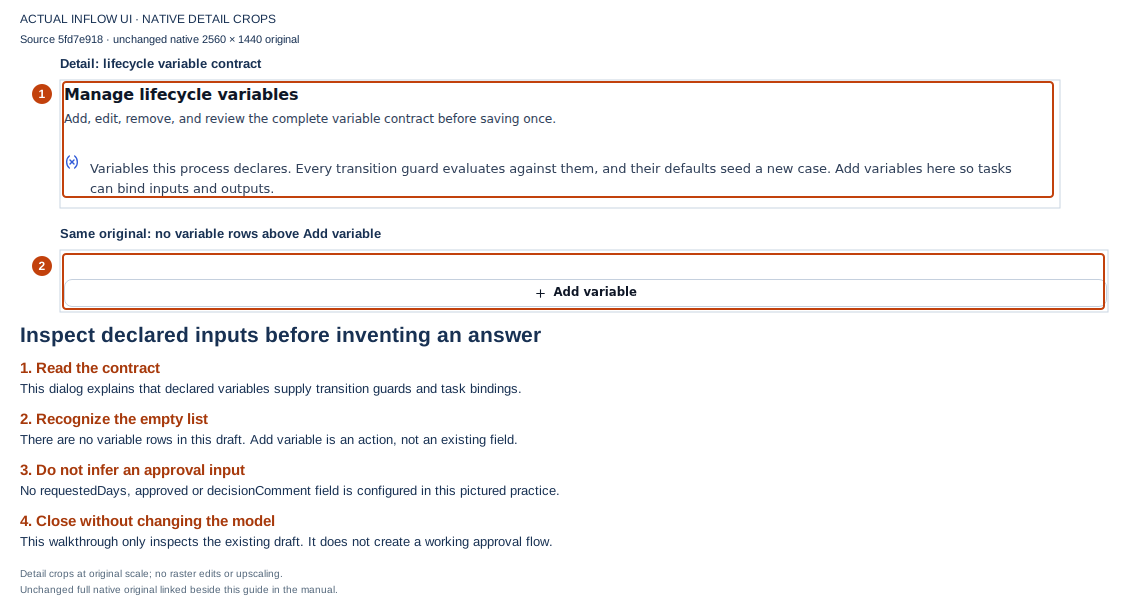
An empty variable contract is a reason to check the model, not an invitation to invent field names. Open the unchanged native 2K screenshot.
The editor's Editing draft v1 label refers to the model version shown by this screen. It does not establish a published release. Keep the editor's version, a saved draft revision and a sandbox's selected revision/source distinct when comparing results.
Before you begin
Have the intended workspace and an existing Lifecycle or Process Flow open in its designer. The leave workflow lesson explains how to create the manager task, save its outputs and configure the approved and declined paths. This guide tests that configuration; it does not create those routes for you.
Use fictional teaching details: Mohammad requests 14–18 December 2026, 5 days, with a reason such as “Family holiday.” These describe the simulation input, not a new stored leave request. Use the actual declared field names from your model. For the shared lesson, approved is a Boolean answer and decisionComment is Text. Its Boolean default is false, so a missing task answer can retain false; that matters when interpreting the missing-answer exercise.
In the Interactive Token Sandbox, modeled external work does not contact the real service or create a live human task. A fixture is an agreed pretend response for a particular step. If a step needs a fixture you have not supplied, read the unresolved-operation message. Do not interpret that run as a successful test of the connector. Complex fixture preparation belongs with the process specialist; the optional reference at the end covers it. Monte Carlo analysis is also a modeled analysis; the physical-data injection described later is the operation that writes sample records.
Open the intended version and set the starting information
- In the Lifecycle designer, choose Simulate. In the Process Flow designer, use Simulate Process Flow (Simulation Studio) in the toolbar. If the action is absent, confirm the intended workspace and ask the owner about your access; do not use another person's account.
- Choose Interactive Token Sandbox. A token is the marker showing where this simulated journey has reached. When no sandbox session exists, selecting this tab immediately attempts to initialize one with the current settings; it is not only a navigation action. The lifecycle entry illustrated here starts on Monte Carlo Batch Analysis. Its run buttons are separate actions: do not choose a batch run when you intend to inspect one journey.
- If the sandbox is available, inspect Revision Target and the session's displayed revision/source. Choose Current Unsaved Draft Snapshot to investigate the diagram you are editing, or Pinned Published Revision only for an actual released version you have confirmed. An offered published-version label alone does not prove that the lifecycle has been published. Record which source you intend to use; changing the selector does not replace an already initialized session.
- Under Start Input, enter an actual declared variable name and its teaching value, then choose + Set Start Input. Repeat for each required starting value. For example, enter requestedDays and 5 only if your model declares requestedDays; use the names and types your workflow actually expects.
- Read the added input chips. Correct an incorrect chip using its remove control and add it again. A number such as 5 and a Boolean such as false have different meanings from ordinary words.
- If no session exists and initialization is offered, choose Initialize Interactive Sandbox. If a session is already open and you changed its starting inputs or revision selection, choose Restart with Inputs deliberately to begin a new session with those settings. Preserve any run you still need for comparison; do not repeat initialization blindly after an error or uncertain response.
- Before Step Next or Play Auto, turn Auto-Simulate Human Tasks (Play Auto) off when you want to inspect and answer a waiting human task yourself. It starts on, and affects Step as well as Play Auto. Check the displayed revision information, first step and variable inspector before moving forward.
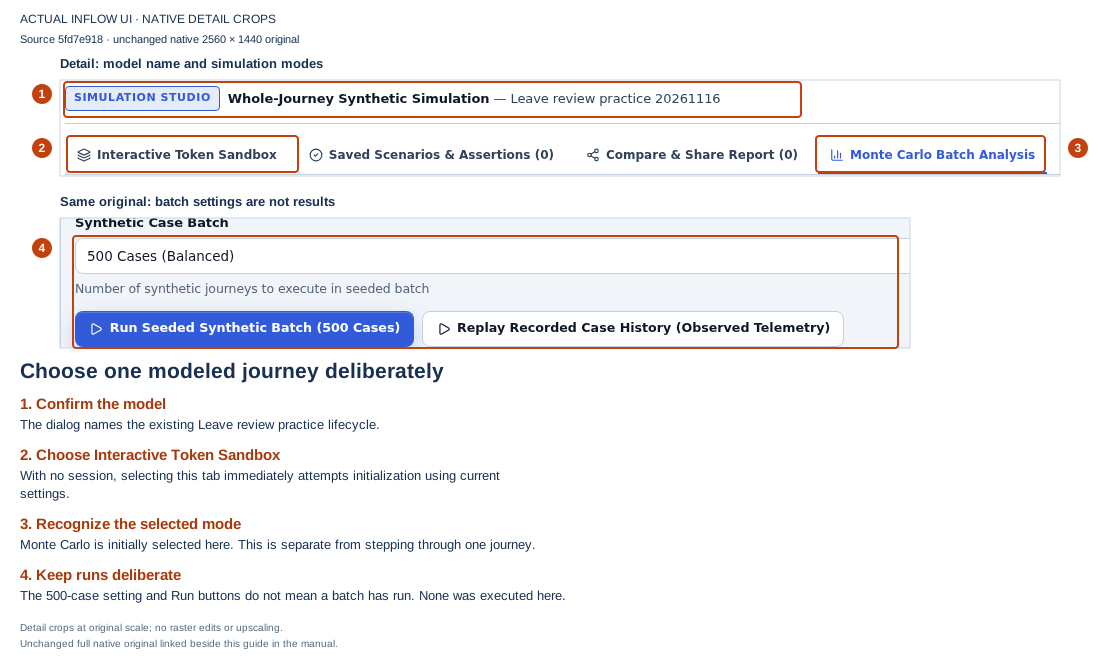
Choose the mode for your question. The displayed 500 cases and cost assumptions are settings, not completed results. Open the unchanged native 2K screenshot.
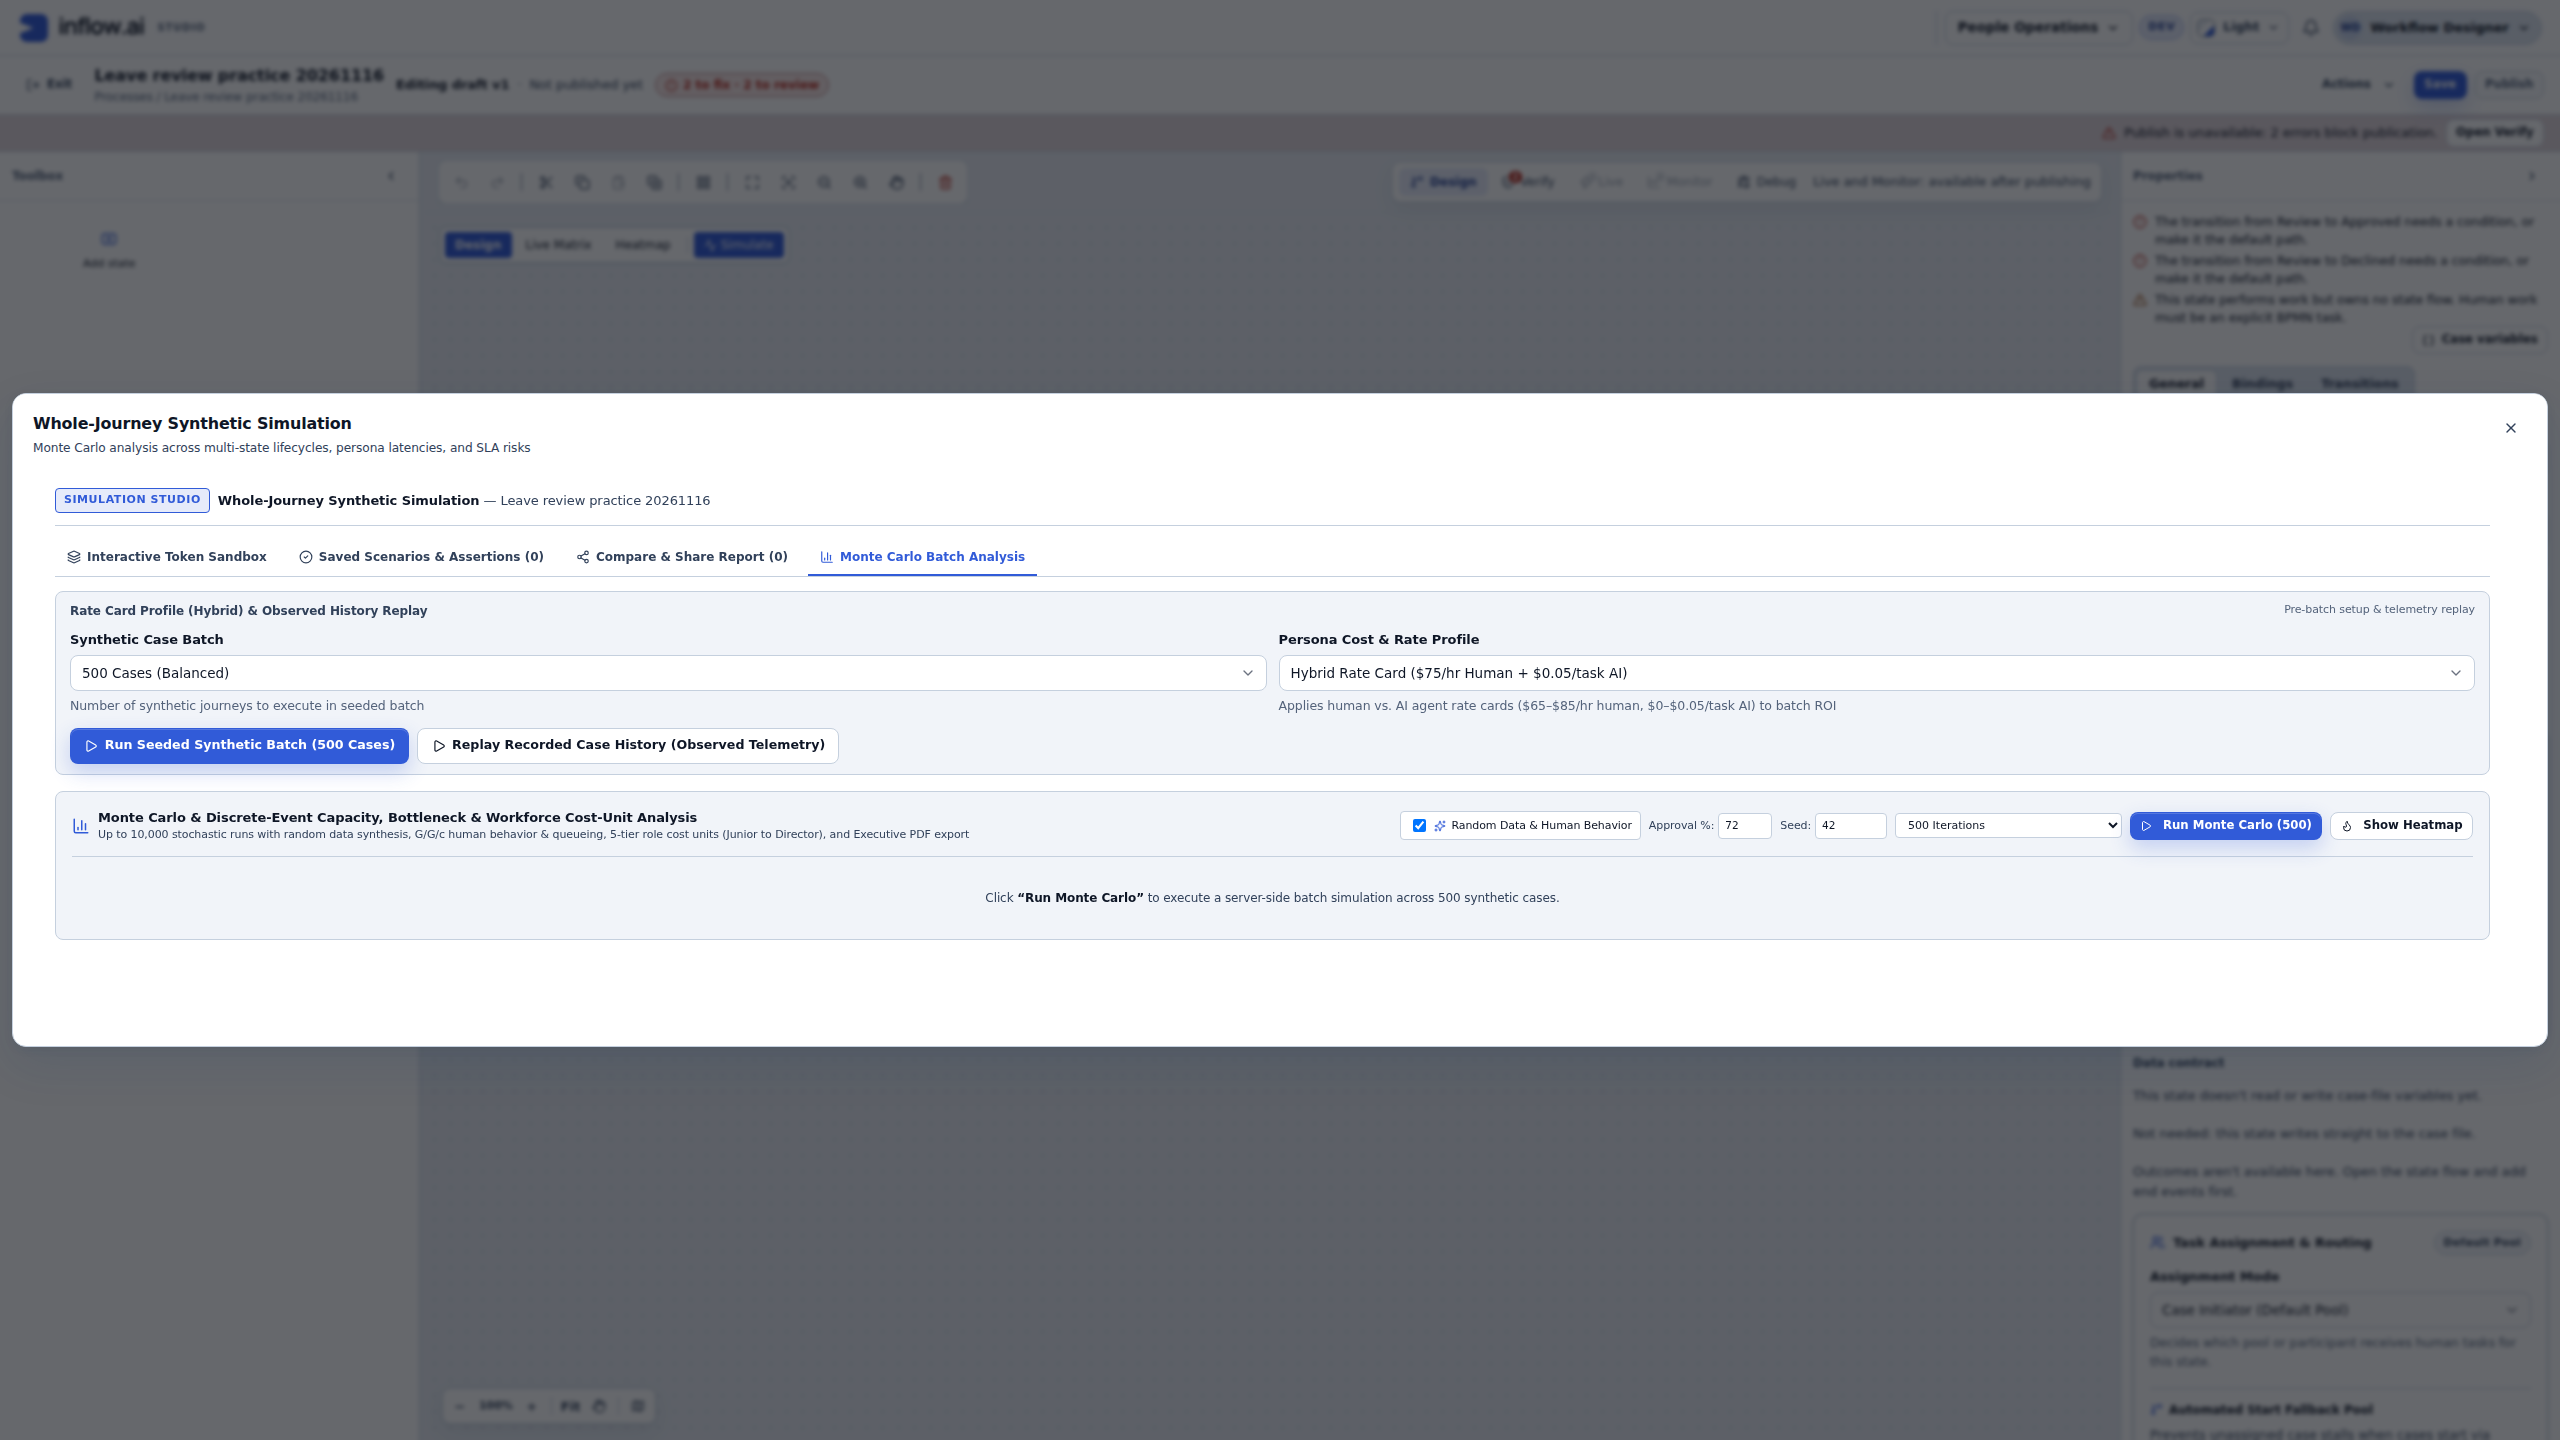
Expected result: the sandbox contains a particular copy of the model and your chosen starting values. Editing the original draft later does not rewrite this existing run. Begin another session when you want to test the changed draft.
Common mistake: changing an input chip and assuming it changed the already-running journey. Restart with the intended inputs, then check the first snapshot again.
If the sandbox says it is not available
In the pictured session, Nadia could open the lifecycle designer, but choosing Interactive Token Sandbox returned This is not available to you. The sandbox controls disappeared. No successful sandbox session or task decision was obtained. Being able to edit a diagram does not establish access to every simulation operation, and a role name alone does not explain the server's refusal.
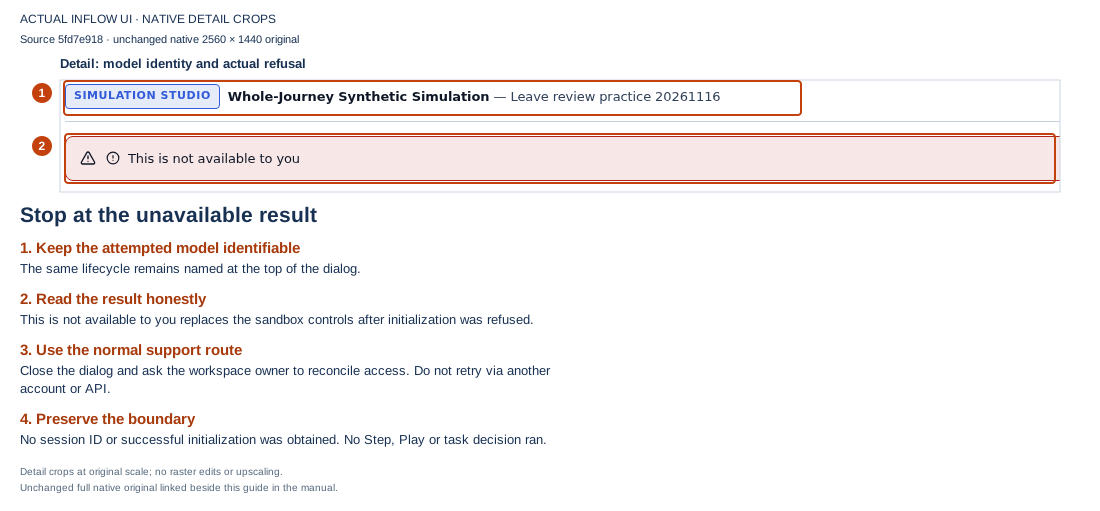
This is the actual unavailable state, not a paused task or a successful run. Open the unchanged native 2K screenshot.
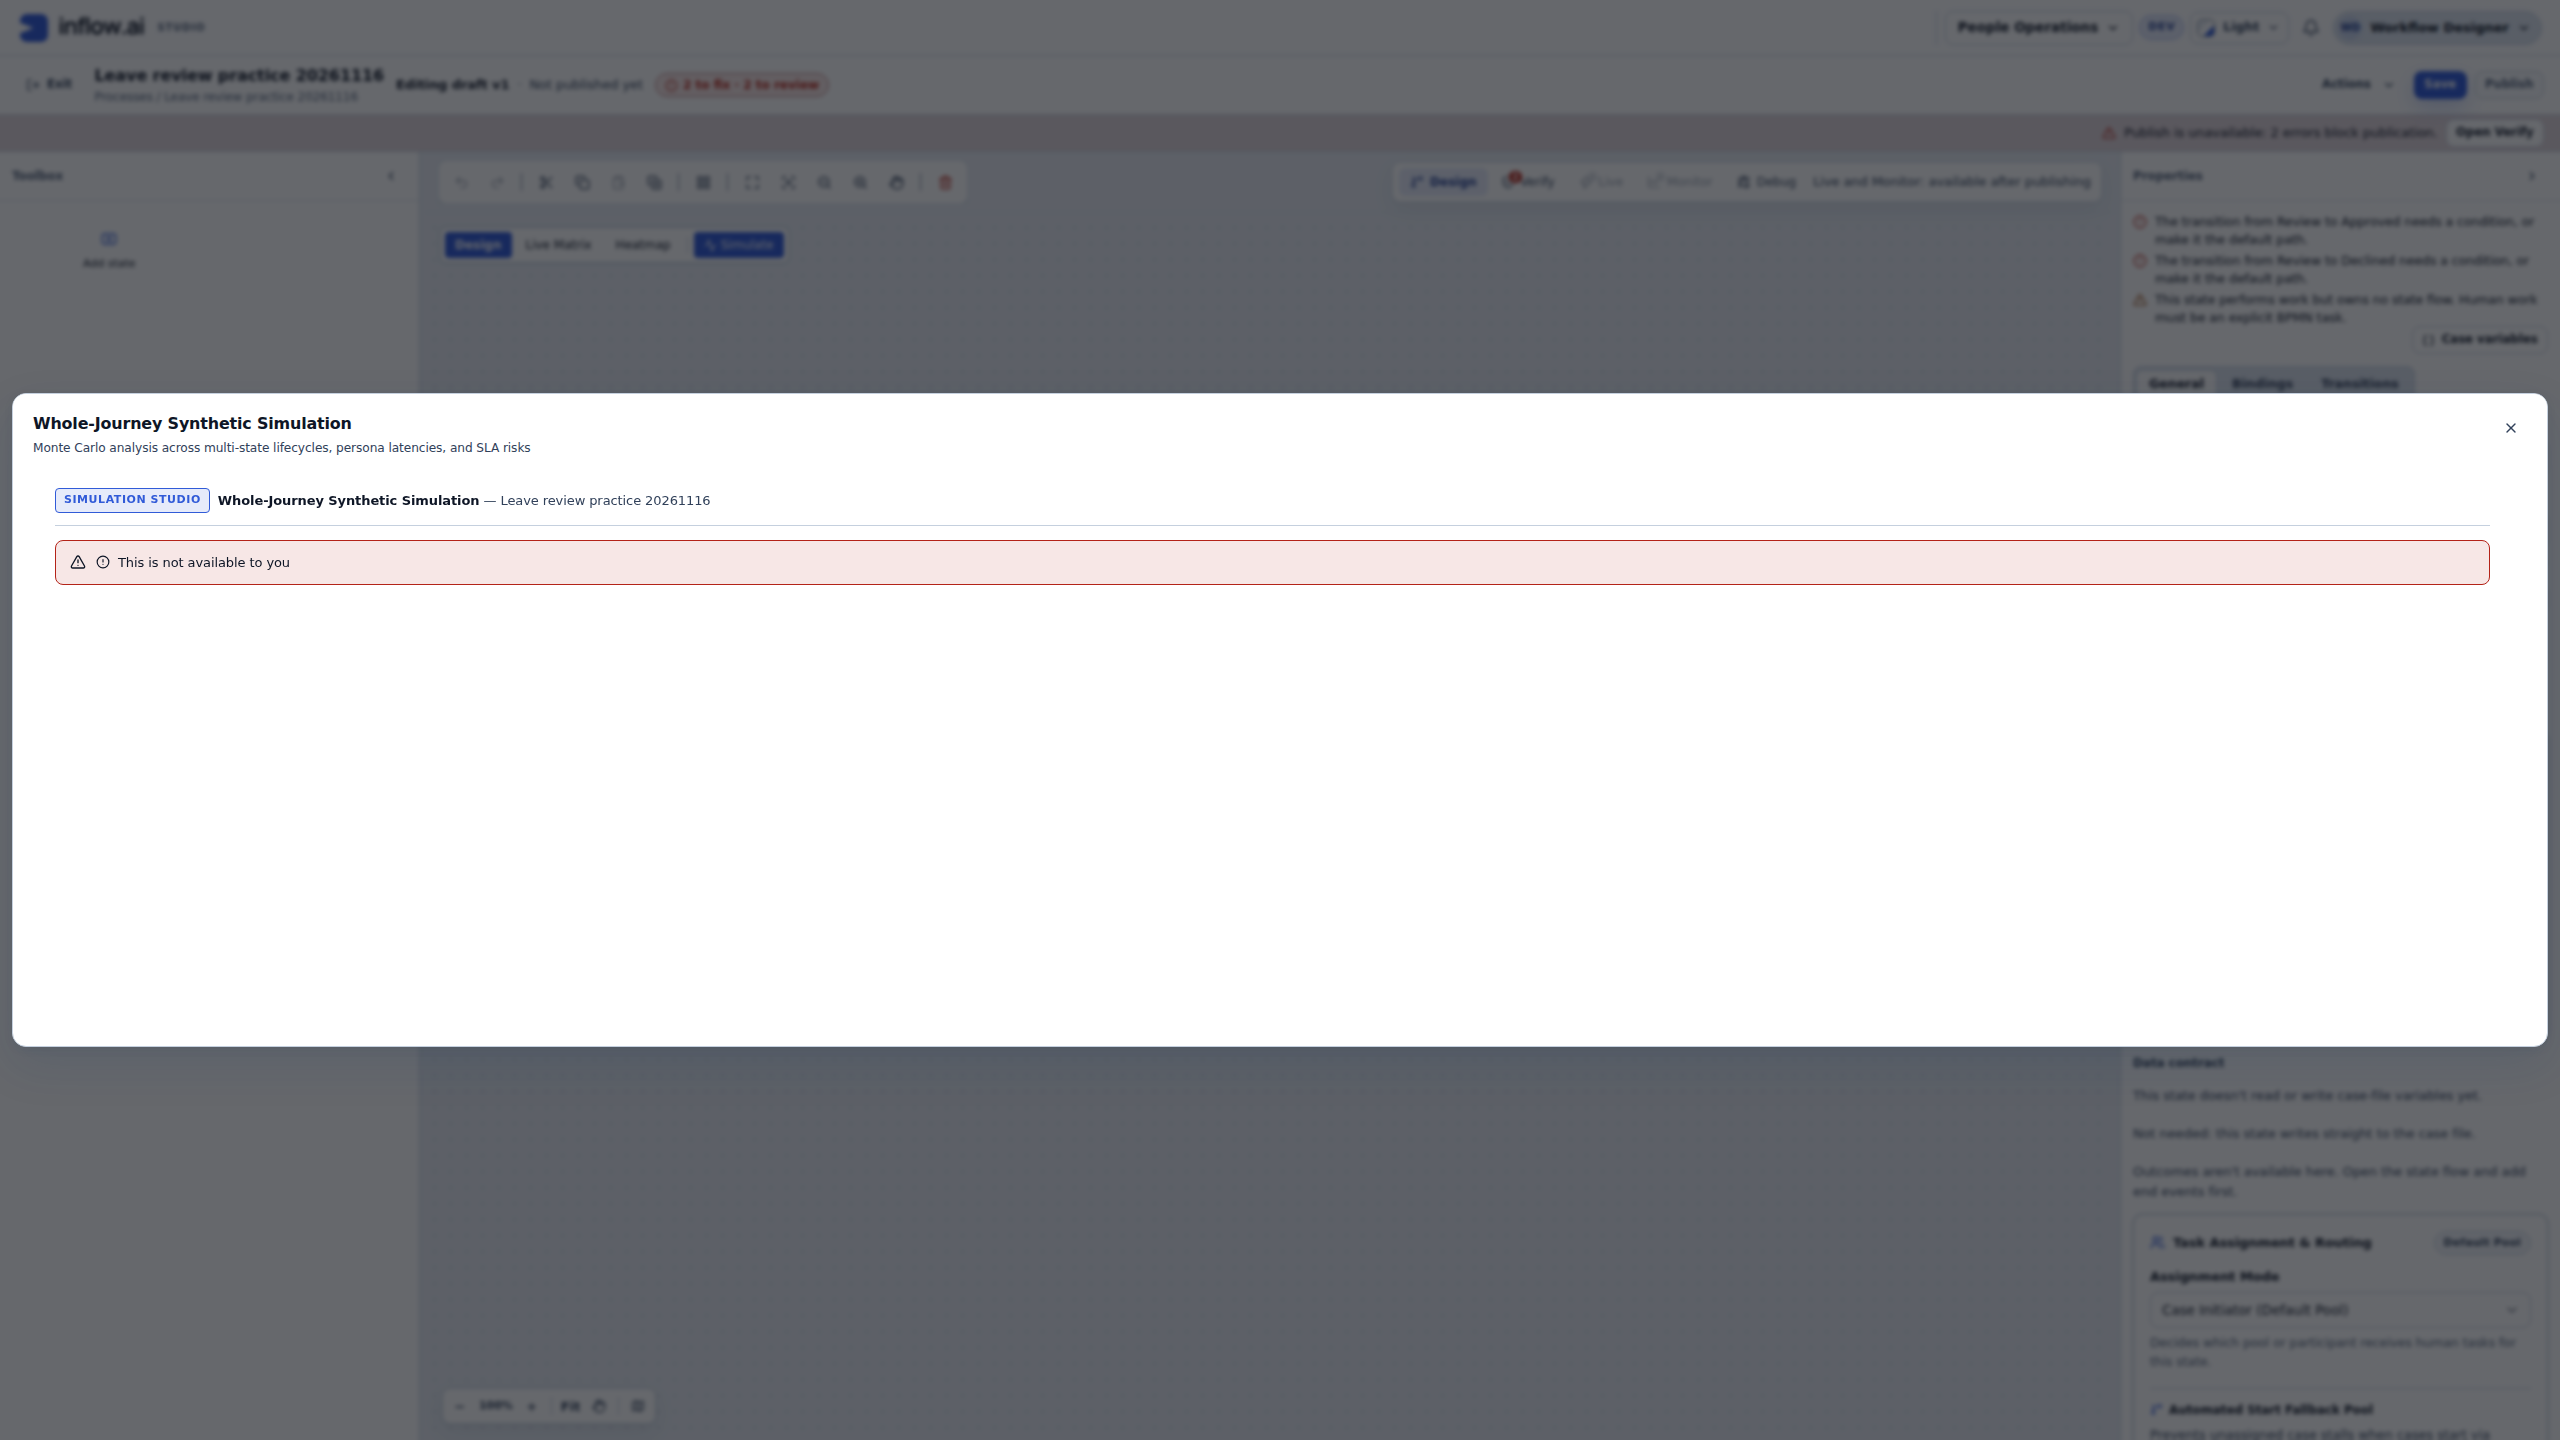
Close the dialog. Give the workspace owner the workspace, process name, attempted operation and time through the normal support route. Let the owner reconcile the intended access and selected model; do not borrow another account, repeat the run through a direct API or assume that changing the model will fix an access refusal. If the application instead says access could not be checked, report that distinct availability problem rather than treating it as a confirmed denial.
These four screenshots establish entry, model inspection, mode selection and the unavailable result on the pictured draft. They do not establish a successful initialization, human-task pause, approval/decline path, published-version run or batch result. The examples below describe the configured model and access needed to continue; they are not results obtained from this unfinished draft.
Read what happened at a step
Use Step Next to move deliberately through the journey. Play Auto can advance automatically, but use single steps while learning a task or investigating a surprising route. At a human task, read the displayed task name, offered actions, fields and Configured Output Mapping before making a decision.
The variable inspector shows more than a value. It also explains whether a value exists and where it came from. Search for the field you are investigating and check its scope when the same name appears in more than one part of a process.
| Display | Business meaning |
|---|---|
| UNSET | No starting value, default or completed step has supplied an answer yet. |
| DEFAULTED | The model supplied its configured starting default. |
| FALSE | A Boolean answer is explicitly false; this is a real answer. |
| ZERO (0) | A numeric answer is zero. It is not a blank answer. |
| EMPTY_STRING | Text is present but empty. |
| NULL | A value was explicitly cleared to null. |
| WRITTEN | An input or step has supplied a value. |
At a gateway, inspect the branch table: the condition, actual operands and result. In the leave lesson, approved == true means “take this route when the saved approval answer is true.” approved == false tests the other Boolean answer. The table helps distinguish an incorrect condition from an earlier task that never saved its answer. Use the offered producer/binding link to find the step responsible for a value.
Gateway-aware sampled approval/decline/default outcomes
The Auto-Simulate Human Tasks (Play Auto) switch controls whether Step and Play Auto may complete human tasks for you. With it off, the run pauses at a human task. Read the outcome buttons before choosing: when the simulator can trace a task output into a downstream XOR/OR gateway, buttons can show the inferred branch and a probability badge. For example, an approval task whose decision output maps to approvalDecision, followed by Approved and Rejected conditions plus a default flow, can offer Approved · True, Rejected · False, and a default counter-example such as Deferred · Default.
With the switch on, both Step and Play Auto ask the server to choose an eligible outcome and continue past the task. Play Auto also advances timers in the modeled run; this does not represent real elapsed time or an external timer service. The choice is verified against the configured output mapping and gateway conditions. A seeded run repeats its modeled choice for the same session inputs and step. For a gateway with primary, alternate and default paths, the built-in heuristic may weight those categories around 70%, 20% and 10%; with only primary and alternate paths it may use 80% and 20%. These are simulation sampling weights, not a forecast of a real manager's behavior or a policy recommendation. Rework loops have a bounded visit count so auto-completion cannot loop forever.
Some task fields are prefilled from process variables and marked read-only. Inspect their values, but do not try to edit or submit them as form answers. Change an editable decision field or choose an outcome button; the configured output mapping writes that answer to the process variable used by the gateway. If a field or outcome is missing, check the form and mapping in the designer rather than changing the read-only value to force a branch.
Example: if decision maps to approvalDecision, and the gateway tests approvalDecision == "Approved", choose the displayed Approved outcome to exercise that route. If the gateway also has approvalDecision == "Rejected" and a default flow, the Default option uses a value that fails the explicit conditions. Check the gateway table after stepping; the badge explains the simulated option, while the table shows the condition and actual result.
- Initialize one sandbox session with a recorded seed and the intended model revision.
- Step to the approval task with Auto-Simulate Human Tasks (Play Auto) off. Check the mapping, editable decision, any read-only fields, and the displayed outcome badges.
- Select the alternate or default option on a separate Branch Run, or turn automatic completion on and use Step to sample one outcome. Use Play Auto only after the single-step behavior is understood.
- Read the gateway table and confirm the saved output value, tested condition and selected route. Repeat the same seeded scenario to compare the modeled result; do not present the weights as real approval statistics.
Example 1: check Sara's approval path
Nadia wants to confirm that the manager's answer reaches the approved route. Use the configured leave model, not a diagram with unnamed placeholder tasks.
- Initialize the sandbox with the fictional request details and inspect the starting approved value. With the shared lesson's default, it should be false before Sara answers.
- Choose Step Next until the manager task is shown under Paused at Human Task — Consultant Action Required.
- Read Configured Output Mapping. Confirm that the displayed approval and comment outputs lead to the intended process fields. If the form is marked unsupported or those mappings are absent, correct the model with its owner before treating this as an approval test.
- For a supported form showing approved, select true in its Boolean field and enter Team coverage confirmed in decisionComment. Choose Submit Task Inputs & Step. If your model instead supplies configured outcome buttons, read each button's displayed written value and use the actual approval action; do not assume its text or value matches this Boolean form.
- Inspect the approval field after the step. It should contain the intended answer in the intended scope. Check the saved comment separately.
- Step to the decision gateway and inspect the actual branch result. For the shared Boolean model, the true condition should select the approved route. Continue to its expected terminal step.
Expected result: you can explain the complete chain: manager answer, saved process value, matching condition and visited destination. Merely seeing the word “Approved” on a button does not establish that chain.
If it goes wrong: find the first mismatch. A correct form answer with an unchanged process value points to output mapping; a correct saved value with the wrong route points to conditions or route configuration. Return to the relevant editor, repair the draft and start a new simulation. Keep the old run to compare what changed.
Example 2: try a decline without losing the approval run
A good approval test also checks the other answer. Use a branch so the checked approval remains available for comparison.
- Pause playback. Choose Rewind until you reach the snapshot where the manager task is waiting, before the approval was submitted. You can also use the offered step controls to select that snapshot.
- Choose Branch Run. Check the branch selector and current step: you are now exploring another run from that point.
- In the supported Boolean decision form, explicitly select false and enter Please choose dates with team coverage. Choose Submit Task Inputs & Step.
- Inspect the saved approved value and comment. Step through the gateway and verify the configured declined route and its actual terminal result.
- Open Compare & Share Report. Select the original approval run from the offered branch/session choices and choose Compare Runs.
- Read the different values, selected routes and visited paths. Check that the differences match the changed manager answer rather than a different starting request or revision.
Expected result: the two runs tell a business story: the same teaching request can follow different configured paths because the manager's answer differs. The original run remains available.
Common mistake: treating Rewind as a new editable future. Rewind moves through recorded snapshots; Branch Run creates the separate what-if journey. If you chose the wrong snapshot, select the original run and branch again from the correct waiting task.
Example 3: discover what “no answer” really does
- From the waiting-task snapshot, create another Branch Run.
- Choose Advance without Decision (Test Missing-Decision Path) rather than supplying task outputs.
- Inspect approved and decisionComment immediately after that step. Note whether each was already defaulted, is still unset or was supplied earlier.
- Step to the gateway and read its branch table and any missing-value explanation.
- Compare the observed route with the business requirement for an unanswered request.
With the shared leave model, approved has a Boolean false default. Omitting the task output may leave that existing false in place, allowing the false condition to match. A missing answer is therefore not guaranteed to produce an error. In a model with no supplied value and no matching default route, you may instead see a missing-value/no-path explanation. Read the actual result; do not change the model simply to make it resemble an example.
Expected result: Nadia can tell the owner whether “no answer” means decline, an explicit missing-answer route or a configuration error in this model. If that differs from the intended policy, agree the policy and repair the model before release. Simulation helps reveal the choice; it does not make that business choice for you.
Save a checked journey and repeat it
A saved scenario remembers a journey so you can check it again. An assertion is a saved expectation, such as a value or completion state that should still match. Save a run only after you understand its result; otherwise you may preserve an incorrect expectation.
- Select the completed run you have checked and return to its intended final snapshot.
- Open Saved Scenarios & Assertions.
- Enter a meaningful Scenario name, such as Leave — manager approves, and a description of the expected path.
- Choose Save Current Run as Scenario. The current run supplies its recorded actions and supported expectations; this is not a blank assertion-writing wizard.
- Repeat for the separately checked decline or missing-answer run with a distinct name.
- Choose Run All Scenarios. Read each scenario's PASSED or FAILED result and the individual assertion results. Inspect any stale-revision warning as well.
Expected result: repeated checks are tied to identifiable inputs, actions and model versions. A failure is a question to investigate, not a result to hide by immediately saving a new expected value. A stale-revision warning means the saved scenario and executed revision need review before you interpret the comparison.
Recovery: use Load Inputs in Sandbox to restore a scenario's starting inputs and fixtures, then initialize or restart the sandbox deliberately. That action loads inputs; it does not itself replay the whole saved journey.
Prepare a report people can understand
- Select the intended run and, if useful, compare it with the relevant alternative under Compare & Share Report.
- Enter a Report title, such as Leave approval and decline — draft review.
- Choose Create Redacted Report and inspect the resulting report and any comparison or scenario results it contains.
- Check its model/revision, inputs, outcomes and remaining unresolved operations before using it in a handover. Keep teaching data in the report; masking credential-like fields is not a substitute for reviewing personal or business information.
Explain what the report establishes: the modeled path with these inputs and fixtures. It does not prove that the real email arrived, a connector accepted a request, Sara had the correct application access or a production service met a response-time target. Complete the separate normal-user workflow checks after configuration and publication.
Use batch analysis after the individual paths make sense
Monte Carlo Batch Analysis repeats synthetic journeys to explore variation. On the current build, the Rate Card Profile & Observed History Replay section offers a Synthetic Case Batch selector labeled in Cases. The report panel offers a second batch-size selector labeled in Iterations. They share the same selected count, seed and active run; 1,000 means one thousand simulated journeys, not one thousand real requests. The current choices are 100, 250, 500, 1,000, 5,000 and 10,000. The service caps a batch at 10,000. If your installed build shows a different set, use only its displayed choices and record the exact label and count.
Before a batch, open Rate Card Profile & Observed History Replay if needed. Choose Hybrid Rate Card ($75/hr Human + $0.05/task AI), Agent-Weighted Rate Card ($65/hr Human + $0.02/task AI), or Human-Only Rate Card ($85/hr Human, $0 AI) to match the planning question. These are editable simulation assumptions; they are not Inflow prices, a payroll quote or measured team costs. The separate five-role table uses Cost Units per hour, not dollars. Keep these two assumption sets distinct when explaining a result.
In the report panel, record the Seed (42 is the initial value) and the Approval % (72 is the initial value). Random Data & Human Behavior is on initially; it varies generated sample data and modeled human choices. For example, 72% is a fictional simulation probability, not a real manager's approval rate. Begin with 100 cases to check the setup, then use 1,000 when you want a broader sample. Use Run Seeded Synthetic Batch for a first run using the selected case count, seed and rate-card profile. When you change Approval %, Random Data & Human Behavior, or the report’s role-mix assumptions, use the report panel’s Run Monte Carlo or Apply & Re-run Now so the current report-panel settings are submitted. The drawer button can reuse the last submitted report-panel extras; do not use it to apply changes that exist only in the report controls. Use Cancel Batch if the active run needs to stop. A cancelled or incomplete run is not a completed result.
Do not equate the synthetic batch with Replay Recorded Case History (Observed Telemetry). The first generates modeled cases; the second replays recorded history. Neither one proves what will happen in production. Read completed and incomplete/blocked counts alongside cycle-time, branch and SLA figures. P50 is the median simulated duration; P95 and P99 show slower portions of the simulated distribution. The SLA is the target used for comparison. These results depend on the supplied model, fixtures, generated inputs, seed, approval assumption, role mix and cost assumptions. They are not observed production measurements, invoices or staffing guarantees. Investigate unresolved operations before presenting an attractive percentage or economic estimate.
Example 4: widen a checked approval model to 10,000 synthetic cases
Nadia has already checked the individual approval, decline and unanswered-task paths above. The process owner wants to see how the modeled flow behaves across more combinations of synthetic leave requests. Nadia uses a training model and fictional assumptions; she does not need real employee records for this exercise. If your installed build lacks a control named below, use only the choices and report sections actually displayed.
- Open the Monte Carlo view for the intended process. Expand Rate Card Profile & Observed History Replay if it is closed. Check the model, revision, SLA target, starting values and external fixtures. Resolve any missing fixture or unsupported operation before interpreting a batch.
- Choose 100 Cases (Quick Sweep) as a setup check. Select a Persona Cost & Rate Profile that fits the question. For Nadia's first run she chooses Hybrid Rate Card ($75/hr Human + $0.05/task AI). These are modeled rates, not Inflow prices or measured team costs. The separate role-cost table reports Cost Units rather than dollars.
- In the batch report controls, leave Random Data & Human Behavior on for this exercise, set Approval % to 72, and record Seed 42. These values control a synthetic scenario; 72% does not describe Sara or any real manager. Keep the seeded inputs and fixtures fictional.
- Select 1,000 Cases (Stress Test) in the main selector. The report panel shows the same selection in its Iterations control. Start the first sweep with Run Seeded Synthetic Batch. When it finishes, check the total simulated and completed counts, SLA compliance, P50/P95/P99, branch outcomes and top bottleneck. Investigate blocked or incomplete journeys instead of counting them as successful completions.
- Review the five-role workforce assumptions separately from the human/AI rate card. The default role mix is Junior 35% at 1.0 Cost Units/hour, Intermediate 30% at 1.8, Senior 20% at 3.0, Manager 10% at 4.5 and Director 5% at 7.0. If the planning question calls for a different role mix or unit rate, change the appropriate role fields and note them. When the configured mix does not total 100%, the report indicates that it normalized the mix; read the displayed value rather than assuming the entered shares were used unchanged.
- To compare an approval assumption, record Nadia's 72% result, change Approval % to a fictional alternative such as 55, keep the same model, case count, seed, fixtures, profile and role assumptions, then choose Apply & Re-run Now or Run Monte Carlo in the report panel so those current settings are sent with the rerun. The comparison isolates the changed assumption; it still does not predict an actual person's decision.
- After any setting changes, check for Simulation Parameters Modified. The displayed report belongs to the last completed run until you choose Re-run Monte Carlo or Apply & Re-run Now and the new batch finishes. Do not export or present a stale report as if it reflects the new assumptions. Use Show Heatmap when you want a visual view of modeled bottlenecks; it is part of the same simulation, not live operational telemetry.
- If a wider sweep is justified, select 10,000 Cases (Enterprise DES Sweep) and rerun with the same seed and assumptions. The larger sample explores more simulated combinations, but it does not prove that the model's assumptions are correct. If P50 is within target but P95 or P99 exceeds it, inspect the slower branches and bottlenecks before recommending a process change.
- Use Download Executive PDF Report to export the report. Review its process summary, synthetic outcomes, bottleneck analysis, workforce calculation, roadmap and assumptions before sharing it.
Expected result: a repeatable, assumption-bound analysis of the selected process revision. It does not create requests, contact the simulated external systems, approve a real manager task or measure live service capacity. Follow up with ordinary-user tests and separately admitted production telemetry when those are required.
Recovery: if the run reports missing fixtures, incomplete cases or a surprising branch mix, return to the individual sandbox, correct the model or fixture with its owner, then rerun and record the new assumptions. If the report says Simulation Parameters Modified, rerun before interpreting or exporting it. Do not alter the model merely to make the report's percentages look better.
Optional: write synthetic process and document records into a workspace
This operation is different from the preceding sandbox and Monte Carlo examples. Inject simulated data creates physical database records for a selected published lifecycle. It cannot inject a draft snapshot or a standalone Process Flow. It can create lifecycle and child state-flow instances, human tasks and ownership intervals, engine events, state/step visit projections, sample documents in a governed workspace cabinet, task-document attachments and process/SLA KPI data. The values and files are synthetic, but these are still records in Inflow. They can appear in Live View, Process Monitor, task lists, document views and Process KPIs according to ordinary access rules.
Use this only in a nonproduction workspace explicitly approved for synthetic training or demonstration data. Never inject into production or into a workspace containing live business records; owner approval does not override this boundary. Before you begin, confirm the workspace name, model and published revision with its owner. If the training workspace is shared, the owner must approve this exact exercise and its cleanup plan. Use fictional data only; do not enter real employee, customer, claim or other personal information. The operation is permission-gated: the model must be accessible, the user needs process-definition update (authoring), process-instance start and document-management access, and workspace admission must allow the operation. Purging repeats those injection checks and also requires process-instance purge permission plus authorization to mutate the selected model/batch. If a control is absent, request the right access through the workspace owner rather than borrowing another account.
Example 5: seed and inspect a small training batch
Nadia and the workspace owner have agreed to populate a disposable training workspace so the team can see how synthetic cases, tasks, documents and KPI projections look in the application. Nadia starts small and records the batch identifier so the owner can reconcile it later.
- Open Simulation Studio for the intended lifecycle in the approved training workspace. Check the workspace and lifecycle name, then select and confirm its exact Pinned Published Revision. Injection requires a published lifecycle; a draft snapshot or standalone Process Flow cannot be used. If it is unpublished, stop here and use the ordinary reviewed publication process before returning to this exercise.
- Confirm Inject simulated data is available. If the lifecycle is unpublished, the control is state-disabled with a publish-first explanation; do not try another route or call the endpoint directly. Choose the control only for the confirmed published lifecycle. Read the full Physical Database Write Warning — Demo & KPI Data Will Be Written to Inflow before proceeding. If the selected workspace or model is wrong, choose Cancel and reopen the correct one.
- Start with a small count, for example 10 lifecycle runs. The field accepts 1–5,000; the preset buttons include 10, 25, 50, 100, 250, 500 and 1,000. Each requested run can also create child state-flow instances, human tasks, documents, attachments and projections, so the run count is not the total number of rows or files written.
- Choose an Industry Vertical for Fake Data & Sample Documents, a Historical Time Horizon (7, 14, 30 or 90 days), and a Case & SLA Disposition Mix Profile. For a first visual walkthrough, keep the default balanced profile. The stress profile intentionally produces more in-flight/overdue and failed/incident cases; the optimal profile models a mostly completed, on-time mix. These are synthetic compositions, not observed customer outcomes.
- Recheck the selected workspace, model, revision, count and warning. Choose Confirm & Inject only when the team expects these writes. Follow the progress stages through batch-ledger verification; do not close the work as successful merely because progress started.
- Read the final receipt. Record the batch ID, workspace, model/revision, run count and the created lifecycle, state-flow, task, document, attachment and KPI counts. The receipt's sample business keys and document names help identify the generated material. If there is an error or the result is uncertain, inspect the current batch list and operation/result before retrying; repeating injection can create another batch.
- Use Live View, Process Monitor and Process KPIs to inspect the synthetic records. Confirm that the examples carry the expected synthetic business keys and do not confuse their historical timestamps with live activity. A KPI chart from this batch is a view of generated demo data, not evidence of production performance.
Expected result: the selected workspace contains a tracked synthetic batch that can be inspected through ordinary product surfaces. Injection also creates an append-only audit event containing the workspace, actor, model/revision, batch and generated counts. Synthetic values do not make the write non-persistent or exempt it from workspace access, audit or retention rules.
Example 6: purge the synthetic batches for this model
Before the exercise, Nadia asks the workspace owner to confirm which model's batches should be removed. The visible Purge Injected Demo Data action applies to active injected batches for the selected model in that workspace; do not treat it as a one-batch undo button when several batches exist.
- Confirm the workspace and selected model, then review the active batch list and compare each batch ID with the team's recorded receipts. If the workspace contains a batch you cannot identify, stop and ask its owner before purging.
- Confirm that the intended user has the additional purge permission. Select Purge Injected Demo Data only when every active batch for that model in the workspace is approved for removal.
- Read the result counts for purged batches, instances and sample documents. Refresh the batch list and inspect the relevant operational surfaces to confirm the synthetic entries are gone. If the purge reports an error or you are uncertain whether binary documents were removed, do not repeat it blindly; retain the batch ID and error and ask the workspace administrator to reconcile the batch and document storage.
- Keep the audit record in mind: purge is not a trace-free erase. The append-only audit records for injection and purge remain. The implementation also preserves folders/cabinets that still contain non-synthetic material, and a binary cleanup failure can leave the purge incomplete and reported as an error.
Expected result: batch-owned synthetic operational records and documents are removed when purge completes, and the batch is marked purged. The audit trail remains. Never promise that a purge removes audit evidence or unrelated workspace content.
Continue with the workflow lesson for real task handling and the handover checklist for ordinary-user checks. The optional technical Simulation Studio reference preserves the detailed contracts, fixture boundaries and historical engineering evidence.