6. Check and publish your changes
A form is ready to share when its questions, answers and actions have been checked for the intended users. Publishing releases your work; it is not just another way to save an unfinished draft.
A generated form gives you questions and actions based on a chosen record destination. An App Shell template gives the application a starting arrangement of navigation and page areas. A draft is the design you are editing. A published version is the released design people can use. Editing a draft does not automatically change that released version.
The current publication practice below shows a separate inert form captured on 16 November 2026. Pattern, empty-destination and three-question validation-only figures show fictional practice captured on 15 November. Figures explicitly marked historical show the earlier nine-field training run from 8 November. These older numbered guides open through their links; current publication and 15 November generation figures remain inline. Keep each example’s prerequisites and outcomes separate; an older screenshot is not confirmation of your current setup.
Before you publish
Know what this form should do and which records/rules/workflow it needs. Use fictional examples while learning. Check a normal answer and a mistake. If an action can save data, start work or contact a service, do not treat a test click as harmless decoration.
Current practice: publish a small form, then change only its draft
Learn the release boundary on a form with nothing consequential to submit. You will create Publication practice with one Heading and one Prose control, publish version 1 once, change the draft wording, and compare Preview with the unchanged released page. This is separate from the connected nine-field intake example later in the chapter.
The twelve figures in this practice were captured on 16 November 2026 from the build of master fb09eea4a7, at native 2560 × 1440. The normal Designer account had Admin in People Operations Access Practice, without platform bypass. These images demonstrate that author's form publication and viewing path; they do not establish employee application access, a record save, a task decision or a dependency update. Preview's Desktop · 1440 is the logical form viewport within Studio, separate from the full screenshot size.
1. Create an inert practice draft
- Open a workspace where you may author and publish a practice Form. In the illustration, choose People Operations Access Practice → Build → Forms → New form.
- Keep Form selected. Choose Leave Management for Placement.
- Enter Publication practice, an available practice key such as
publication_practice_20261116, and a description explaining its synthetic purpose. Keep earlier forms intact; do not replace the connected intake or another person's work. - On Review, check the kind, placement, title, key and description. Choose Create interface once.
- Add a Heading. Give it Name
releaseHeadingand LabelPublication practice — first wording. - Add Prose. Give it Name
releaseExplanationand LabelThis page demonstrates release versions. It has no Submit action and does not save a business record. - Keep the exercise to the Form root, Heading and Prose. Add no Submit button, automation, rule, record connection or provider action. The description alone is not evidence of that configuration: inspect the actual controls and configuration before continuing.
The captured saved definition has exactly these three nodes and no declared inputs or action wiring. It needs no employee details, records, tasks or data-model deployment to teach the difference between Save and Publish.
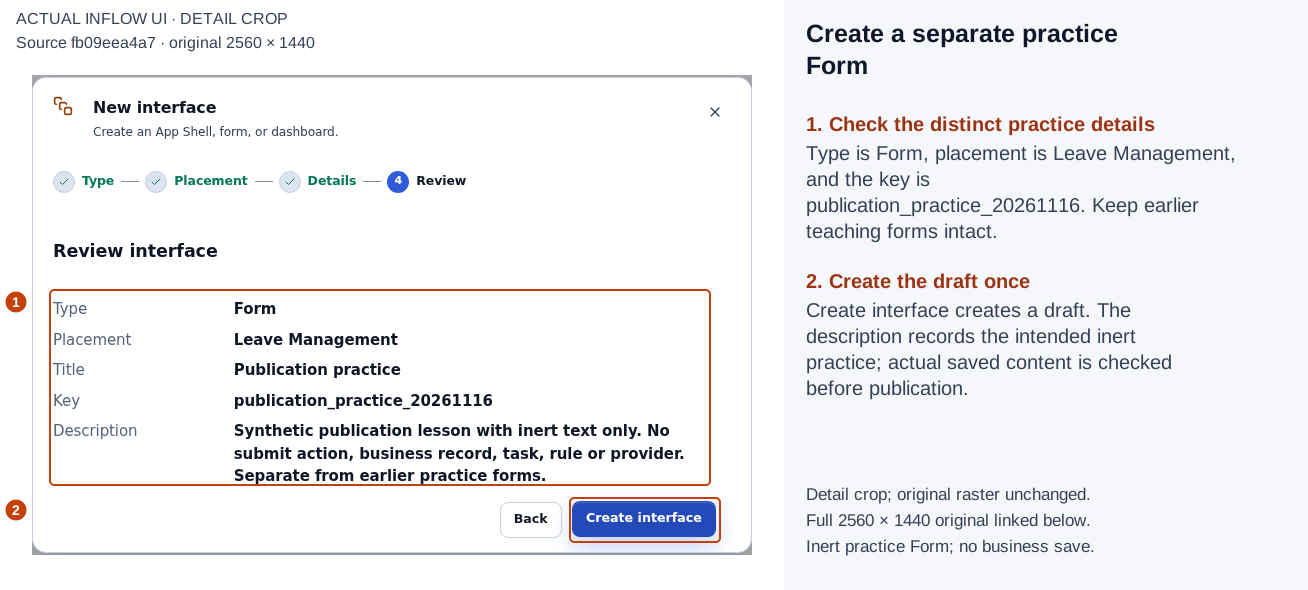
1–2: review a separate practice Form and create its draft. This is not the final publication review. Open the full-size numbered guide · Open the unchanged full 2560 × 1440 screenshot.
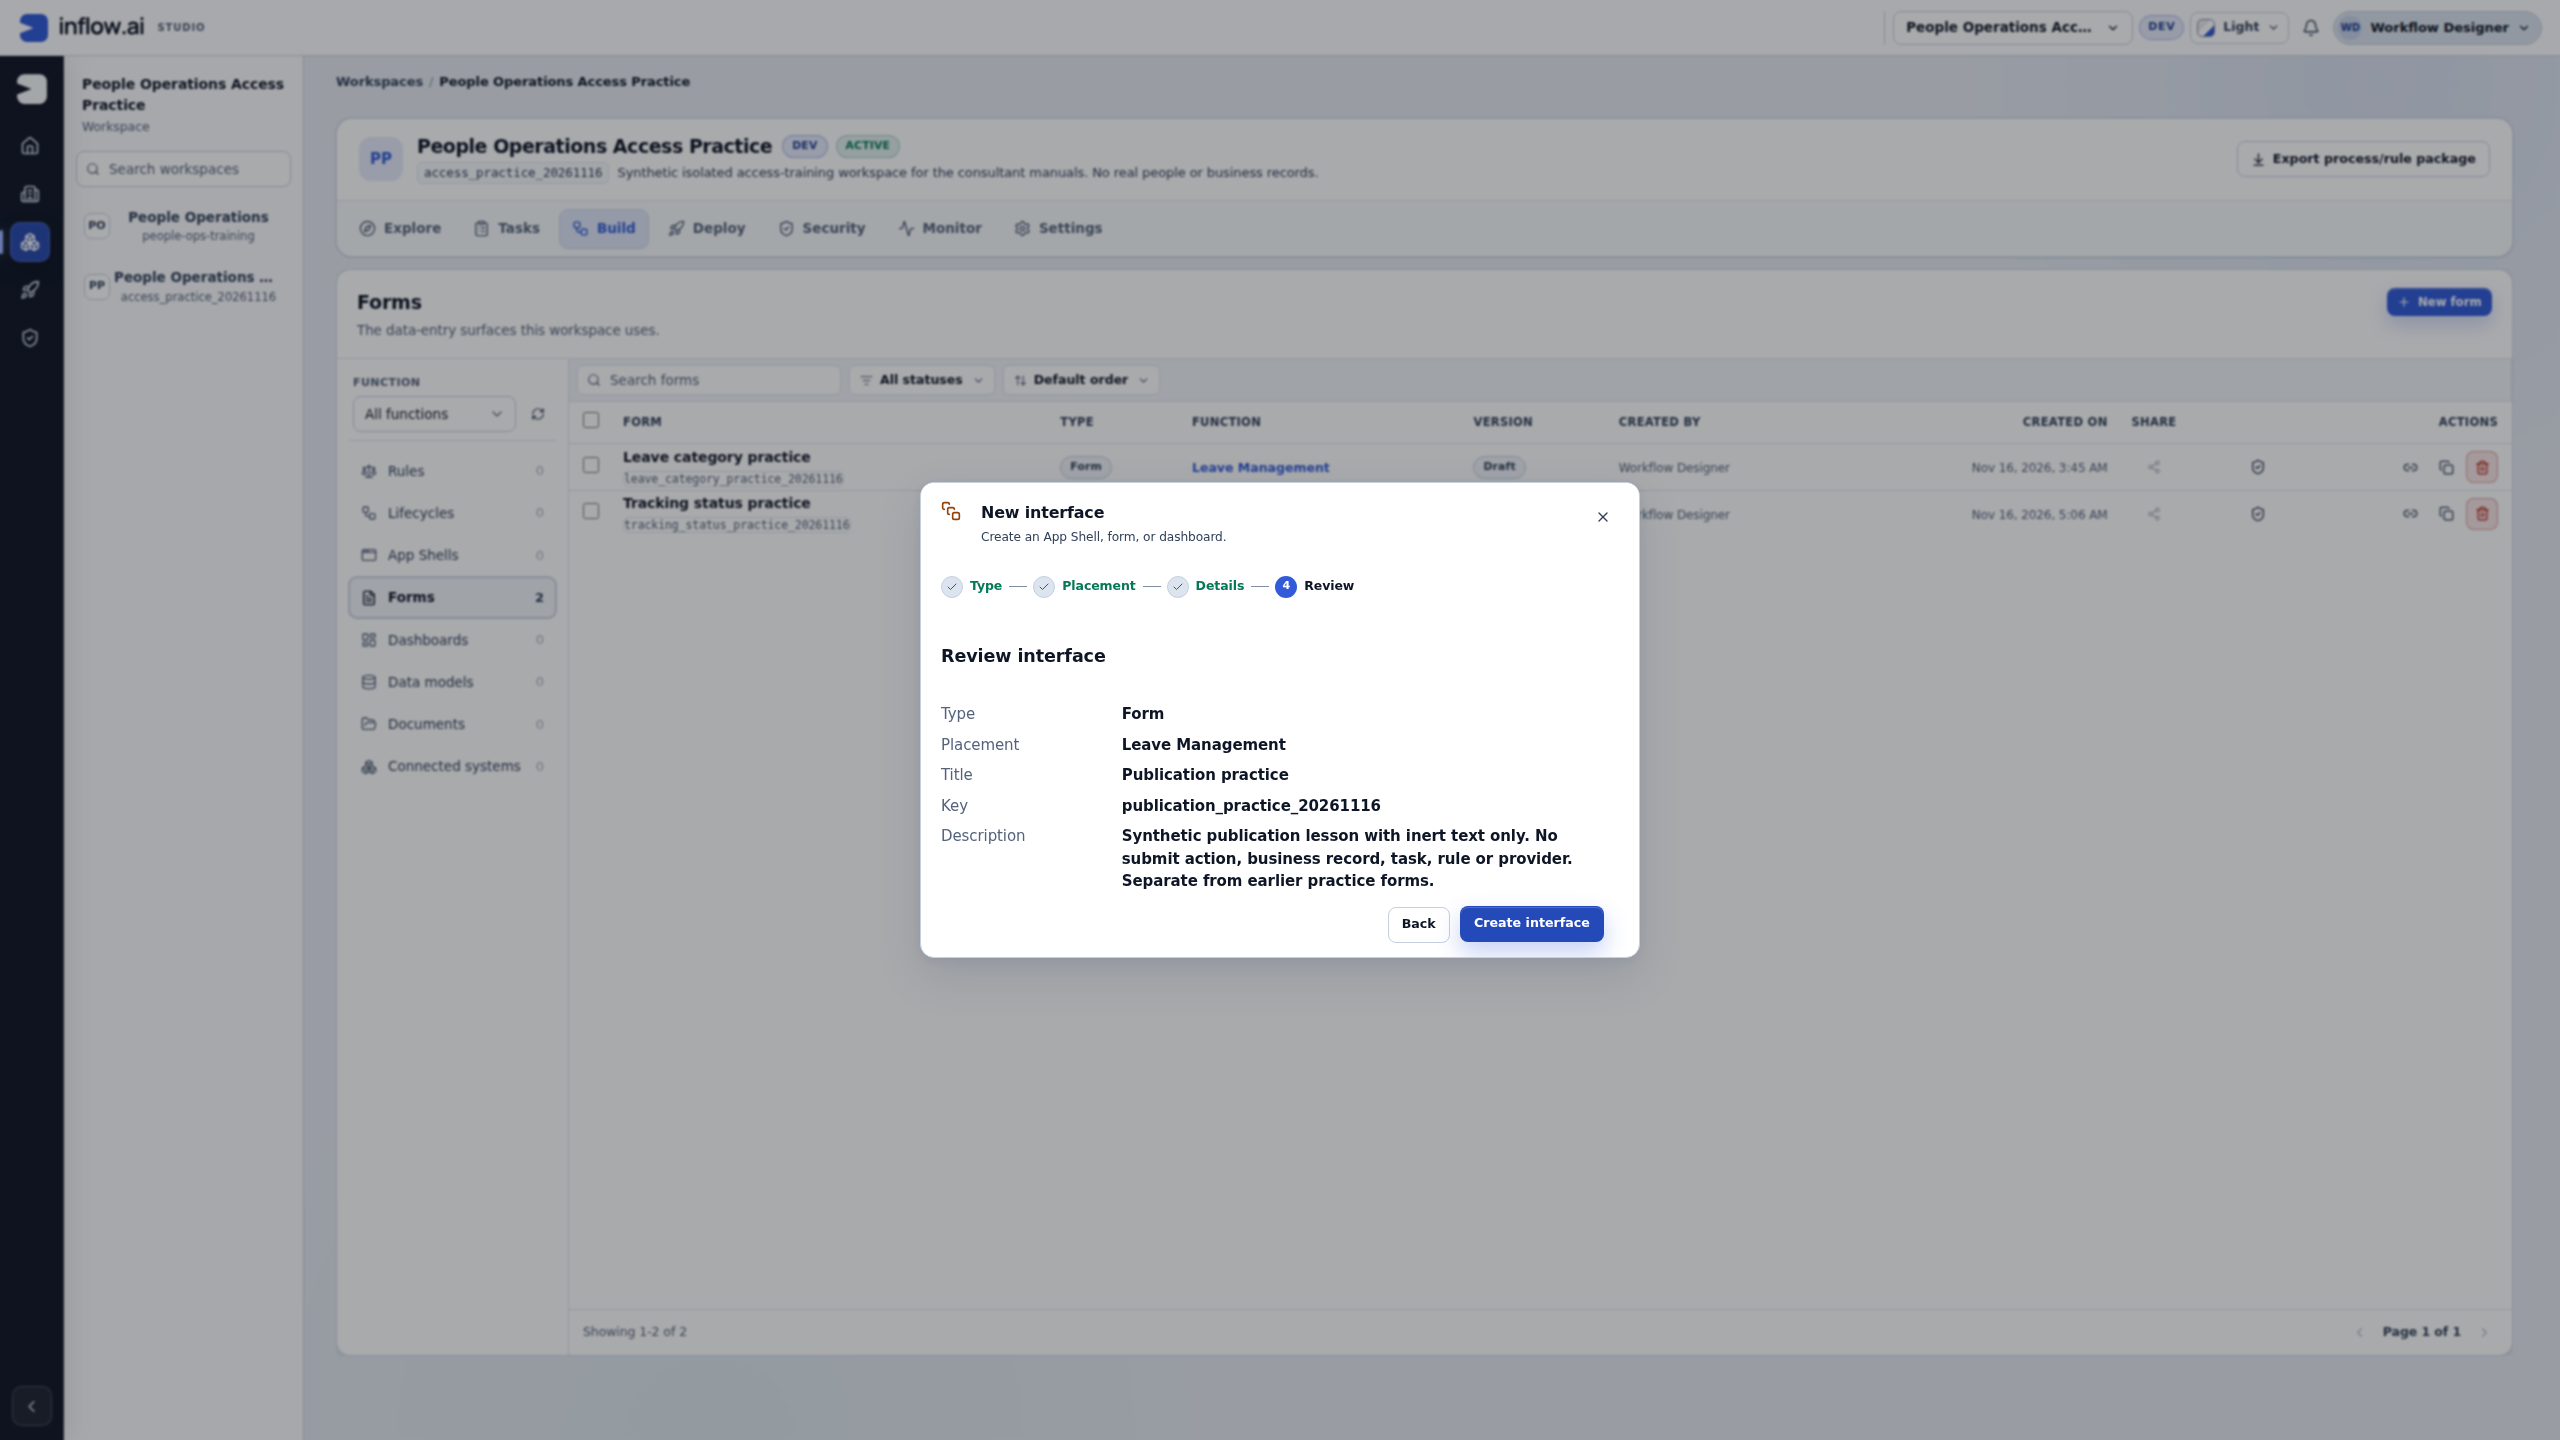
2. Save and validate the definition
- Leave the edited field and choose Save.
- Wait for Saved remotely. Saving is the persistent draft checkpoint; publication is a later decision.
- Choose Validate and read Problems.
- In this practice, the result is No problems found. If your definition has a problem, repair the named issue and validate again before publication.
- Close Problems when you have read the result.
No problems found applies to the checked definition. A static practice form has no business submission to exercise, and a validator result does not prove that employees have access or that a connected workflow would complete.
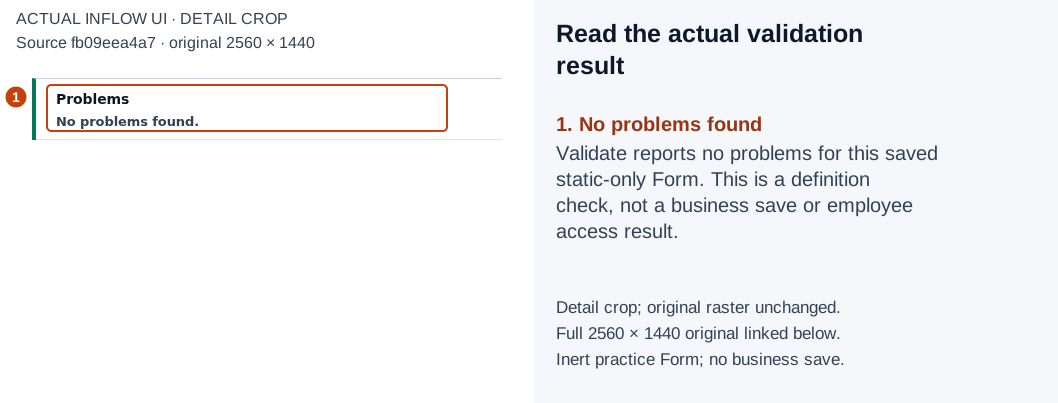
1: the actual Problems result is No problems found for this saved inert practice definition. Open the full-size numbered guide · Open the unchanged full 2560 × 1440 screenshot.
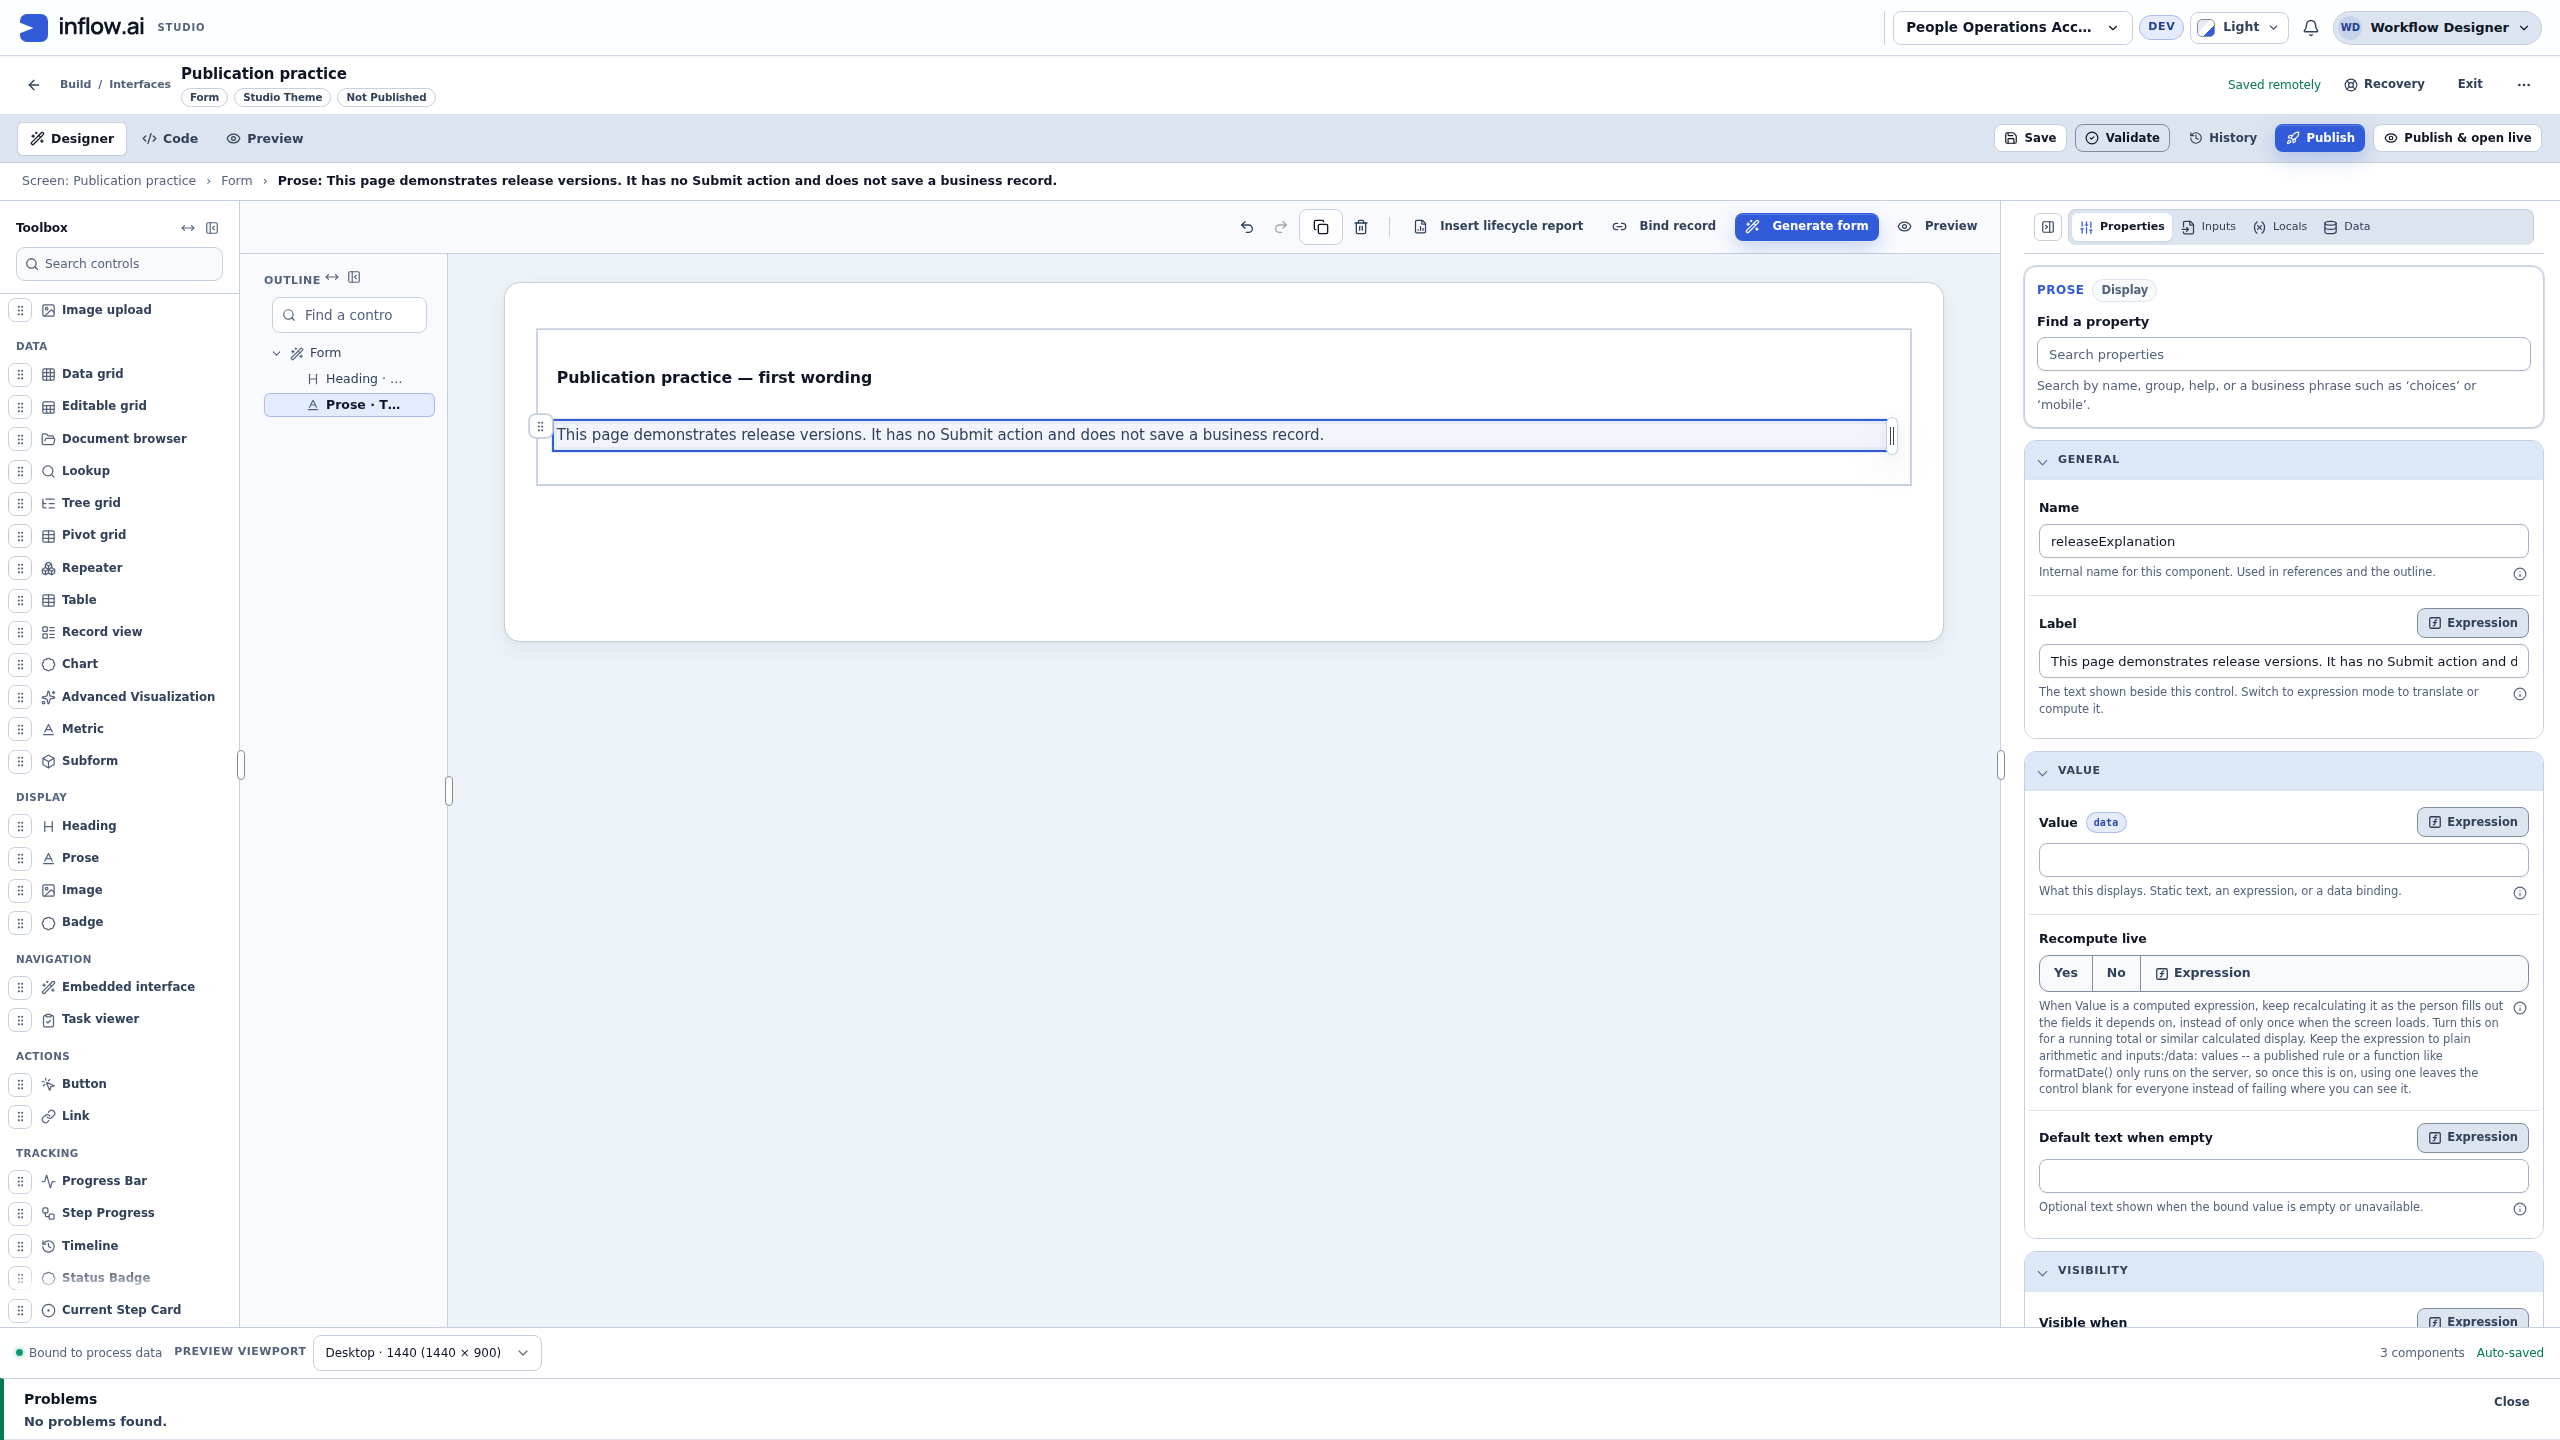
3. Open a review, then cancel deliberately
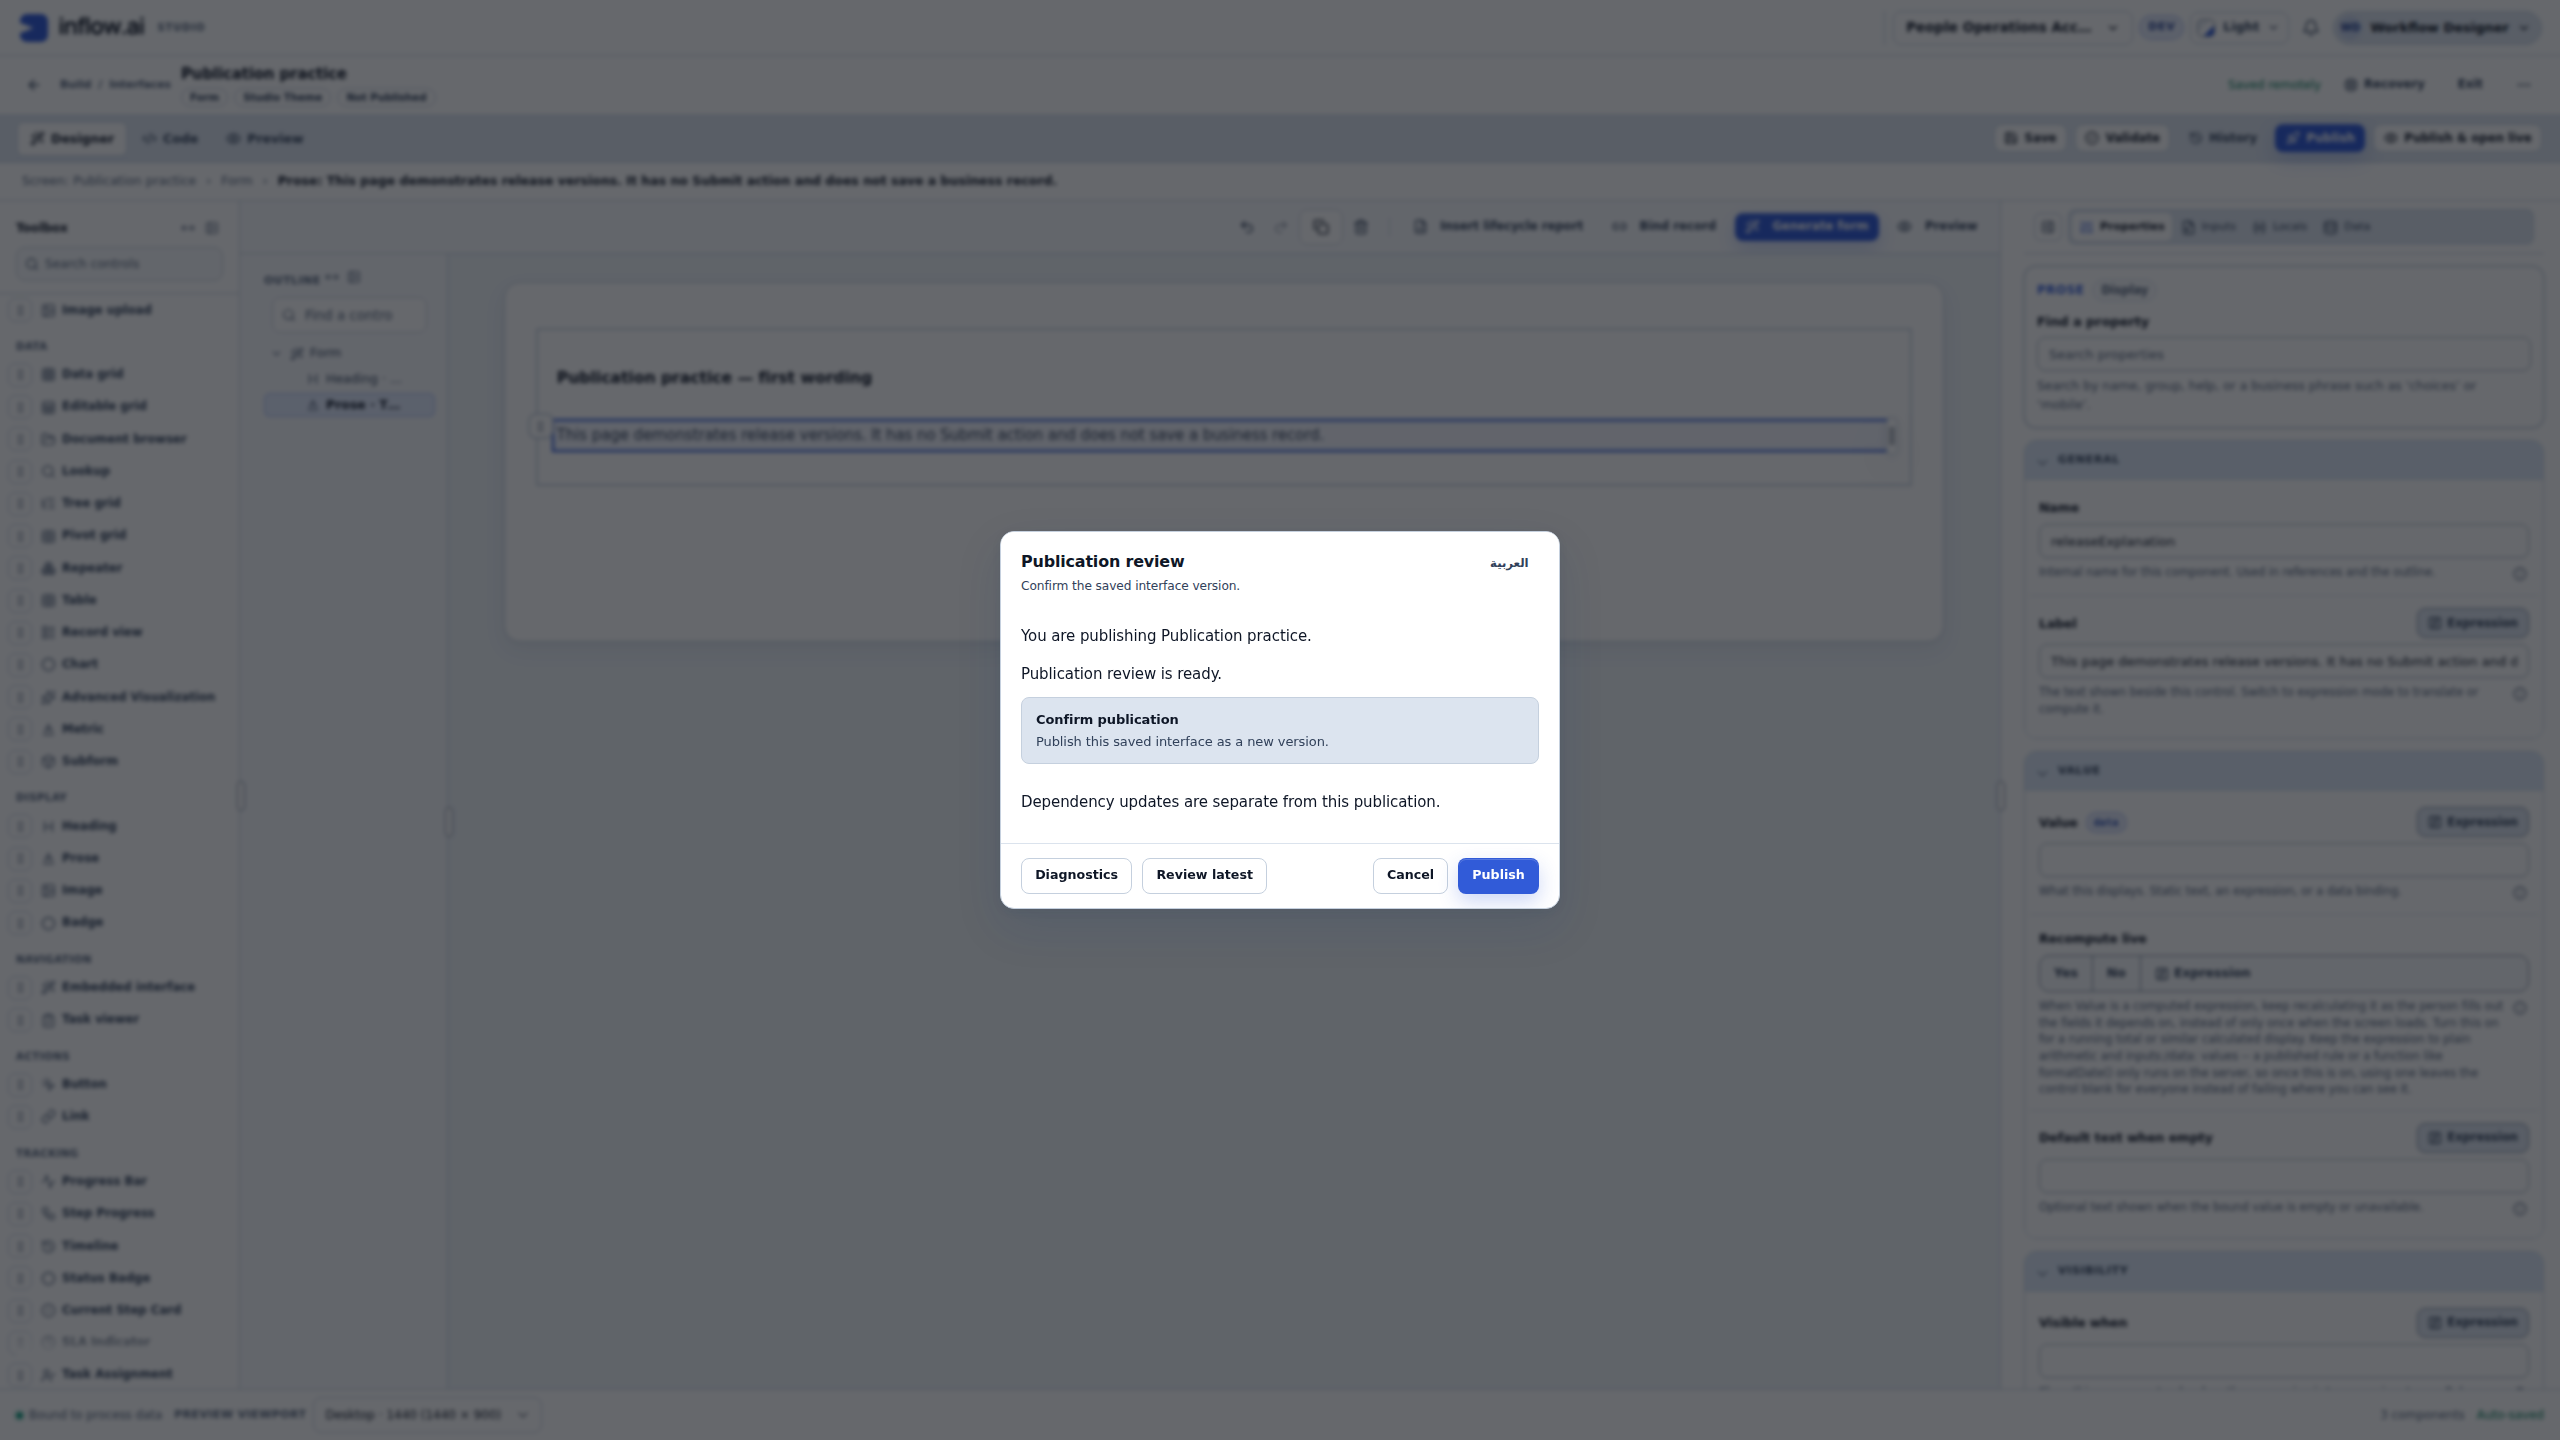
- Choose the header Publish. Opening this action prepares Publication review; the dialog still has its own final Publish button.
- Confirm Publication practice is the named candidate and read Publication review is ready.
- Read Publish this saved interface as a new version. This is the intended effect of the final confirmation.
- Read Dependency updates are separate from this publication. The dialog confirms the saved interface itself; it is not a list of dependency changes or proof that dependent rules and records are ready.
- For this first check, choose Cancel.
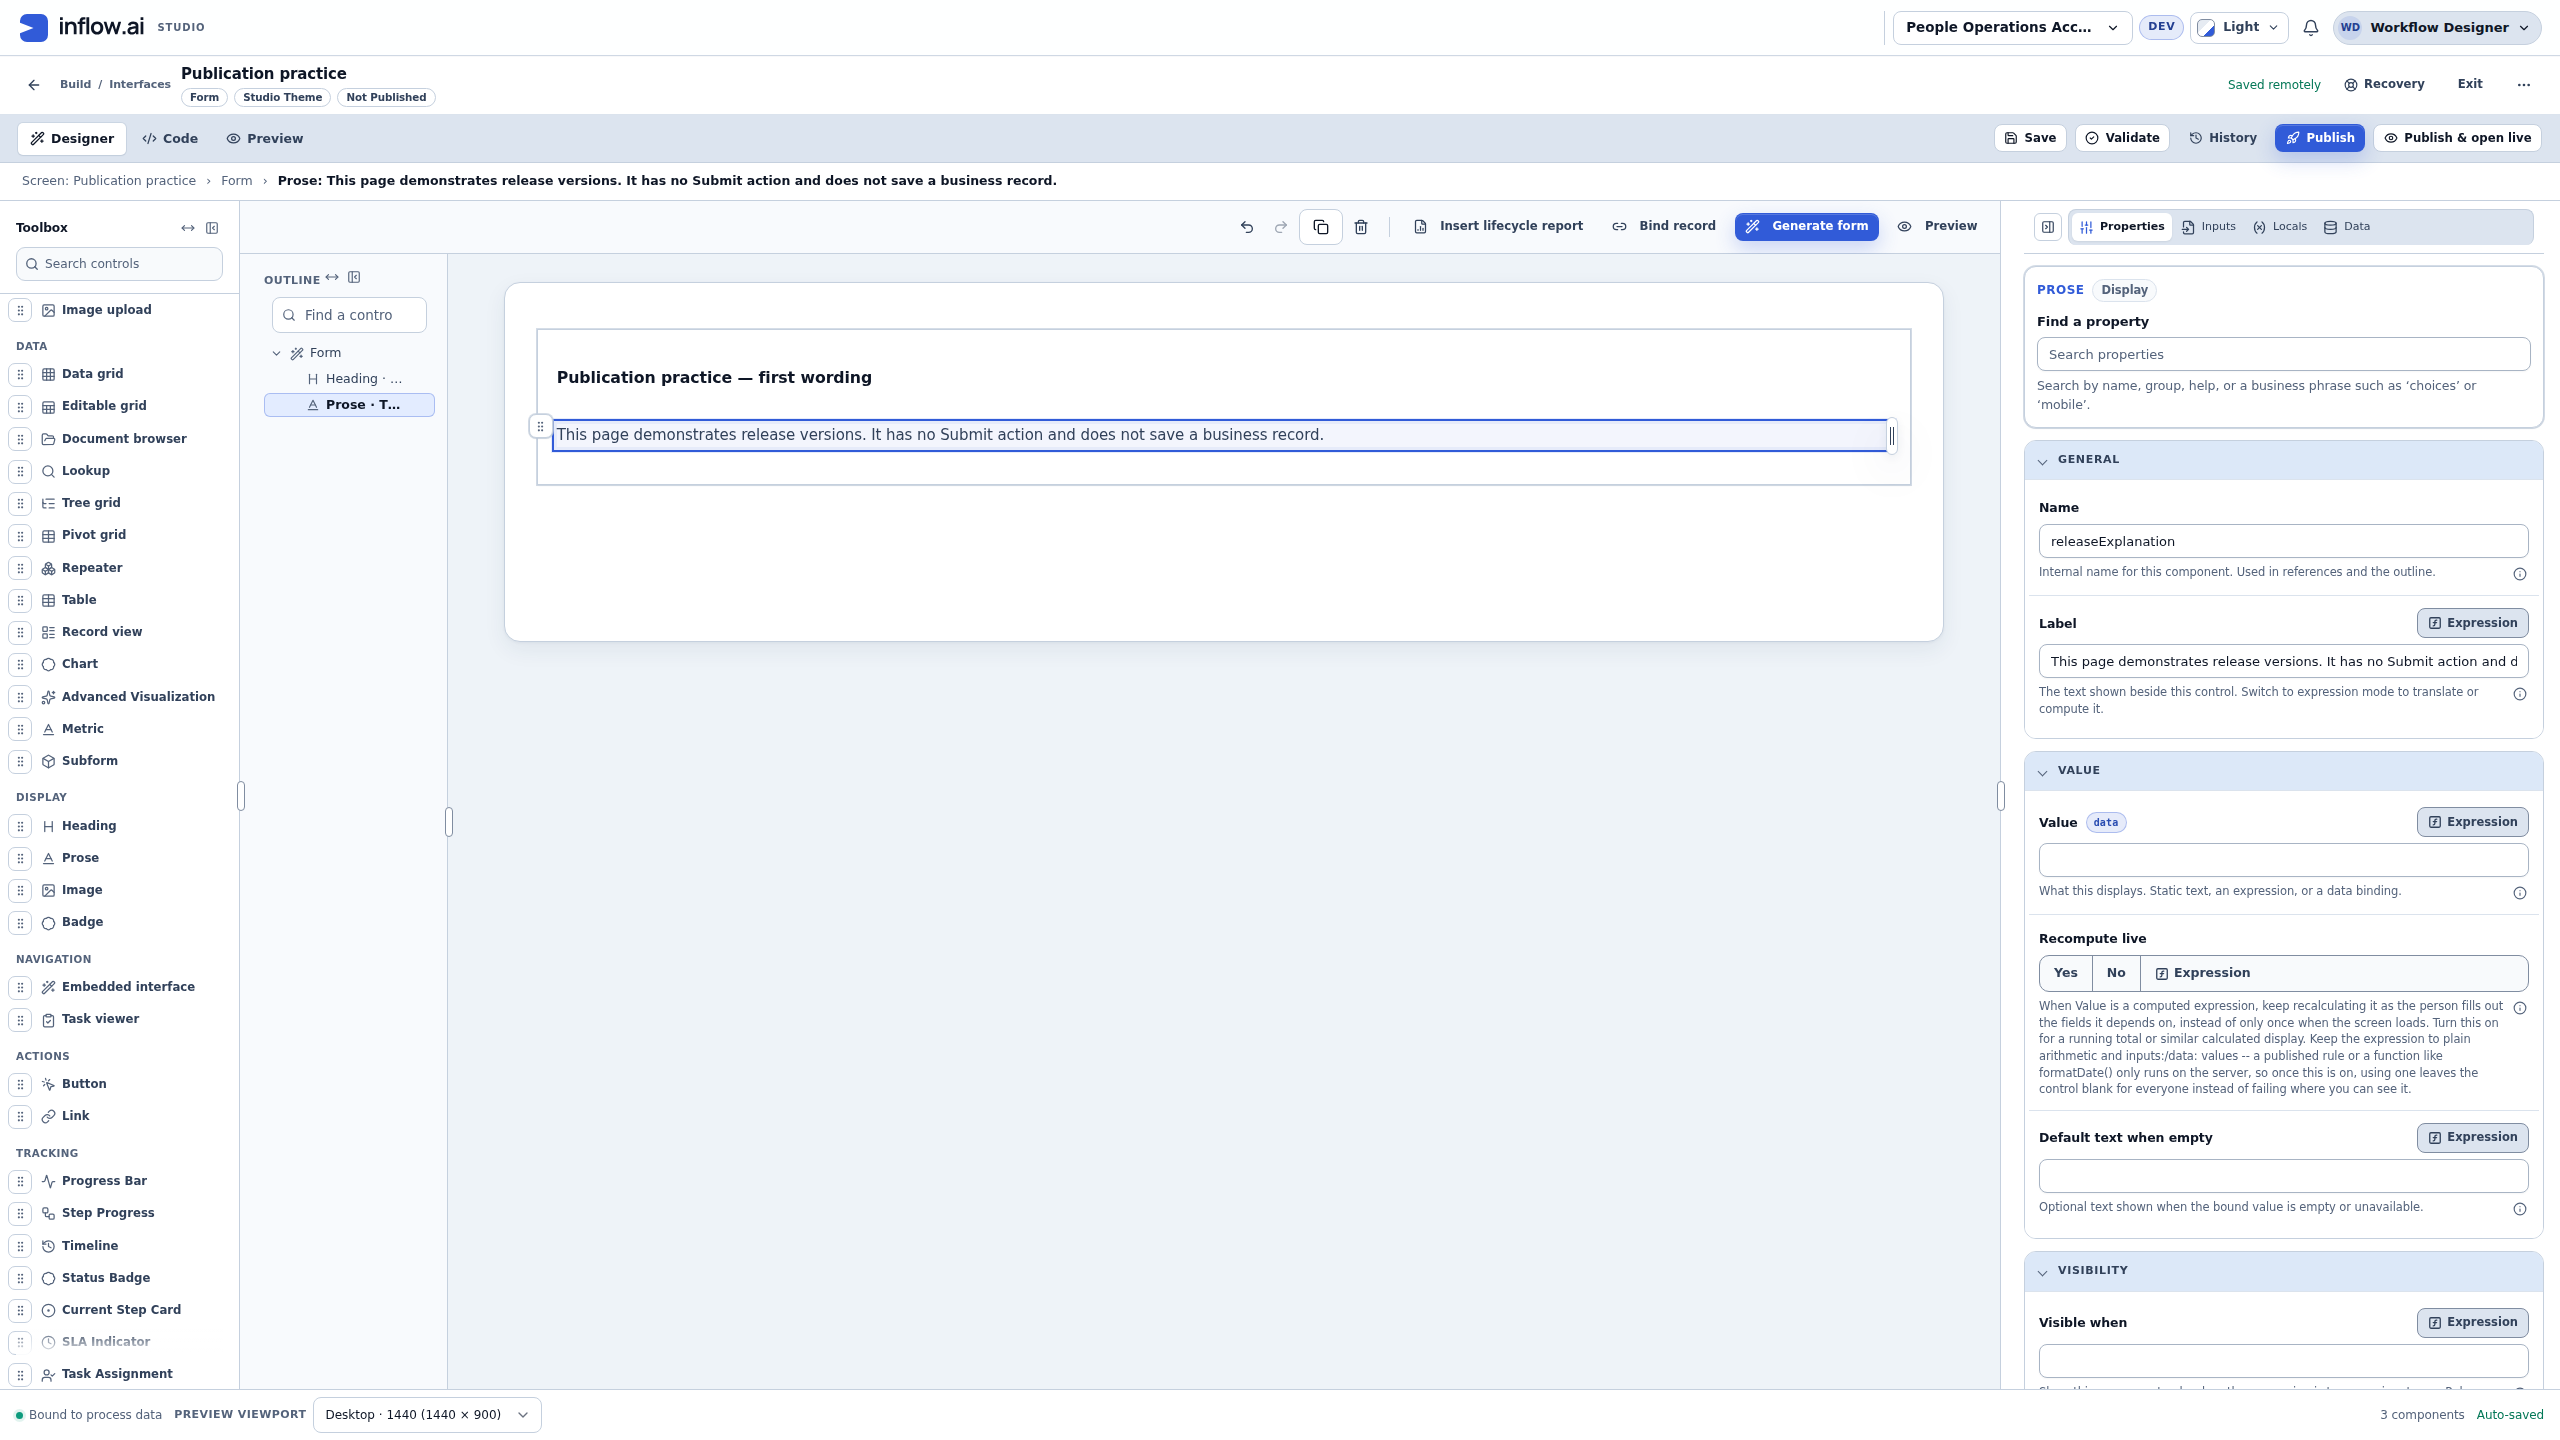
- Inspect the header. It still says Not Published in this never-published practice. The saved draft remains available, and no release was created by Cancel.
Cancel closes the review. It does not delete the draft, unpublish an existing release, or undo a publication already sent. In the captured run the draft stayed revision 4 and the latest published-version read returned no version after this cancellation.
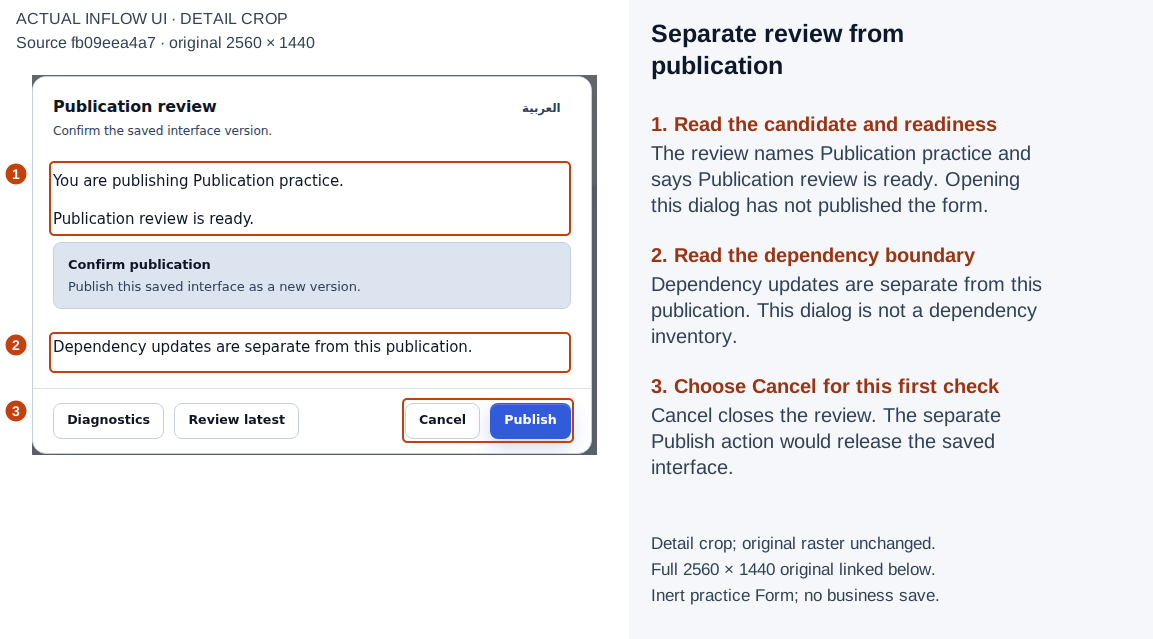
1–3: candidate, readiness, dependency boundary and separate Cancel/Publish actions in the current root review. Open the full-size numbered guide · Open the unchanged full 2560 × 1440 screenshot.
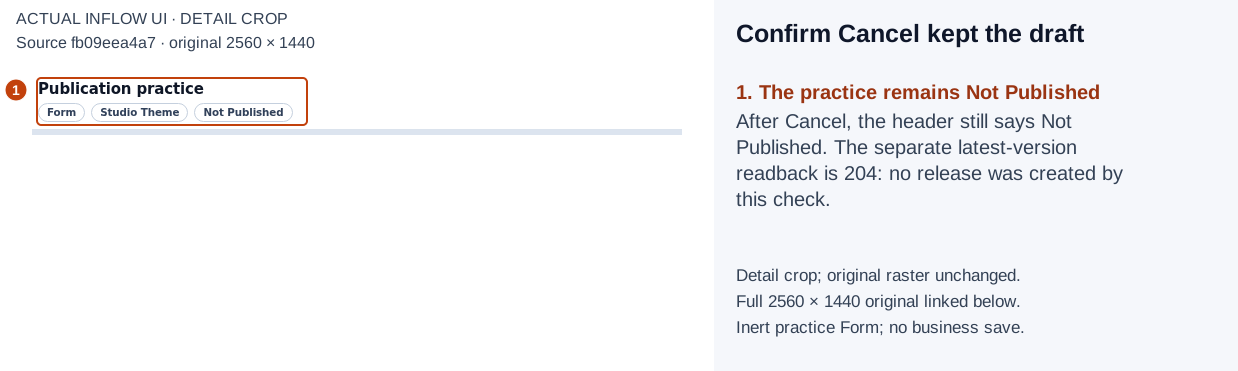
1: after Cancel, the practice remains Not Published. The captured cancellation created no version. Open the full-size numbered guide · Open the unchanged full 2560 × 1440 screenshot.
4. Confirm the exact saved candidate before one intended release
- Reopen Publish for the same practice form.
- Read the name and ready status again. Do not assume an earlier review still describes work that changed afterward.
- If you need the precise saved checkpoint, open Diagnostics. This illustration names
publication_practice_20261116and Saved revision 4. - If work changed after a review was prepared, use Review latest and read the refreshed result before deciding. Review latest refreshes the review; it is not the final Publish. That stale-review scenario was not exercised in this small practice.
- When the saved candidate and ready state are correct and you intend a release, choose the dialog's Publish once.
- Wait for the result. If the outcome is unclear, preserve it and inspect the current published state before deciding whether another attempt is appropriate.
Draft revisions and published version numbers are different counters. The captured draft revision 4 produced published version 1. Your revision number can differ after additional saved edits; do not try to make it match the picture by creating extra versions.
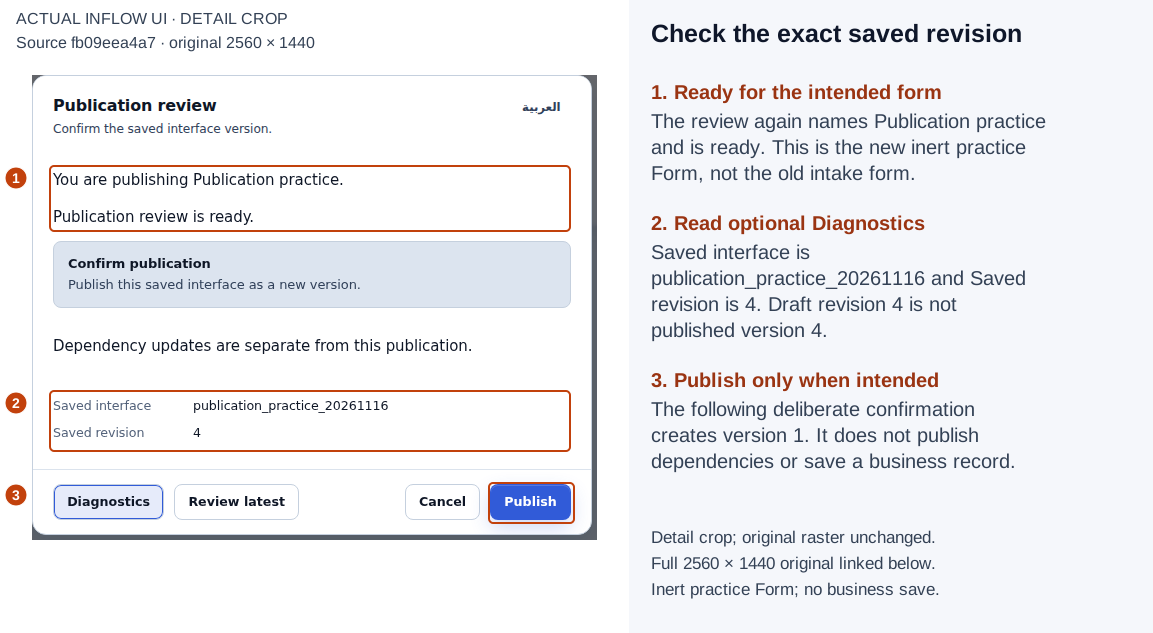
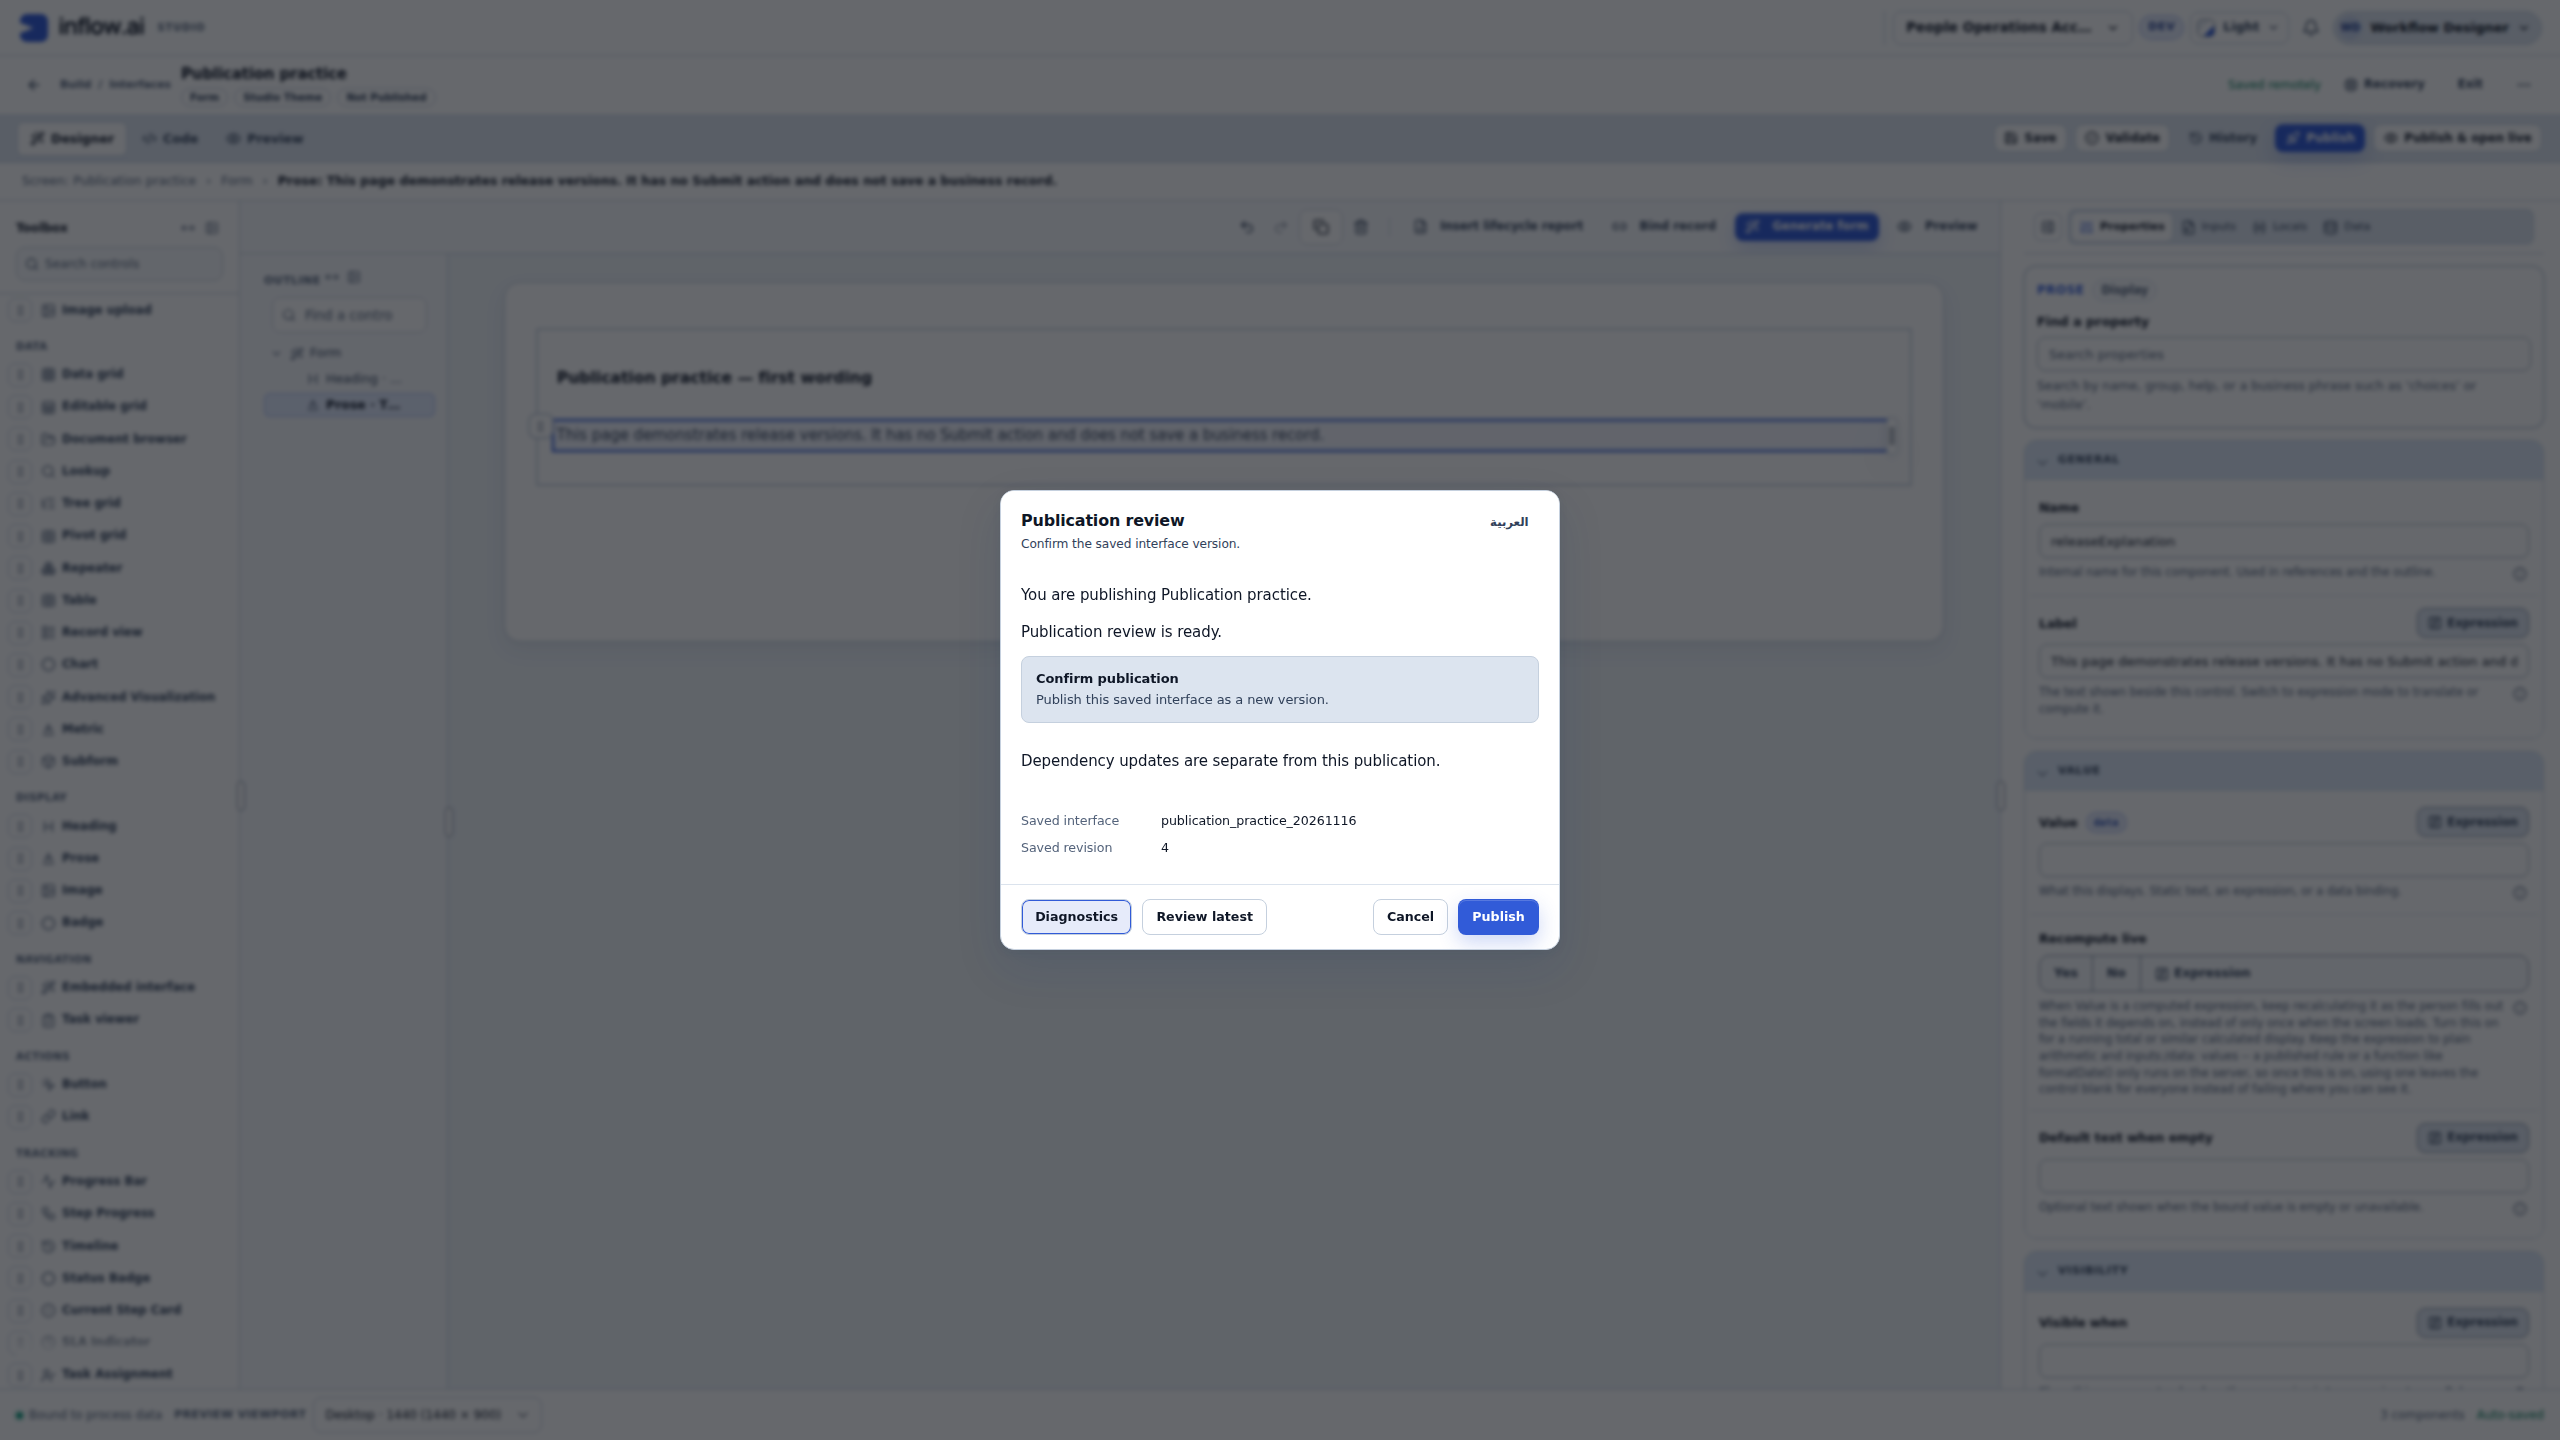
1–3: optional Diagnostics identifies saved revision 4 of the intended practice. The next Publish confirmation is deliberate and happens once. Open the full-size numbered guide · Open the unchanged full 2560 × 1440 screenshot.
5. Read success, then open the actual release
- Read the original result: Published interface v1.
- Read the offered Live link and the available Continue editing, Copy link and Open live choices.
- Choose Open live to view the released form. In this run it opened a new browser tab while the designer tab remained available.
- Confirm the actual page shows Publication practice — first wording and the explanatory prose. This Live form has no Interactive test toolbar and no Submit action.
- Keep that published-page tab or its offered link for the comparison below.
The URL in the picture belongs to the local teaching runtime. Use the Live link offered by your own form; copying a local sample URL does not deploy or grant access to an application. Publishing this form also does not publish its workspace, make a data model live or assign a manager task.
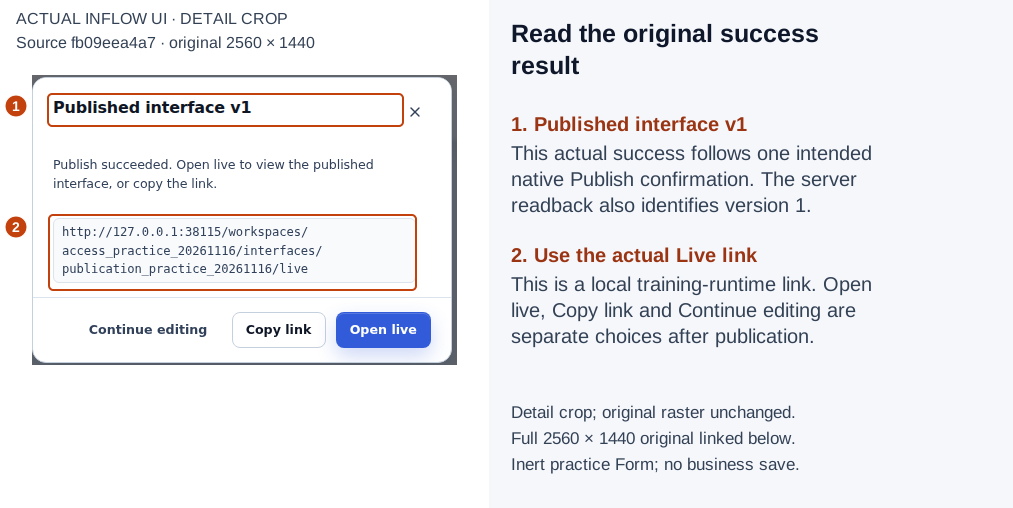
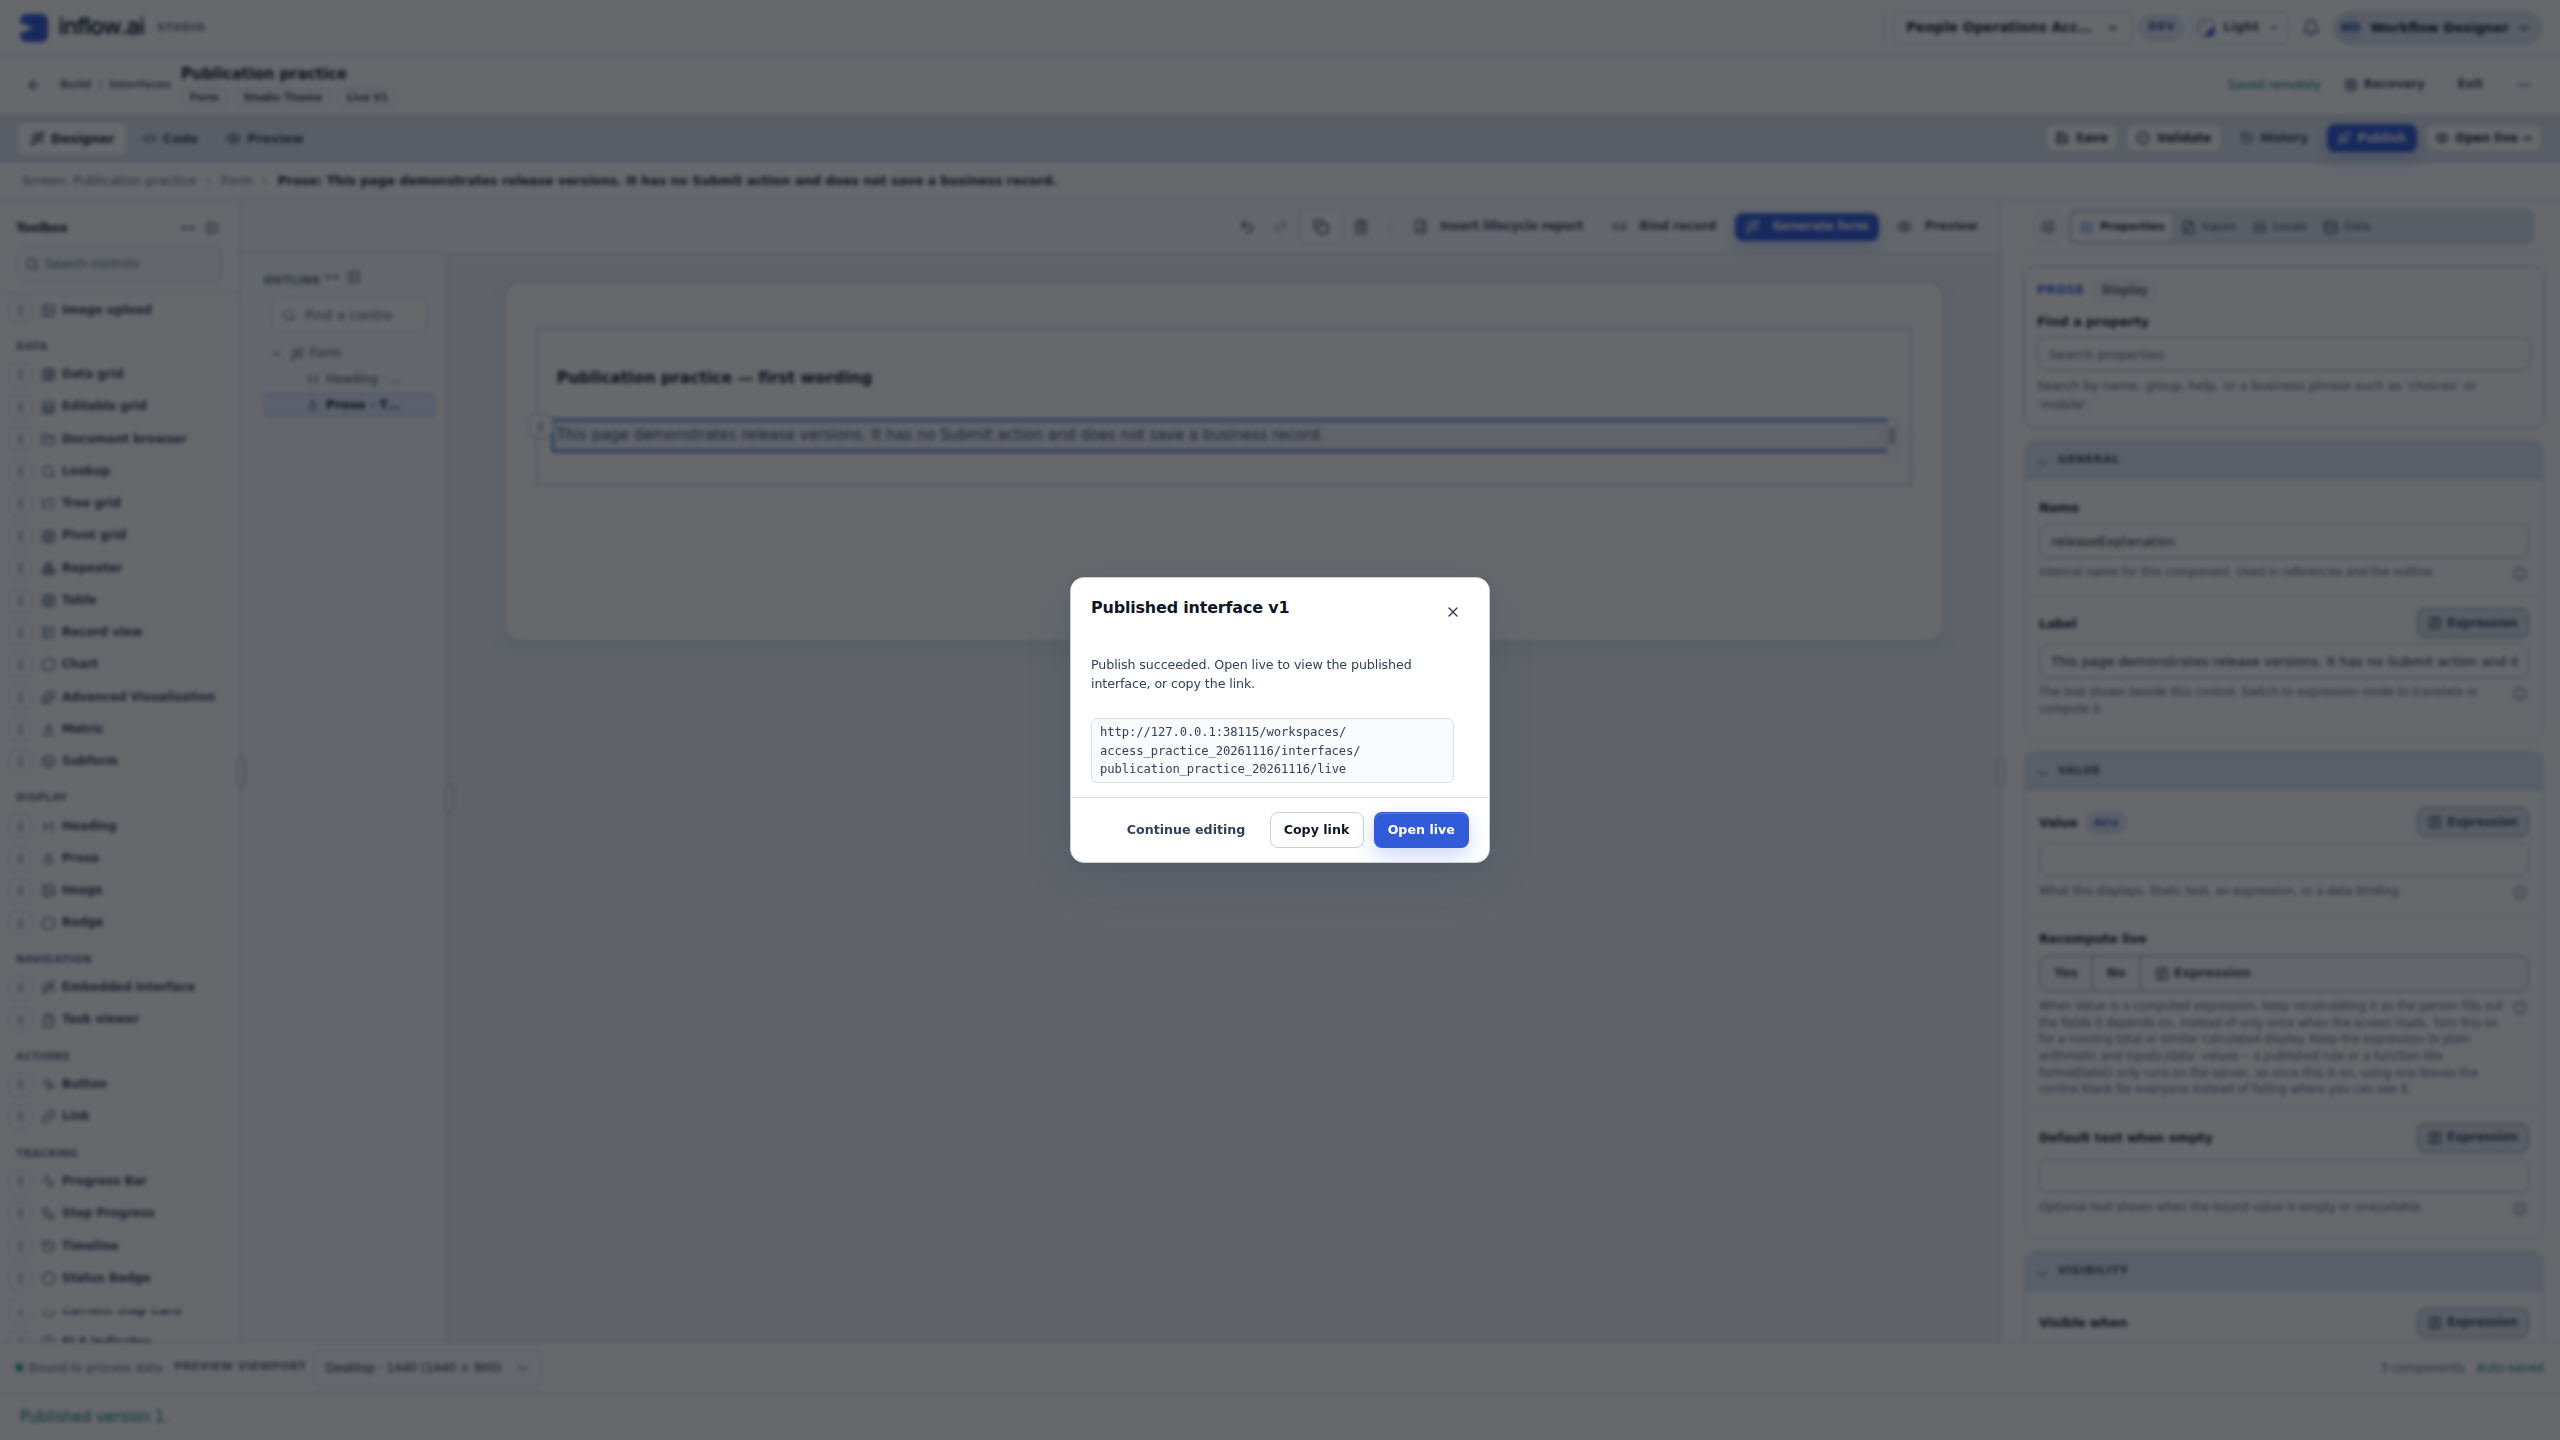
1–2: actual version-1 success and its local training Live link. The link and viewing actions are separate from the completed publication. Open the full-size numbered guide · Open the unchanged full 2560 × 1440 screenshot.
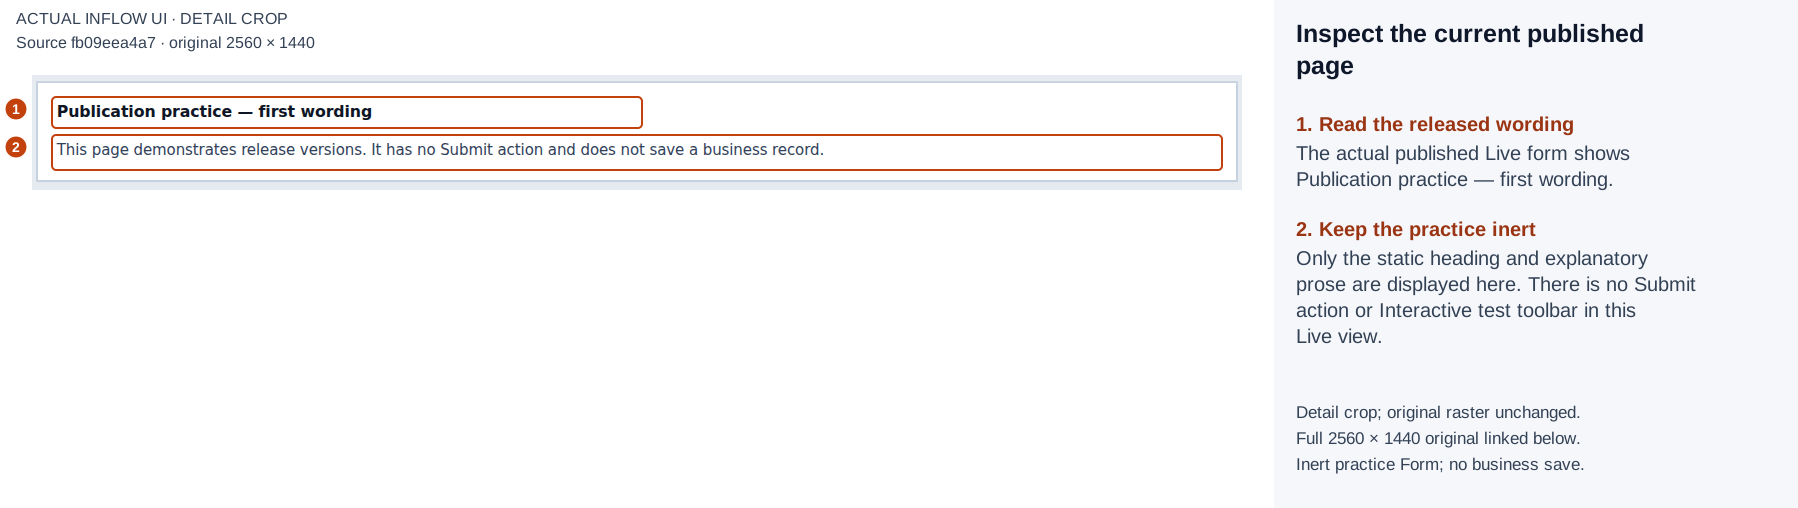
1–2: the current published Live page contains the first wording and inert prose, with no submission action. Open the full-size numbered guide · Open the unchanged full 2560 × 1440 screenshot.
6. Save a different draft without releasing it
- Return to the retained designer tab.
- Select the existing Heading in the outline.
- Change its Label to
Publication practice — revised draft wording. - Leave the field, choose Save, and wait for the saved result. Keep the existing Prose and all other settings unchanged.
- Inspect the header and the Unpublished changes banner shown during this edit. Live V1 still identifies the existing release; it does not mean the revised draft text has been released.
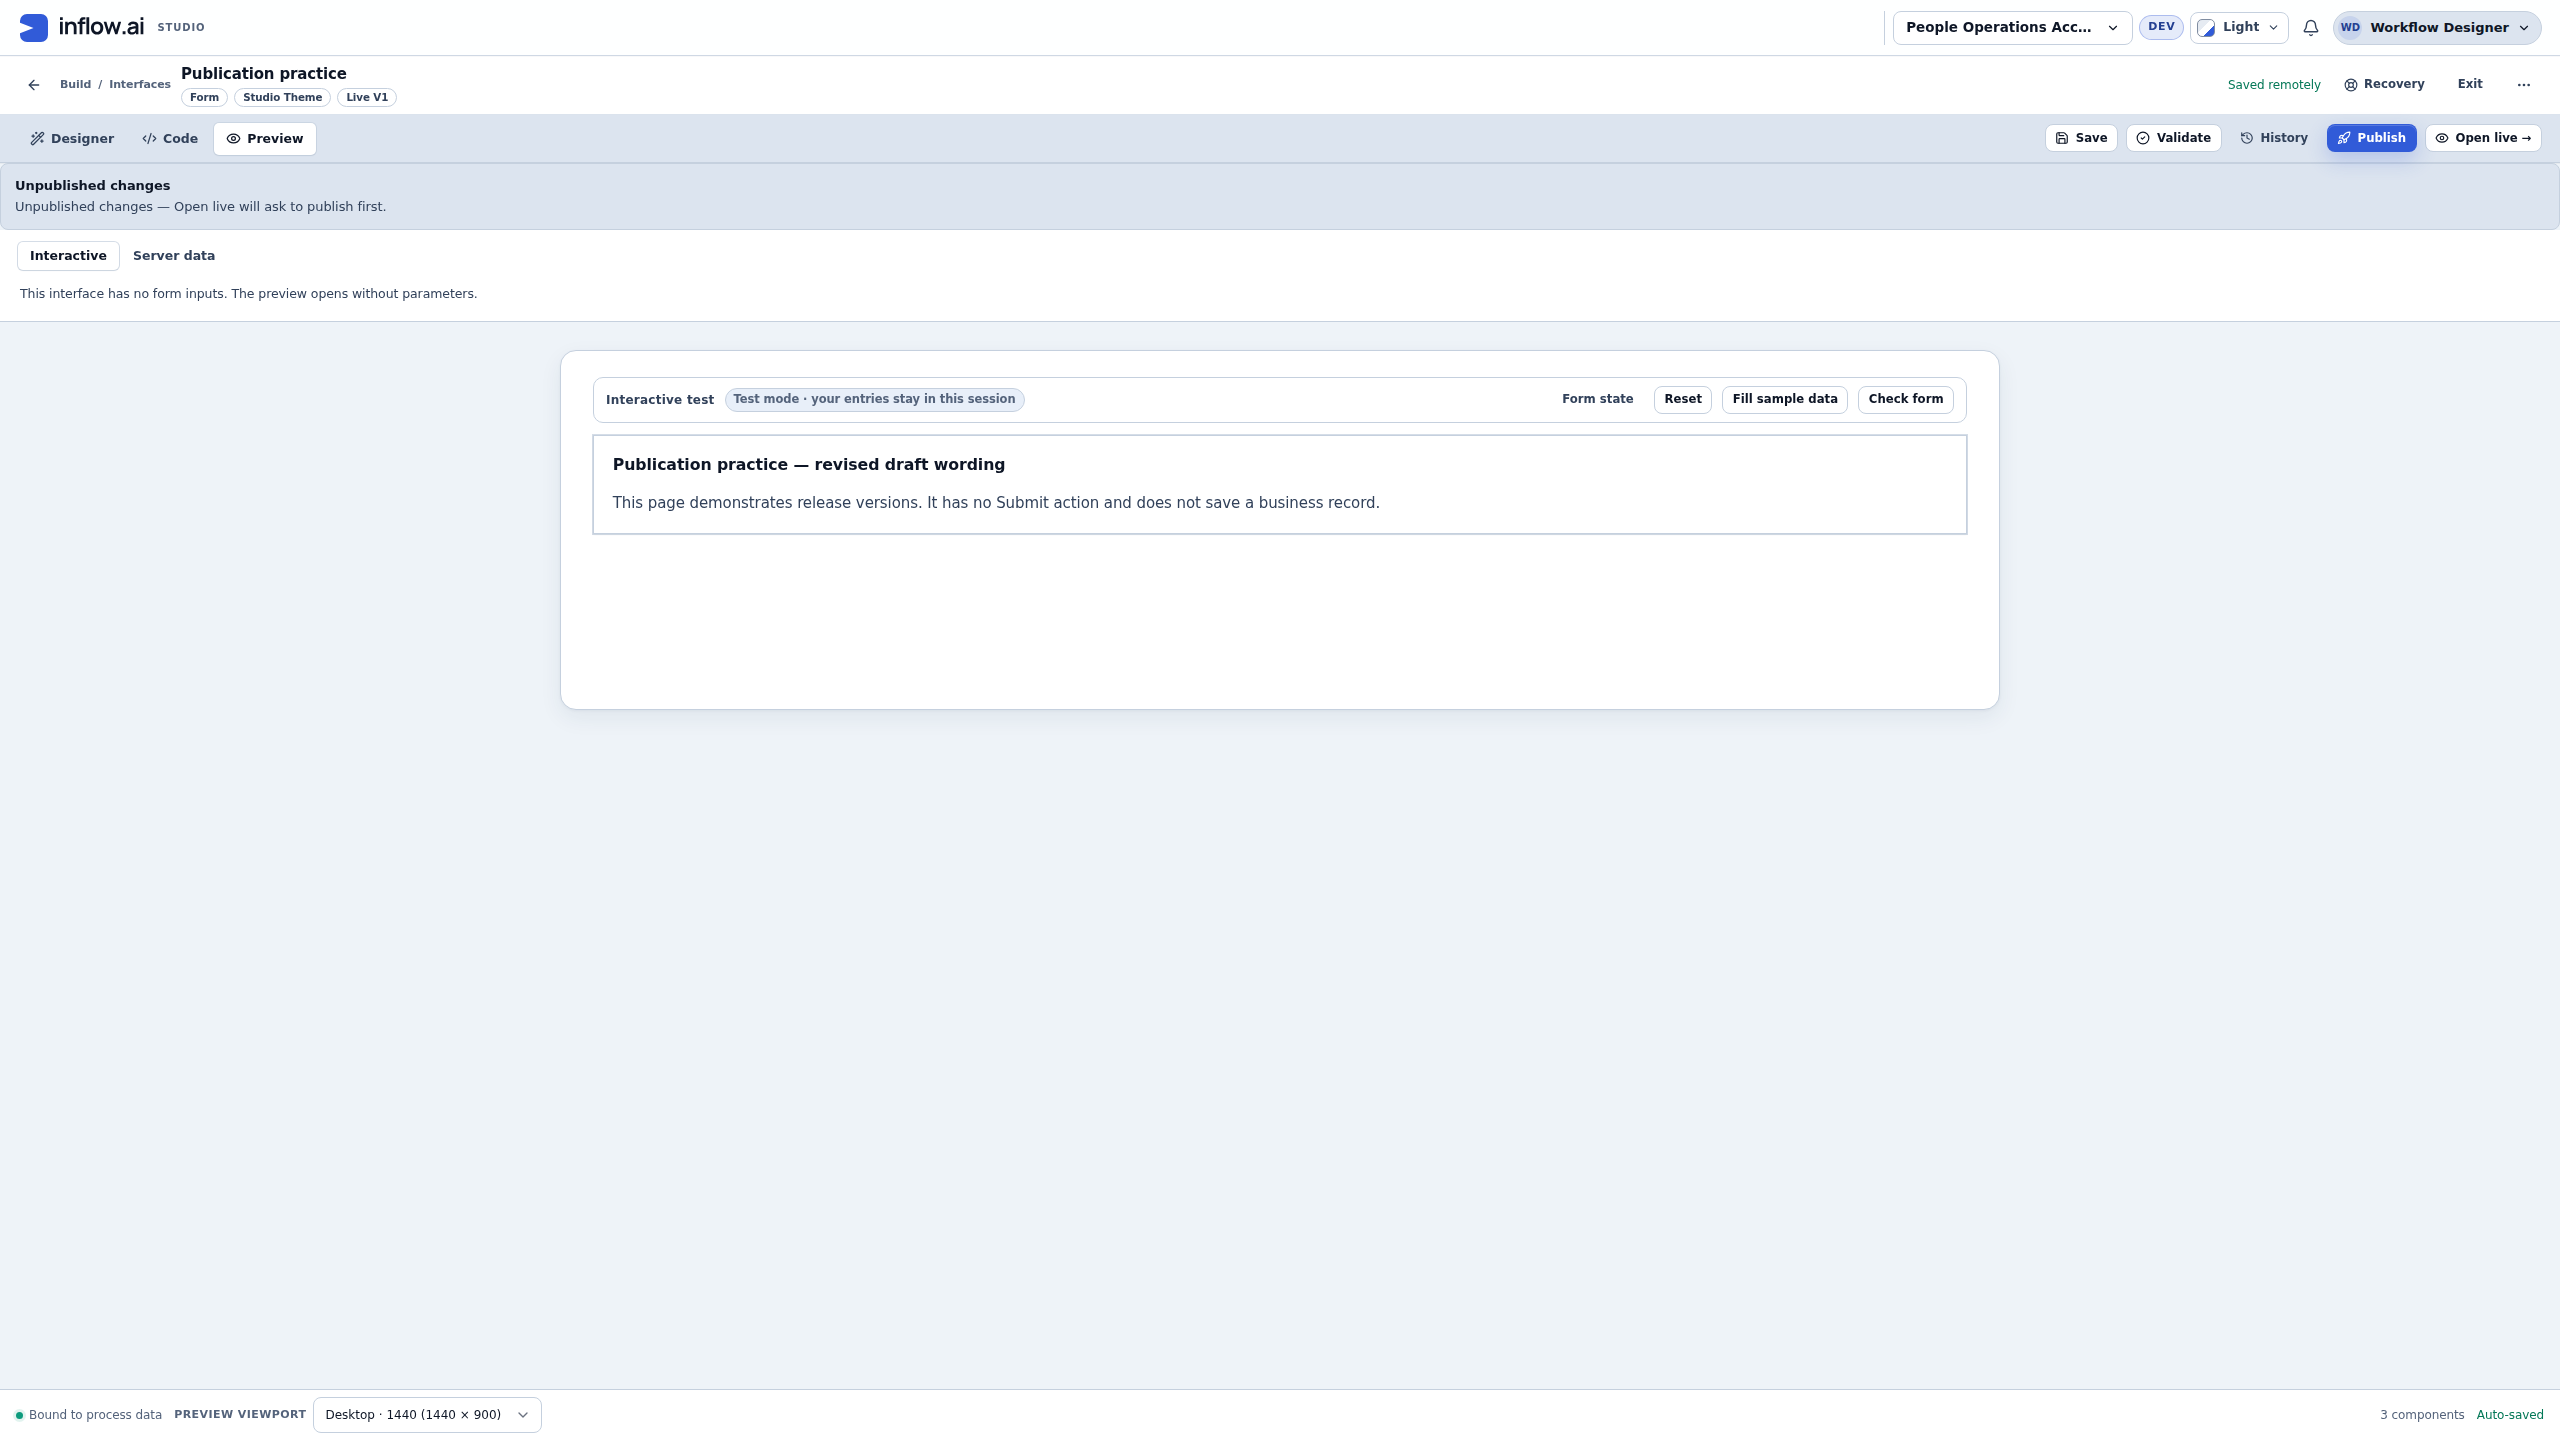
- Open Preview → Interactive. Read the revised wording under the session-only test controls.
In the illustration, this saved edit is draft revision 5. The published version remains 1, with the same first-wording definition and publication time. Preview and Live now intentionally show different wording, so you can see which surface you are checking.
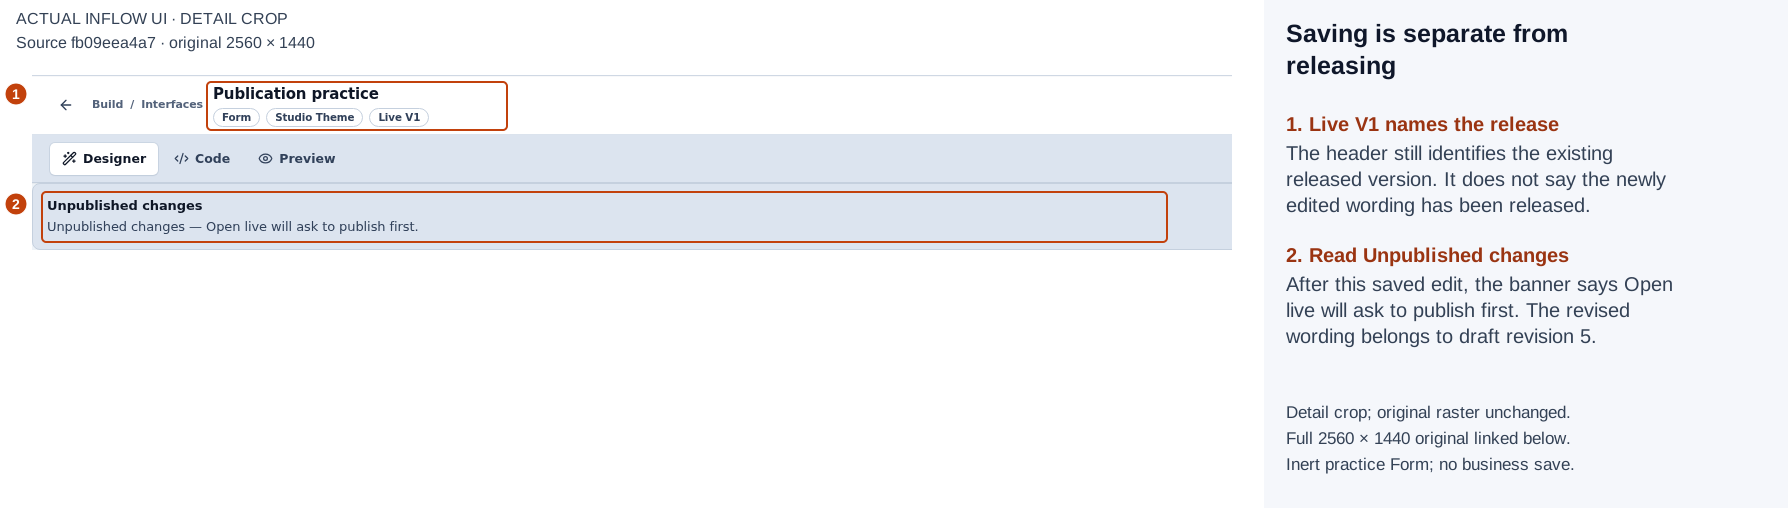
1–2: Live V1 still names the release while the current edit has Unpublished changes. Saving this edit did not publish it. Open the full-size numbered guide · Open the unchanged full 2560 × 1440 screenshot.
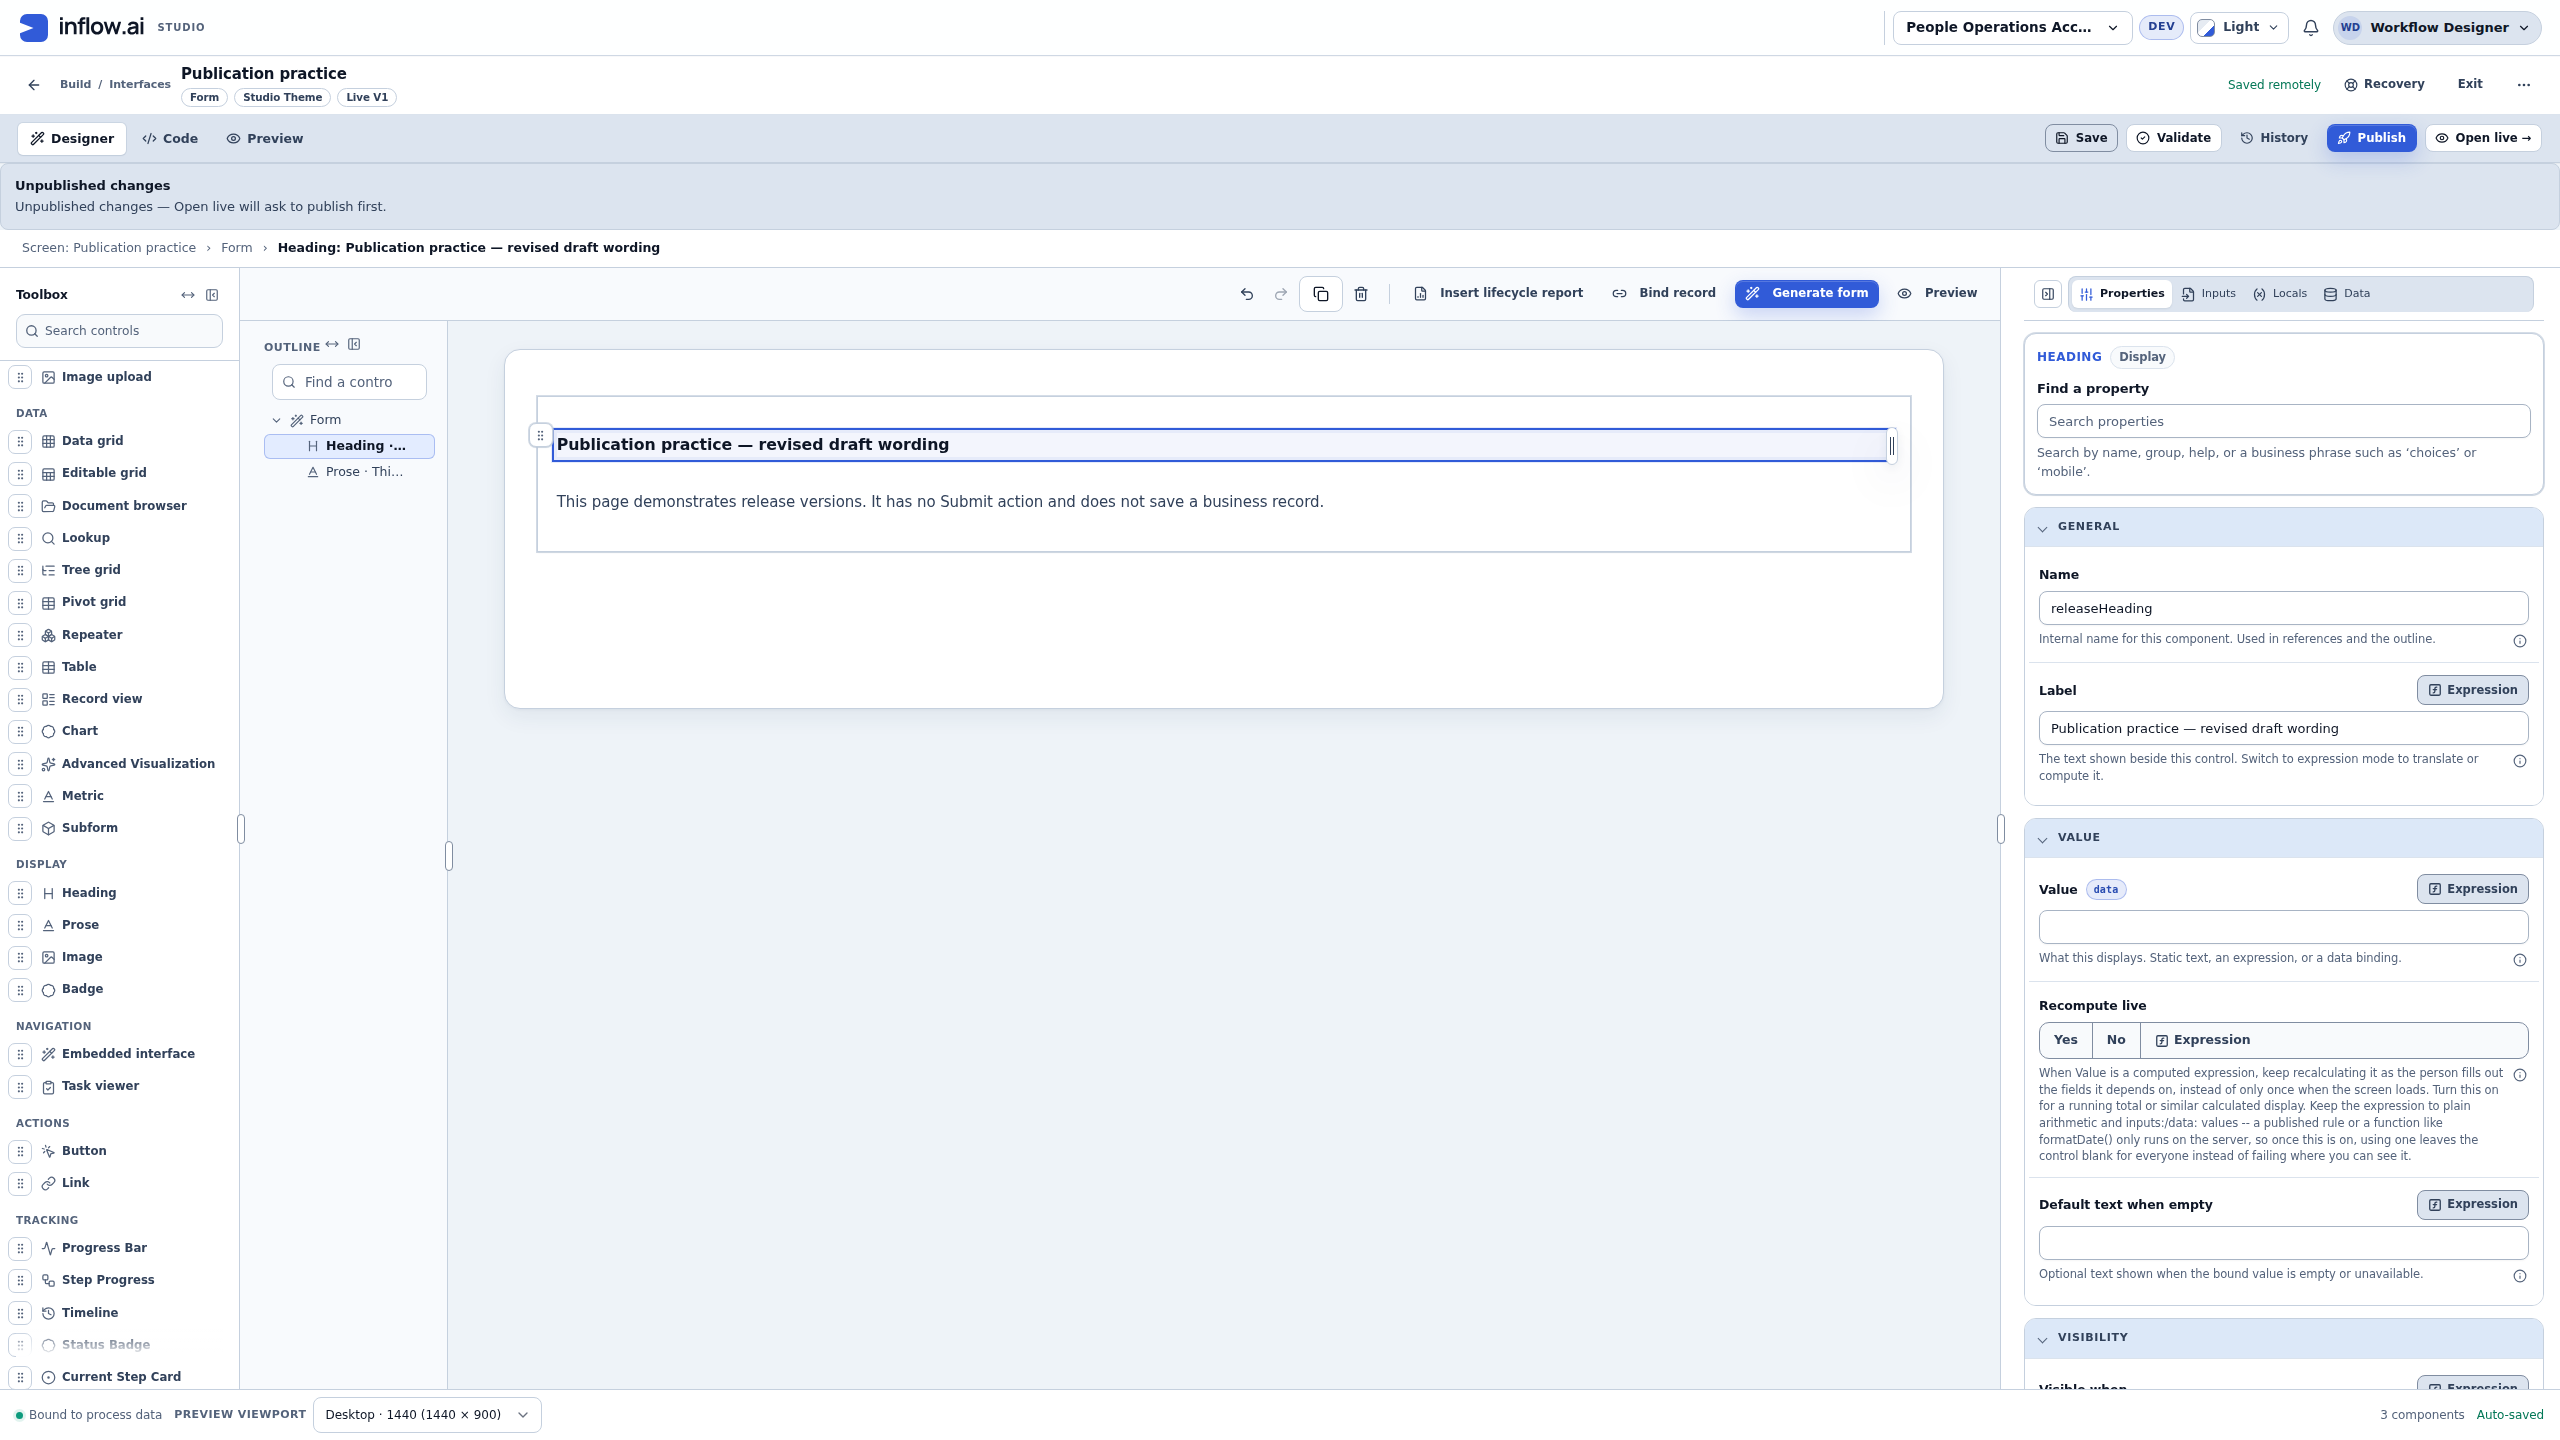
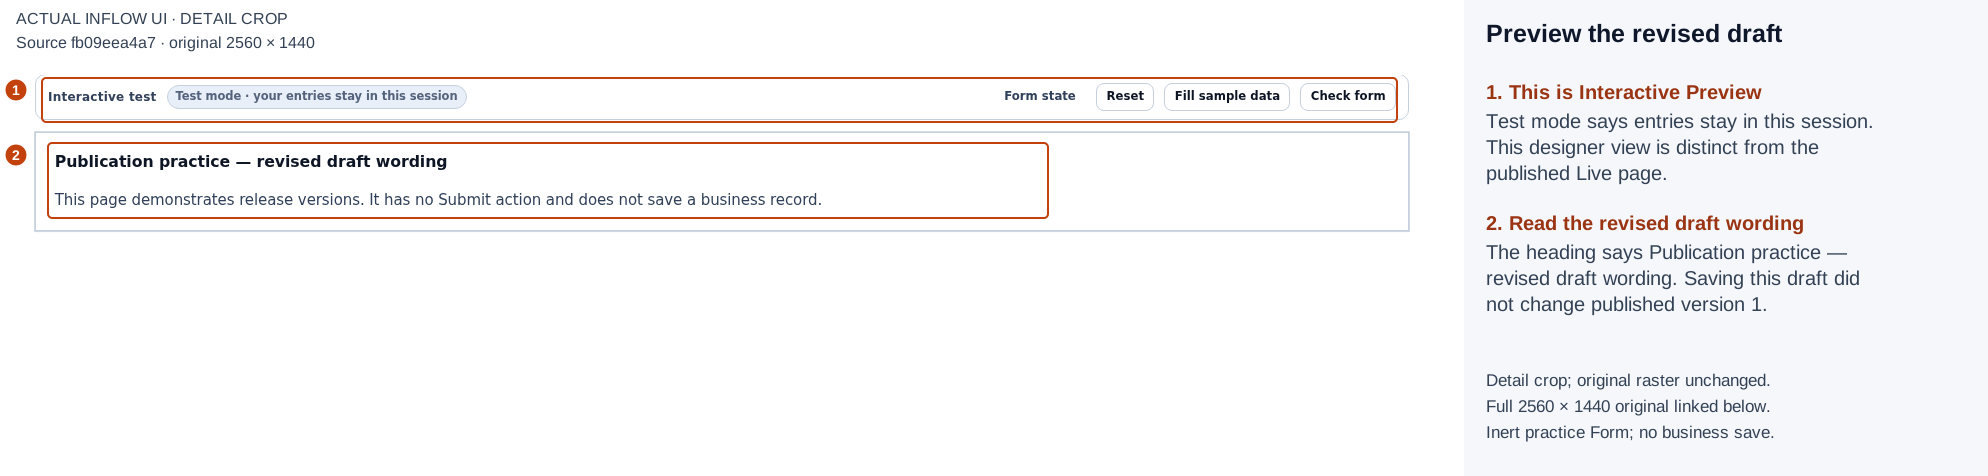
1–2: Interactive Preview displays the revised draft wording. Its test controls identify the authoring surface. Open the full-size numbered guide · Open the unchanged full 2560 × 1440 screenshot.
7. Read Open Live's prompt before confirming anything
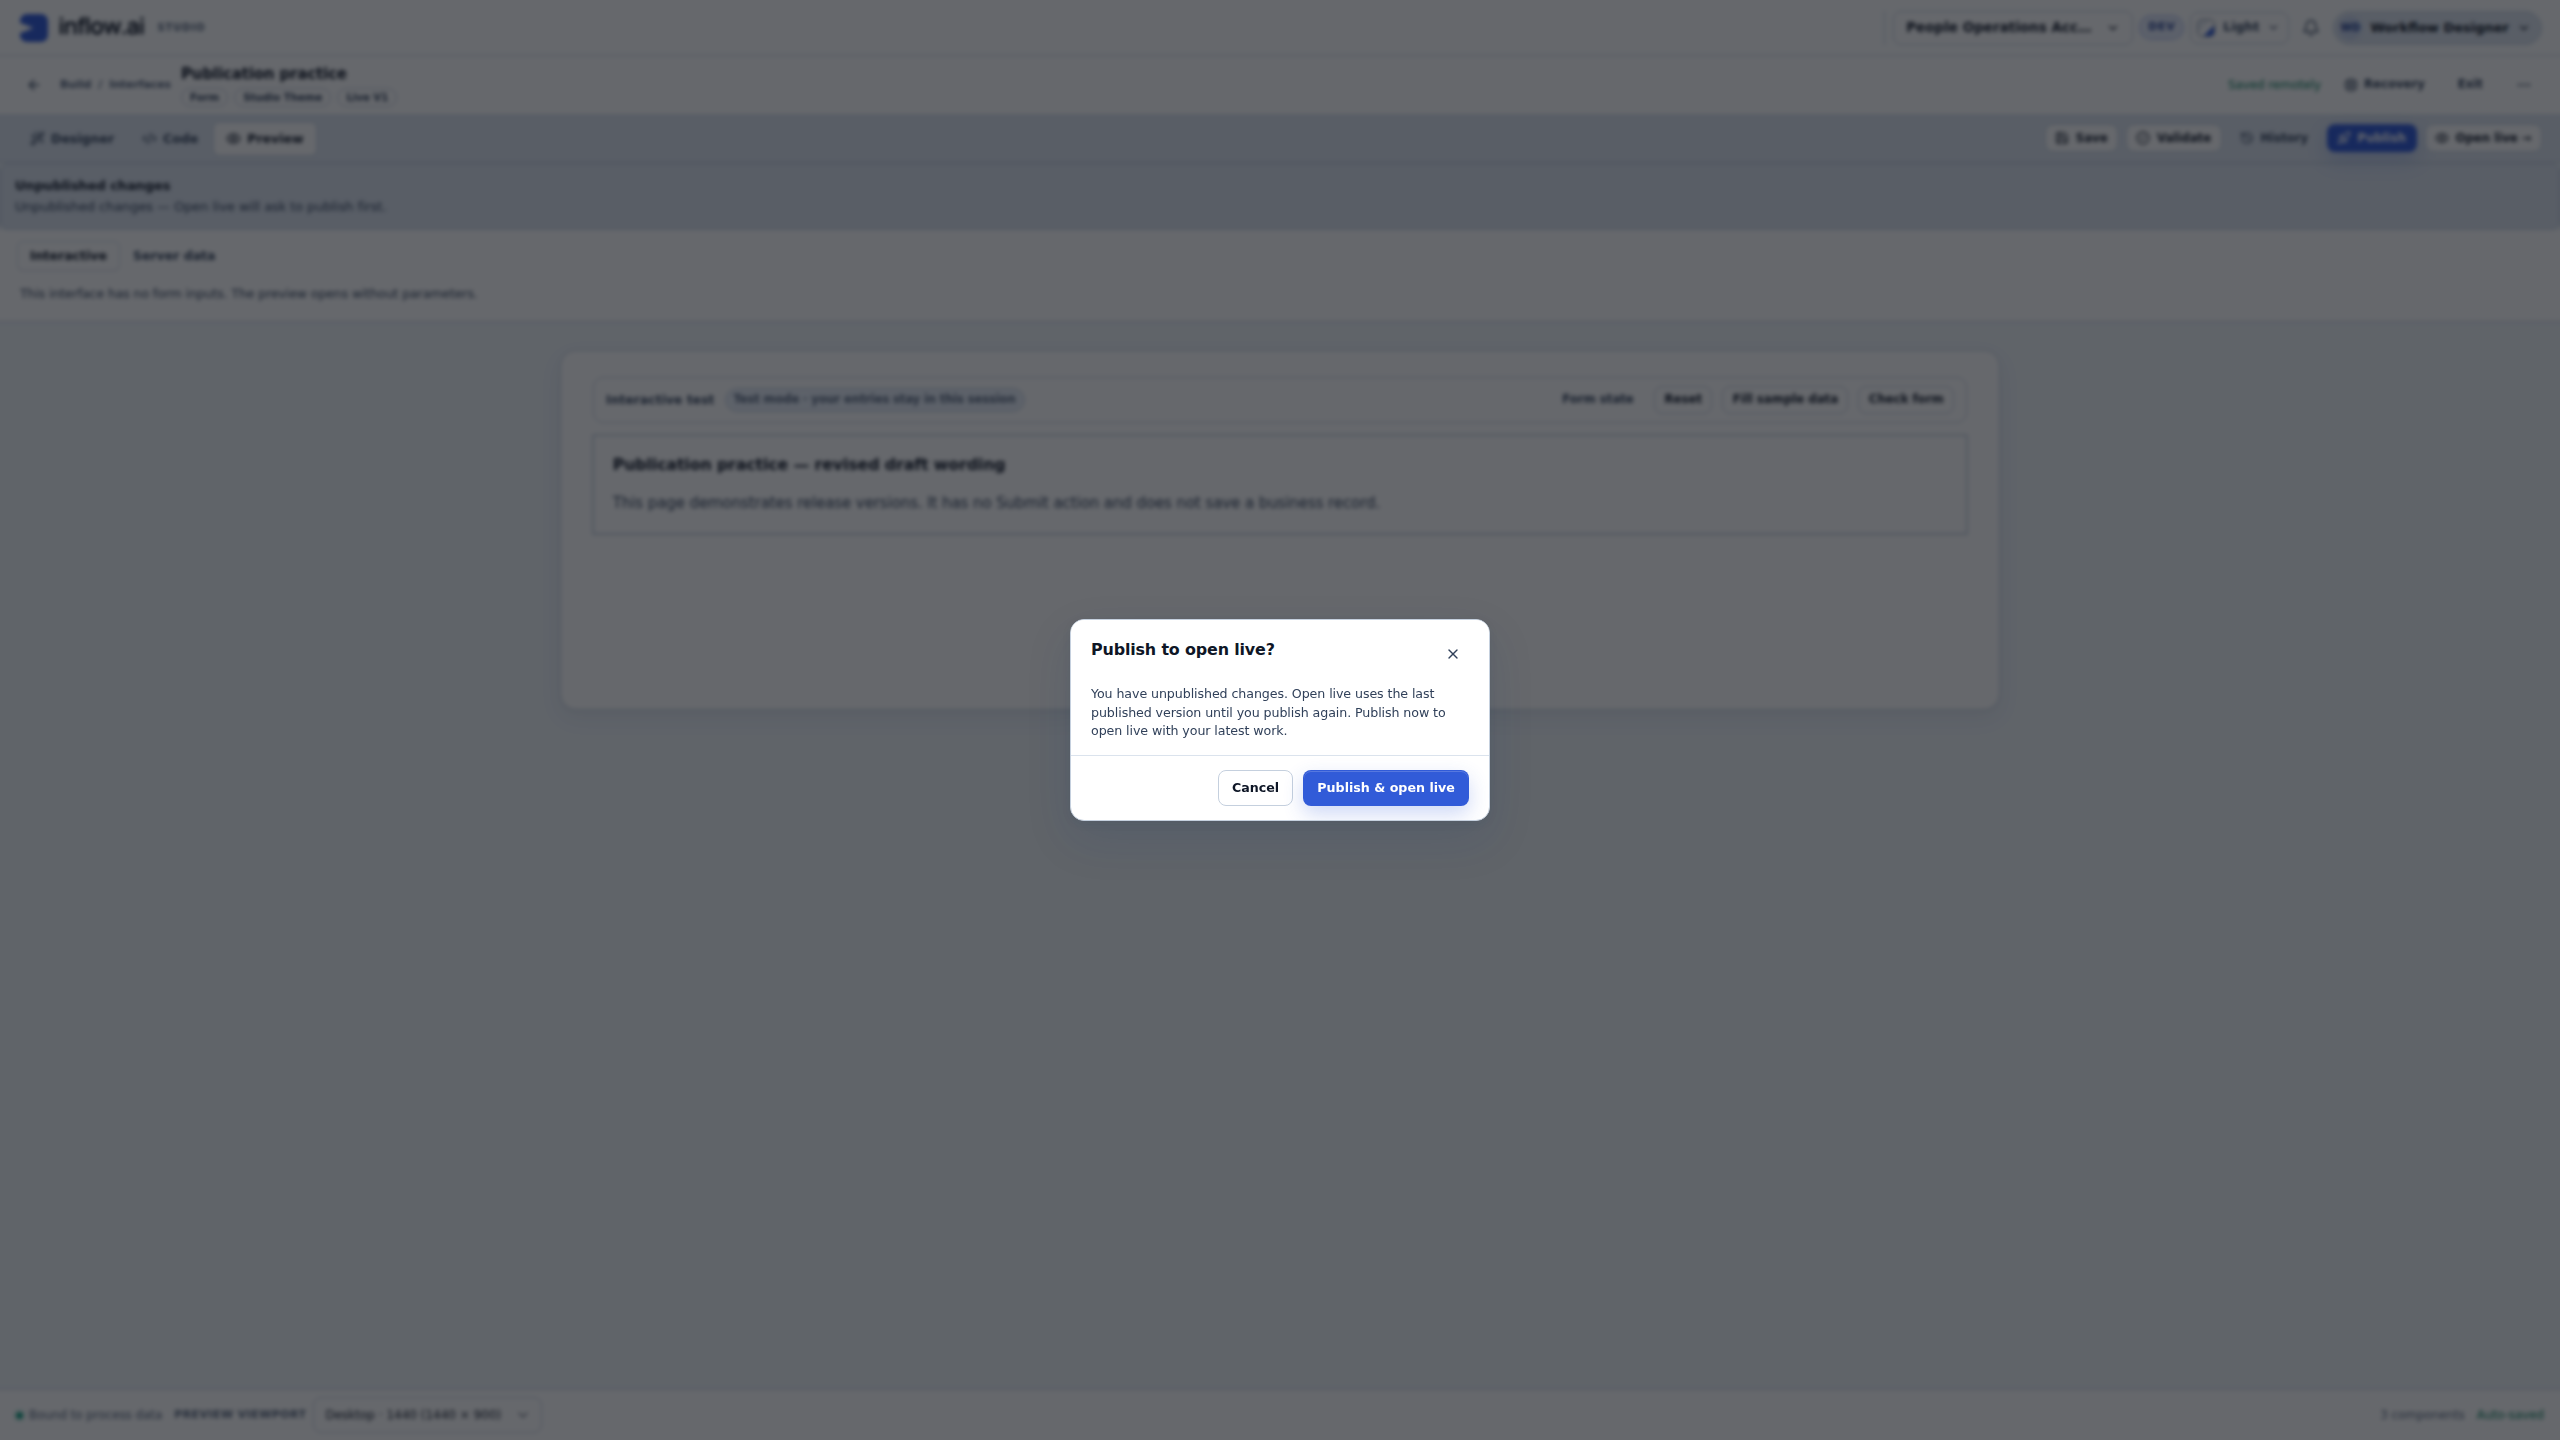
- While this edit's Unpublished changes state is visible, choose the header Open live →.
- Read Publish to open live? and its explanation: Live uses the last published version until you publish again.
- For this comparison, choose Cancel. Do not choose Publish & open live, because the exercise is retaining version 1.
- Return to the existing published-page tab and reload that same Live page.
- Confirm it still shows Publication practice — first wording.
The prompt matters even though the draft was saved: saving and releasing are different decisions. The offered Publish & open live is a consequential confirmation, not a harmless navigation shortcut. Cancel preserves this exercise's existing release and draft.
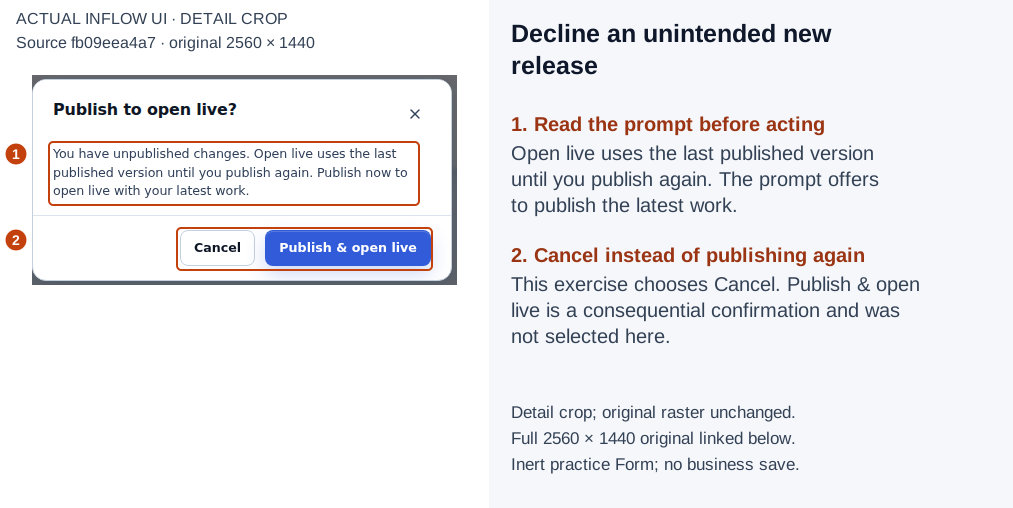
1–2: read the offered publication effect; this exercise chooses Cancel and creates no second release. Open the full-size numbered guide · Open the unchanged full 2560 × 1440 screenshot.
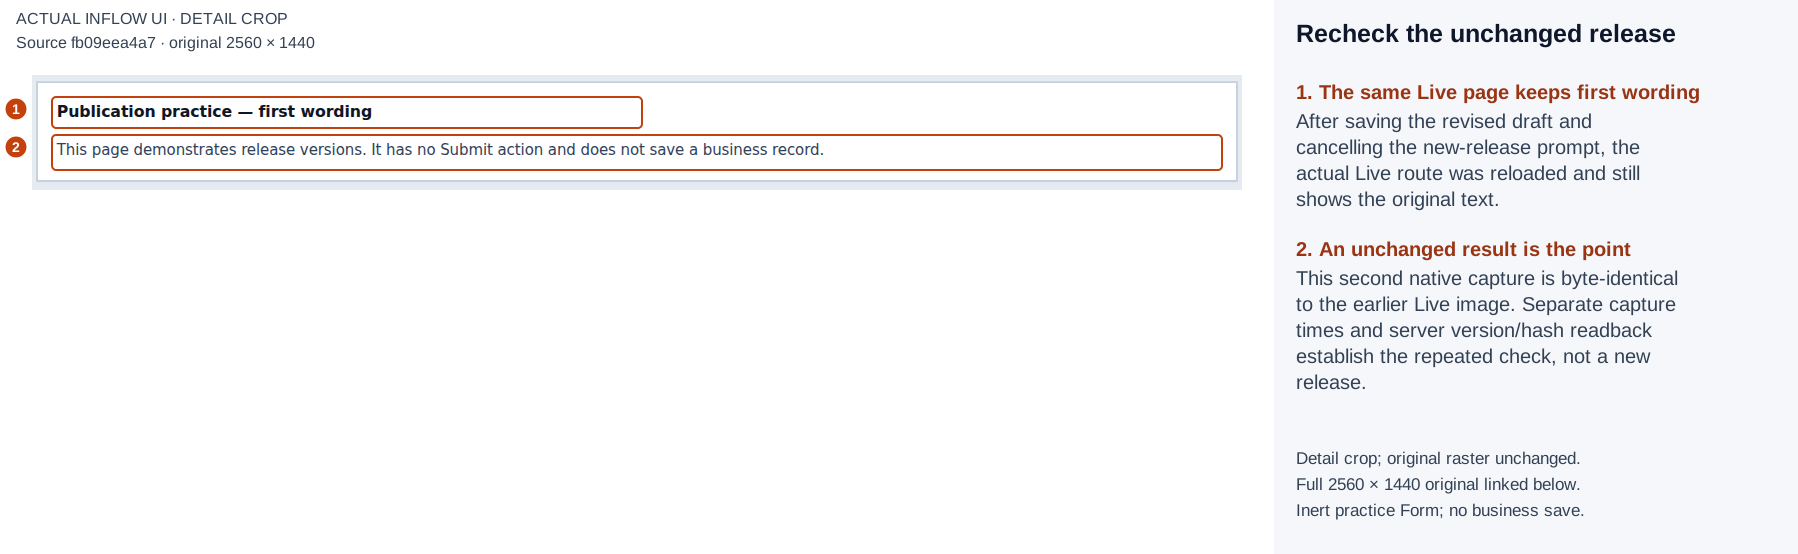
1–2: after reloading the same published page, the first wording is unchanged. This new native capture is byte-identical to the earlier Live image; its separate capture time and unchanged version readback record the repeated check. Open the full-size numbered guide · Open the unchanged full 2560 × 1440 screenshot.
8. Reopen the saved draft and compare again
- Reopen or reload the saved draft through its normal designer route.
- Open Preview → Interactive and read Publication practice — revised draft wording again.
- Compare it with the already checked published page, which still has the first wording.
- Keep the draft saved without publishing another version merely to finish the comparison.
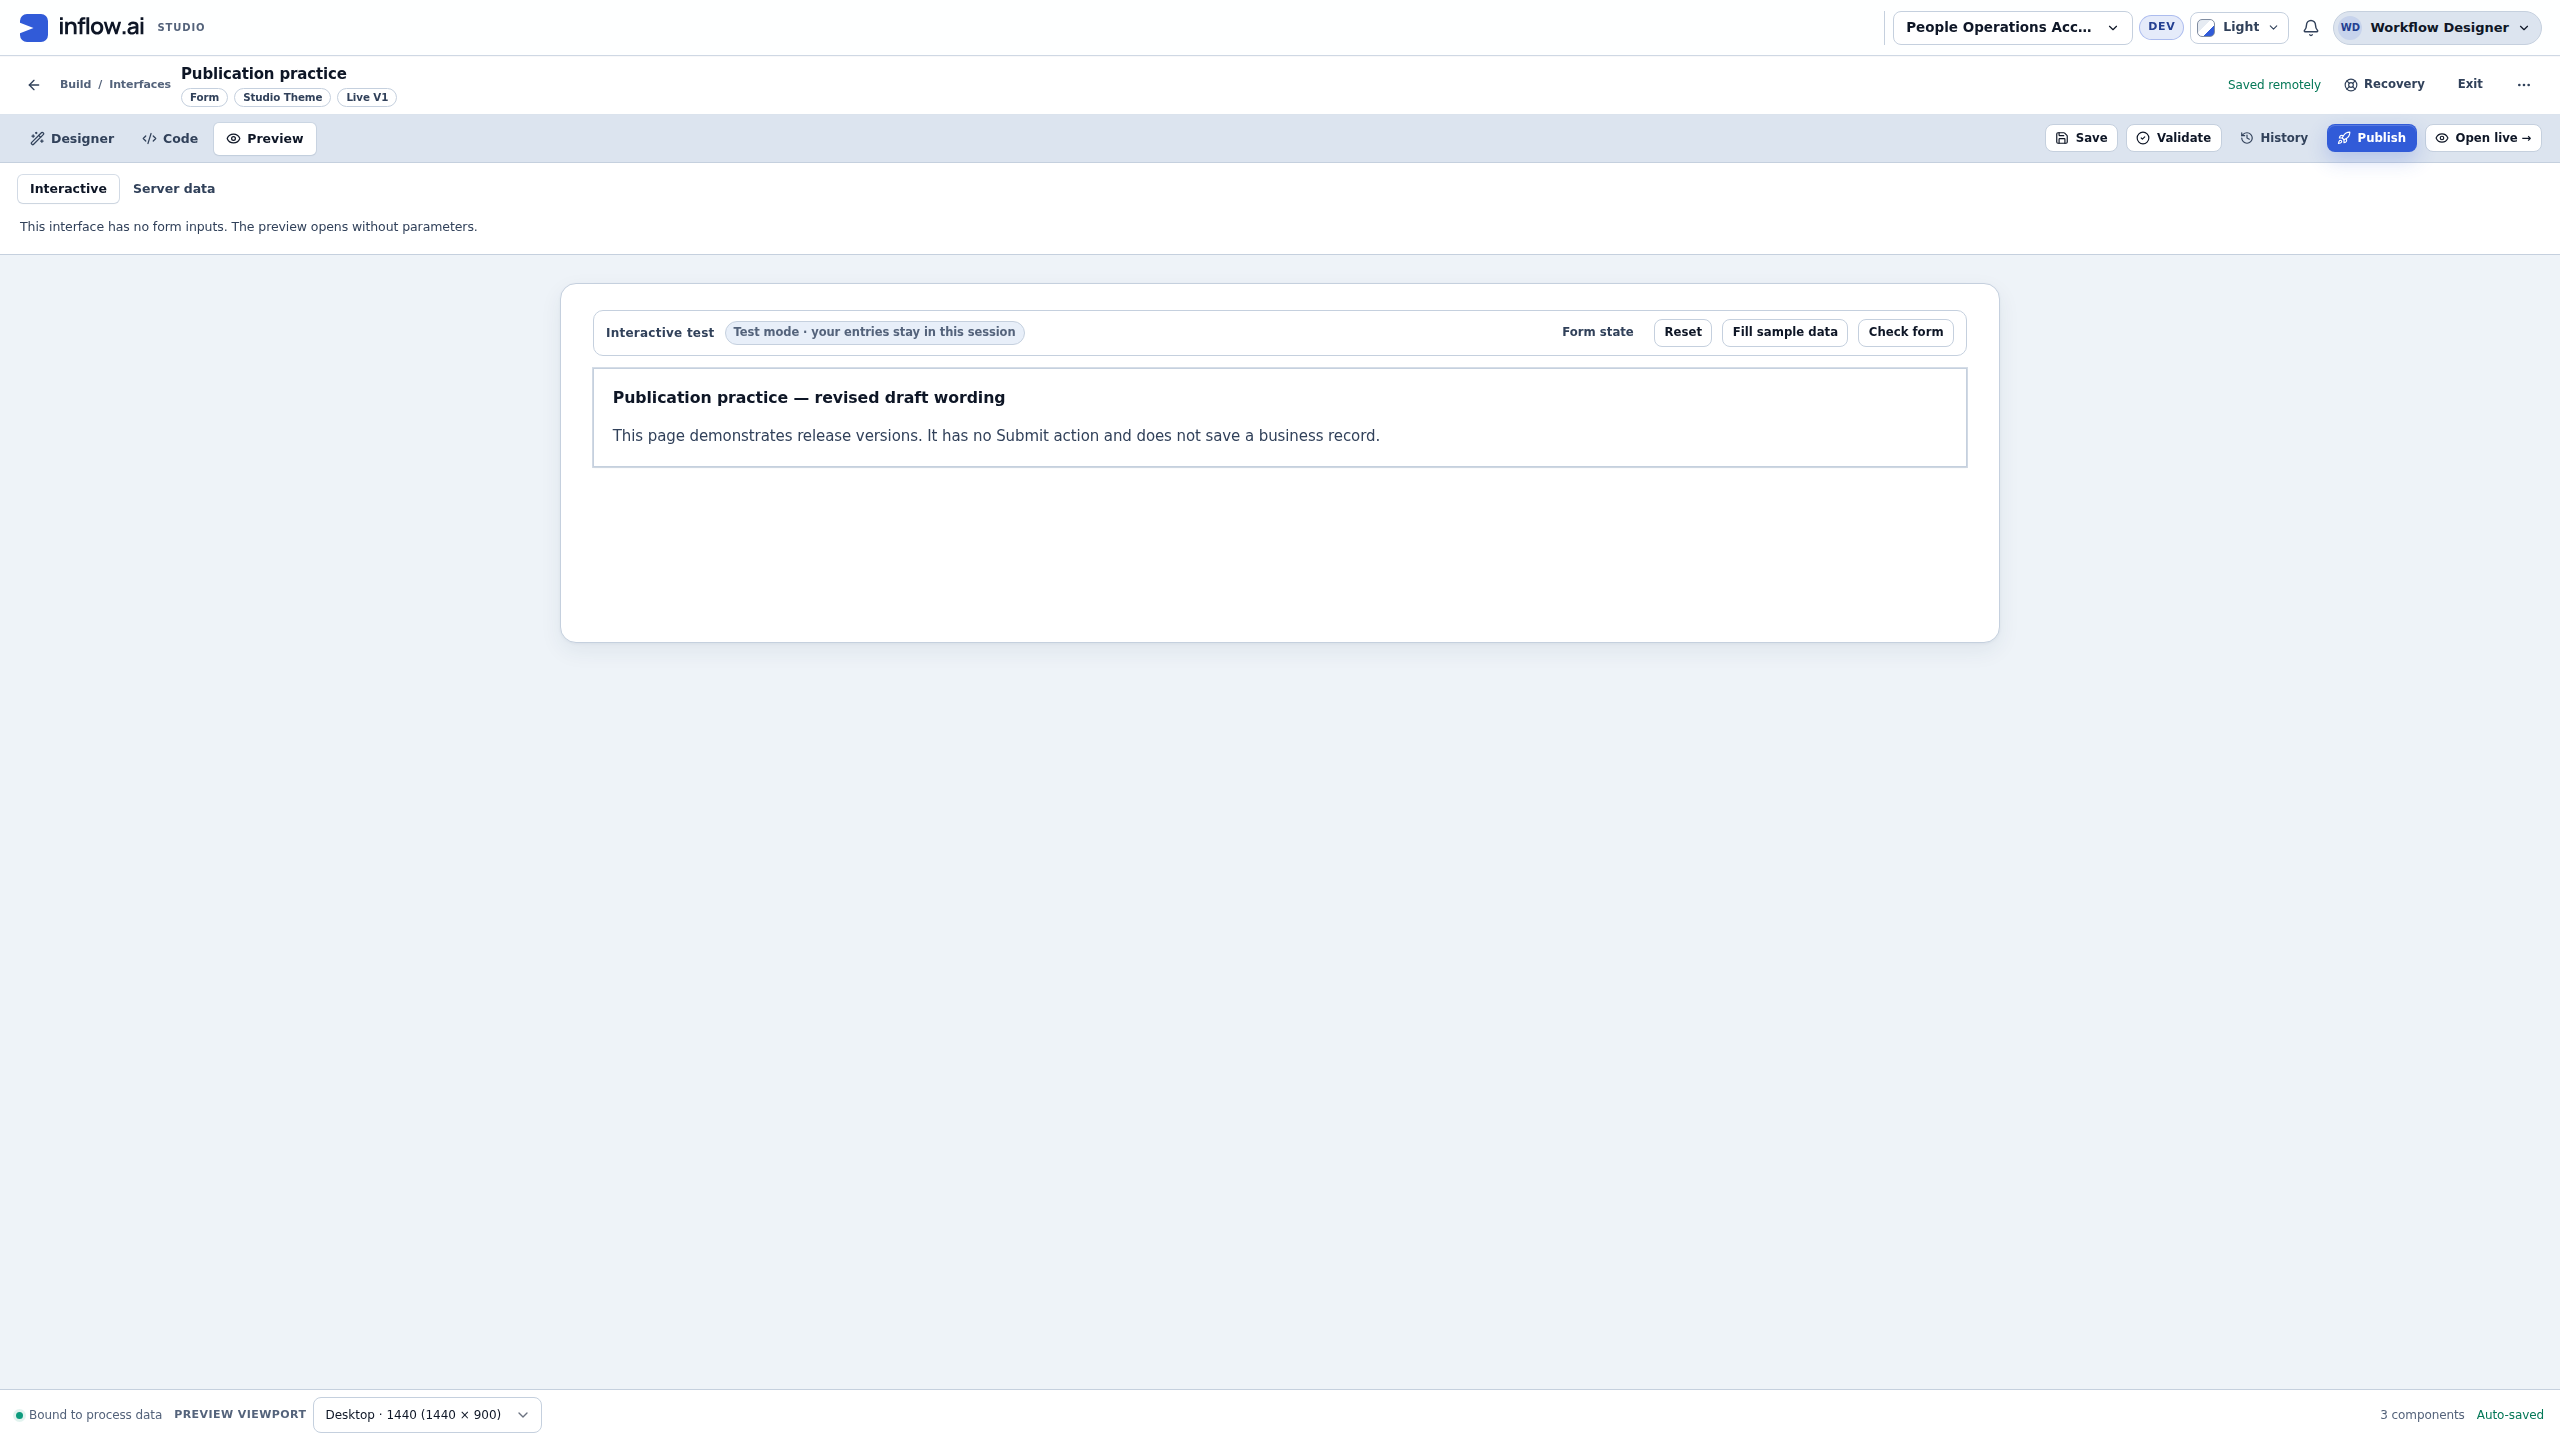
The edit-session Unpublished changes banner shown earlier was absent after this reload. Do not rely on that banner alone to establish what was released. The Preview tab and its test controls still identify the draft, while the actual published link and version identify the release.
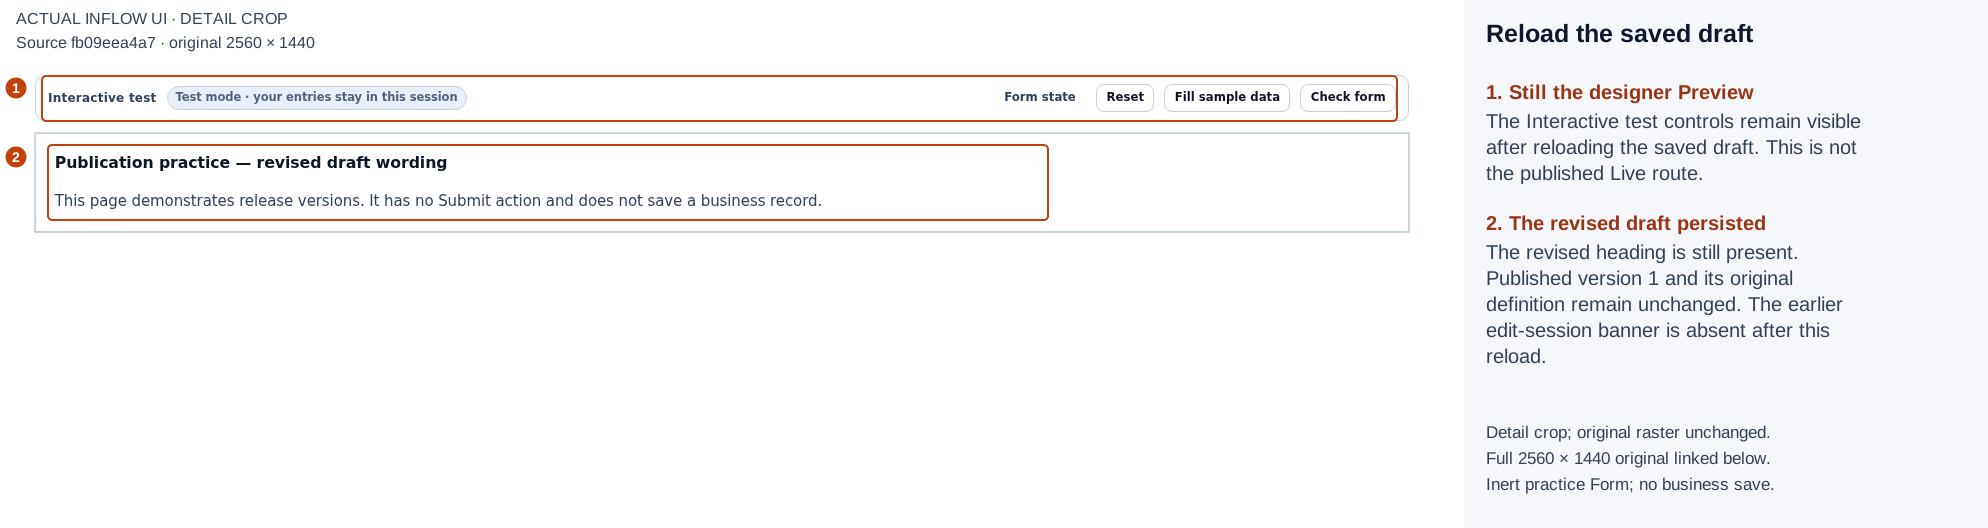
1–2: the revised saved draft survives reload in Interactive Preview. The earlier edit-session banner is absent; the released definition remains version 1. Open the full-size numbered guide · Open the unchanged full 2560 × 1440 screenshot.
Keep the three checkpoints separate
| Checkpoint in this practice | Observed result | What remains a separate check |
|---|---|---|
| Save and Validate | Draft saved; No problems found for the static definition. | Connected actions, employee access and business behavior. |
| Cancel the first ready review | The never-published form remains Not Published. | An intentional final publication. |
| Confirm Publish once | Published interface v1; current version readback is 1. | The actual released page and any business actions it contains. |
| Open the offered Live link | First wording appears on the current released page. | Other users, widths, languages and connected workflow behavior. |
| Save revised wording | Draft revision 5 and Preview show revised wording. | Publishing that edit; this exercise deliberately does not. |
| Cancel Publish & open live, then reload the existing Live page | Version 1 still shows first wording. | Any future intended release. |
The capture ended with published version 1 unchanged and draft revision 5 saved. Earlier tracking and choice-practice drafts remained revisions 9 and 6. No successful business save, employee access or manager approval is claimed. Continue to the connected intake example only when its separate destination, rule and authorization prerequisites are actually ready.
Example 1: generate a separate Leave request intake form
Nadia already has the small Leave request practice form from Create your first form. Keep that work. For this exercise, create a separate Form called Leave request intake in People Operations → Leave management. If that form already exists, inspect and reuse it instead of creating another copy.
The data owner has published Leave management → Leave request, made it live at Training PostgreSQL, and prepared its generated create rule. These are prerequisites, not results of pressing Generate. See Publish and make the teaching model live for that preparation.
Choose the operation and destination
Repeating this lesson: if Leave request intake already has the matching generated sections, field bindings and Submit automation, inspect and retain them. Skip the generation and application steps below and continue at Try missing and valid answers in Interactive Preview. Do not insert another copy of the layout or replace later edits merely to repeat the exercise. Generate only a new empty draft, or an intentional change whose effects you have reviewed.
- Open Leave request intake in Designer and confirm its workspace and title. Continue generating only if this is the new empty draft or an intended reviewed change.
- Choose Generate form. The initial pattern may be Browse & search list; deliberately choose Create record, then Next.
- On Connect data, keep Leave request intake as the Title. Selecting a destination may suggest a different title, so check it again.
- In Create destination, select Leave management · Leave request · Training PostgreSQL. Check the complete model, record type and connection, not just a familiar word.
- Read the destination explanation and the governed Create fields. This example has nine fields: seven required and two optional. Required does not mean the application has already supplied a value.
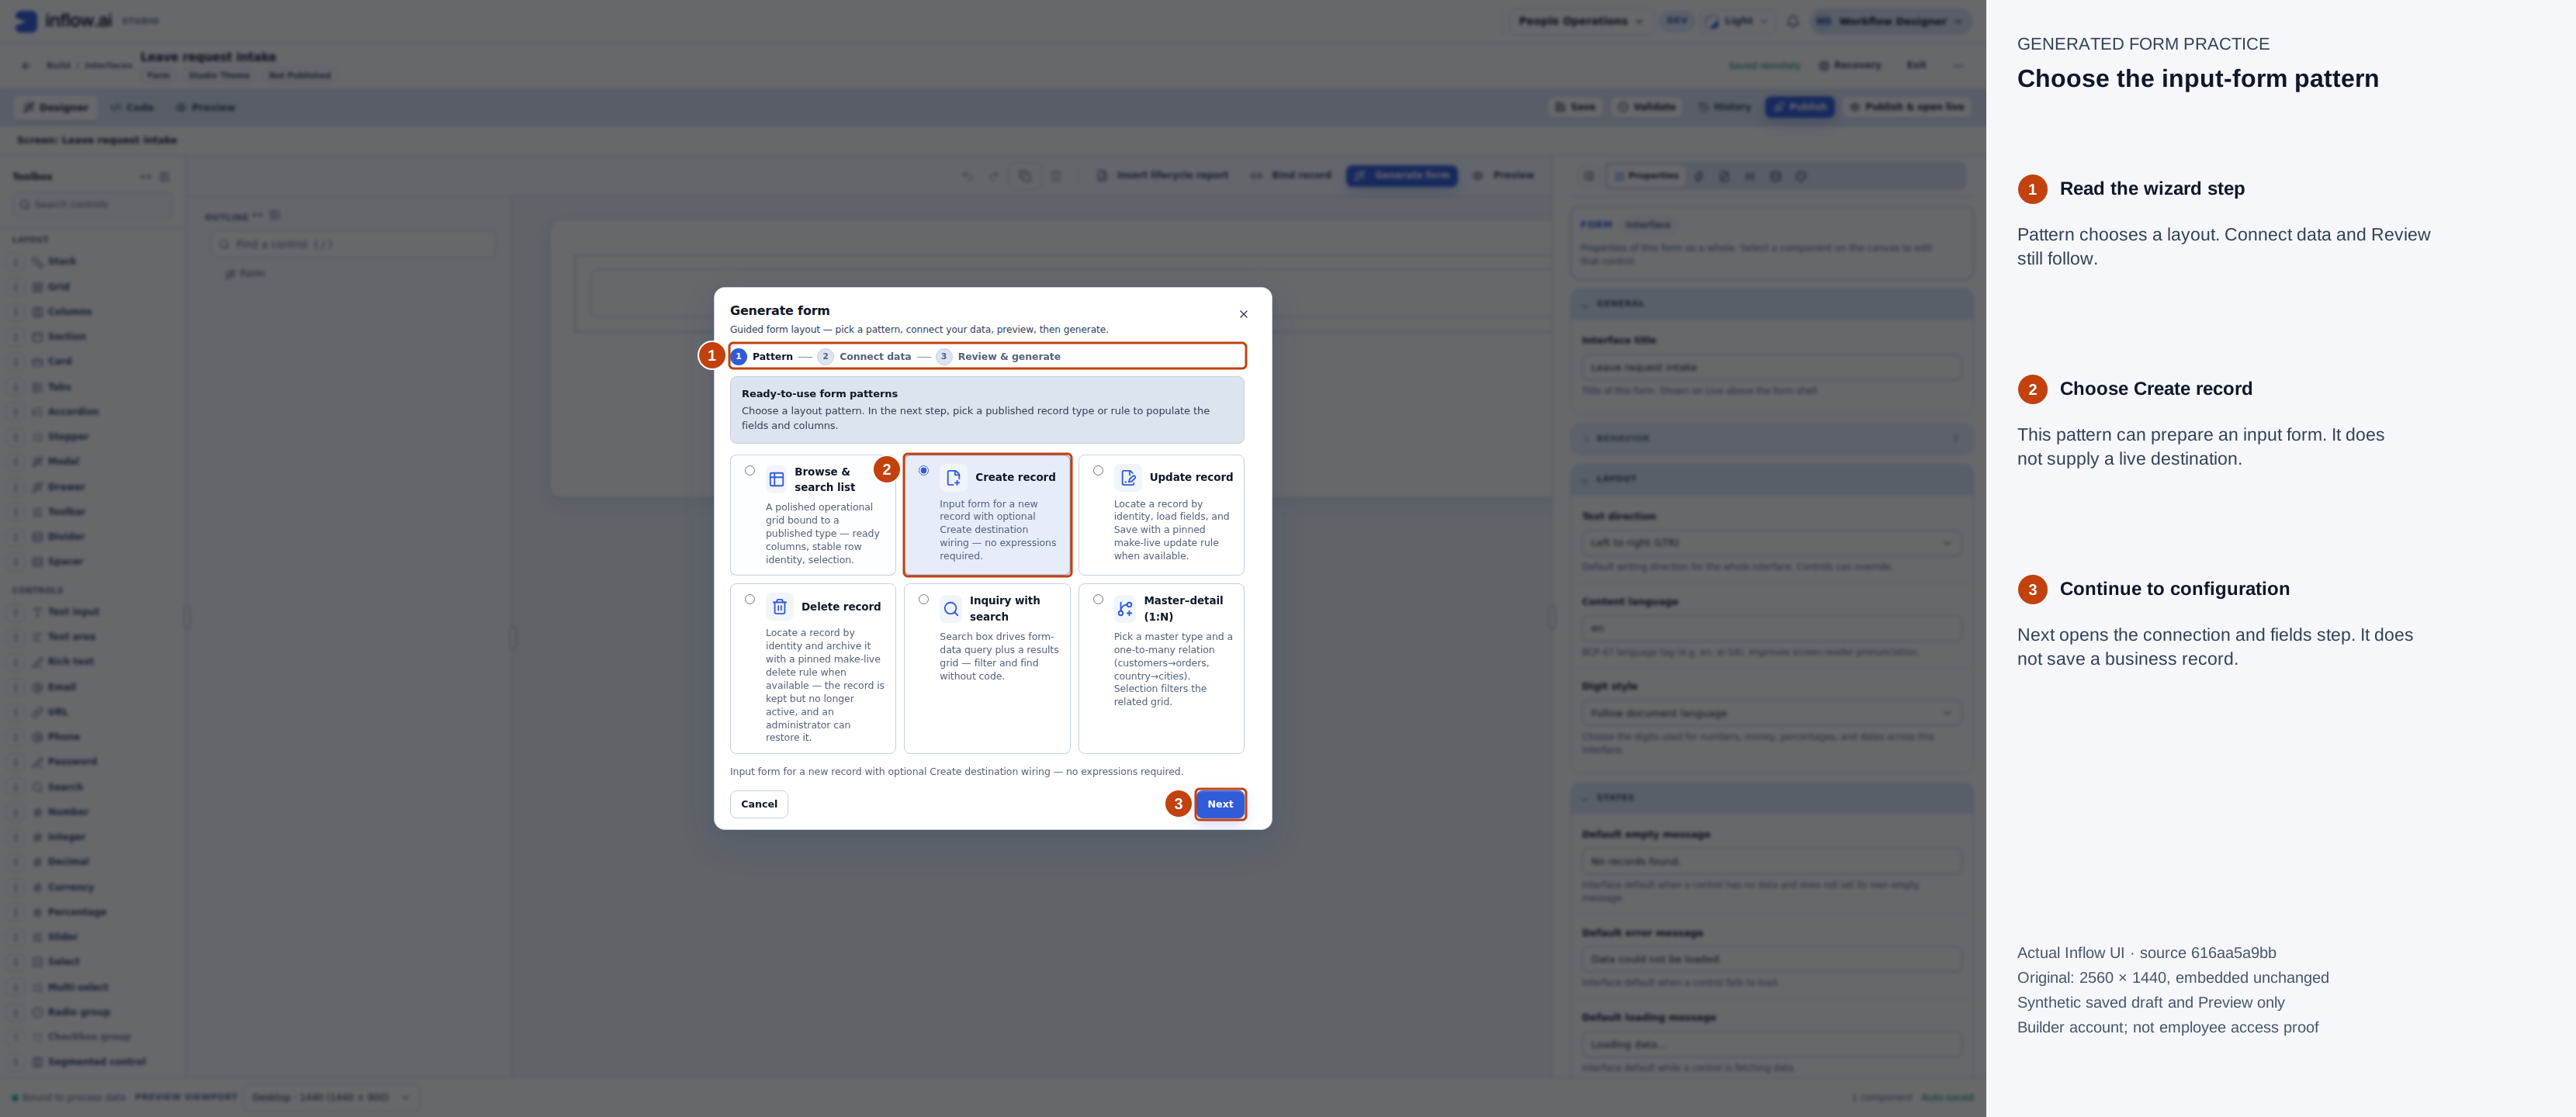
- Pattern is the first wizard step; data connection and review follow.
- Create record is the chosen input-form layout. Select the actual destination on Connect data; the layout choice does not provide one.
- Next opens configuration. It does not submit a form or create a record.
Actual 15 November practice capture. Full-size numbered guide · Unchanged original. Choosing a pattern does not create a record.
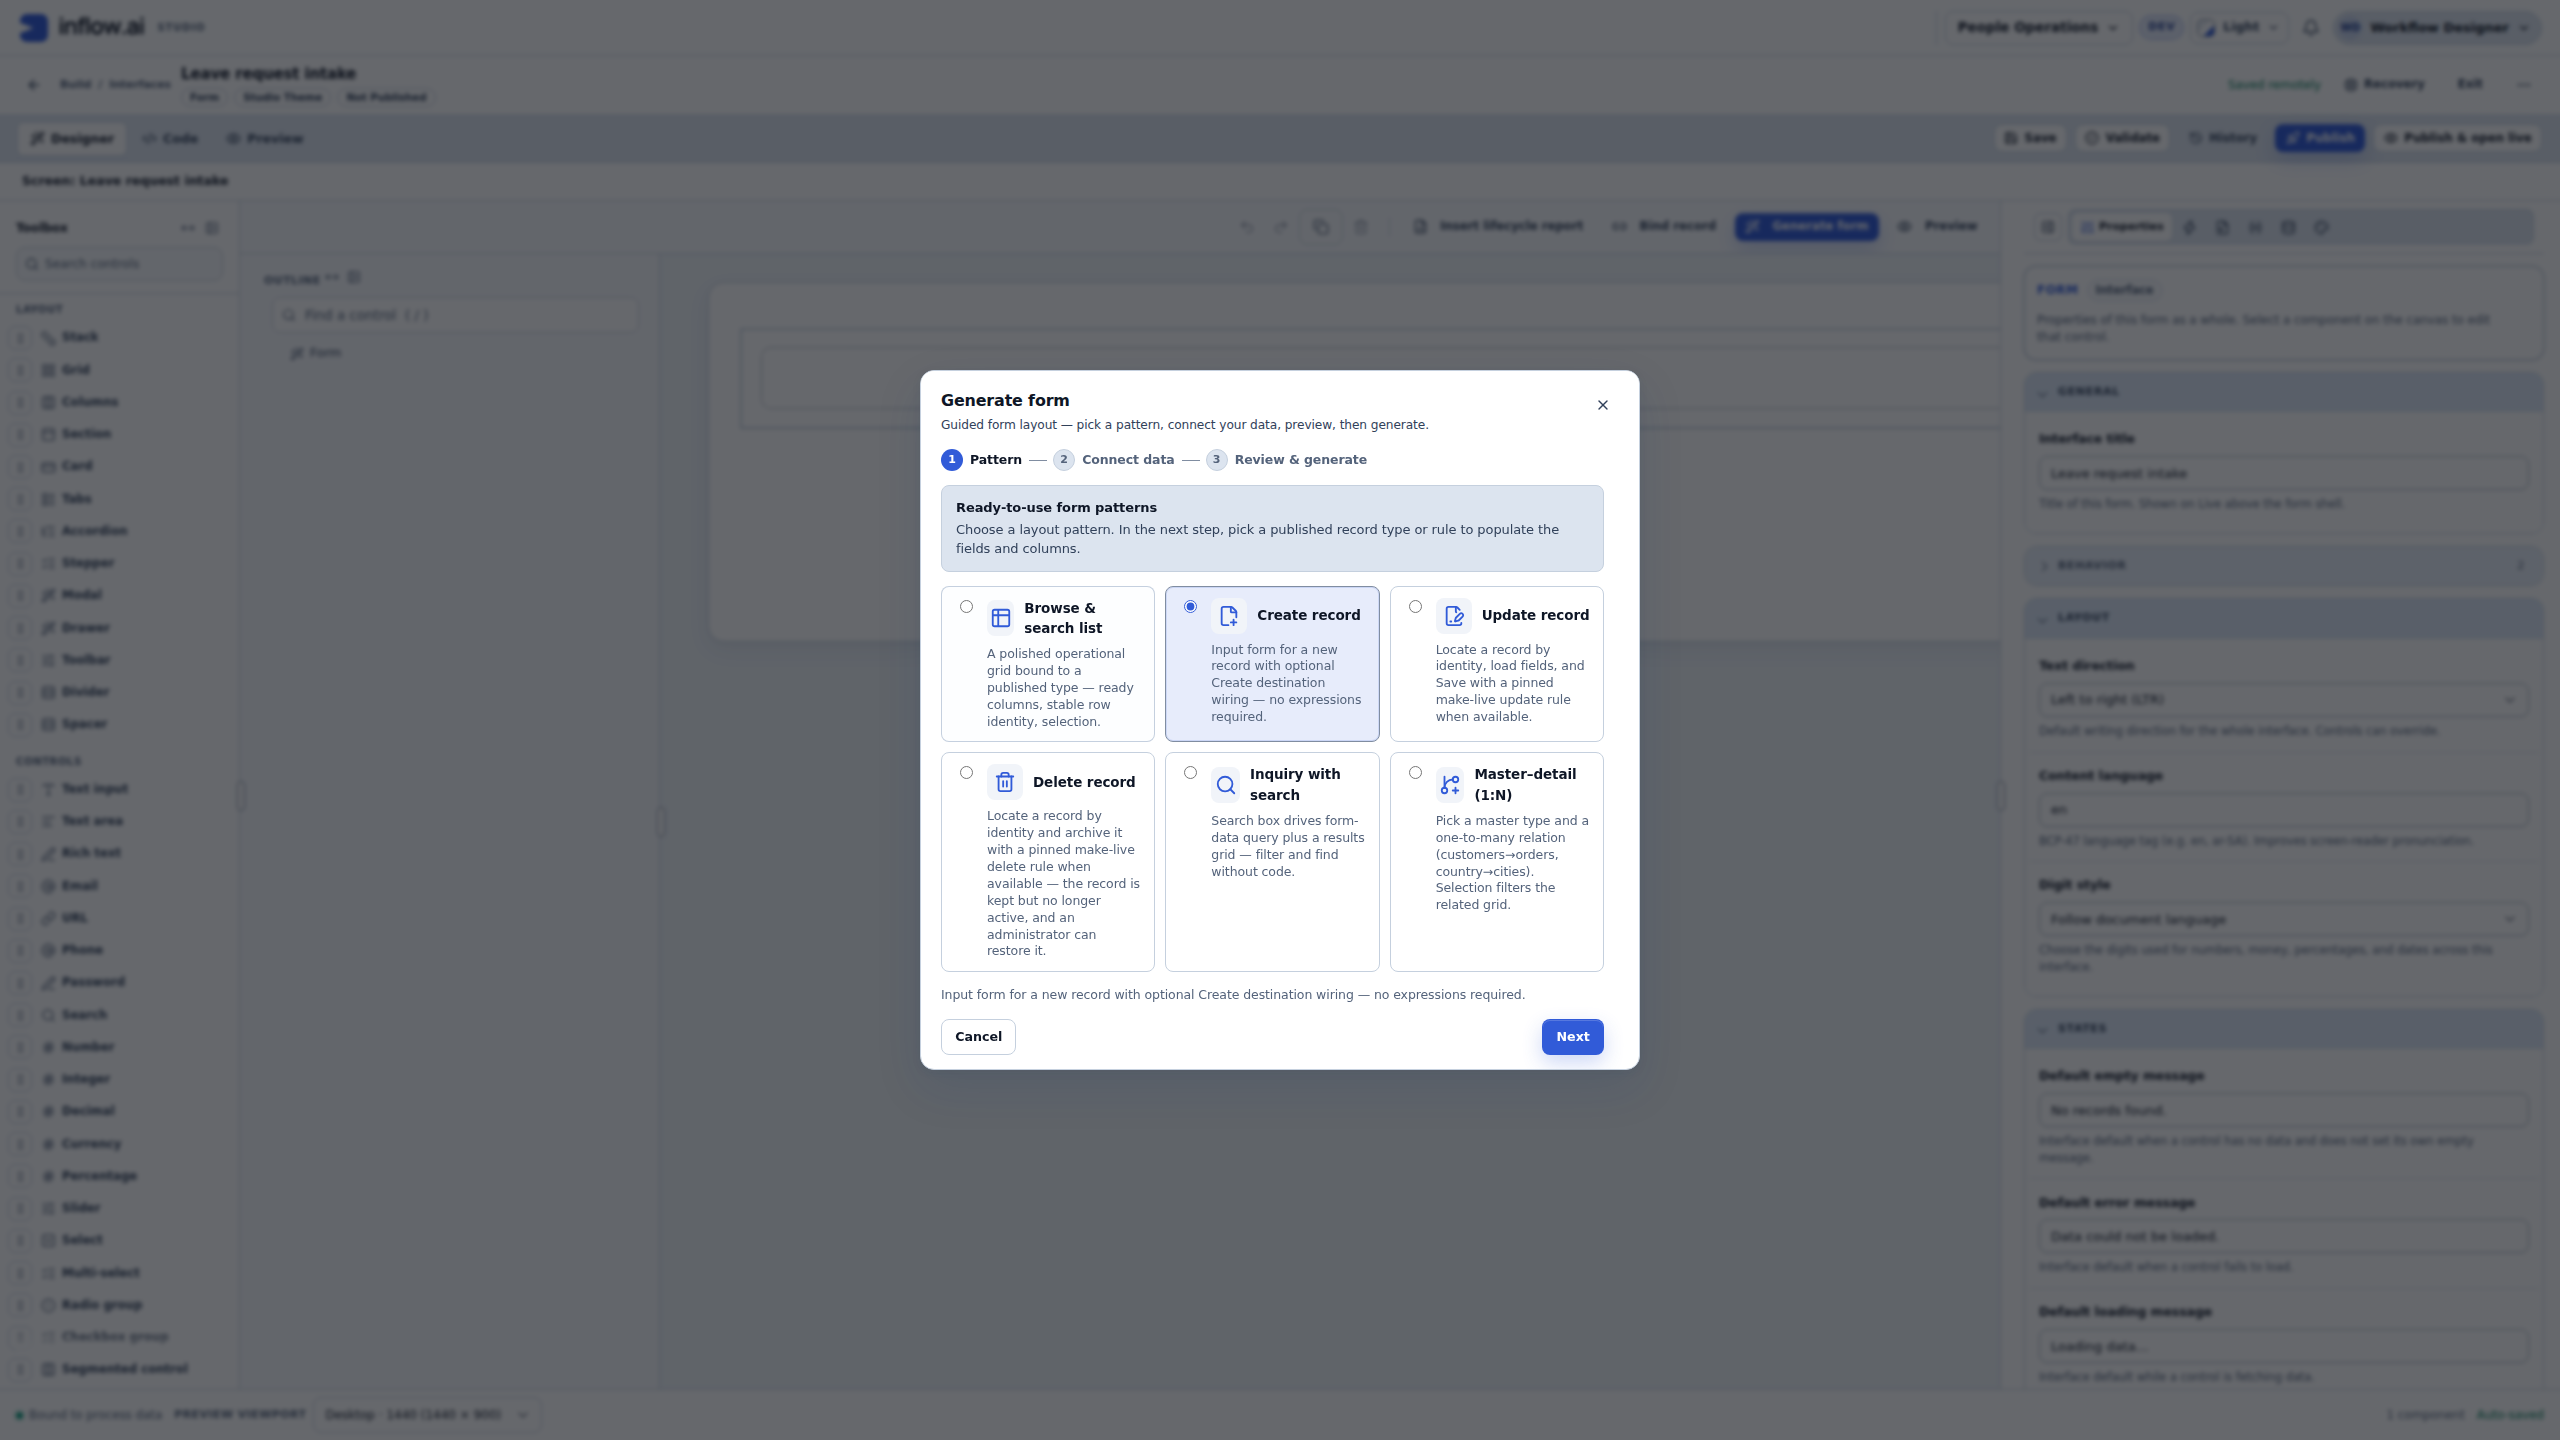
View the unannotated original screenshot
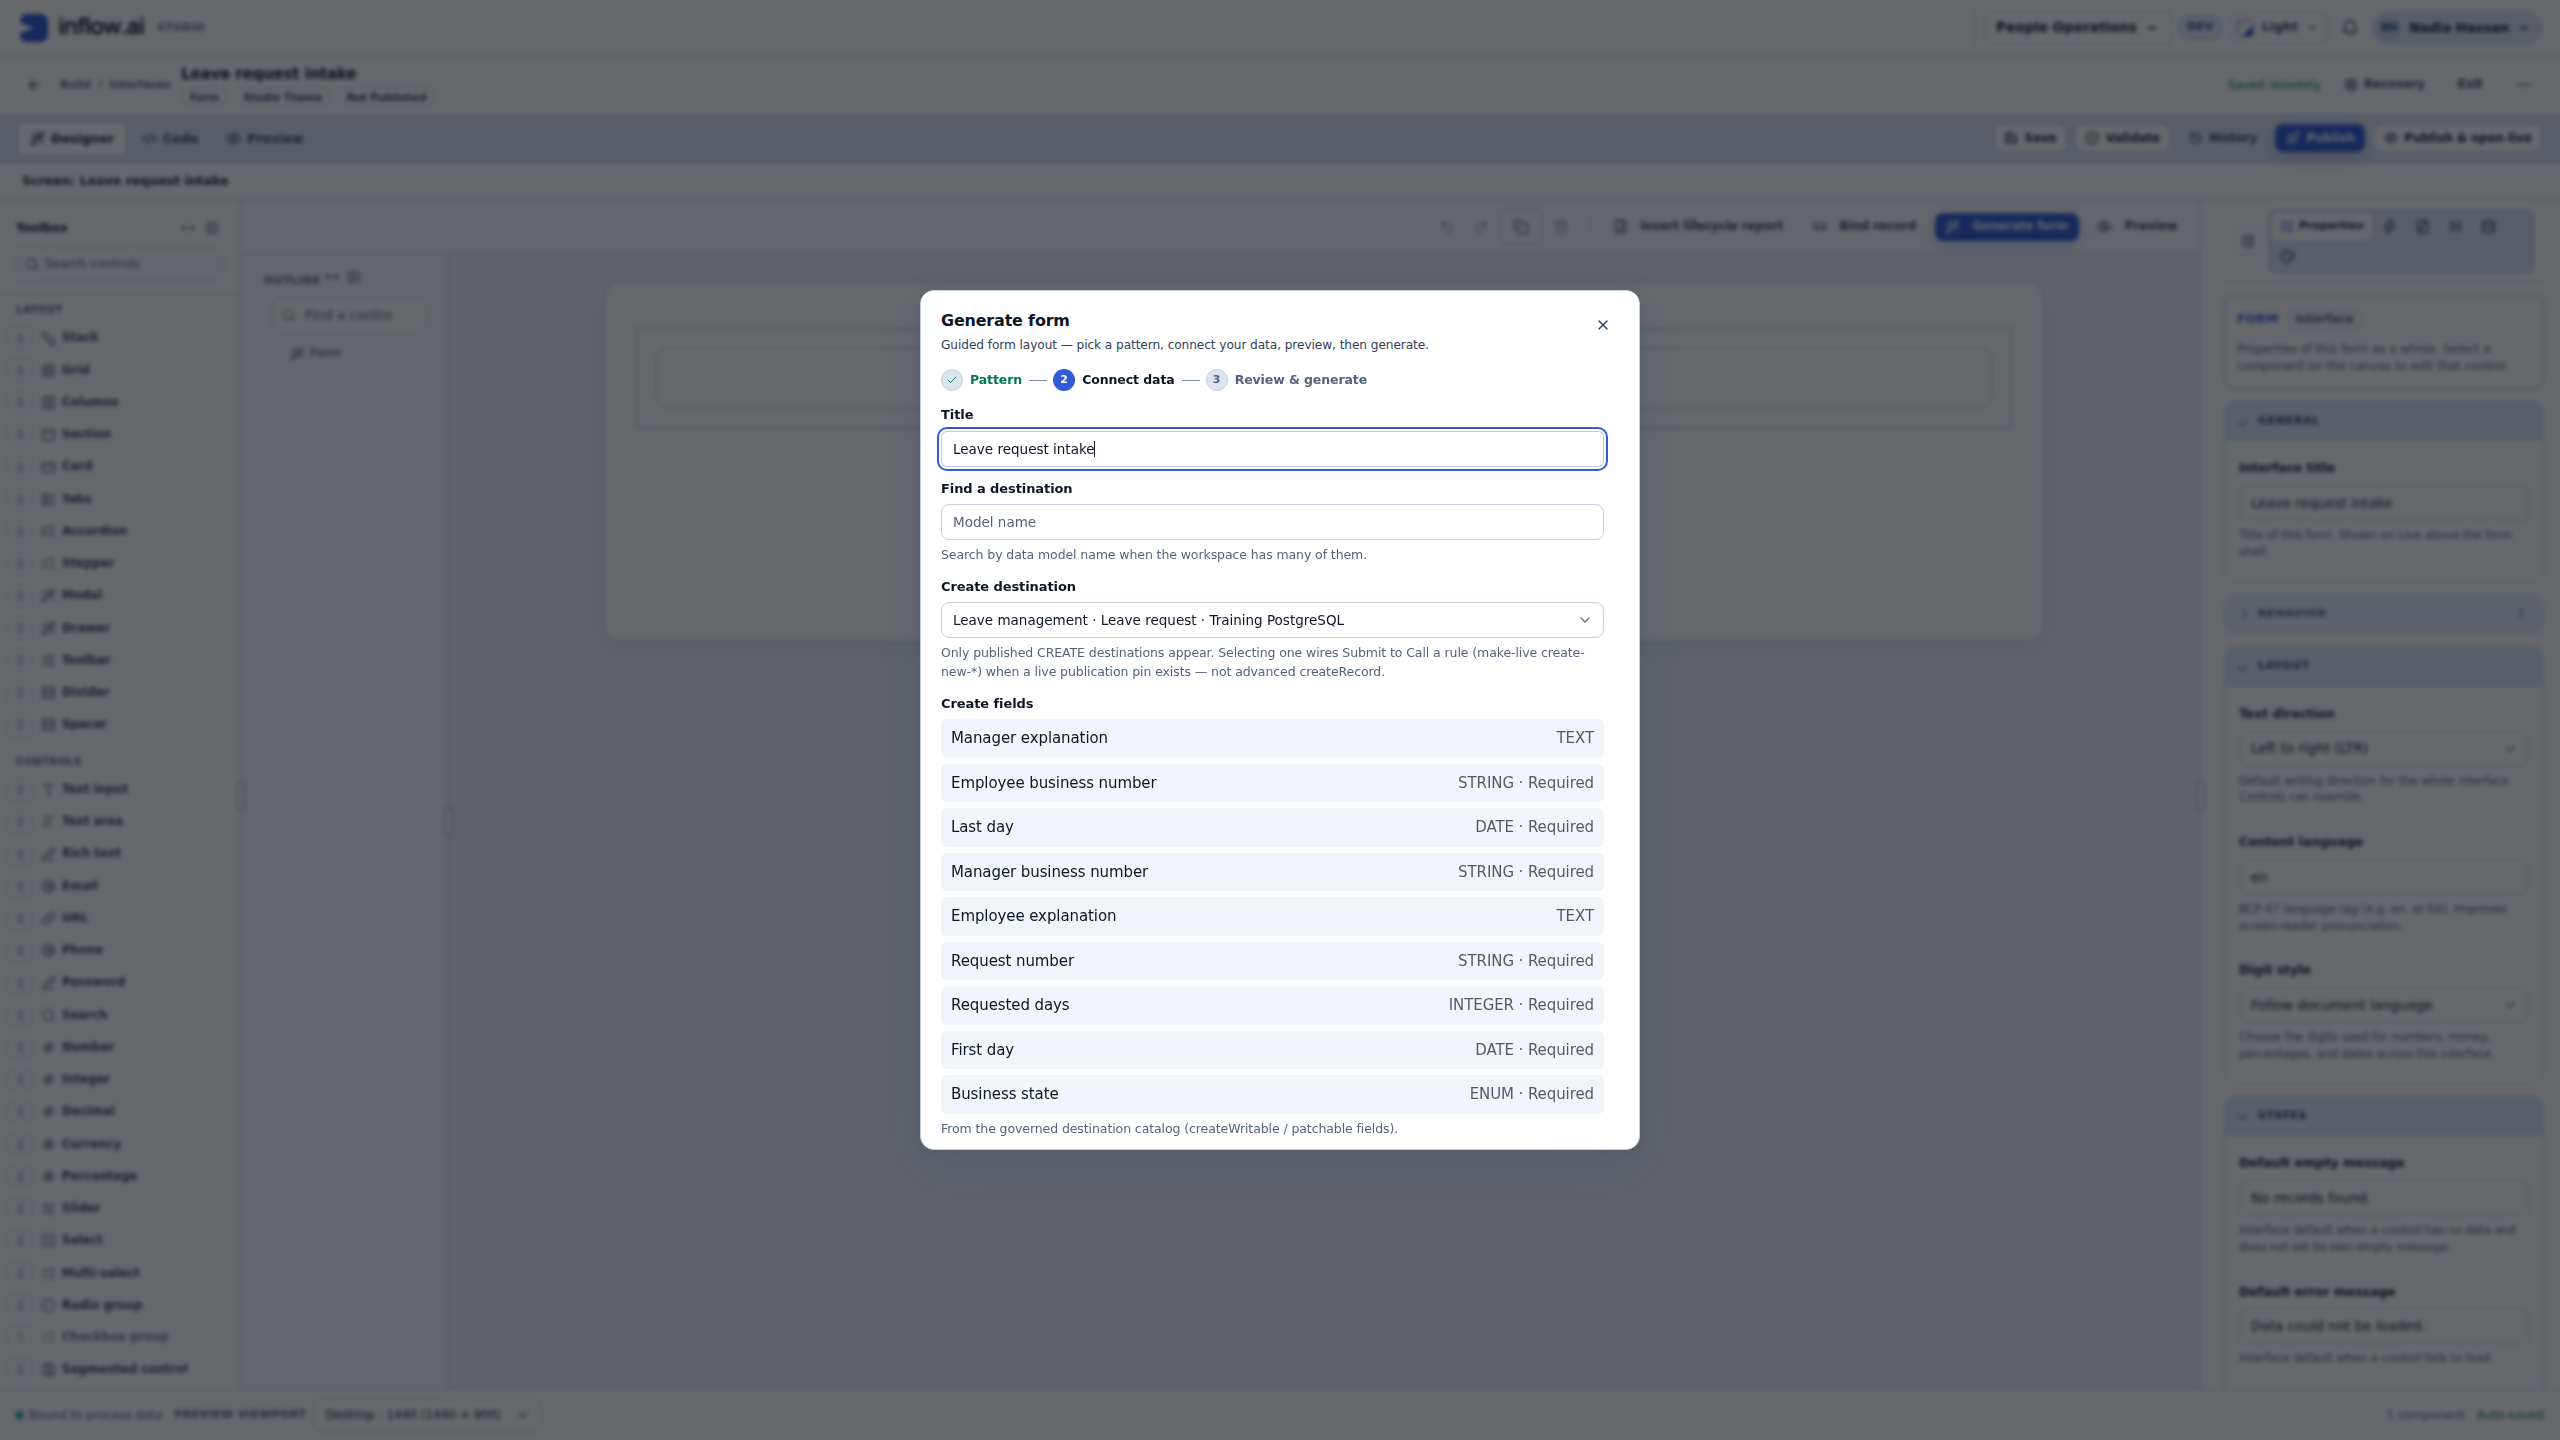
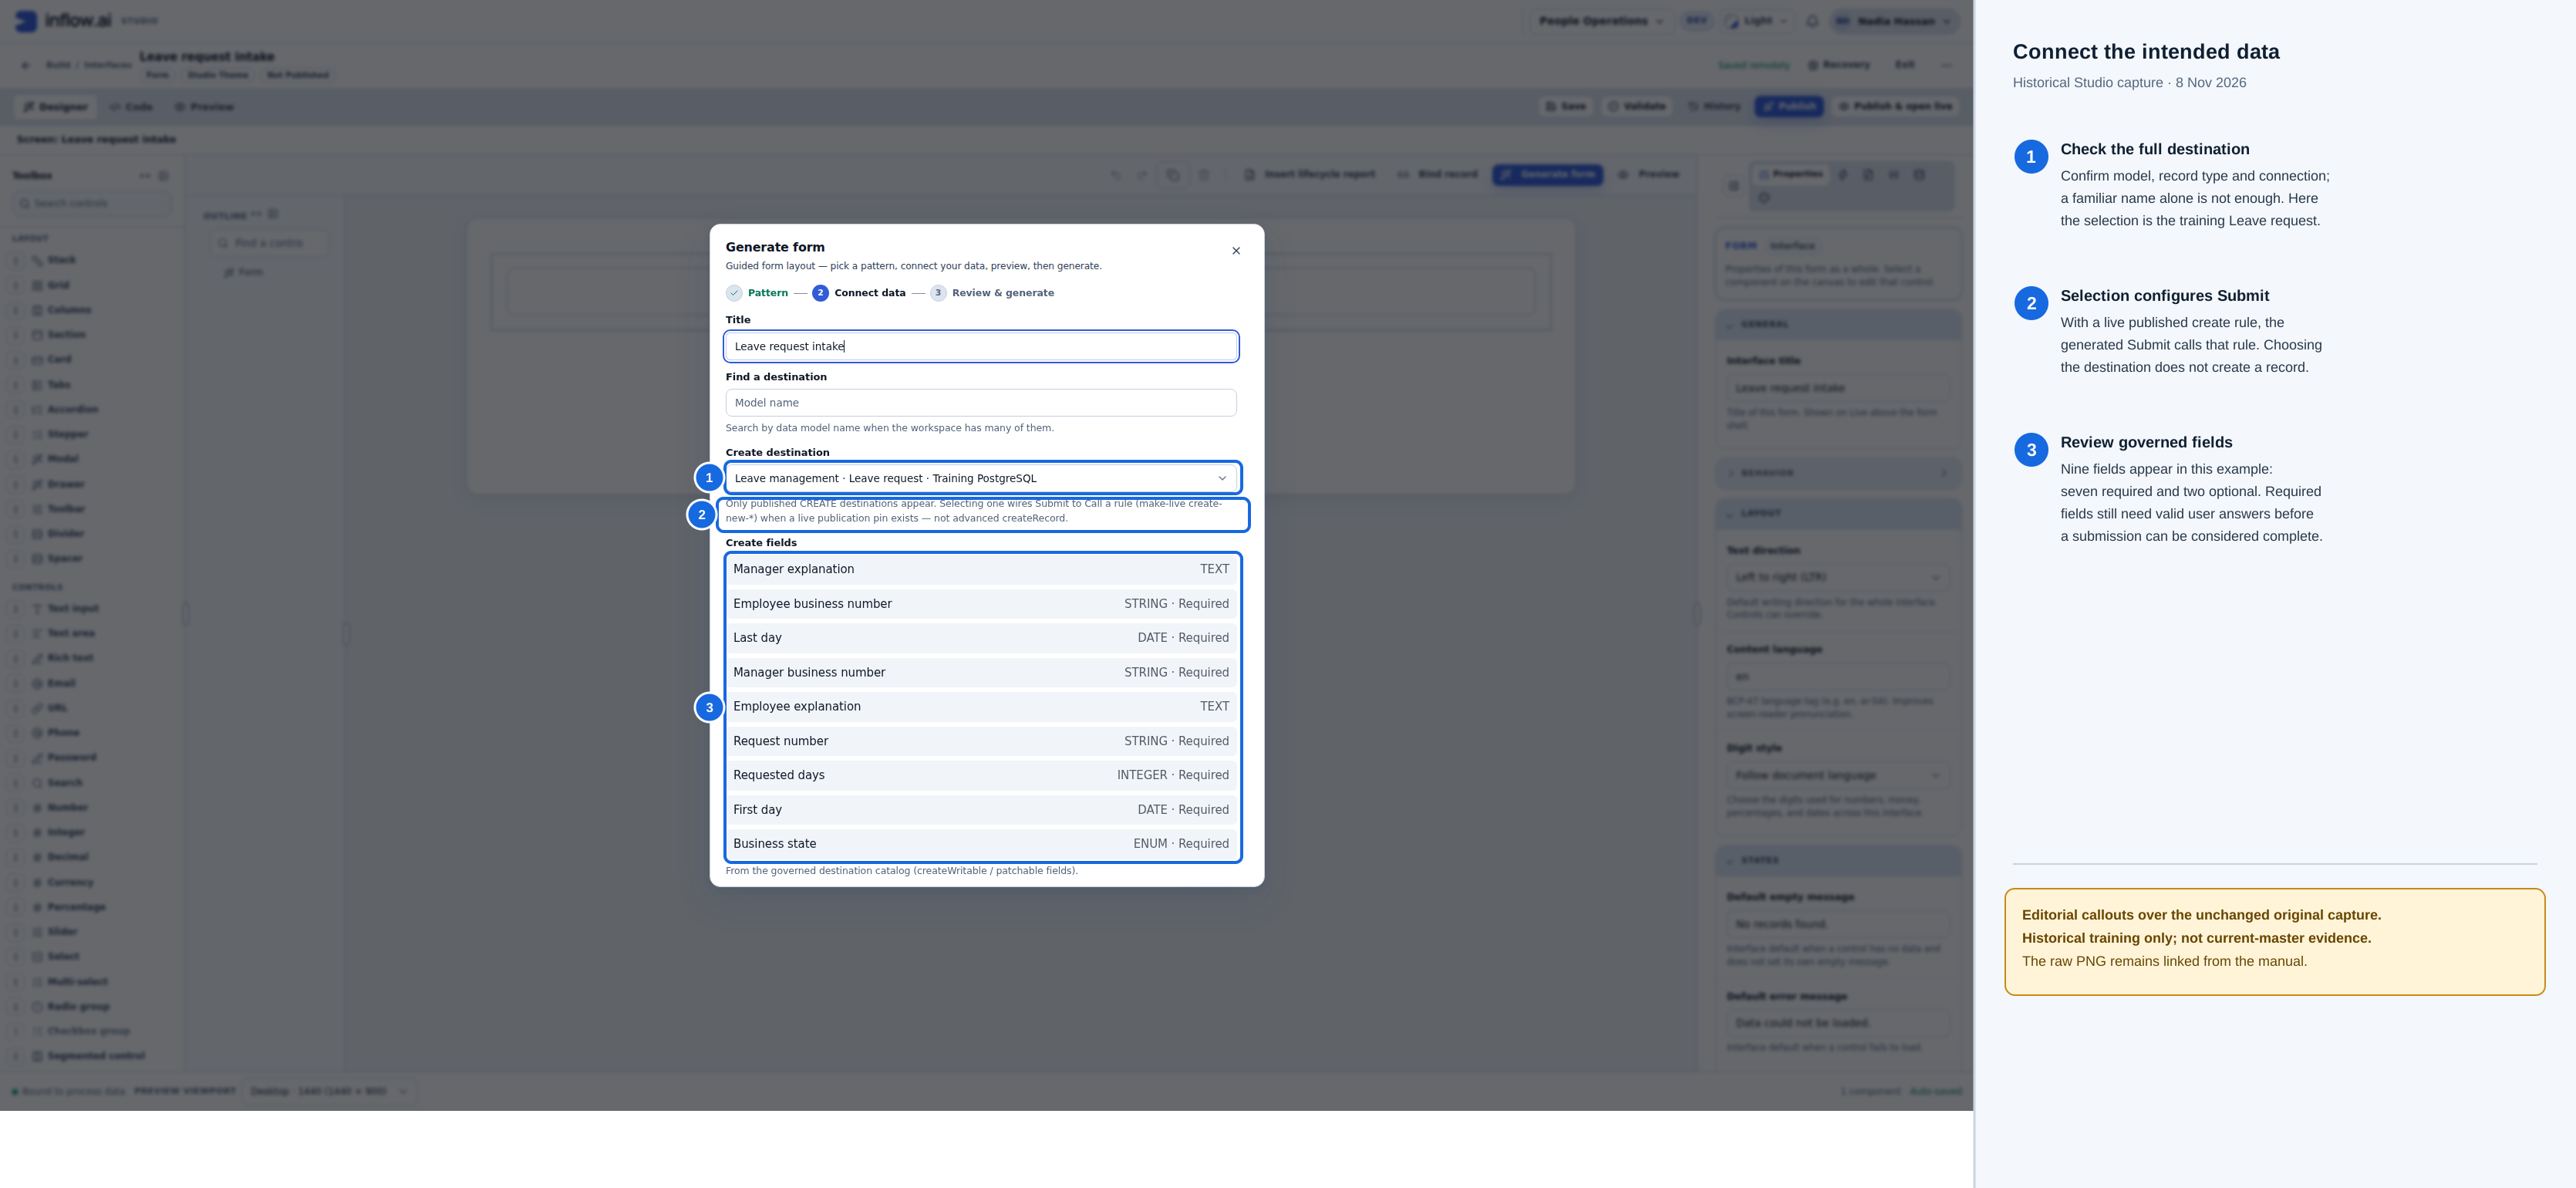
- Confirm the intended model, record type and connection together. This captured choice is the training Leave request at Training PostgreSQL.
- A selected published create destination configures the generated Submit action to call its create rule. Selecting it does not itself create a record.
- Review the governed field list. In this example, seven fields are required and two are optional; each required answer still needs a valid value.
Historical editorial guidance over the 8 November 2026 capture. The unchanged original PNG remains available; this is not current-master evidence.
If no destination appears: do not choose an unrelated record or continue as though a save is wired. A published/live destination, the record-create operation permission, and access to the intended model are separate prerequisites. Nadia could manage the model before her training administrator gave her the record-create permission. Model management alone did not populate this picker. Have the authorized administrator check the intended account and scoped model access; do not grant an administrator role simply to finish the lesson.
View the unannotated original screenshot
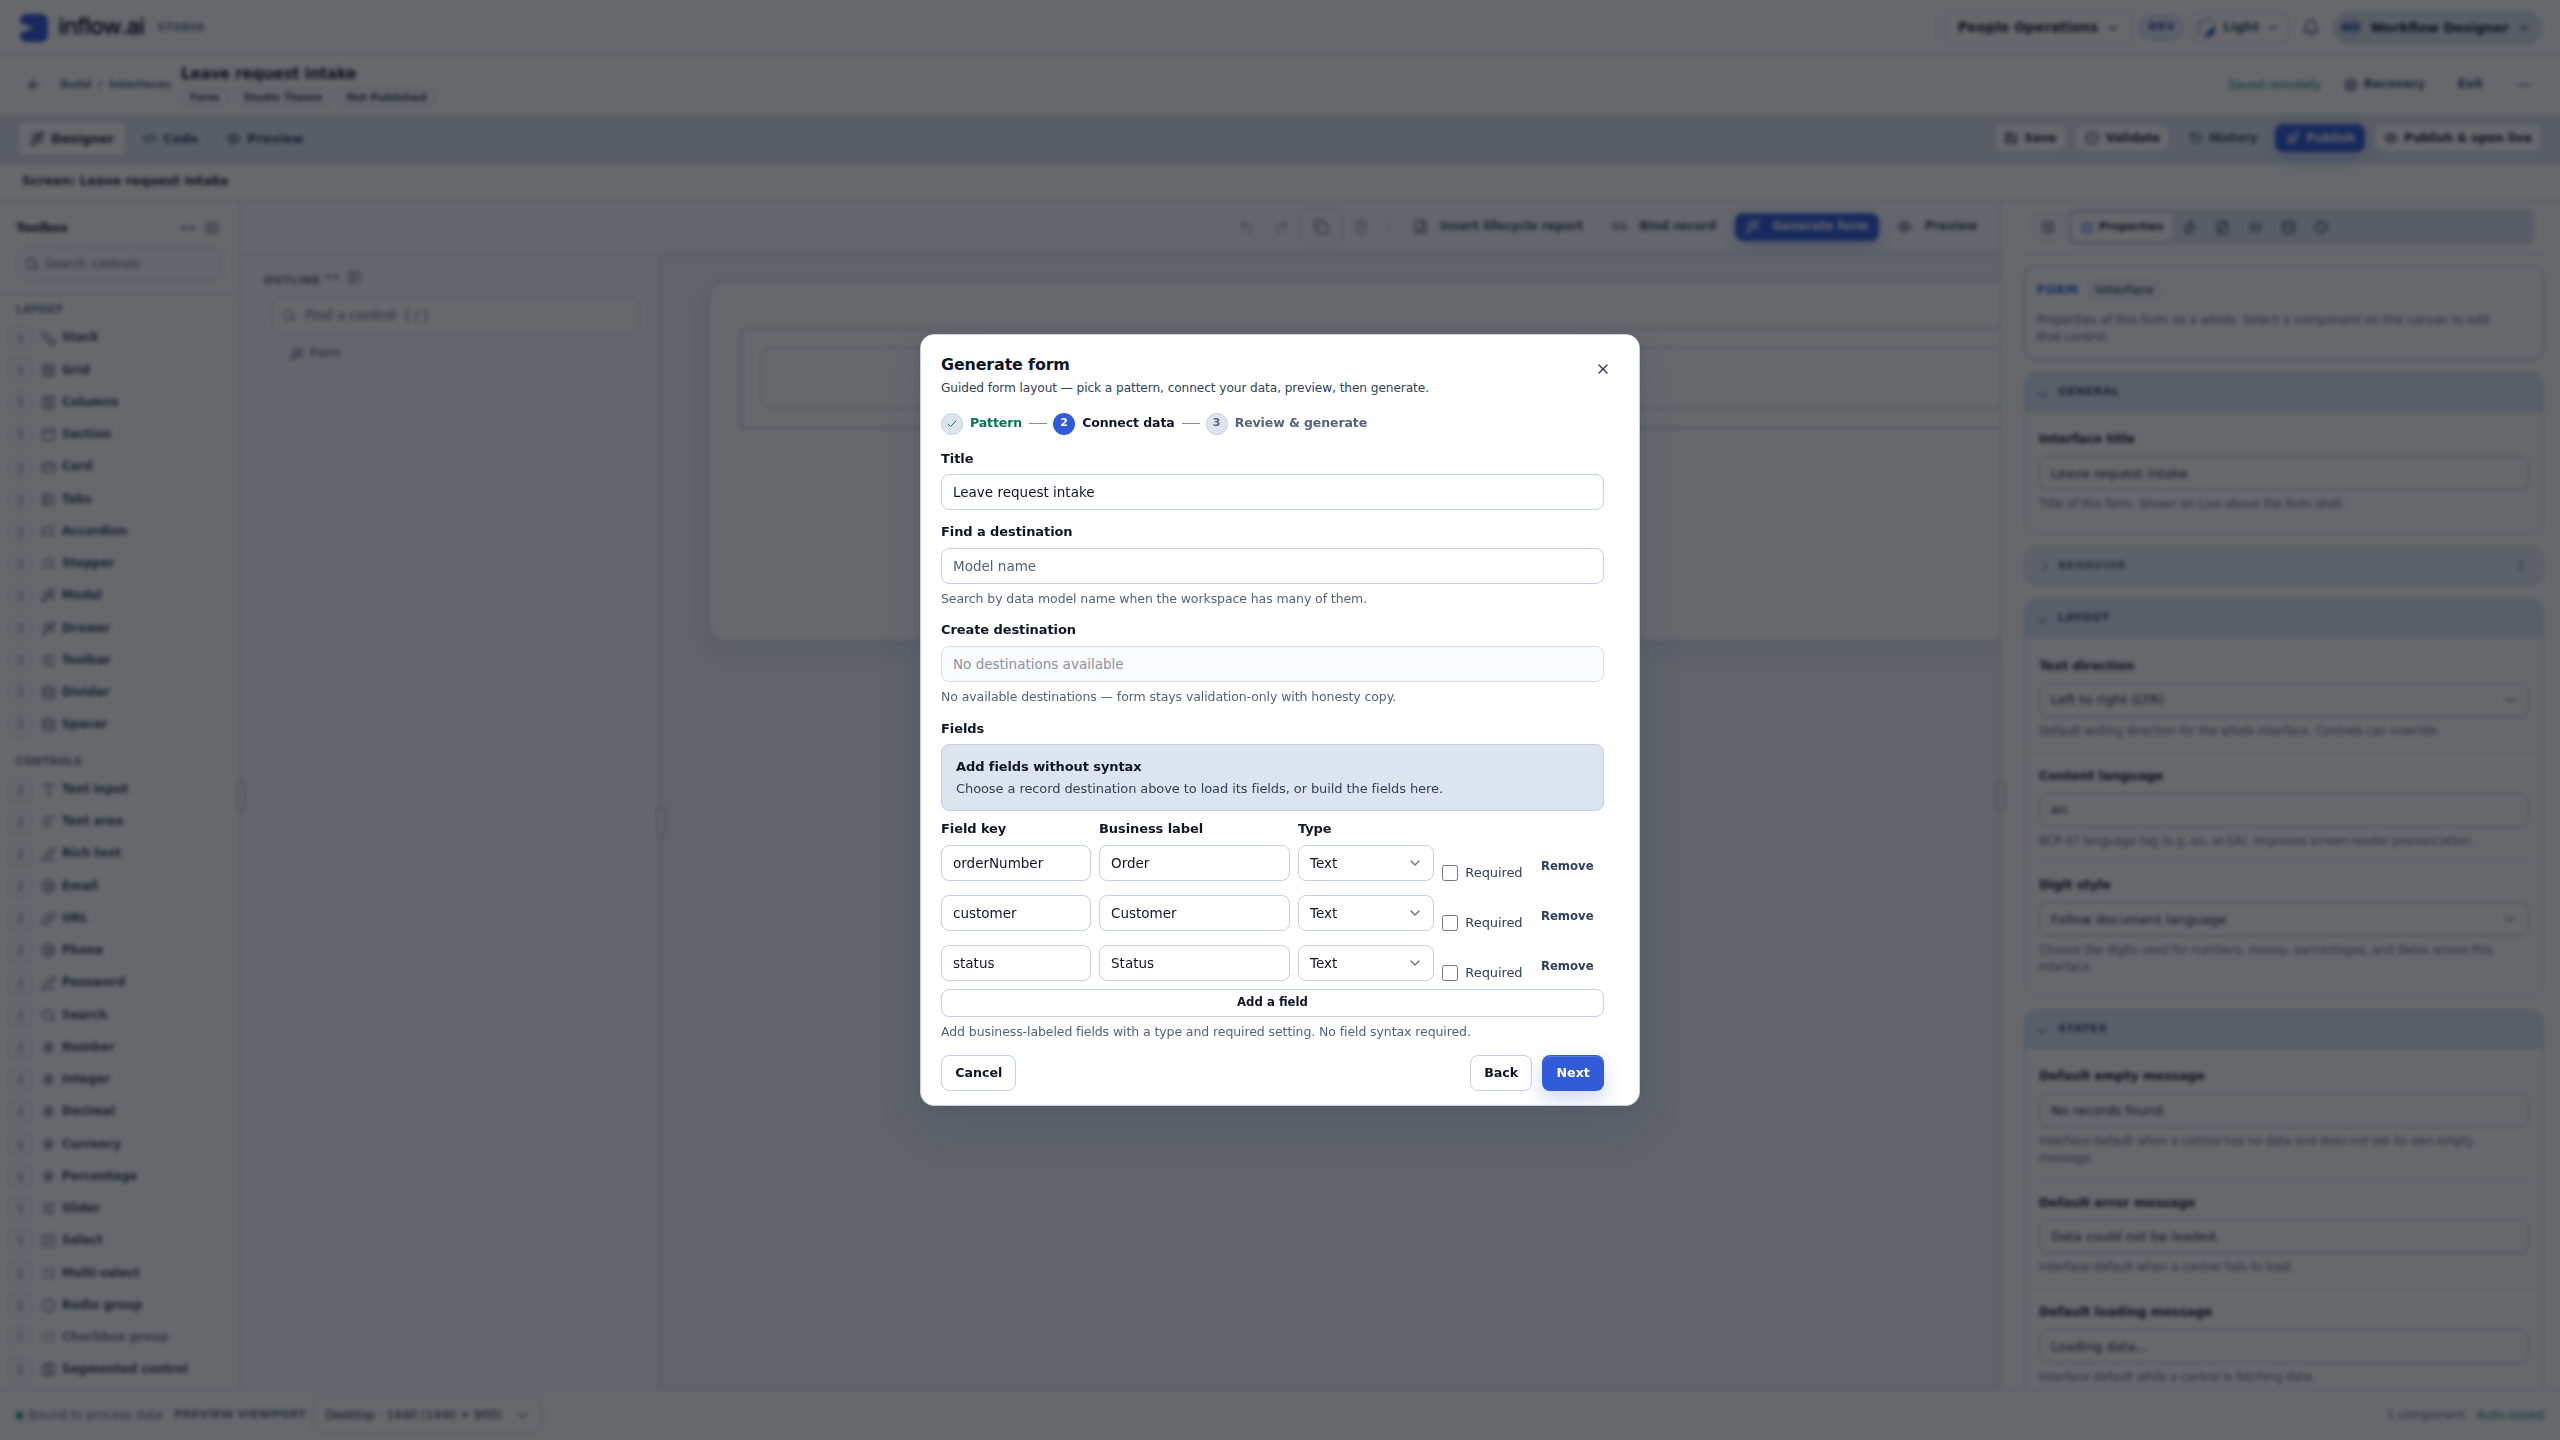
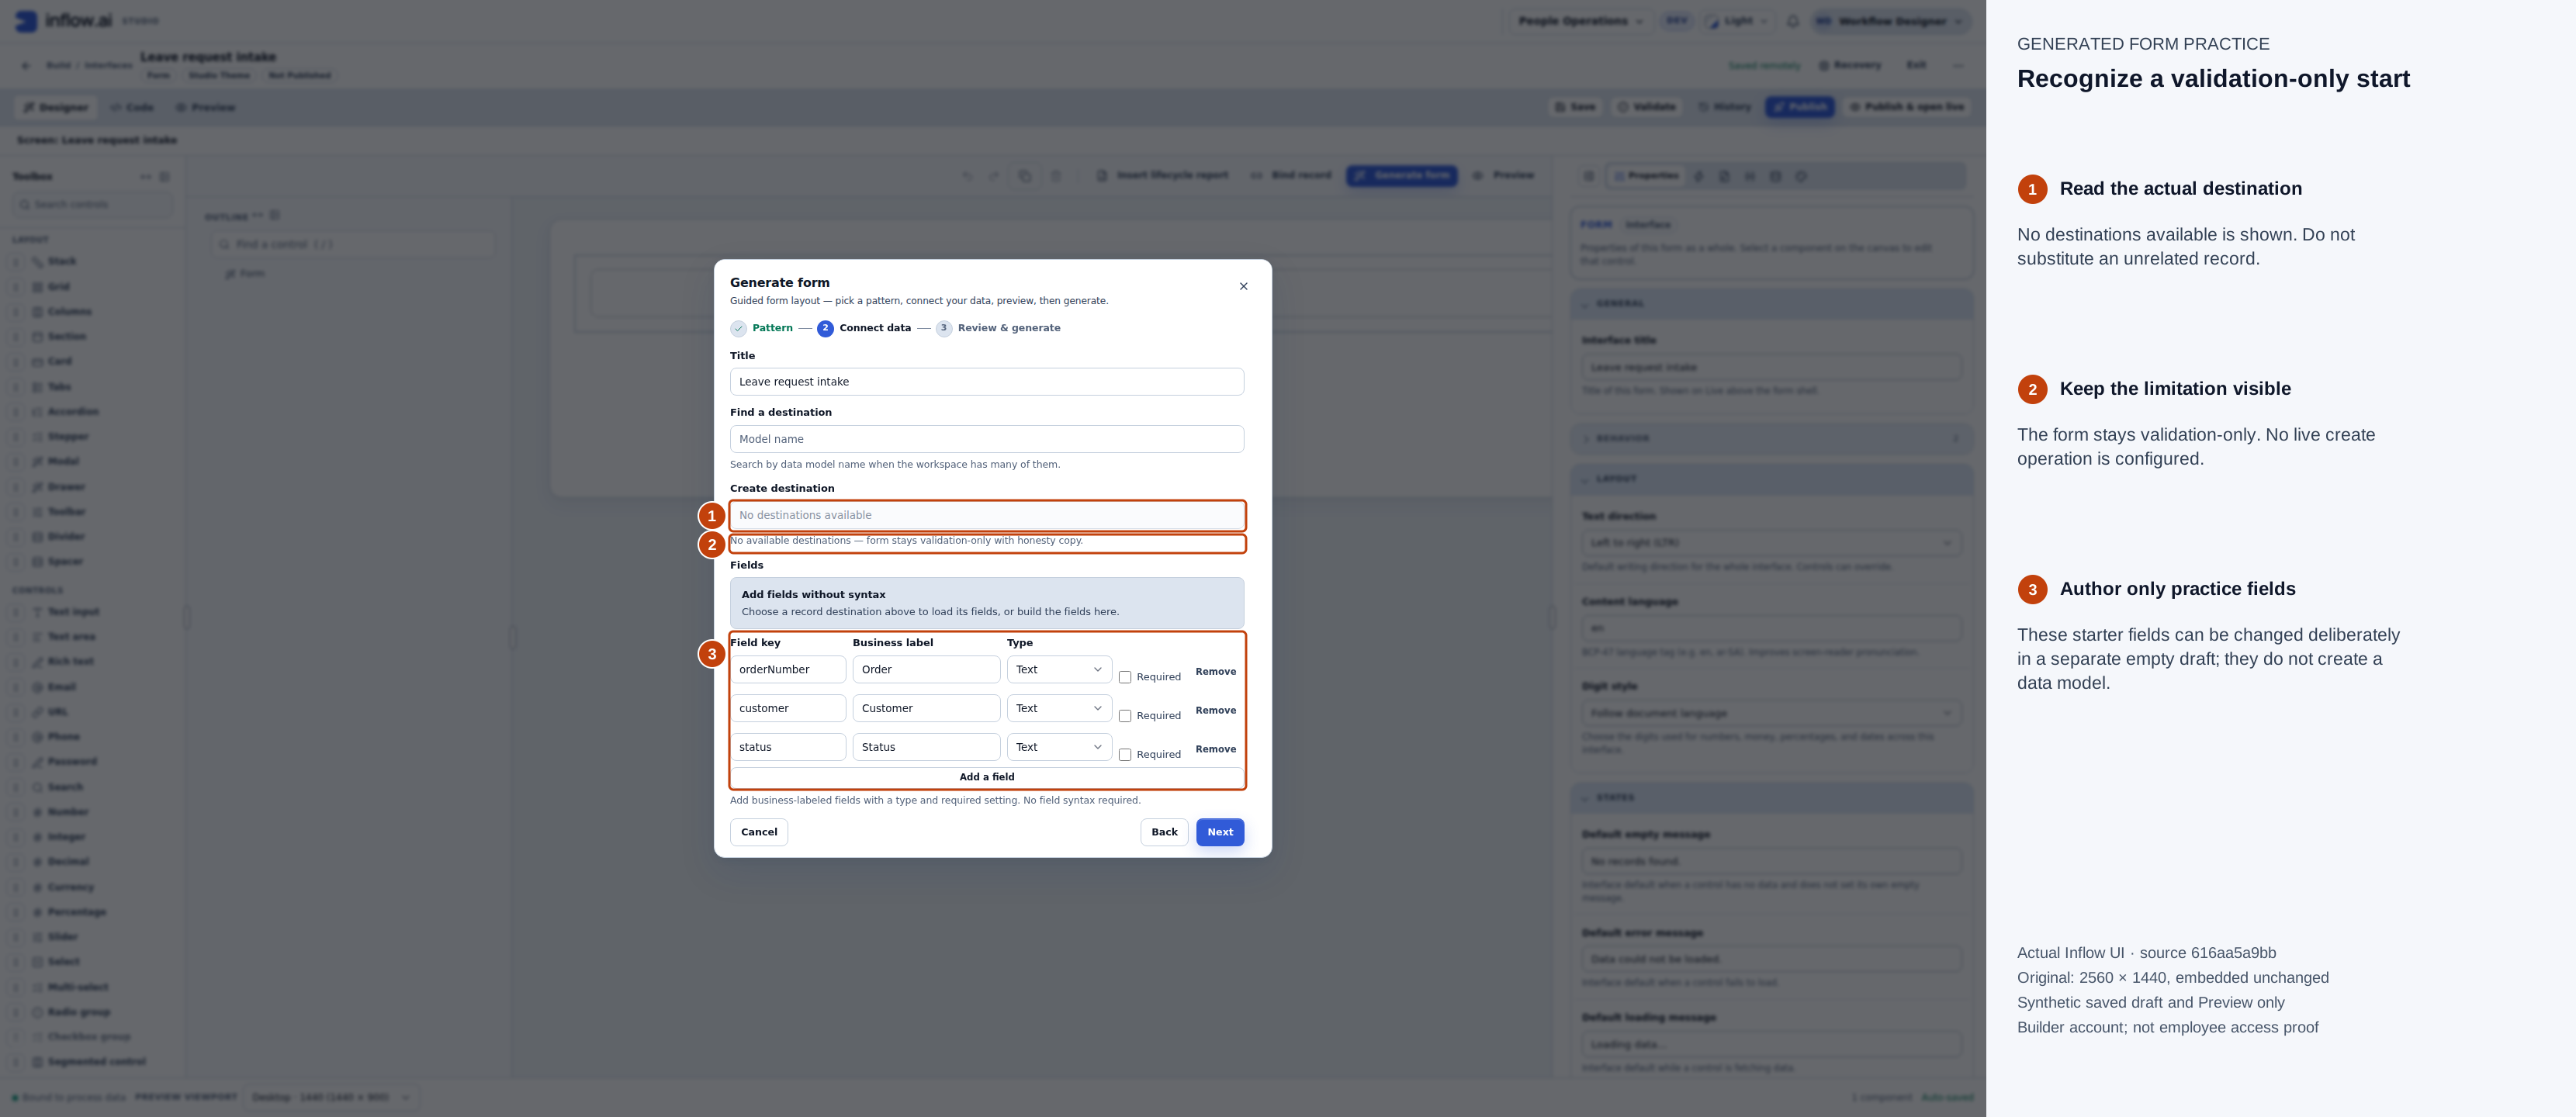
- No destinations available means this form remains validation-only. Do not bind it to a different model just to proceed.
- The accompanying explanation keeps the validation-only limitation visible; no live create operation is configured.
- The starter field definitions can be changed for a separate practice draft. They do not create a data model or configure persistence. Next advances to review, not record submission.
Actual 15 November empty-destination state. Full-size numbered guide · Unchanged original. The visible starter rows do not configure a live save.
None — validation-only Save is also a deliberate layout-only choice when destinations are available. It does not configure a real record save. The selected live destination needs a matching published create-rule version; read any offered regeneration or validation-only explanation before continuing.
Optional practice while the destination is not ready
Use the separate validation-only generated-form walkthrough if you want to practise generation before a live destination exists. Its three questions are Reason for leave, Start date and End date. This is a different, smaller practice variant from the nine-field connected example below. Retain any existing populated or connected intake form; use an intentionally empty practice draft.
The walkthrough shows lowercase generated field keys, an incomplete proposal cancelled before application, the corrected proposal, and actual empty-answer and repaired checks. In its Interactive Preview, empty Submit reports three required-field issues:
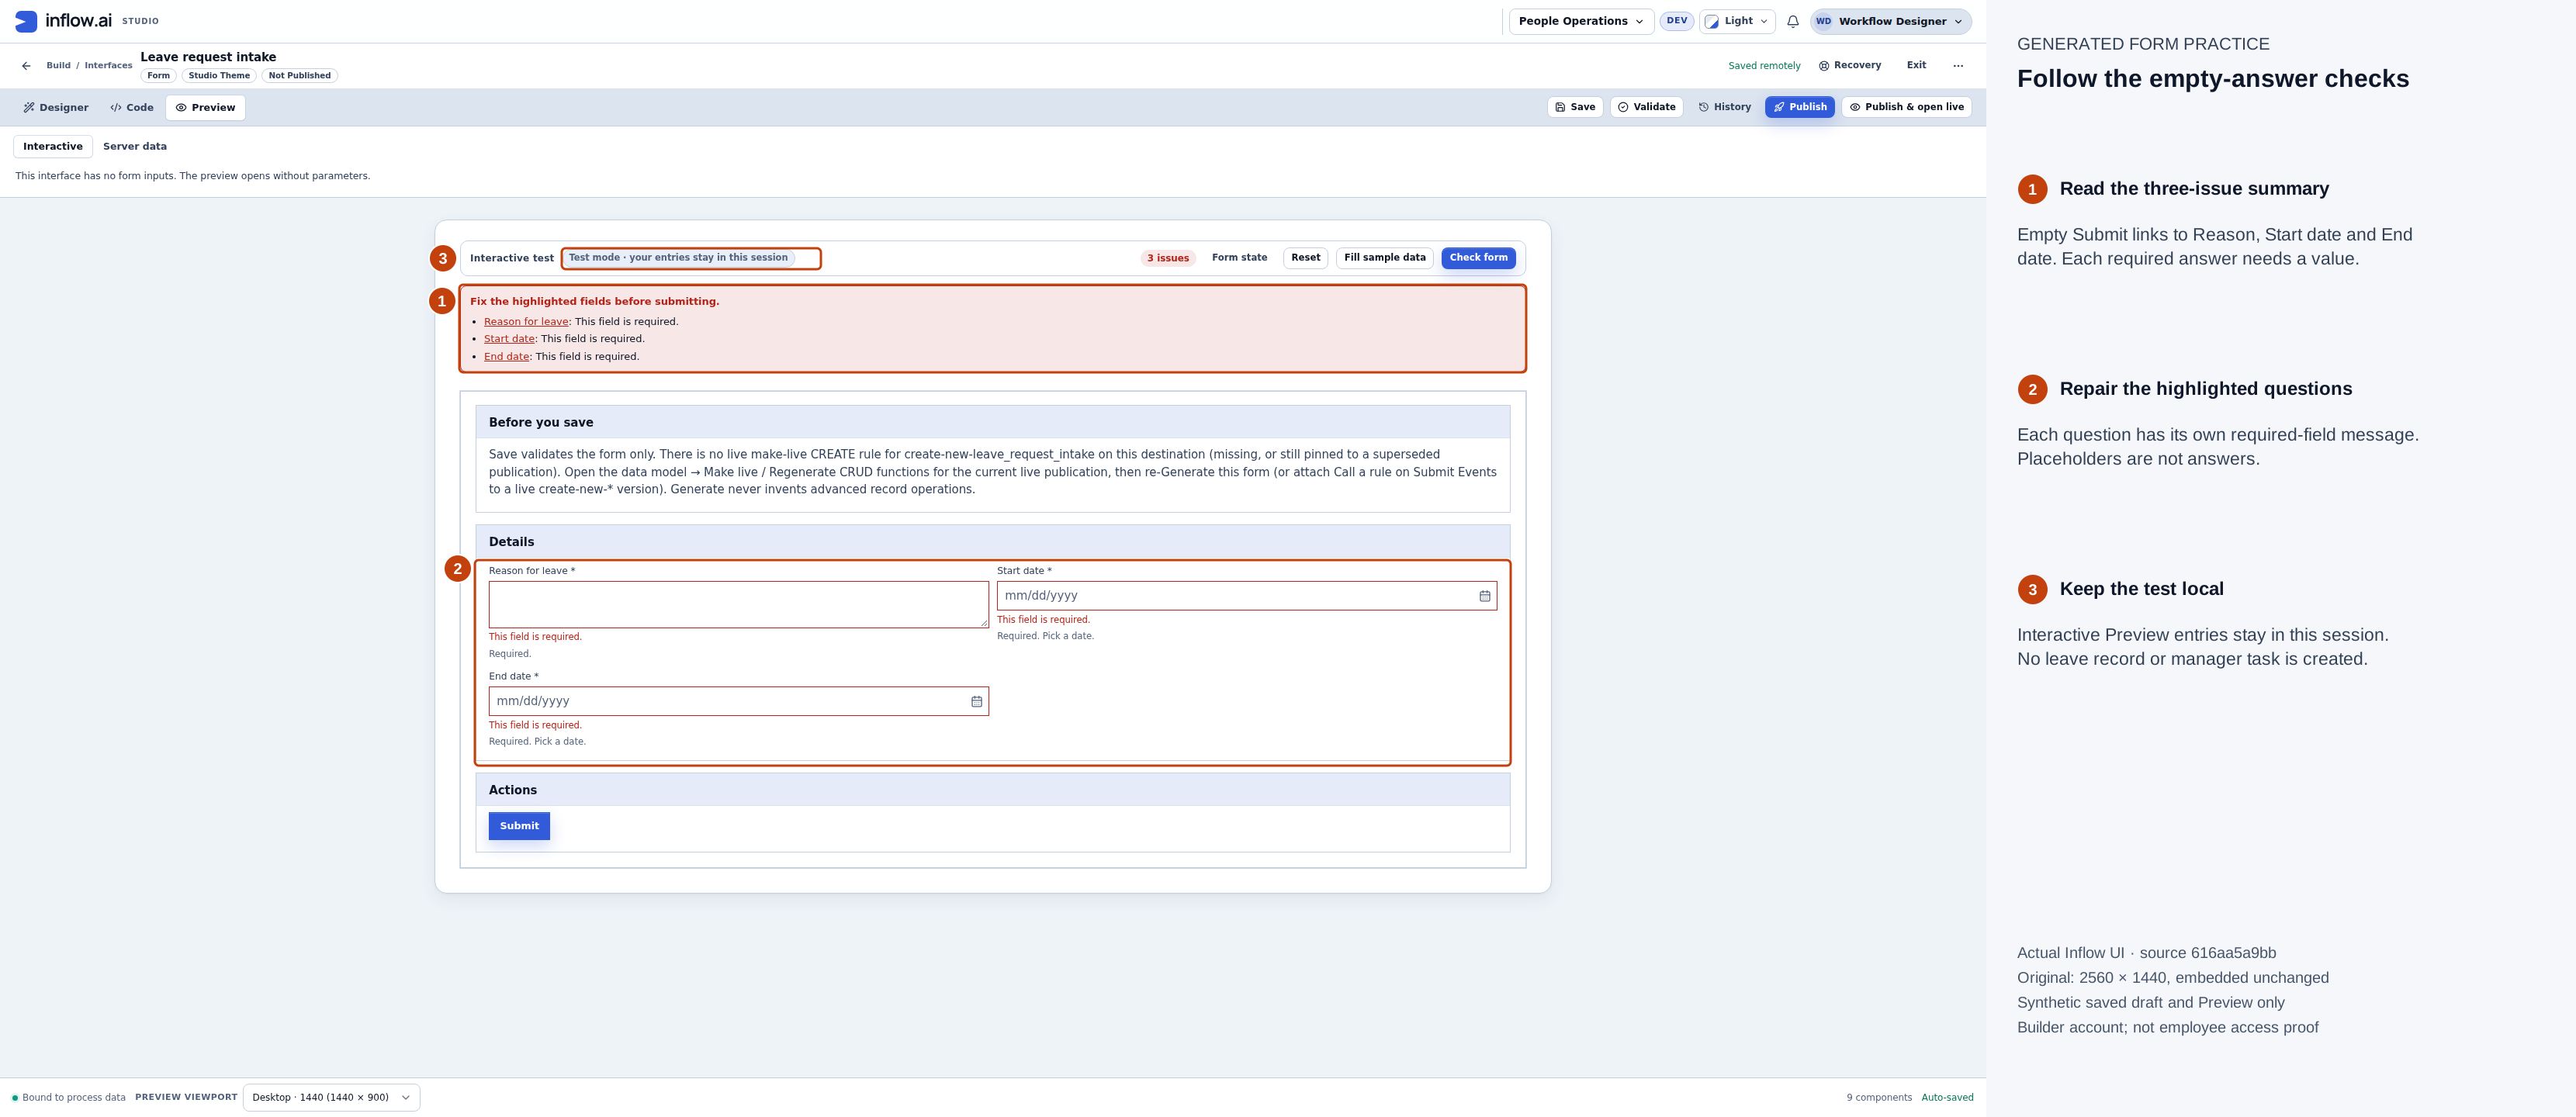
Actual validation-only practice: repair the three answers rather than removing the checks. Full-size guide · Unchanged original.
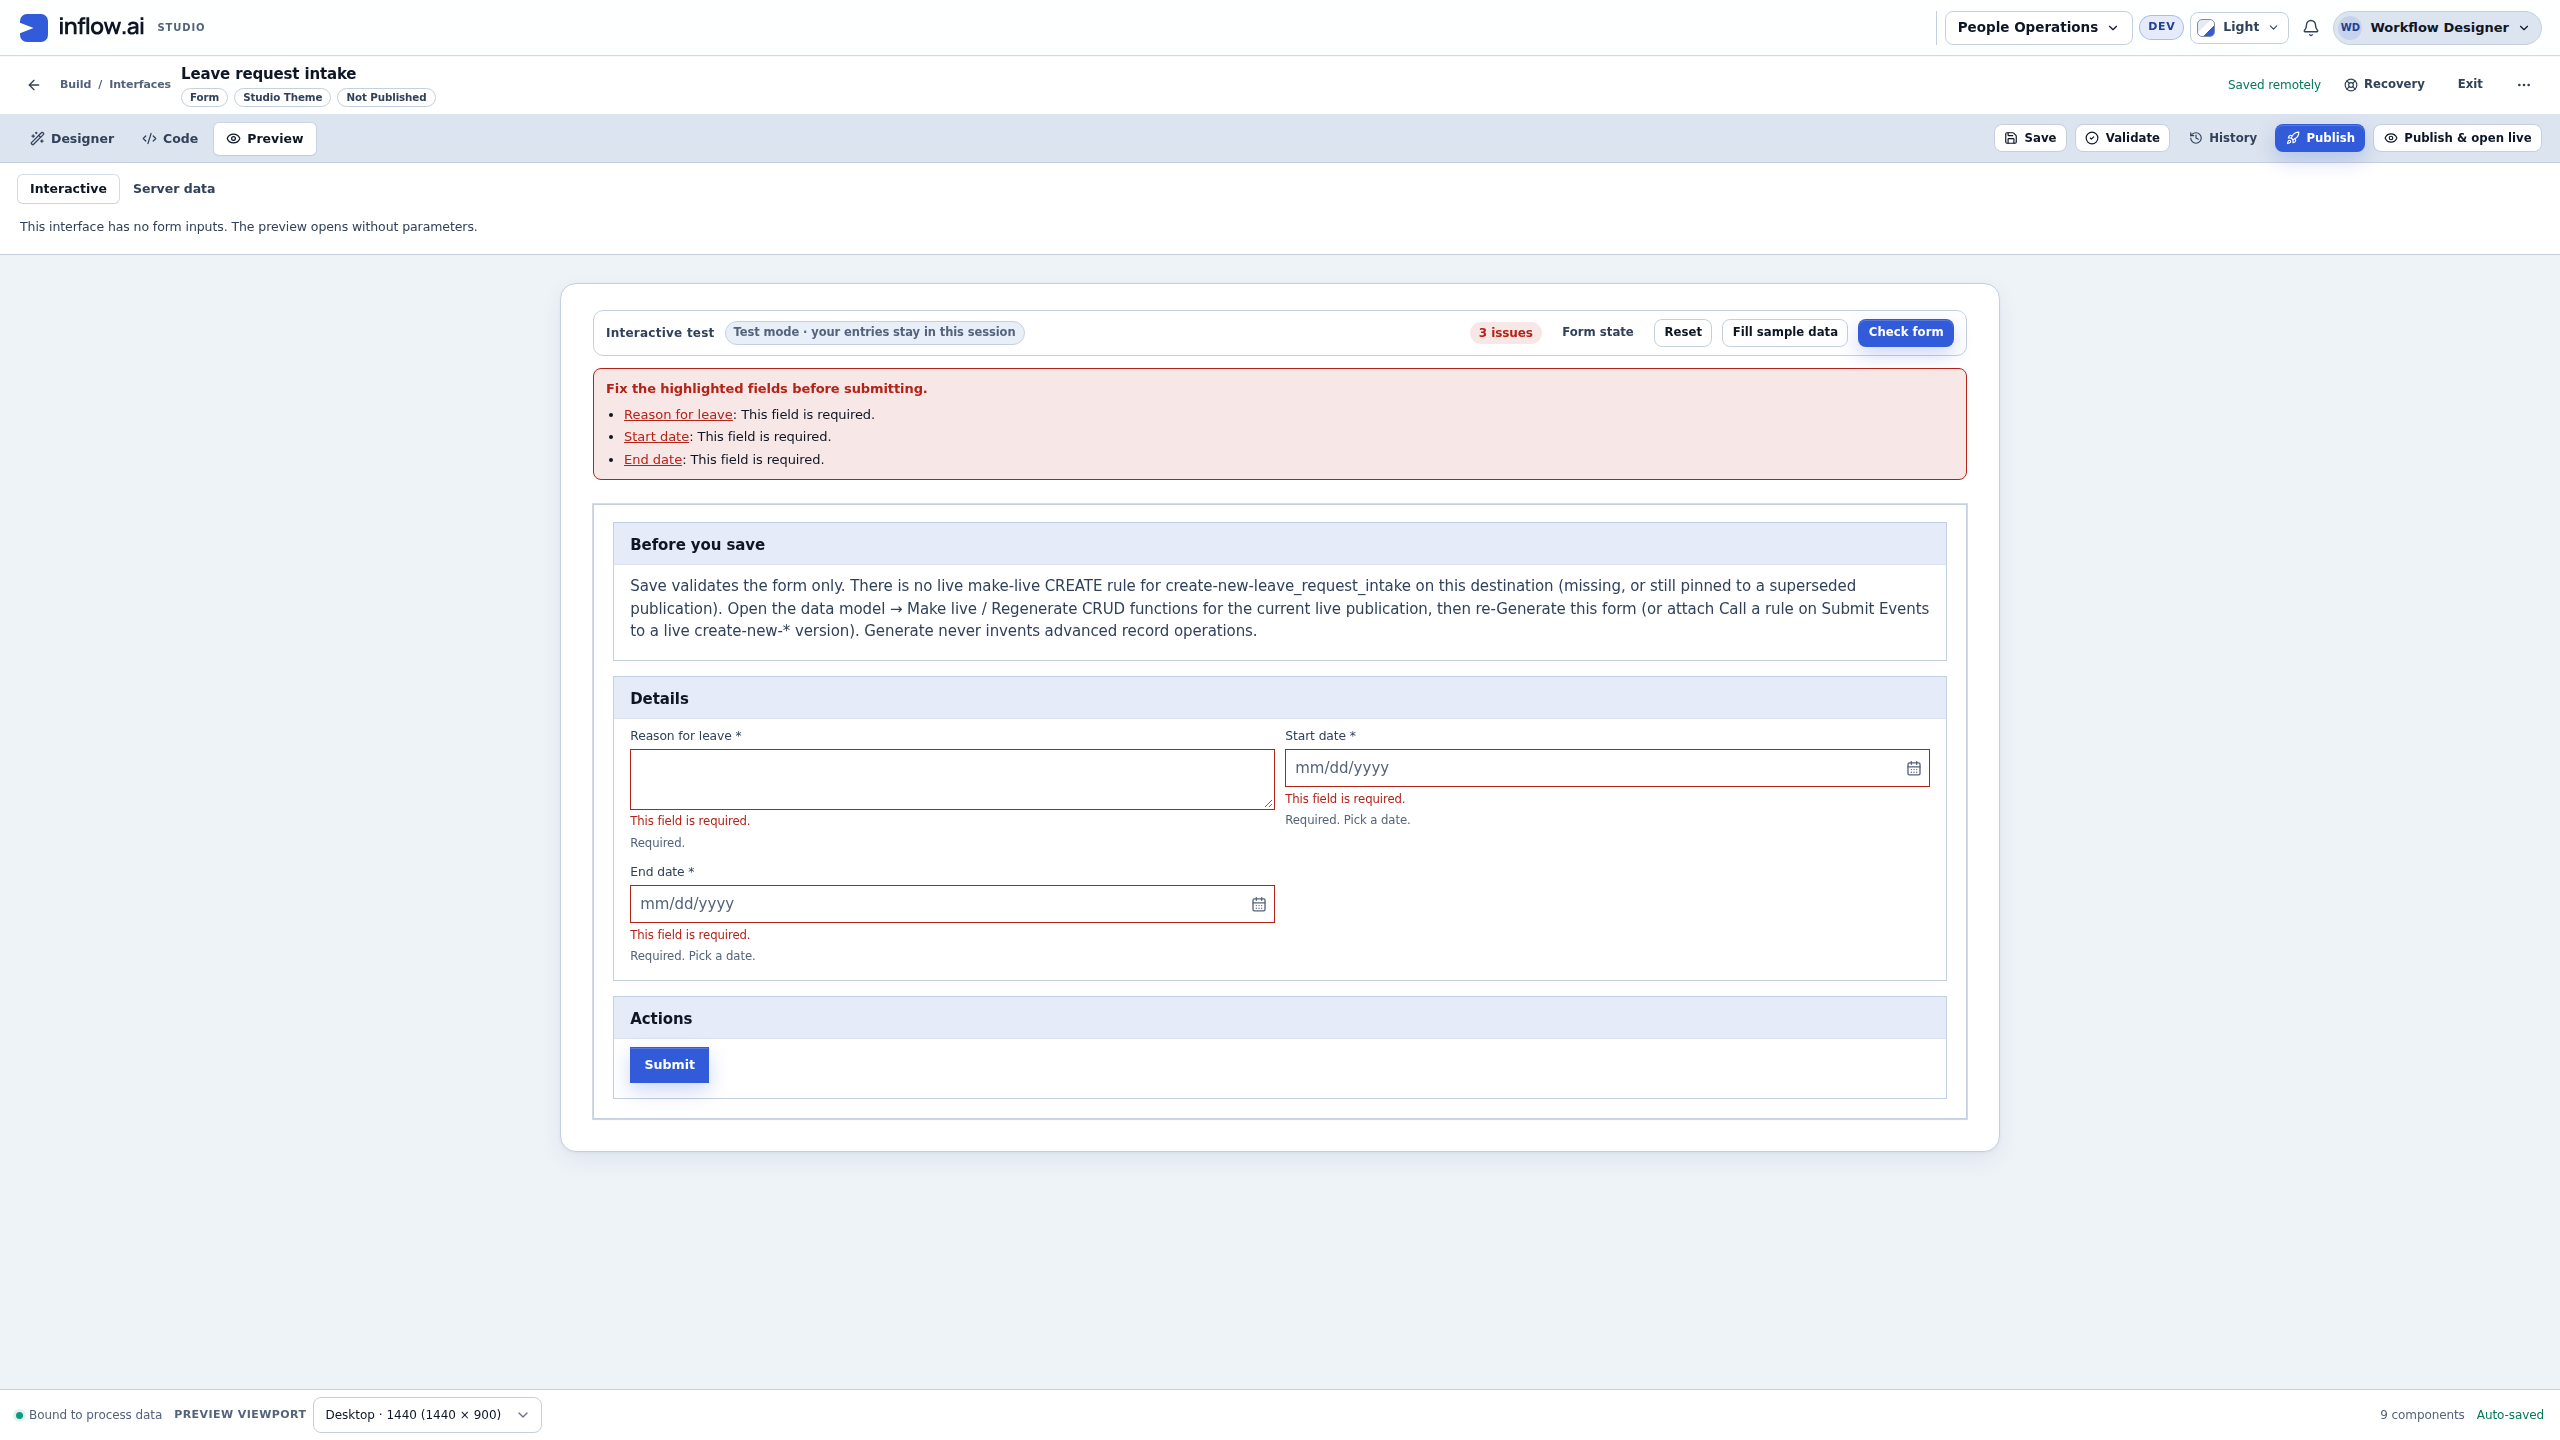
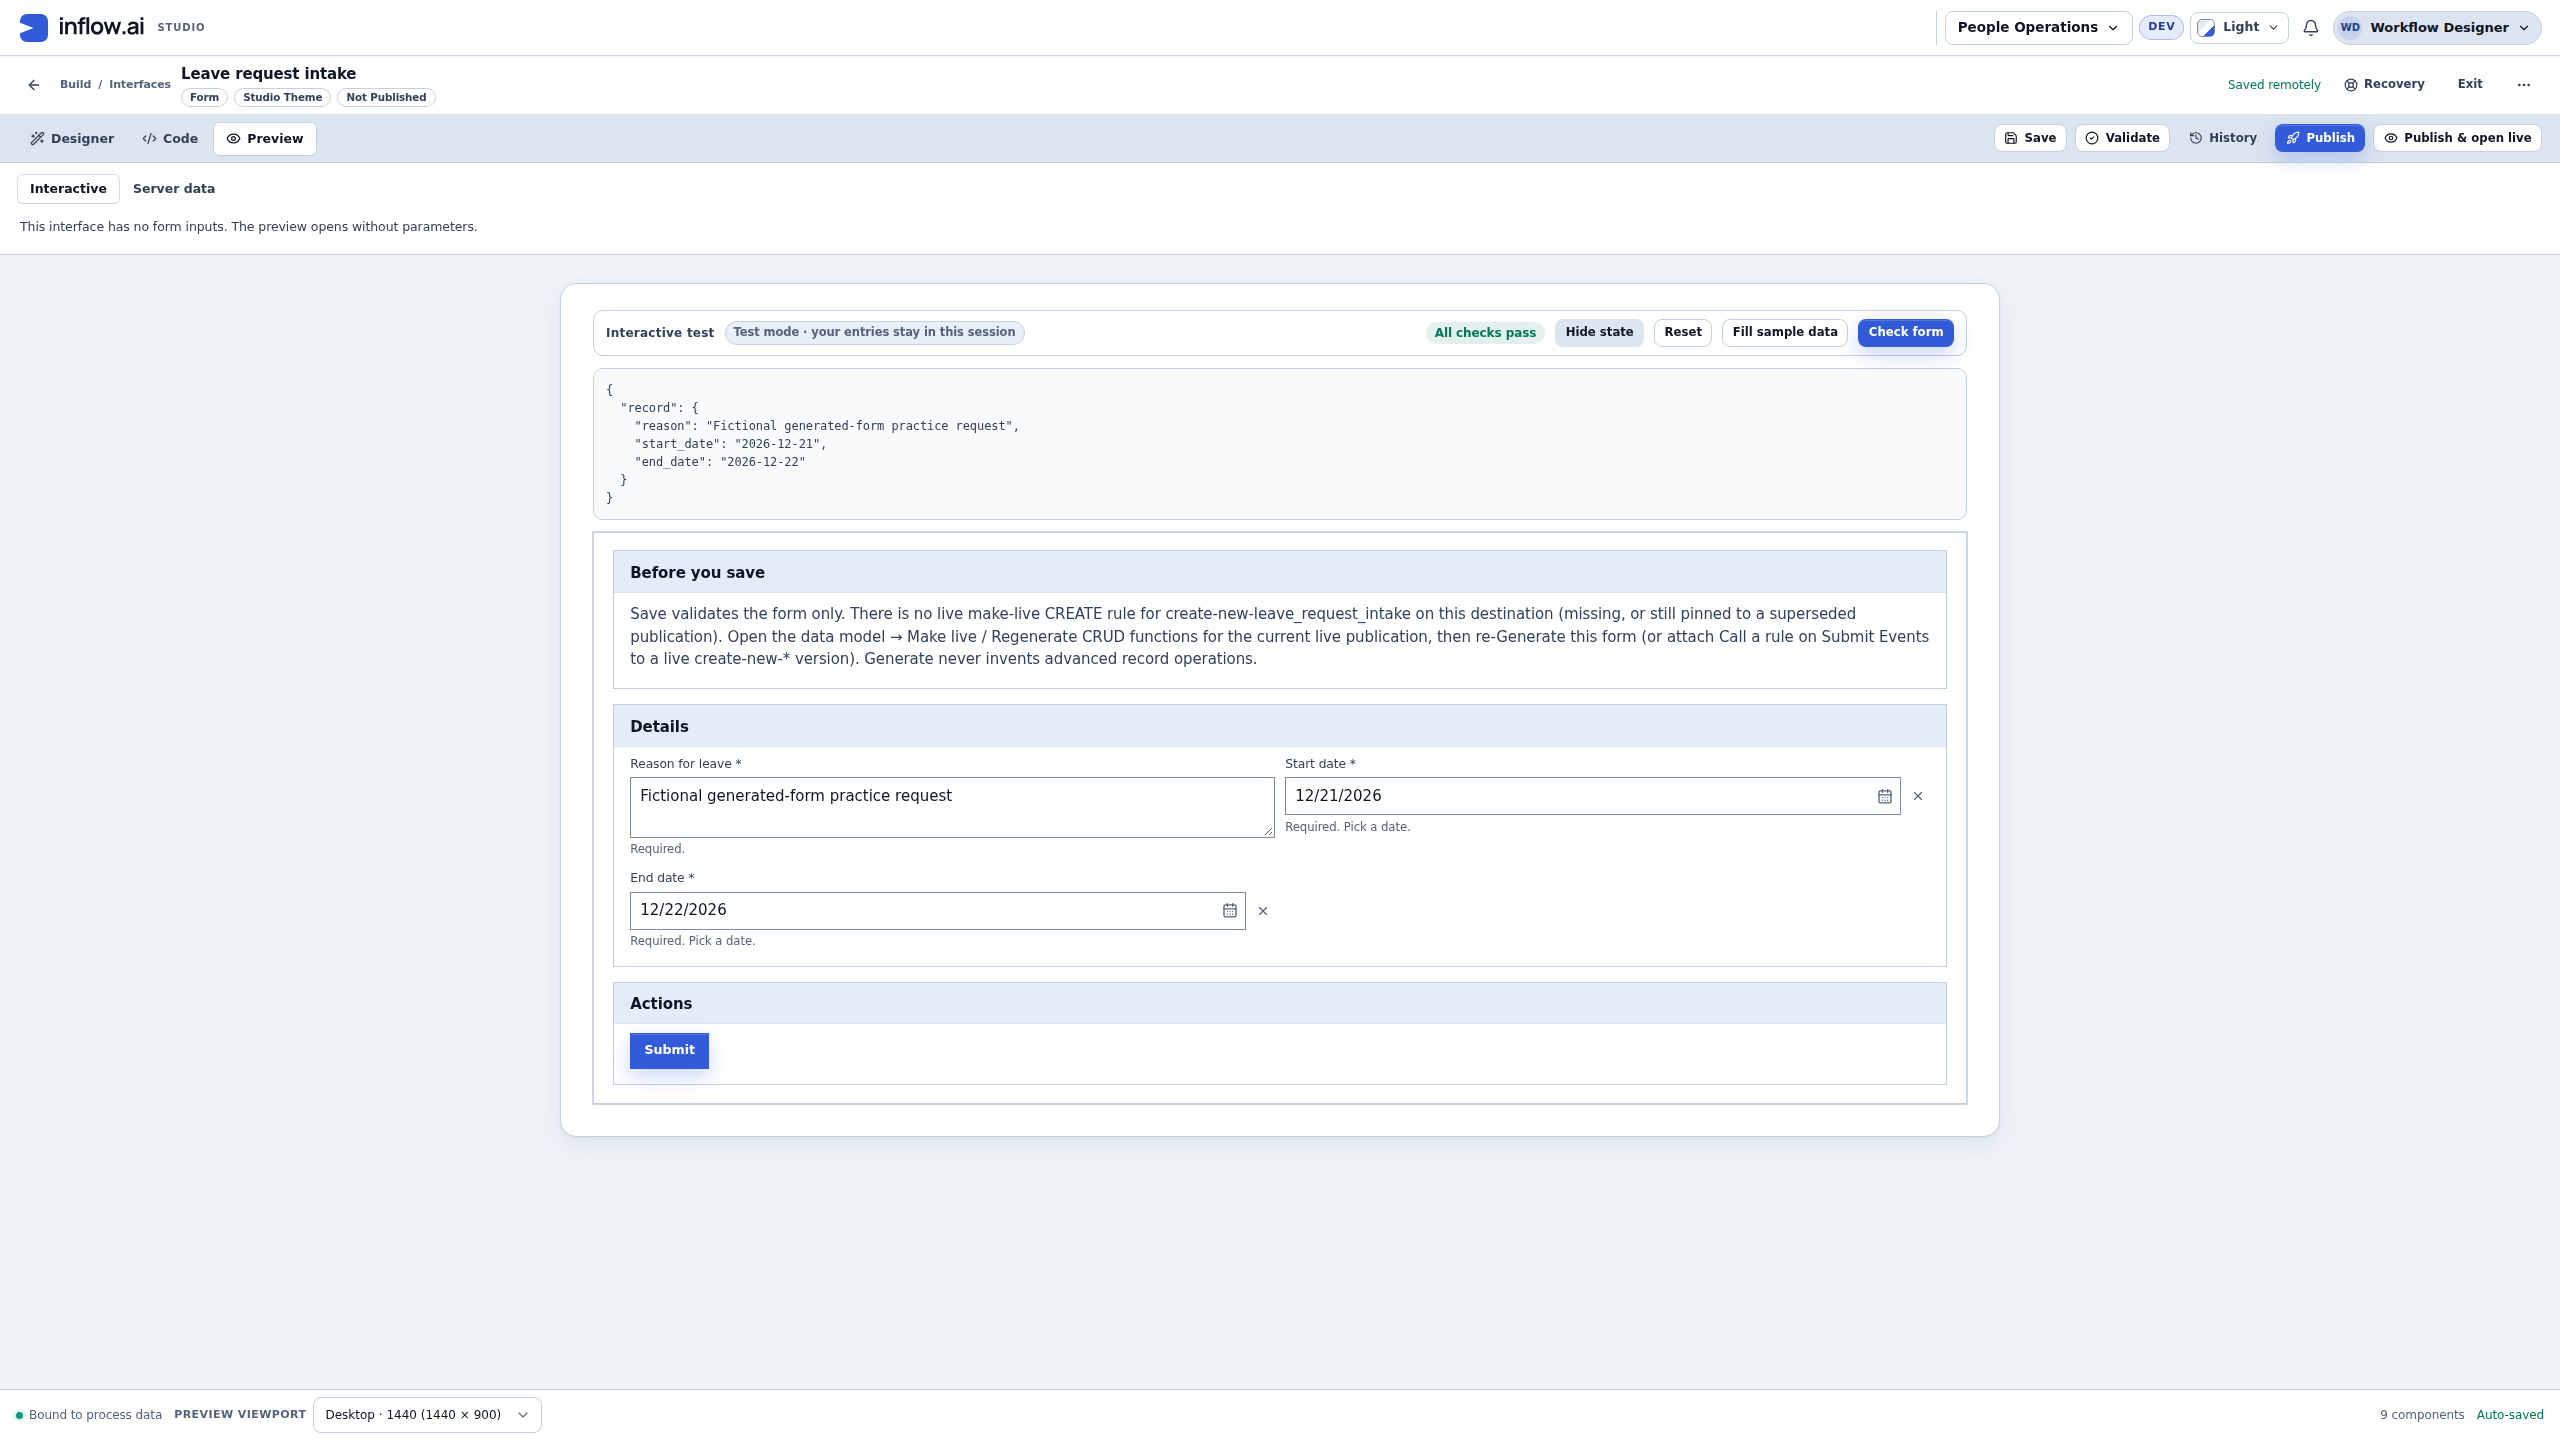
After the fictional reason and December 21–22 dates are entered, Check form passes and Form state shows the local values:
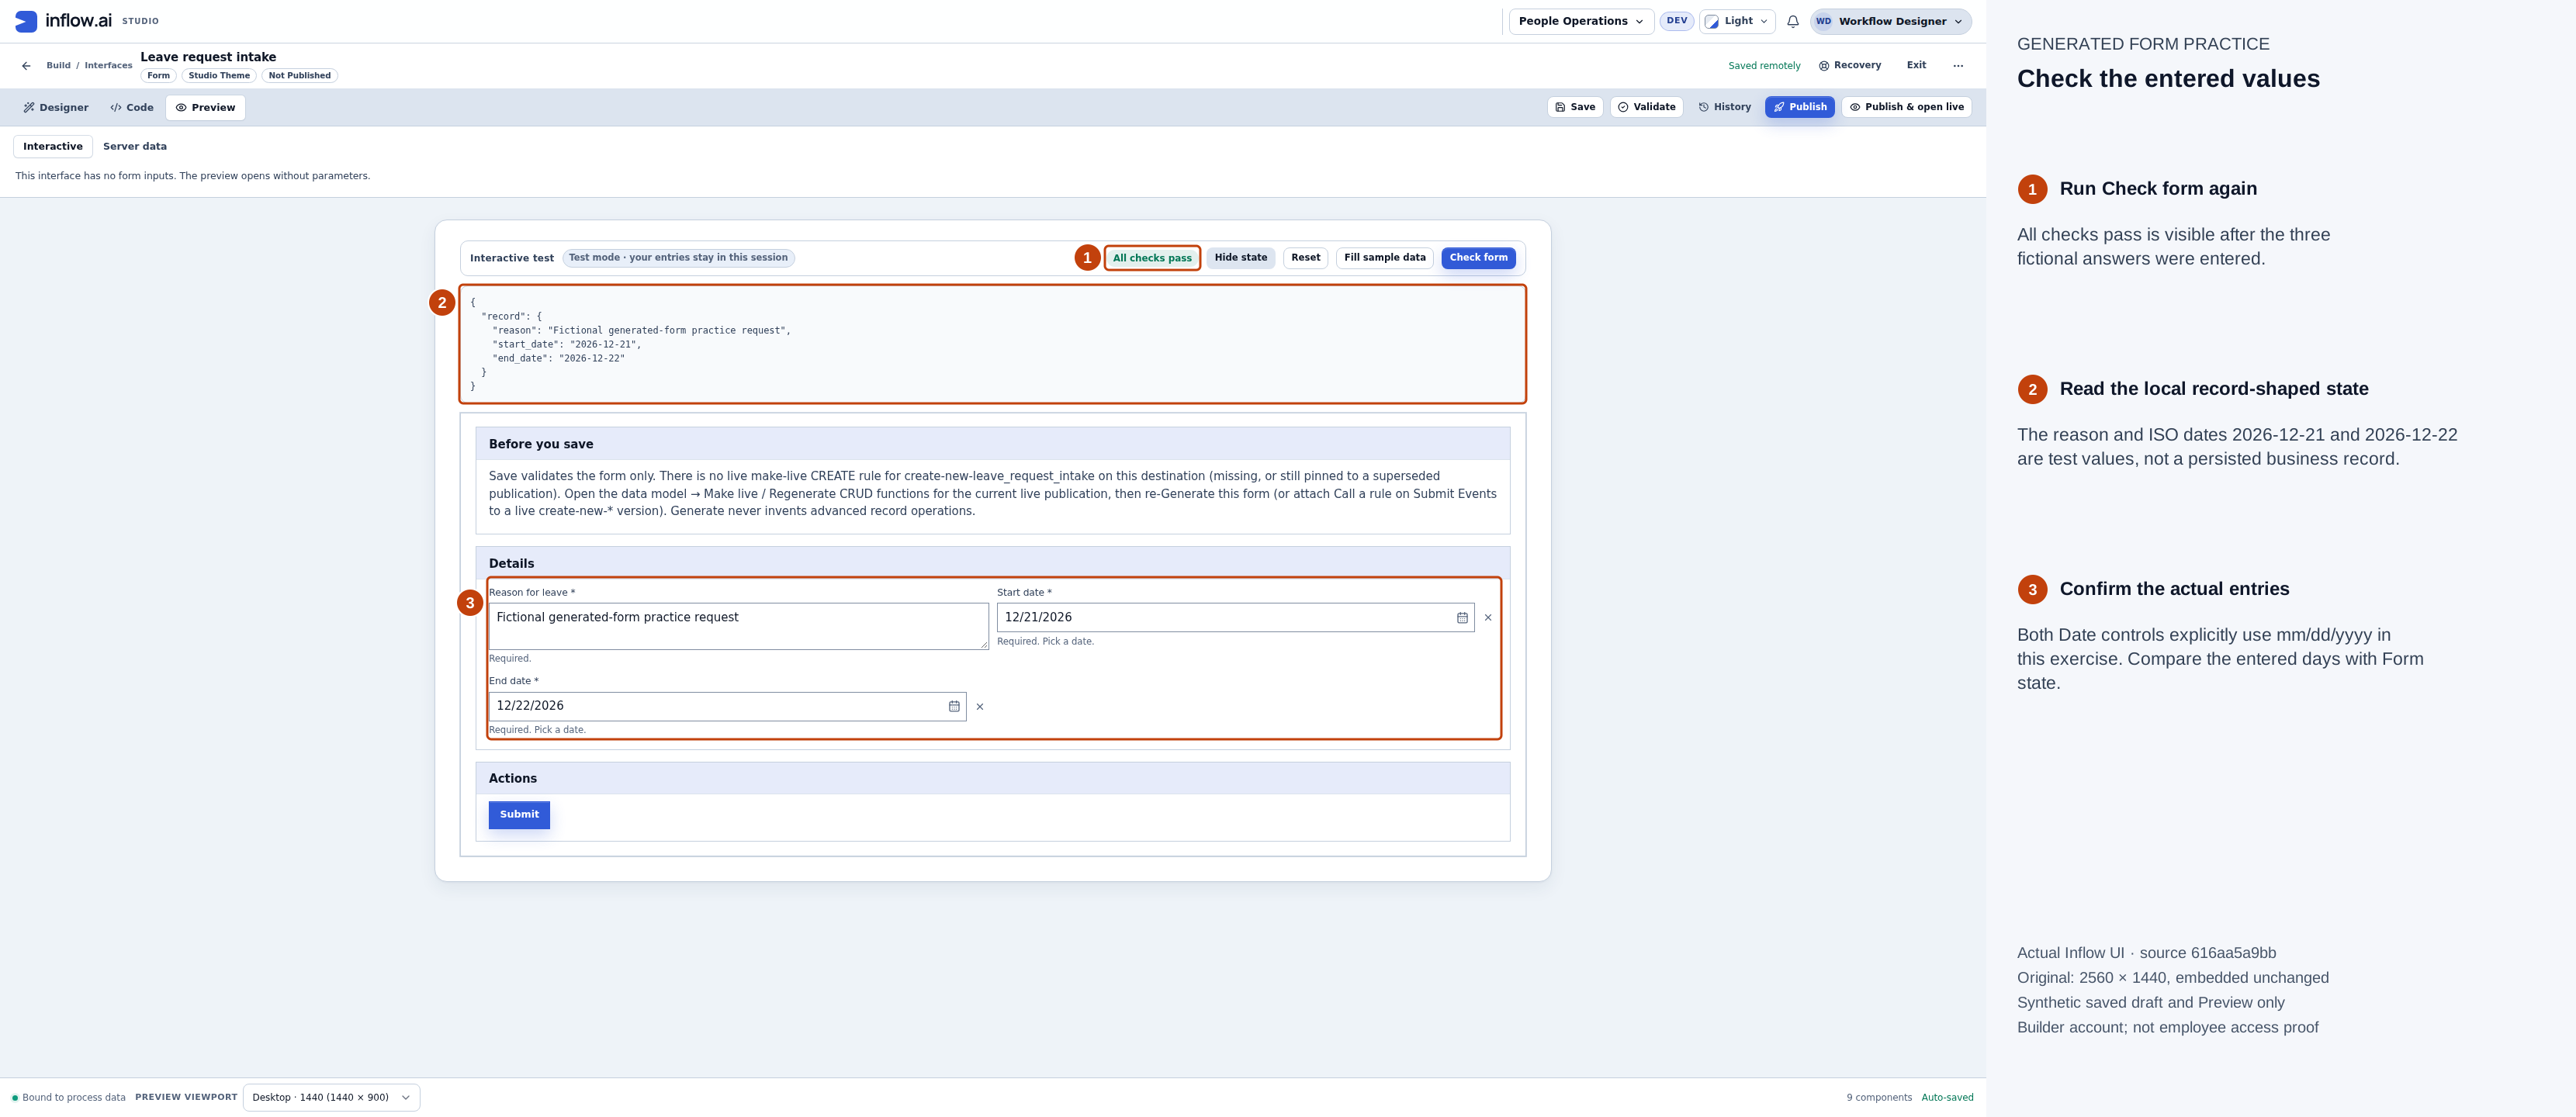
The local state is not a saved leave record. The two Date controls explicitly use mm/dd/yyyy for this exercise. Full-size guide · Unchanged original.
A further Submit in that practice reports Preview only — nothing was saved. Continue the connected nine-field example below only when its intended destination is actually ready; validation-only practice does not satisfy that prerequisite.
Review twice before applying the layout
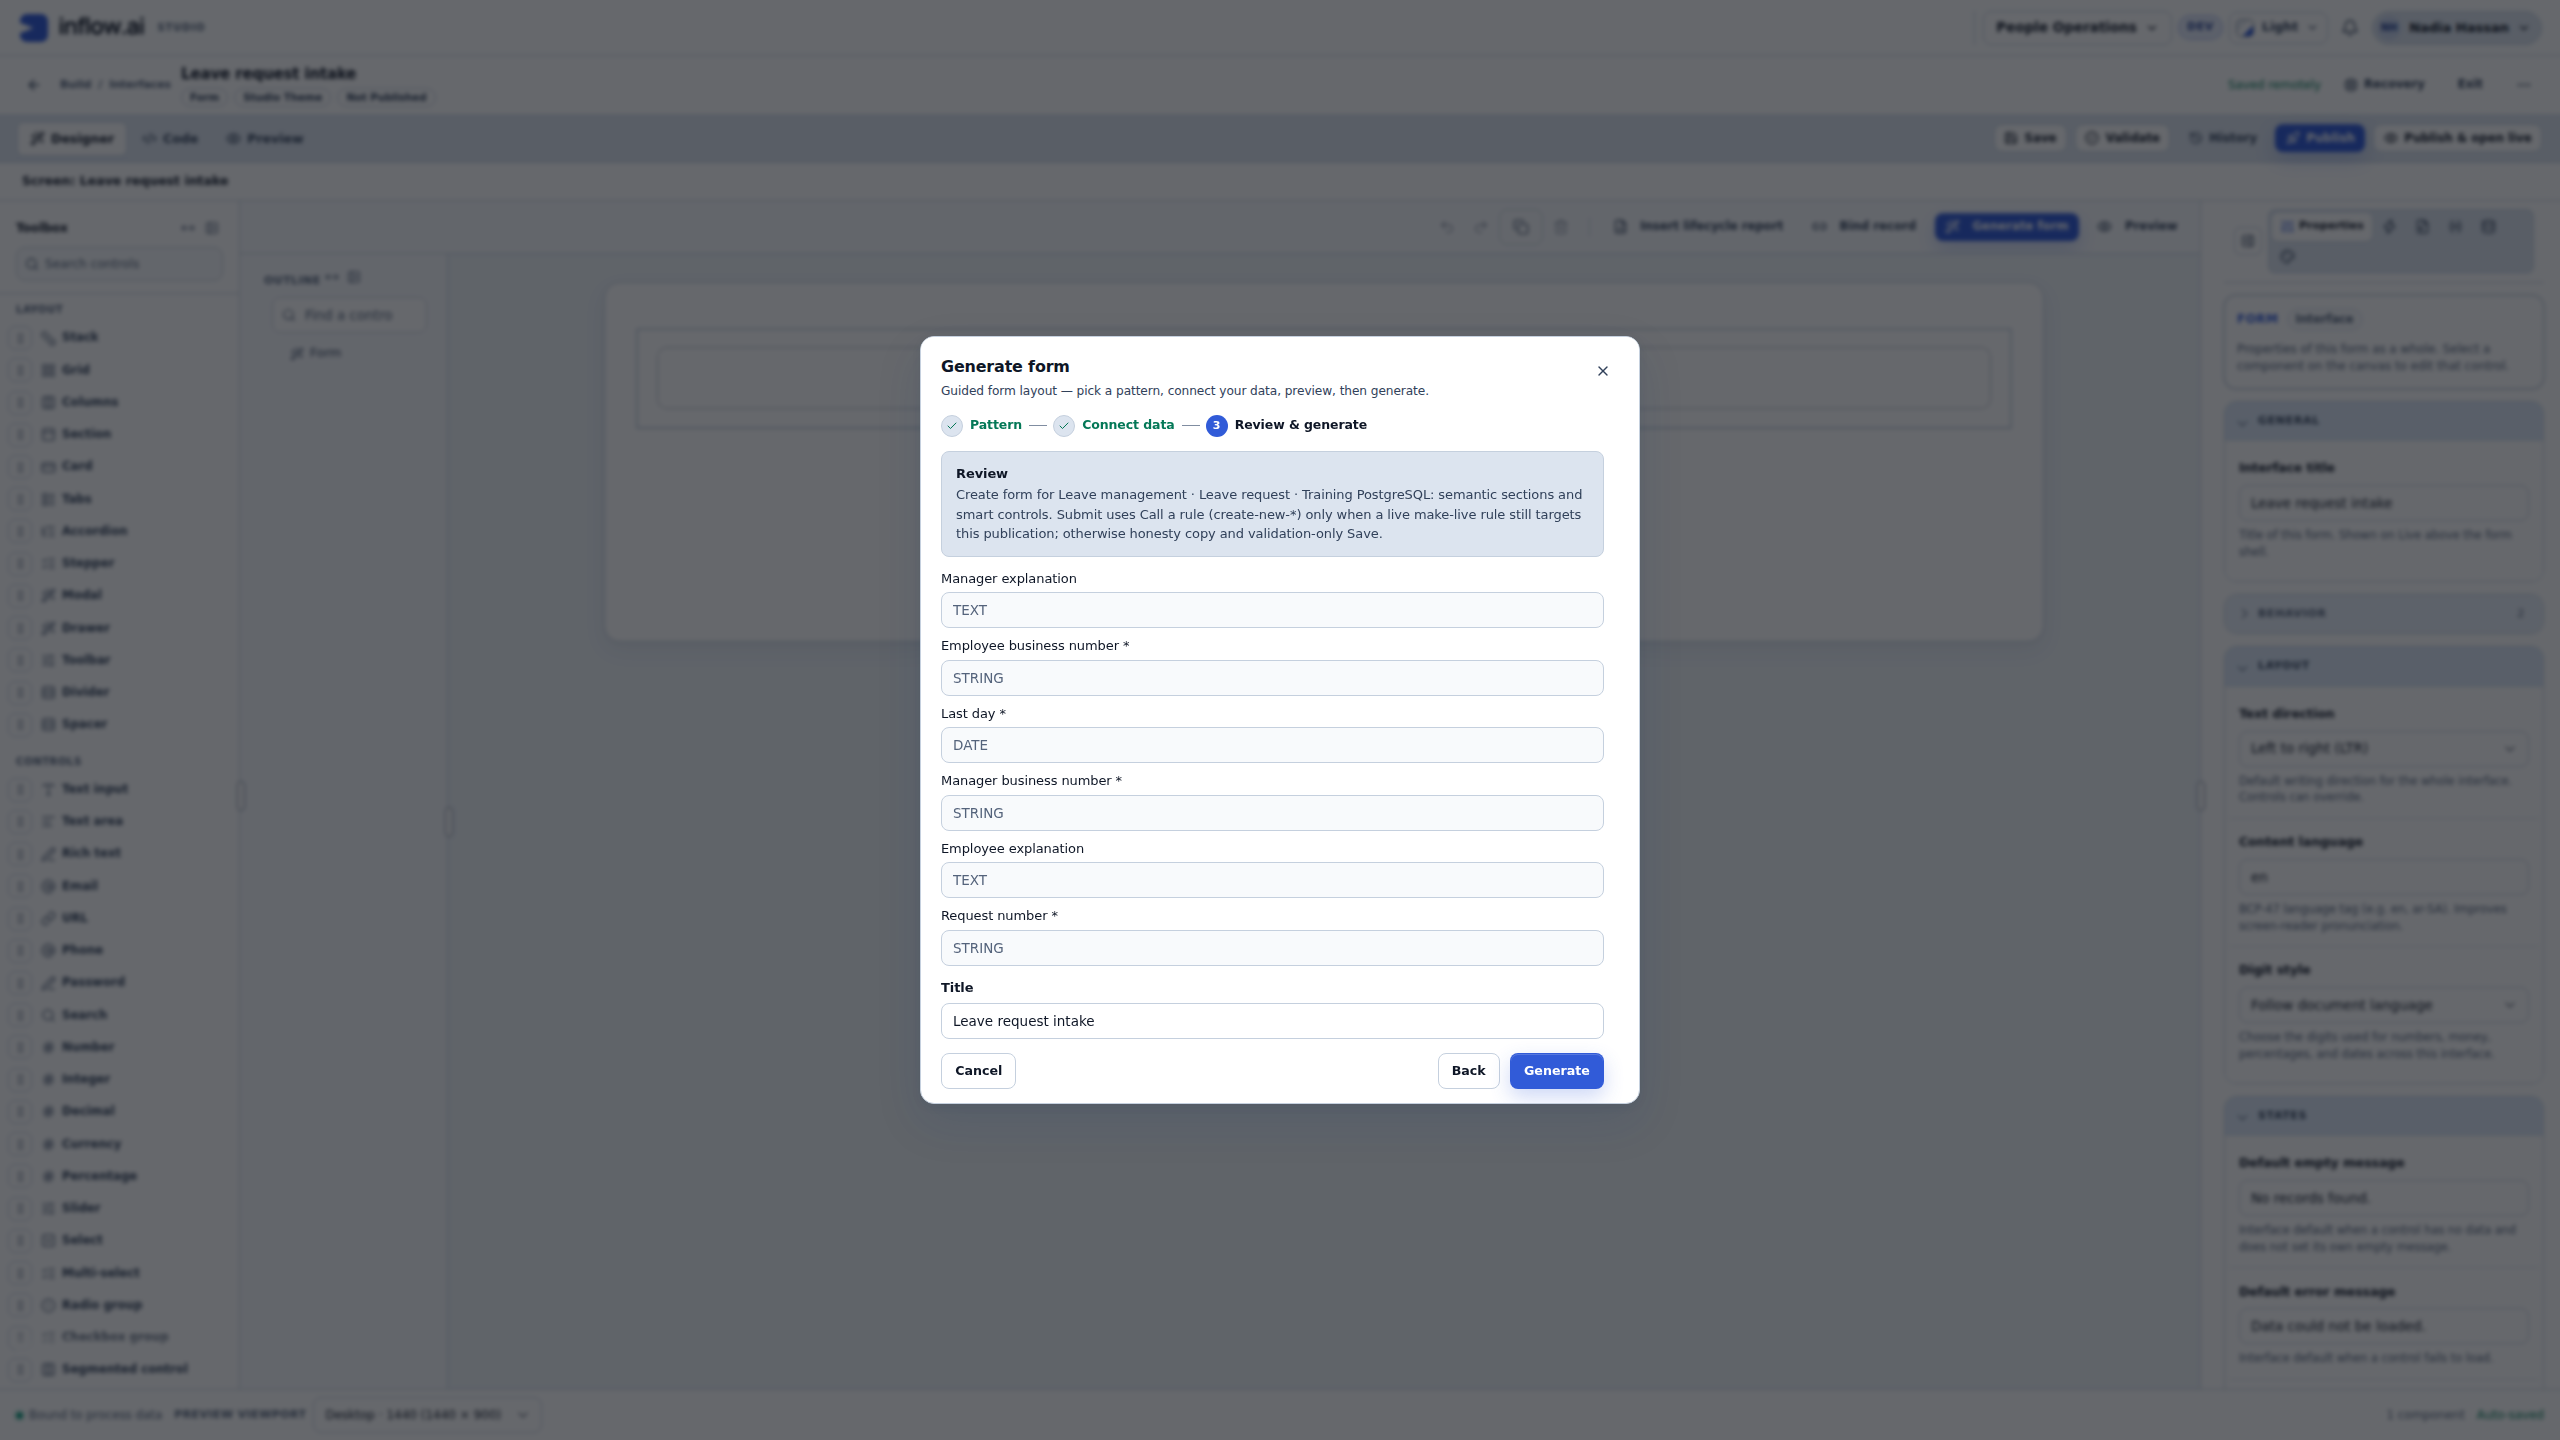
- Choose Next to open Review & generate. Inspect the selected destination, title and field previews. Scroll within the dialog to read fields below the initial view.
- Choose Generate when that proposed form is correct. This prepares a layout; there is still a separate application decision.
- Read Review generated changes. Inspect added/removed/changed controls, data connections and automations. In this new empty teaching draft, the review shows 13 controls added, 9 data connections and 2 automations, with none removed or changed.
- Choose the application option that preserves the work you need: Insert into selection, Replace existing content, or Create another interface. Use Cancel if the effect is wrong. Nadia chooses Replace existing content only for this separate empty intake draft; she does not replace the earlier practice form.
- Inspect the resulting Details, Status & audit, and Actions sections. Save and wait for Saved remotely.
- Select Submit in Outline and open Automations. Inspect its Call a rule target and field mappings with the data owner. Generation uses the prepared create rule when a matching live publication pin is available. A familiar success-message text is not proof that this action executed.
Example 5: diagnose the effective Submit route
With the generated Submit button selected, read the On submit card at the top of Automations. It summarizes the effective submission route for this button and may include a button to open the configured Interface or Form automation. If the card identifies the selected button's own handler, inspect that handler on the selected button. For this generated intake, compare the owner and summary with the intended Call a rule target and its field mappings. The card describes configuration; only the later ordinary-user Live journey can show that a record was actually saved.
For example, Interface submit (primary CRUD rule) identifies the interface submit route and shows its prepared rule key and version when present. Form submit (<form title>) identifies the owning Form by its current title, label, or ID. Choose the offered Open Interface submit automation or Open Form submit automation to inspect that configuration.
If the card says Multiple submit automations configured, the interface and one or more Form controls have competing submit handlers. Ask the interface owner to choose the intended single route, remove the unintended duplicate, then reopen On submit and confirm the conflict is gone before continuing. If the card says This Submit button (When pressed) and notes that it bypasses a configured Interface/Form submit automation, the button's own handler takes priority; ask the owner which route is intended before changing either handler. If it says No submit automation configured, ask the owner to confirm the intended submission path before relying on it. This is a configuration summary, not proof of a successful save. Do not use the card, a generated success message, or the Preview to claim that a record exists.
View the unannotated original screenshot
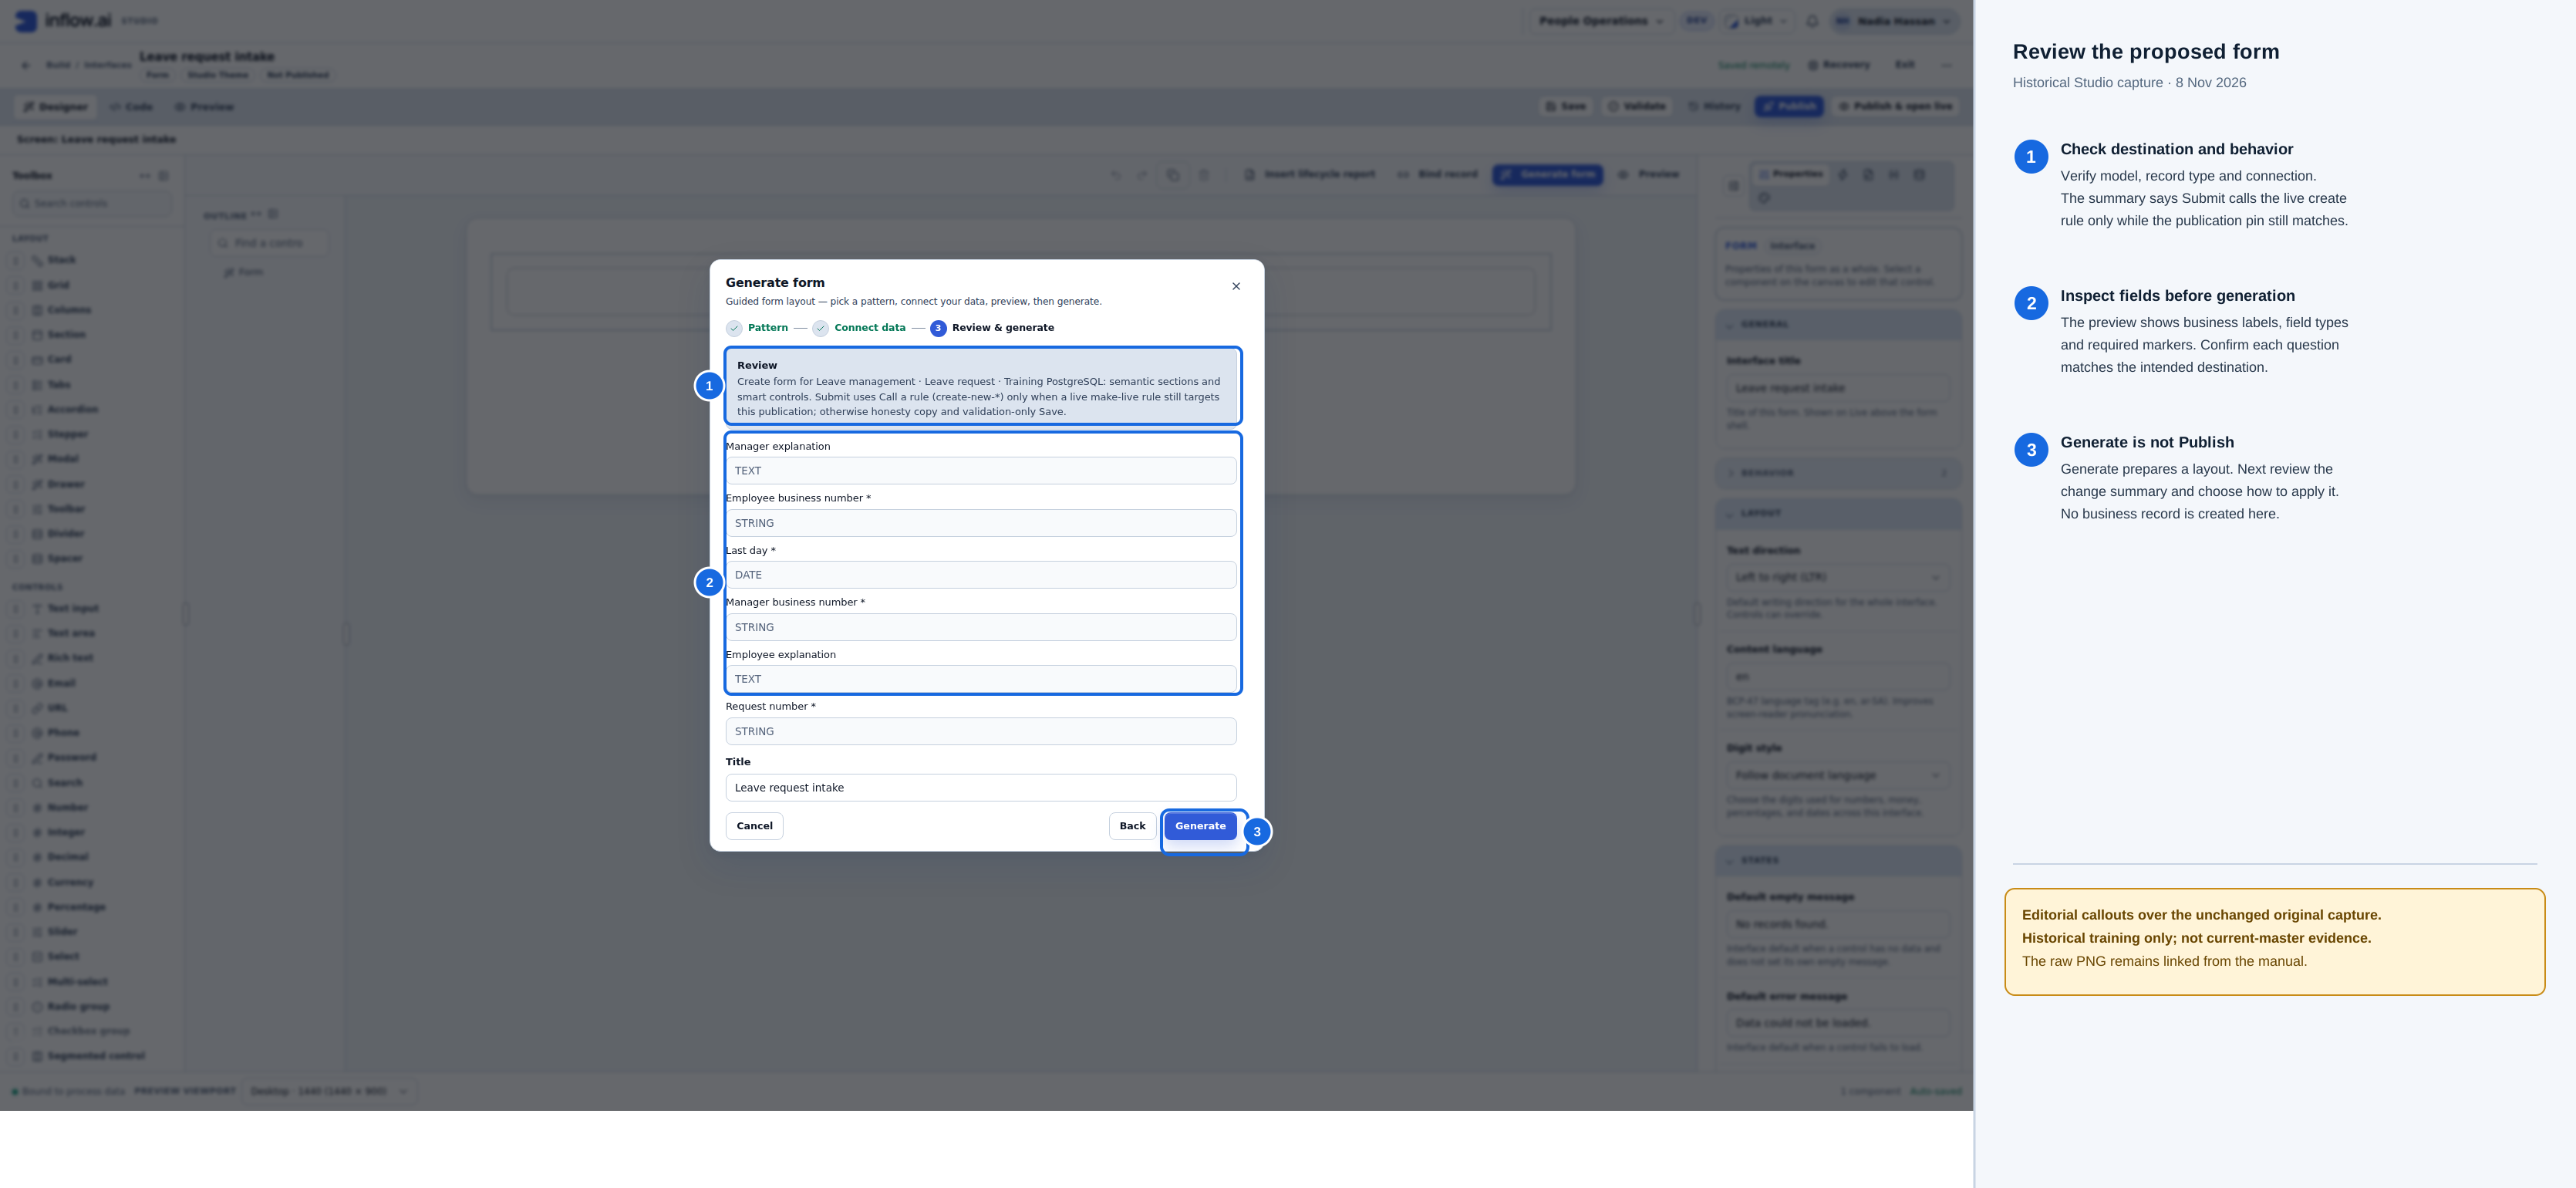
- Recheck the destination summary. The Submit call depends on the live create-rule publication still targeting this destination.
- Read the business labels, types and required markers before generating. A required question still needs a valid answer from the person using the form.
- Generate prepares the proposed layout; it does not publish the app or create a business record. Review the separate change summary and choose how to apply the layout.
Historical editorial guidance over the 8 November 2026 capture. The unchanged original PNG remains available; this is not current-master evidence.
View the unannotated original screenshot
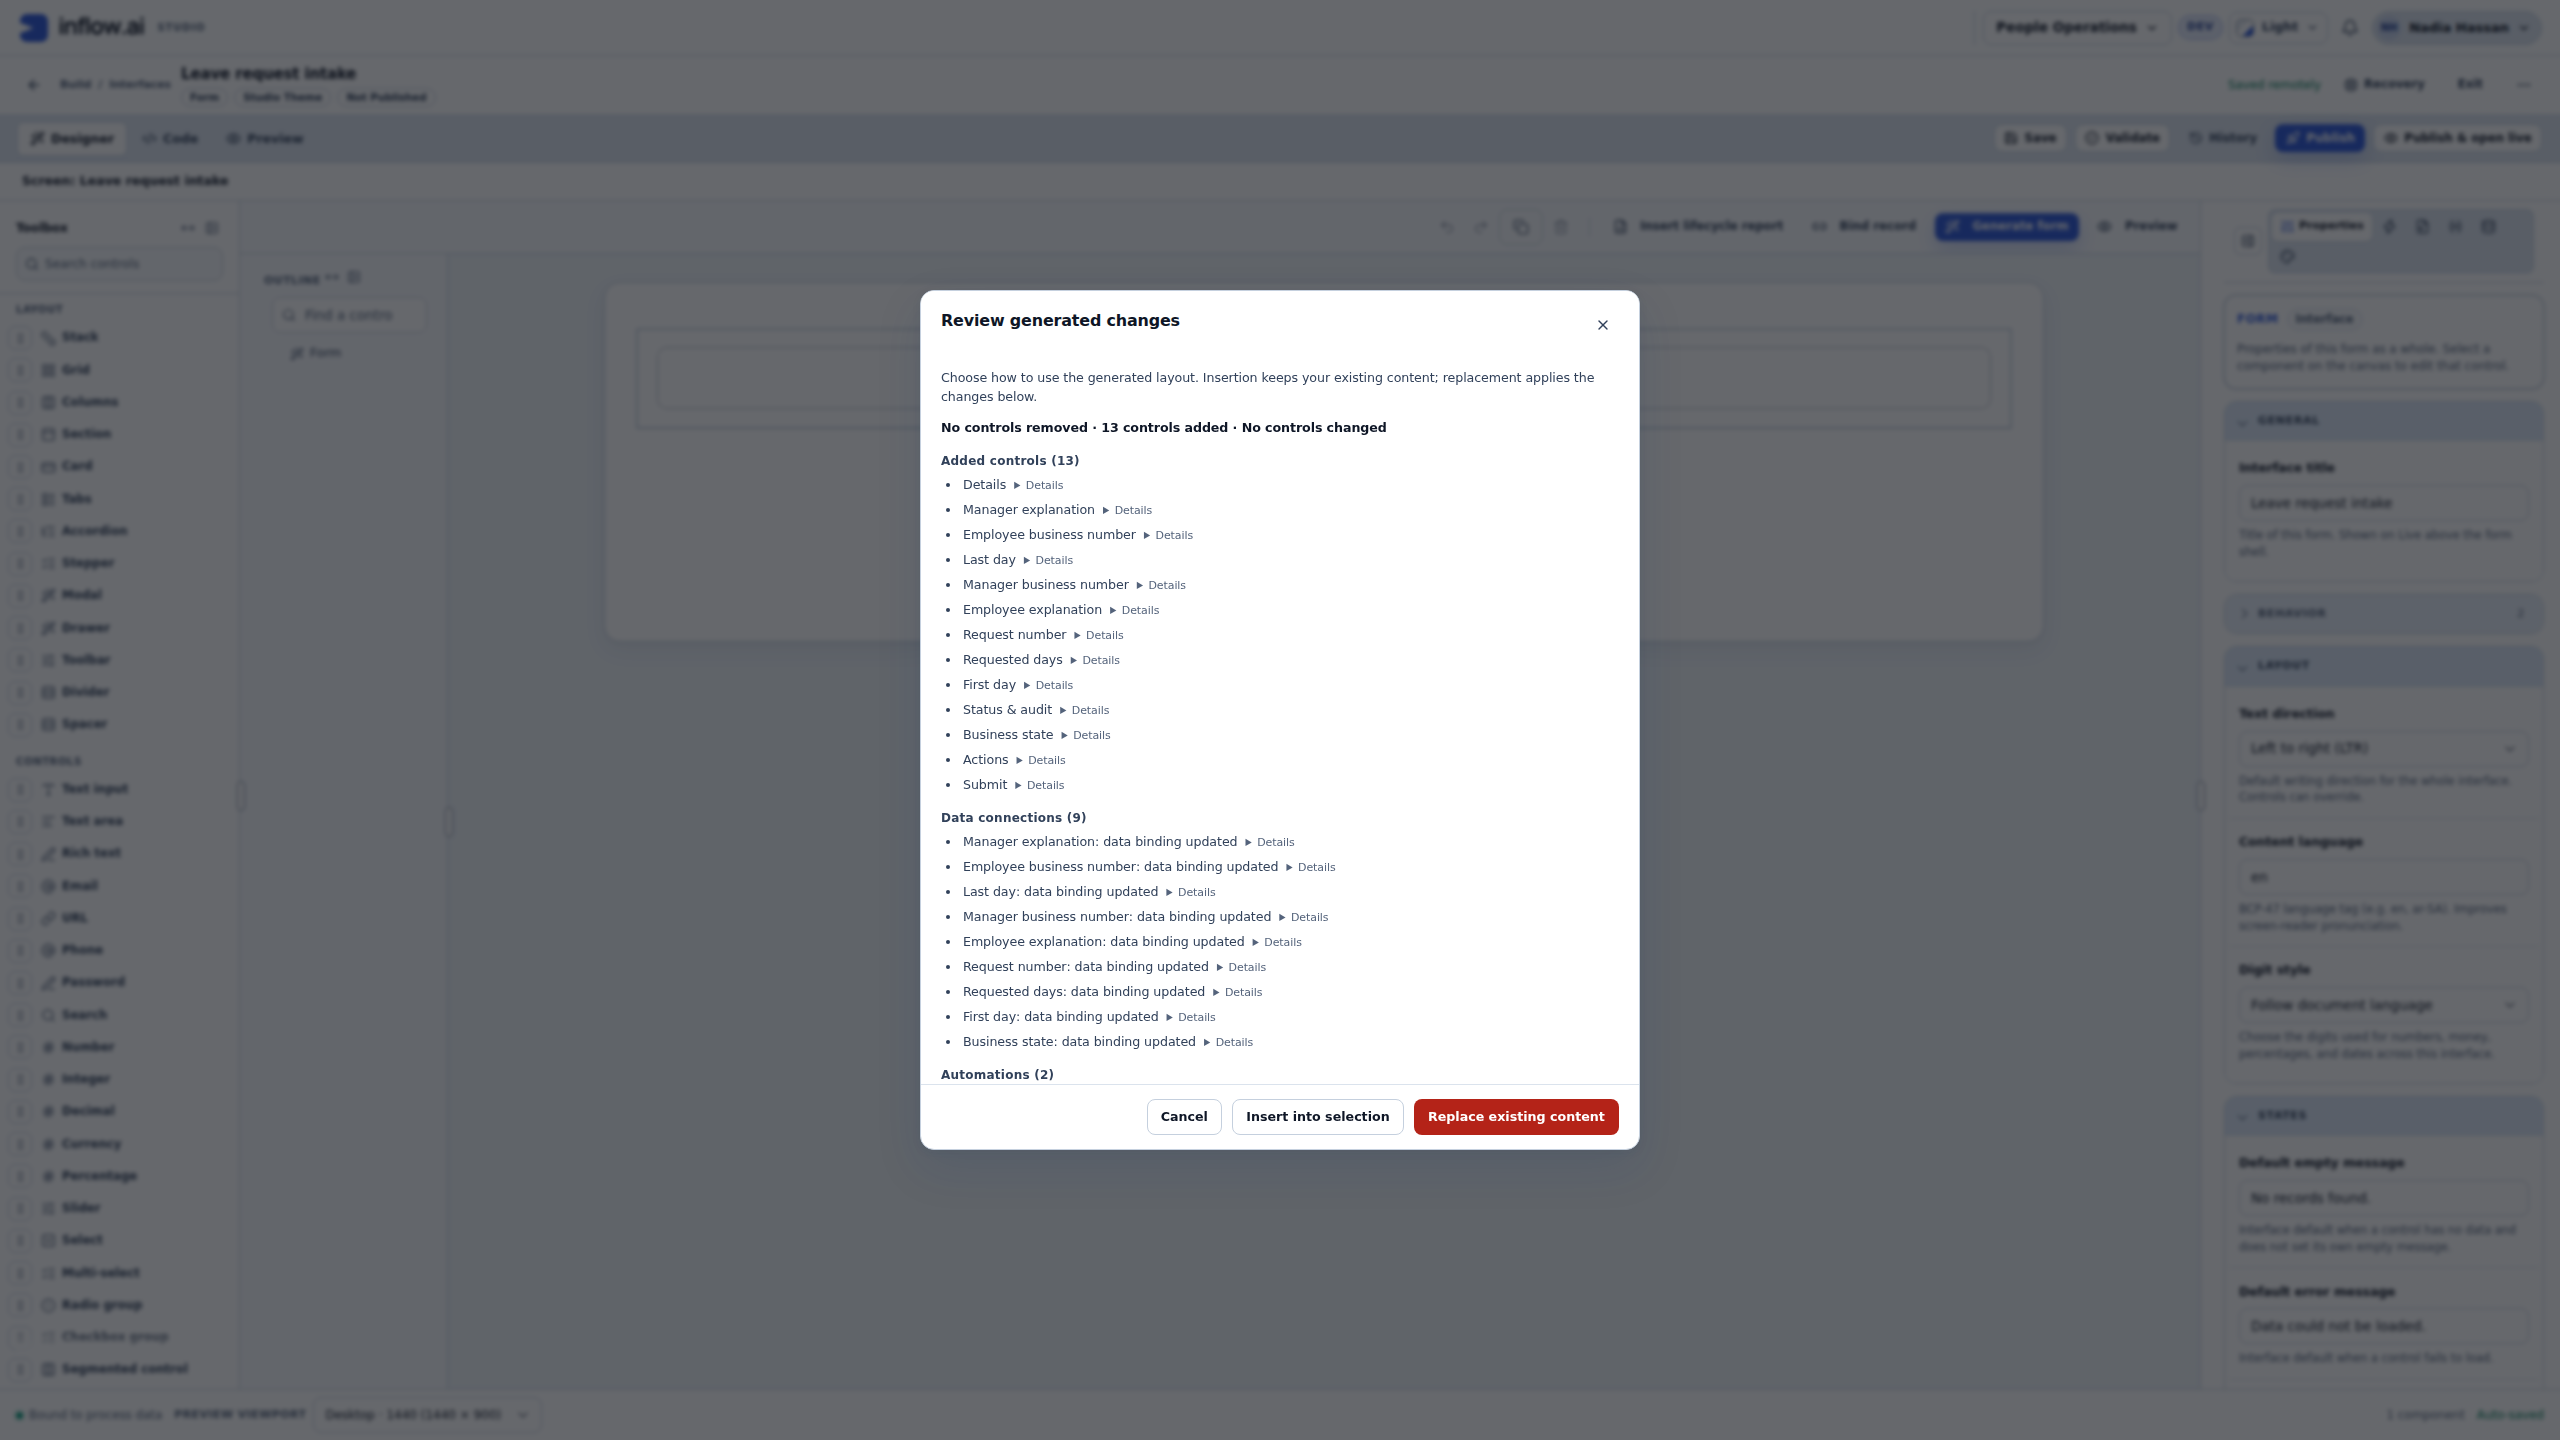
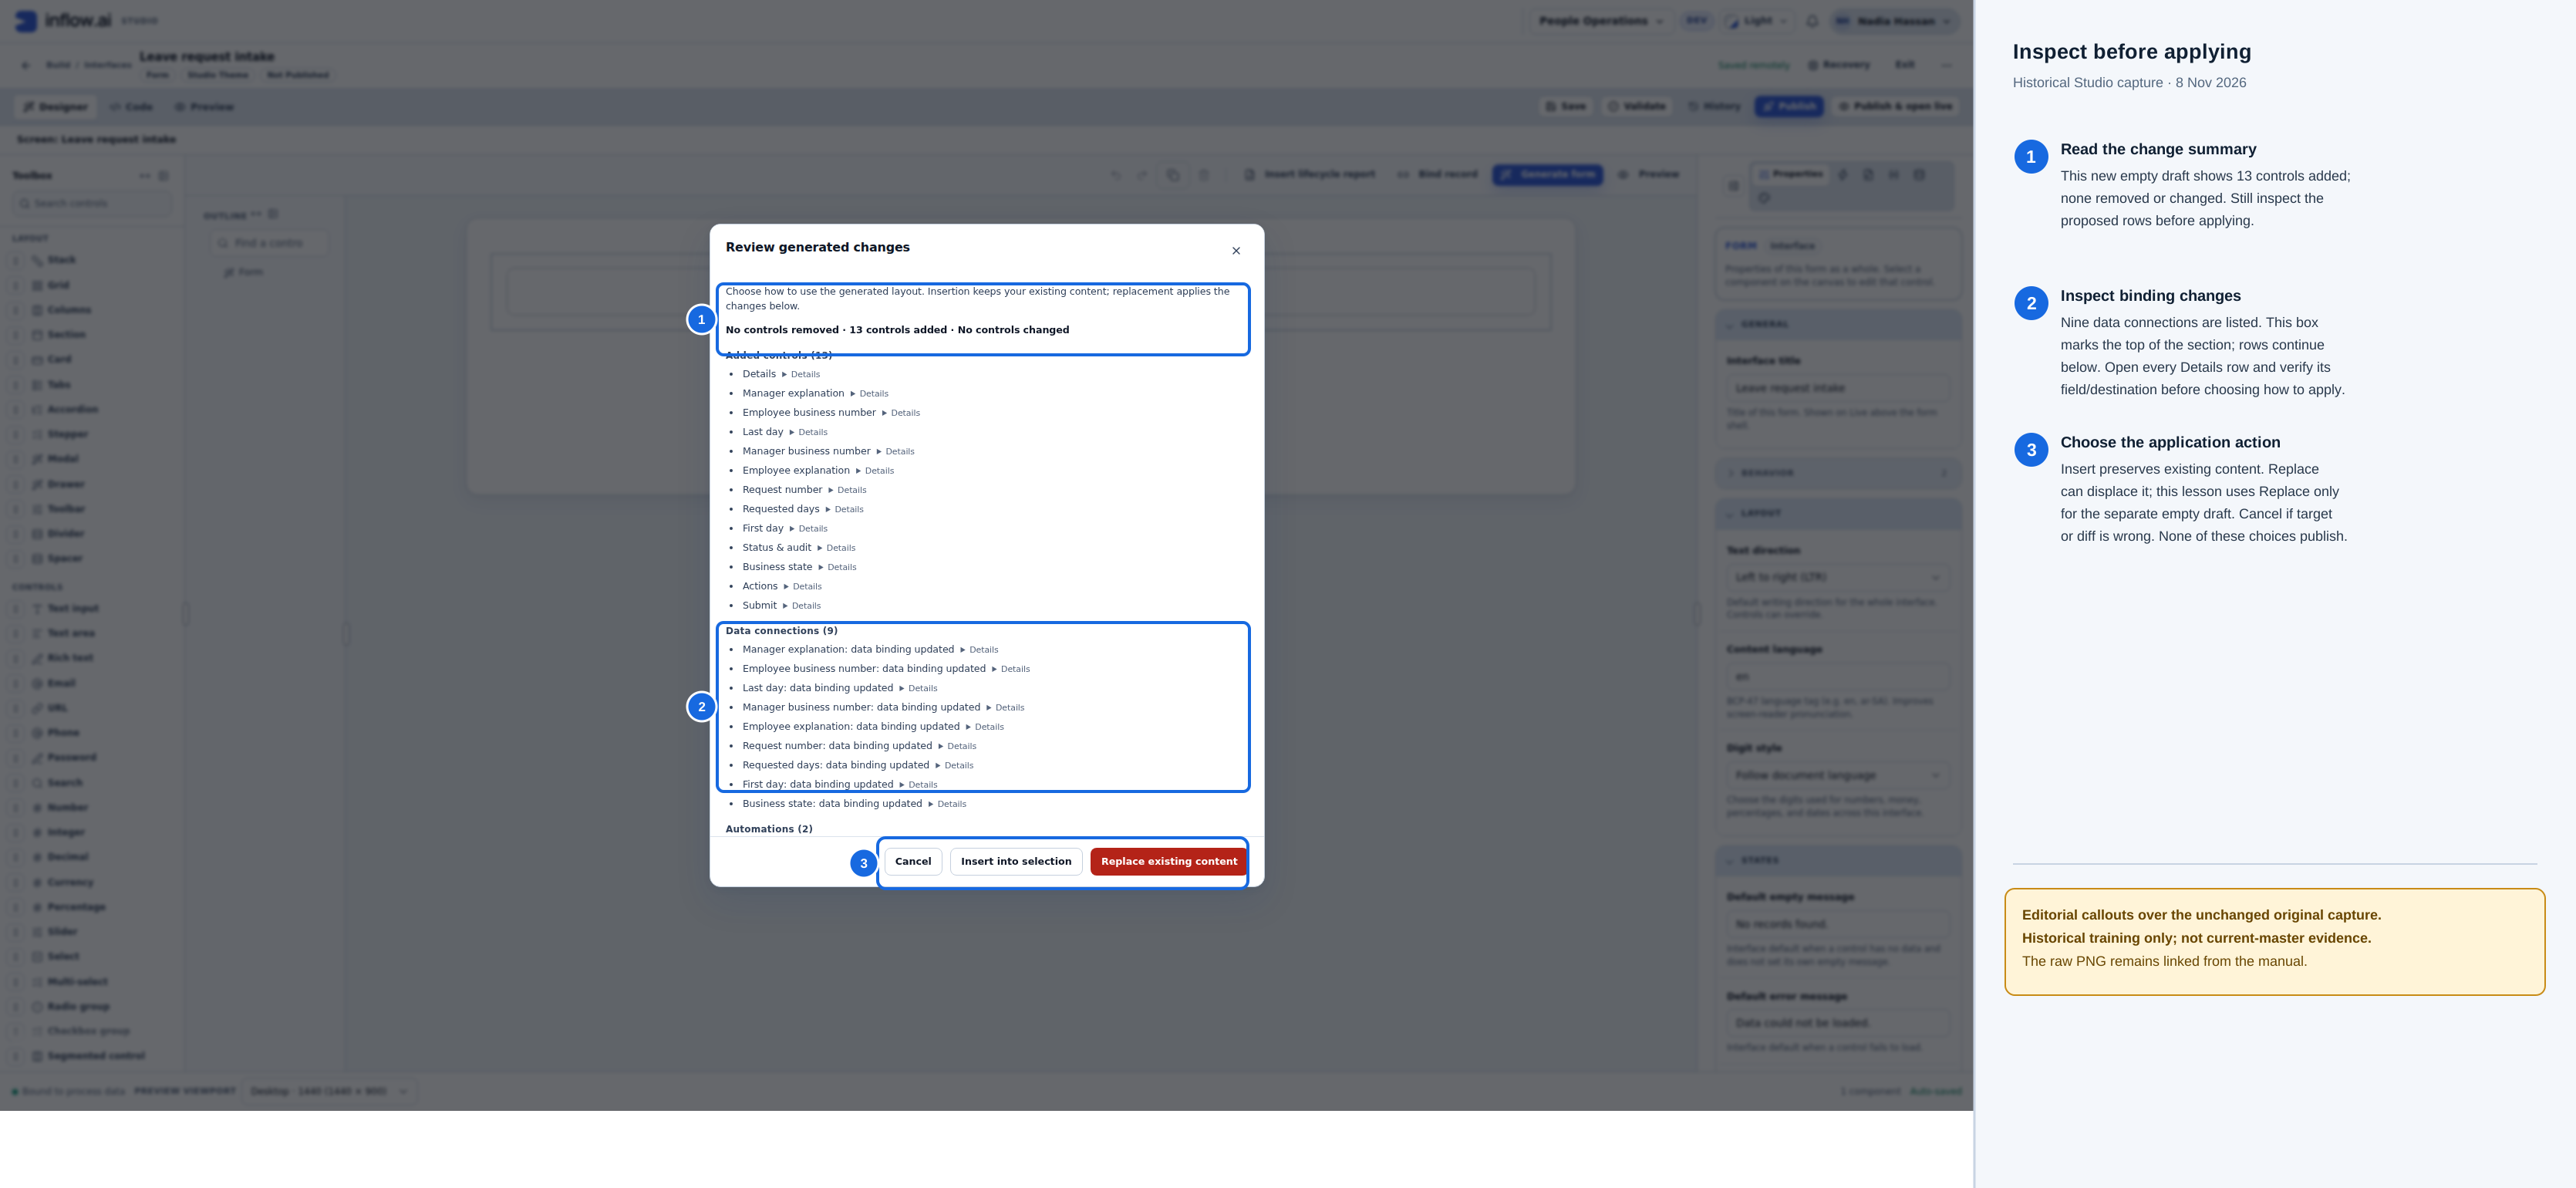
- In the new empty intake draft shown here, thirteen controls are added and none removed or changed. Read the complete change list rather than relying only on its totals.
- Expand each Data connections detail and confirm the intended field and destination. This example reports nine connection changes.
- Insert into selection keeps existing content. Replace existing content can displace it; this lesson chooses Replace only in the separate empty intake draft after checking the diff. Choose Cancel if the target or proposed changes are wrong. This dialog does not publish the interface.
Historical editorial guidance over the 8 November 2026 capture. The unchanged original PNG remains available; this is not current-master evidence.
This generated form is a builder exercise. It exposes Manager business number, Manager explanation and Business state as editable questions. That is not an employee approval design. Before releasing an employee application, configure trusted identity/manager values, the initial pending state and approval outcomes through the application's supported authorization and workflow. Hiding a field alone does not secure a write. Creating a form does not configure those rules or assign a manager task.
Try missing and valid answers in Interactive Preview
- Open Preview → Interactive. Read Test mode · your entries stay in this session. The actual empty Business state is Choose…, even though the designer's display sample showed Pending. Select a value explicitly; do not treat a display sample as a configured default.
- Press Submit with the questions empty. Read the seven required-field issues and follow an issue link to the field needing repair.
- Enter the agreed fictional values below. Use the Date field's calendar to choose the first and last days, then check both displayed dates.
- Explicitly choose Pending for Business state. Leave the manager's explanation empty.
- Press Submit once. Read the preview notice and any authored message together. Do not repeatedly click because a new record is absent.
| Question | Fictional answer |
|---|---|
| Request number | leave-2026-017 |
| Employee business number | M014 |
| Manager business number | S002 |
| First day | December 21, 2026 |
| Last day | December 22, 2026 |
| Requested days | 2 |
| Employee explanation | Fictional generated-form practice request |
| Business state | Pending |
| Manager explanation | Leave empty |
View the unannotated original screenshot
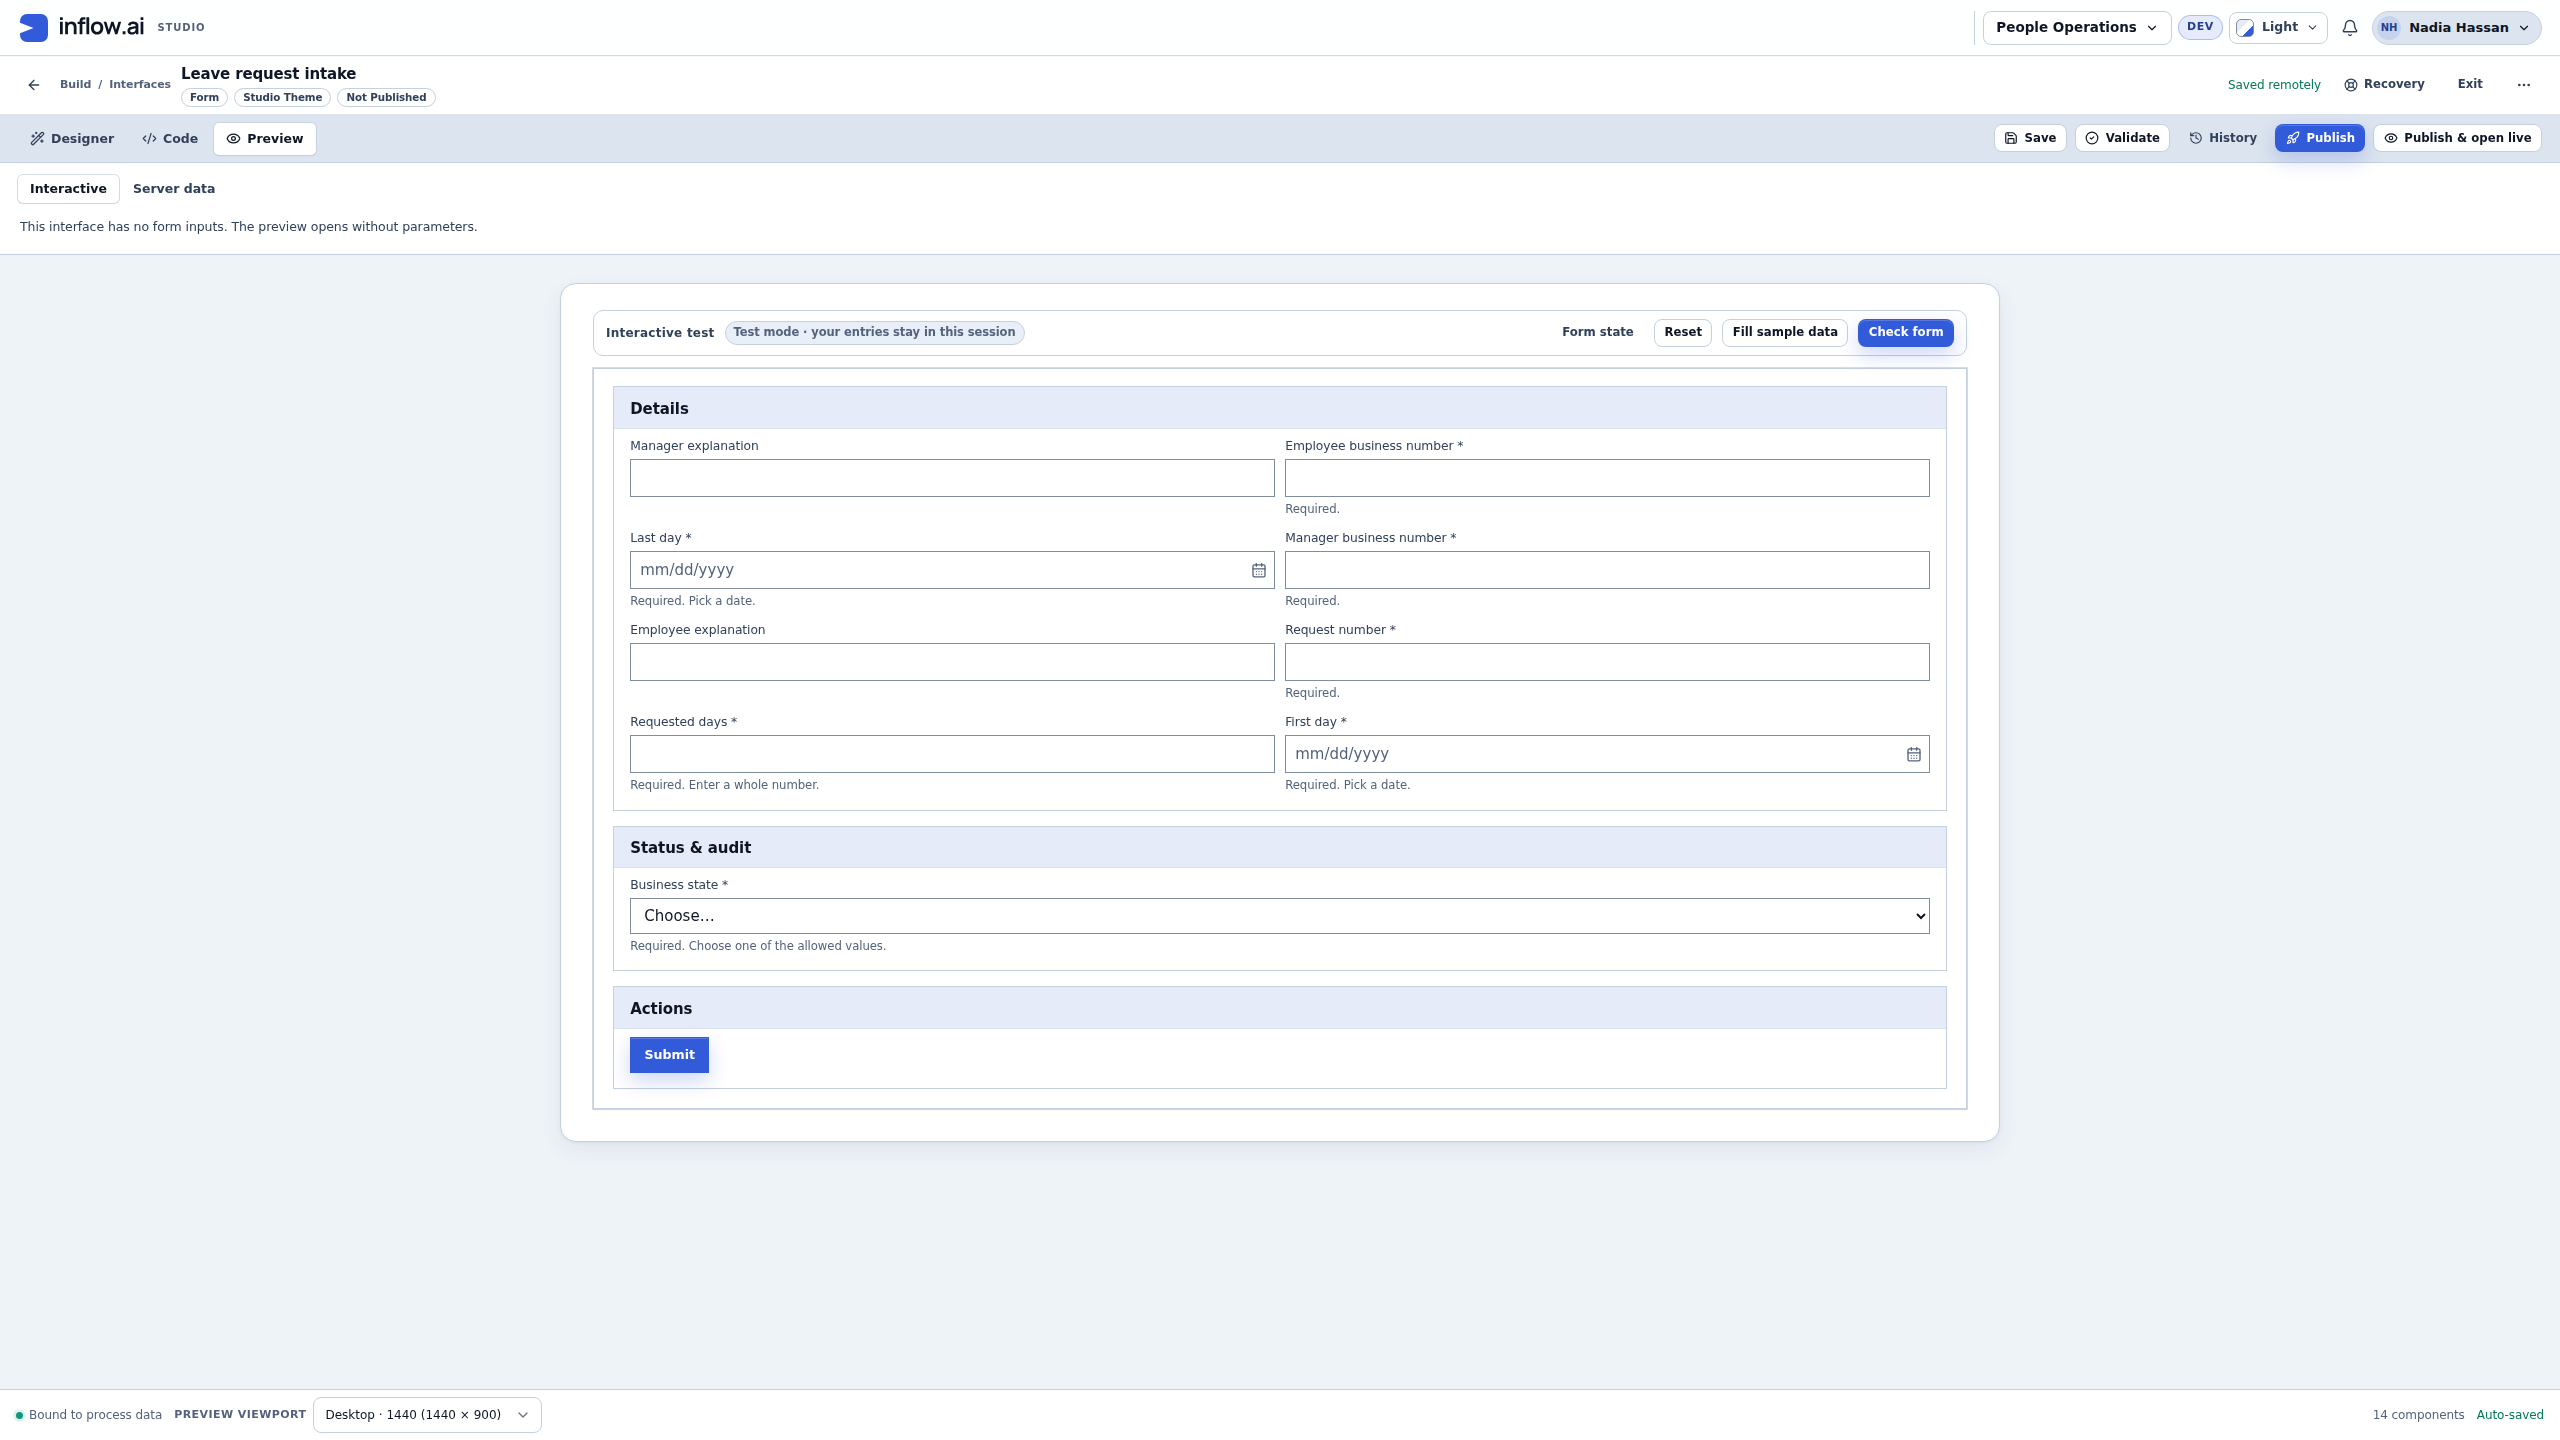
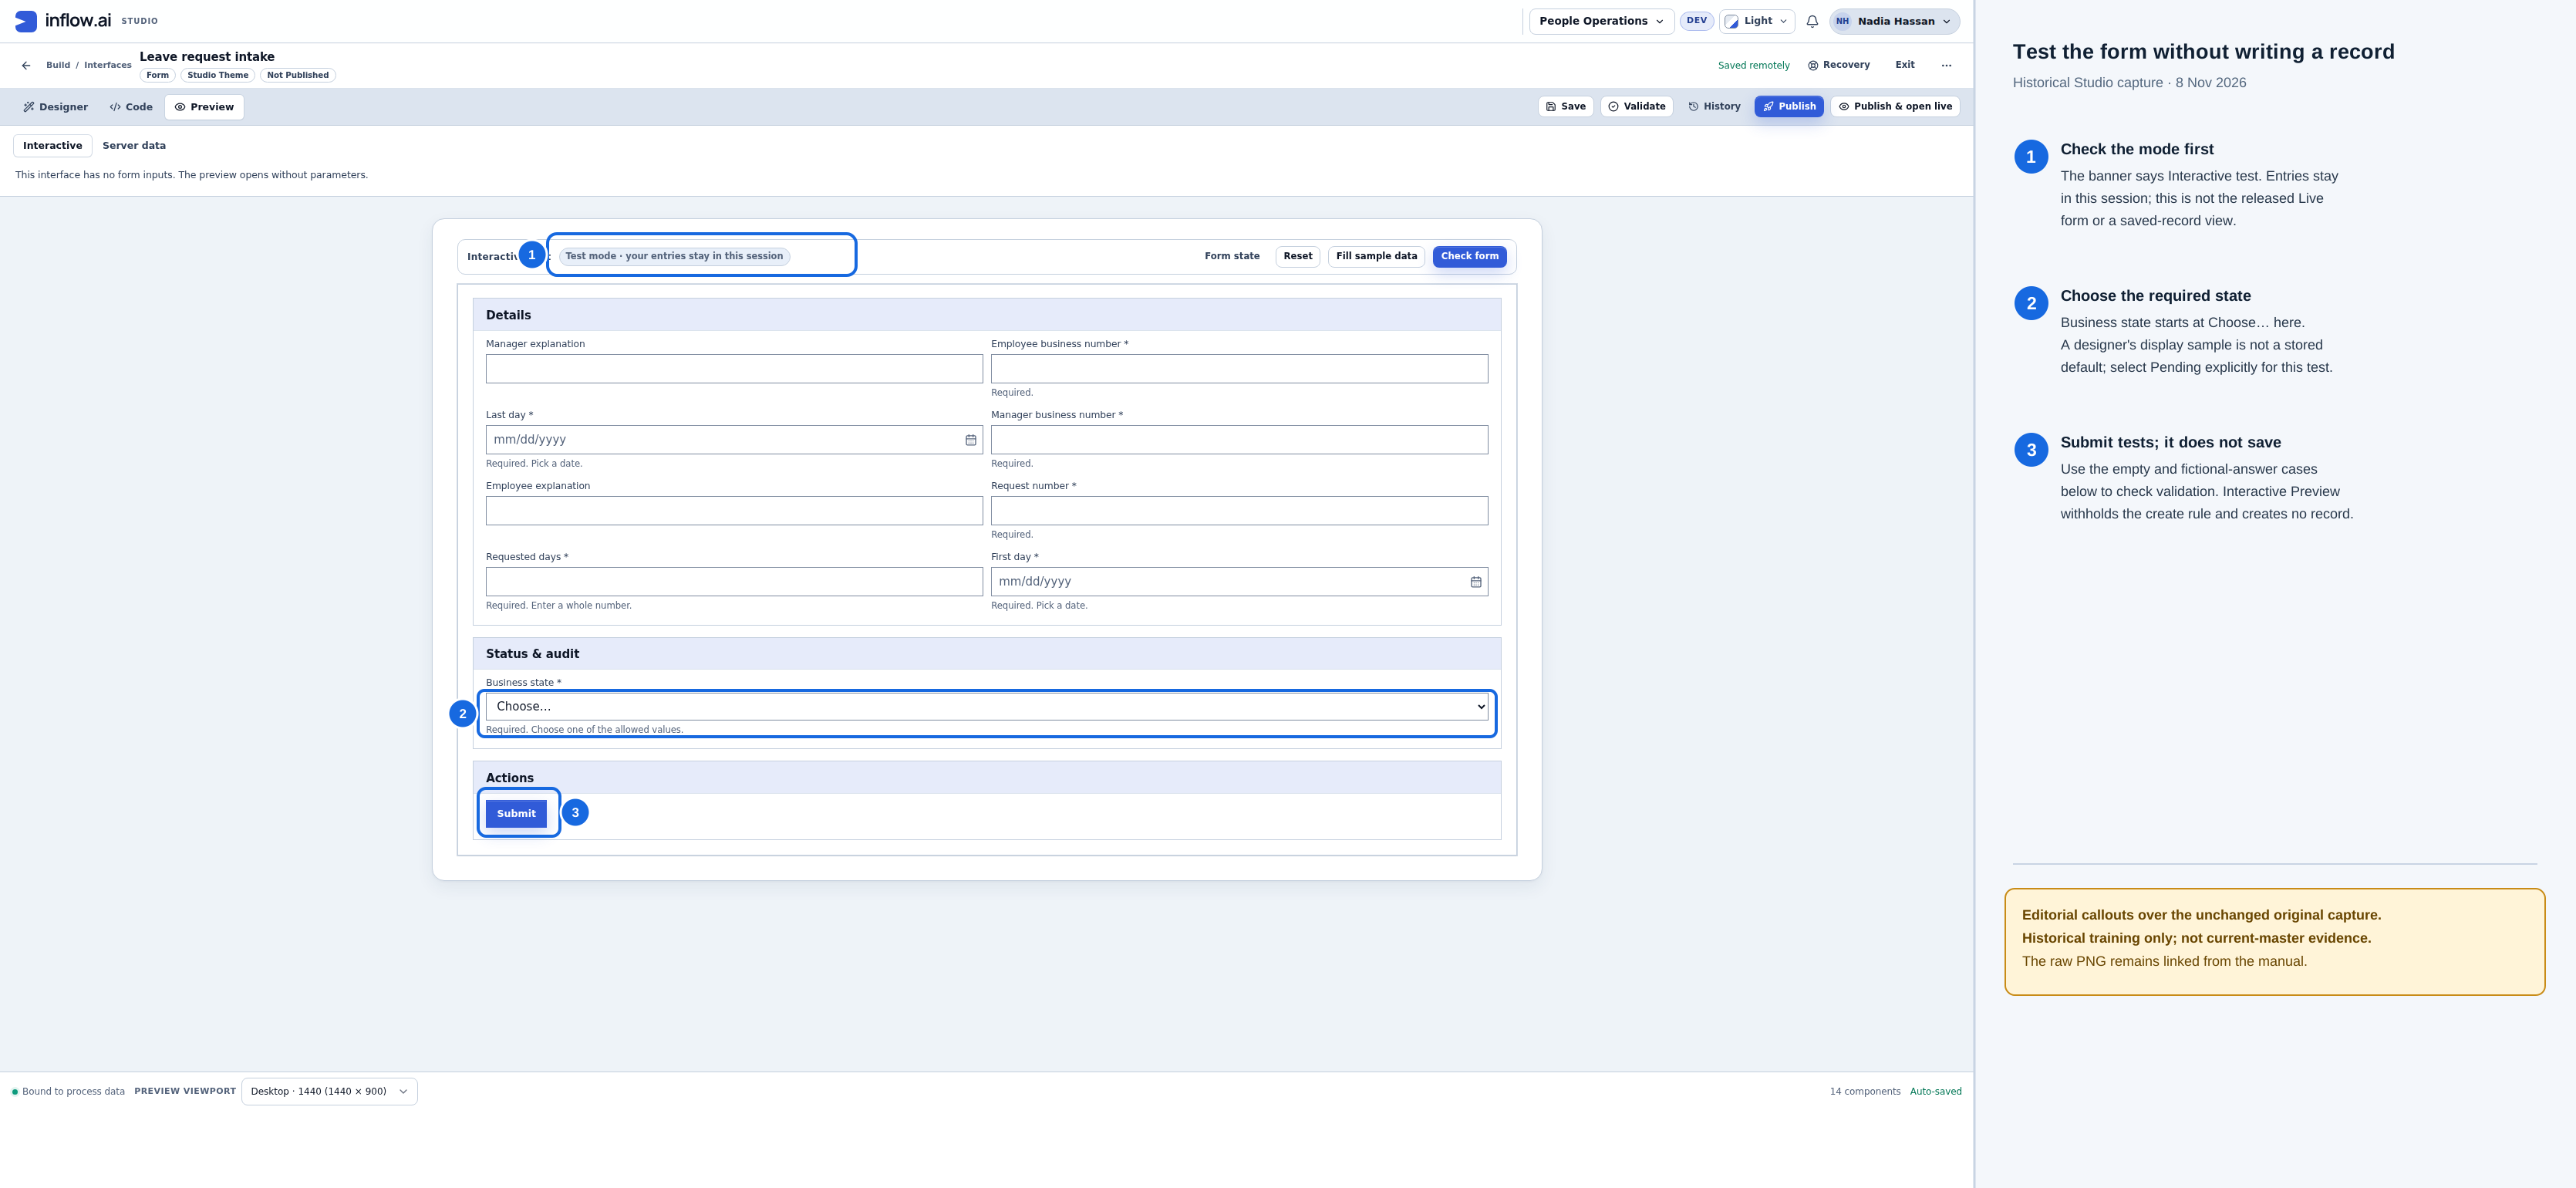
- Interactive test keeps entries in this session. It is not the released Live form or a saved-record view.
- In this capture, required Business state is Choose…. Select Pending explicitly; do not infer a stored default from a designer sample.
- Use the empty and fictional-answer cases below to inspect validation. Interactive Preview withholds the create rule; its Submit does not create a business record.
Historical editorial guidance over the 8 November 2026 capture. The unchanged original PNG remains available; this is not current-master evidence.
View the unannotated original screenshot
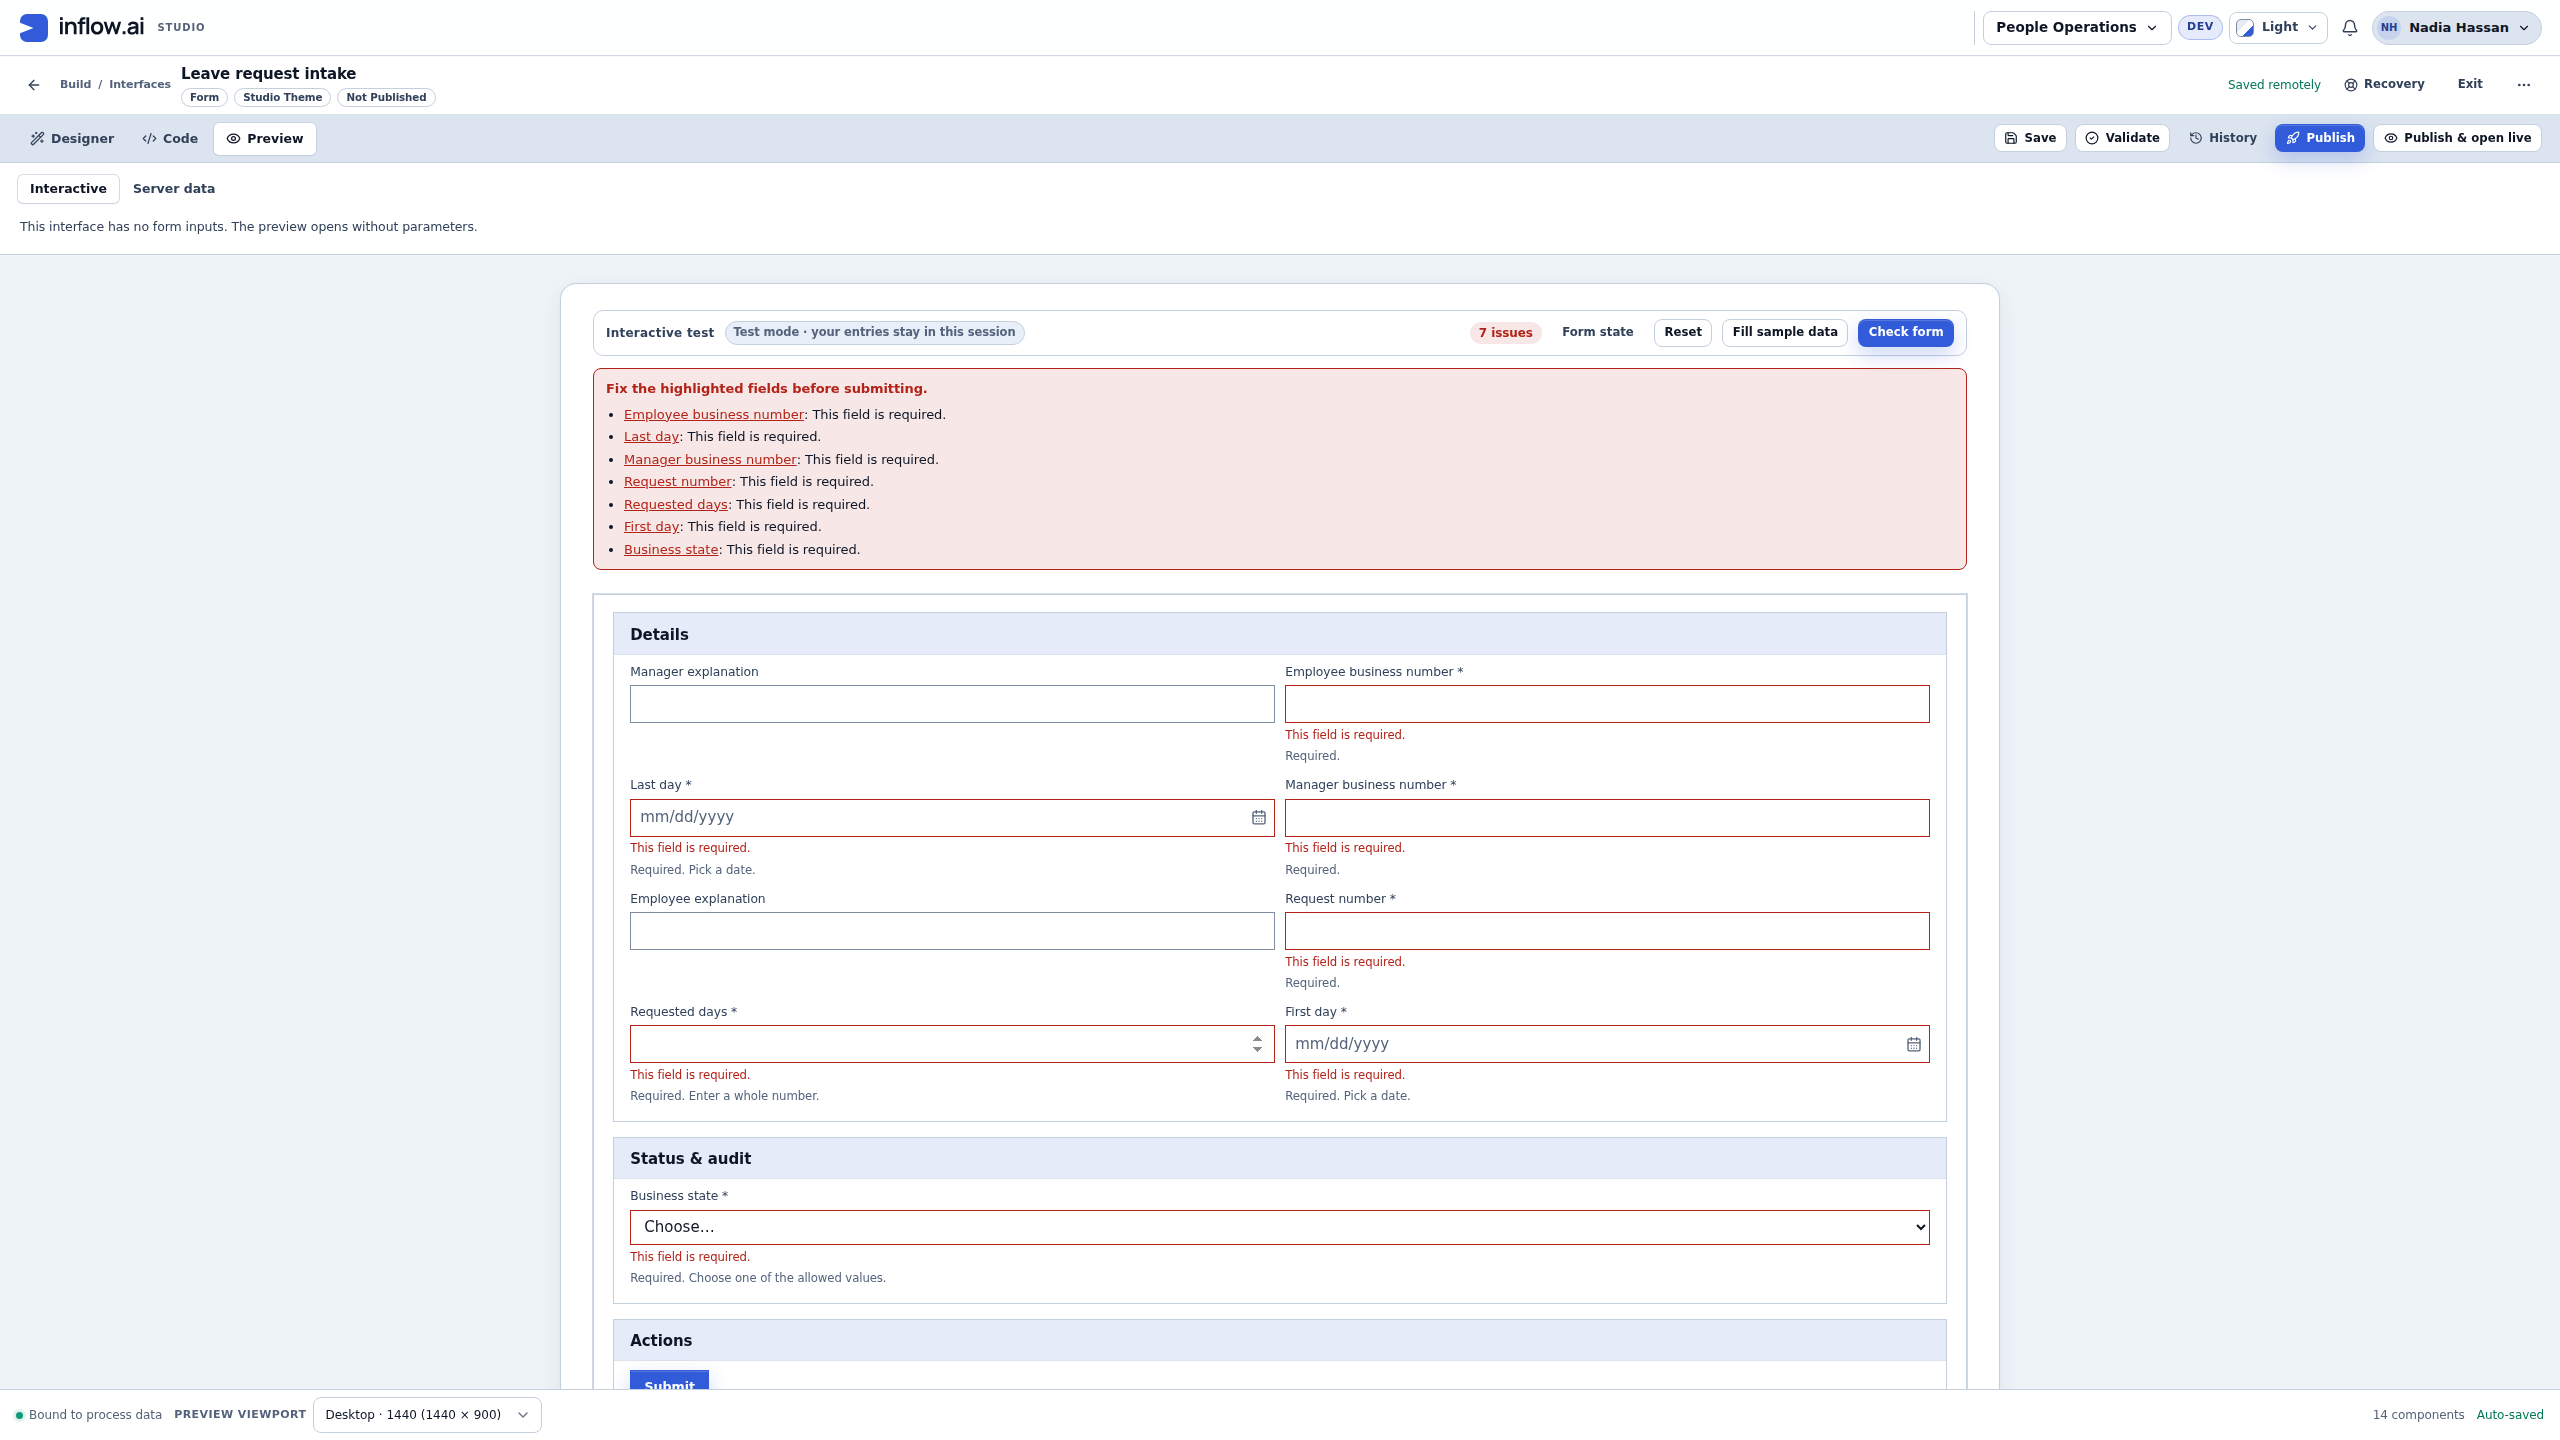
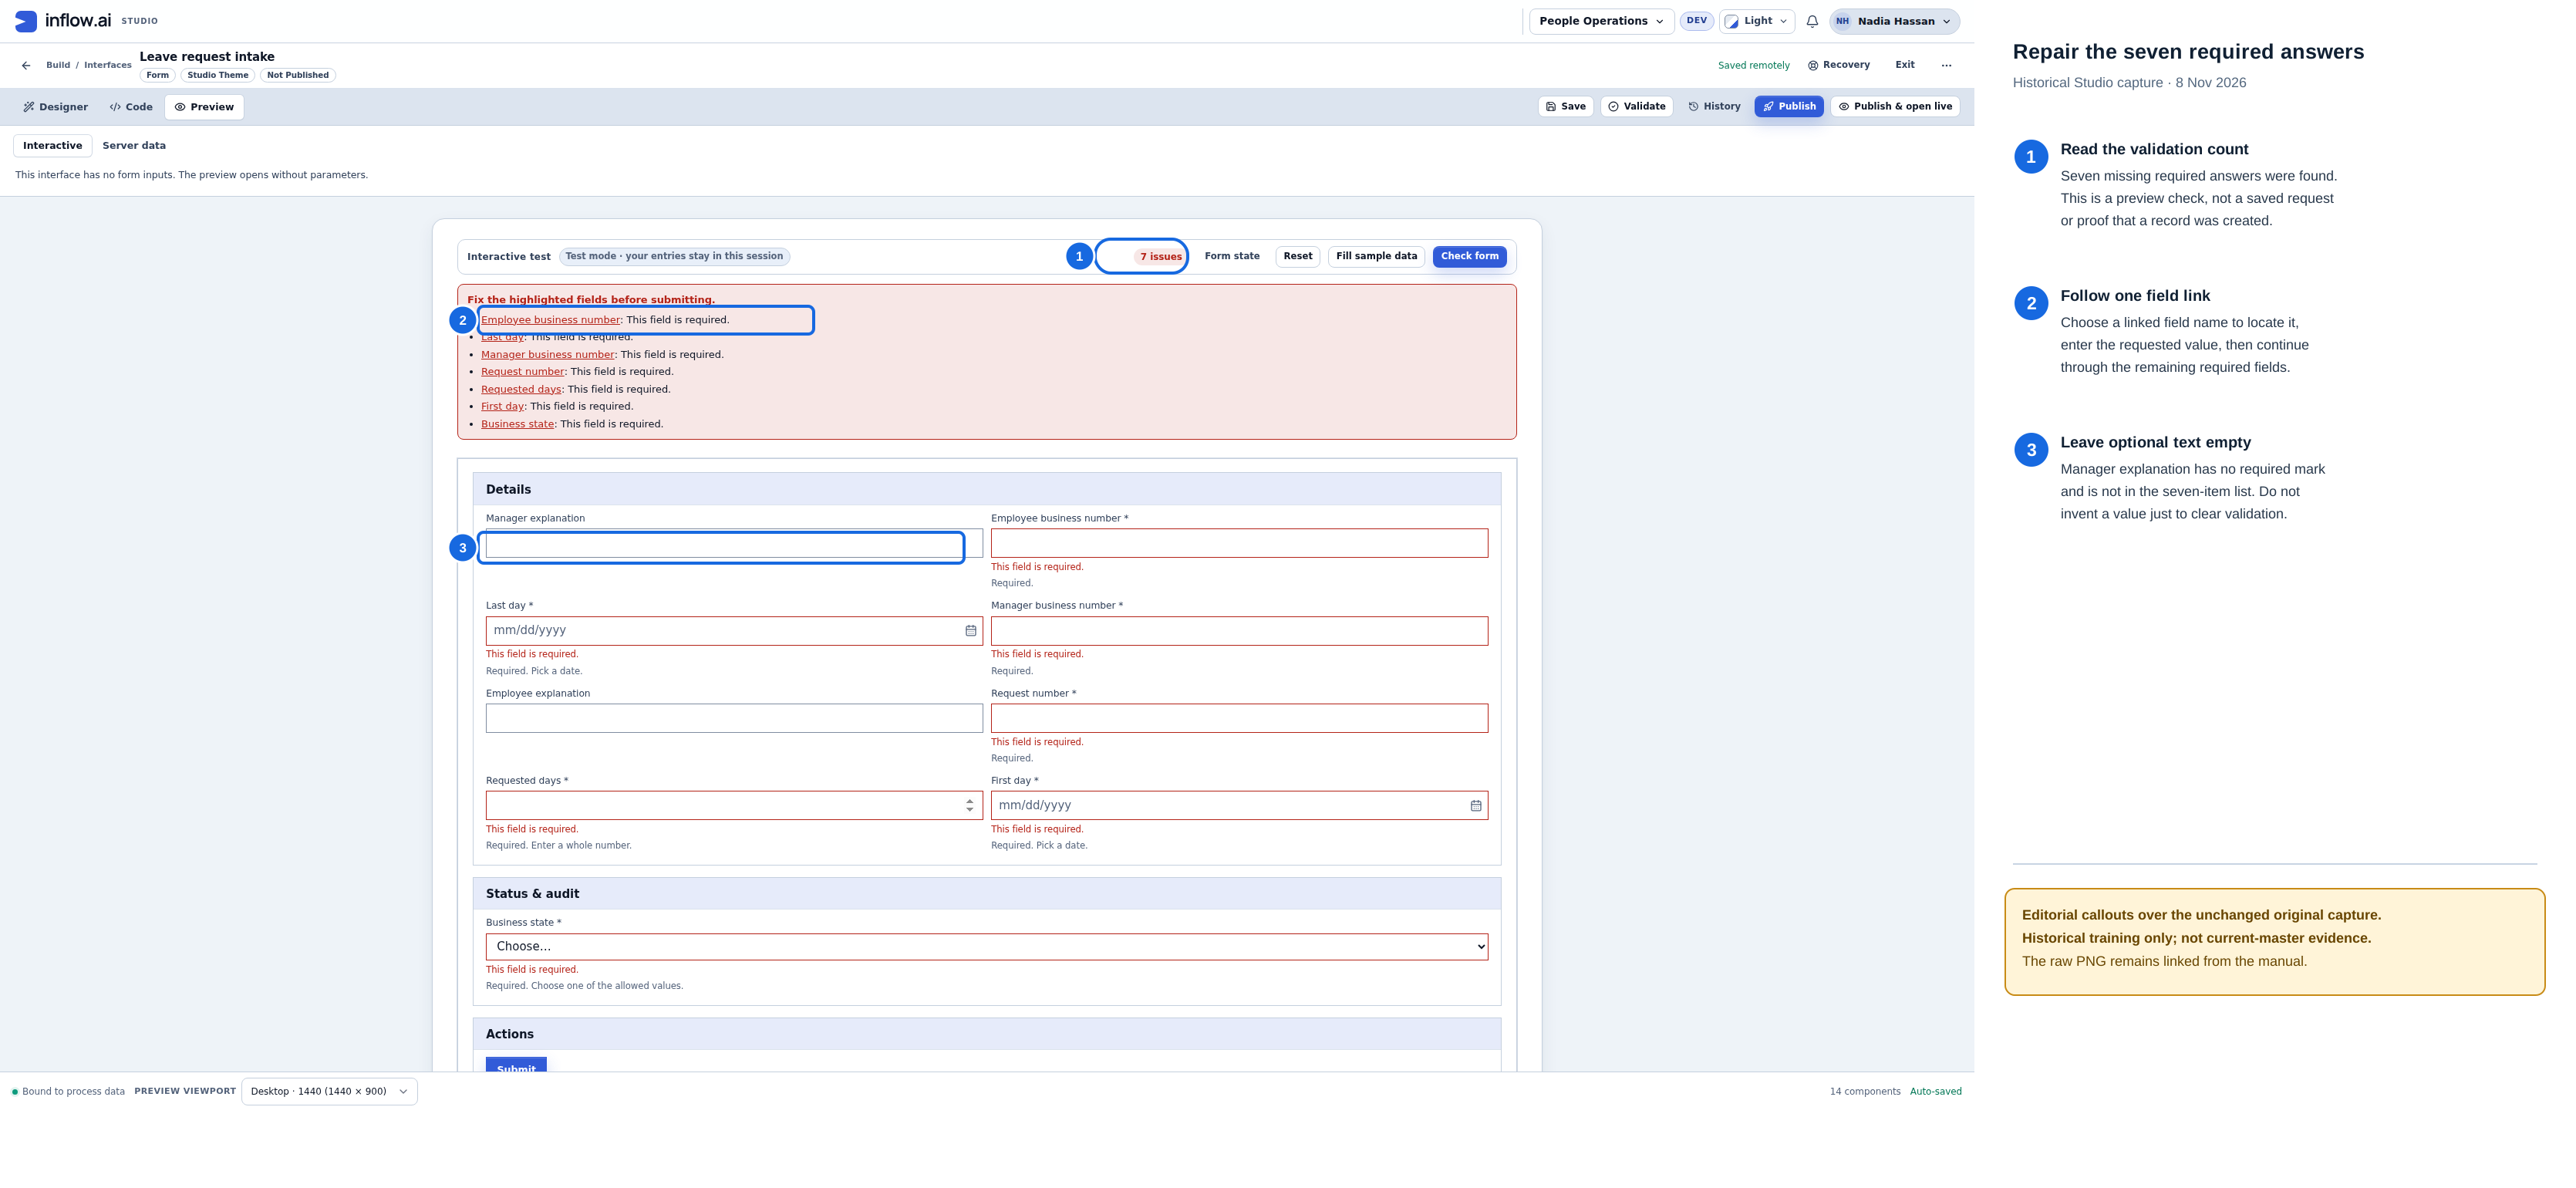
- The seven-item list is the result of this preview validation attempt; it is not a save receipt or a created request.
- Select a linked field name to return to that input, provide its missing value, then continue through the remaining required entries.
- Manager explanation has no required marker and is not in the list. Leave it empty unless the workflow has a separate, valid reason to collect it.
Historical editorial guidance over the 8 November 2026 capture. The unchanged original PNG remains available; this is not current-master evidence.
View the unannotated original screenshot
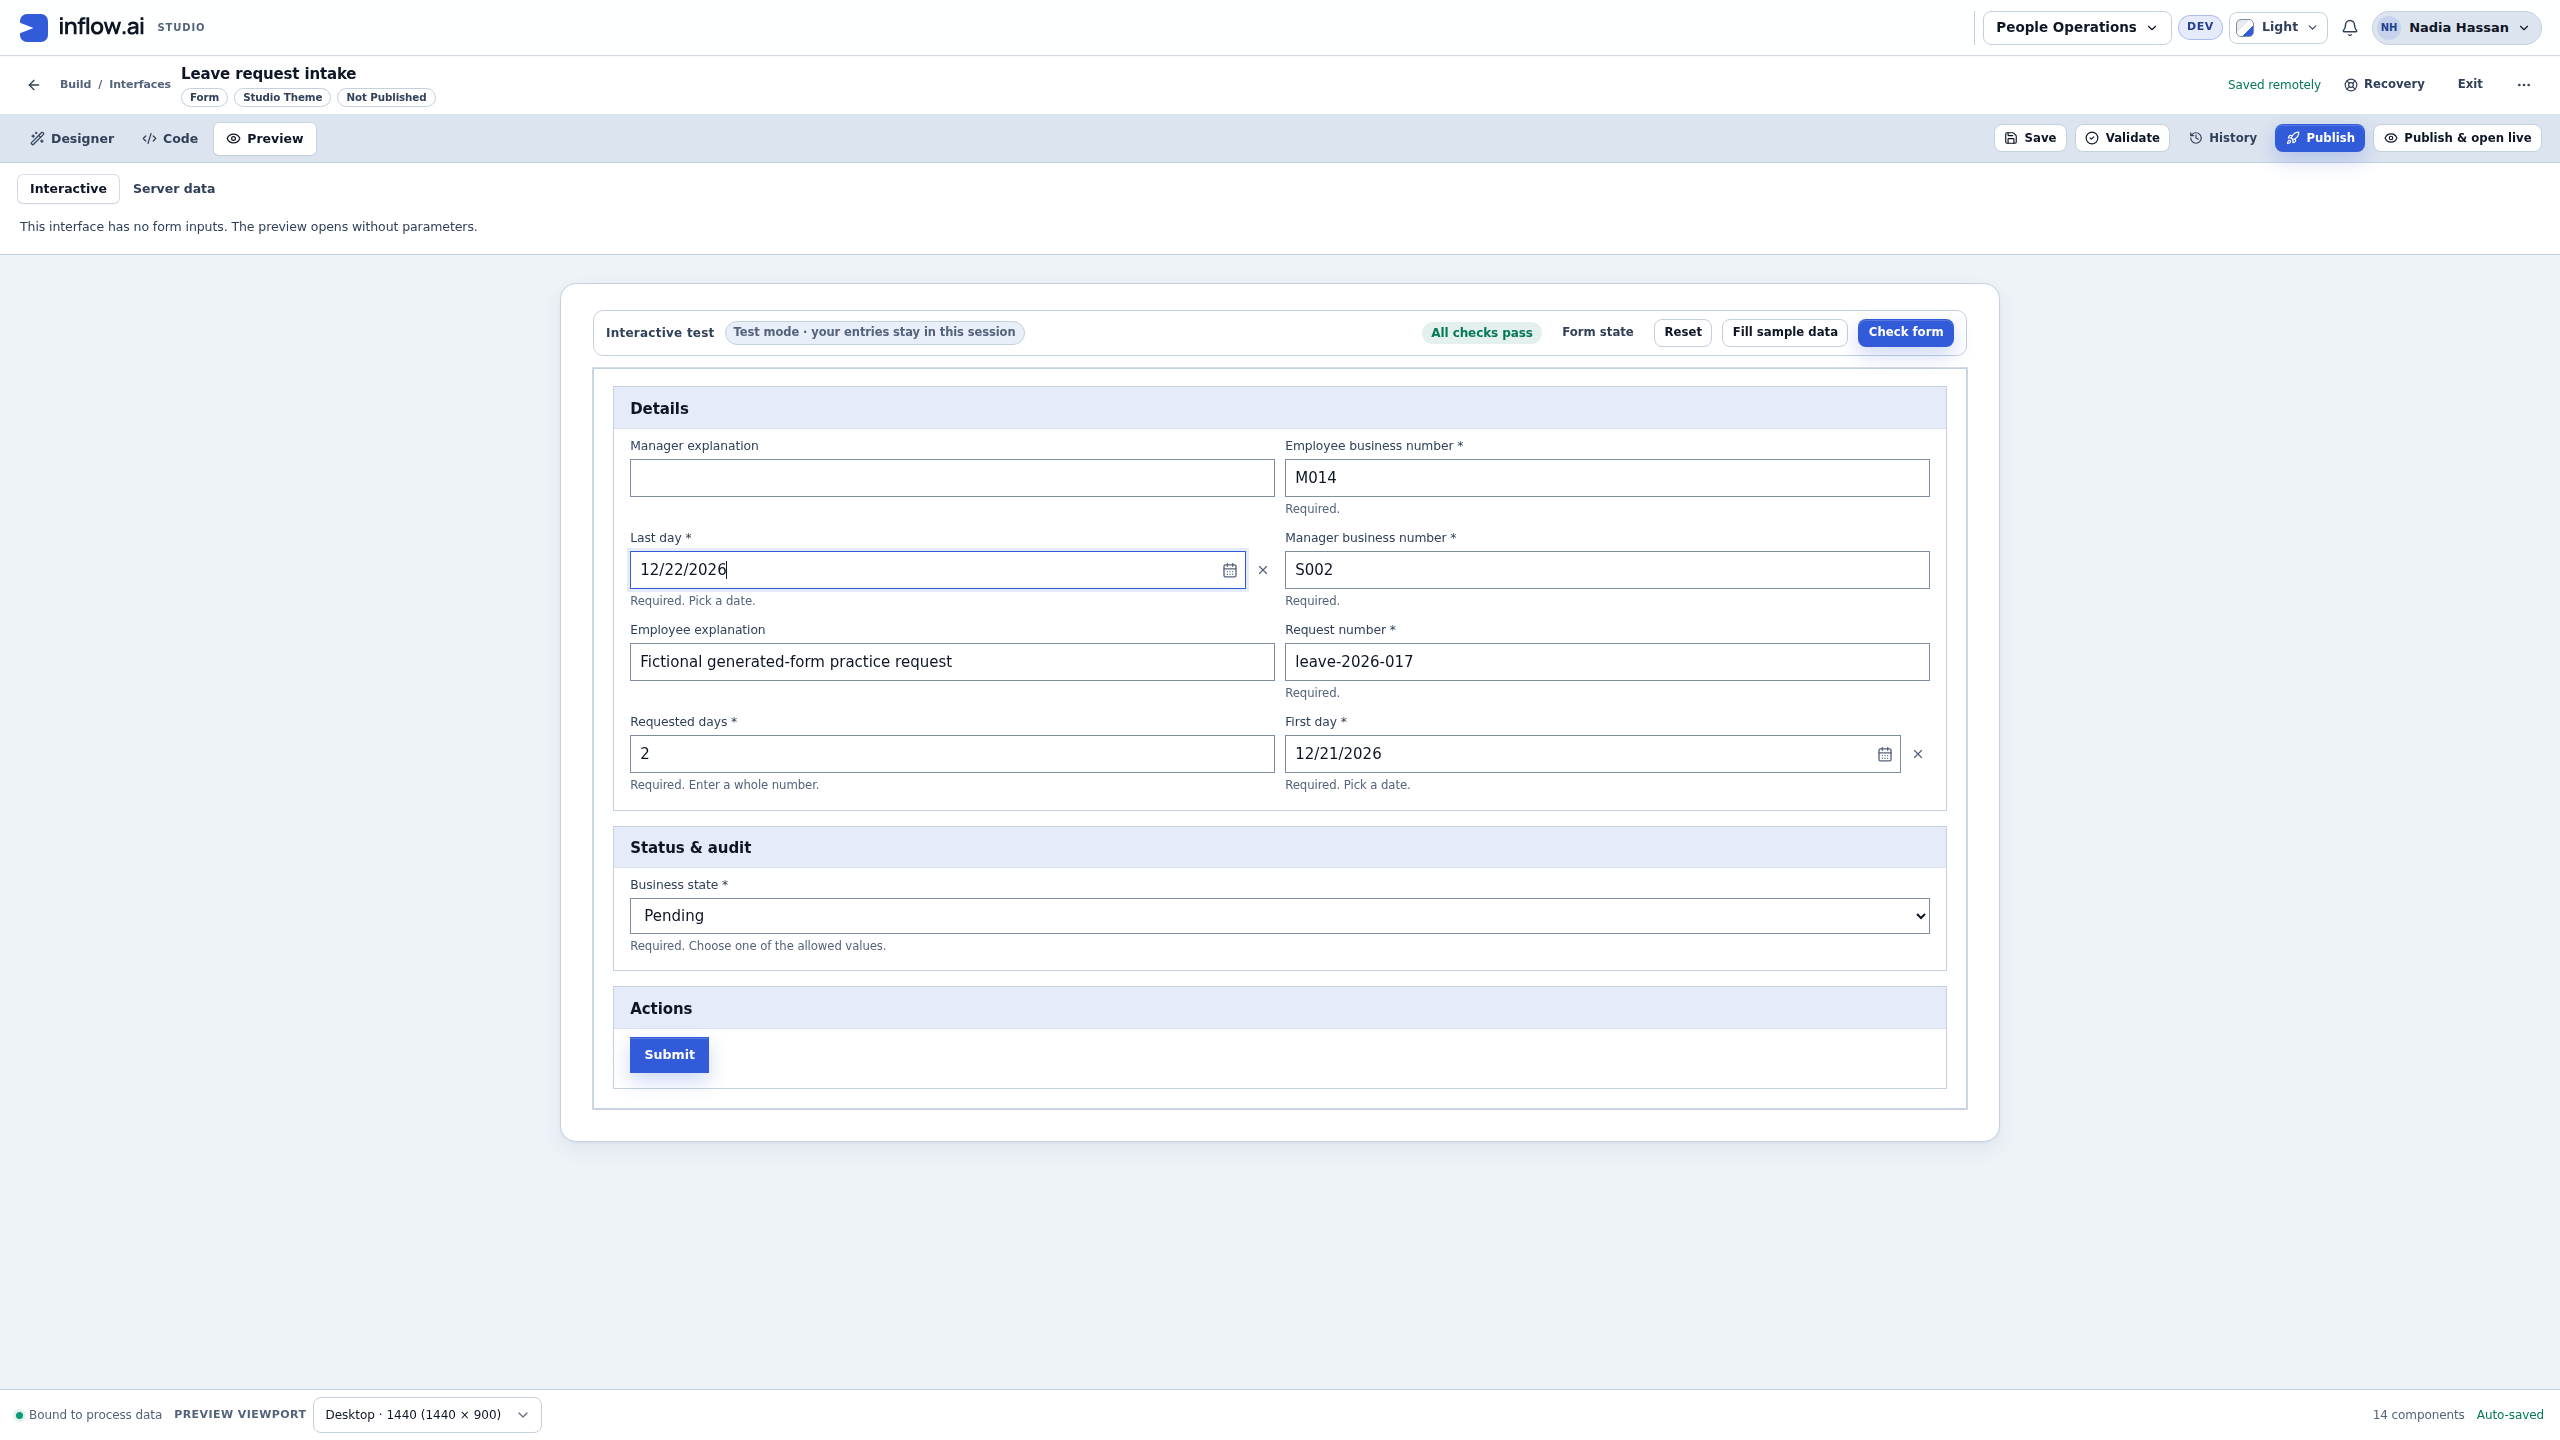
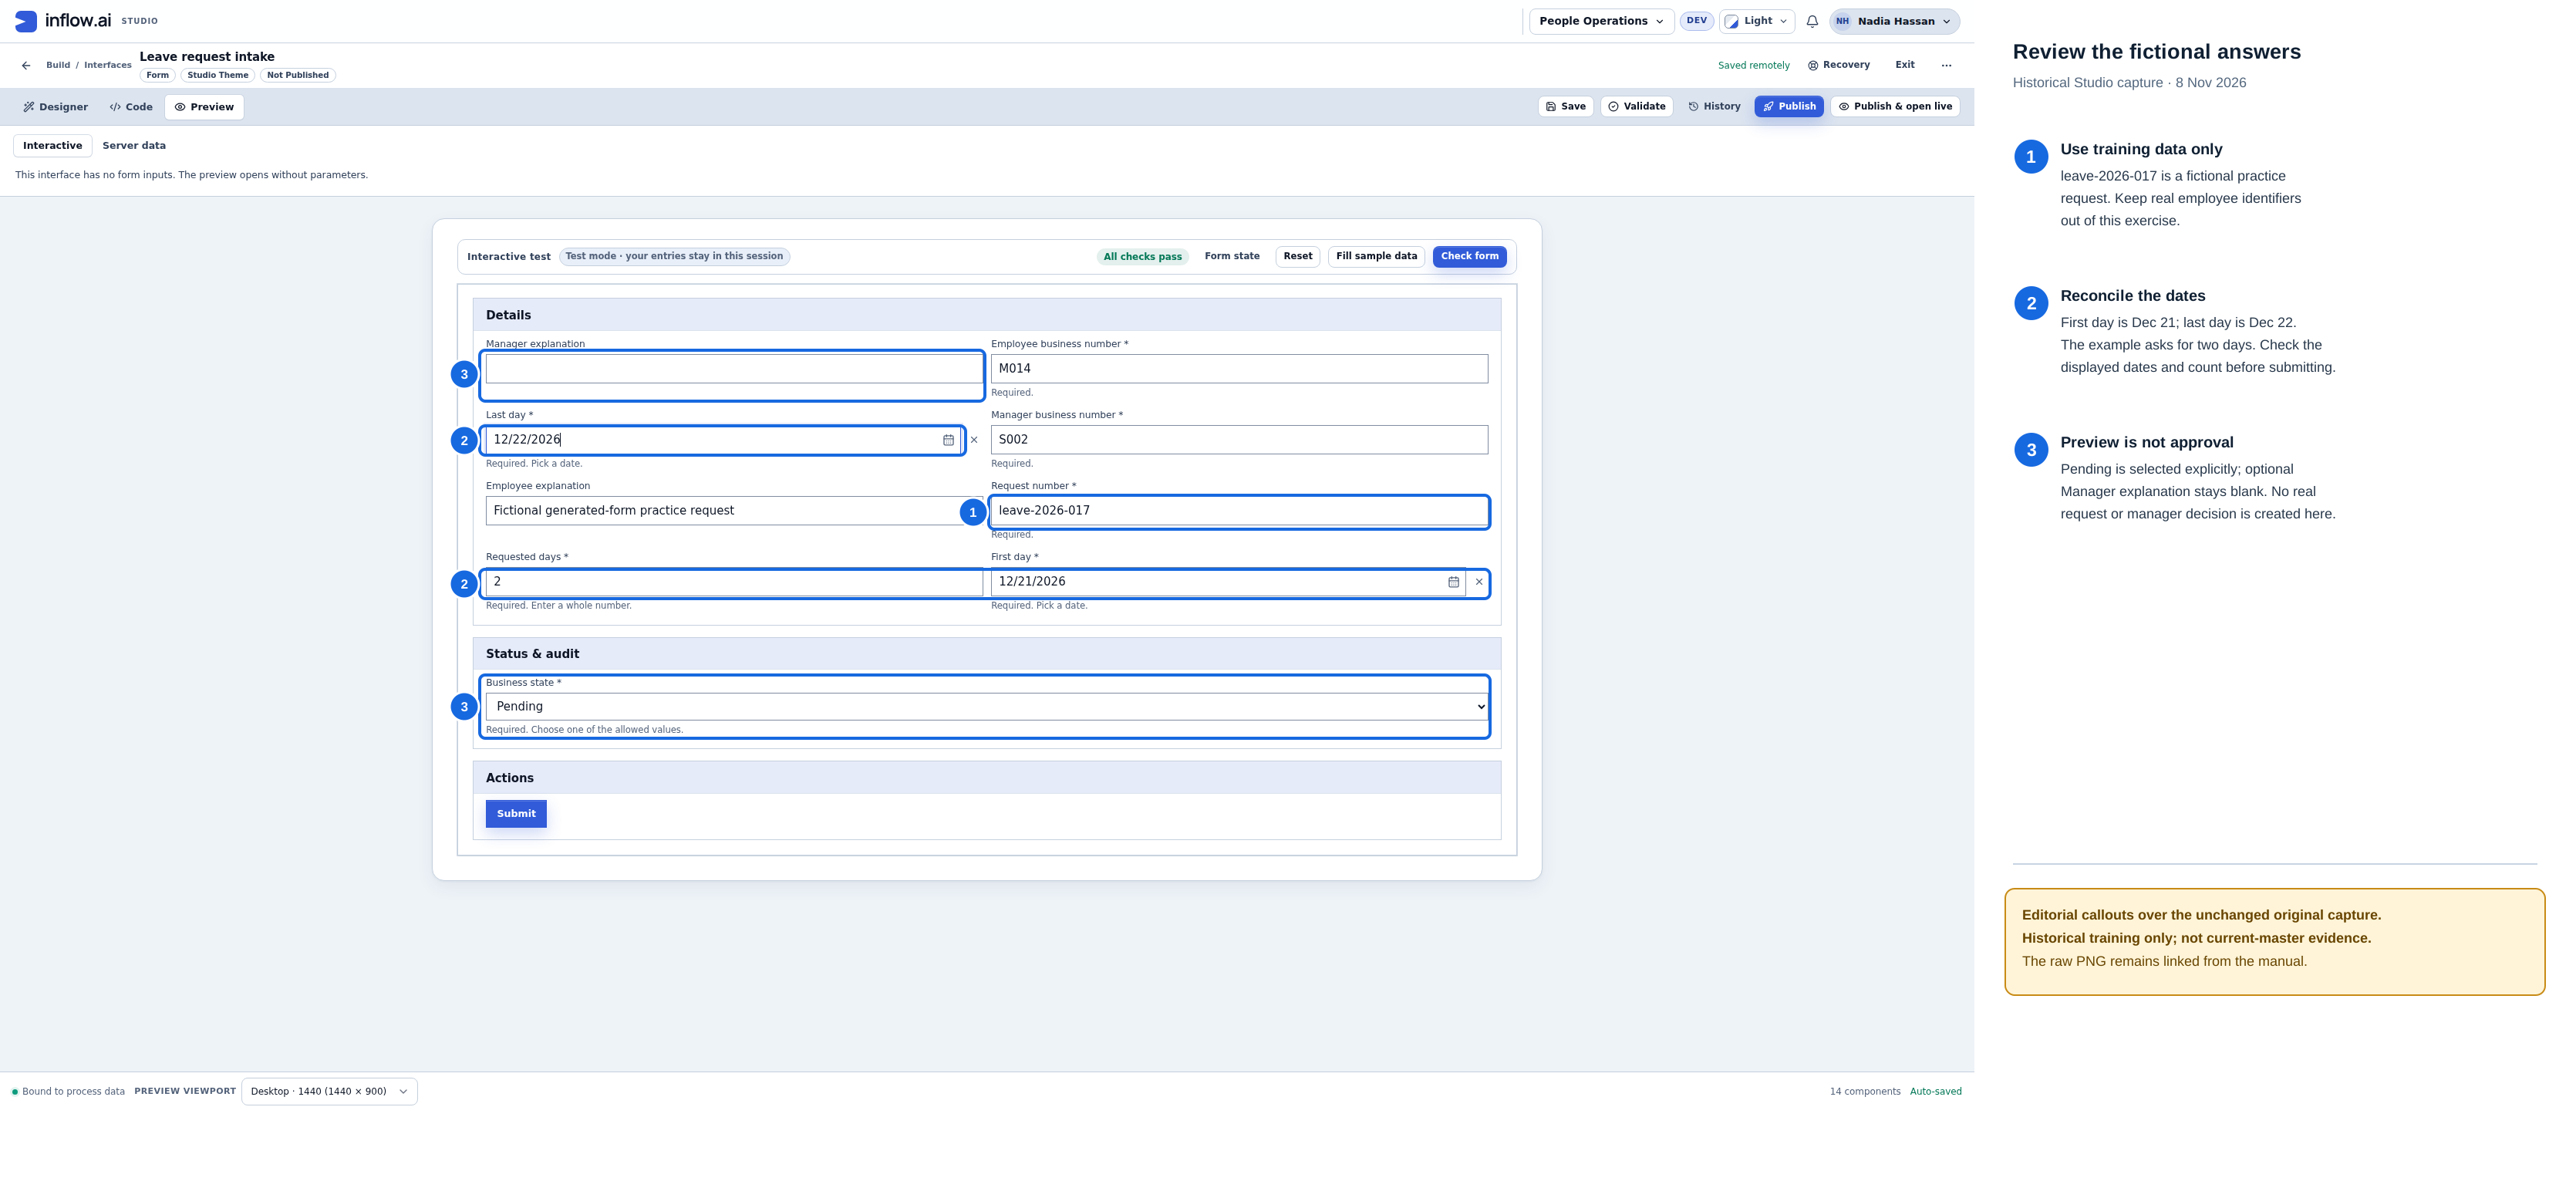
- This is fictional practice data for
leave-2026-017; do not substitute real employee identifiers in the training example. - The selected dates are December 21 and 22, and the requested-day count is two. Check that those fields agree before submitting.
- Pending was selected explicitly. The optional Manager explanation remains blank; this preview neither creates an employee request nor records a manager decision.
Historical editorial guidance over the 8 November 2026 capture. The unchanged original PNG remains available; this is not current-master evidence.
Expected preview result: required questions can be checked and repaired. Interactive Preview withholds the create-rule execution. It can still show the generated “Saved. The record was created.” message; the same screen explicitly says “Preview only — nothing was saved.” Treat that message as authored preview content, not a persistence receipt.
View the unannotated original screenshot
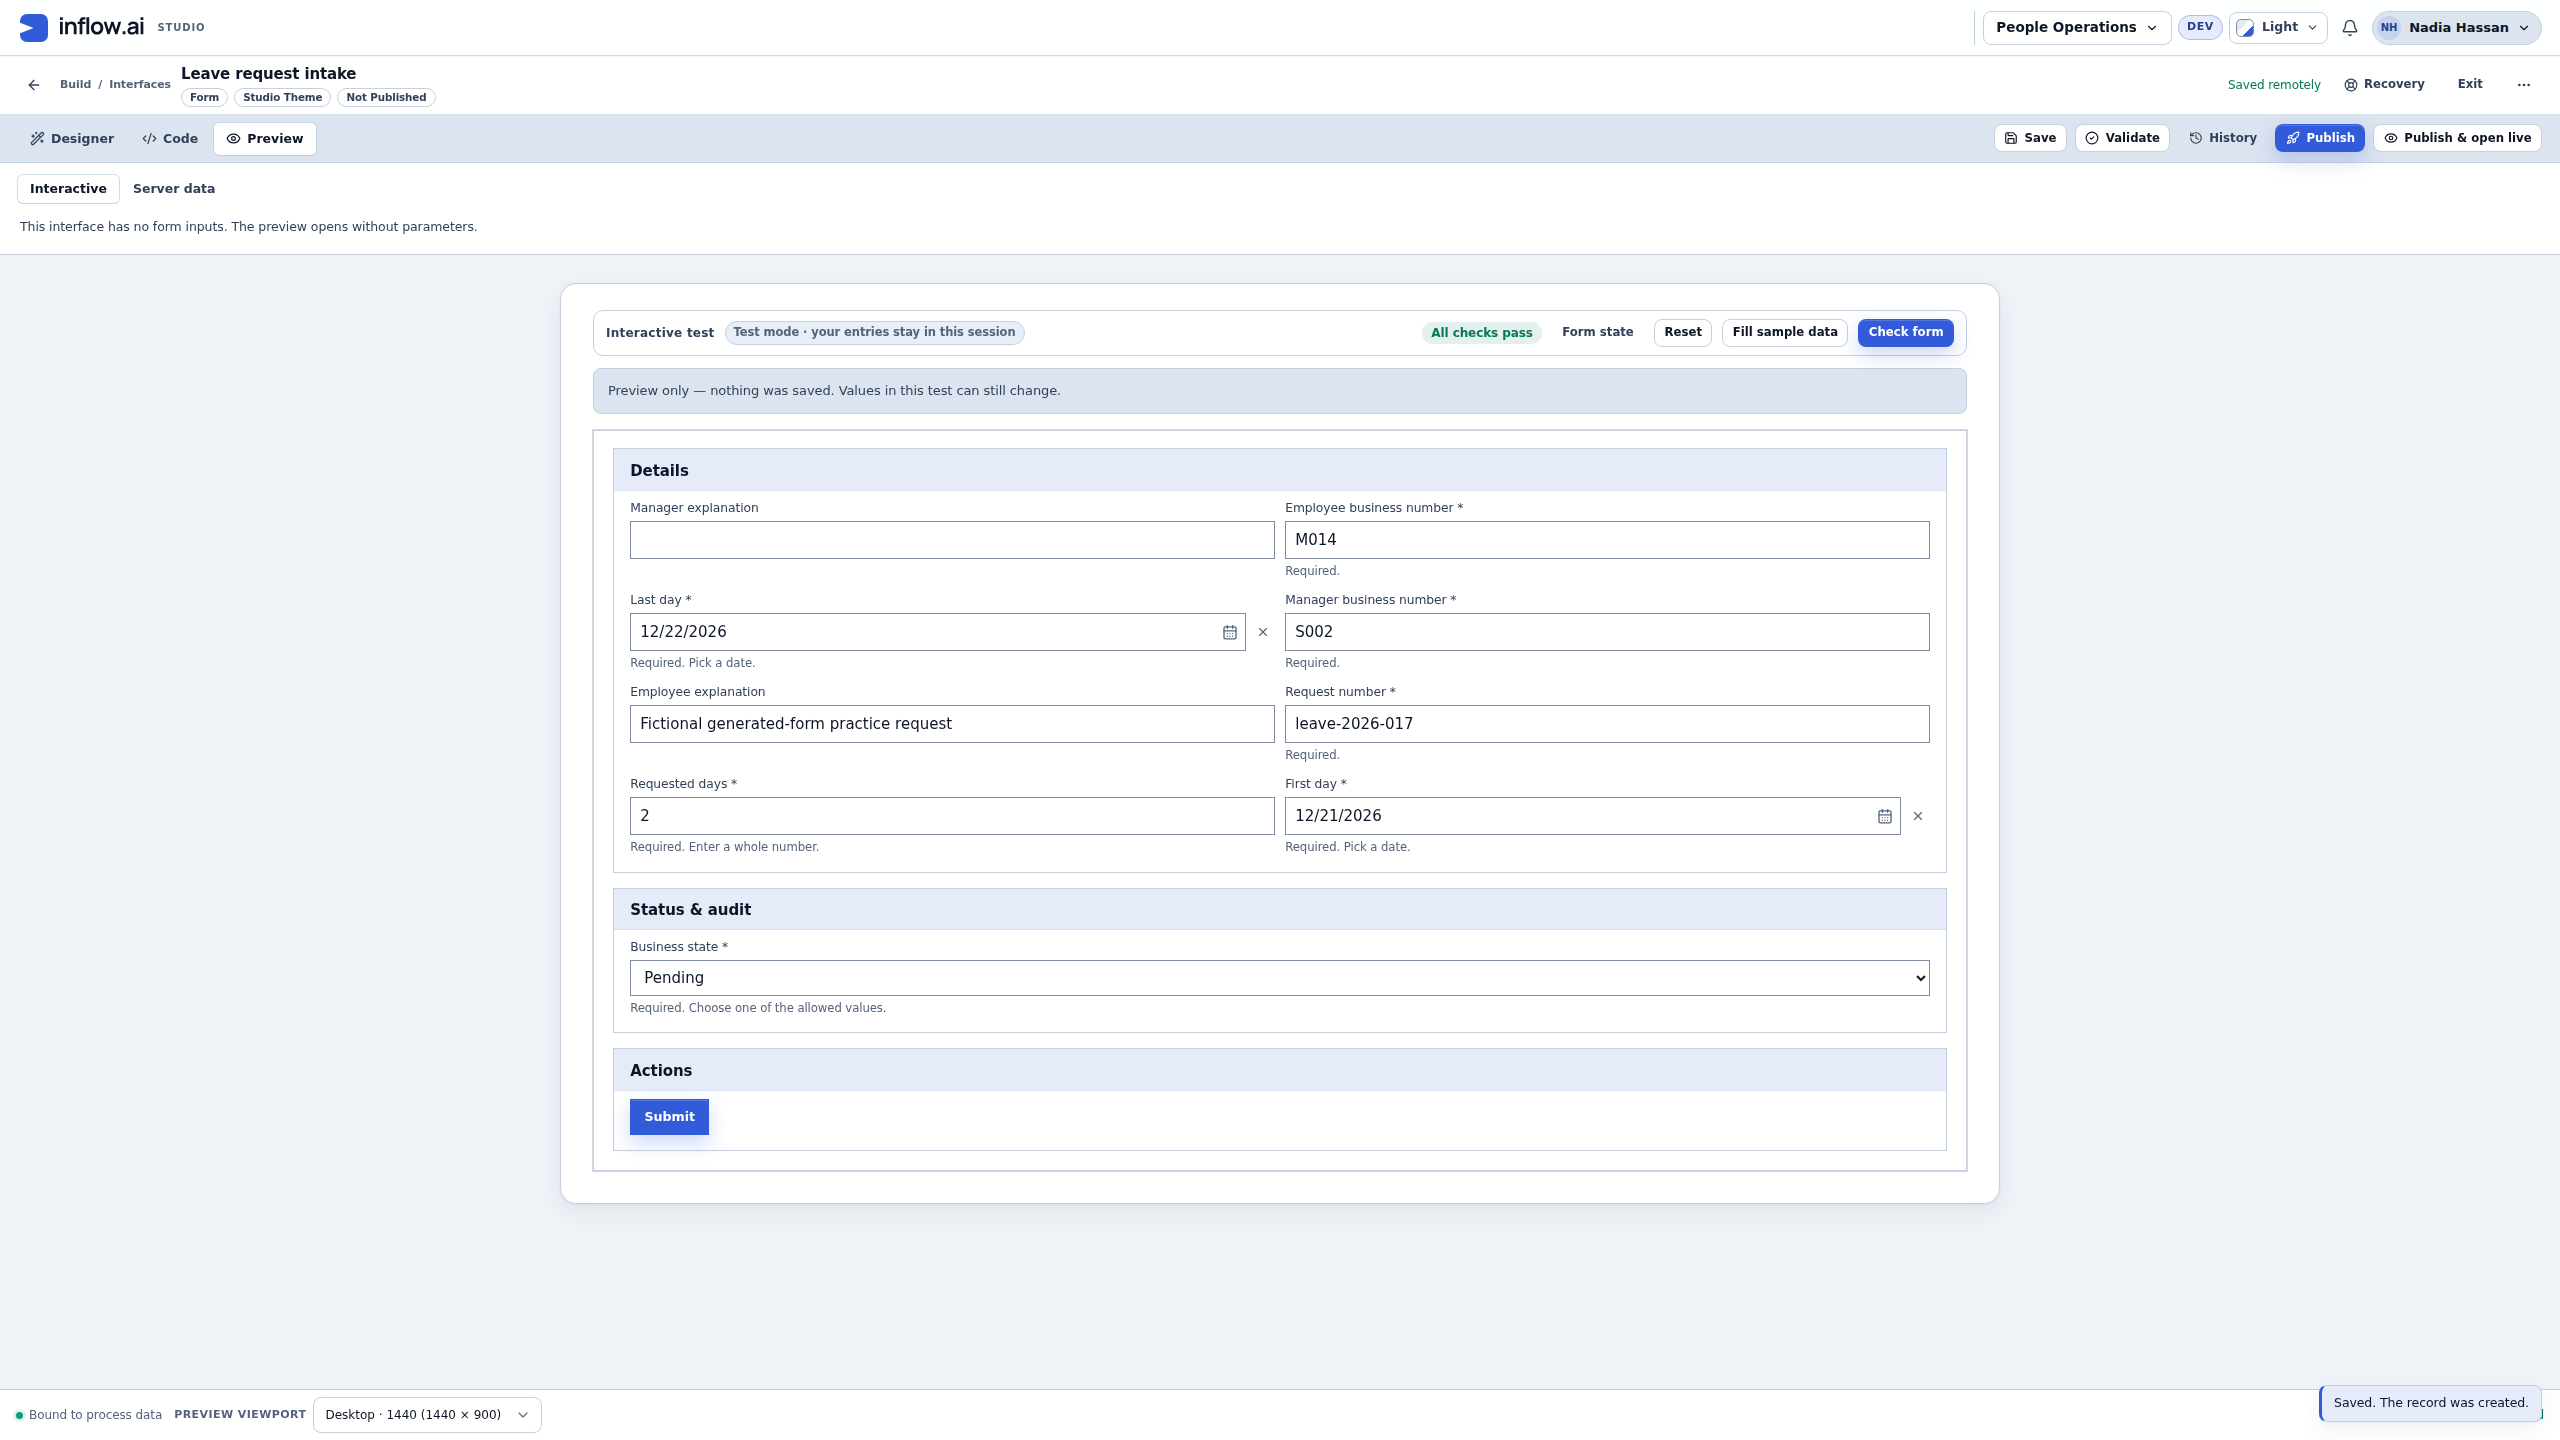
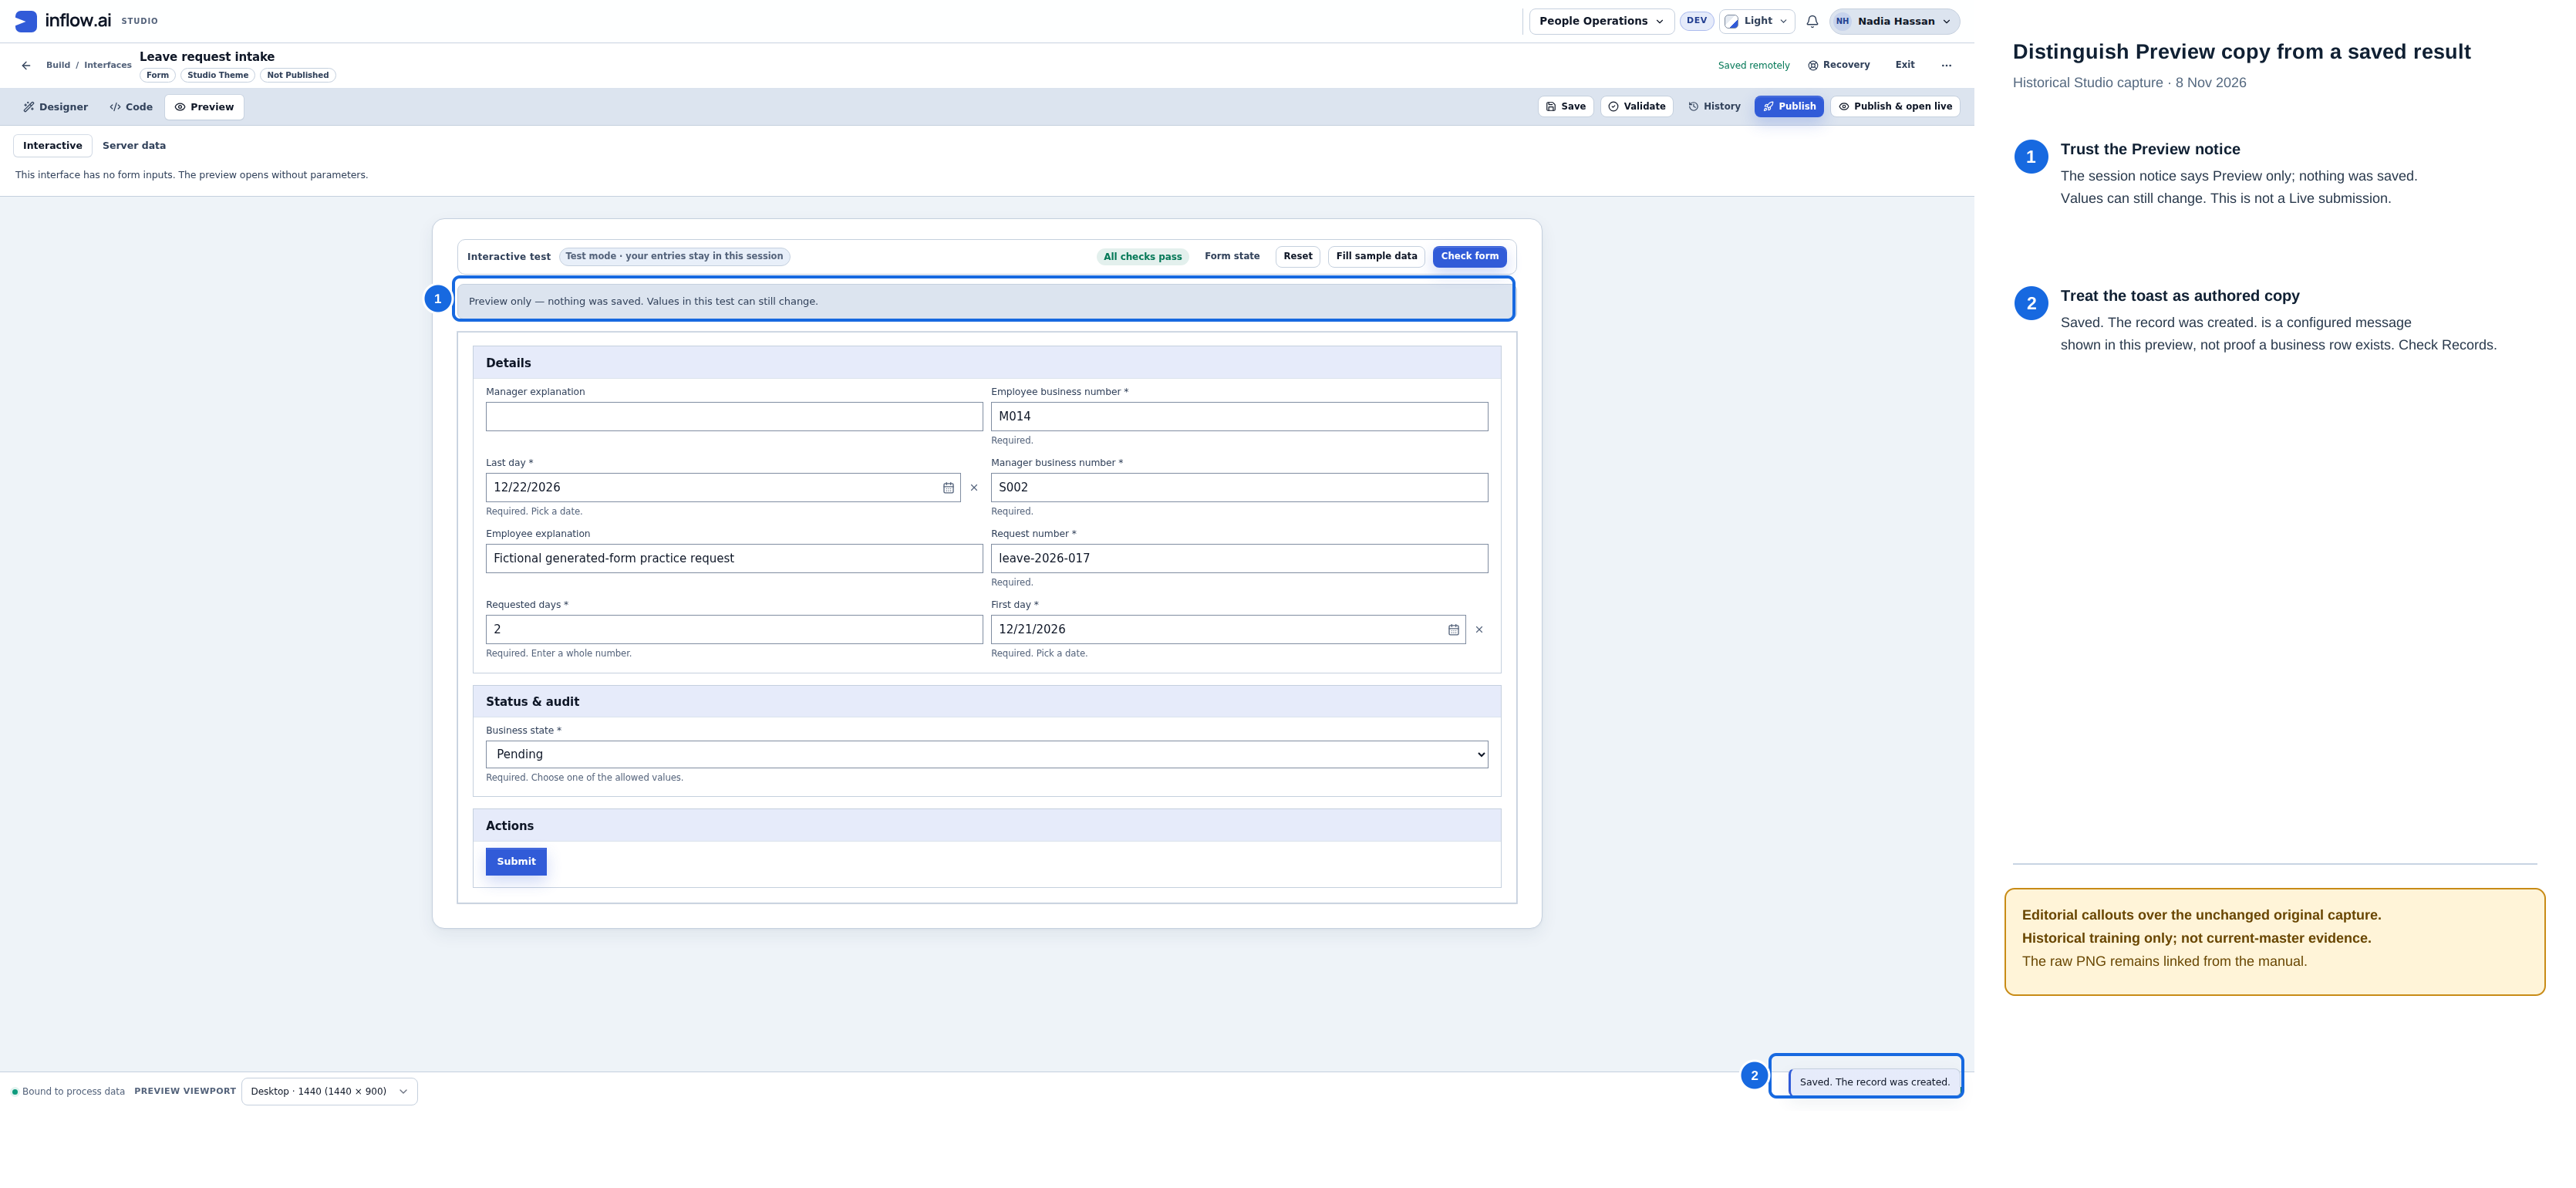
- The Interactive test banner says Preview only — nothing was saved and that the values can still change.
- Saved. The record was created. is the form's configured message, not a persistence receipt. Treat it as display copy in this session.
Historical editorial guidance over the 8 November 2026 capture. The unchanged original PNG remains available; this is not current-master evidence.
Nadia then opened the model's Records tab and chose Refresh. Only the original leave-2026-014, leave-2026-015 and leave-2026-016 samples remained; this preview did not add leave-2026-017. The earlier query lesson's two pending samples therefore remain unchanged.
View the unannotated original screenshot
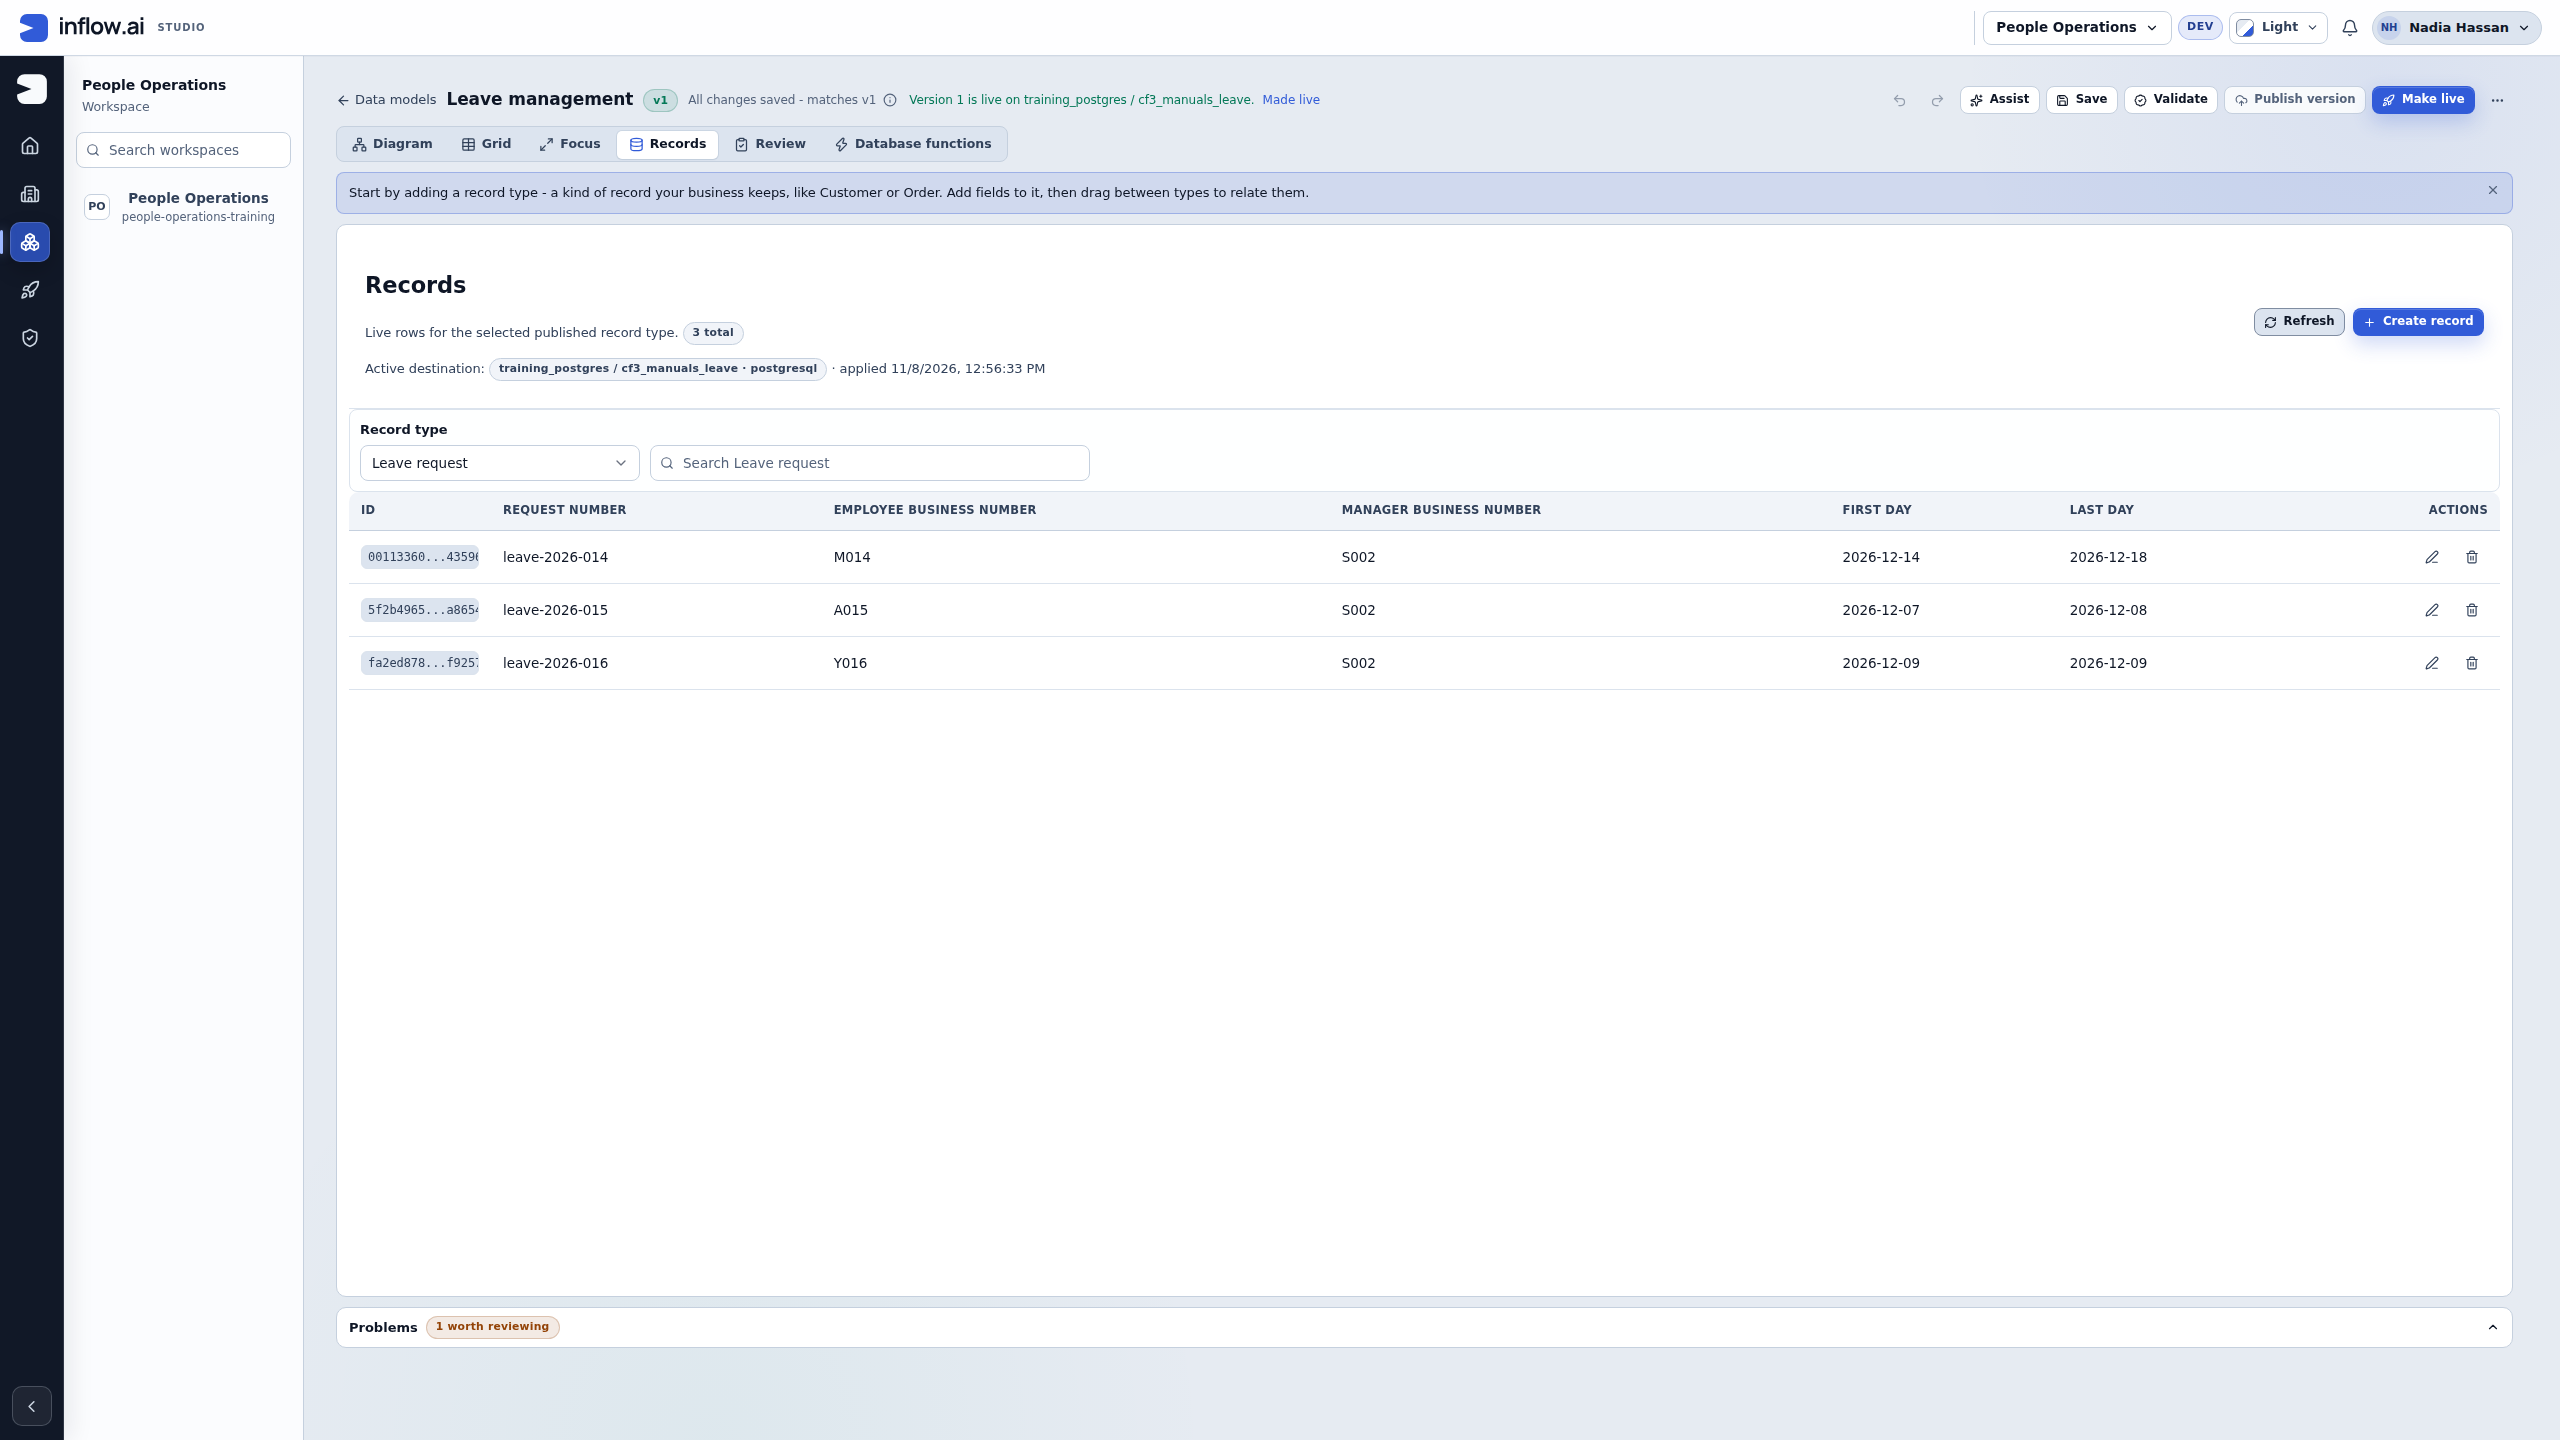
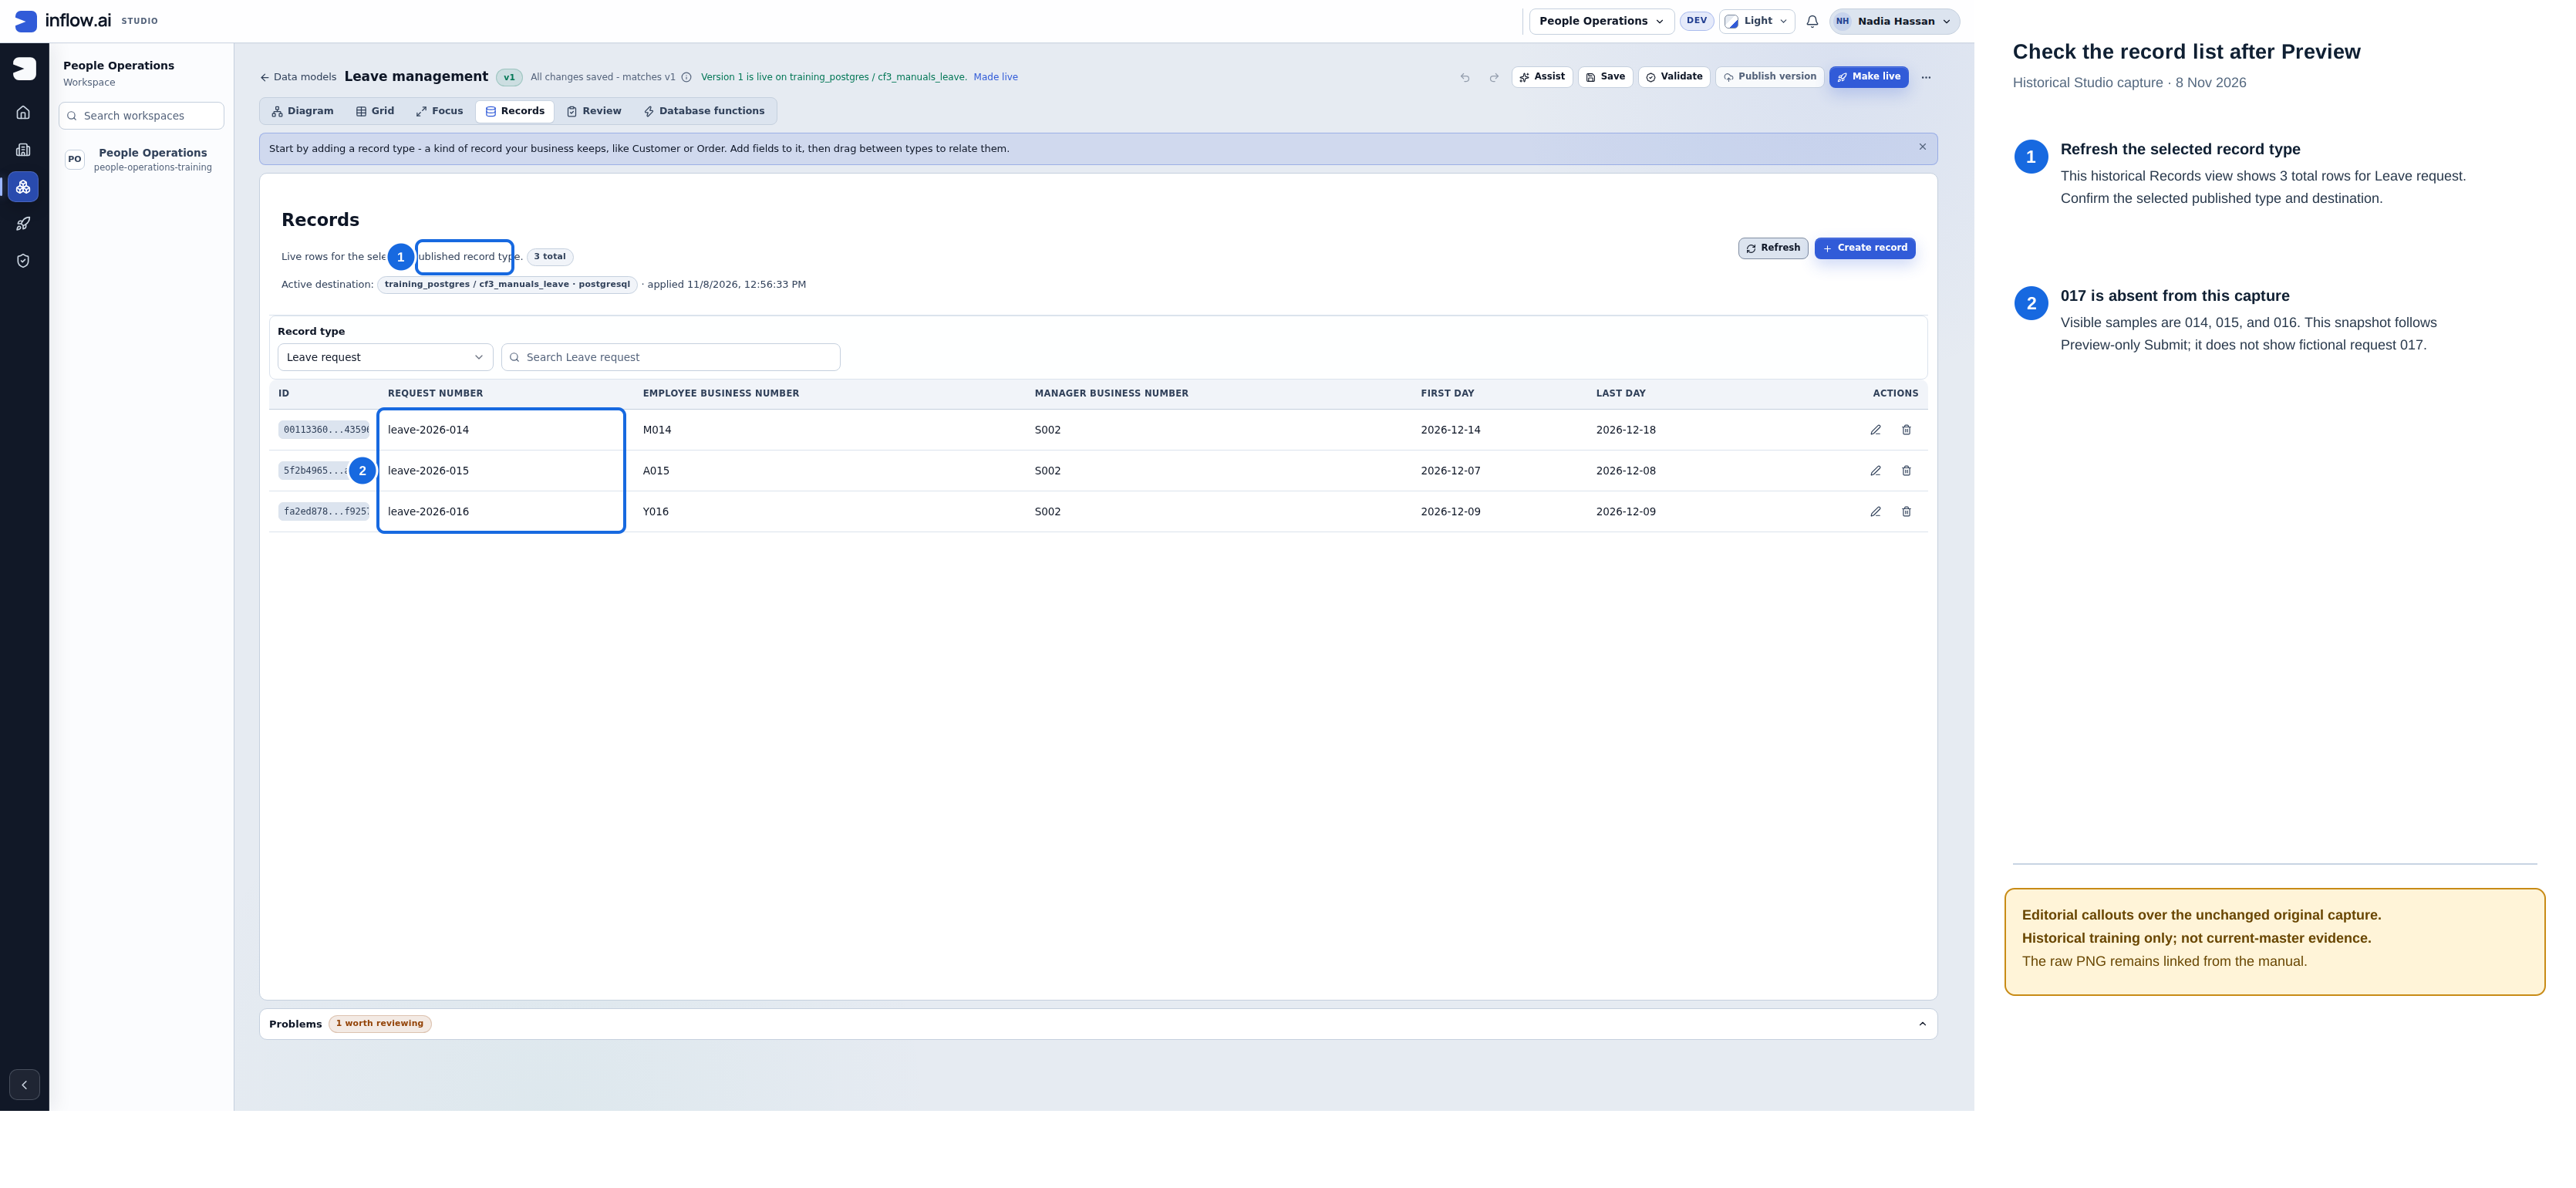
- Refresh the intended published record type and confirm the active destination before interpreting its rows.
- This historical sample shows three rows:
leave-2026-014,leave-2026-015andleave-2026-016; the fictionalleave-2026-017is not present in this capture. - Use this only as a cross-check of the training fixture after the Preview-only result above. It is not a current production read or a reason to retry an uncertain Live submission.
Historical editorial guidance over the 8 November 2026 capture. The unchanged original PNG remains available; this is not current-master evidence.
Continue to the release check: the generation and Preview sequence above has not saved a business request. The publication example below opens the actual current Live form and shows why its save result still needs checking. Before repeating a real submission, inspect its existing result; the business request reference has not been configured as a unique key. Employee access and manager approval remain separate work.
Example 2: choose a real App Shell starting arrangement
An App Shell organizes the application's pages; it is a different object from the form above. If you are only publishing a form, continue to the publication steps below. When building the complete Leave requests app:
- Open Build → App Shells → New App Shell.
- If Type is shown, confirm App Shell, then complete Placement for the intended business function before choosing the layout.
- In Shell template, inspect the offered arrangements and choose one suited to the application. Read the selected preview before moving on.
- Review Options, including the offered content width, navigation and sample-page choices. Keep samples clearly recognizable until you replace them with the intended pages.
- Complete Details, then inspect Review for the application name and pages. Choose Create interface only after that review.
- Inspect the new shell in Designer. Add or review the intended employee and manager pages using the App Shell tutorial; the template has not published your forms, prepared task assignment or granted application access.
Expected result: a useful application frame exists for your real pages. If the arrangement does not suit the work, inspect the shell settings and page structure before publishing. Do not replace the employee form with a shell or assume a shell template makes a working approval application by itself.
Use Preview for the draft and Live for the release
In Preview → Interactive, inspect and validate the configured draft while you build. The preview keeps entries in the session and withholds business actions such as the generated create-rule call. Data controls can still read their configured sources. Read the preview-only notice and keep teaching values fictional; an authored message alone does not prove a saved record.
Server data is a separate preview mode. Inspect its selected inputs, source and access state rather than assuming it behaves like the local Interactive test. Neither preview mode replaces checking the actual published Live release.
For the released application, use the designer's published Open Live action/current published app entry after publication. Inspect the current/latest published experience, not a historical or substitute runtime. Check which form/app you opened before entering business information.
Example 3: publish the checked Leave request intake draft
Use the separate intake builder exercise, not the manually assembled practice form. If the intended unchanged intake release is already Live V1, retain it and choose Open live; do not publish another version merely to repeat this lesson.
- Check Leave request intake and People Operations in the header. Save pending work and wait for Saved remotely.
- Choose Validate and read Problems. Nadia's saved teaching draft reports No problems found. If your draft reports a problem, repair its specific question, connection or action before continuing.
- Choose the header Publish. Read the separate Publication review dialog. It confirms the saved interface version; opening the review is not the final publication.
- Check the interface name and the readiness message. In a ready state, the dialog says Publish this saved interface as a new version. It also says Dependency updates are separate from this publication. This root-only confirmation does not provide a dependency inventory, a rule-version comparison, or a list of screens that might be rewritten.
- If you changed and saved the interface after the review was prepared, choose Review latest and read the refreshed candidate and status. That action refreshes the review; it does not publish. If the dialog reports that review needs attention, the interface changed, or the result needs checking, stop and follow the displayed message. Do not publish from a non-ready state.
- If you are not proceeding, choose Cancel to close the review without publishing a new version; it does not unpublish an existing release. Otherwise, when the saved interface and ready status are correct, choose the dialog's Publish once. This confirms the interface itself; it does not configure, update, or certify dependent rules and records.
- Wait for the publication result. The success dialog identifies the published App Shell or interface and version, displays the Live link, and offers Continue editing and Copy link. In the publish-only path it also offers Open live. Copying the link or opening Live is separate from publishing.
- Choose Open live when it is offered, or use the normal published-app entry. Confirm you opened the current release. Continue with the separate Live checks below; a published interface alone does not prove access or a successful business save.
Historical screenshots: these 8 November 2026 captures show an earlier dependency-impact review and its success confirmation in that training run. They are historical editorial aids, not evidence from the current master build. Read the current review text and release state in your own session; the screenshot URL is from a local training runtime. The current normal-Form review and success are illustrated in the separate inert practice above. That practice does not show this connected nine-field intake being republished or successfully saving a business record.
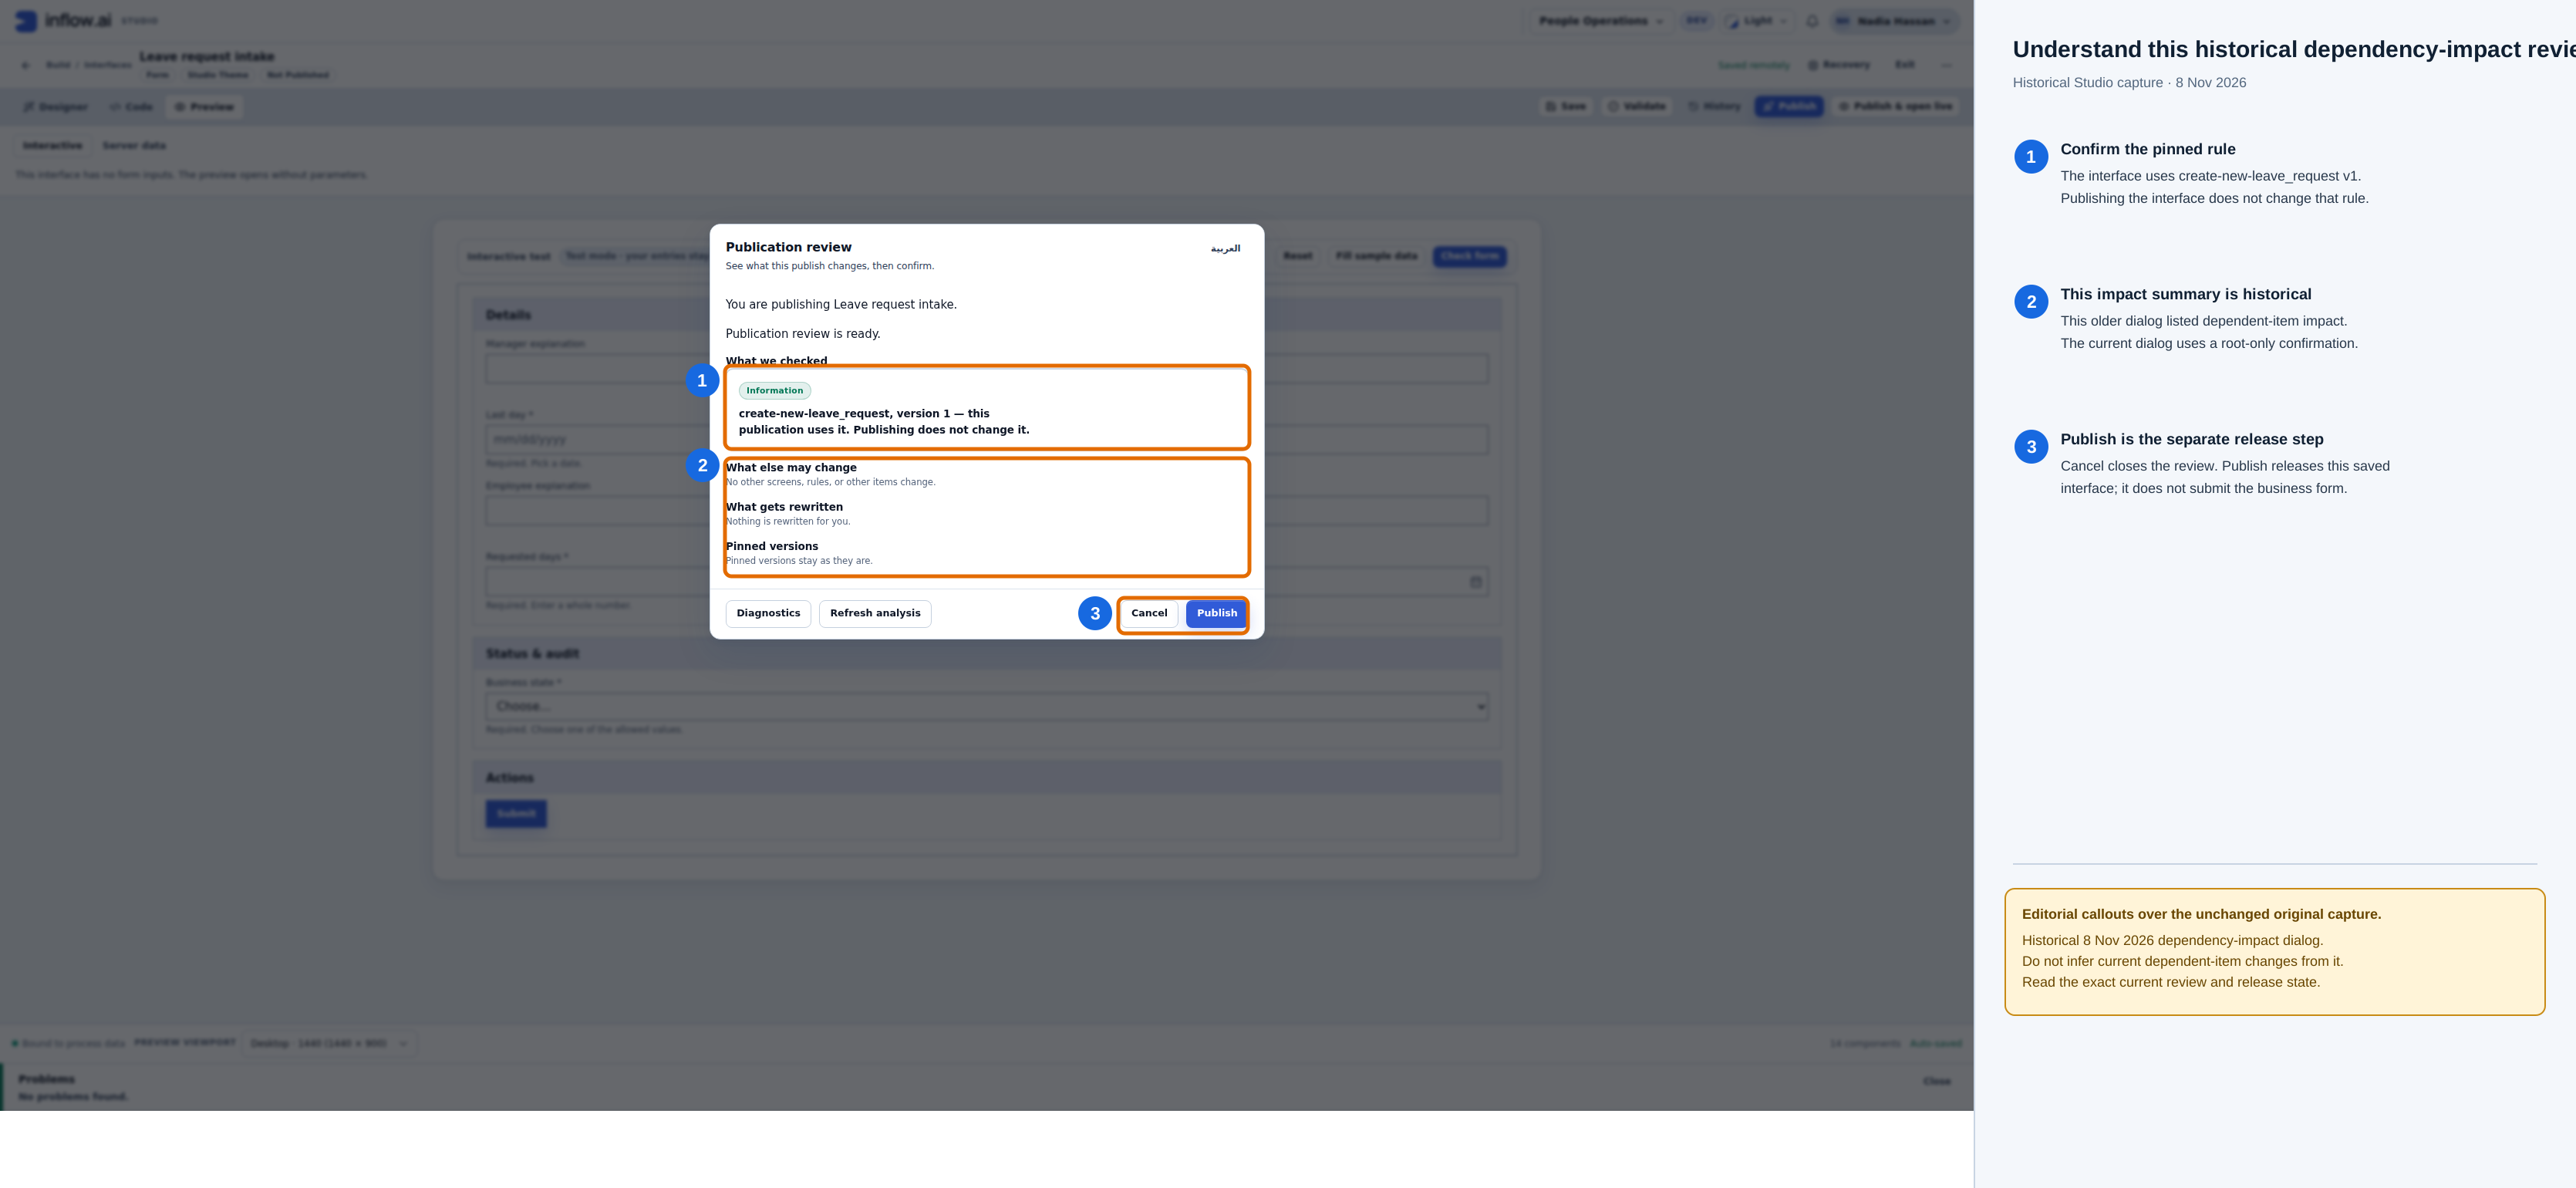
Open the unchanged original Publication review screenshot
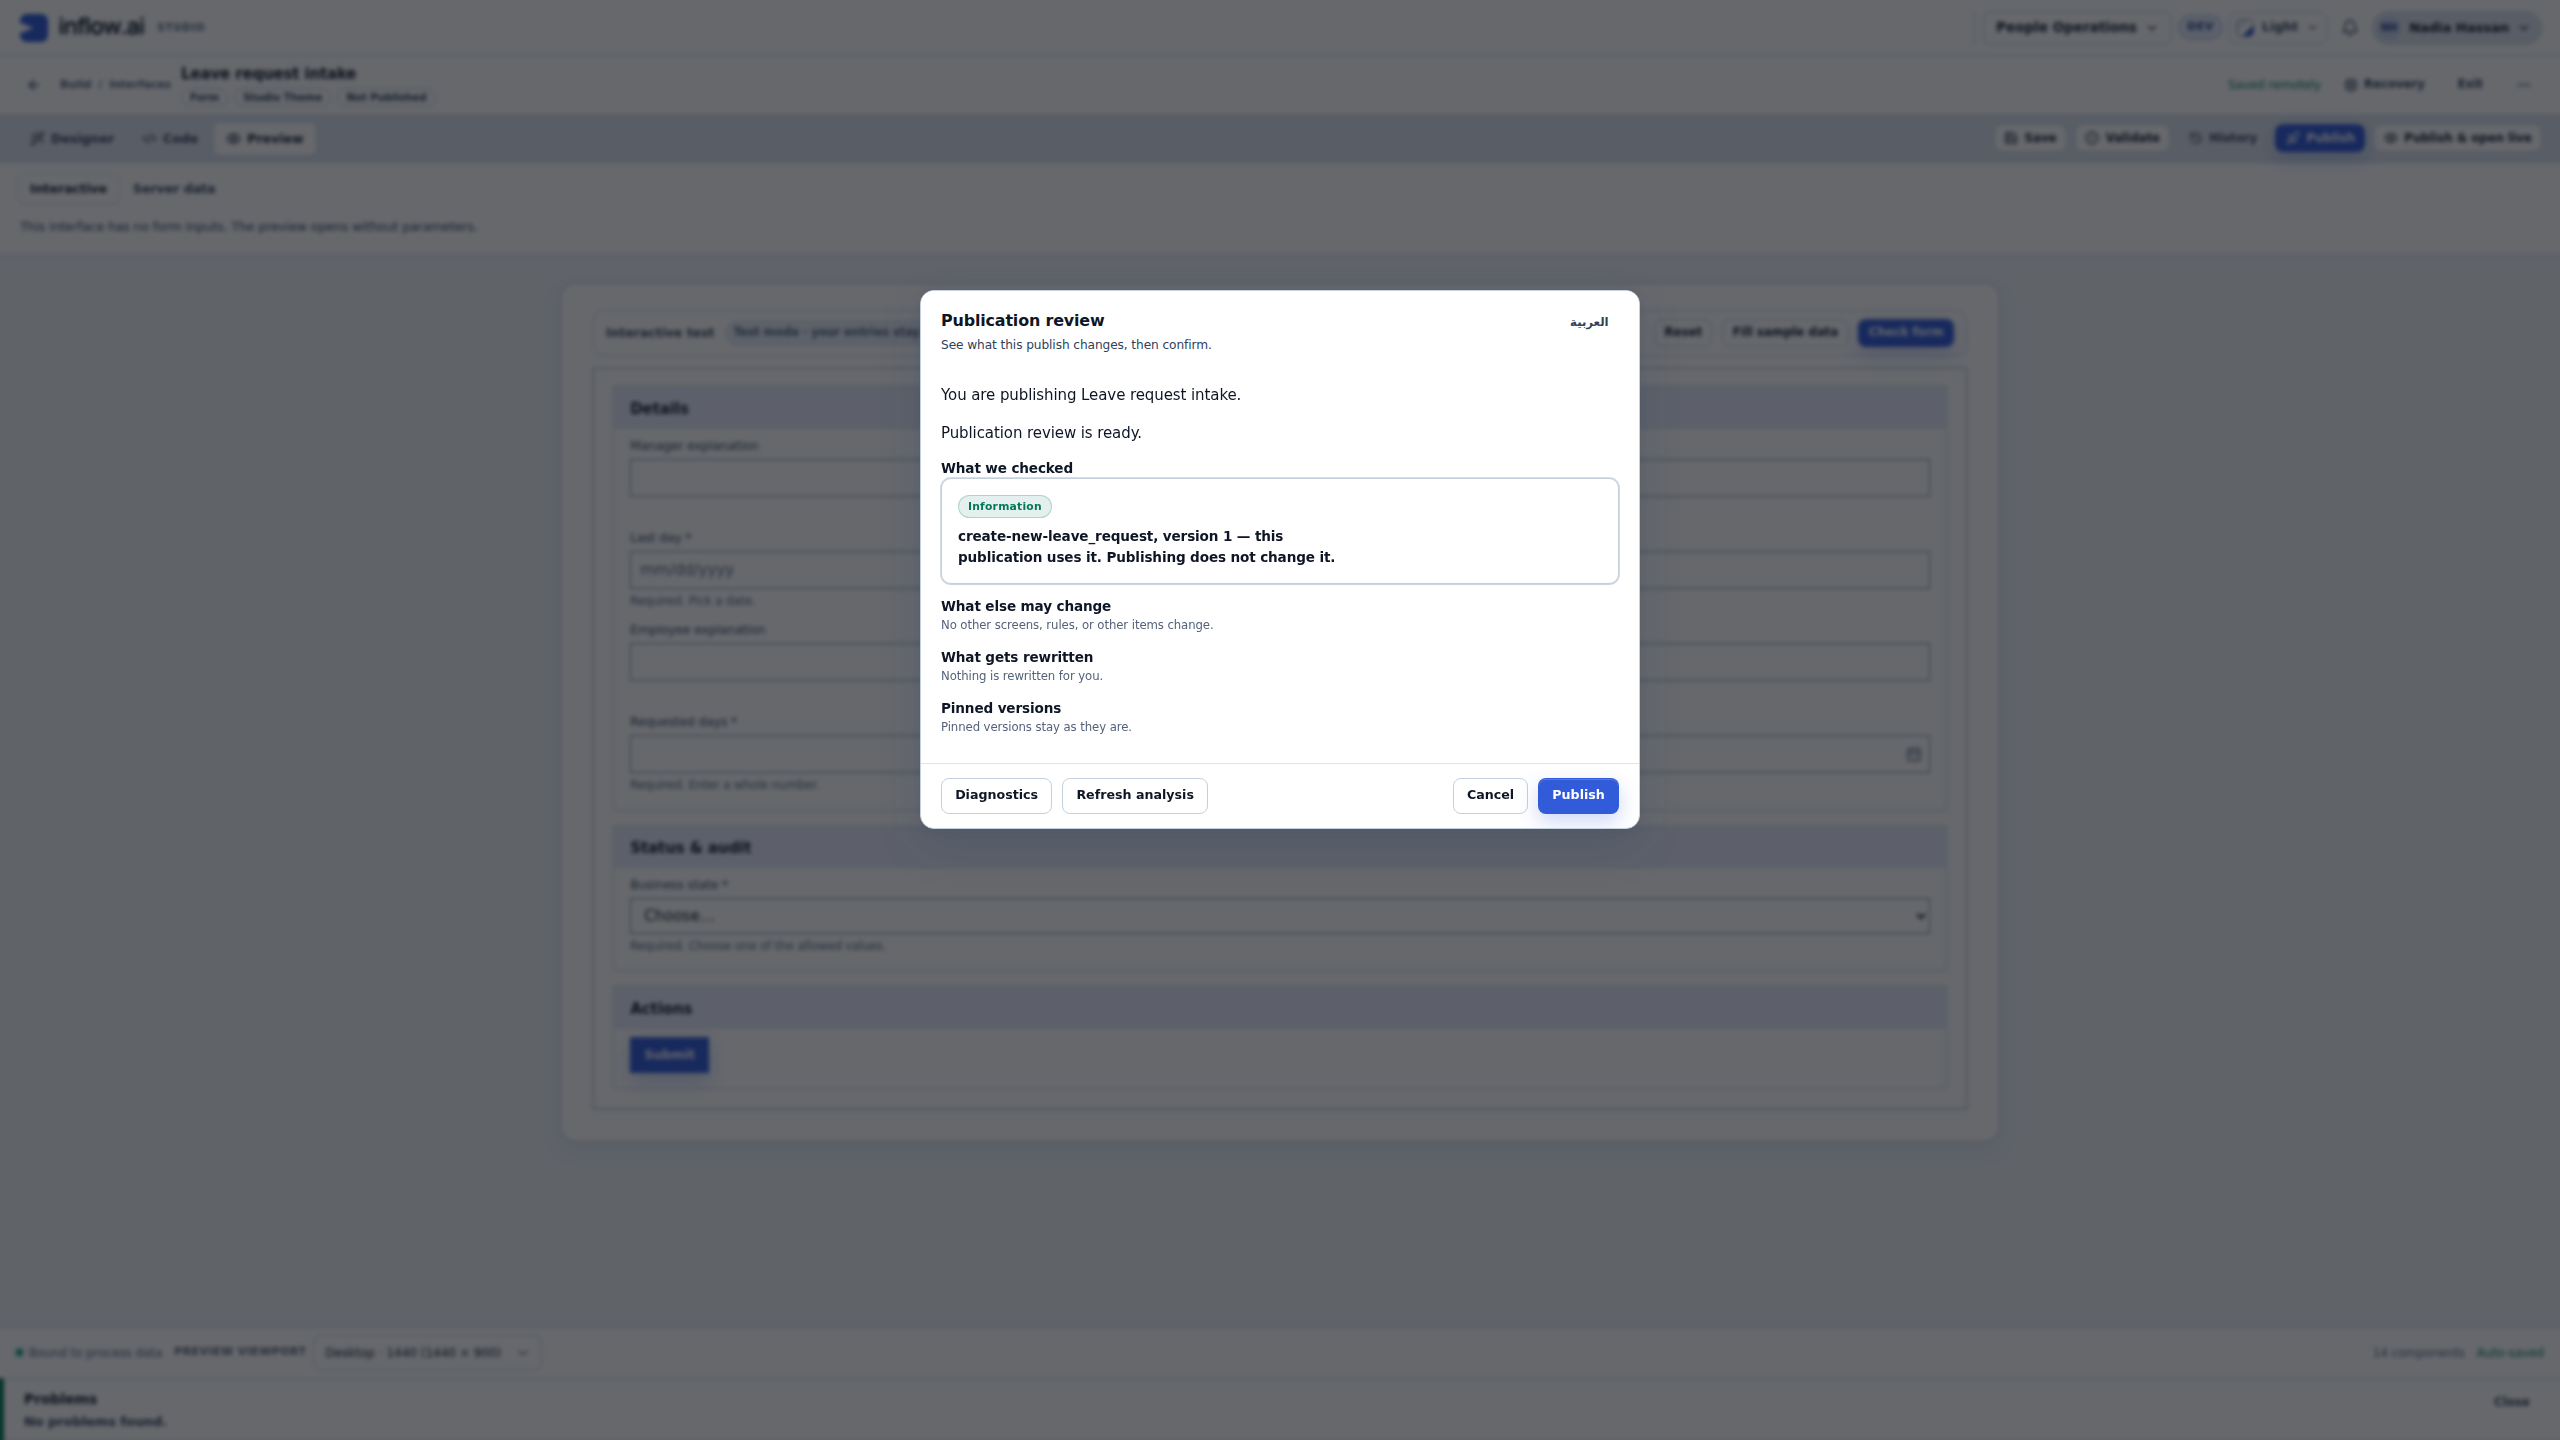
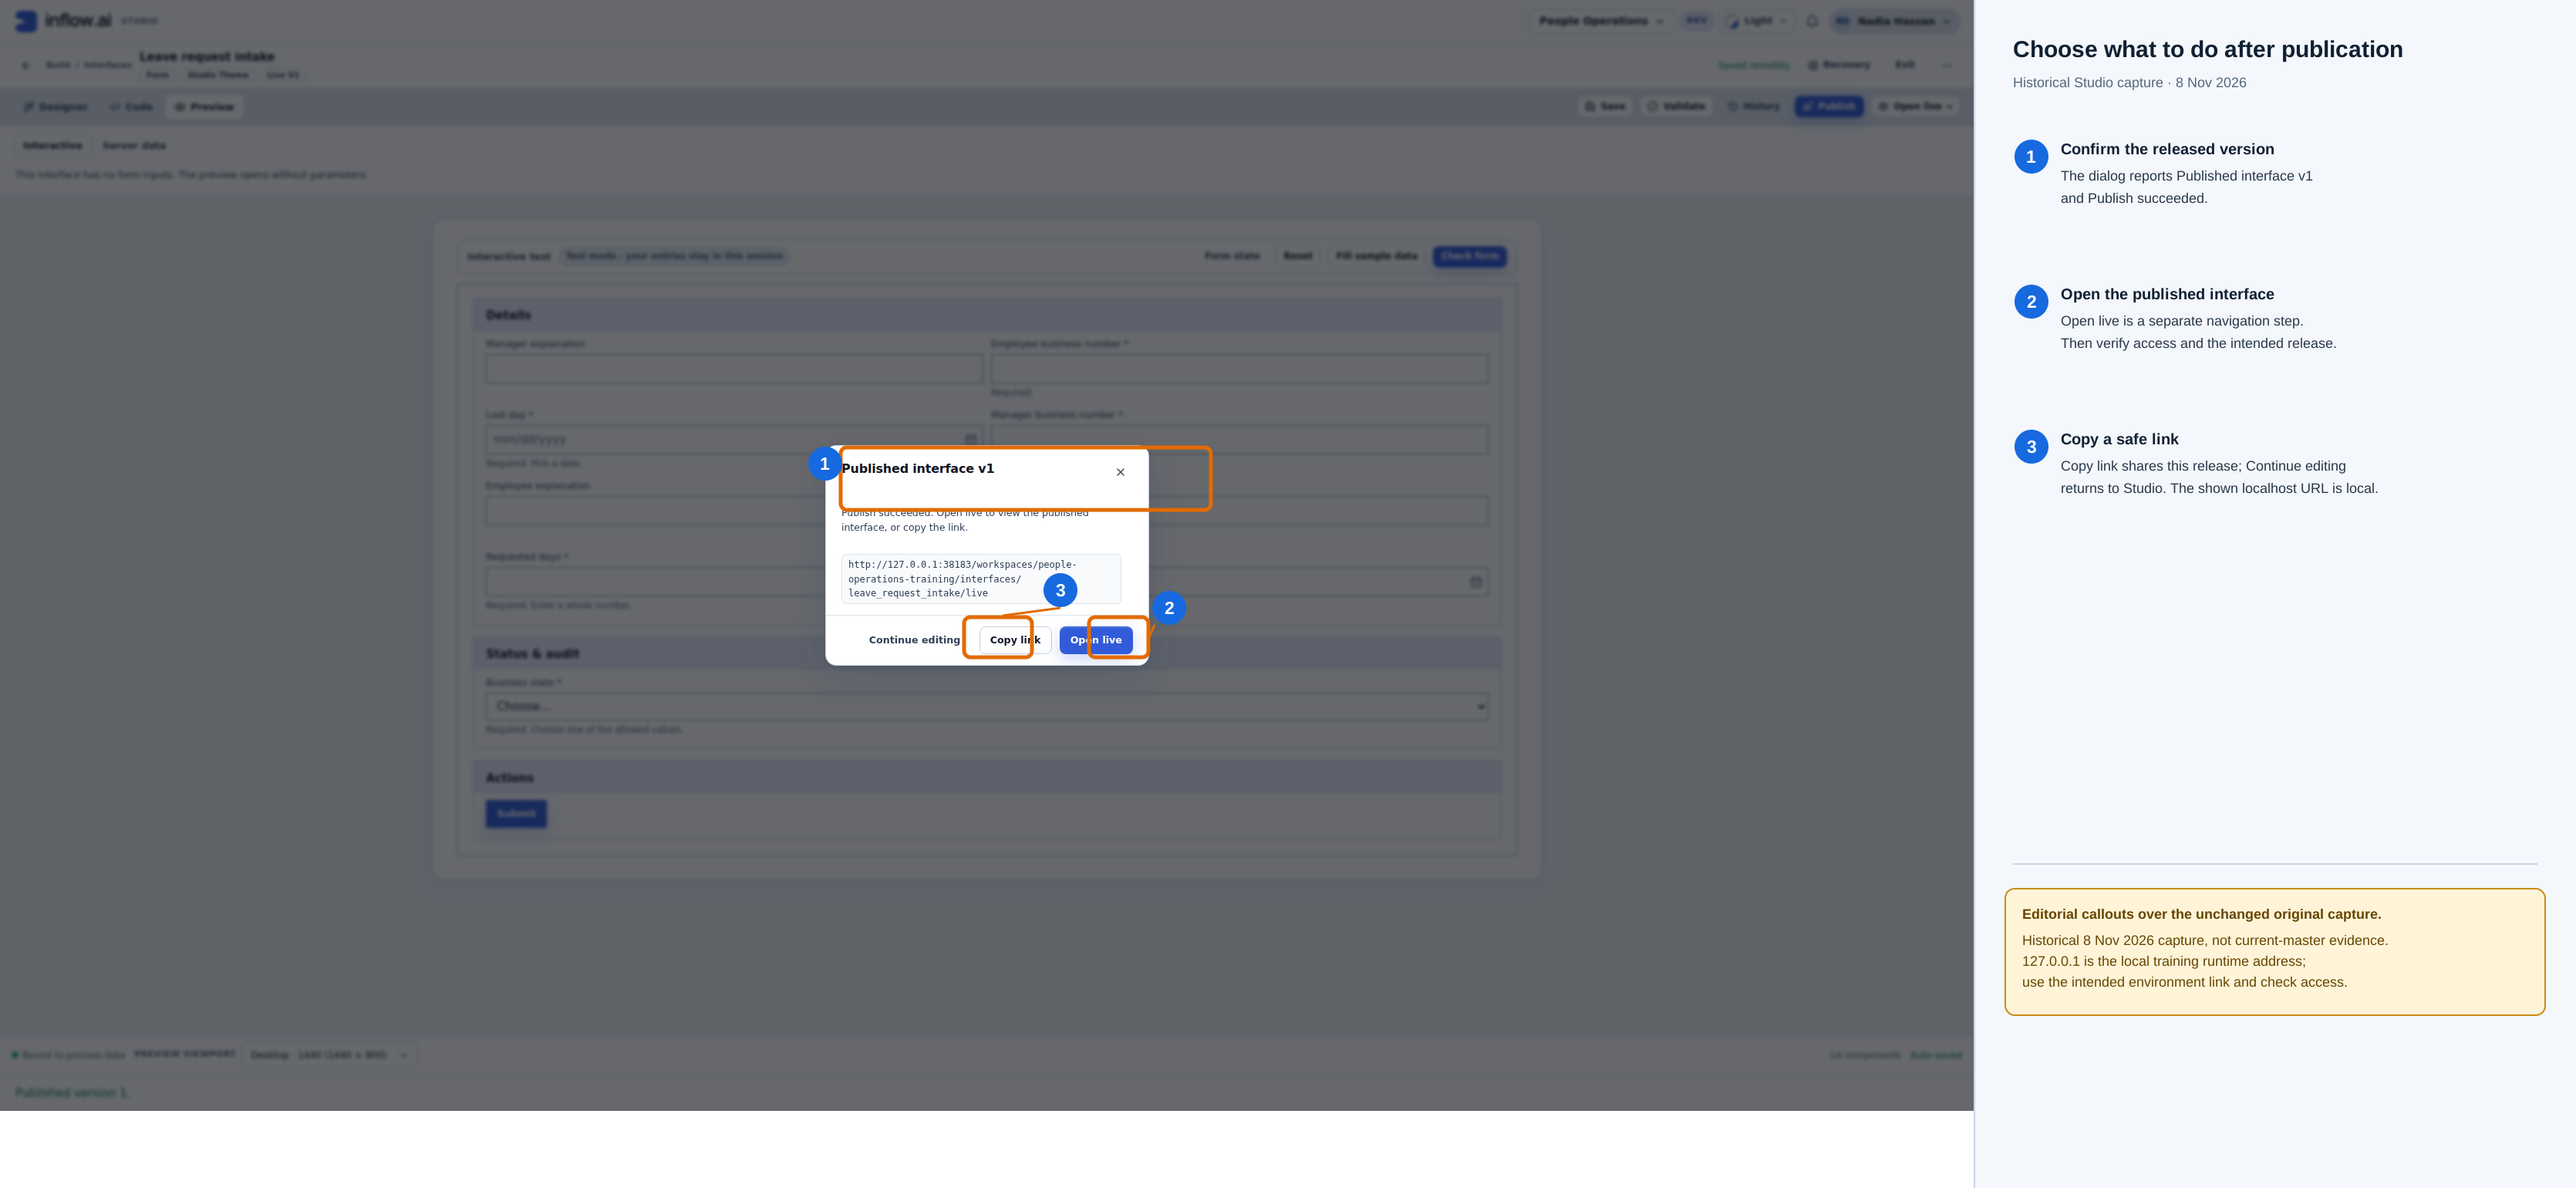
Open the unchanged original Published interface v1 screenshot
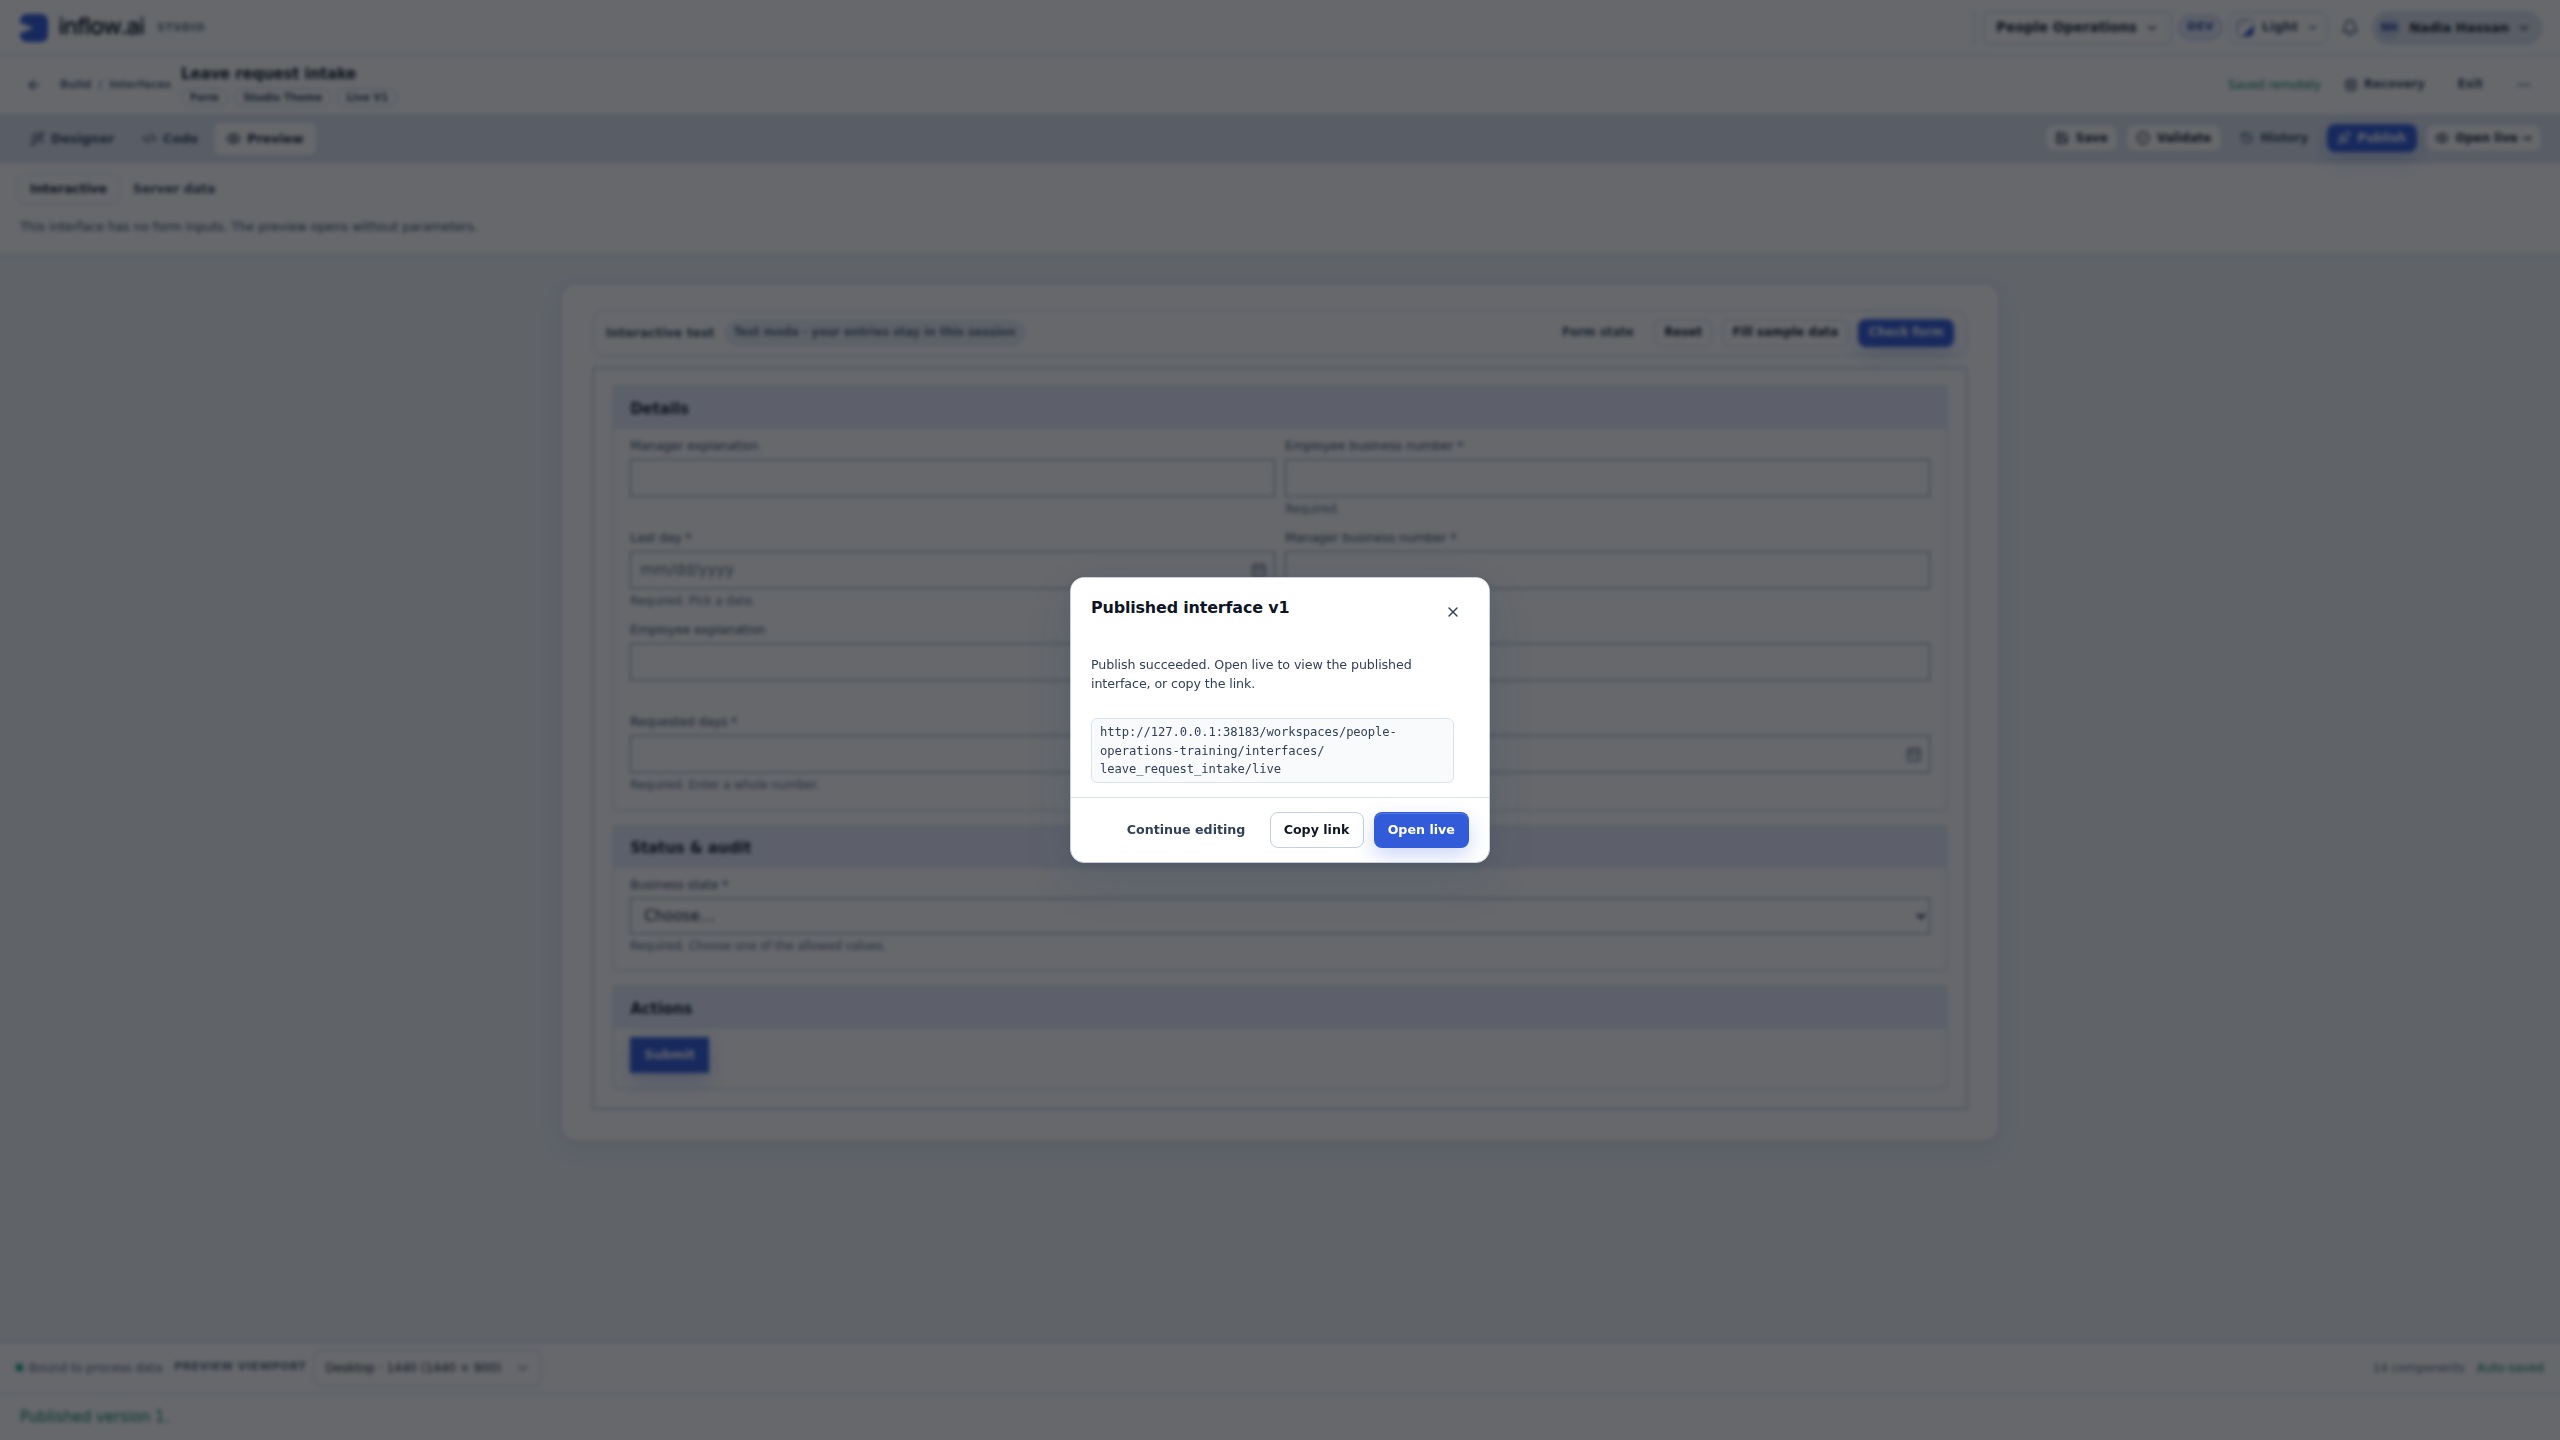
Expected publication result: the form has a released version and Nadia can open it. This does not automatically give employee accounts application access or prove that a business save works. Continue with an actual agreed Live check below.
Check the Live action and reconcile its result
- Confirm that you used Open live for the intended current form. This released form does not show the designer's Interactive test or Preview only notice.
- With the questions empty, choose Submit once. Read and repair the seven required-field issues. The released form still validates required answers.
- Use the agreed fictional request values from the table above, including both calendar-selected dates and explicitly chosen Pending. Before a real create, inspect the destination to ensure that reference is not already present; it is not configured as a unique key.
- Choose Submit once when the intended values are correct. Read its actual response. A failure or uncertain response is not a reason to click repeatedly.
- Open the destination model's Records tab and choose Refresh. Inspect the reference and values rather than relying only on a toast. If the outcome remains uncertain, preserve the form and ask the responsible application administrator to reconcile it before another consequential attempt.
View the unannotated original screenshot
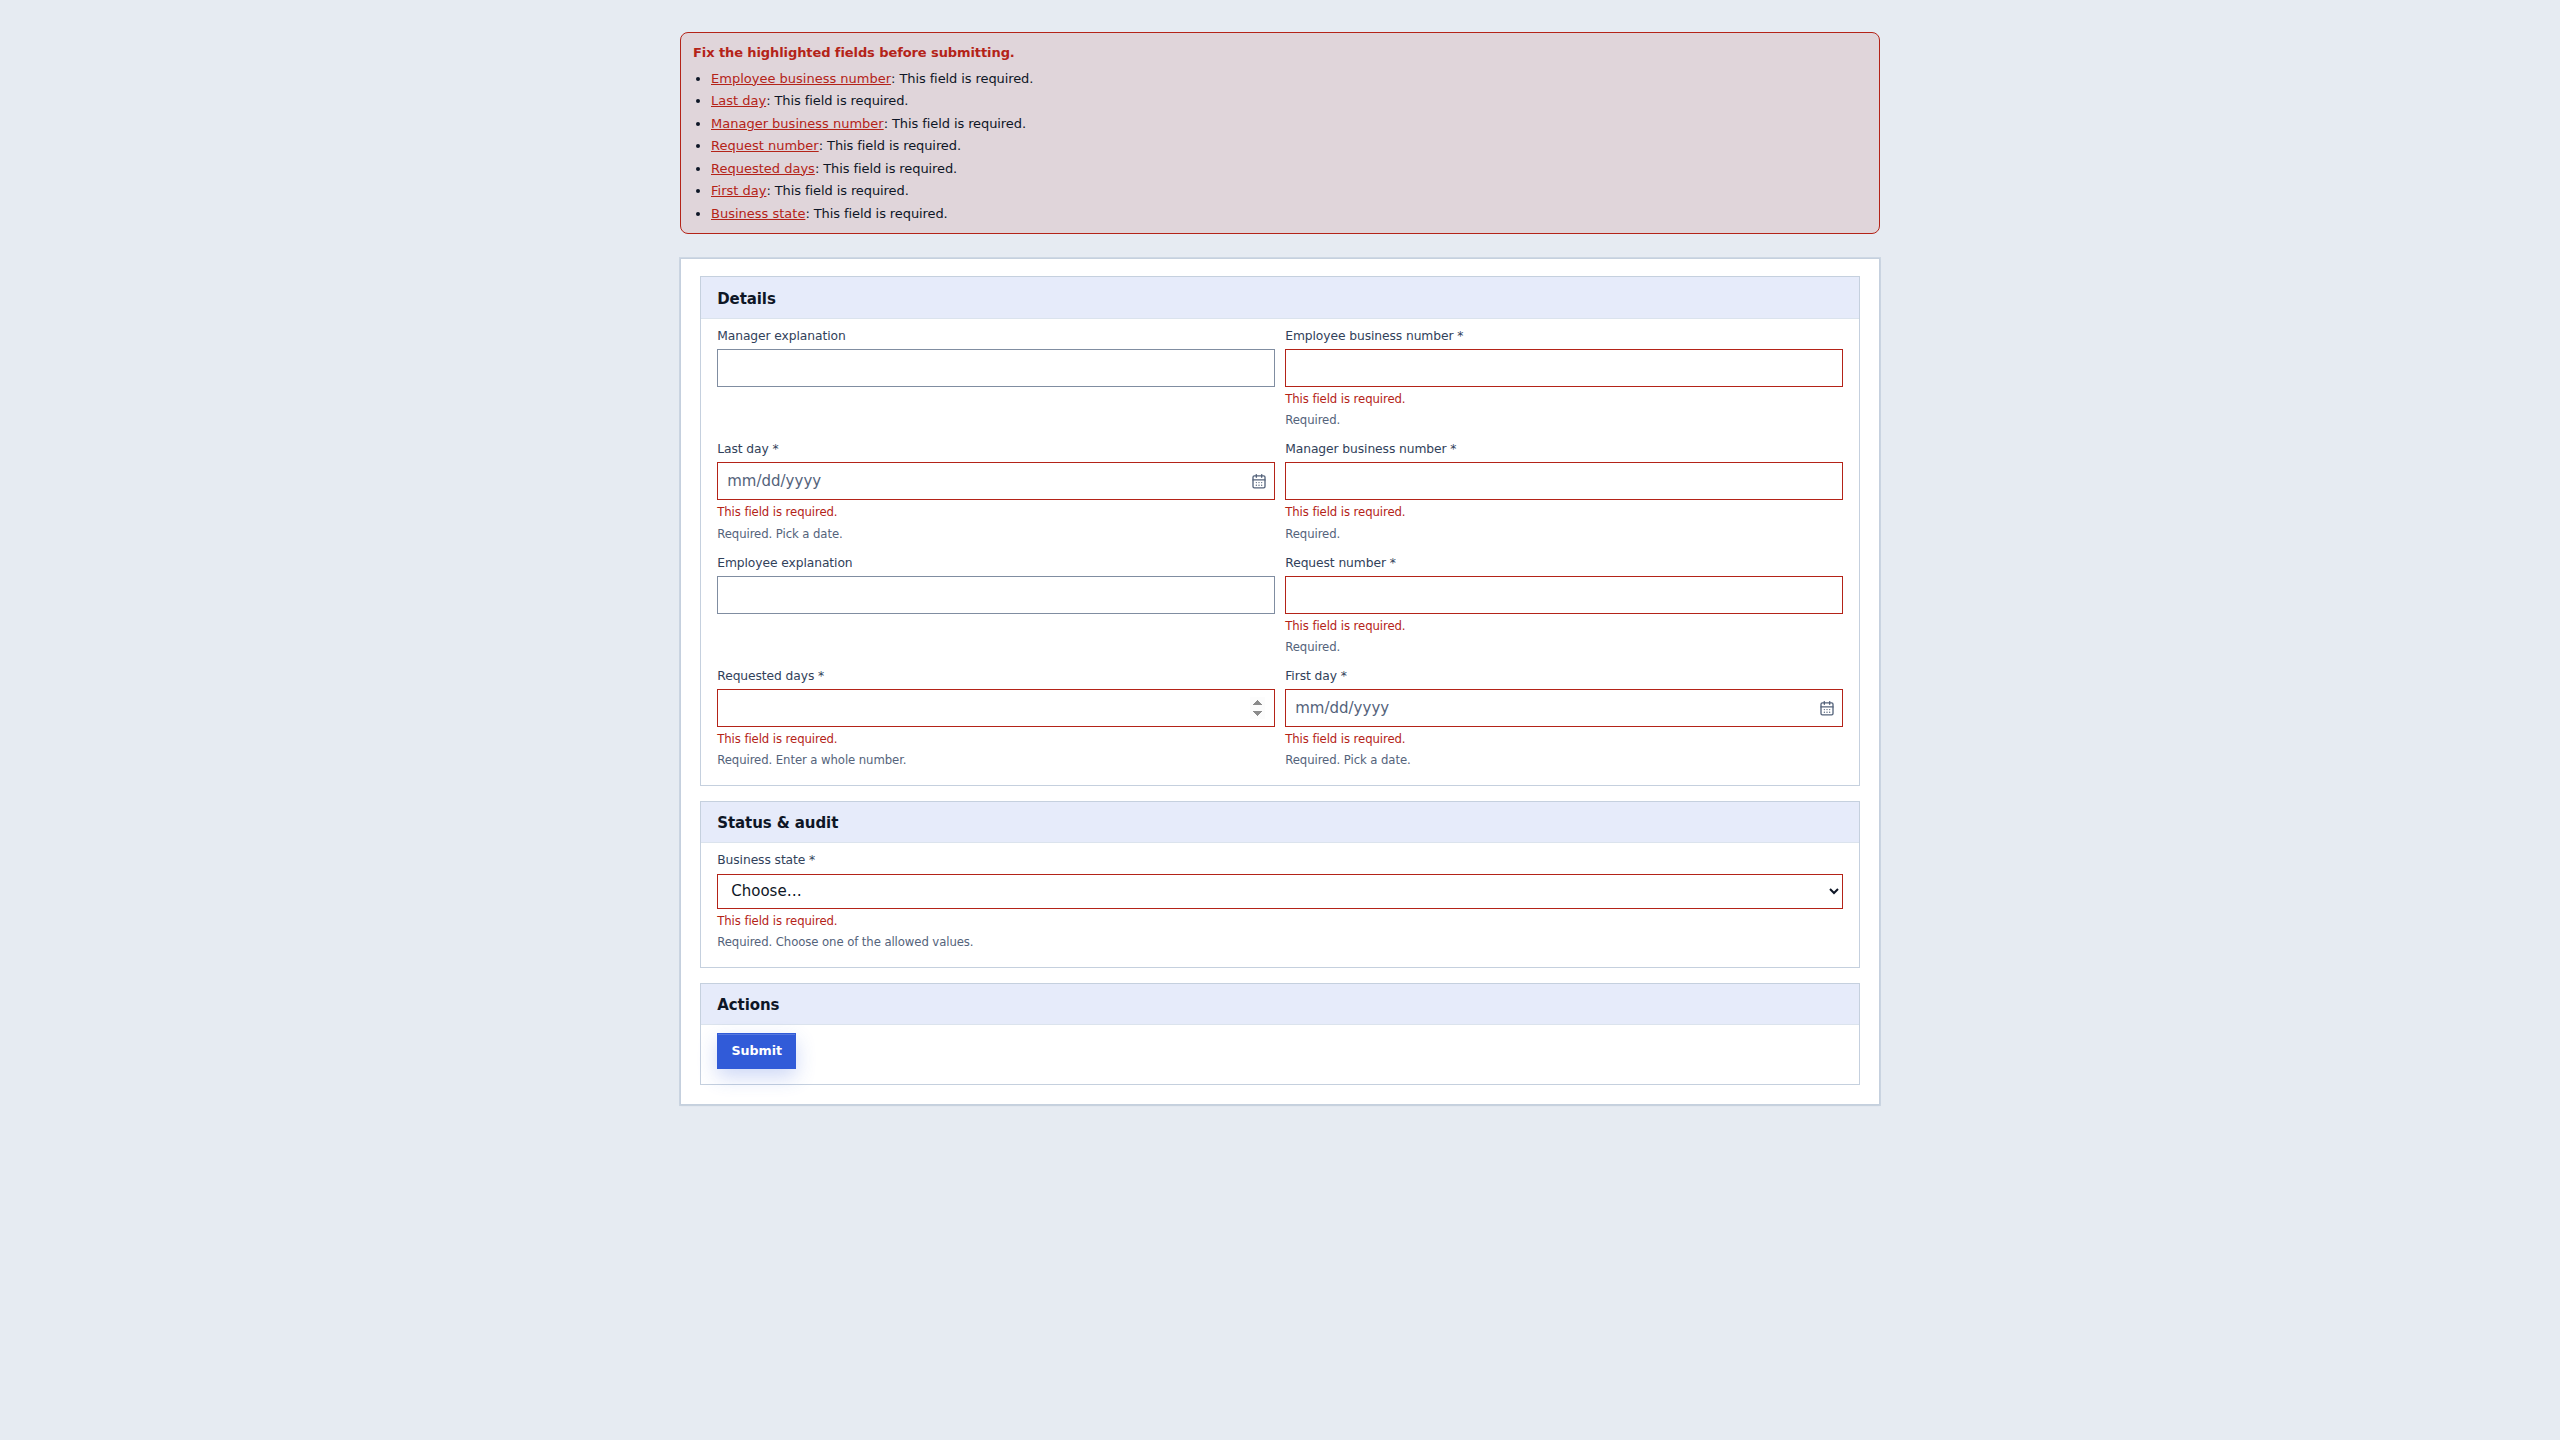
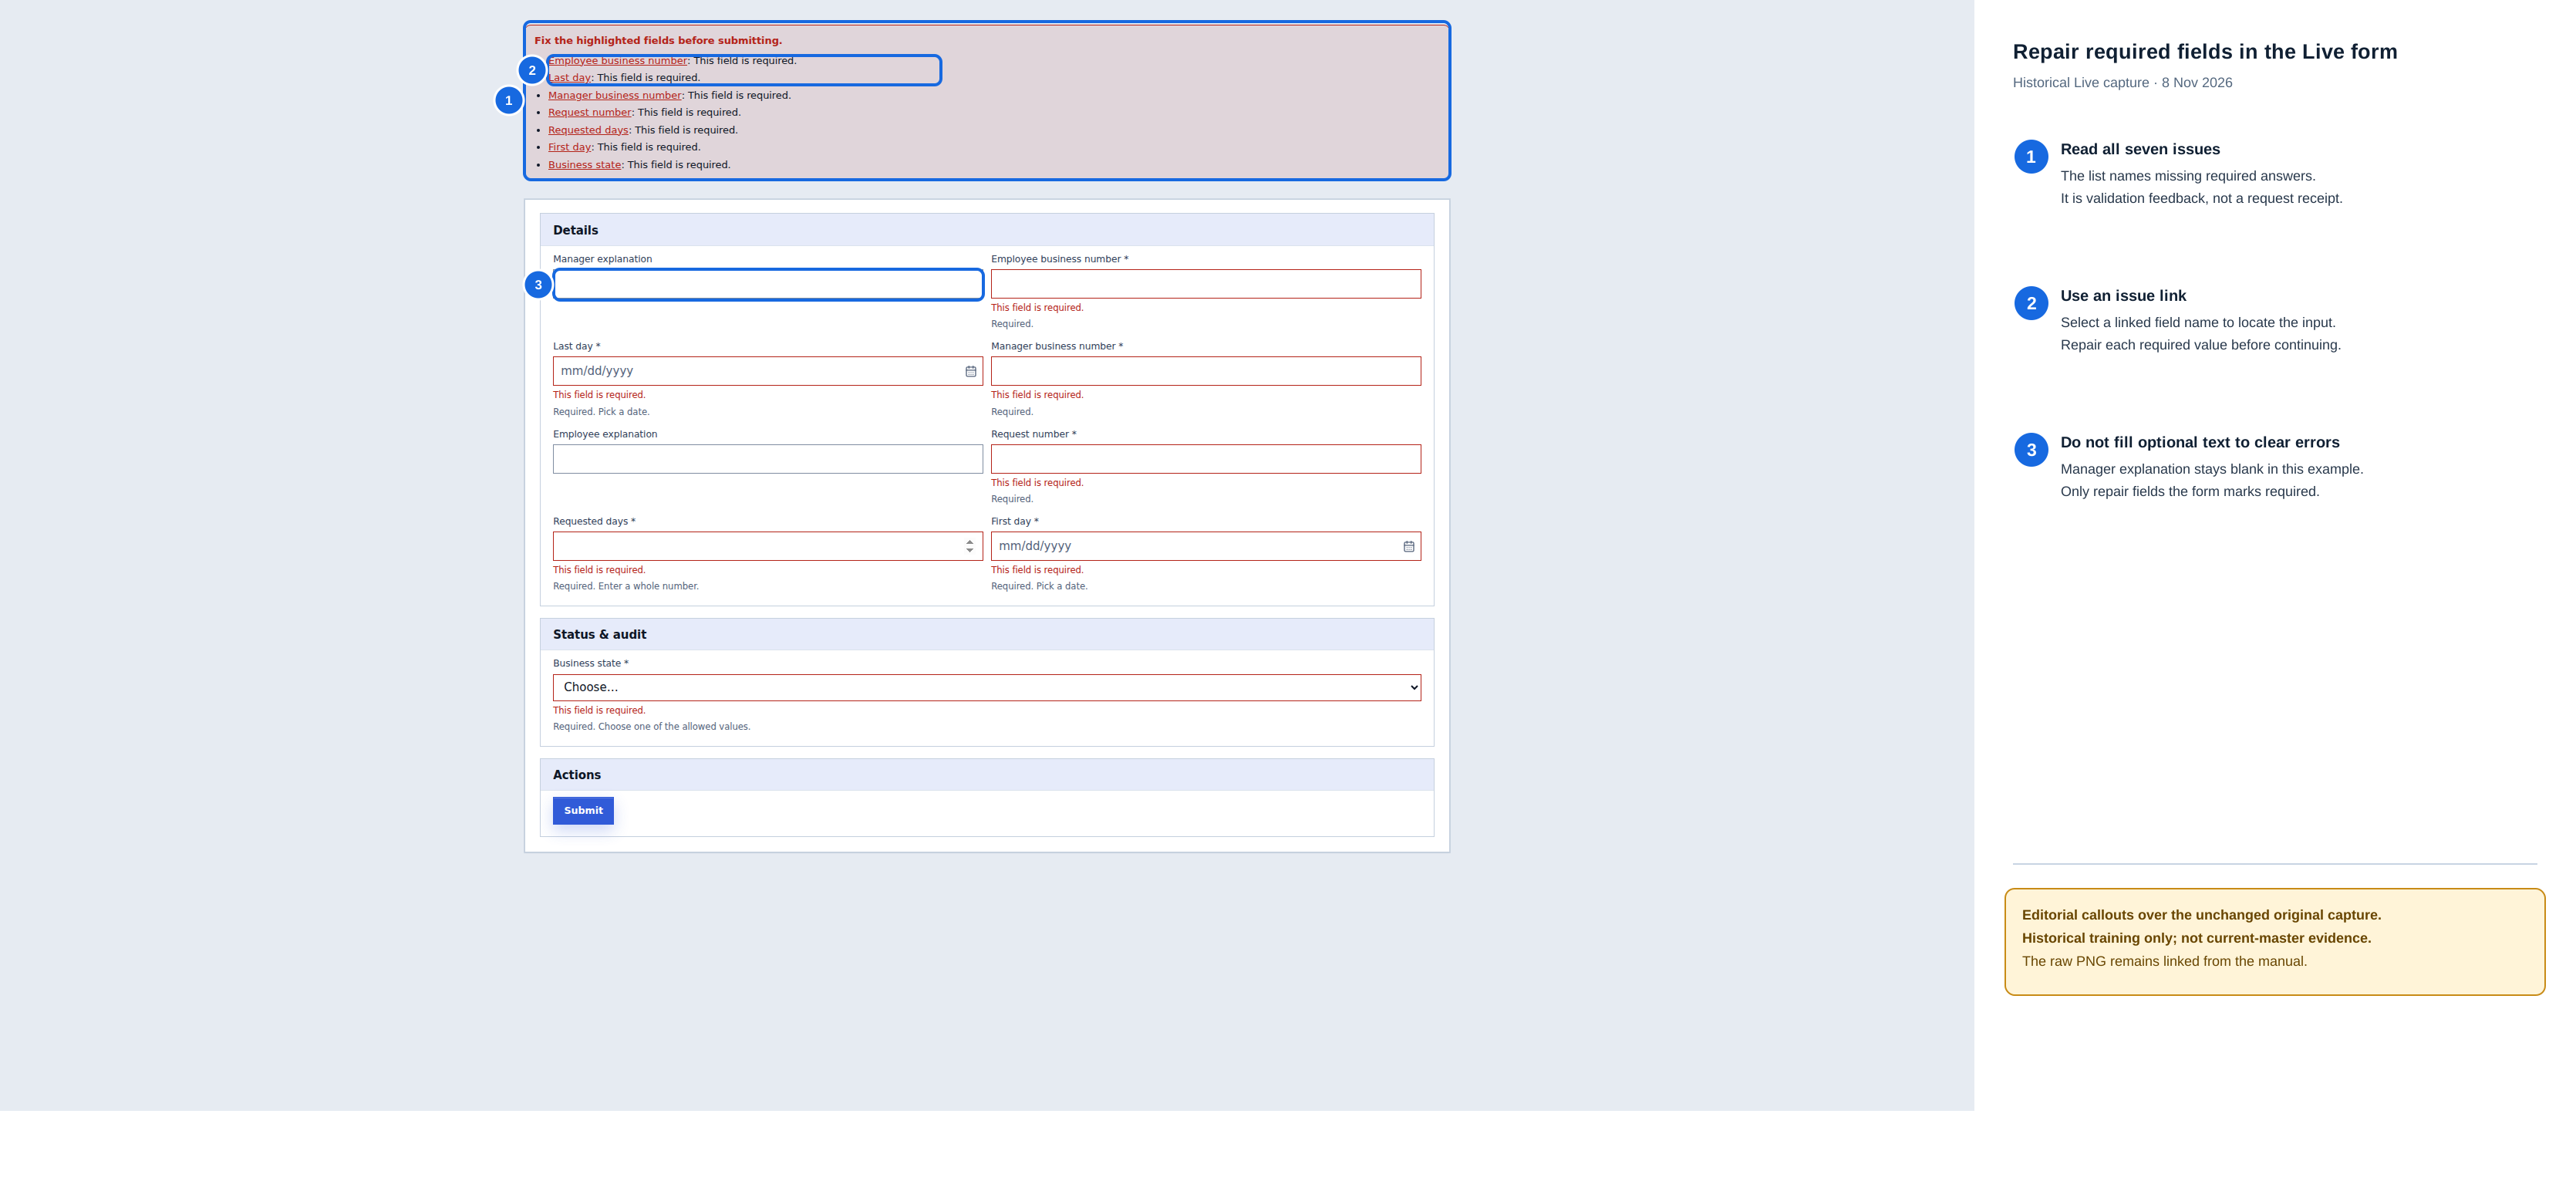
- The seven-item list names required answers that block this incomplete attempt. It is validation feedback, not a request reference.
- Use a linked field name to locate and repair each missing required value.
- The optional Manager explanation is not one of the seven required answers; do not invent text just to clear validation.
Historical editorial guidance over the 8 November 2026 capture. The unchanged original PNG remains available; this is not current-master evidence.
View the unannotated original screenshot
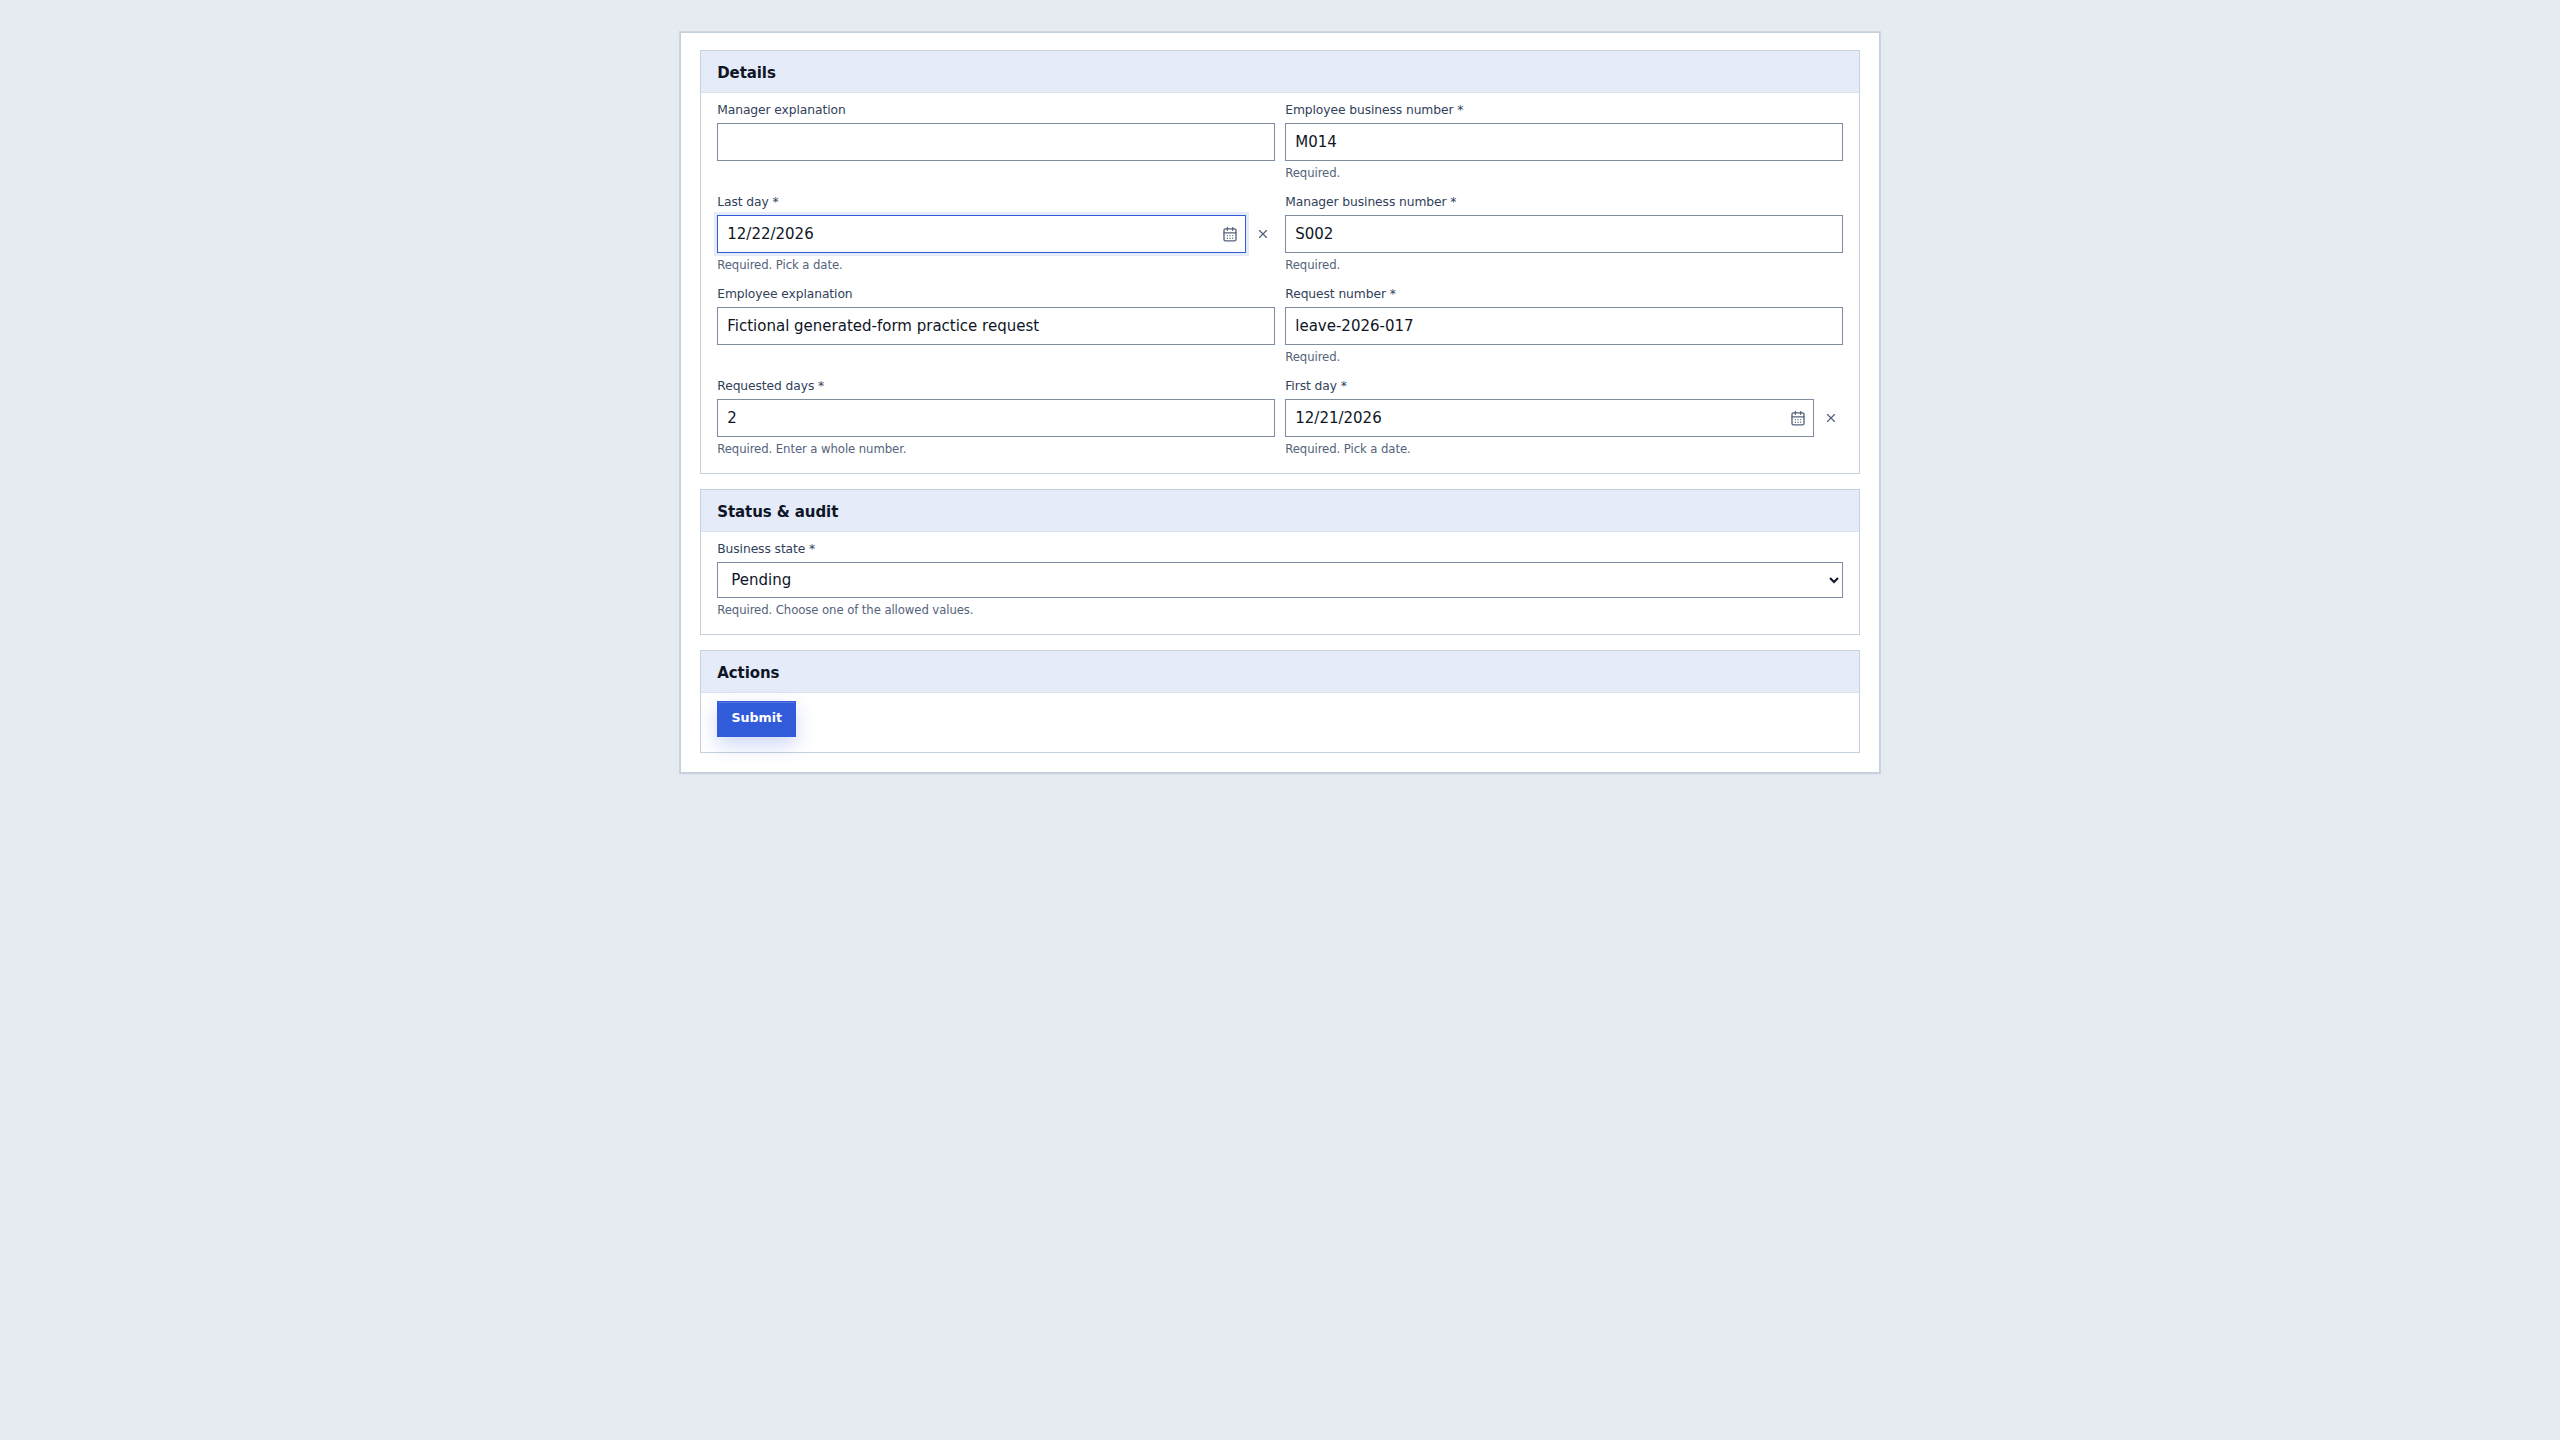
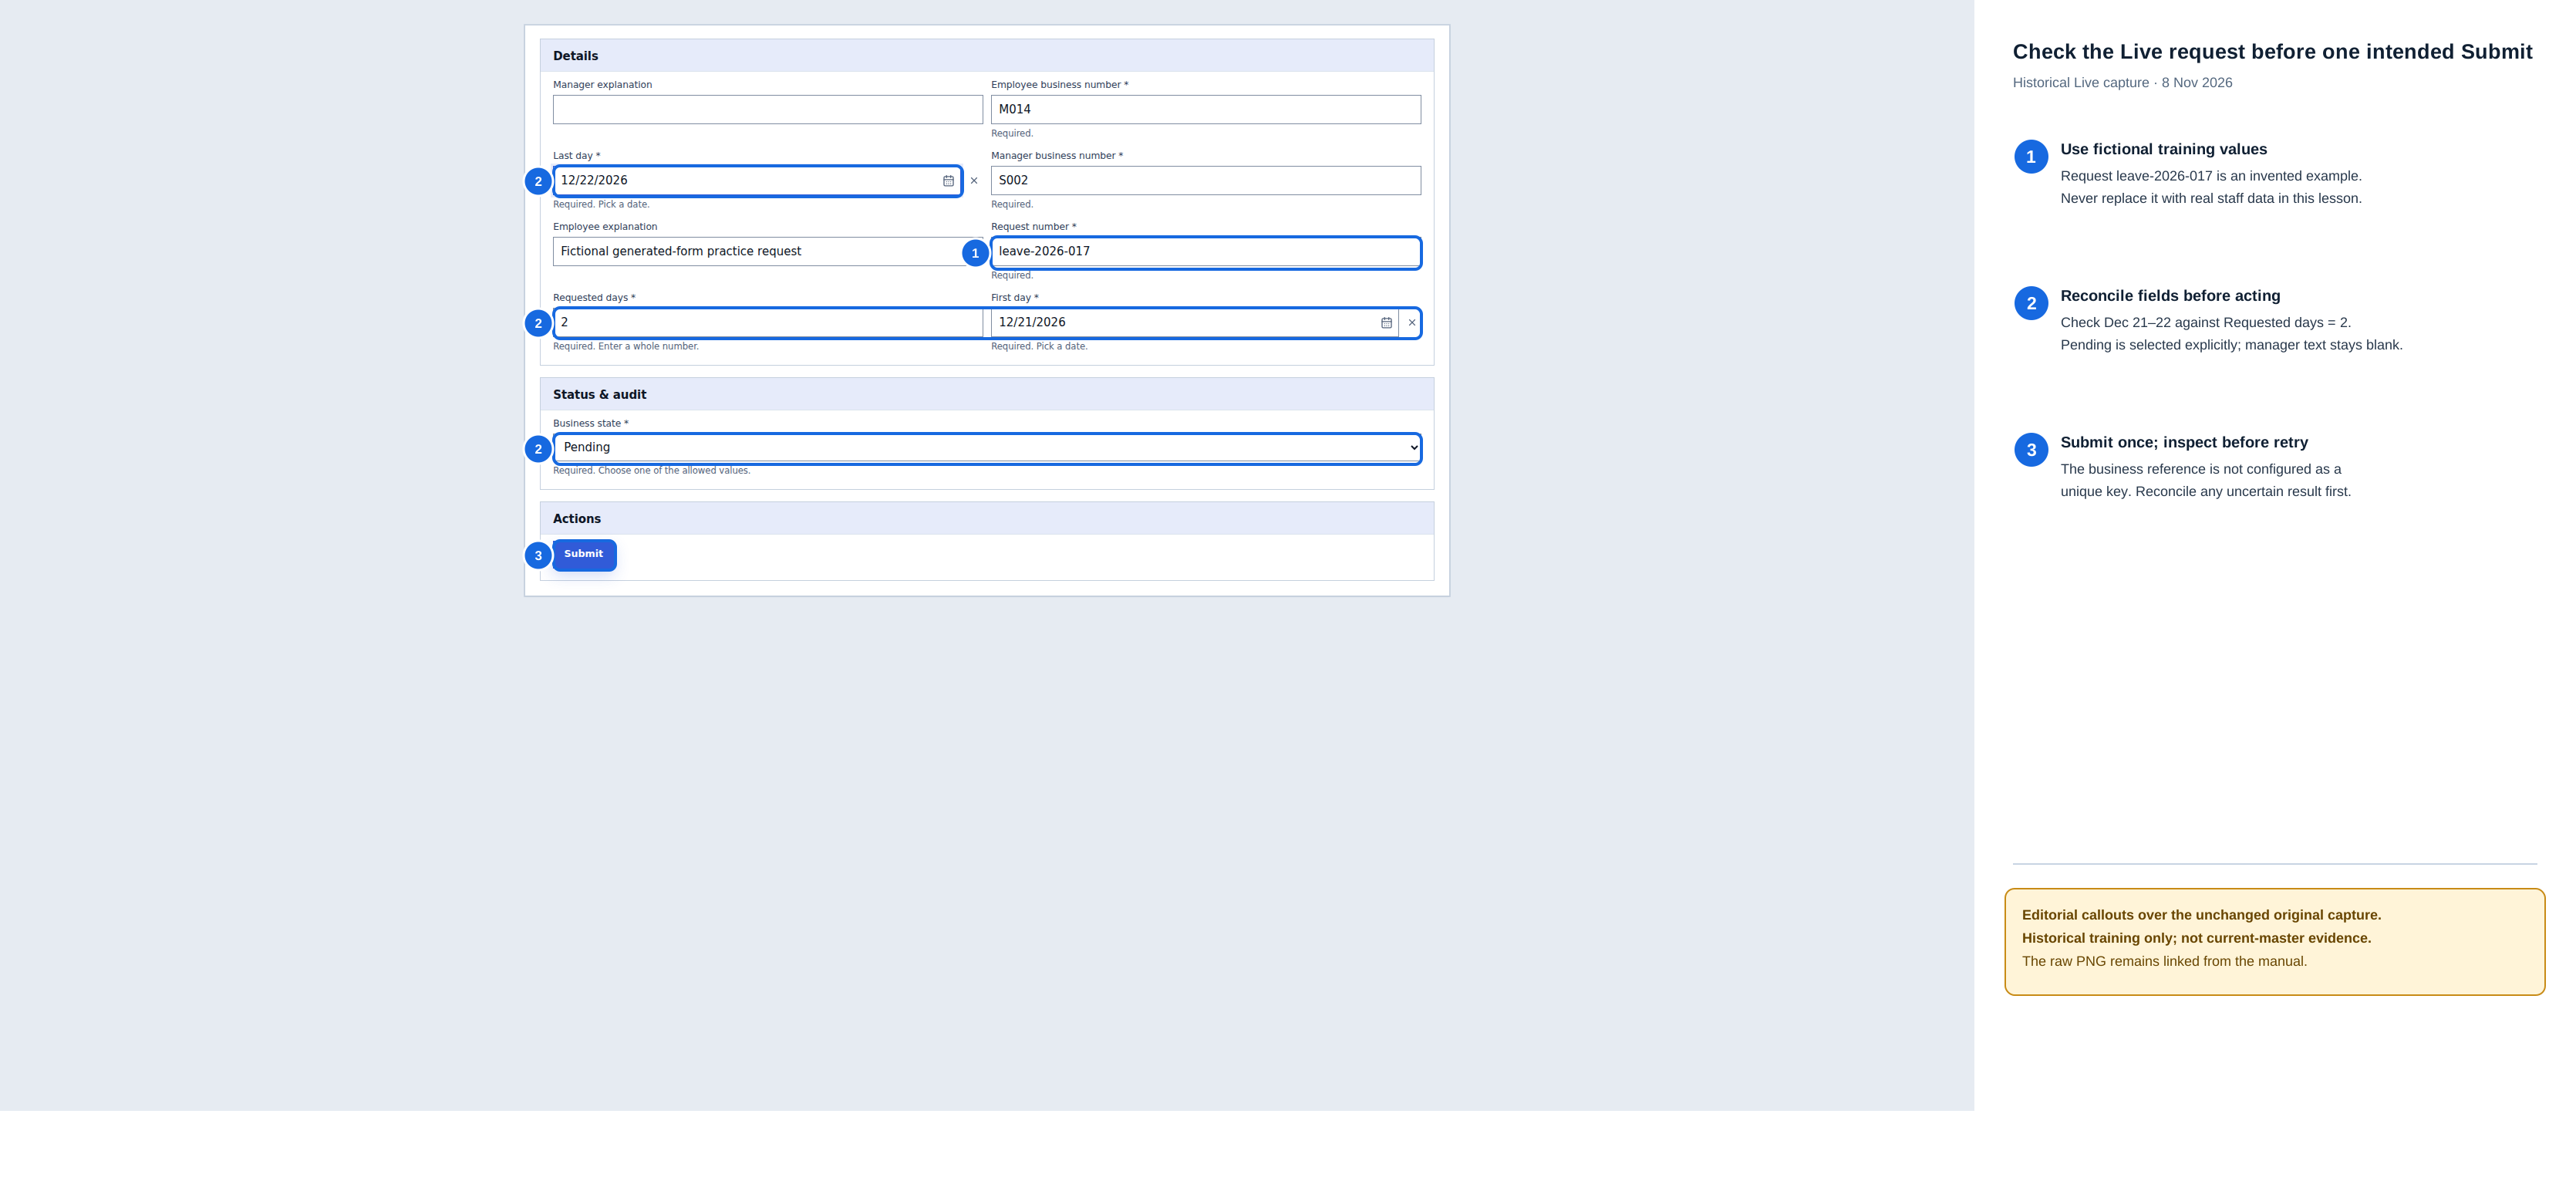
leave-2026-017and the associated business numbers are fictional teaching values; never enter real employee data into the example.- Check December 21 and 22 against Requested days = 2, and confirm Pending was selected deliberately.
- This is a ready form, not a success receipt. Submit once; because the business reference is not unique, inspect the outcome before any retry.
Historical editorial guidance over the 8 November 2026 capture. The unchanged original PNG remains available; this is not current-master evidence.
In the admitted captured teaching run, the complete Live submission returned Current rule access is unavailable. Nadia retained the entered form and checked the actual Records list. Only the original three samples remained; there was no leave-2026-017. This is a demonstrated release and failure/reconciliation path, not a successful Live save.
View the unannotated original screenshot
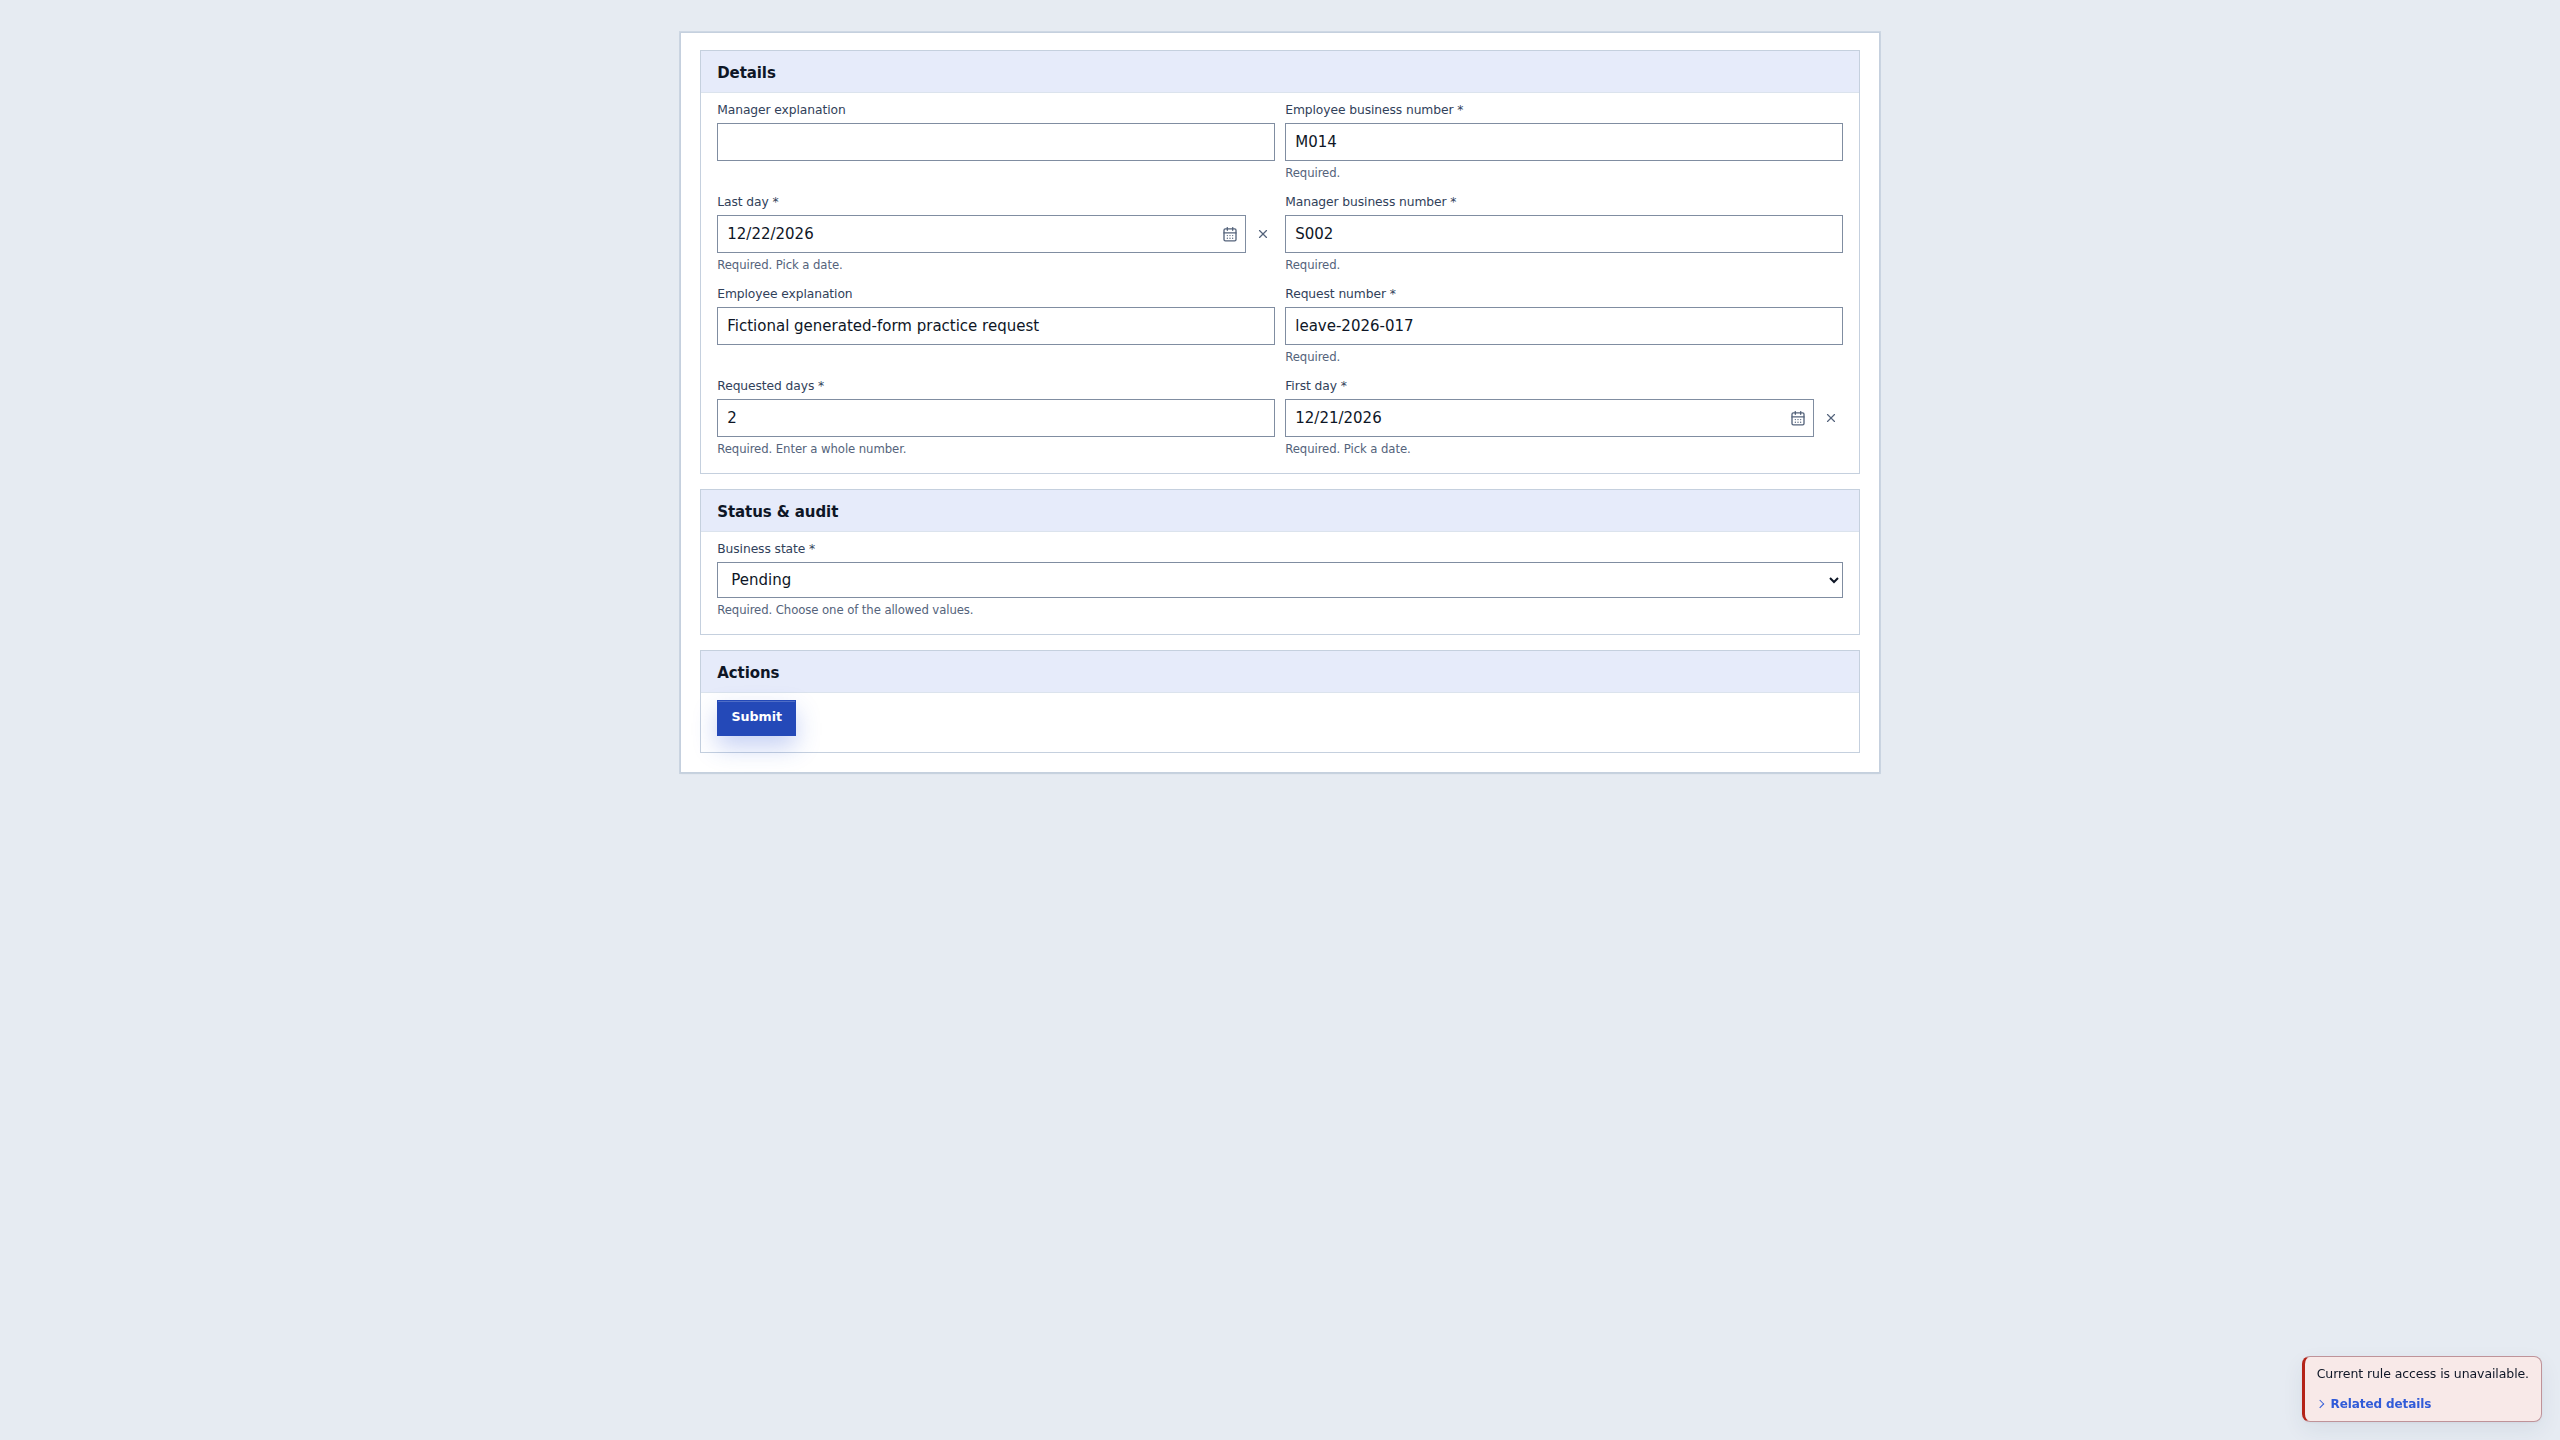
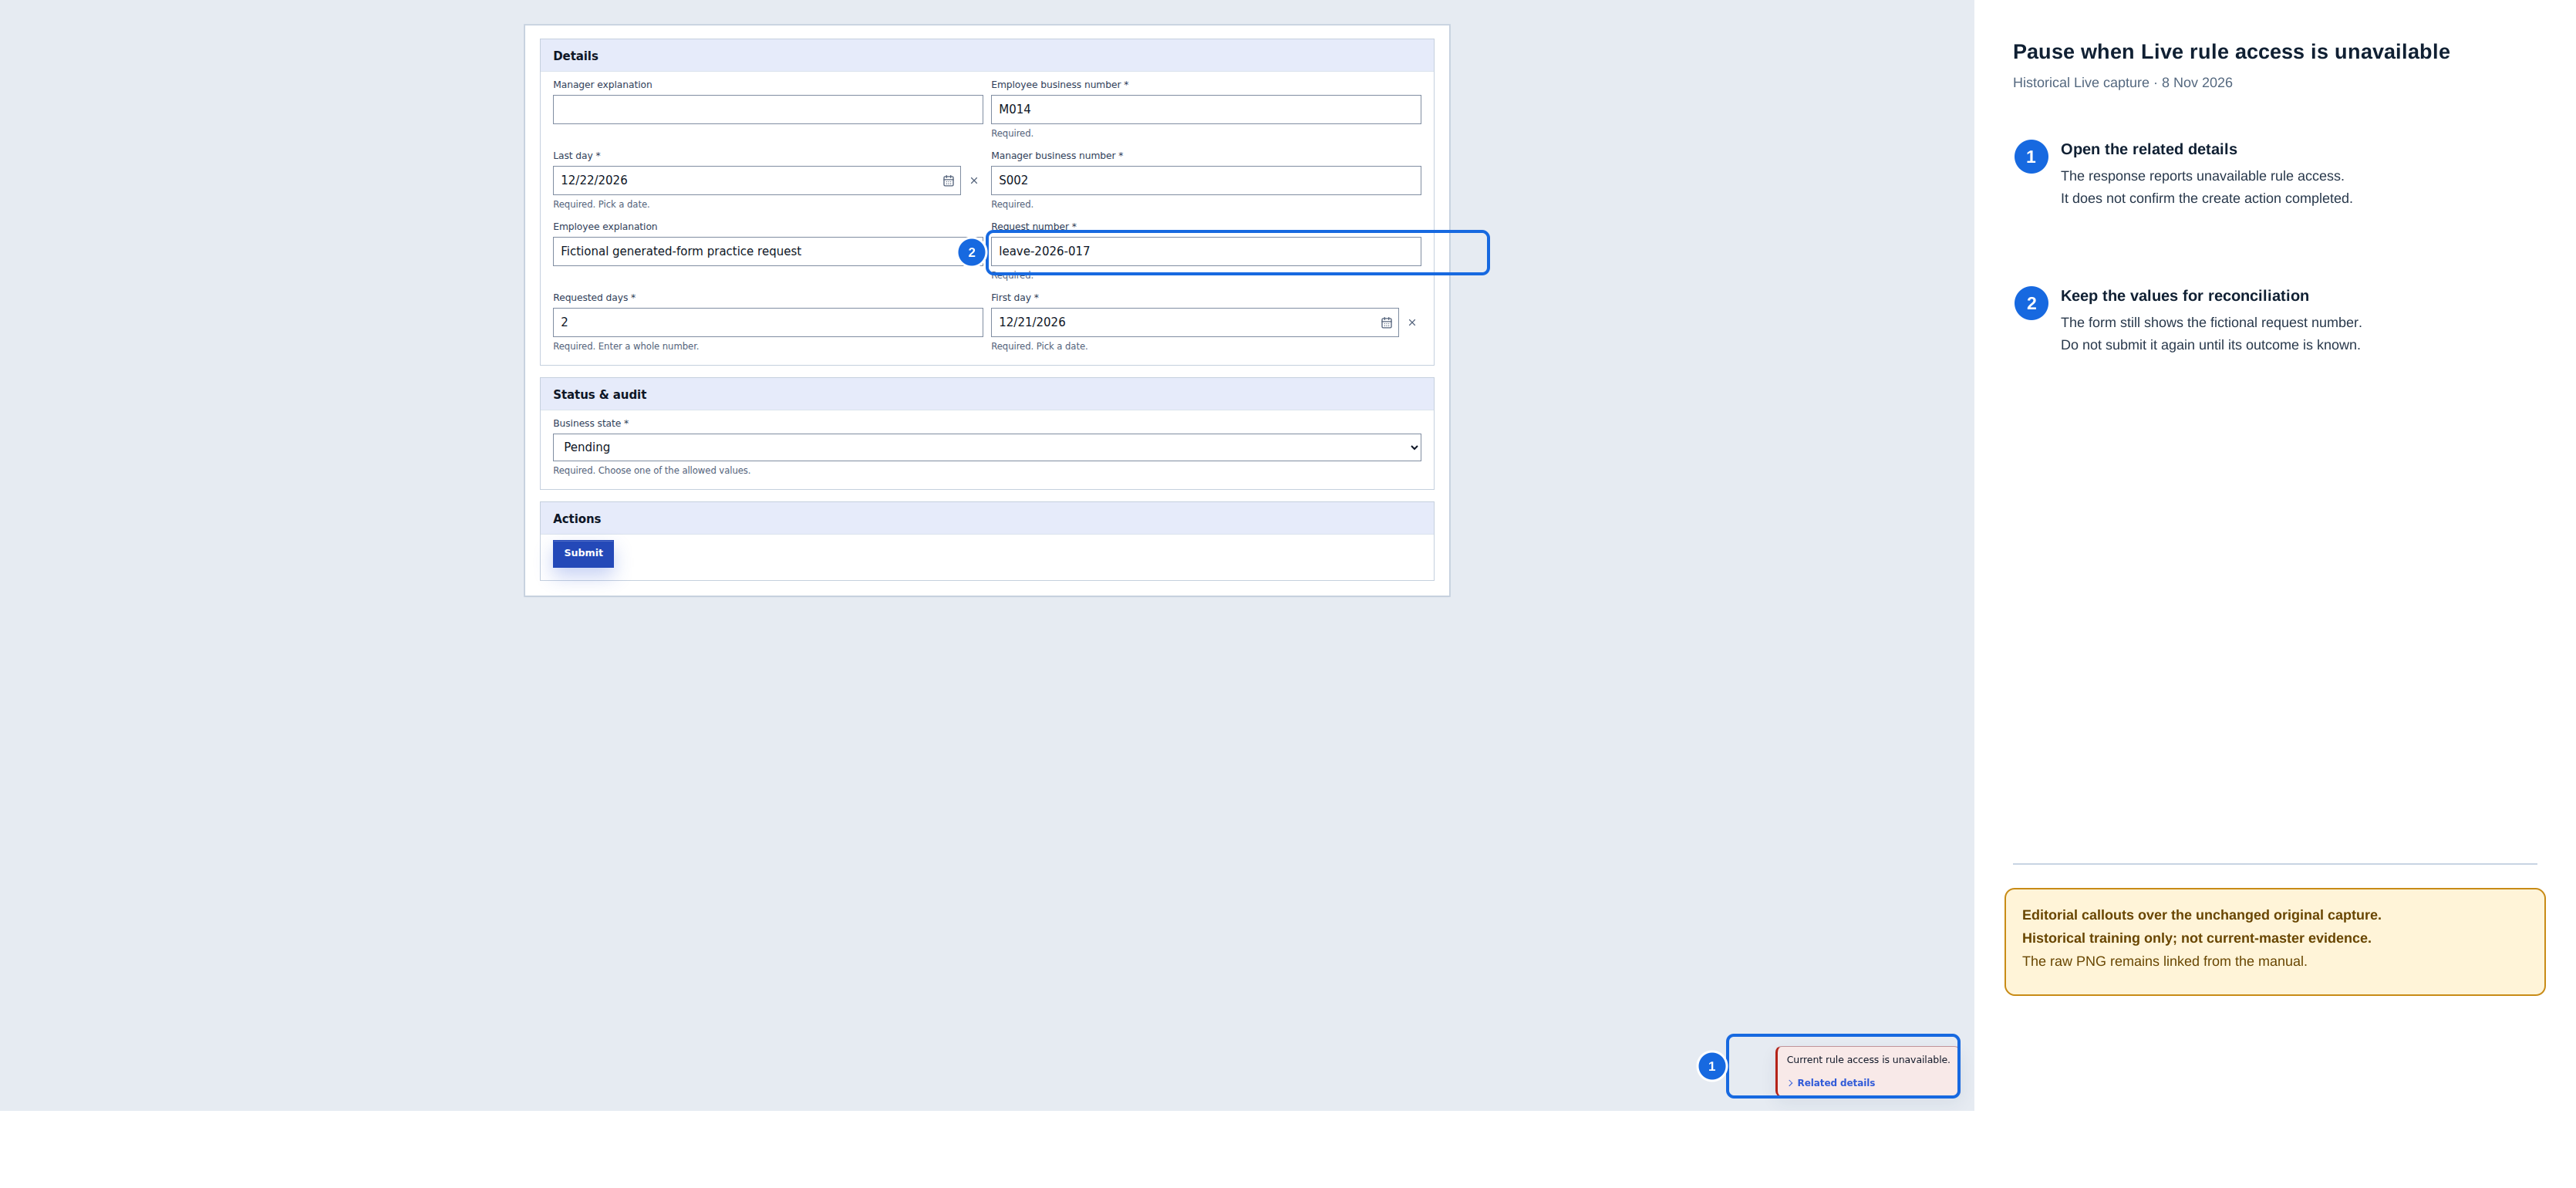
- Read Current rule access is unavailable and open Related details. This response does not by itself establish a permission denial or confirm a saved request.
- The fictional request number remains visible. Preserve the entered values, investigate with the responsible application administrator, and do not submit again until the result is reconciled.
Historical editorial guidance over the 8 November 2026 capture. The unchanged original PNG remains available; this is not current-master evidence.
View the unannotated original screenshot
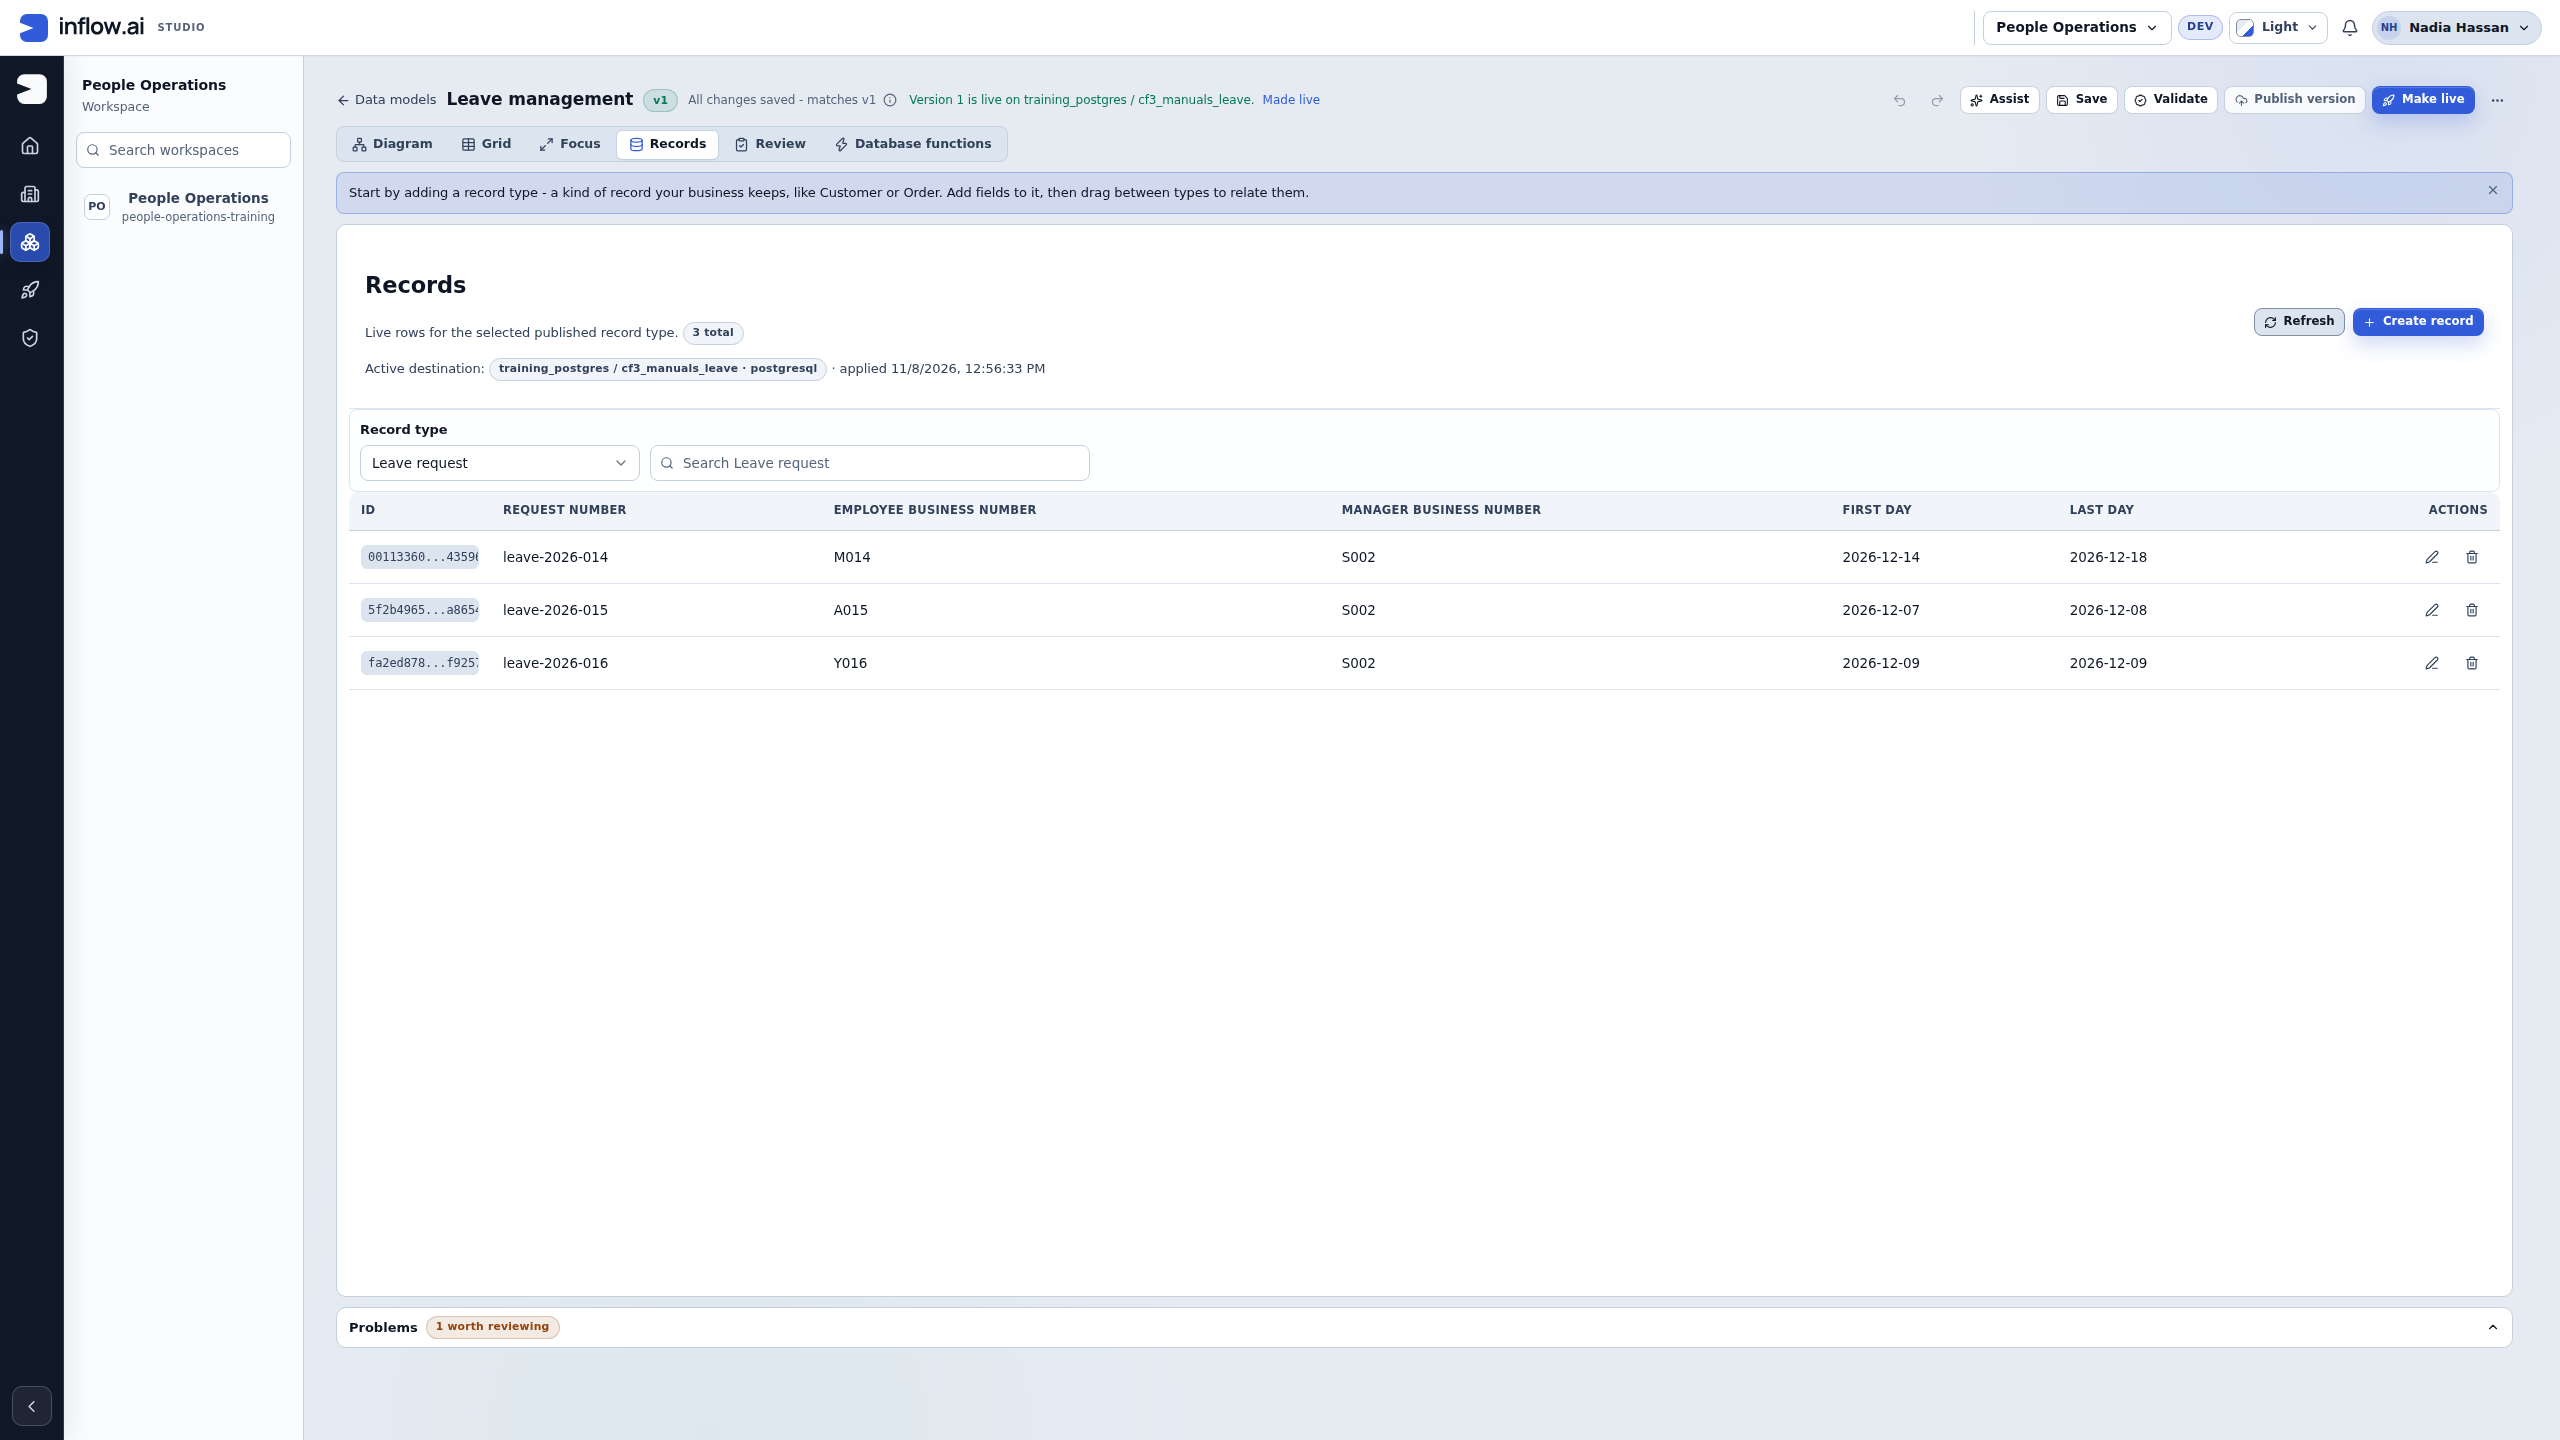
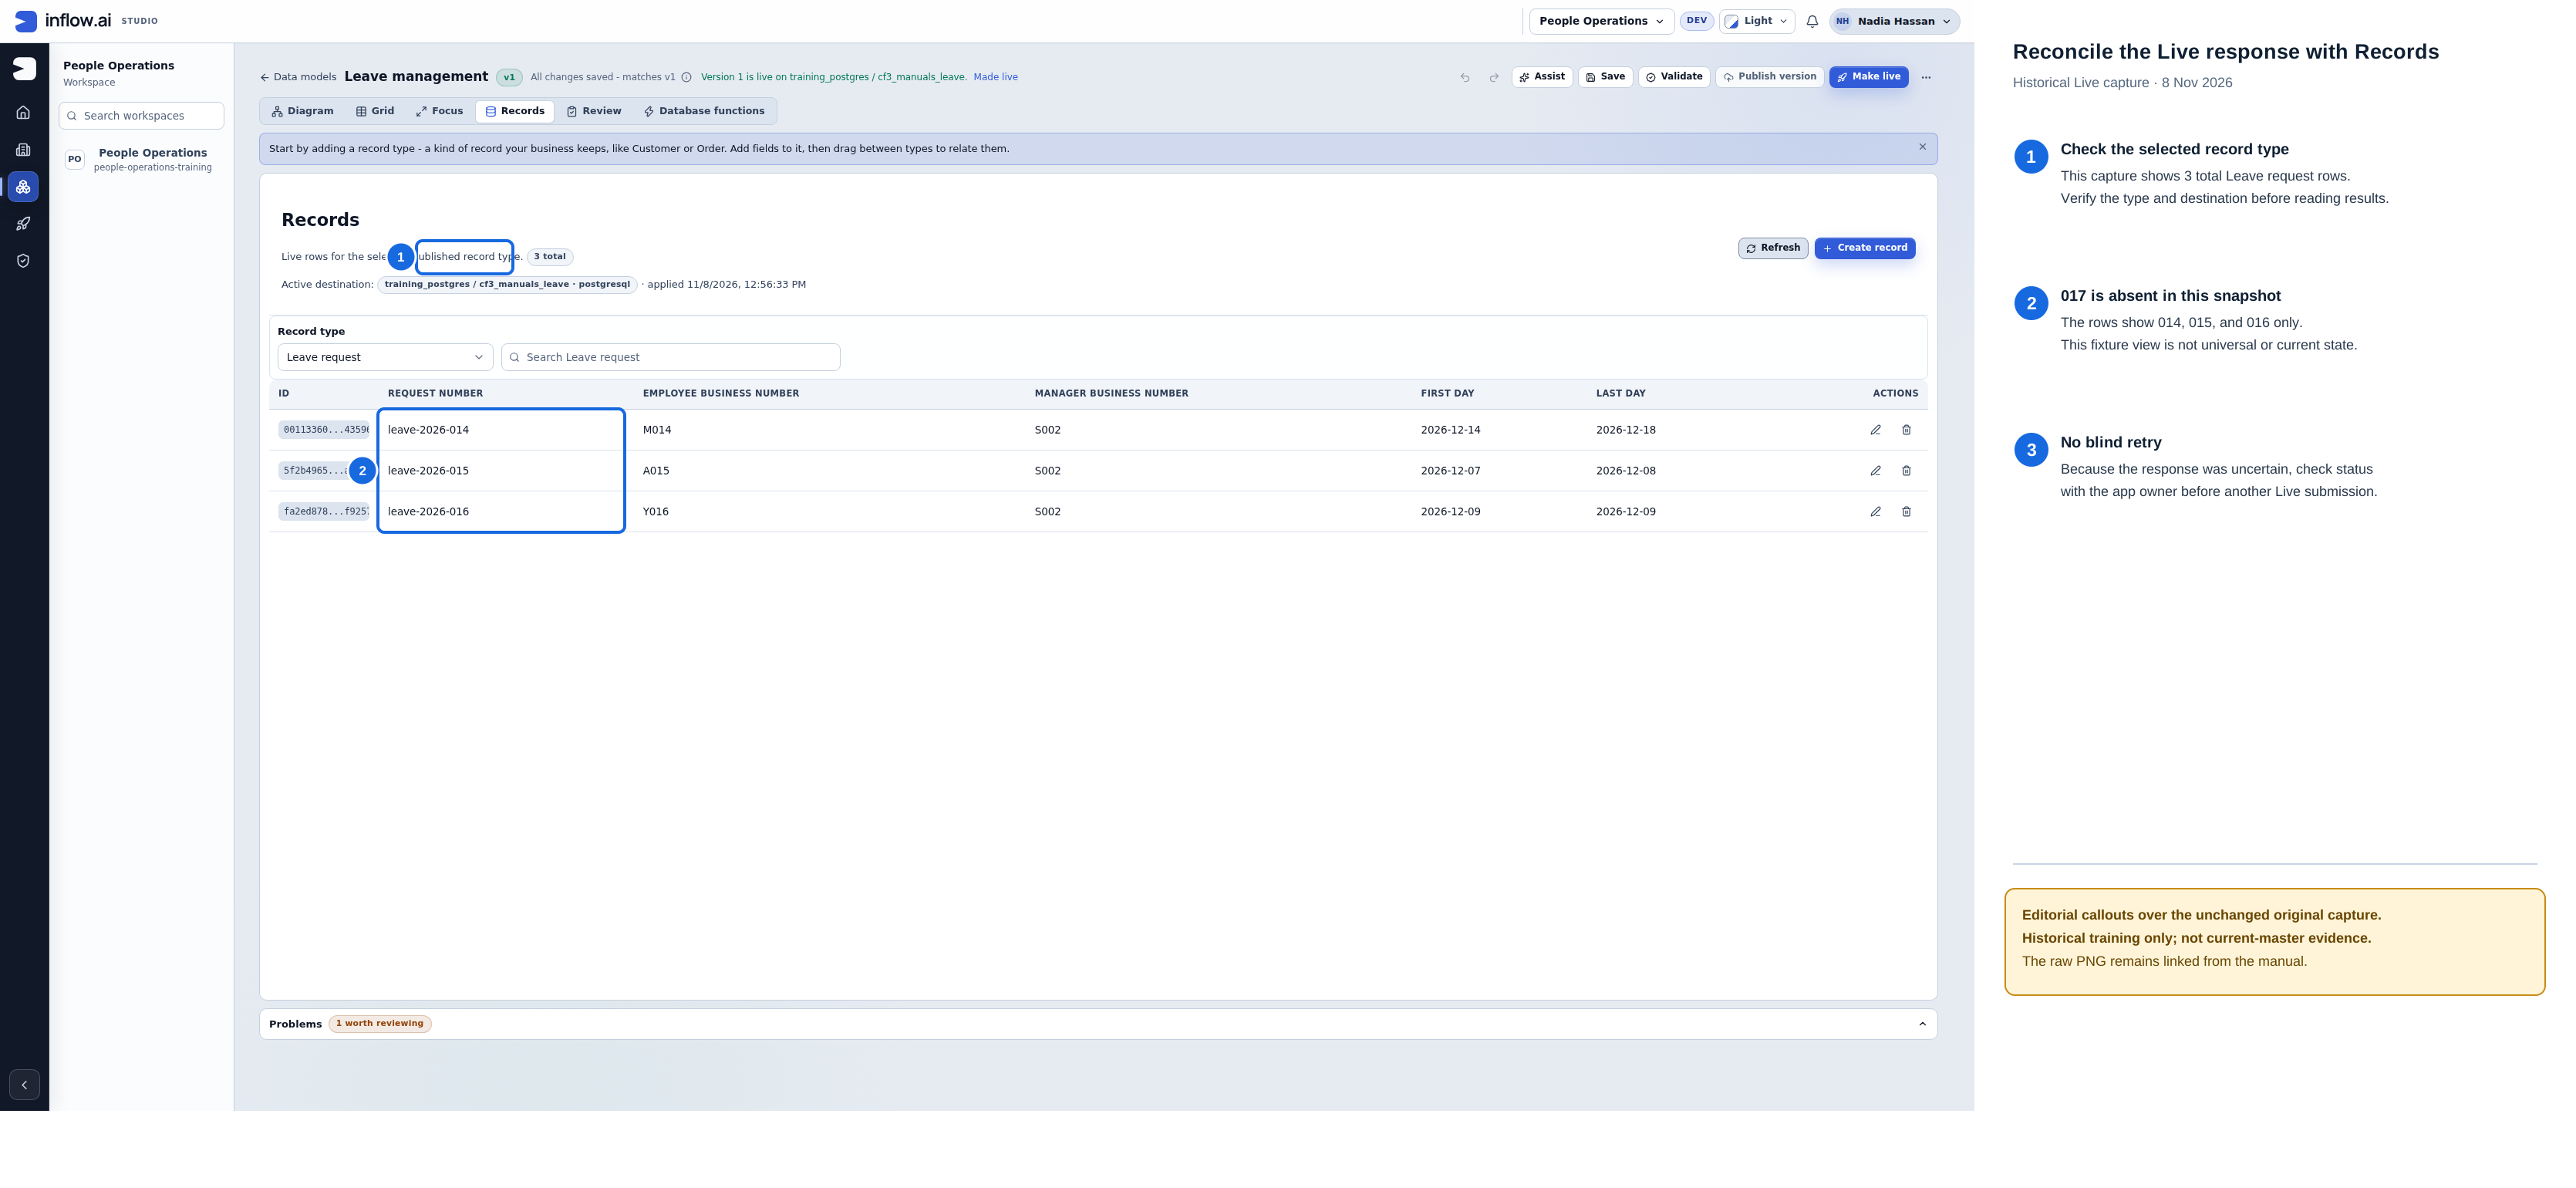
- Confirm the selected published Leave request type and its active destination before interpreting the table.
- This historical capture lists
leave-2026-014,leave-2026-015, andleave-2026-016; it does not show fictionalleave-2026-017. - Treat this as evidence about the pictured training fixture only. Do not infer current production state or repeat an uncertain Live action from this screenshot.
Historical editorial guidance over the 8 November 2026 capture. The unchanged original PNG remains available; this is not current-master evidence.
If current rule access is unavailable: preserve the entered values and the displayed result. Have the administrator investigate the current access-policy service and normal session health. This message does not establish that a permission was denied; do not widen permissions or switch to an administrator account just to make the teaching save appear successful. Resume the intended business check only after the cause is understood and the existing result is reconciled.
Handover remains incomplete here: a successful Live save and the intended employee/manager access and approval journey still need their own checks. The generated form continues to be a builder exercise with the editable manager/status caveat described above.
Example 4: publication confirmation is missing
Suppose Nadia clicked Publish and the connection interrupted before a clear result appeared.
- Read the visible status rather than assuming failure.
- Check the form's published state and the currently released result through the normal page.
- Preserve unsaved wording or notes you still need.
- Follow the UI's offered recovery. If the outcome remains unclear, ask the application owner before repeating the same consequential action.
This avoids creating unnecessary repeated work. If someone else changed the draft, reload and compare their changes before deciding what to keep. Do not overwrite another person's edit simply to return to the lesson's earlier state.
A short release checklist
- People understand the title, labels, help and action names.
- Each answer goes to the intended field and has a compatible type.
- Missing/invalid input has a helpful repair message.
- Data and task sources are the intended ones, with no misleading samples.
- The normal employee/manager roles see their intended pages and work.
- The Live application shows the released behavior you checked.
Continue with Check your form before handover or the connected app tutorial. Advanced publication and source details are in the optional technical chapter.
Confirm a saved publication
The current Publication review is a confirmation of the saved interface root. Review the displayed candidate and ready status, refresh it with Review latest after a saved edit, and choose the dialog's Publish only when the intended version is ready. Cancel closes this review without publishing a new version; it does not unpublish an existing release or undo a publication already sent. The dialog does not enumerate dependency changes; dependency updates are separate. A neutral Not available state can omit protected details and actions. Follow the normal access path or ask the responsible administrator instead of trying a different account.
After the success result, check the current Live journey and reconcile any consequential business action at its actual destination. If the publication result is unclear, inspect the saved/published state before retrying. Review latest refreshes the review without publishing. When the current edit has unpublished changes, Open live can offer Publish & open live; read that confirmation and choose Cancel if you intend to retain the existing release. The separate final publication confirmation creates a new version.