8. Find a control for your task
Use this page as a practical lookup while building. Begin with what the person needs to do, then open the relevant lesson. You do not need the internal property names or every default setting to choose a useful control.
Example 1: choose questions for Leave request
- Write the business question in ordinary words: When does leave start? How many days are requested? What explanation is needed?
- Use the lookup below to choose Date, Integer and TextArea.
- Give each question a clear Label and use its answer-destination picker.
- Check a normal answer and a missing/wrong answer before adding more decoration.
| The person needs to… | Consider… | What to configure first |
|---|---|---|
| Enter a short reference | Text | Label and Store value in. |
| Explain a request | TextArea | Label, help, answer destination and Required. |
| Enter a whole quantity | Integer | A compatible whole-number answer. |
| Enter a day | Date | Date answer and any agreed limits/checks. |
| Pick one known option | Select or Radio group | Choices and Store selection in. |
| Pick several known options | Multi-select or Checkbox group | A collection-valued answer. |
| Choose a governed record | Lookup | Supported source, identity and displayed label. |
| Supply a document | Appropriate document/upload control | Permitted library/location and the expected document answer. |
A clear question with the correct destination is more useful than an impressive-looking control that the next step cannot use.
Work through a three-question example
Nadia needs three different answers for a fictional coverage check: a number of requested days, whether the leave is unpaid, and a written explanation. Start with those meanings. A Checkbox is useful for a true/false answer; an Integer is useful for whole days; a Text area gives the person room to explain. Choosing three controls that look similar would not make their answers interchangeable.
The following guides reuse the unchanged Coverage condition practice screenshots captured on 16 November 2026 for Practical formulas. They show the normal Designer account with Admin in People Operations Access Practice, using its authoring draft and Interactive Preview, not an employee submitting a leave request. They retain that run's original build, account and fixture; they are not new captures for this chapter. The other record, task and document controls in this lookup are not demonstrated by these images.
1. Choose the answer type before the control
- Open the practice Form's Inputs panel. Inspect what is already declared; reuse a matching input rather than creating another answer with a similar name.
- Match the business answer to its type using the table below.
- For this exercise, retain Single, leave the declaration Default empty and keep its separate Required switch off. Conditional Required will be configured on the explanation question.
- Save and wait for Saved remotely before using those names in the controls.
| Business question | Declared Name and type | Control | Why this pairing fits |
|---|---|---|---|
| How many whole days? | requestedDays — Integer |
Integer | A whole number can be compared with the agreed five-day threshold. |
| Is this unpaid leave? | isUnpaid — Boolean |
Checkbox | Checked and unchecked supply the true/false choice used by the condition. |
| What coverage is arranged? | coverageDetails — Text |
Text area | A written explanation needs Text, not another numeric answer or checkbox. |
The names identify different answers even when two types happen to be compatible. If the form later has two Text inputs called reason and coverageDetails, matching Text alone is insufficient: choose the intended business answer. A Label may be changed for clarity without changing that declared destination.
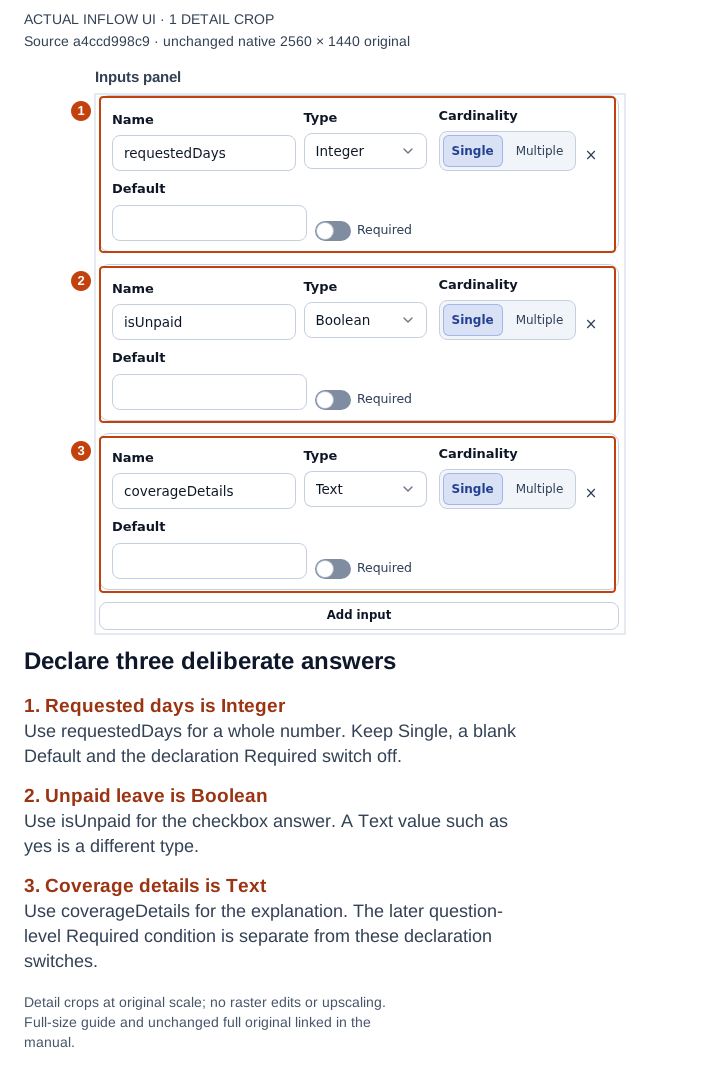
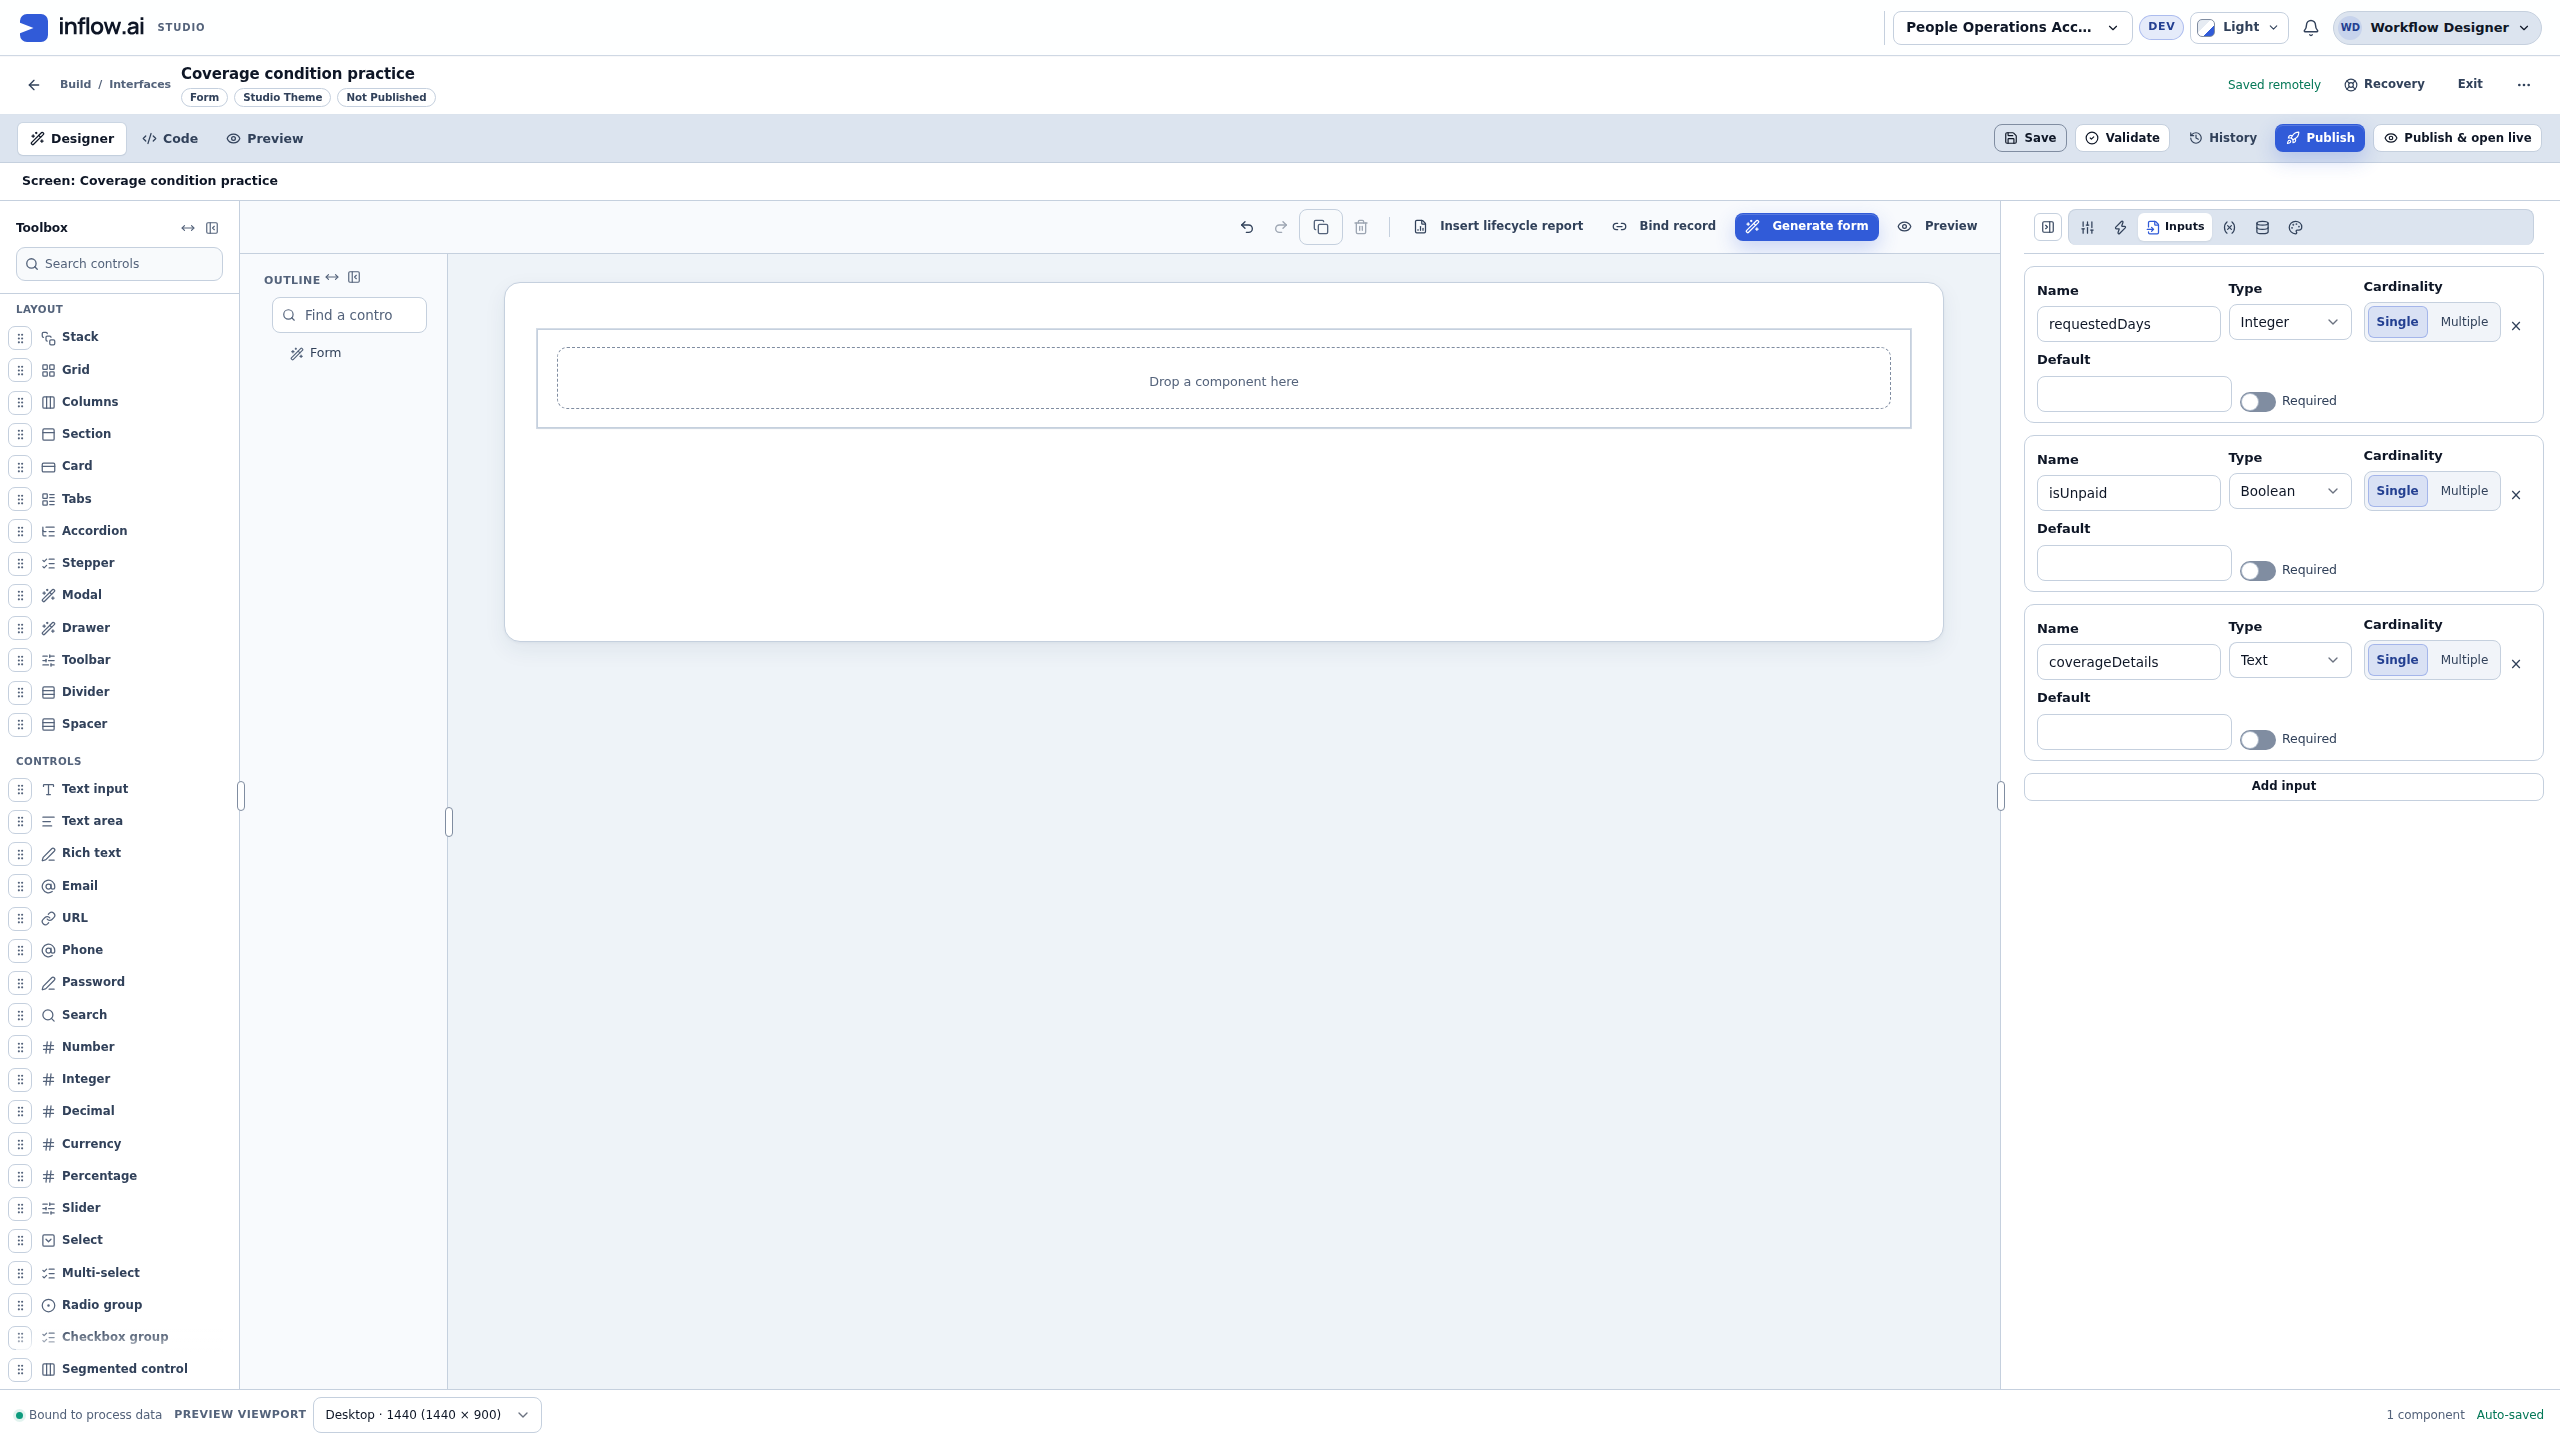
1–3: the actual three declarations use Integer, Boolean and Text. Blank Defaults and declaration Required off belong to this practice; they do not decide every real application’s missing-answer policy. Open the full-size numbered guide · Open the unchanged full 2560 × 1440 screenshot.
2. Connect each question to its intended answer
- Select the Integer in Outline. Give it a clear Label, Requested days, and a deliberate component Name such as
requestedDaysQuestion. - In Data Binding → Store value in, choose the actual Integer answer Requested Days,
inputs:requestedDays. - Select the Checkbox, label it Unpaid leave, and choose
inputs:isUnpaidas its destination. - Select the Text area, label it Coverage arrangements, and choose Coverage Details,
inputs:coverageDetails. - Leave Computed value and Default value empty for these direct-entry questions, then Save and inspect the destination badges.
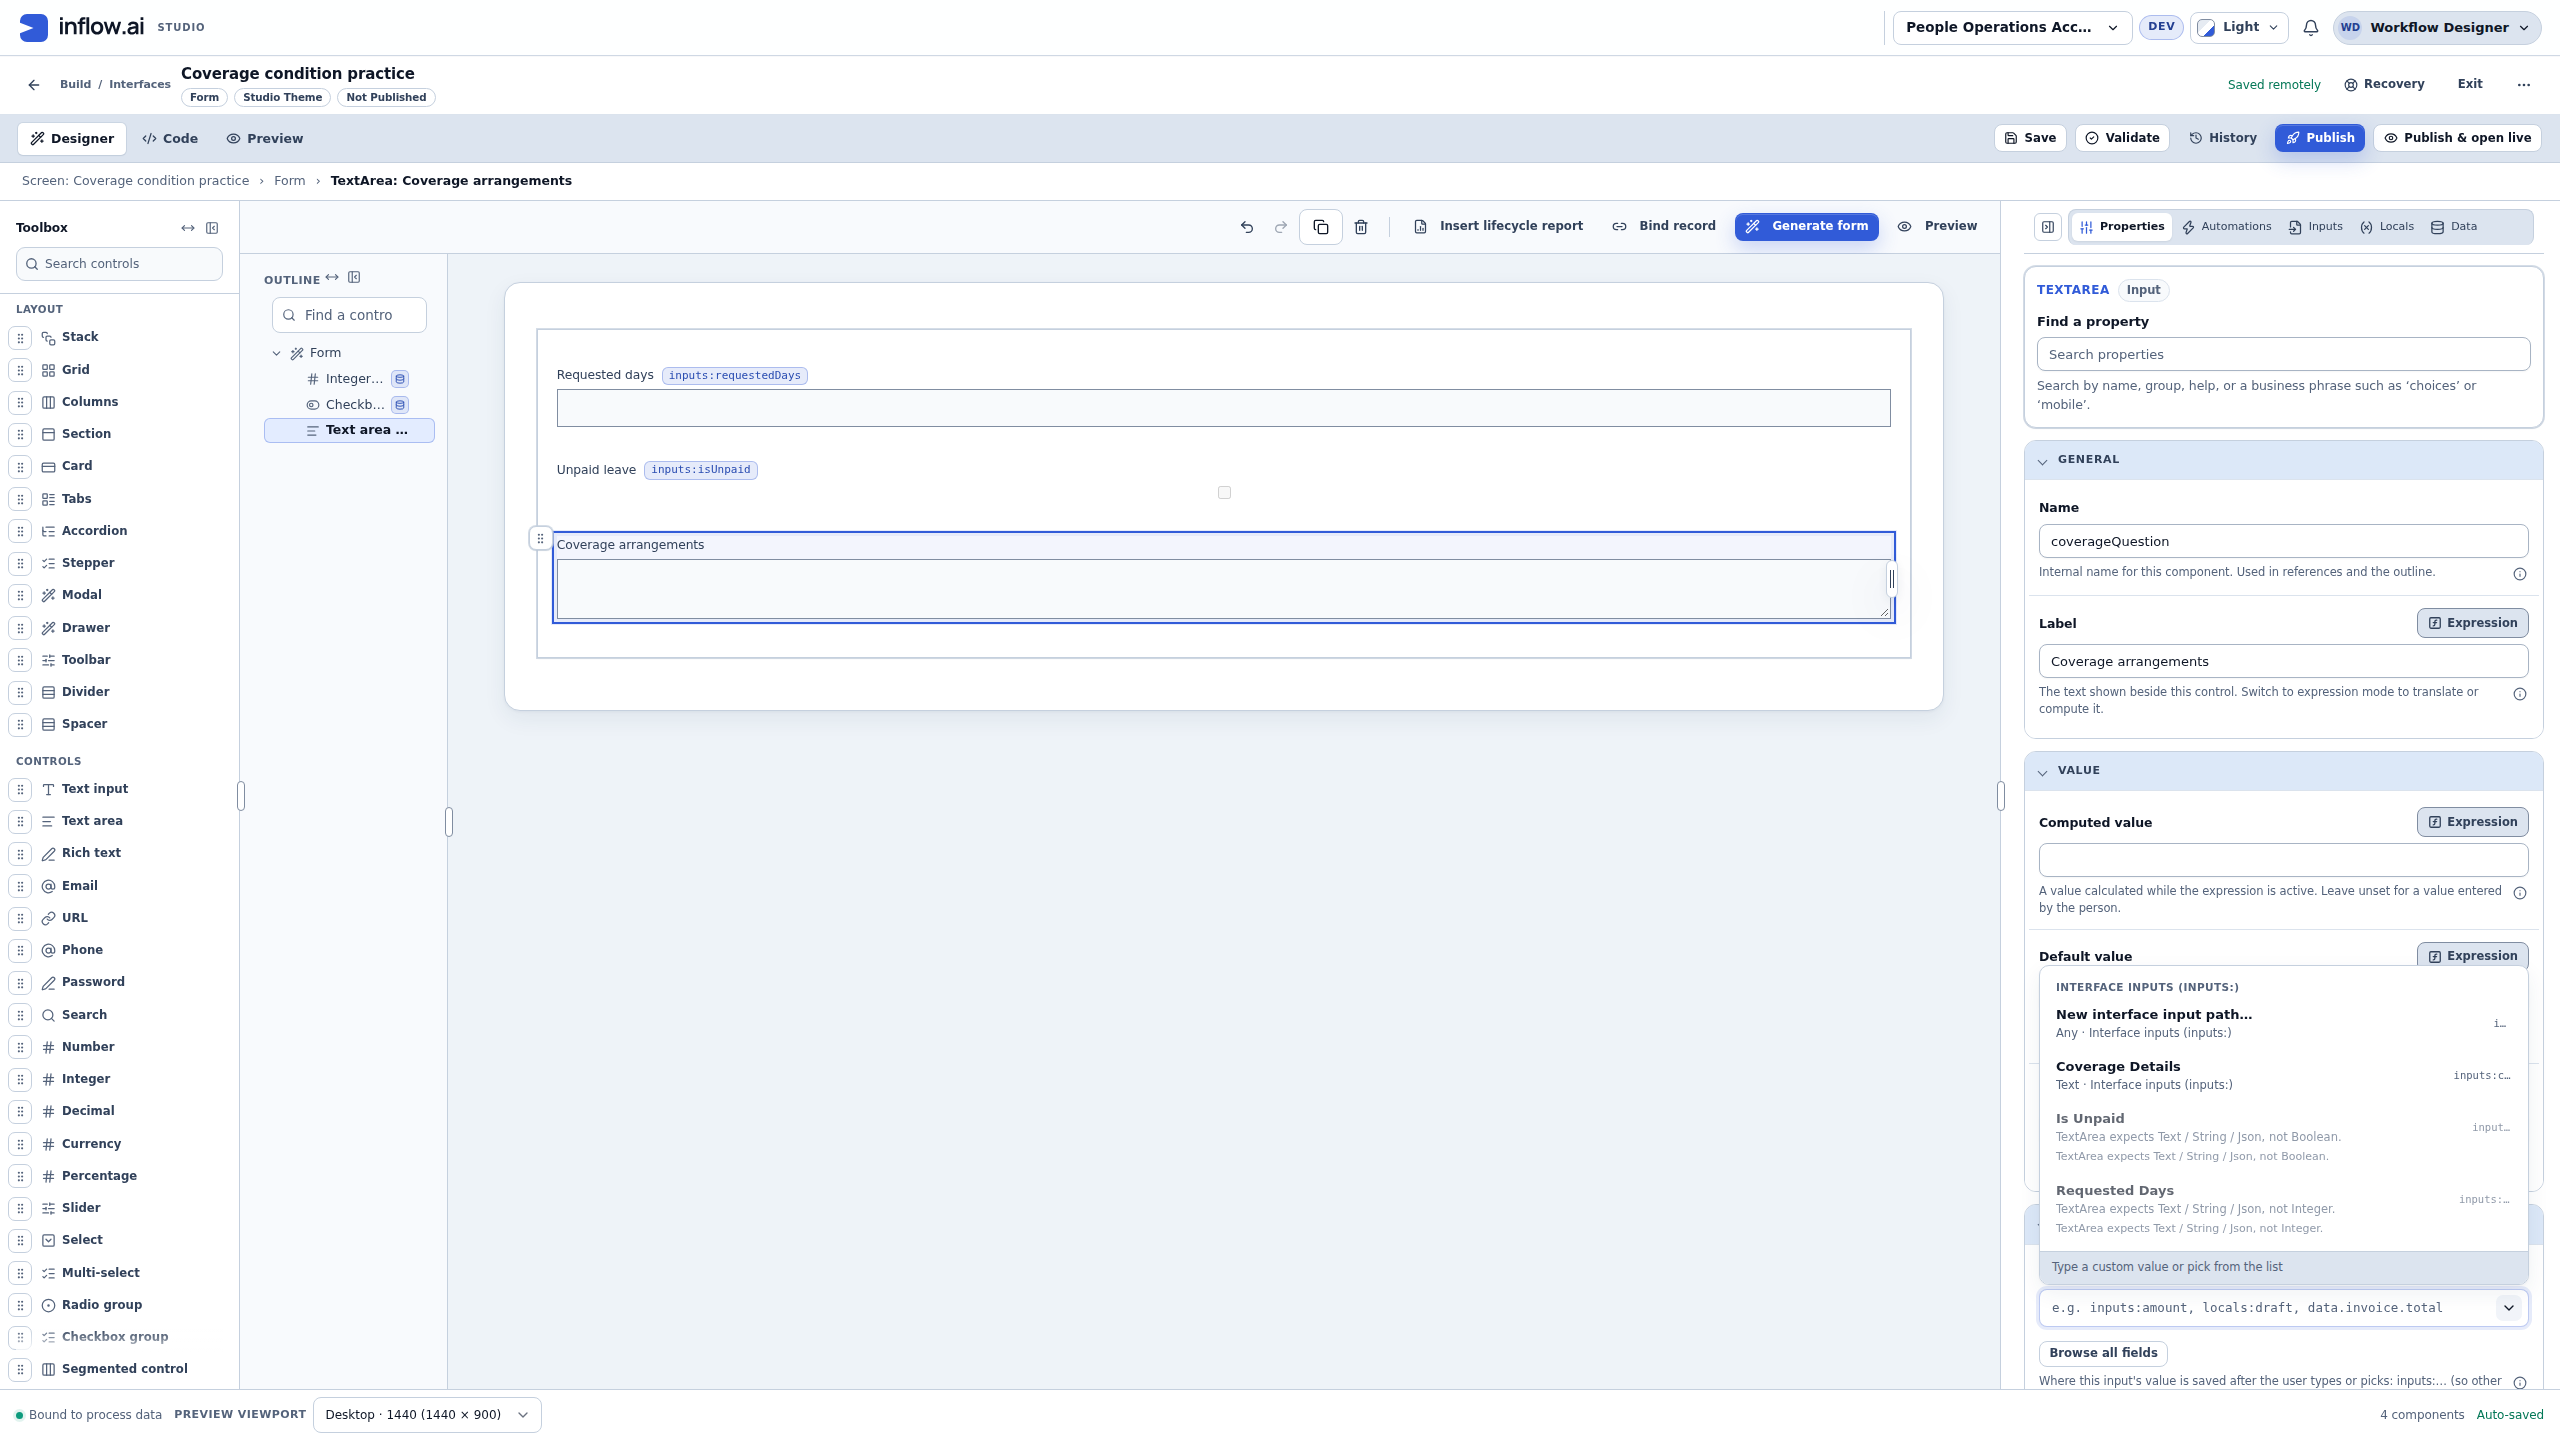
The picker helps prevent a type mismatch. In the captured Text area picker, the Boolean and Integer inputs are incompatible while Coverage Details is a Text choice. Keep the intended answer type; do not convert the number into Text merely to remove a mismatch. A different control may be appropriate when the actual business answer changes, but a warning alone is not a reason to change its meaning.
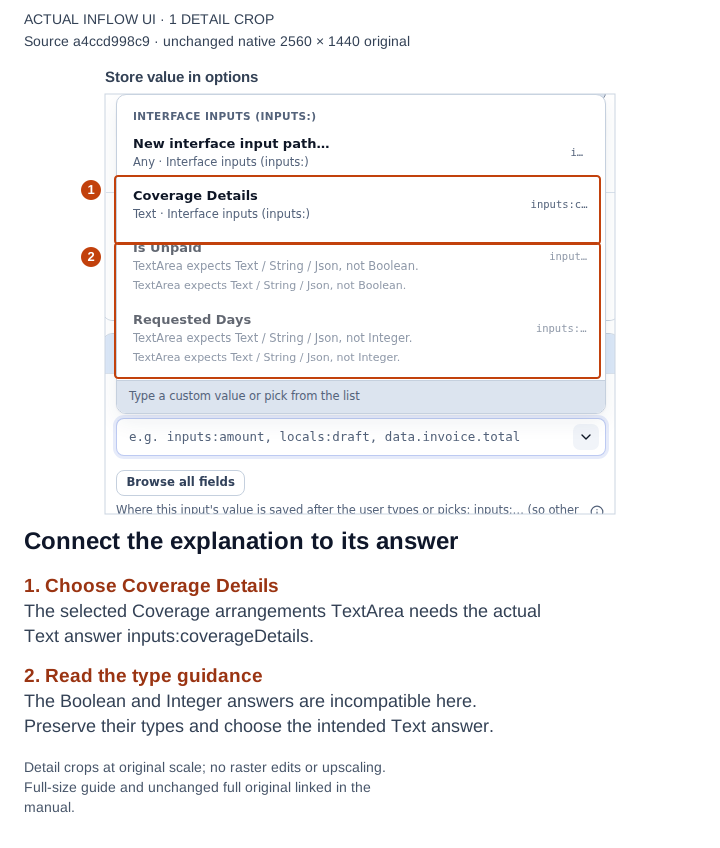
1–2: the selected explanation question needs the actual Text answer. The other declarations are different types; their similar placement in a list does not make them valid destinations. Open the full-size numbered guide · Open the unchanged full 2560 × 1440 screenshot.
3. Decide which setting should change the experience
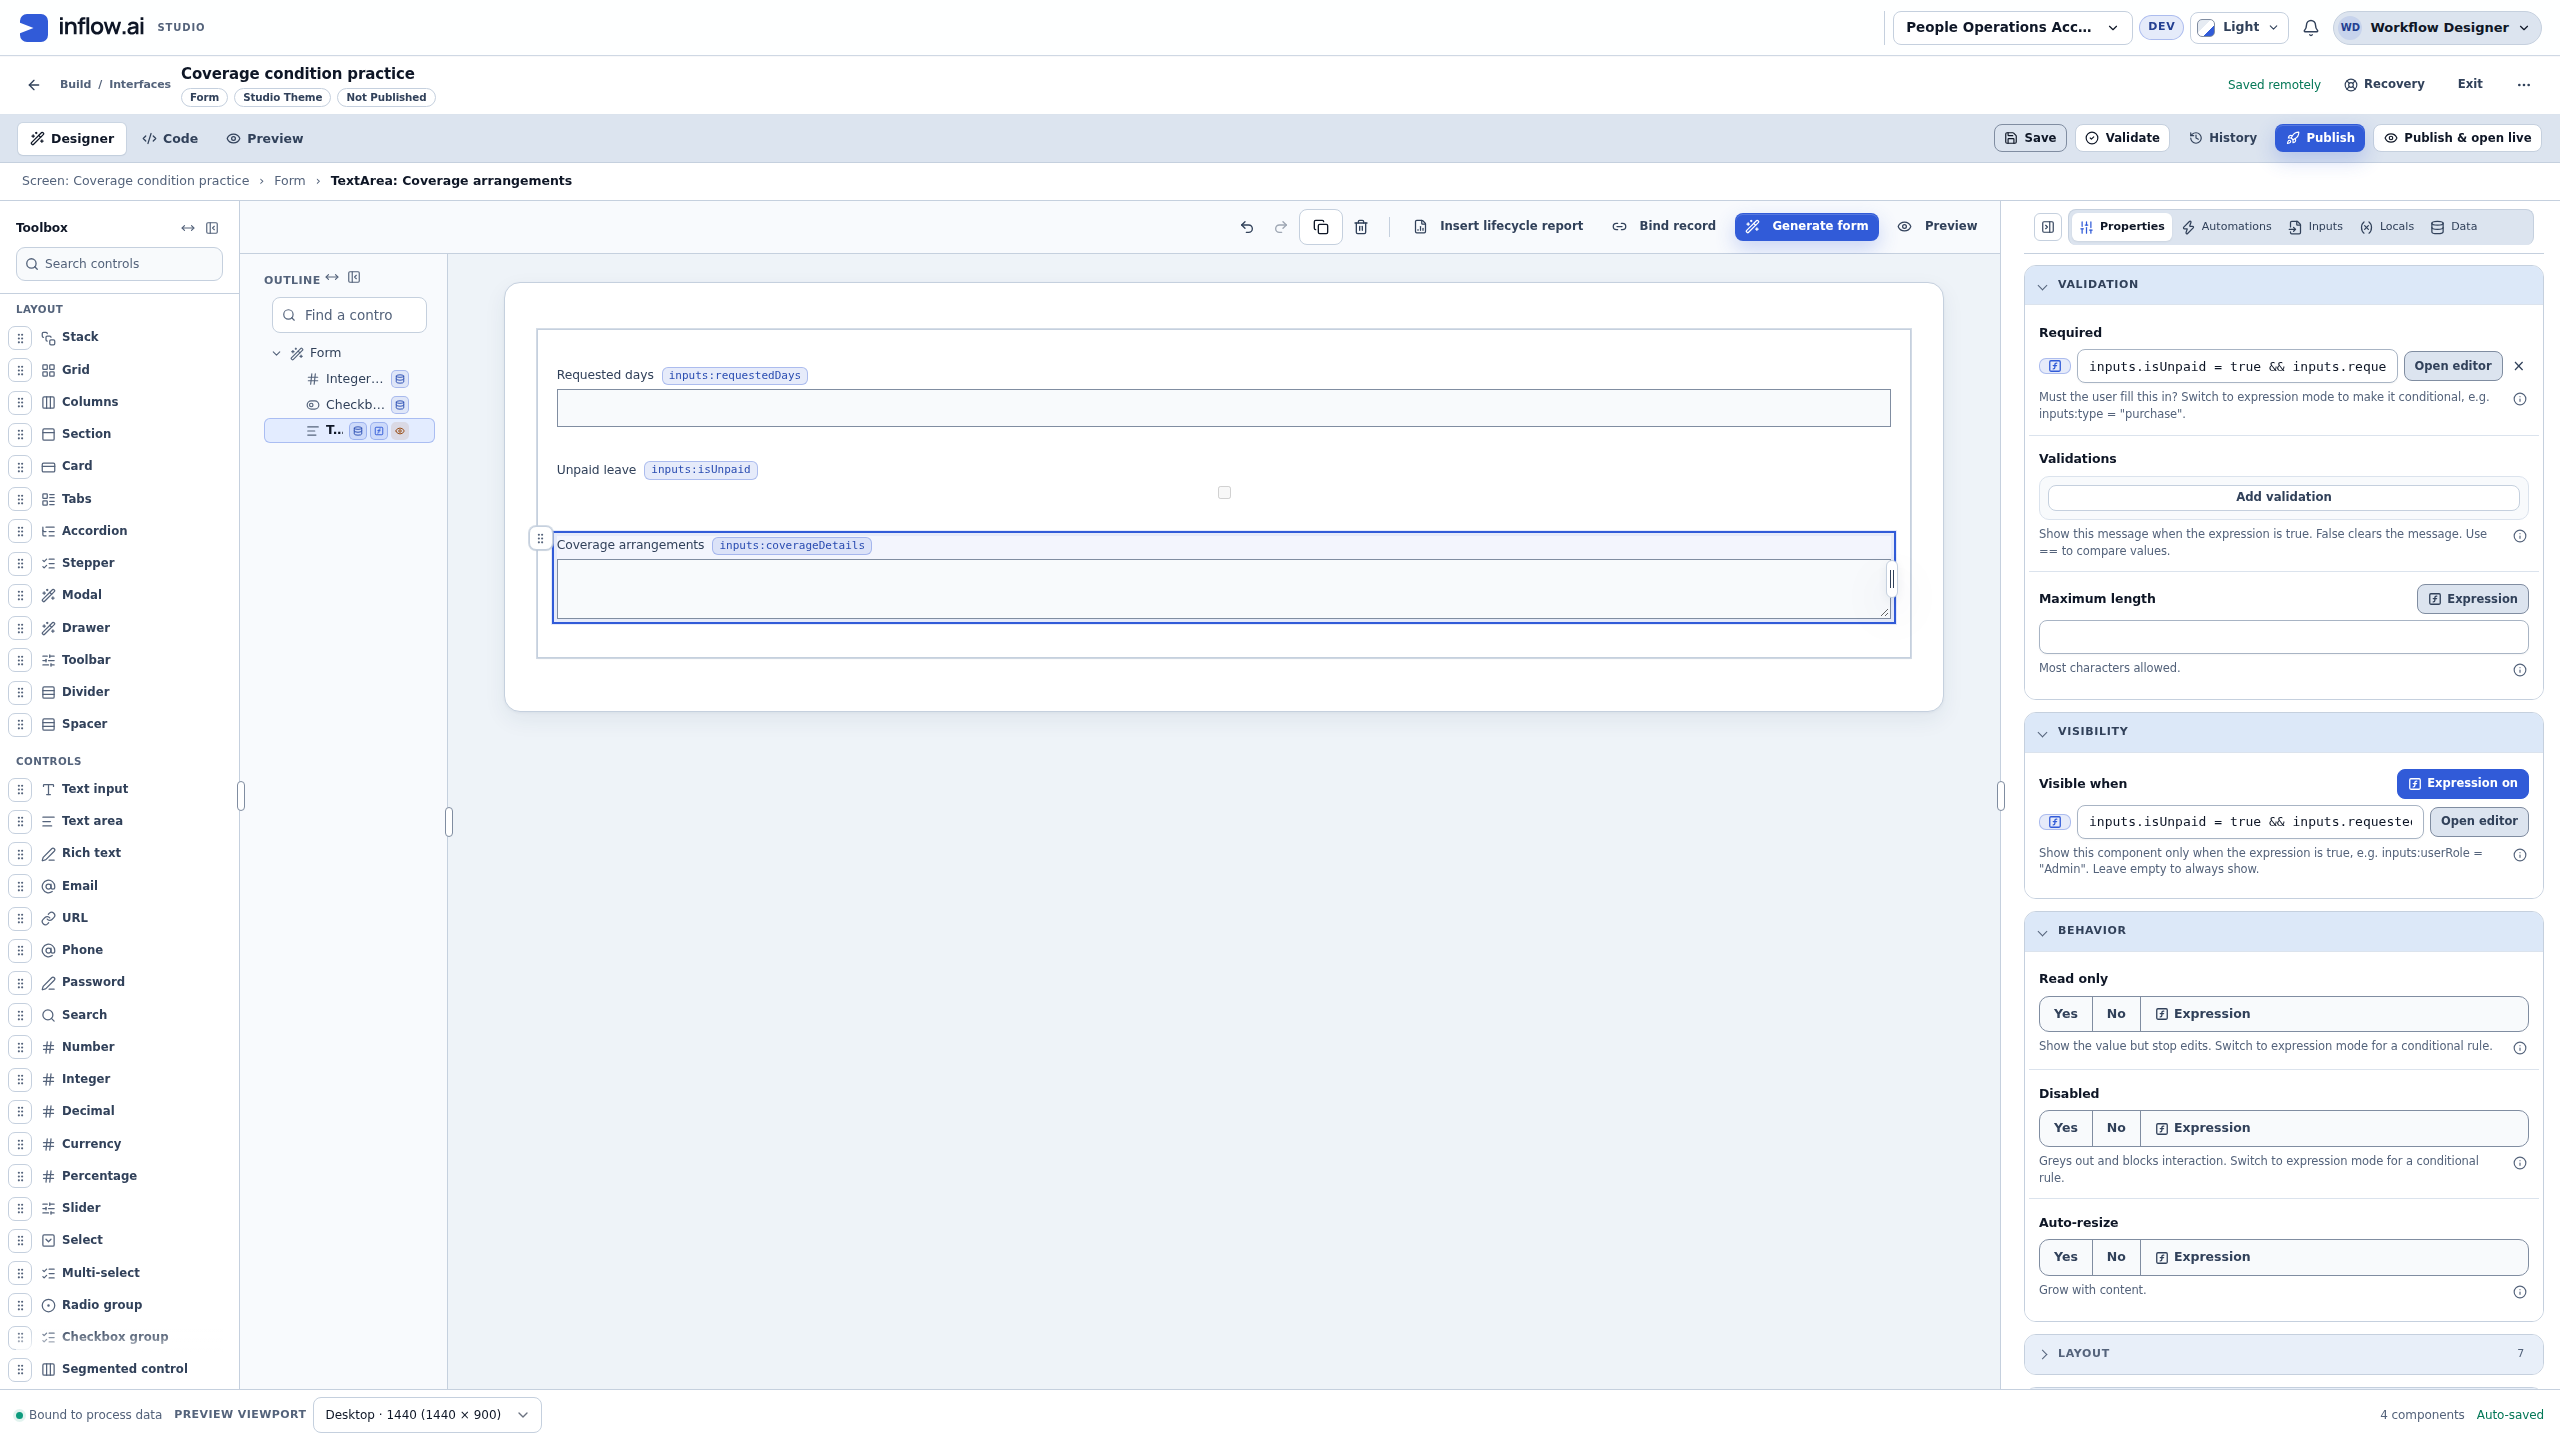
Nadia wants Coverage arrangements to appear only when a request is unpaid and longer than five days, and to require an explanation in that same situation. That calls for a visibility condition and a matching Required condition. It does not call for a new Text input, a renamed Label or a Default answer.
- Select Coverage arrangements in Outline and confirm the selected question.
- Under Visibility → Visible when, use the supported expression editor and actual input picker to configure the combined condition from the worked formula lesson.
- Under Validation → Required, use the same complete condition for this exercise. Read both full expressions in the editor; narrow property fields can clip their ends.
- Save, then check the three Preview cases: eight days/unchecked should hide the explanation, five days/checked should still hide it, and six days/checked should show it and report an empty explanation as required.
- Enter a fictional explanation for the matching case and choose Check form again. Inspect the actual result before adding more controls.
A condition decides presentation or validation in this form. It does not authorize a person to see private records or decide whether leave is approved. That access and business workflow must be prepared through their own supported configuration.
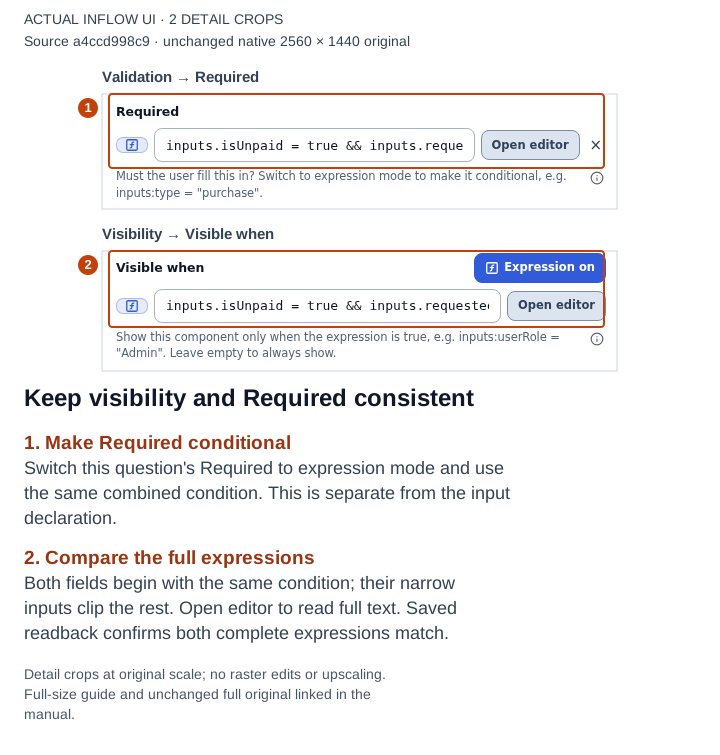
1–2: Required and Visible when have separate property controls. In this saved practice their full conditions match; only the beginnings fit the narrow fields, so open the editor to compare the complete text. Open the full-size numbered guide · Open the unchanged full 2560 × 1440 screenshot.
4. Distinguish a shown question from a required answer
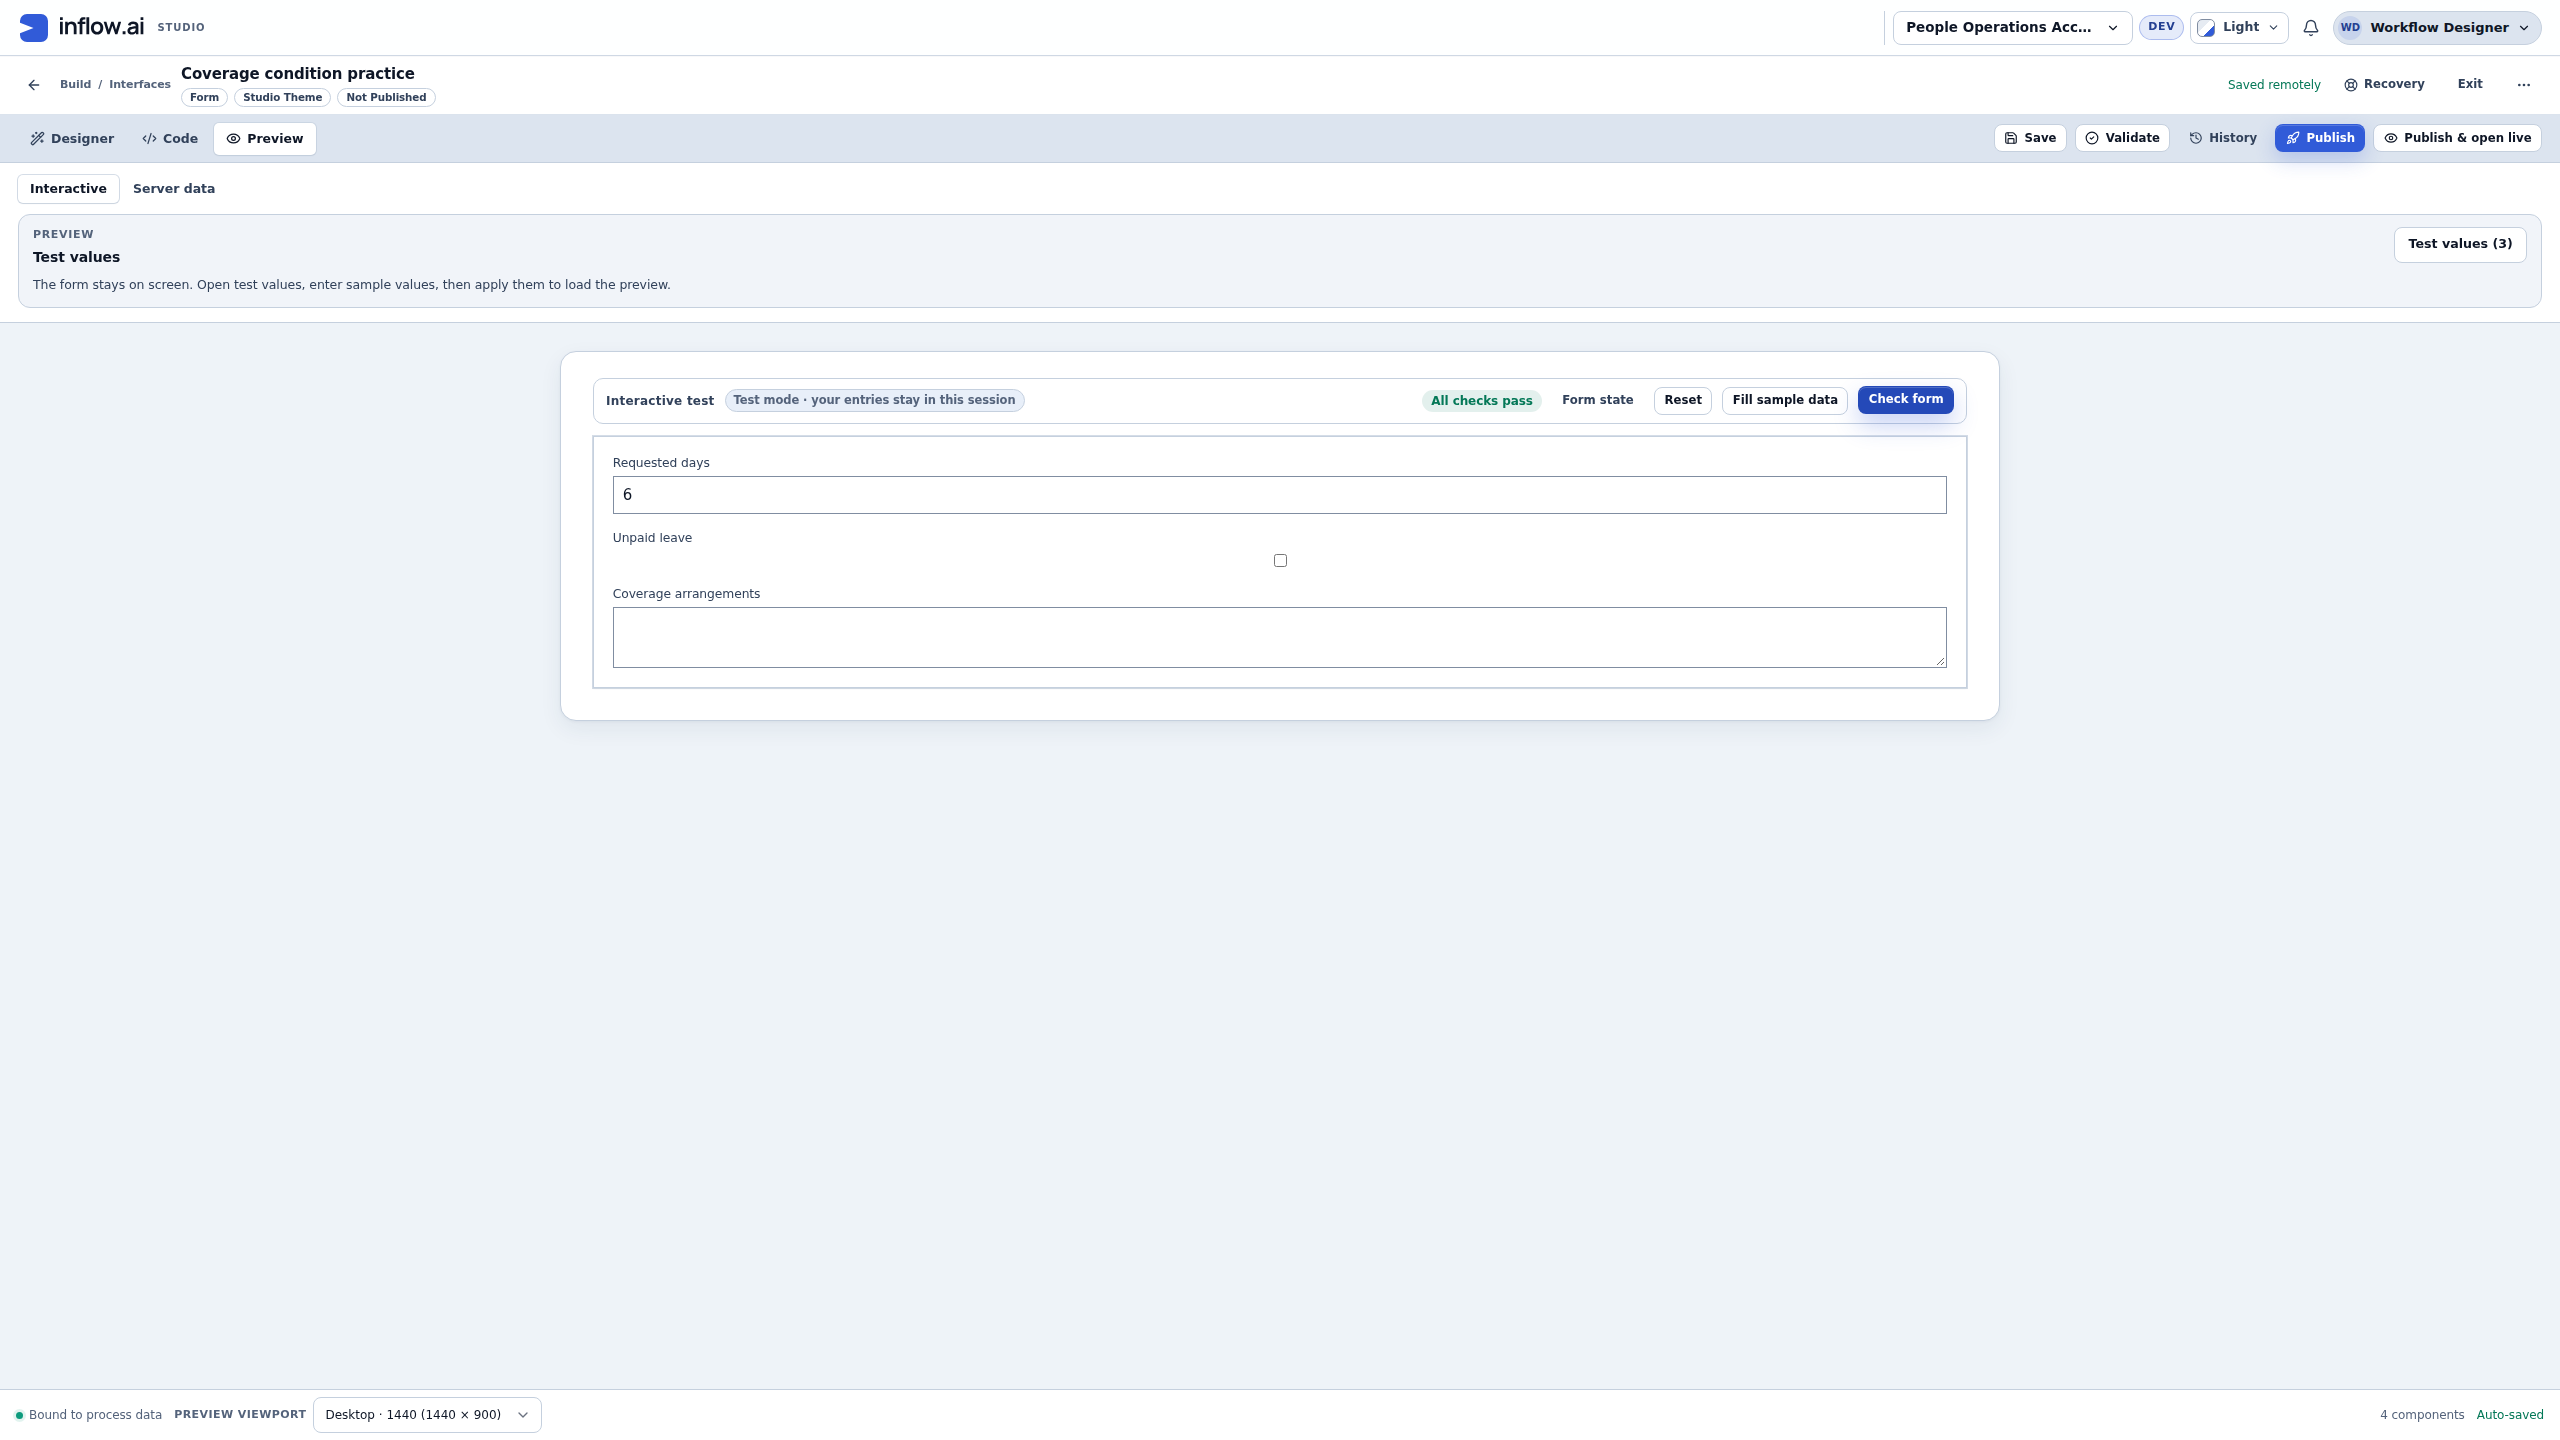
The first stage of the captured lesson deliberately used only Requested days greater than five, before the unpaid checkbox or Required were added. At six days the explanation appeared even with Unpaid leave unchecked, and its empty answer still passed Check form. That result was consistent with those first settings. It was not proof that Required had failed.
- When a question appears unexpectedly, inspect the complete Visible when condition before changing the answer type.
- When an empty visible question passes, inspect its own Required setting separately.
- Compare the saved draft with the intended policy and rerun the matching, nonmatching and exact-boundary cases after a deliberate change.
Do not try to diagnose both policies from one picture. The next guide is explicitly the earlier one-input, optional explanation stage, not the final combined condition.
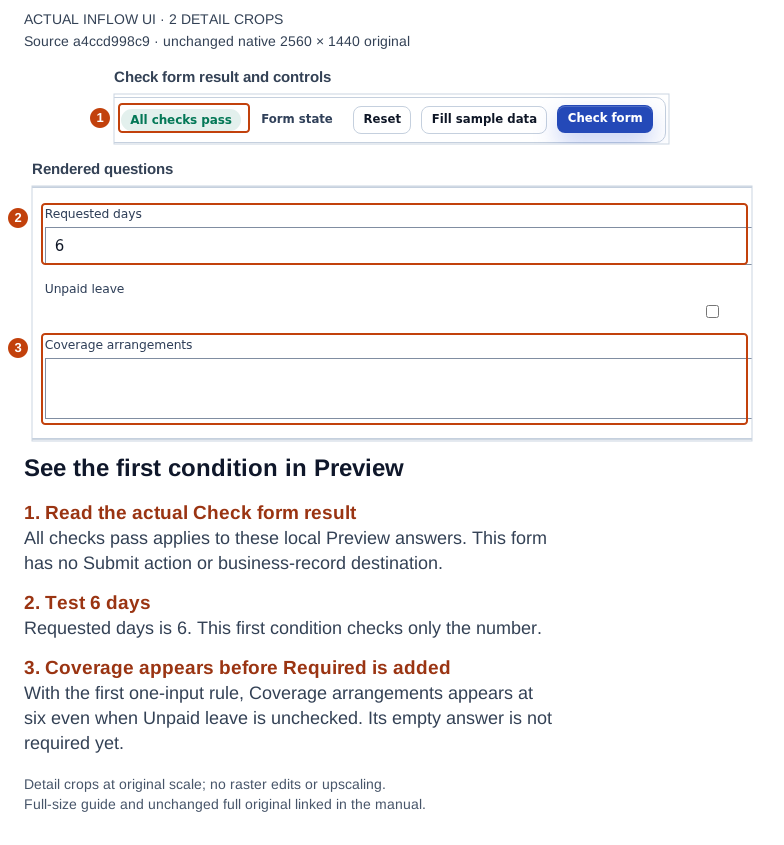
1–3: this earlier stage shows six days, an unchecked box and an empty visible explanation with All checks pass. The one-input visibility rule did not read the checkbox, and conditional Required had not yet been added. Open the full-size numbered guide · Open the unchanged full 2560 × 1440 screenshot.
Keep these five settings distinct
| Setting | A useful example | What to inspect |
|---|---|---|
| Label | Rename the visible wording to Coverage arrangements. | Whether the person understands the question; the label does not select its answer. |
| Store value in | Send the Text area answer to coverageDetails. | The actual compatible declared destination. |
| Default value | Supply an agreed starting answer when that is appropriate. | Whether a starting value is wanted; it is not evidence that the person confirmed it. |
| Computed value | Calculate a value from other information. | Whether the question should be calculated instead of directly entered. Leave it empty for this practice. |
| Placeholder | Offer a short hint while the field is empty. | Whether the hint is understandable; a hint is not an entered answer. |
The last three alternatives are a source-guided explanation of the offered properties; this captured practice leaves them empty. It does not demonstrate every default or computed-value behavior. For missing answers and the difference between Run Test and Check form, continue with the repair examples.
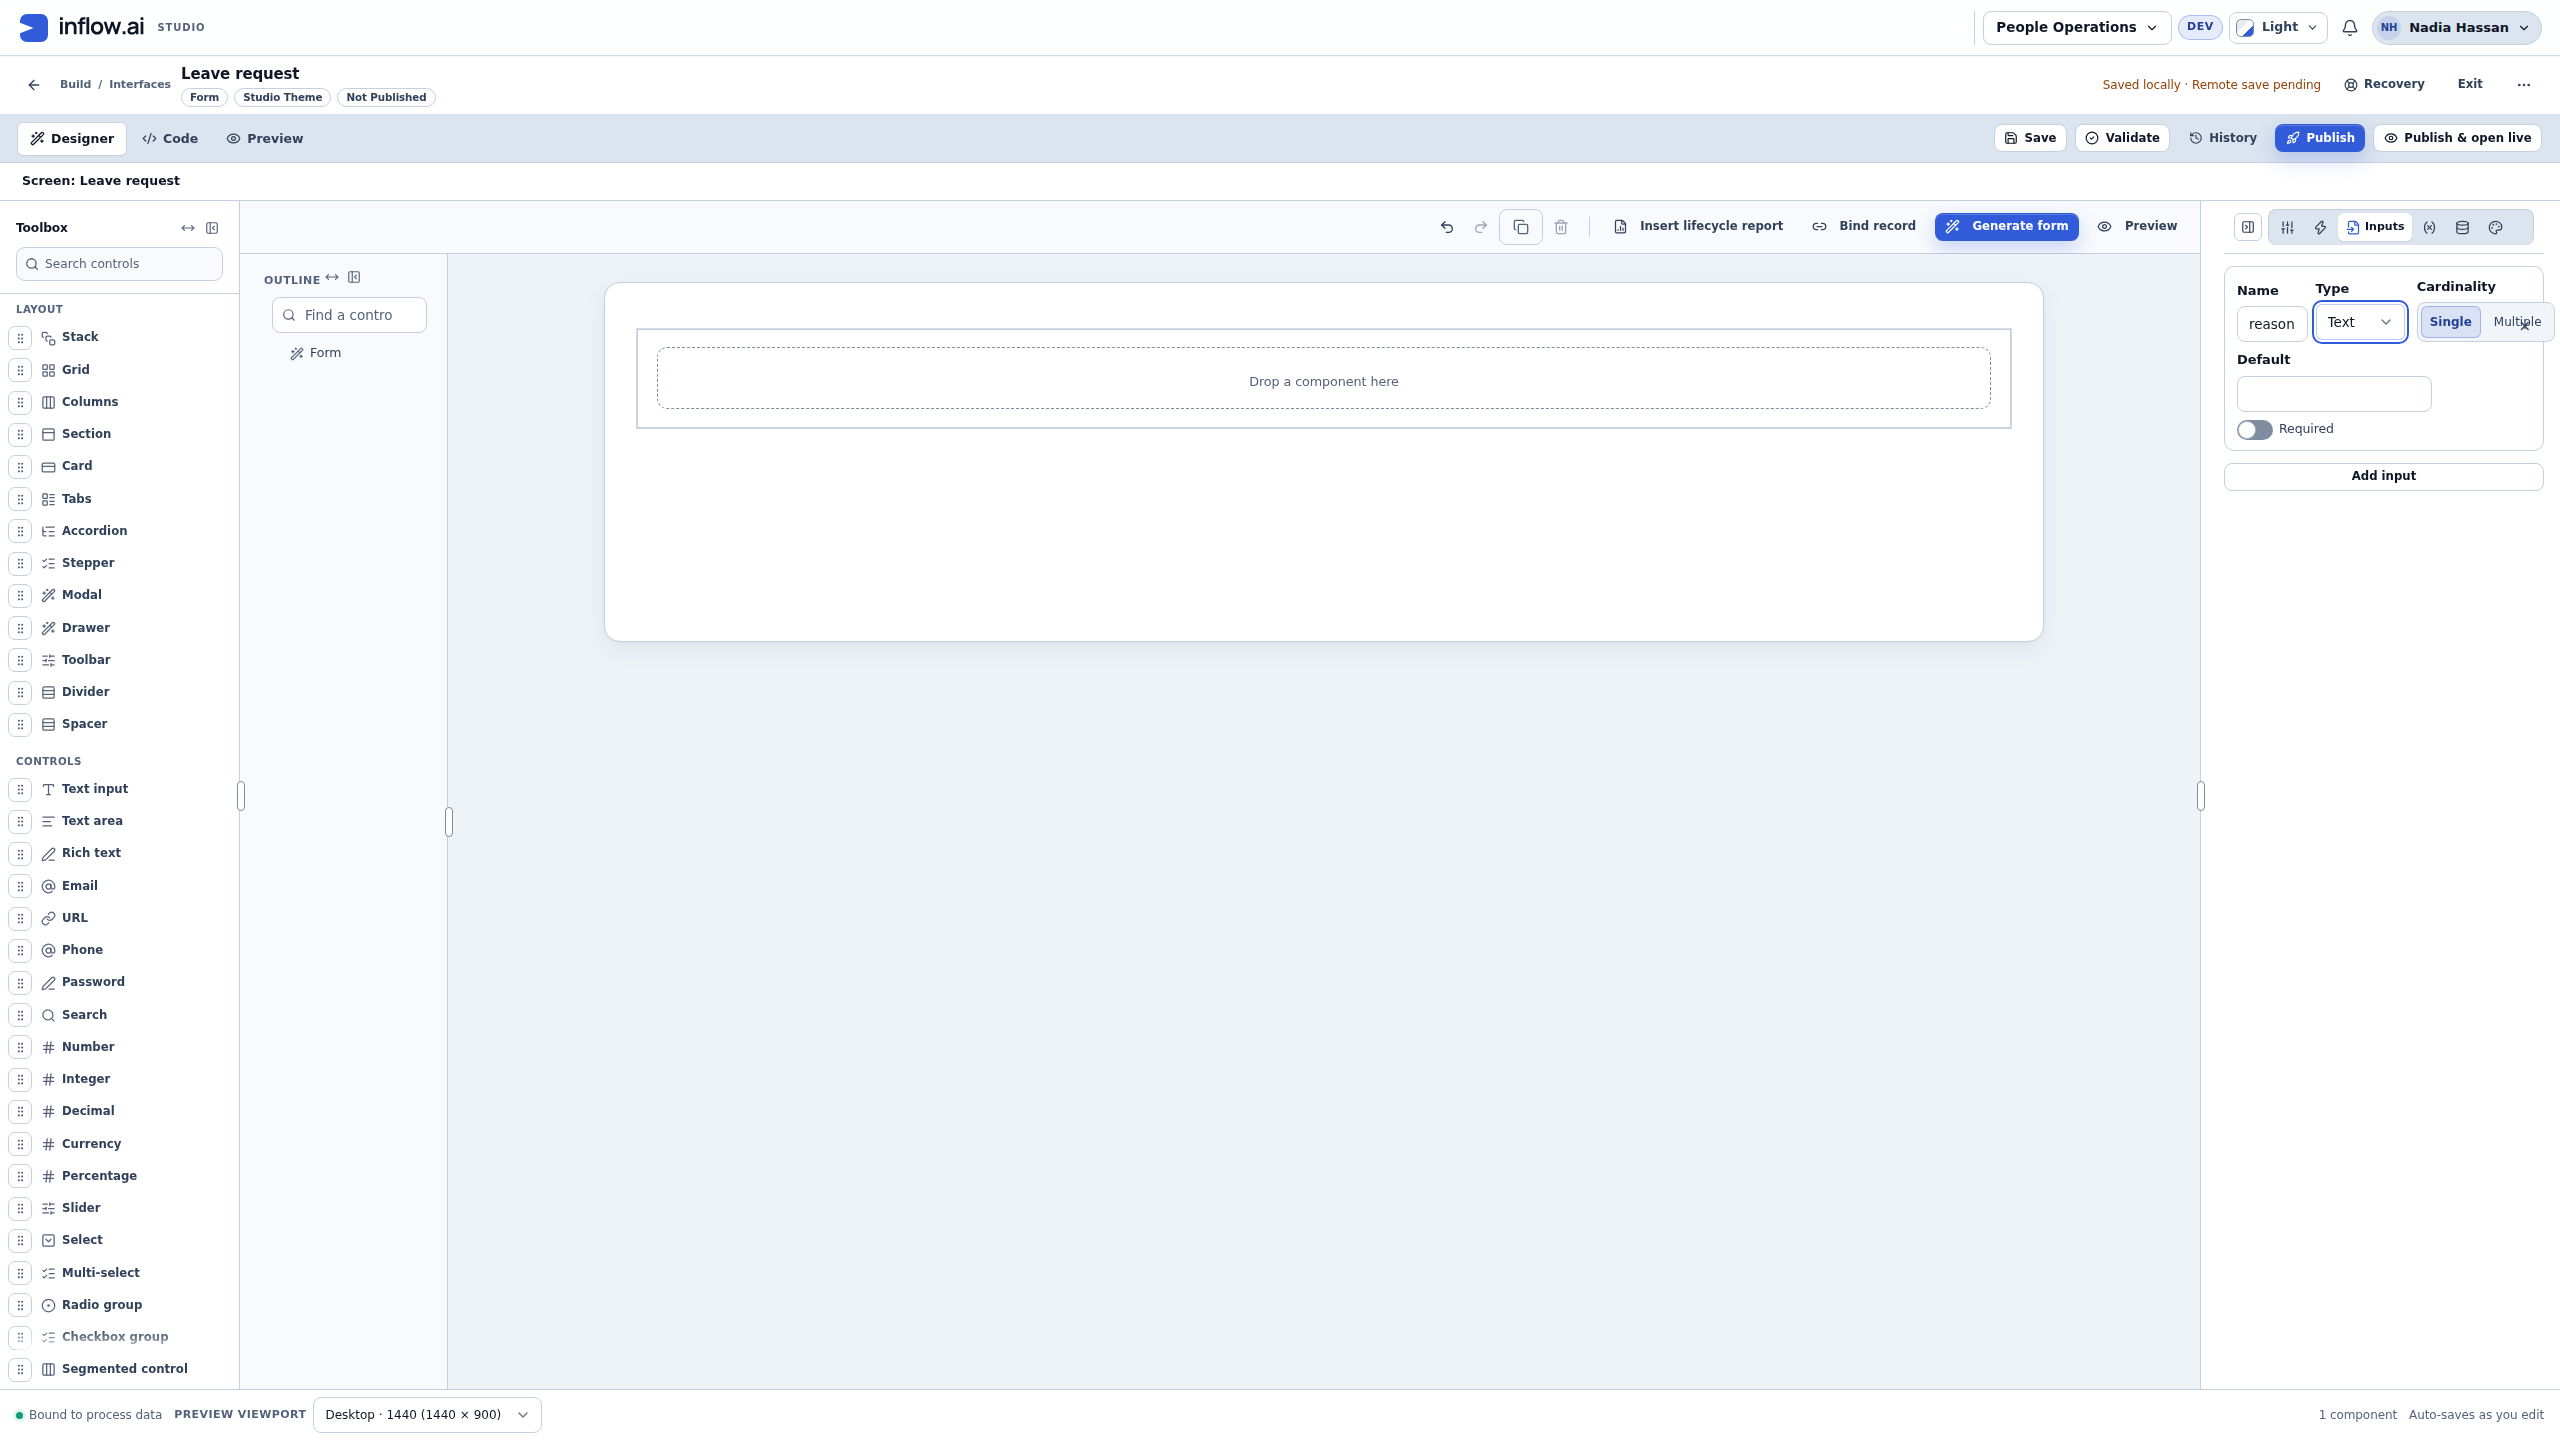
Historical screenshot: This fictional People Operations Designer view was captured on 8 November 2026 from an older build. It shows some Toolbox choices beside a Text answer input; it does not show every control in the table or verify a current draft. Use the current Toolbox and answer types shown in your own workspace.
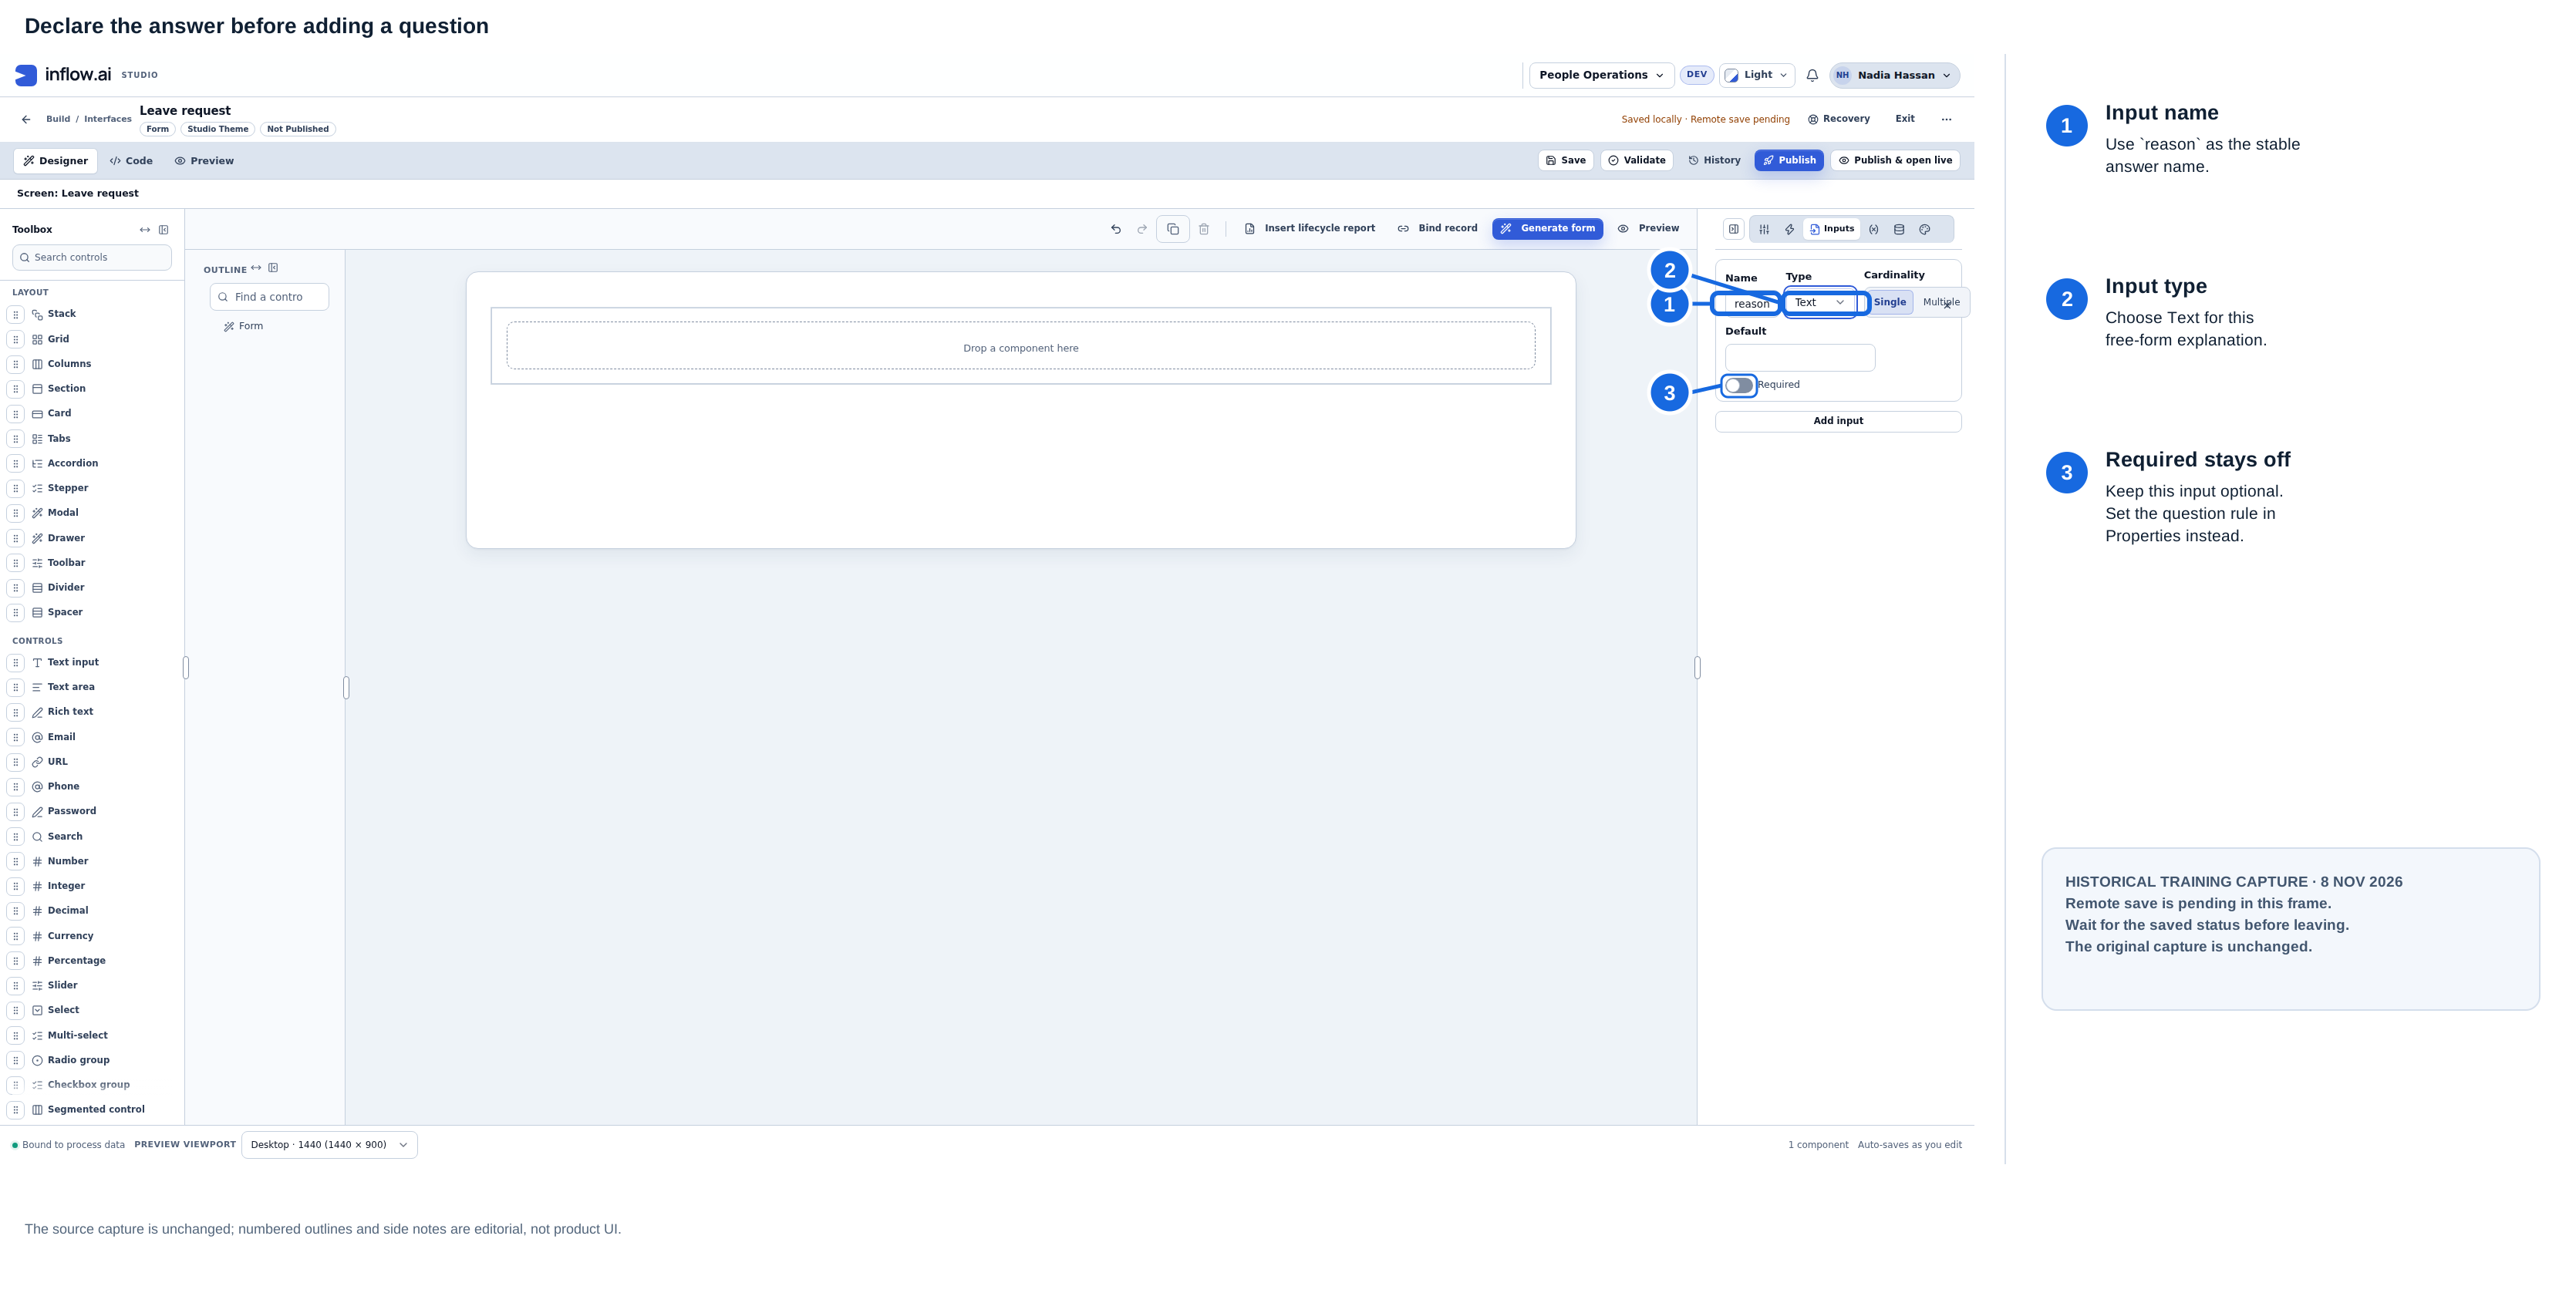
The numbered guide points to the reason input name, its Text type, and the Single and Required-off settings. The original 8 November 2026 PNG is unchanged here. This older-build illustration does not show every control in the table or verify a current draft.
Show information or work
| The page needs to… | Consider… | What to check |
|---|---|---|
| Browse many records | Data grid or Table | Source, fields and offered search/sort/page behavior. |
| Show one selected record | Record view | Which actual record supplies it. |
| Repeat a small layout for records | Repeater | Supported collection and meaningful row identity. |
| Edit a governed collection | Editable grid | Prepared writable source and its supported save/repair behavior. |
| Explain an aggregate | Metric or Chart | The control's own supported source/measure editor. |
| Explain state/progress | Suitable tracking control | Real business information rather than design samples. |
| Work on an eligible task | Task viewer | The actual selected task, host and decision form. |
| Open another page | Link or a configured navigation action | The intended supported destination. |
Each source has its own supported operations. A source that works in a grid may not work directly in a Chart. Follow the actual editor's choices and ask the source owner when an operation is unavailable.
Example: list and open an existing manager task
Nadia is preparing a page where Sara can find an approval task that already exists and work on its own form. Start with a Data grid connected to My assigned tasks, then place a Task viewer beside it in the same host Form. Selecting a row supplies the task identifier to the viewer; Sara does not type an internal ID or create a second approval form. Use Perform only when this page is intended for permitted task work; choose Read only when it should display task details without an executable form. The list is scoped to the signed-in person's eligible work, and neither control grants access or assigns a task.
- Configure the grid and single-row selection as shown in the full assigned-task setup.
- Put a Task viewer beside it in the same host Form and bind its Task id to the selected row. Sara does not type an internal ID or create another approval form.
- Choose Perform only when the page is intended for permitted task work; choose Read only when it should show task details without an executable form.
- Test with the intended person's normal account and an existing eligible task. The list stays scoped to that signed-in person; neither control grants access or assigns work.
What happens when Sara changes the selected task?
Suppose Sara opens Leave request — L-204 and starts writing a comment, but has not posted it. She then selects Travel request — T-118 in the grid. The viewer asks before leaving the current task because its task-local comment is still unsaved. The dialog says “Discard your work on this task?” and explains “You have unsaved changes on this task. Leaving now discards them.”
| Sara chooses… | What happens | When to choose it |
|---|---|---|
| Cancel (or closes the dialog) | The viewer stays on L-204 and keeps its unsent comment. The requested switch does not discard that work. Sara can post the comment or copy it elsewhere before trying again. | She wants to keep working on the current task. |
| Discard changes | The unsaved task-local work is discarded, and the viewer can open T-118 if the task is available to Sara. The new task starts with its own comment area; L-204's unsent comment is not carried across. | She is ready to leave the current task without that unsaved work. |
This prompt is a loss-prevention step, not an approval, save, assignment, or permission grant. It does not post the comment for Sara. If the selected task changes again while the prompt is open, the viewer checks the latest selection before switching; it does not open an obsolete row just because Sara confirmed an earlier request. Access to the destination is still checked by the task services. If a task is unavailable, follow the viewer's current message and ask the task owner to check the assignment or access path; do not infer access from its appearance in a mockup or another person's screen.
Try it safely: use fictional task data, type a short comment, select another row, then choose Cancel and confirm that the original task and text remain. Repeat and choose Discard changes; confirm that the selected task opens only when it is available and that the previous unsent comment is gone. Do not use a real person's private request as training data.
A task card inside the published App Chat is a separate interface and configuration path; do not treat the Studio Task viewer as its chat screen.
Example 2: find the setting that matters
Nadia's Reason question is visible, but its answer is not reaching the expected form field.
- Select Reason in Outline.
- Use Label only to check the wording people read.
- Open Data Binding → Store value in and choose the correct declared reason input.
- Under Validation, check Required if an answer is necessary.
- Try the question again with a fictional answer and inspect the intended result.
| Common setting | What it means |
|---|---|
| Label / Title | Words shown to the person. |
| Store value in | Where an entered answer goes. |
| Store selection in | Where a selected option's value goes. |
| Default value | A starting value, not proof the person confirmed it. |
| Placeholder | A hint, not a saved answer. |
| Required | Whether an answer is needed. |
| Validations | Checks that show helpful messages. |
| Visible when | A condition controlling presentation. |
| Read only / Disabled | State-related interaction settings, not a substitute for permissions. |
Arrange and explain the page
Use Section or Card for a meaningful group; Stack, Grid or Columns for arrangement; Heading or Prose for explanation. Inspect Outline to keep the intended parent-child grouping. A Task viewer and a target area own their displayed content and should not be treated as empty layout boxes.
Continue with Choose controls, Properties and answers and Practical formulas. Developers who need exact properties, defaults and events can open the optional full control-property reference. That large inventory is intentionally separate from this consultant lookup.