Build the leave-request data and rules
In this tutorial, Nadia prepares the information and reusable questions for a small leave application. Mohammad is an employee; Sara is his manager. The names and requests are fictional training data.
Screenshot context: The six model-design, validation and publication-recovery figures were captured on 15 November 2026 from master source 6311724154 at native 2560×1440. The later Make live, records and rules figures remain dated historical captures from 8 November. The current model has a readable version 1 but an unresolved Studio publication receipt; this run did not continue into database deployment or record entry.
By the end, you will have a usable Leave request model, three sample records, a shared allowance, an eligibility formula and a query for pending requests. Forms, the App Shell and the approval workflow come afterward. Creating the records does not start that workflow.
Before you begin
Complete the first four preparation steps in identity and permissions: the development workspace, real training accounts/groups and the required builder access. Return to its application-access steps after the forms and workflow exist.
Use the development workspace selected for the exercise. Ask the administrator which existing database destination to use. You need the model and rule editing/publishing rights for the steps you perform; database/server installation is not part of this lesson.
Example — Mohammad asks for five days
Mohammad requests Monday 14 December to Friday 18 December 2026. The training policy calls this five days and permits an allowance of ten. We enter 5 deliberately; the platform does not infer the policy from the two dates.
| Item | Training value |
|---|---|
| Model name / key | Leave management / leave |
| Record type | Leave request, with key leave_request |
| Request number | leave-2026-014 |
| Employee business number | M014 |
| Manager business number | S002 |
| First / last day | 14 / 18 December 2026 |
| Requested days | 5 |
| Status | PENDING |
| Reason | Family trip |
The employee and manager numbers are business references. In the workflow lesson, select Mohammad and Sara as actual users; a text number is not a task assignment or an access grant.
Step 1 — Create the model
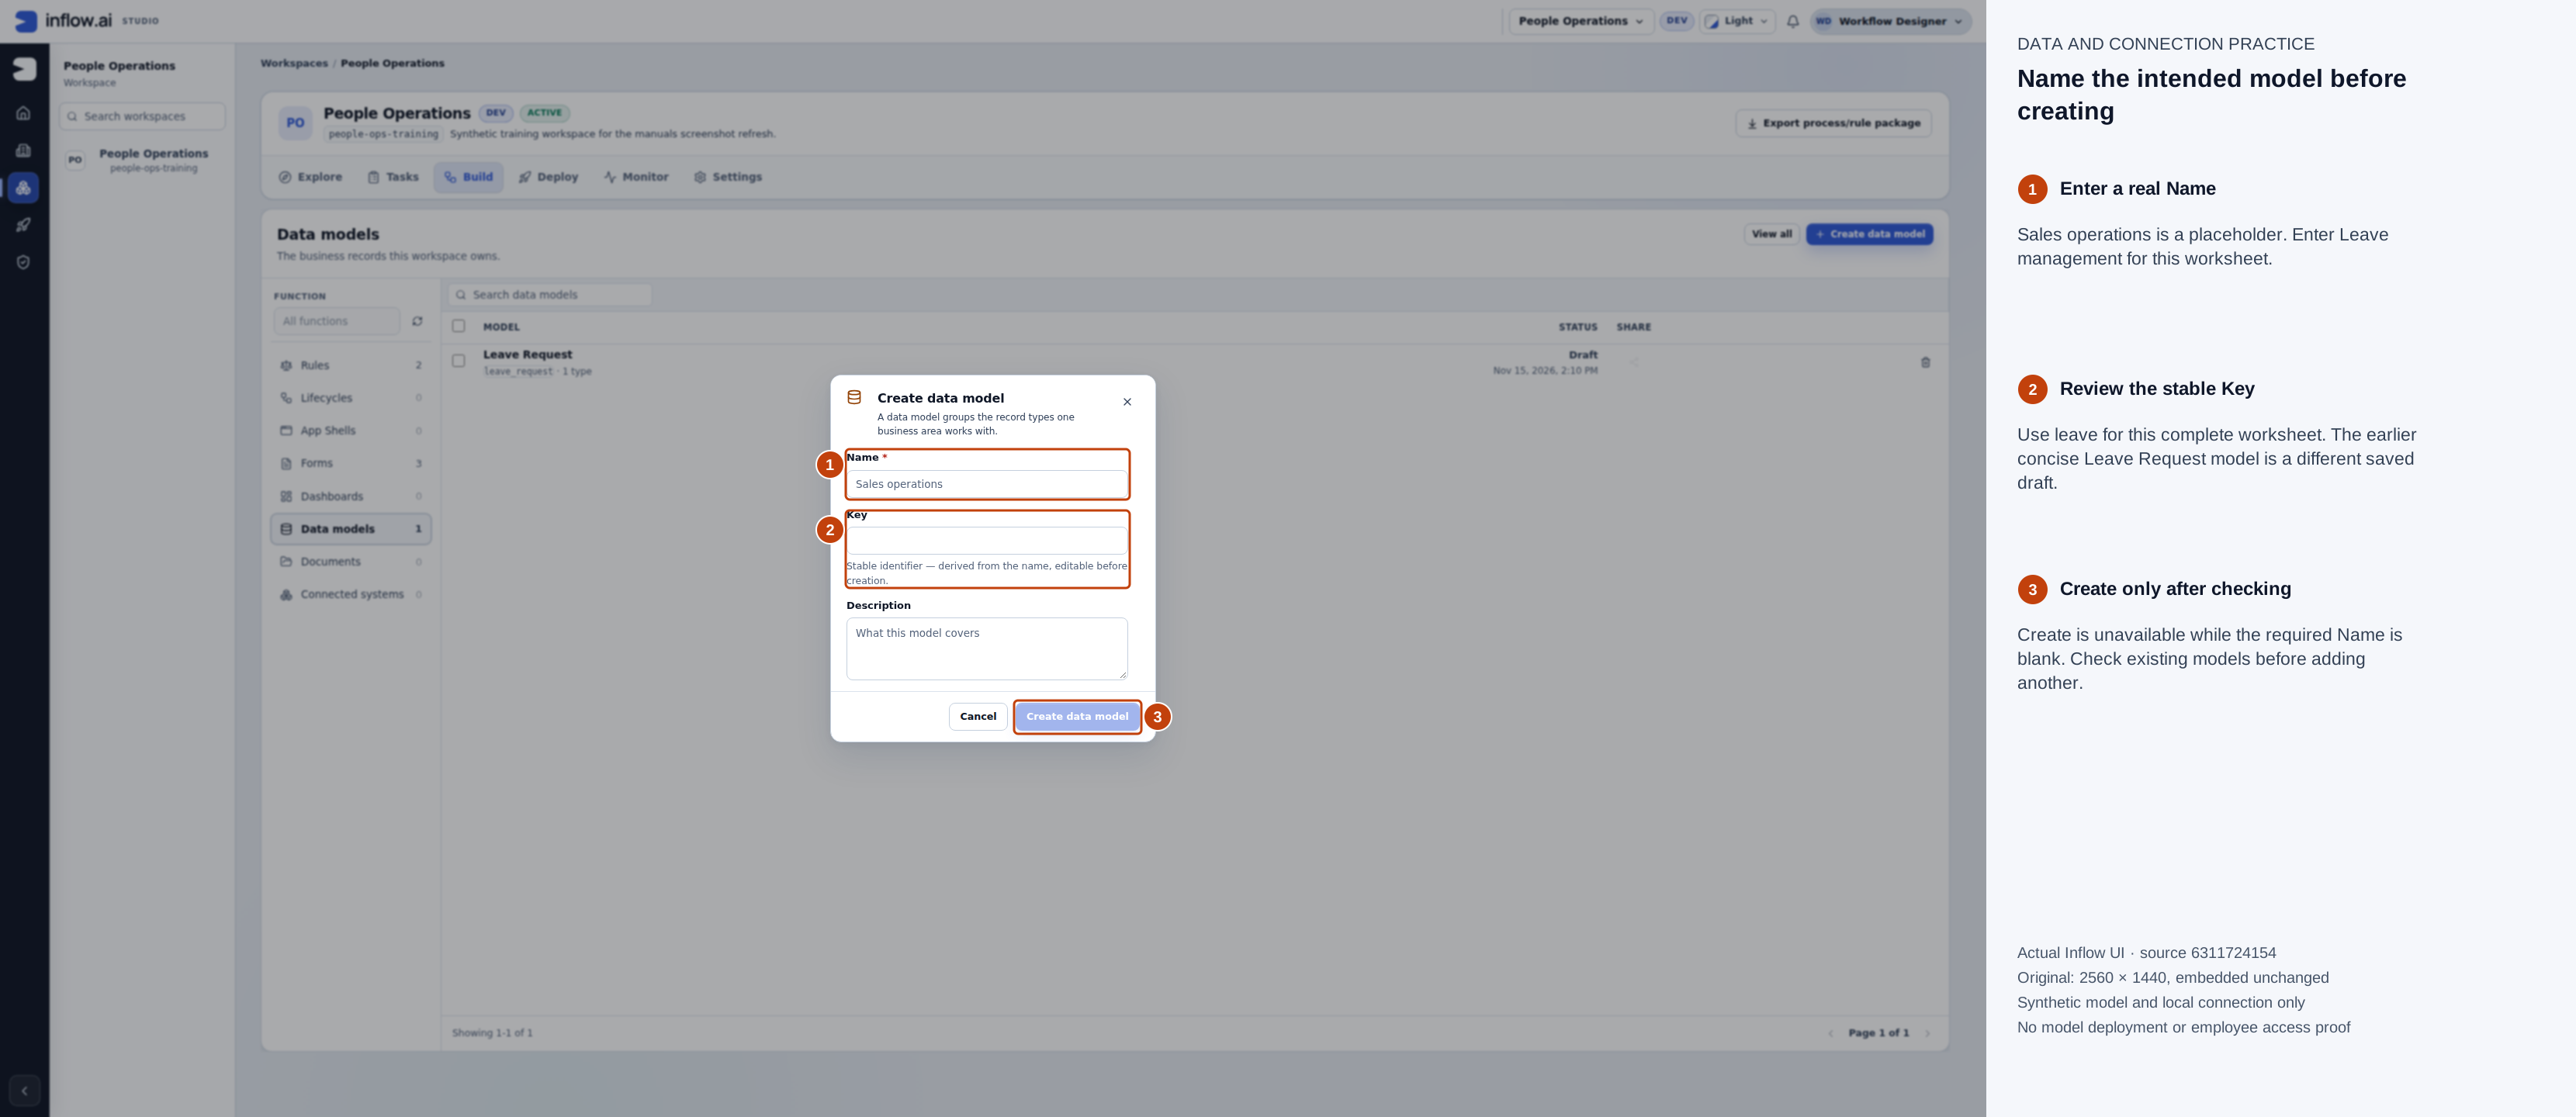
*Actual native 2560×1440 capture, 15 November 2026, source 6311724154. Numbered outlines and the side legend are guidance; open the original or open the full-size guide. *
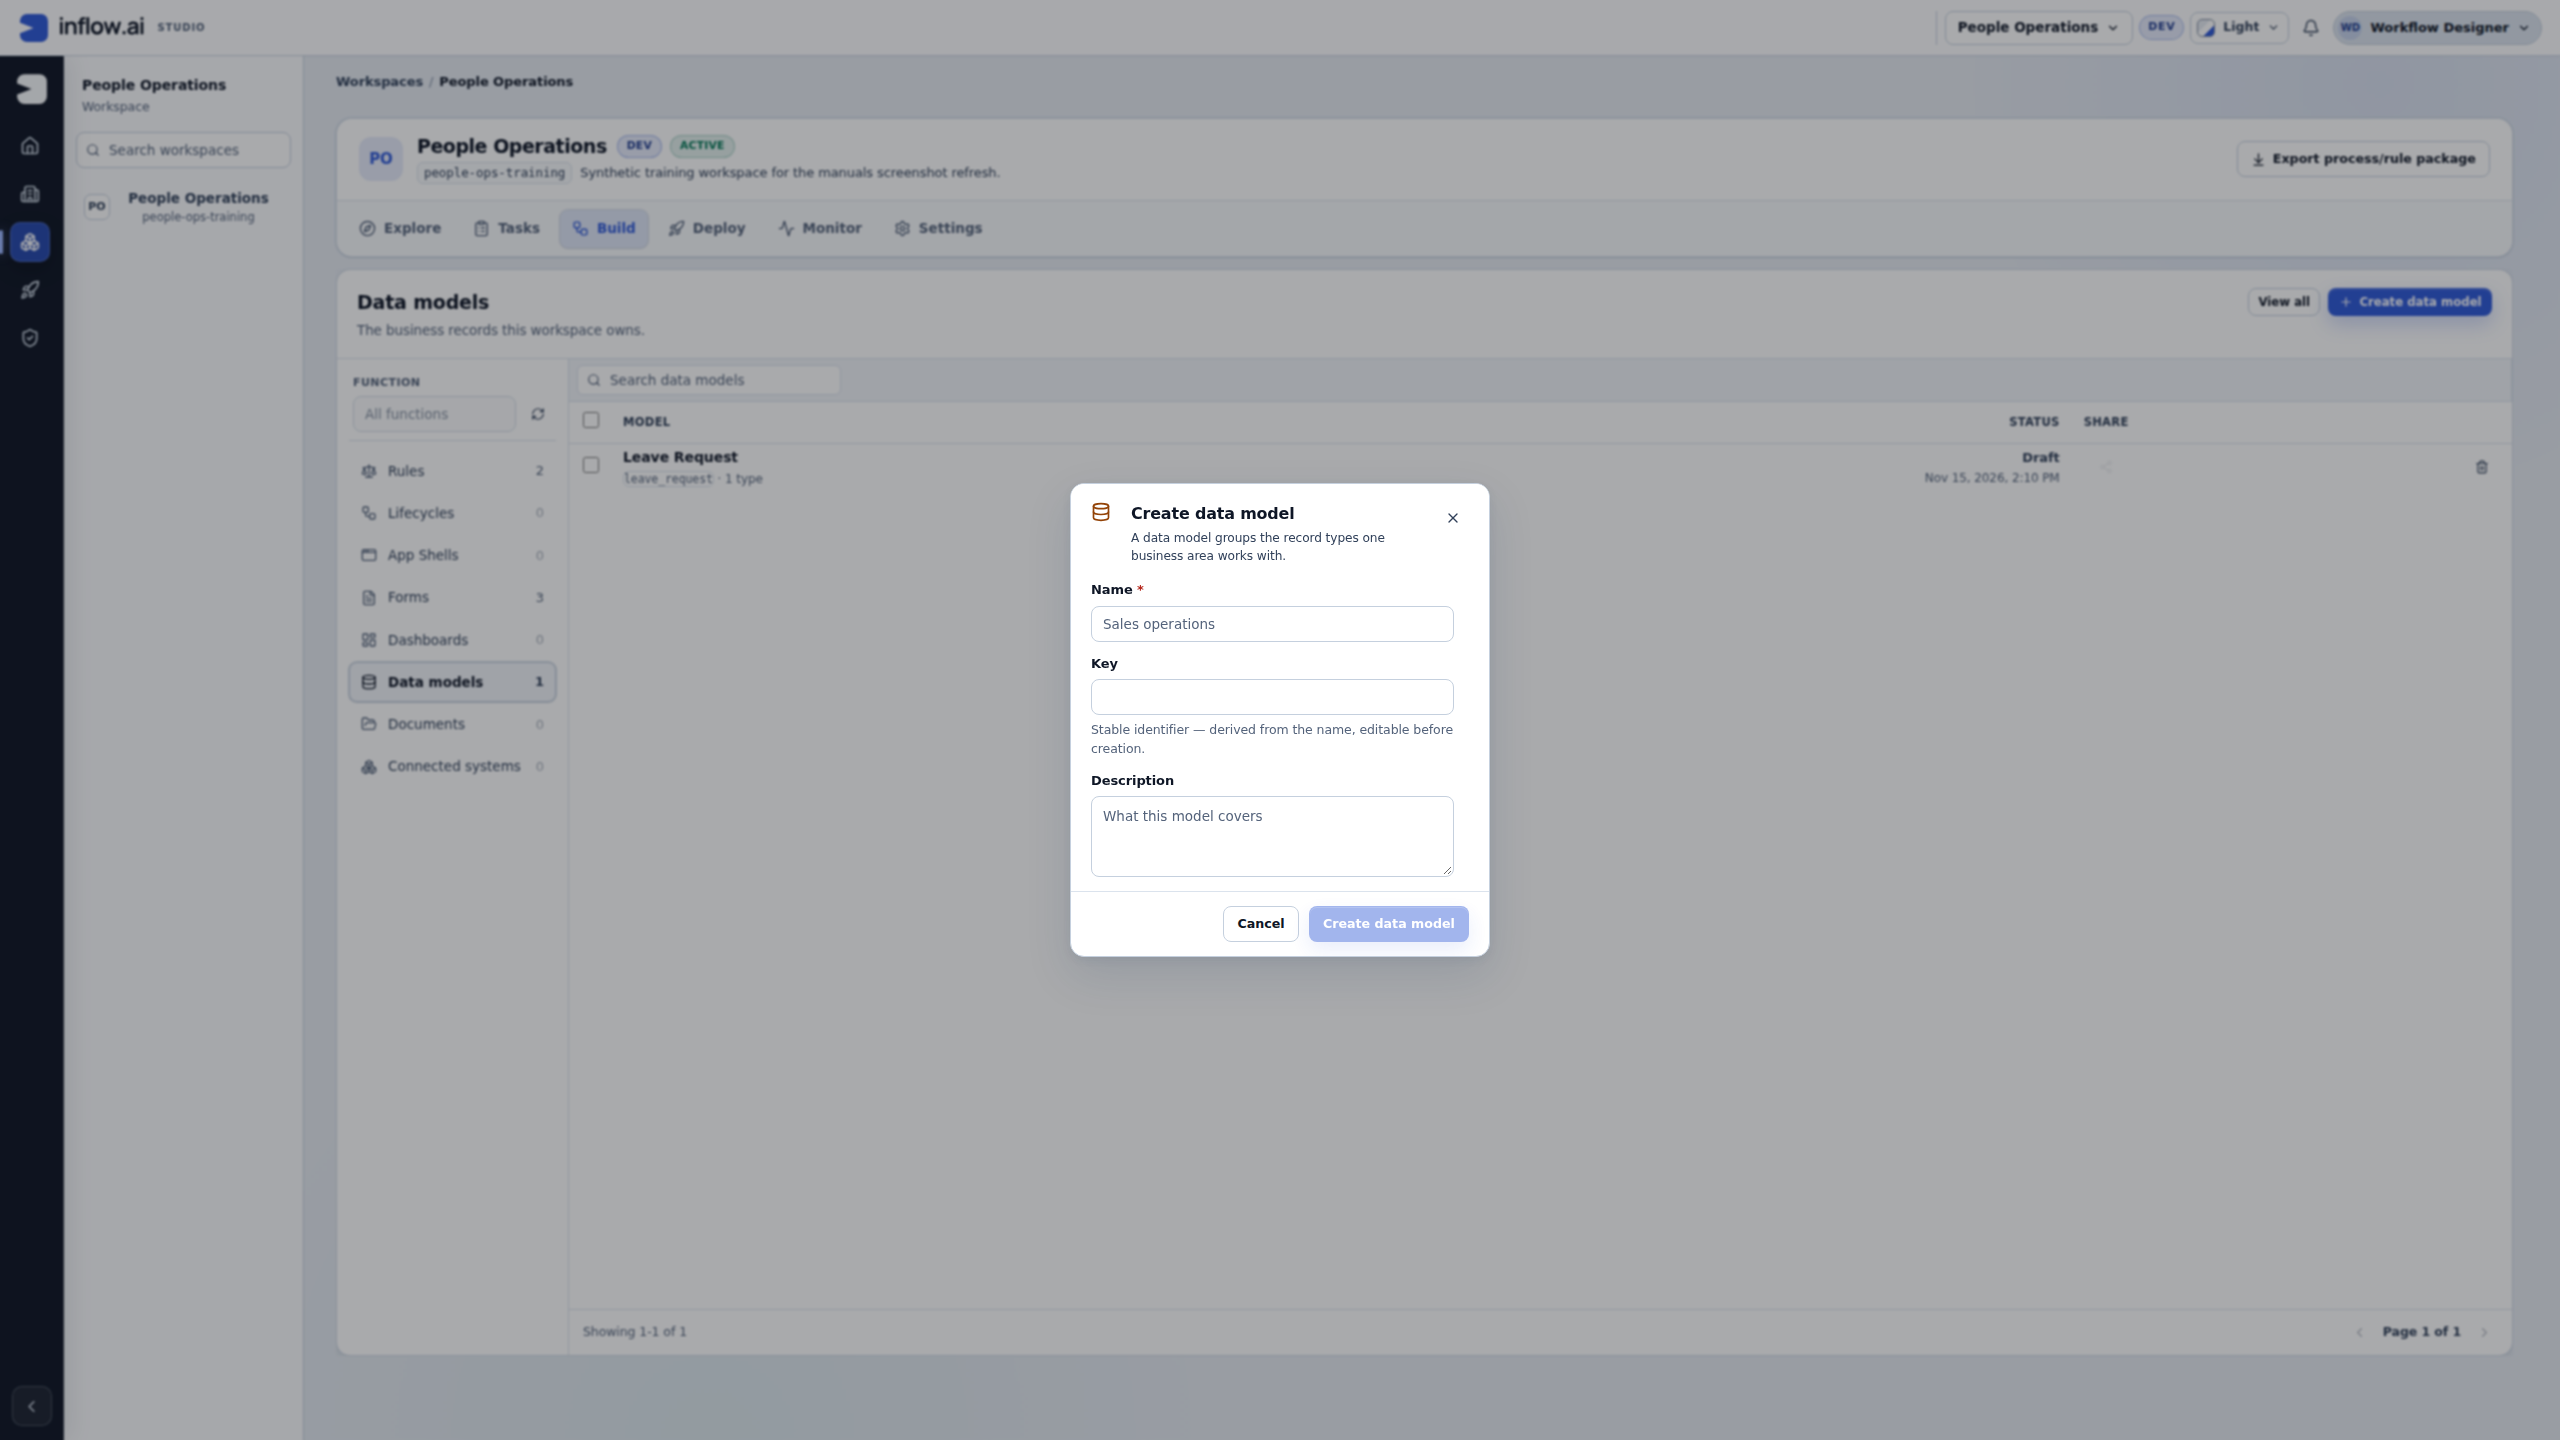
Fill the identity fields: Enter Leave management as Name; Sales operations is only a placeholder. Review the generated leave_management key and use the agreed leave key for this complete worksheet before creating. Describe its fictional records. Keep the earlier concise Leave Request draft as a separate example. Create stays unavailable until the required Name is entered; inspect the catalogue and reuse an existing matching model first.
- Open Build → Data models in the training workspace.
- Open an existing Leave management model with key
leaveif you already prepared it for this course. Otherwise choose the new-model action and enter that name, key and a short description in Create data model. - In the intended model, open Leave request if it already exists. Otherwise add that record type with key
leave_request. - Use the following table as your worksheet. The next section walks through creating or checking each field once; read it before adding the fields. Keep readable Names separate from the exact Keys shown.
| Key | Meaning | Model type and initial choice |
|---|---|---|
| request_id | Request number | string; required |
| employee_id | Employee business number | string; required |
| manager_id | Manager business number | string; required |
| start_date | First day | date; required |
| end_date | Last day | date; required |
| requested_days | Agreed quantity of days | integer; required for this whole-day lesson |
| status | Business state | enum with PENDING, APPROVED, DECLINED; required |
| reason | Employee explanation | text; optional |
| decision_comment | Manager explanation | text; optional |
For example, string means short text, integer means a whole number and enum means a controlled choice list. Use field and input types for more explanation.
Check your work: read each field and required setting back against the table. Do not add fields simply because an unrelated sample model has them.
Check the field keys and guessed types
A field's Name is the readable label, such as Request number. Its Key is the stable identifier used when another part of the app refers to it, such as request_id. Record-type and field keys use lowercase letters, digits and underscores and start with a letter. The record type in this lesson is leave_request. A form input or process field can use a different naming format; connect the actual values deliberately later.
- Select Request number if that field already exists. Otherwise enter Request number in New field name and choose Add field once. Open its Properties if they are not already shown.
- Set its Key to request_id and its Type to string. The editor may guess integer from the word “number”; change that guess because leave-2026-014 is a text reference, not a quantity for arithmetic.
- Turn on Required for this field. For each remaining worksheet row, select its existing field or add it once if missing, then check Name, Key, Type and Required. Do not add a second field when the intended one already exists.
- For Business state, set Key to status and Type to enum. Review the existing options first. Keep the intended PENDING, APPROVED and DECLINED values; use Add option only for a value that is missing, and enter it once. Do not append a second copy of an existing choice. These are the stored choices, so their capitalization is intentional. Leave Default value at No default for this model worksheet; the request action will deliberately supply PENDING.
- Check that the dates use date, requested_days uses integer, and reason/decision_comment use text with Required off. Do not accept every guessed type without checking it.
- Save and Validate. Repair any Must fix before publishing item. If a Key such as requestId is rejected, correct it to request_id in the model; do not change validation to make the invalid example pass.
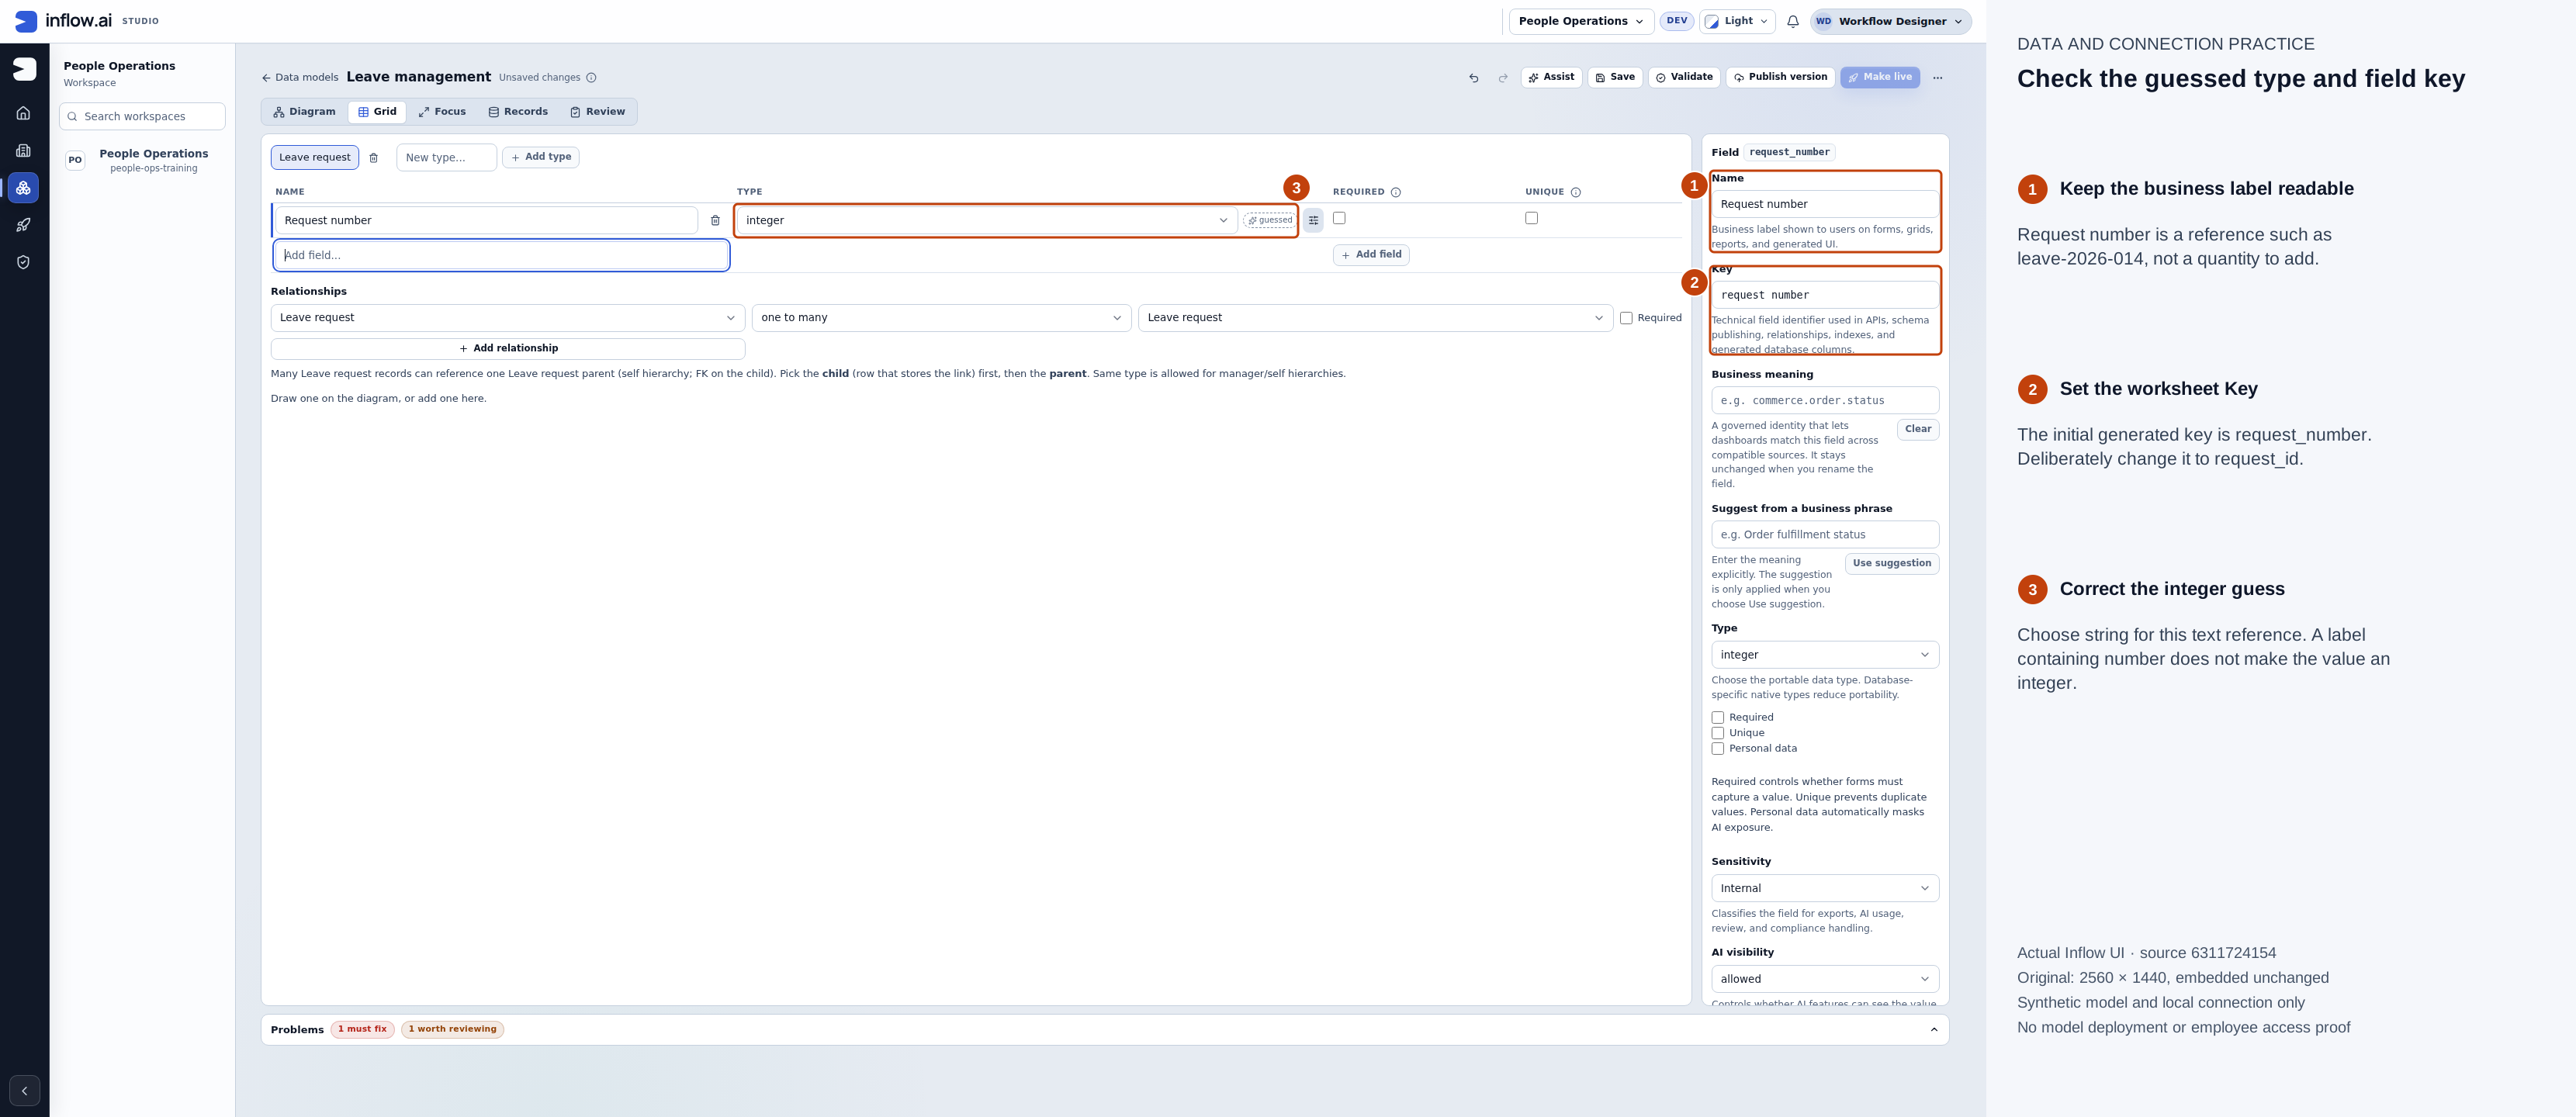
*Actual native 2560×1440 capture, 15 November 2026, source 6311724154. Numbered outlines and the side legend are guidance; open the original or open the full-size guide. *
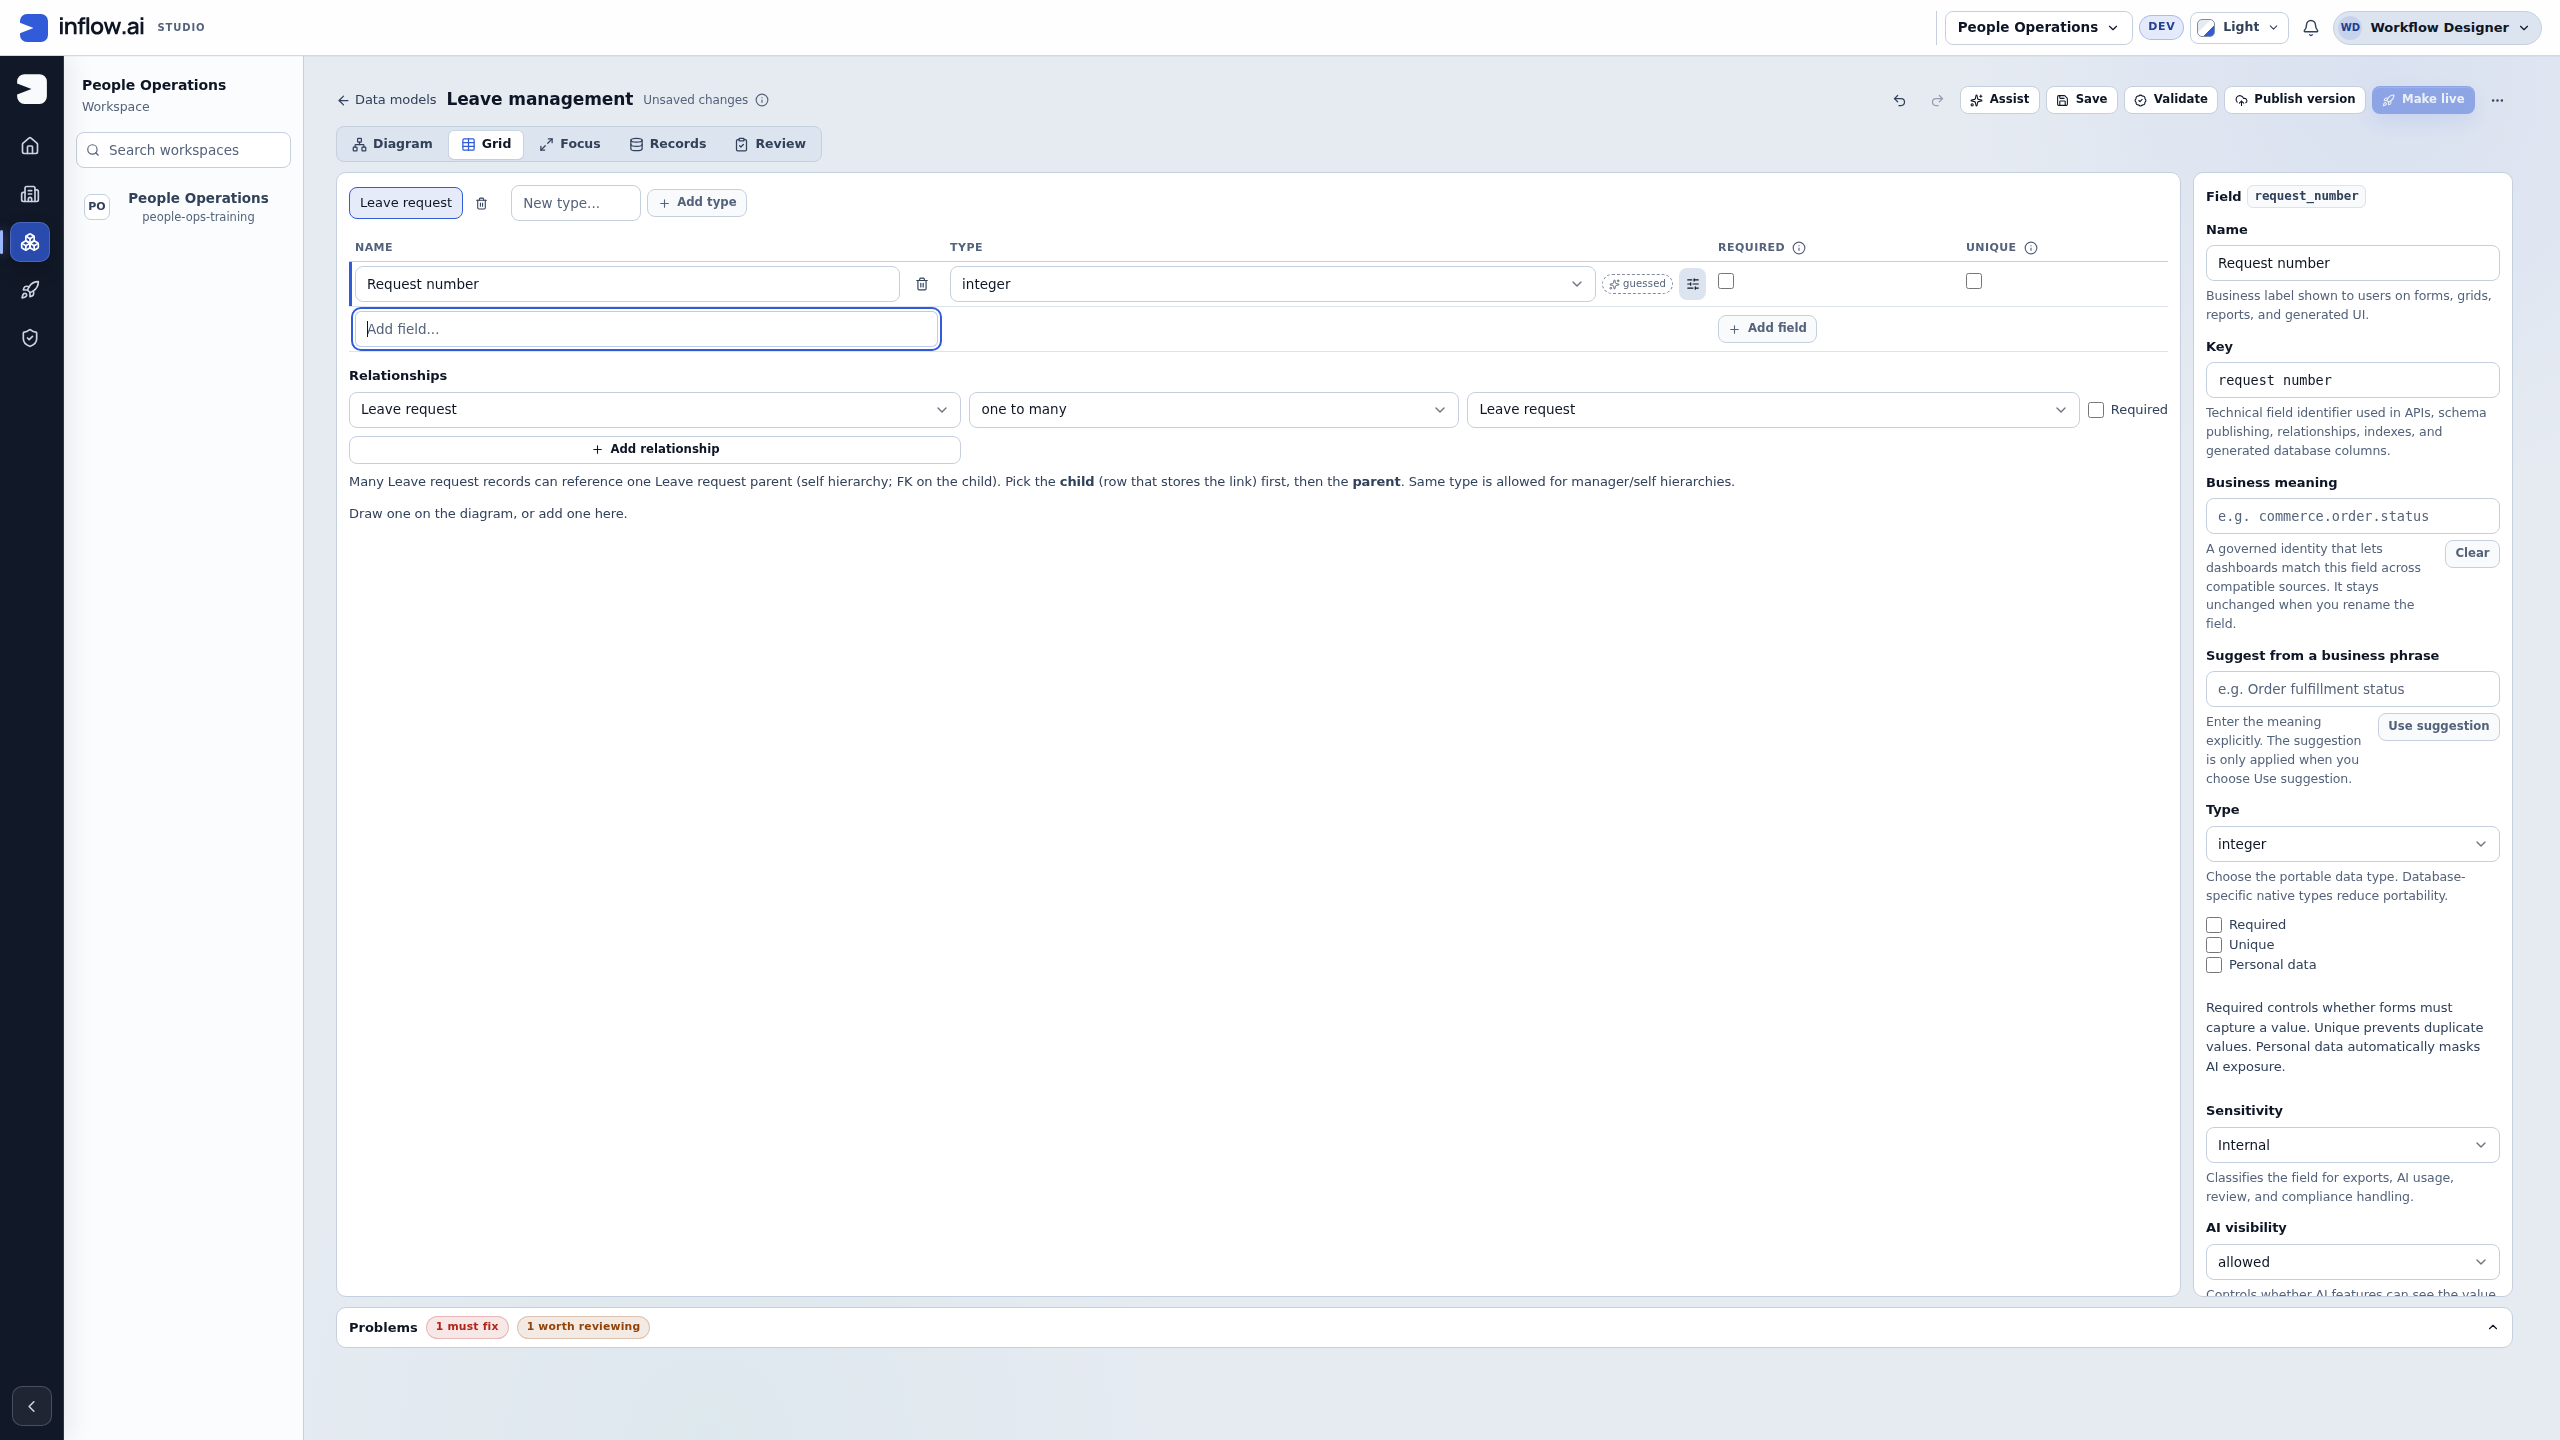
Check the result: This is the initial guess, before correction. Set Key to request_id and Type to string for the teaching reference; leave the friendly Name readable. The manual’s reviewed callout marks the exact controls.
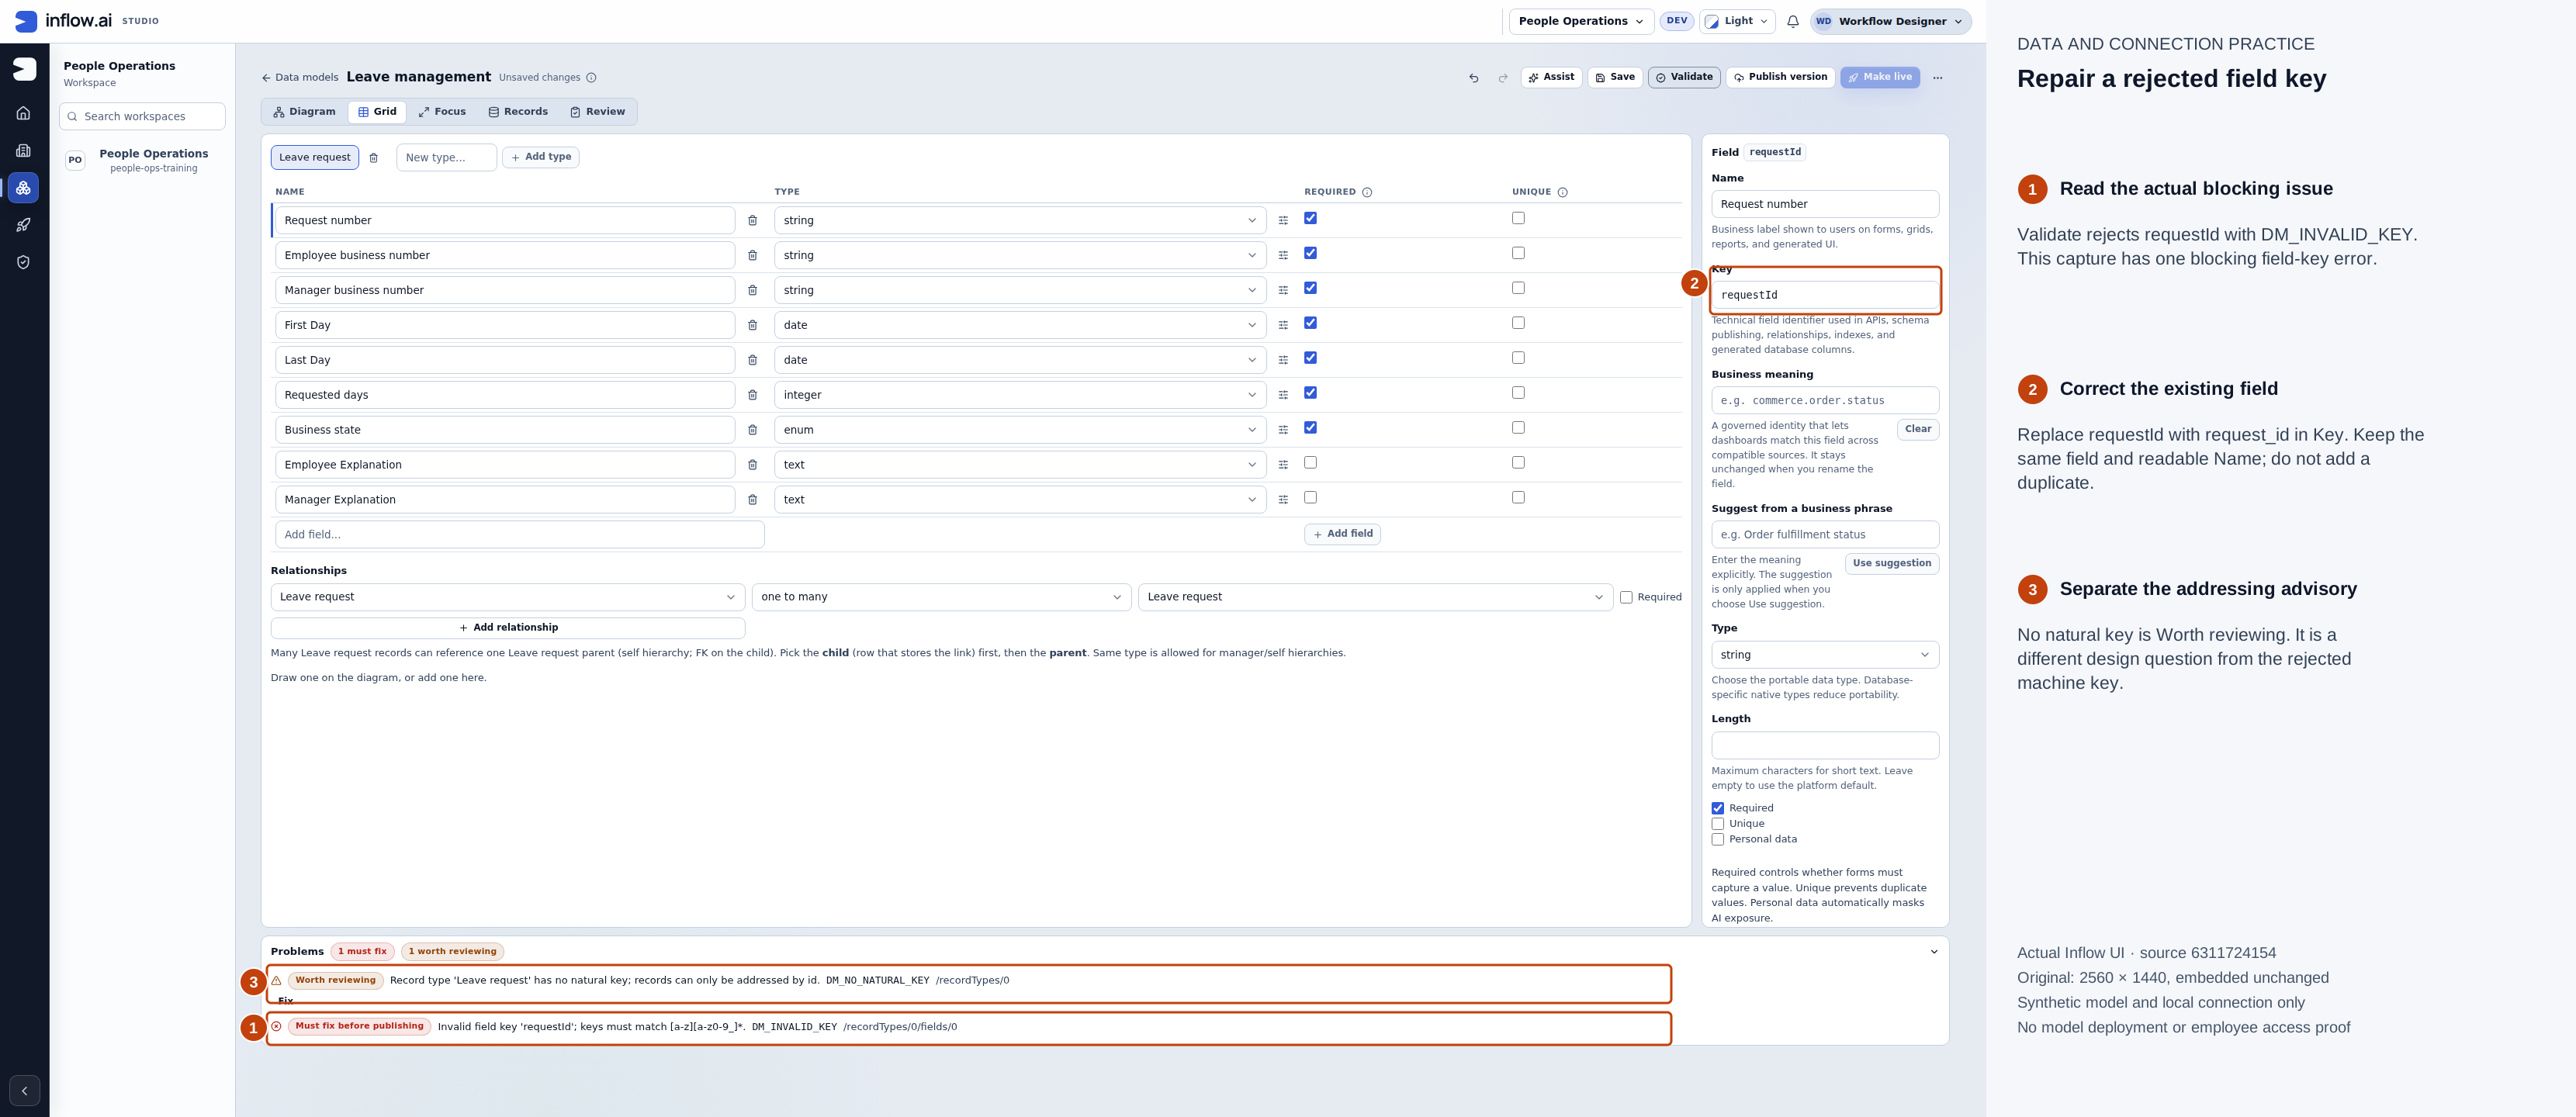
*Actual native 2560×1440 capture, 15 November 2026, source 6311724154. Numbered outlines and the side legend are guidance; open the original or open the full-size guide. *
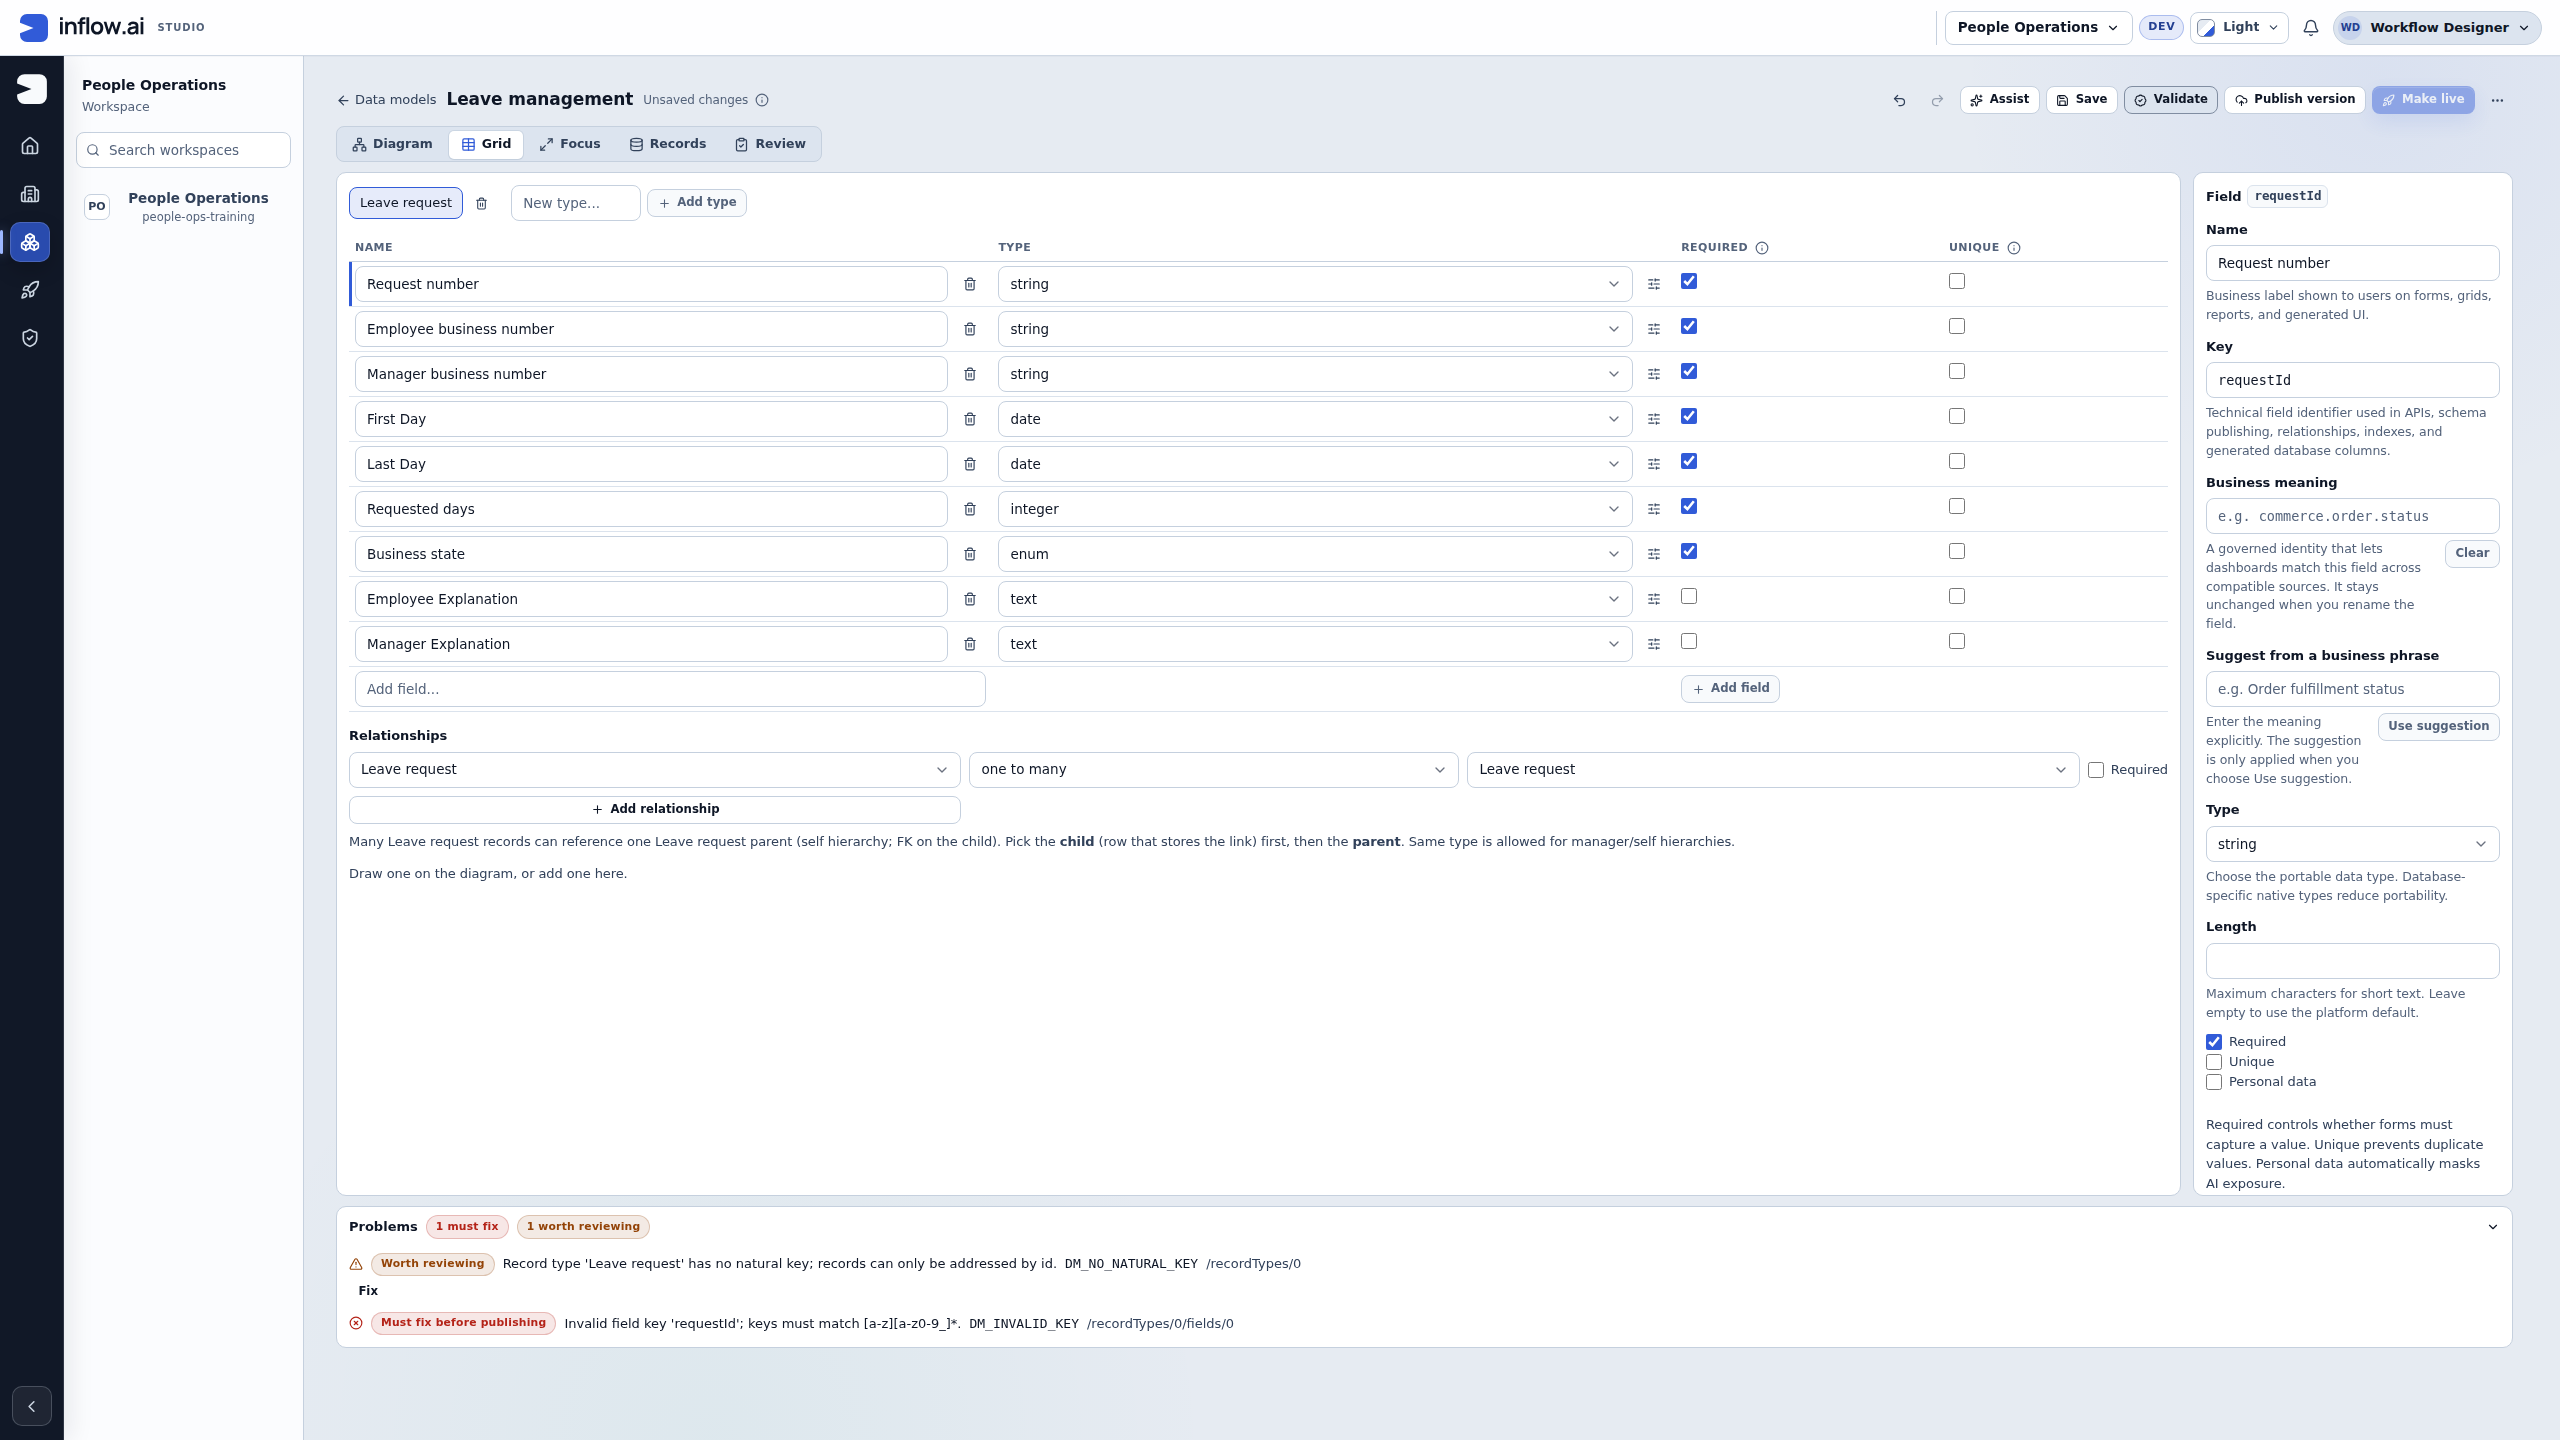
Read the validator: This current capture has one Must fix before publishing error: the existing Request number field uses requestId. Correct its Key to request_id, keep its Name and string type, then Save and Validate again. The remaining rows below are other naming examples, not seven errors observed in this capture.
| Rejected key | Correct key | Readable field name |
|---|---|---|
requestId |
request_id |
Request number |
employeeId |
employee_id |
Employee business number |
managerId |
manager_id |
Manager business number |
startDate |
start_date |
First day |
endDate |
end_date |
Last day |
requestedDays |
requested_days |
Requested days |
decisionComment |
decision_comment |
Manager explanation |
The Name stays readable; the machine Key follows lowercase snake_case. The selected Business state field demonstrates the distinction: Name Business state, Key status, Type enum. The current screenshot shows the single requestId blocker. Read every issue reported by your own model; the table illustrates other common corrections. After correcting keys, save and run Validate again; fix any remaining errors before publishing. The Worth reviewing natural-key notice is a separate design decision, not a rejected field key. Do not mark request_id Unique just to silence it: first confirm whether duplicate values are prohibited by the real data contract and review existing data and callers with the owner.
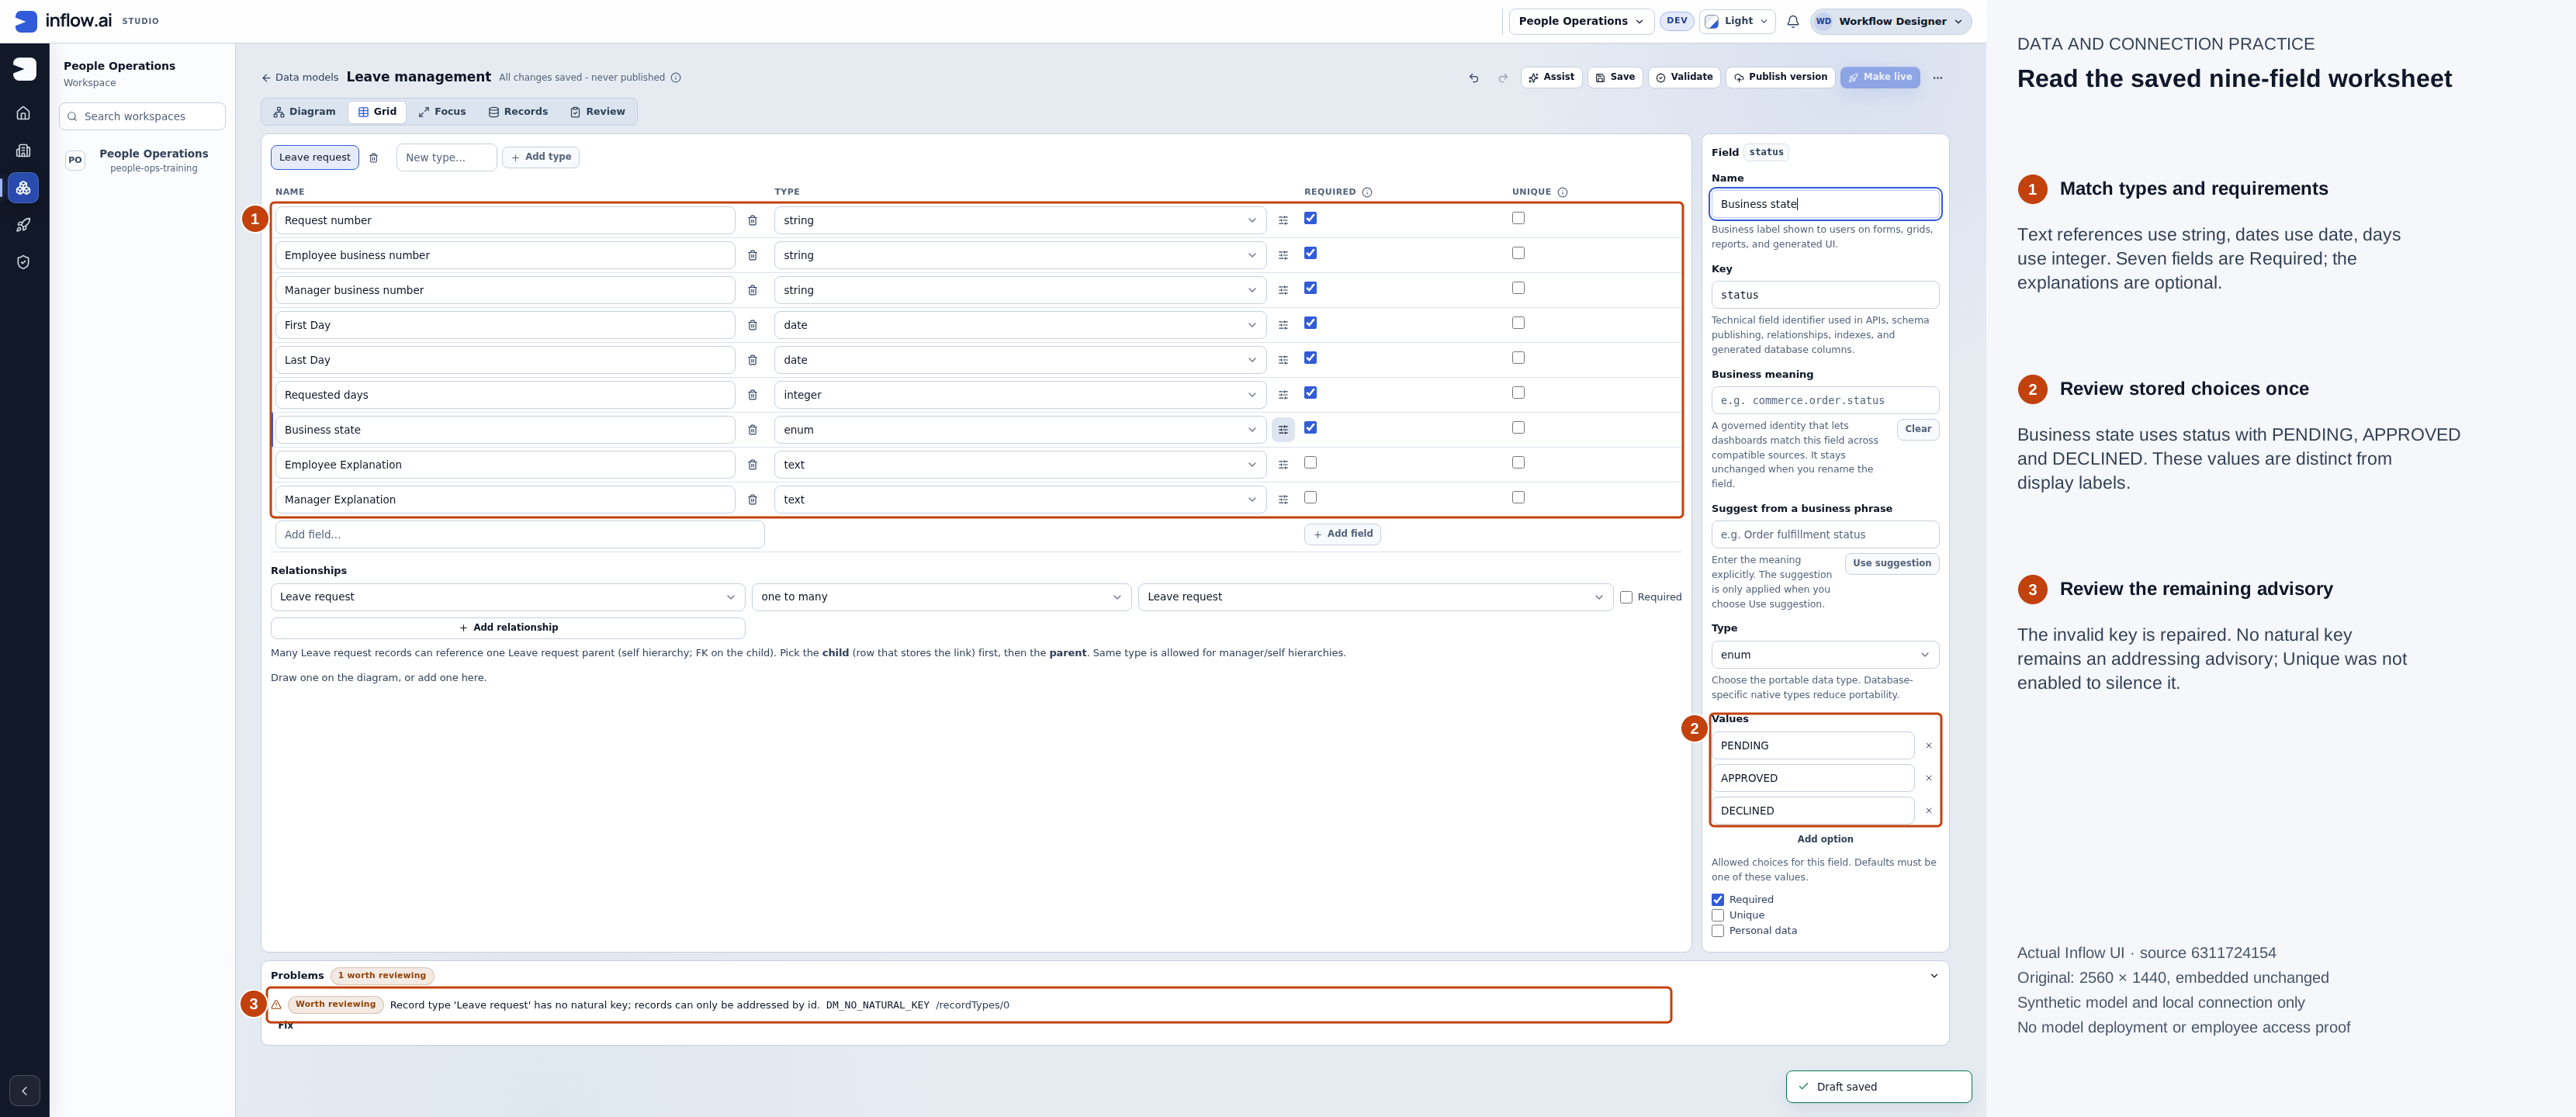
*Actual native 2560×1440 capture, 15 November 2026, source 6311724154. Numbered outlines and the side legend are guidance; open the original or open the full-size guide. *
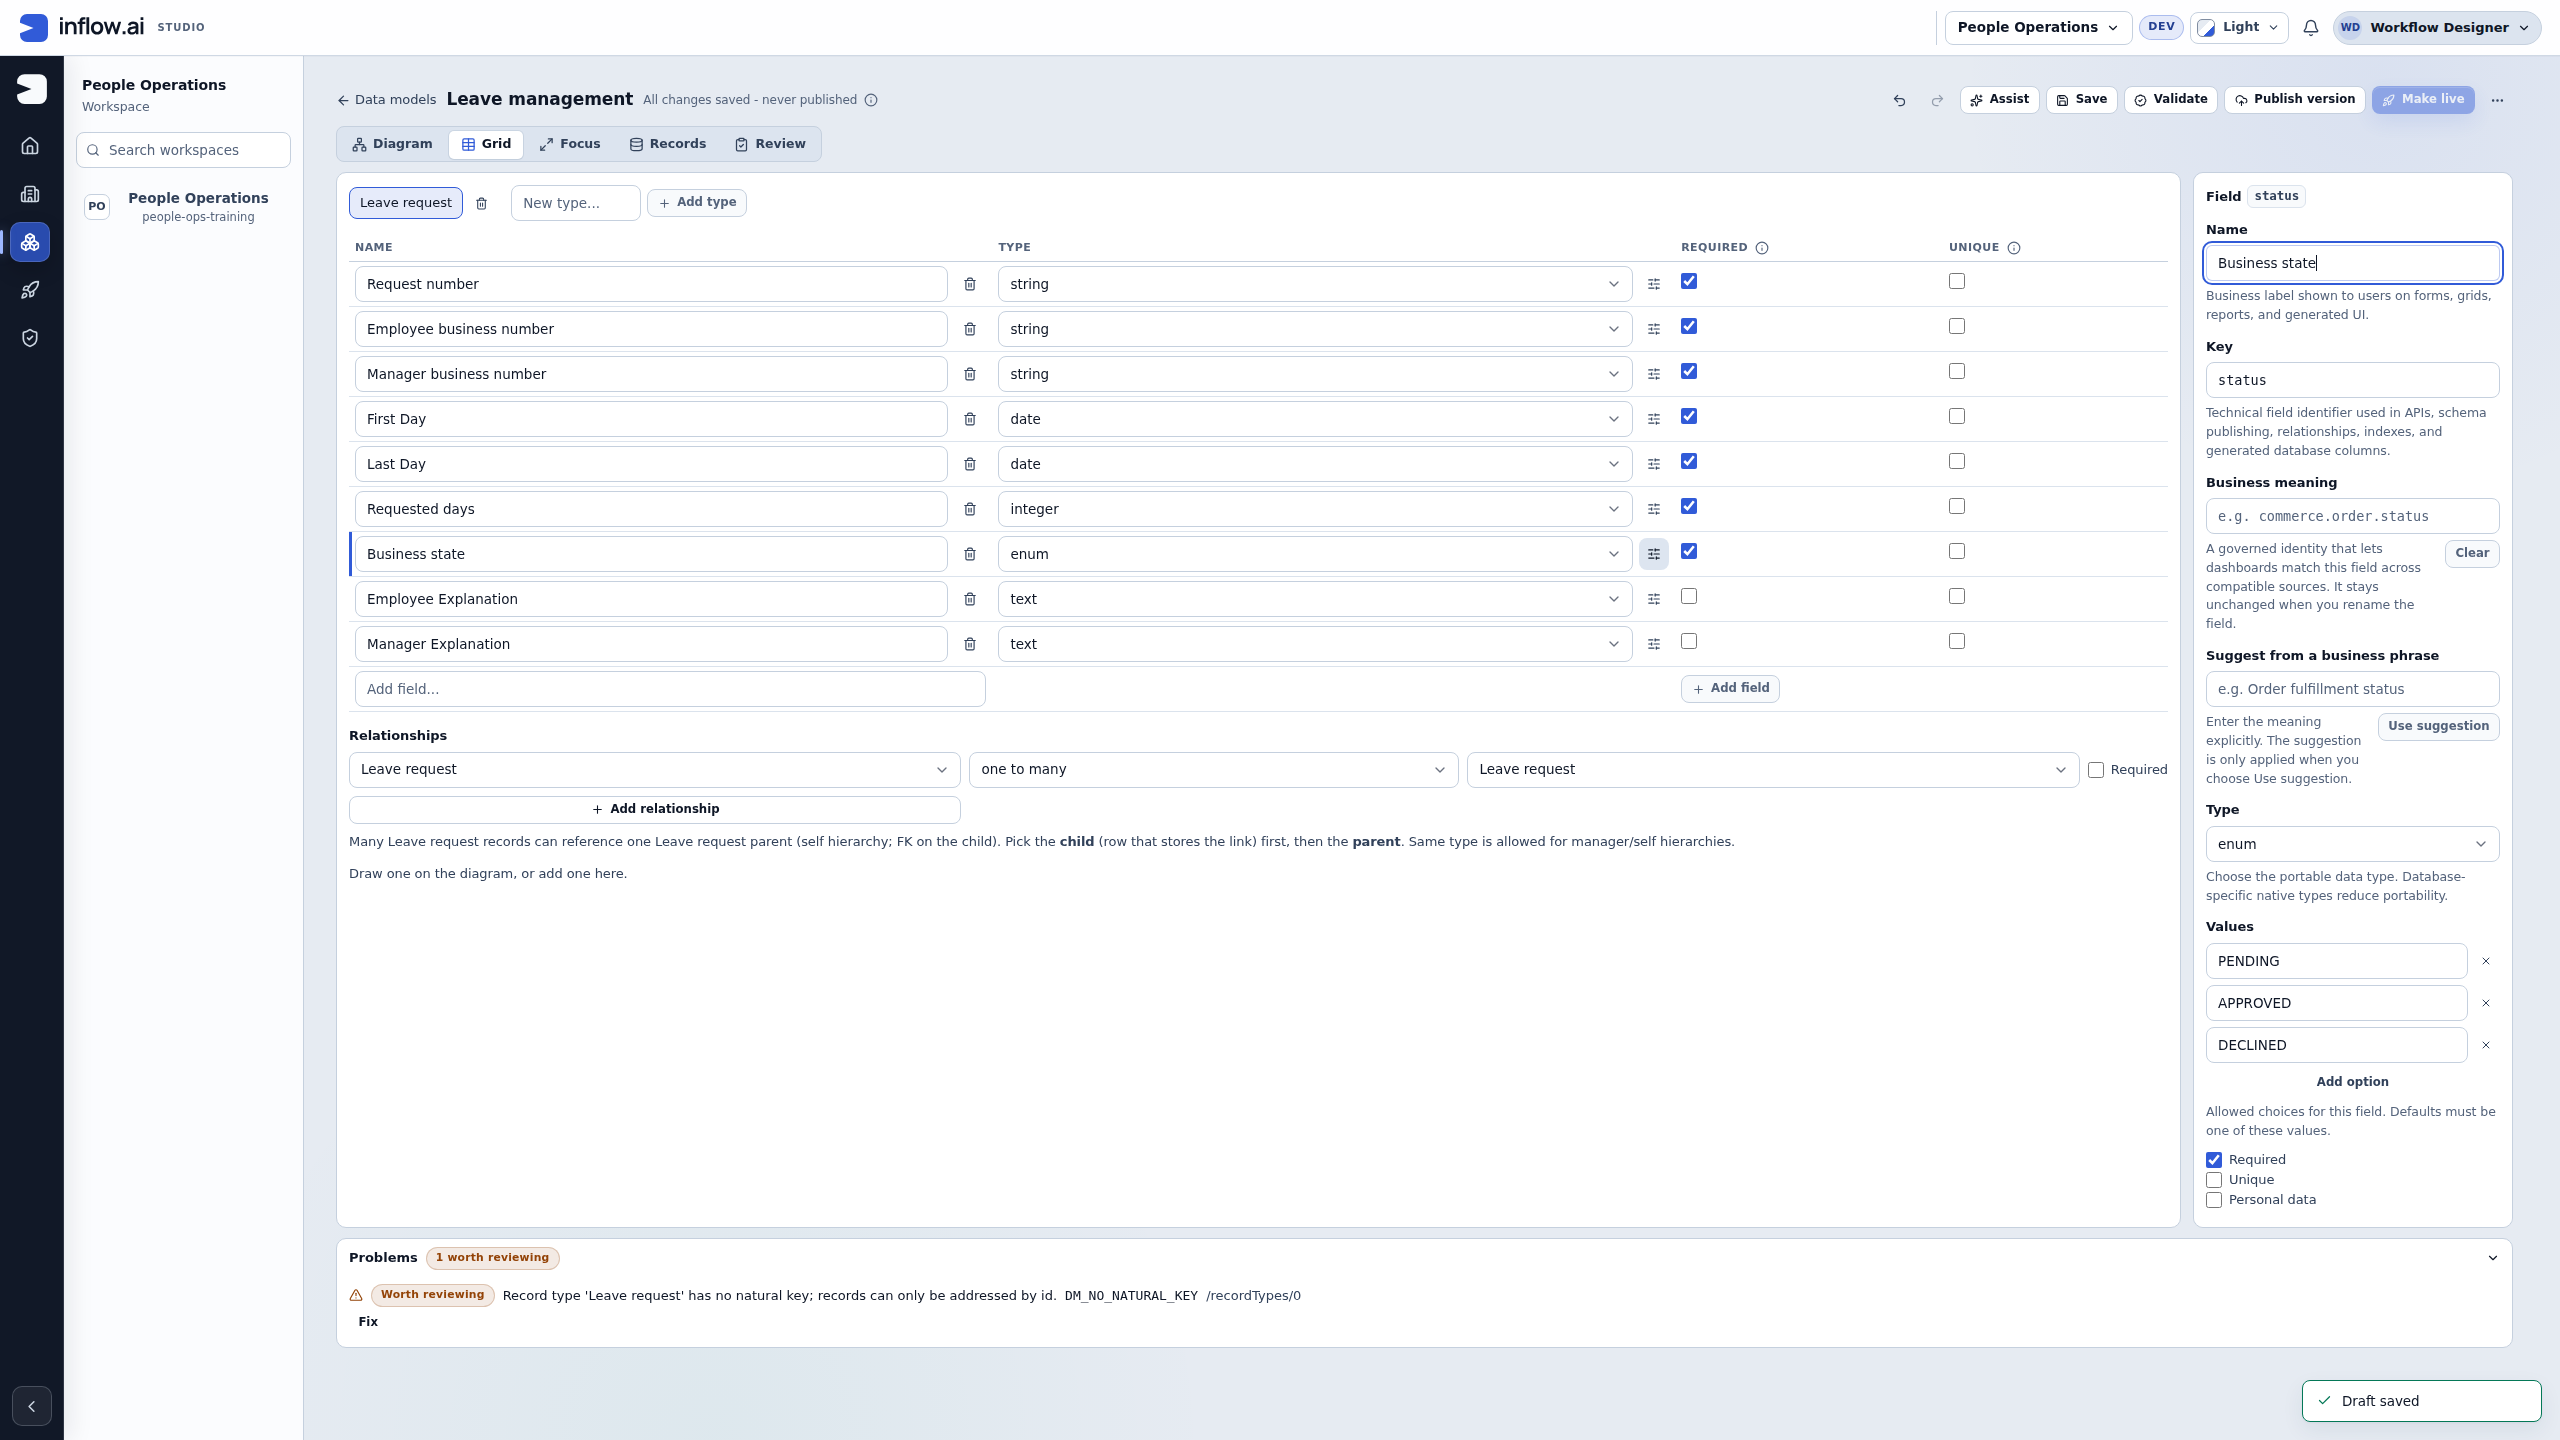
- Match each type to the value: identifiers are text, dates use date, and requested_days uses integer.
- Confirm Business state is enum with PENDING, APPROVED and DECLINED once each; compare Required with the worksheet.
- Treat Worth reviewing as an addressing advisory: records use the system ID because this type has no natural key. It is not a type error.
Check the result: The grid now matches the worksheet types and required settings. PENDING, APPROVED and DECLINED are the status values; the remaining advisory concerns record addressing, not a rejected field key.
The initial design keeps the system-generated record ID. If Worth reviewing reports no natural key, read that warning with the owner: request_id is business text and is not automatically a unique record address. Do not select a different key policy merely to remove the warning. The record's actual ID and the leave request reference have separate uses.
Step 2 — Save and publish the design
- Choose Save, then Validate.
- Read and fix the reported problems in the editor. A field without the required name or an incomplete choice list is a design issue to correct before continuing.
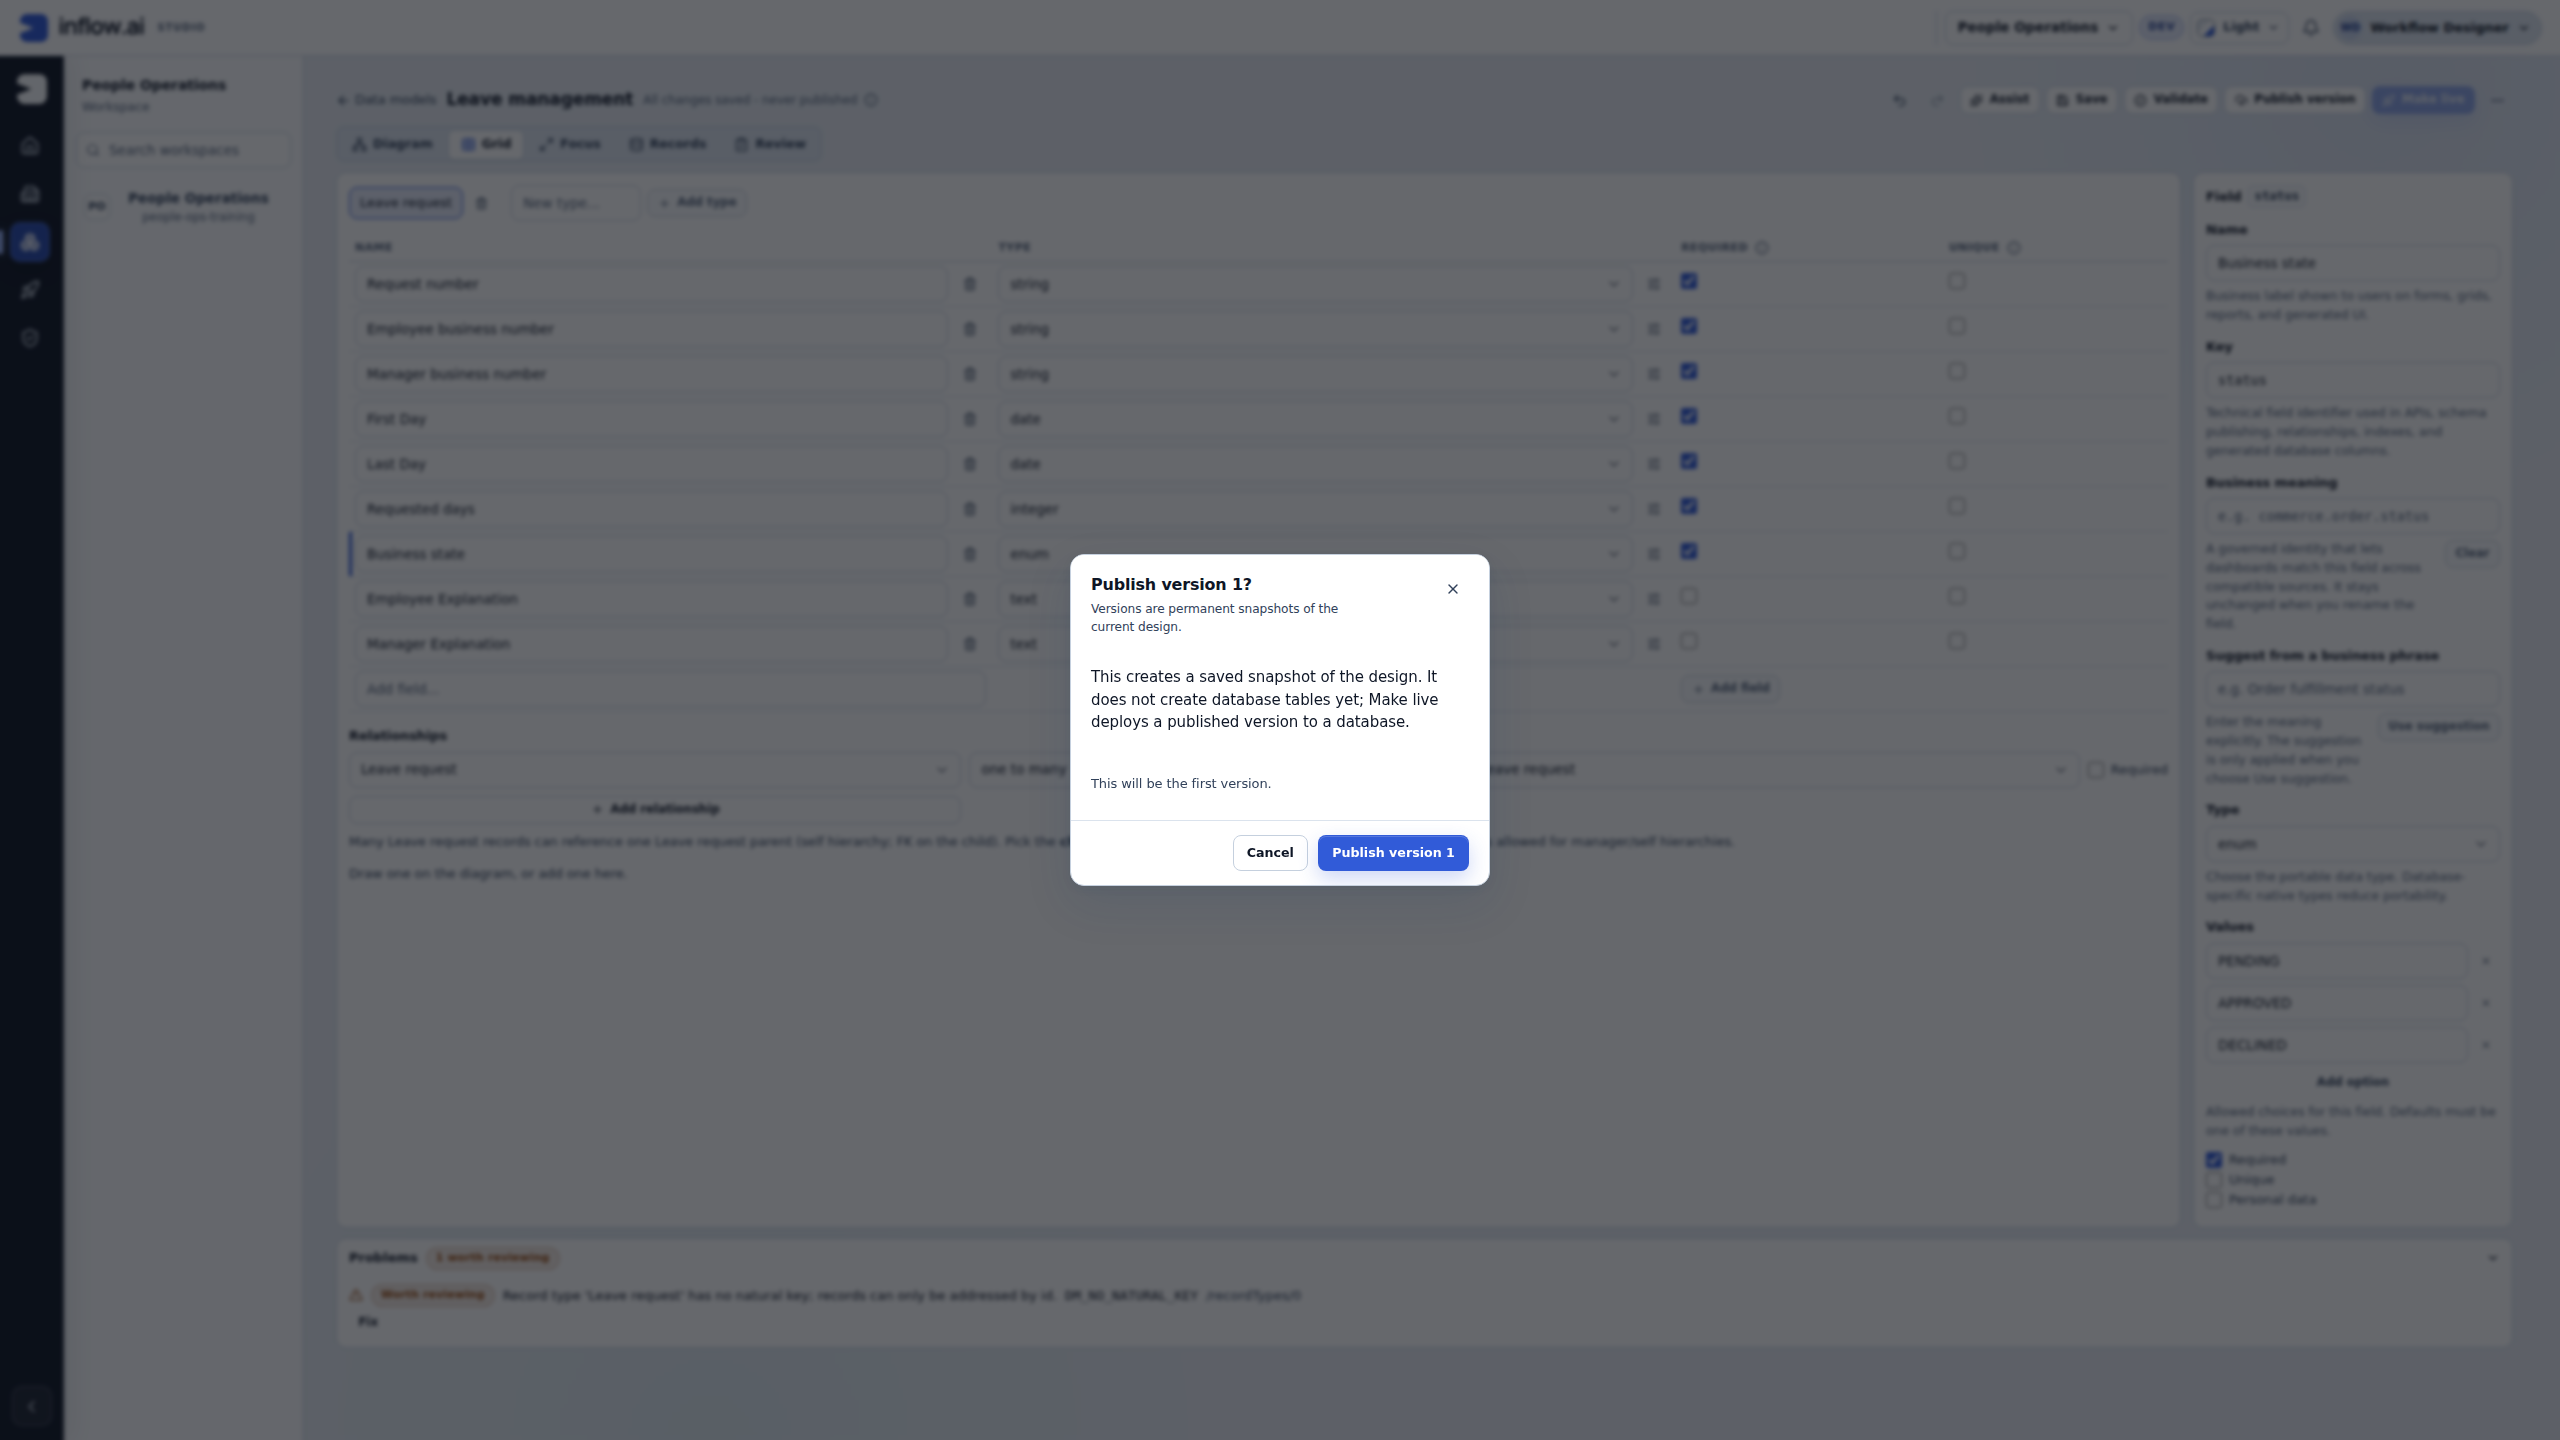
- If publication is ready, no outcome remains unresolved, and the checked draft already matches the intended published version, keep that version and continue to Make live; an unchanged draft does not need another publication. Otherwise choose Publish version and review the Publish version N? confirmation (version 1 for this model's first release). It creates a permanent snapshot of the current design. Choose Publish version N only when the displayed version and saved design are correct. This logical-version confirmation does not show a dependent-impact review; the later Make live workflow has its own database-impact review and dependent-update confirmation.
- Read the published-version status.
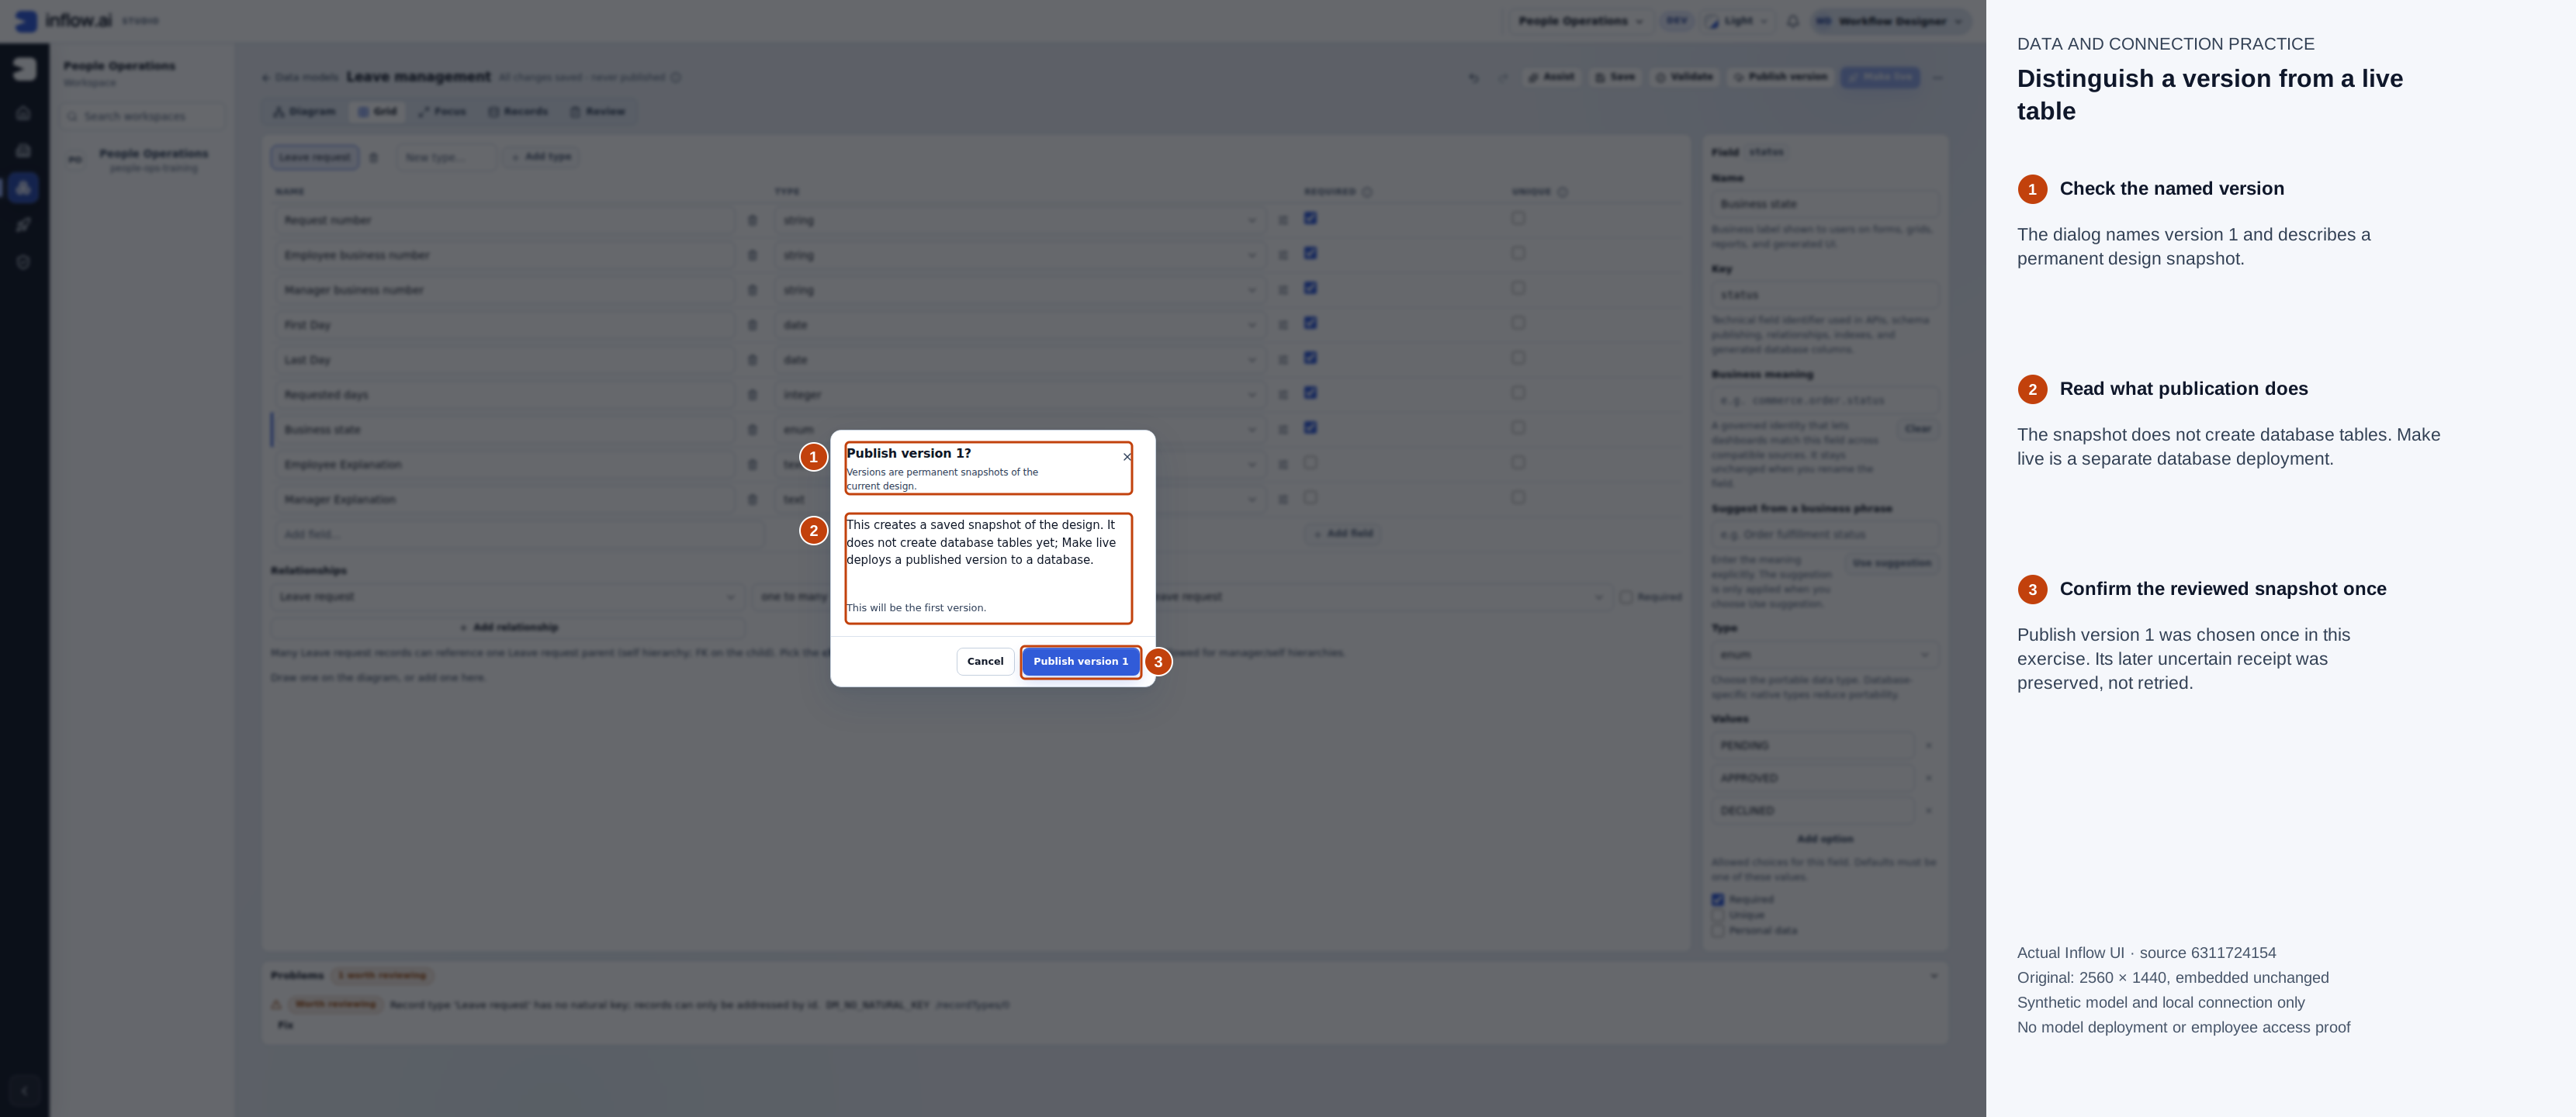
Actual native 2560×1440 capture, 15 November 2026, source 6311724154. Numbered outlines and the side legend are guidance; open the original or open the full-size guide. This version action was submitted once; Make live was not performed in this run.
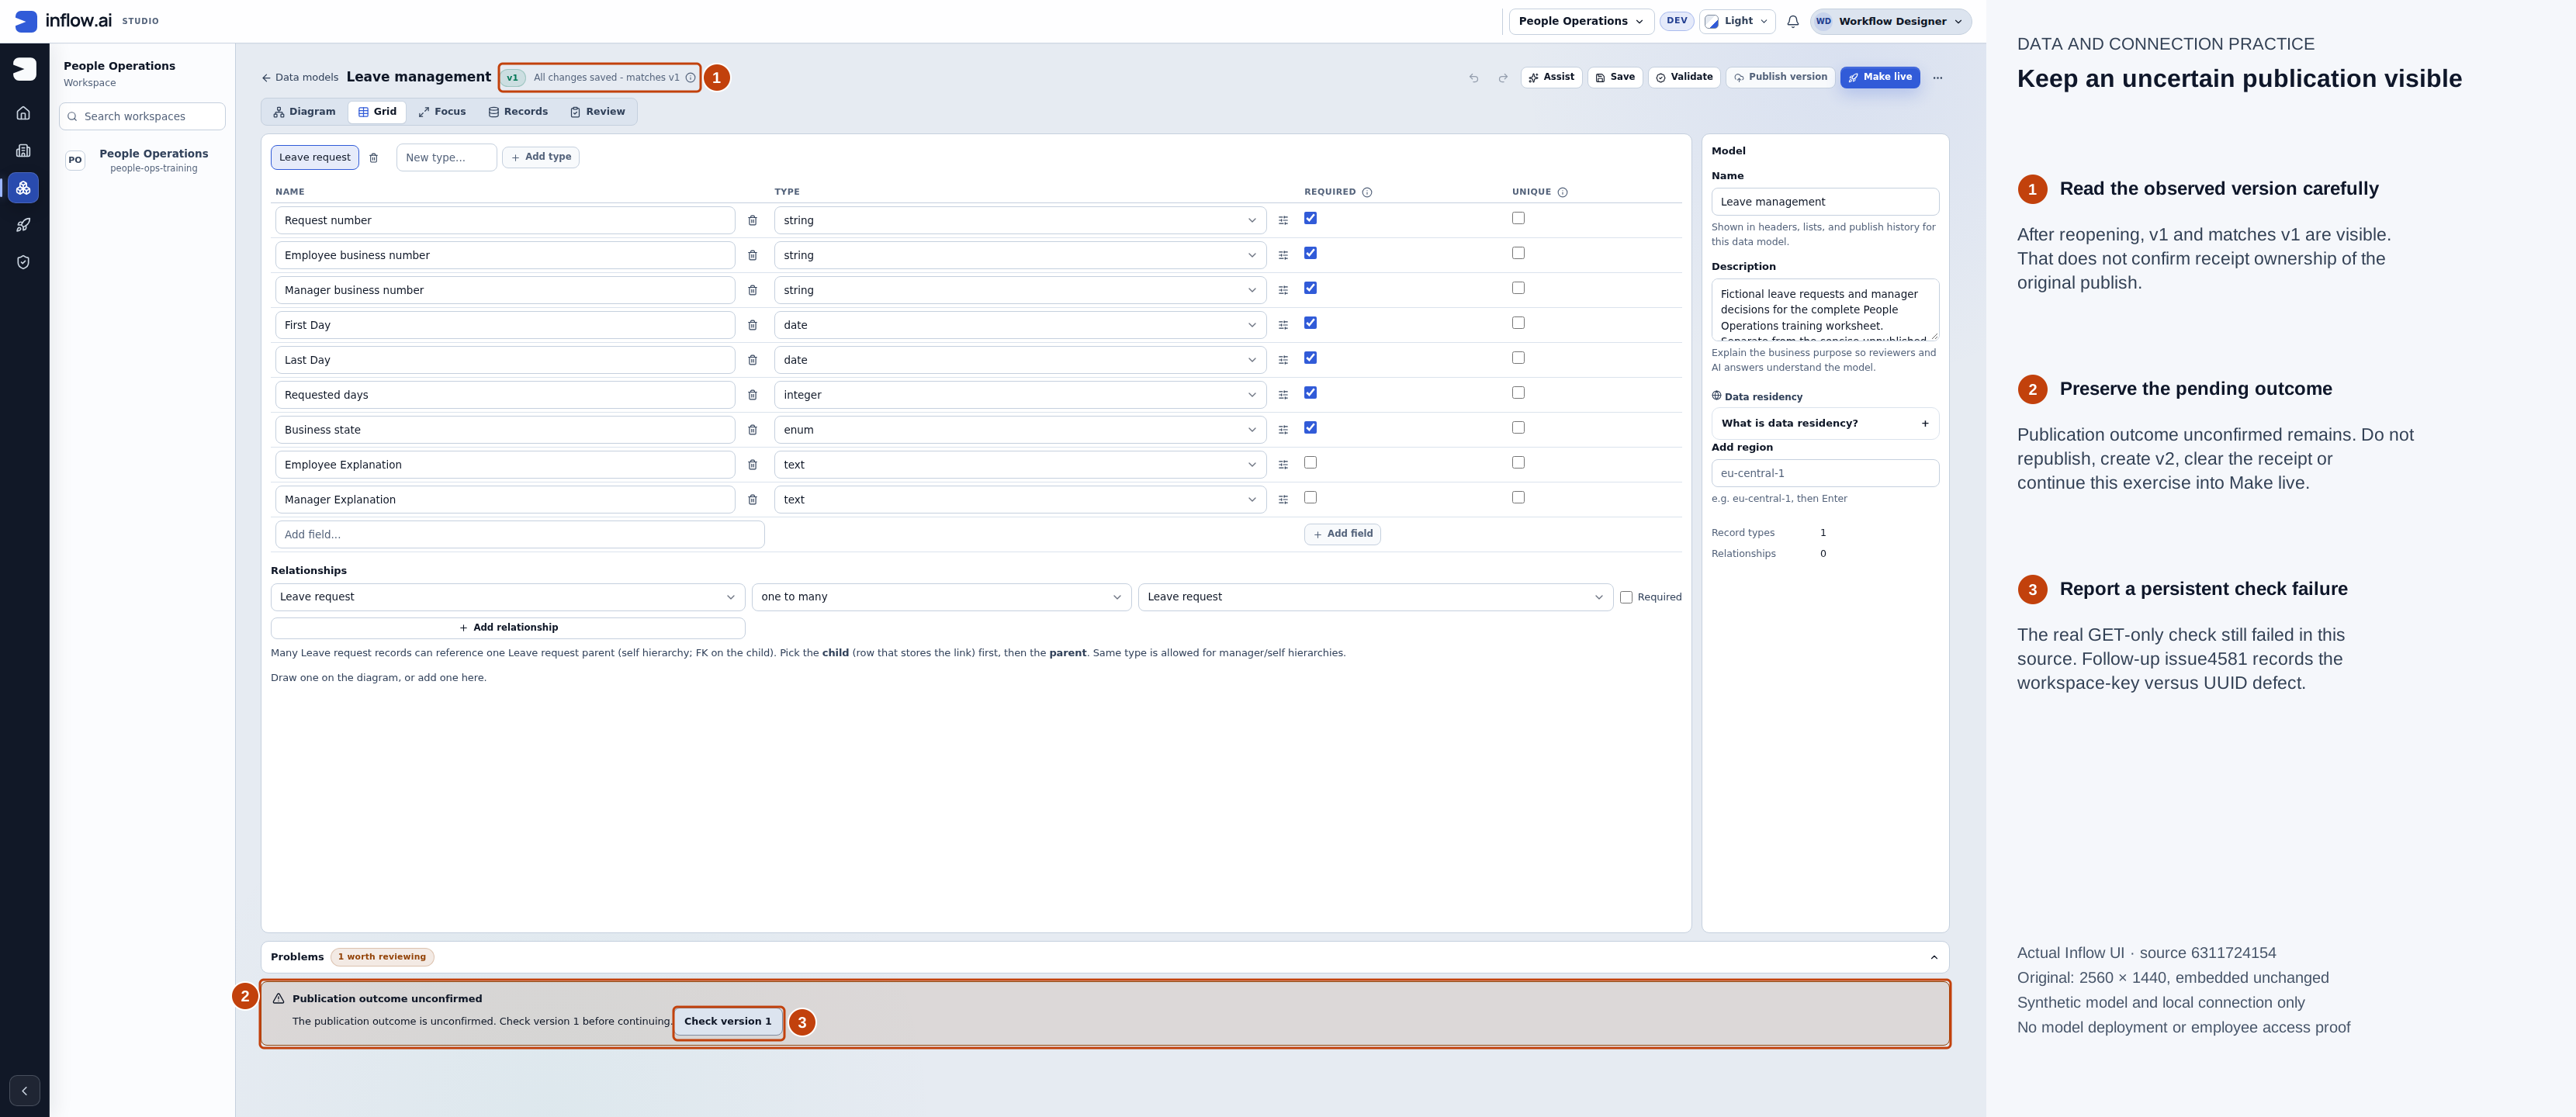
Actual native 2560×1440 capture, 15 November 2026, source 6311724154. Numbered outlines and the side legend are guidance; open the original or open the full-size guide. This is a recovery state, not confirmation of the original publication receipt.
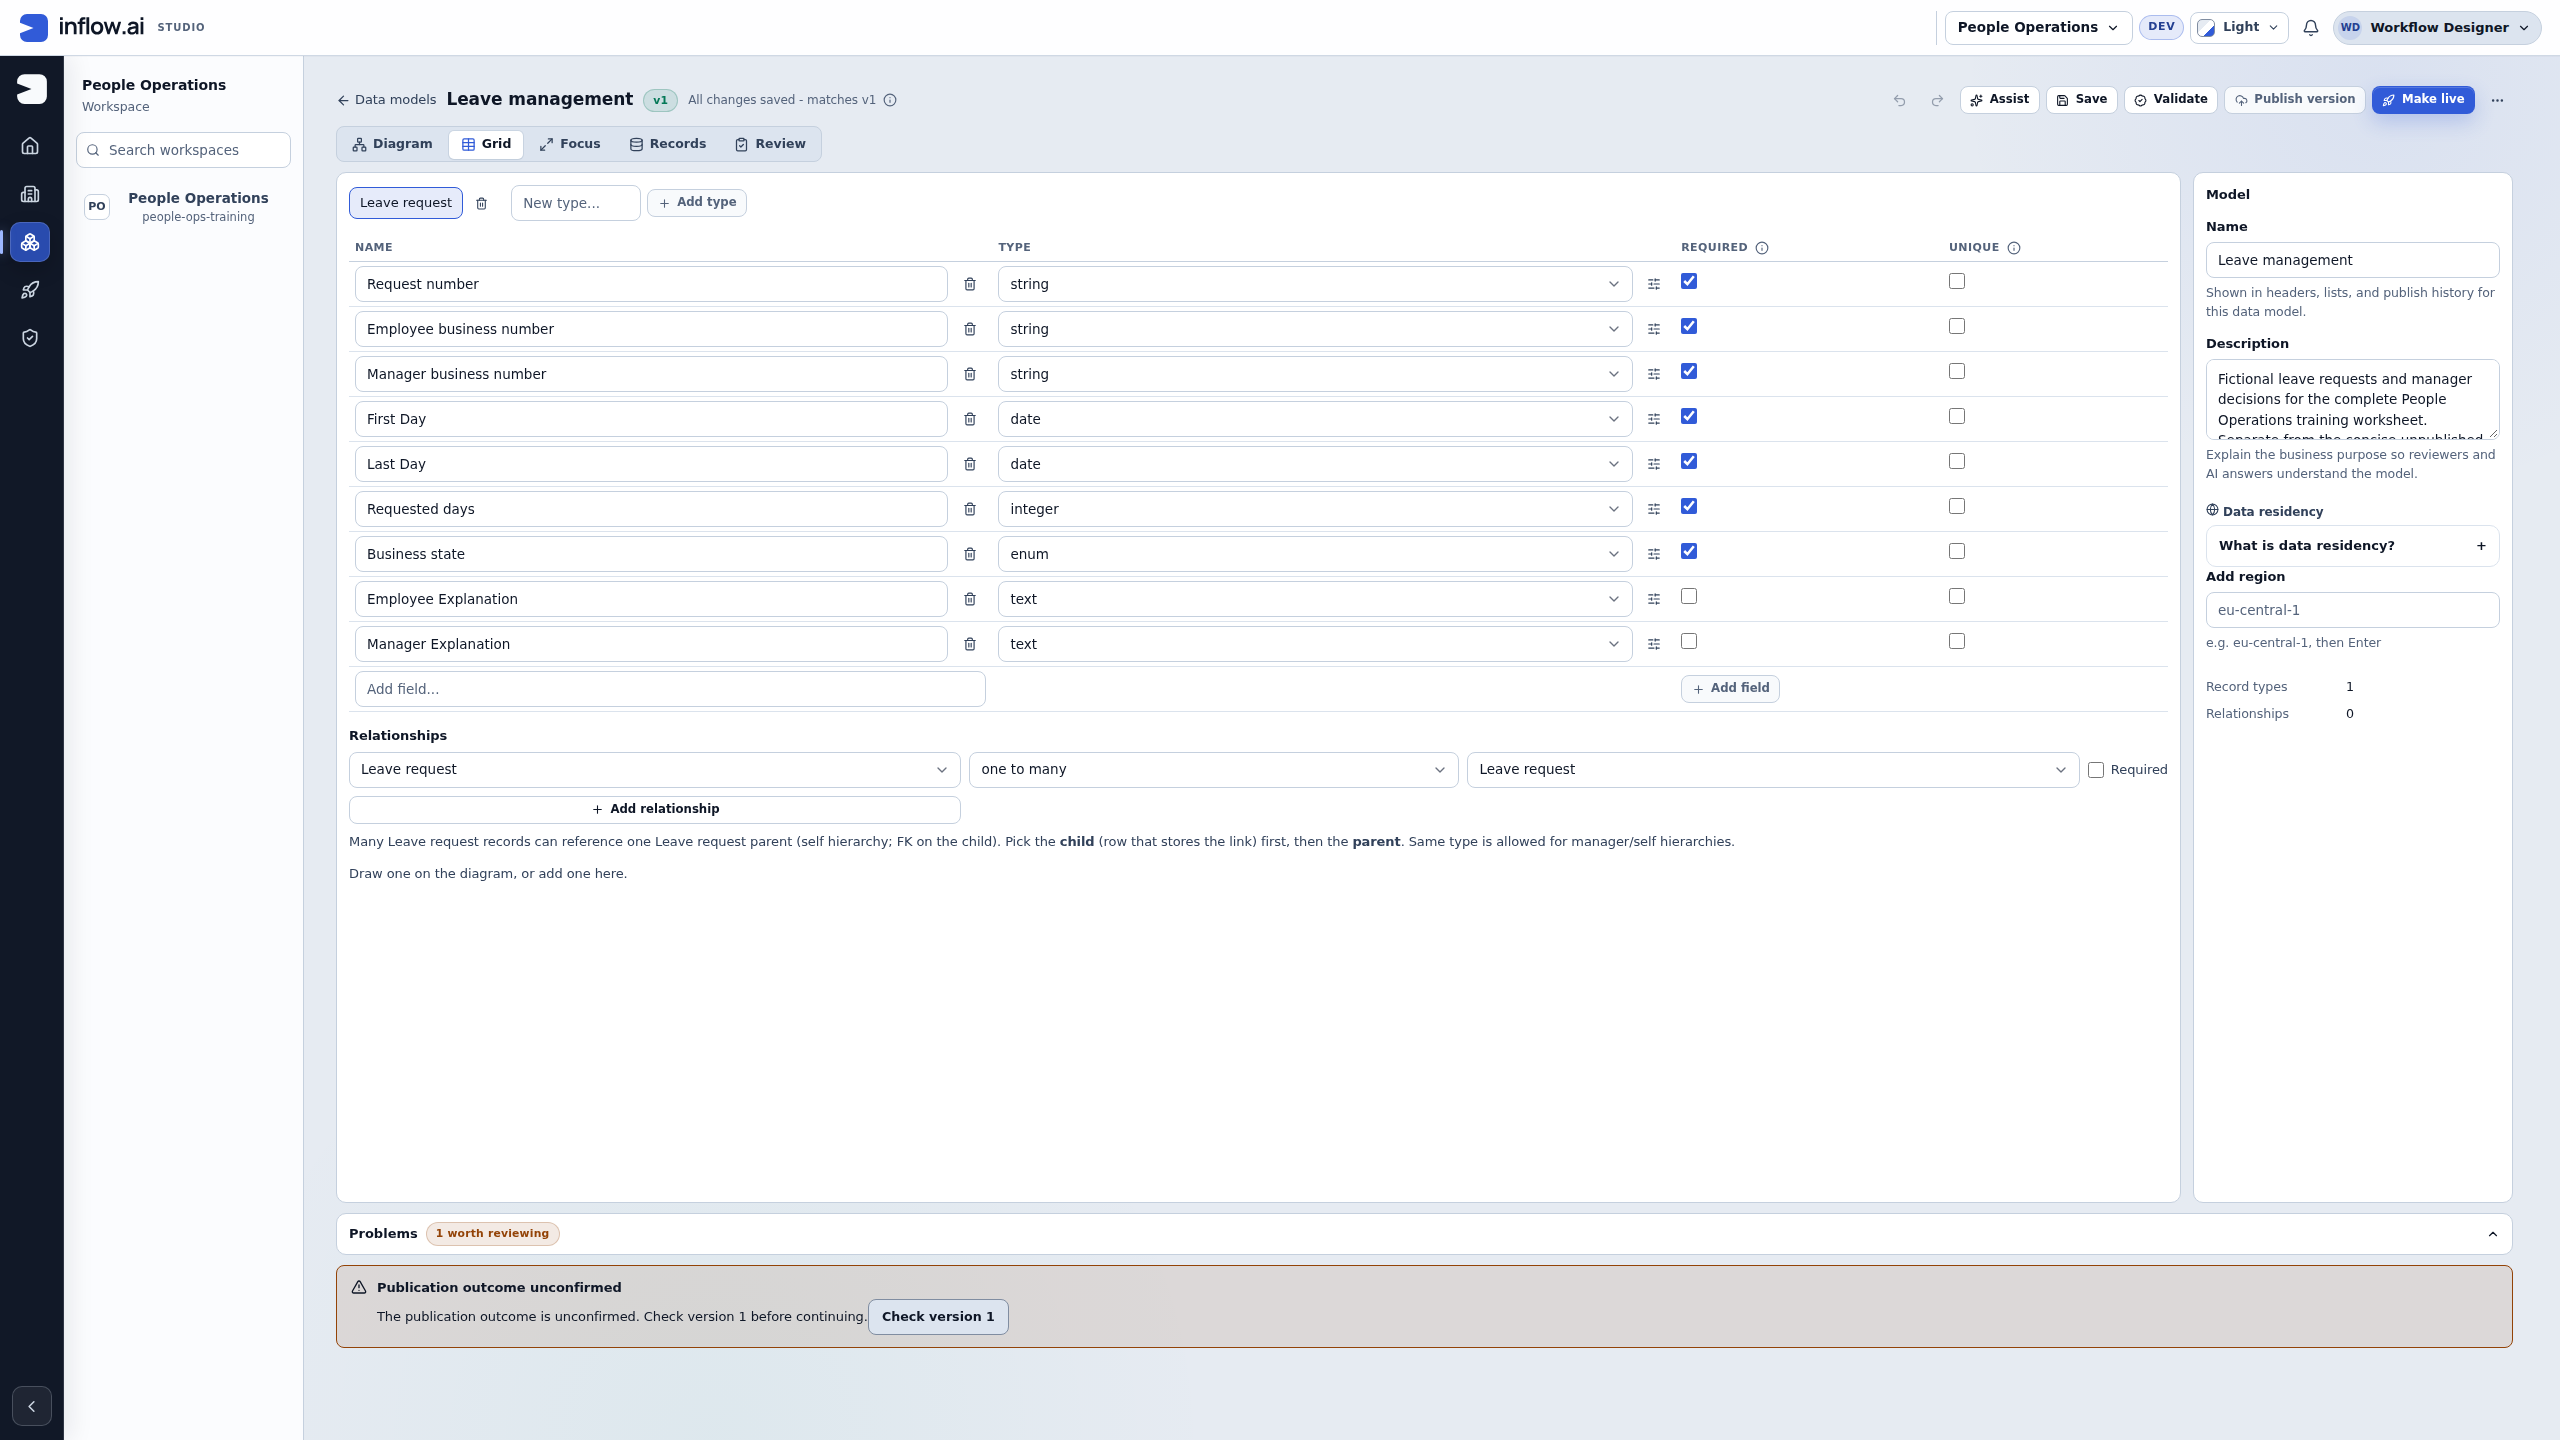
Current-build stop point: On this captured source, the workspace-key URL and canonical workspace UUID are compared incorrectly during publication recovery (issue #4581). The real read-only check still says it cannot confirm the target, even though v1 is readable. Keep the pending receipt and do not publish again, create v2 or clear browser storage. Follow the publication-recovery procedure and stop before Make live until it is resolved. The following historical steps do not mean this current run completed them.
What you should see: a fixed published copy of the design. This is different from the editable draft. The model is not yet live in the selected database merely because publication succeeded.
If somebody else changed the draft, reload and compare their changes before saving again. Keep the useful work; do not discard it just to repeat these steps.
Step 3 — Make the model live
Use the published Training PostgreSQL connection and the empty cf3_manuals_leave schema prepared by the administrator for this exercise. If they are not ready, first follow the illustrated connection setup. Keep an existing correct connection rather than creating another copy.
- Choose Make live, then read Check the model. The initial design uses a system-generated ID; retain the deliberate natural-key advisory described above.
- Under Choose where it lives, explicitly select Training PostgreSQL (training_postgres) and the approved cf3_manuals_leave namespace. Select the inspected schema when a list is offered, or enter it when the page offers a text field. Do not use the first connection or public schema by default.
- Read all of Review the database changes, scrolling through the complete plan. This first exercise has ten statements, including the leave-request table and Inflow's audit/sample-data bookkeeping. It has no proposed drop or rename. Review your actual plan rather than expecting every later update to look the same.
- In Confirm & apply, check the connection and schema again and choose Apply to database.
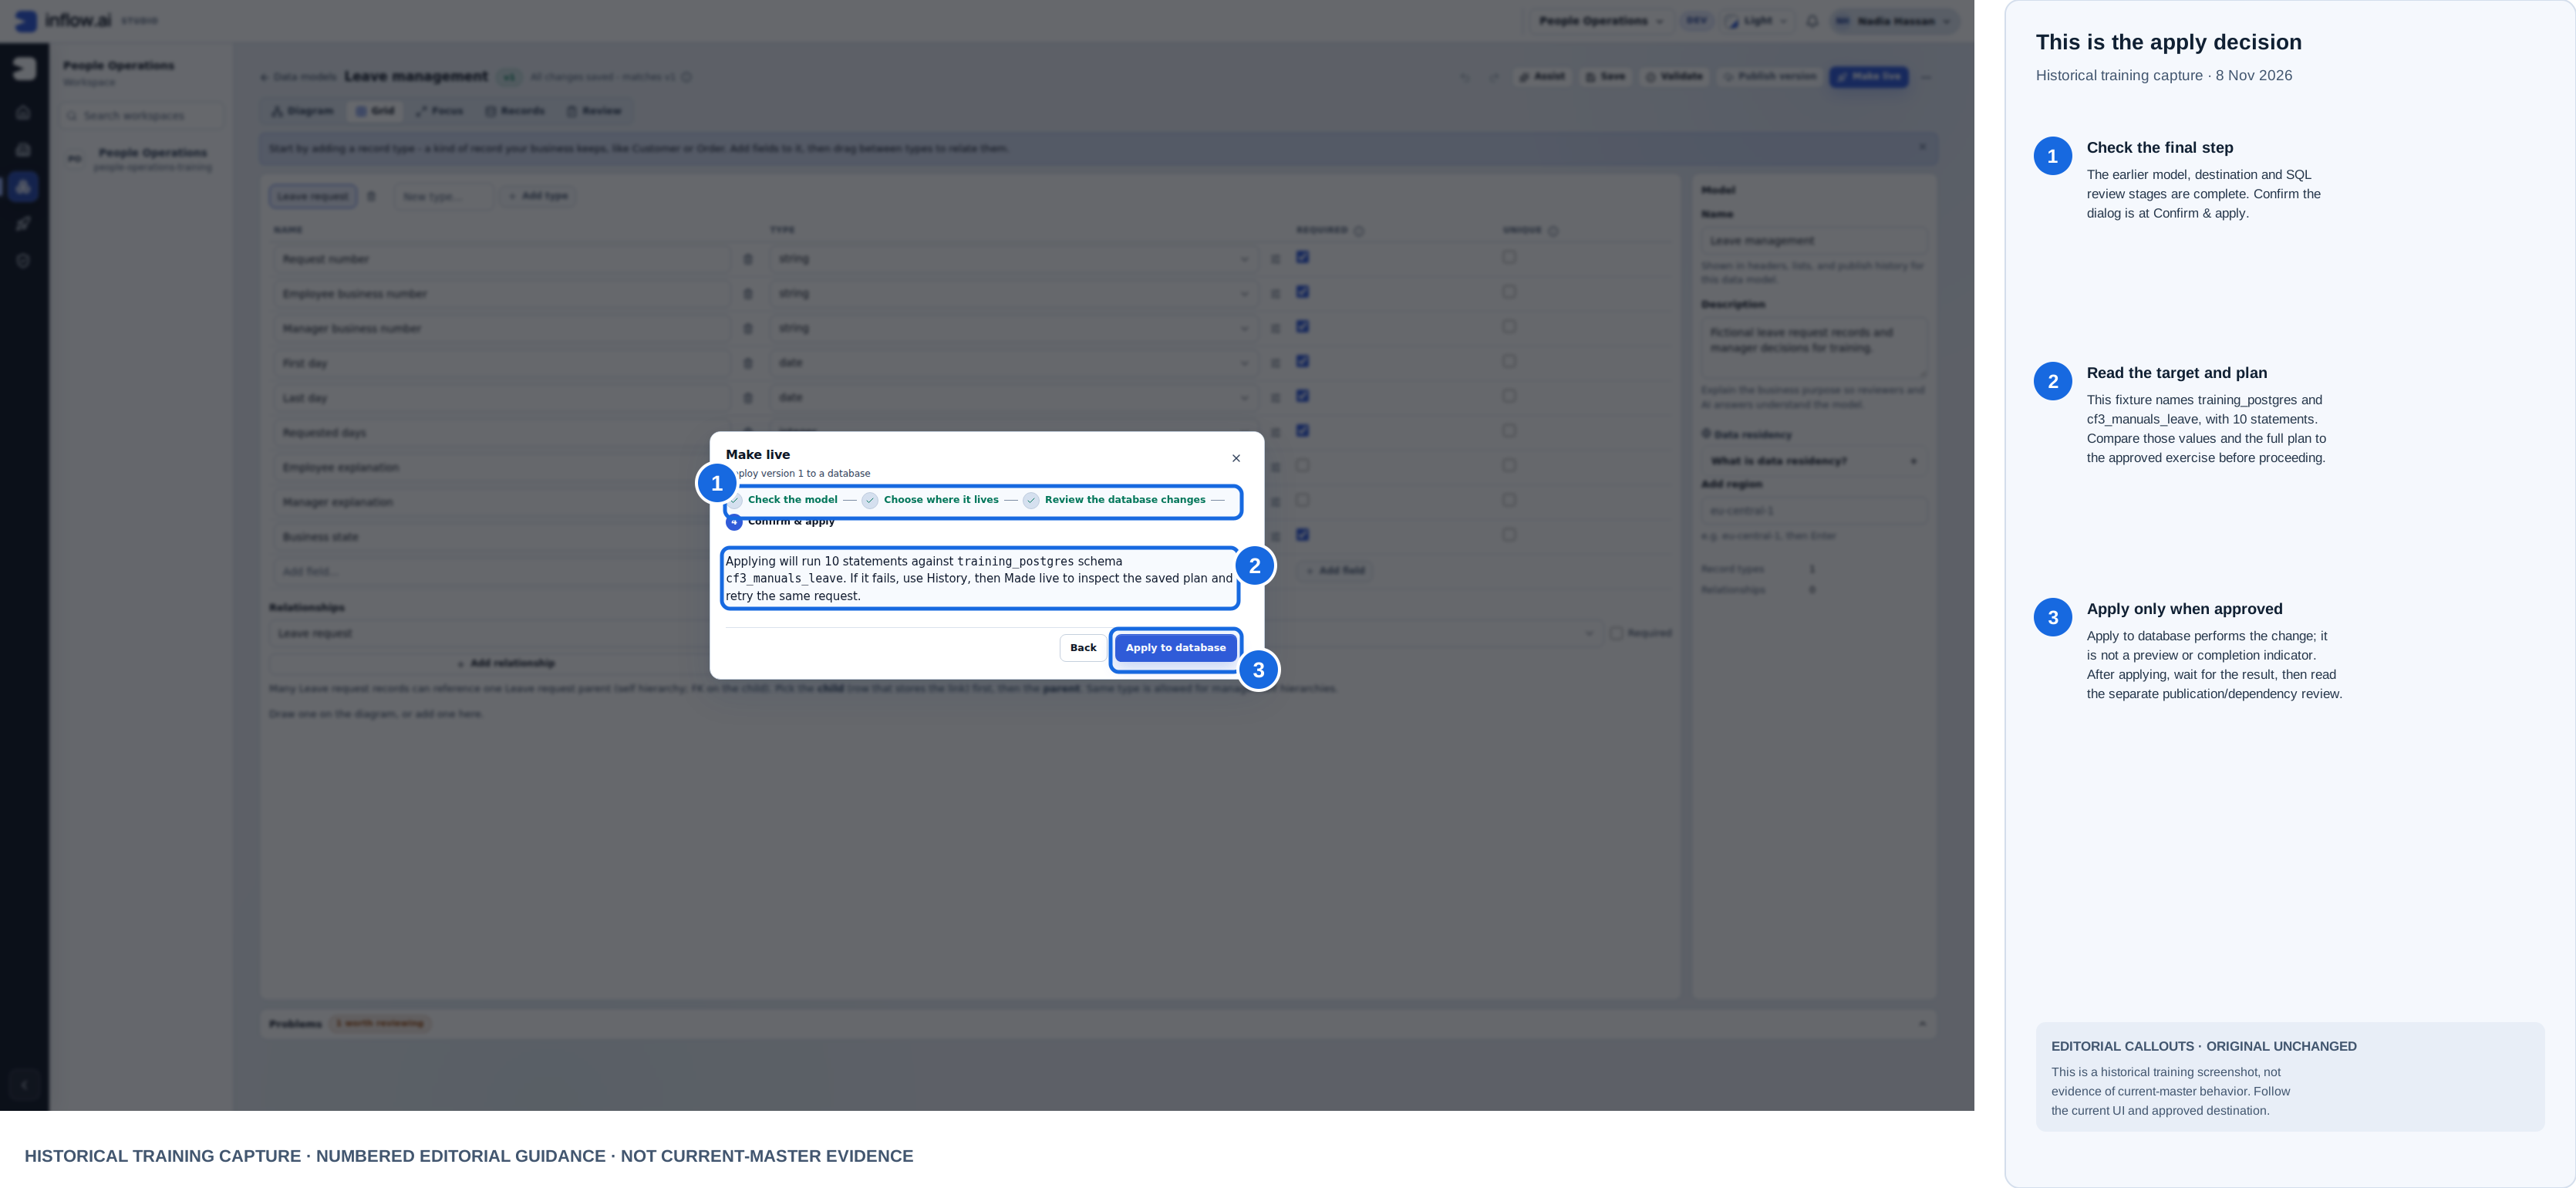
Historical training capture from 8 November 2026. Blue outlines and numbered labels are editorial guidance; the raw screenshot is unchanged here. This composite is not current-master evidence.
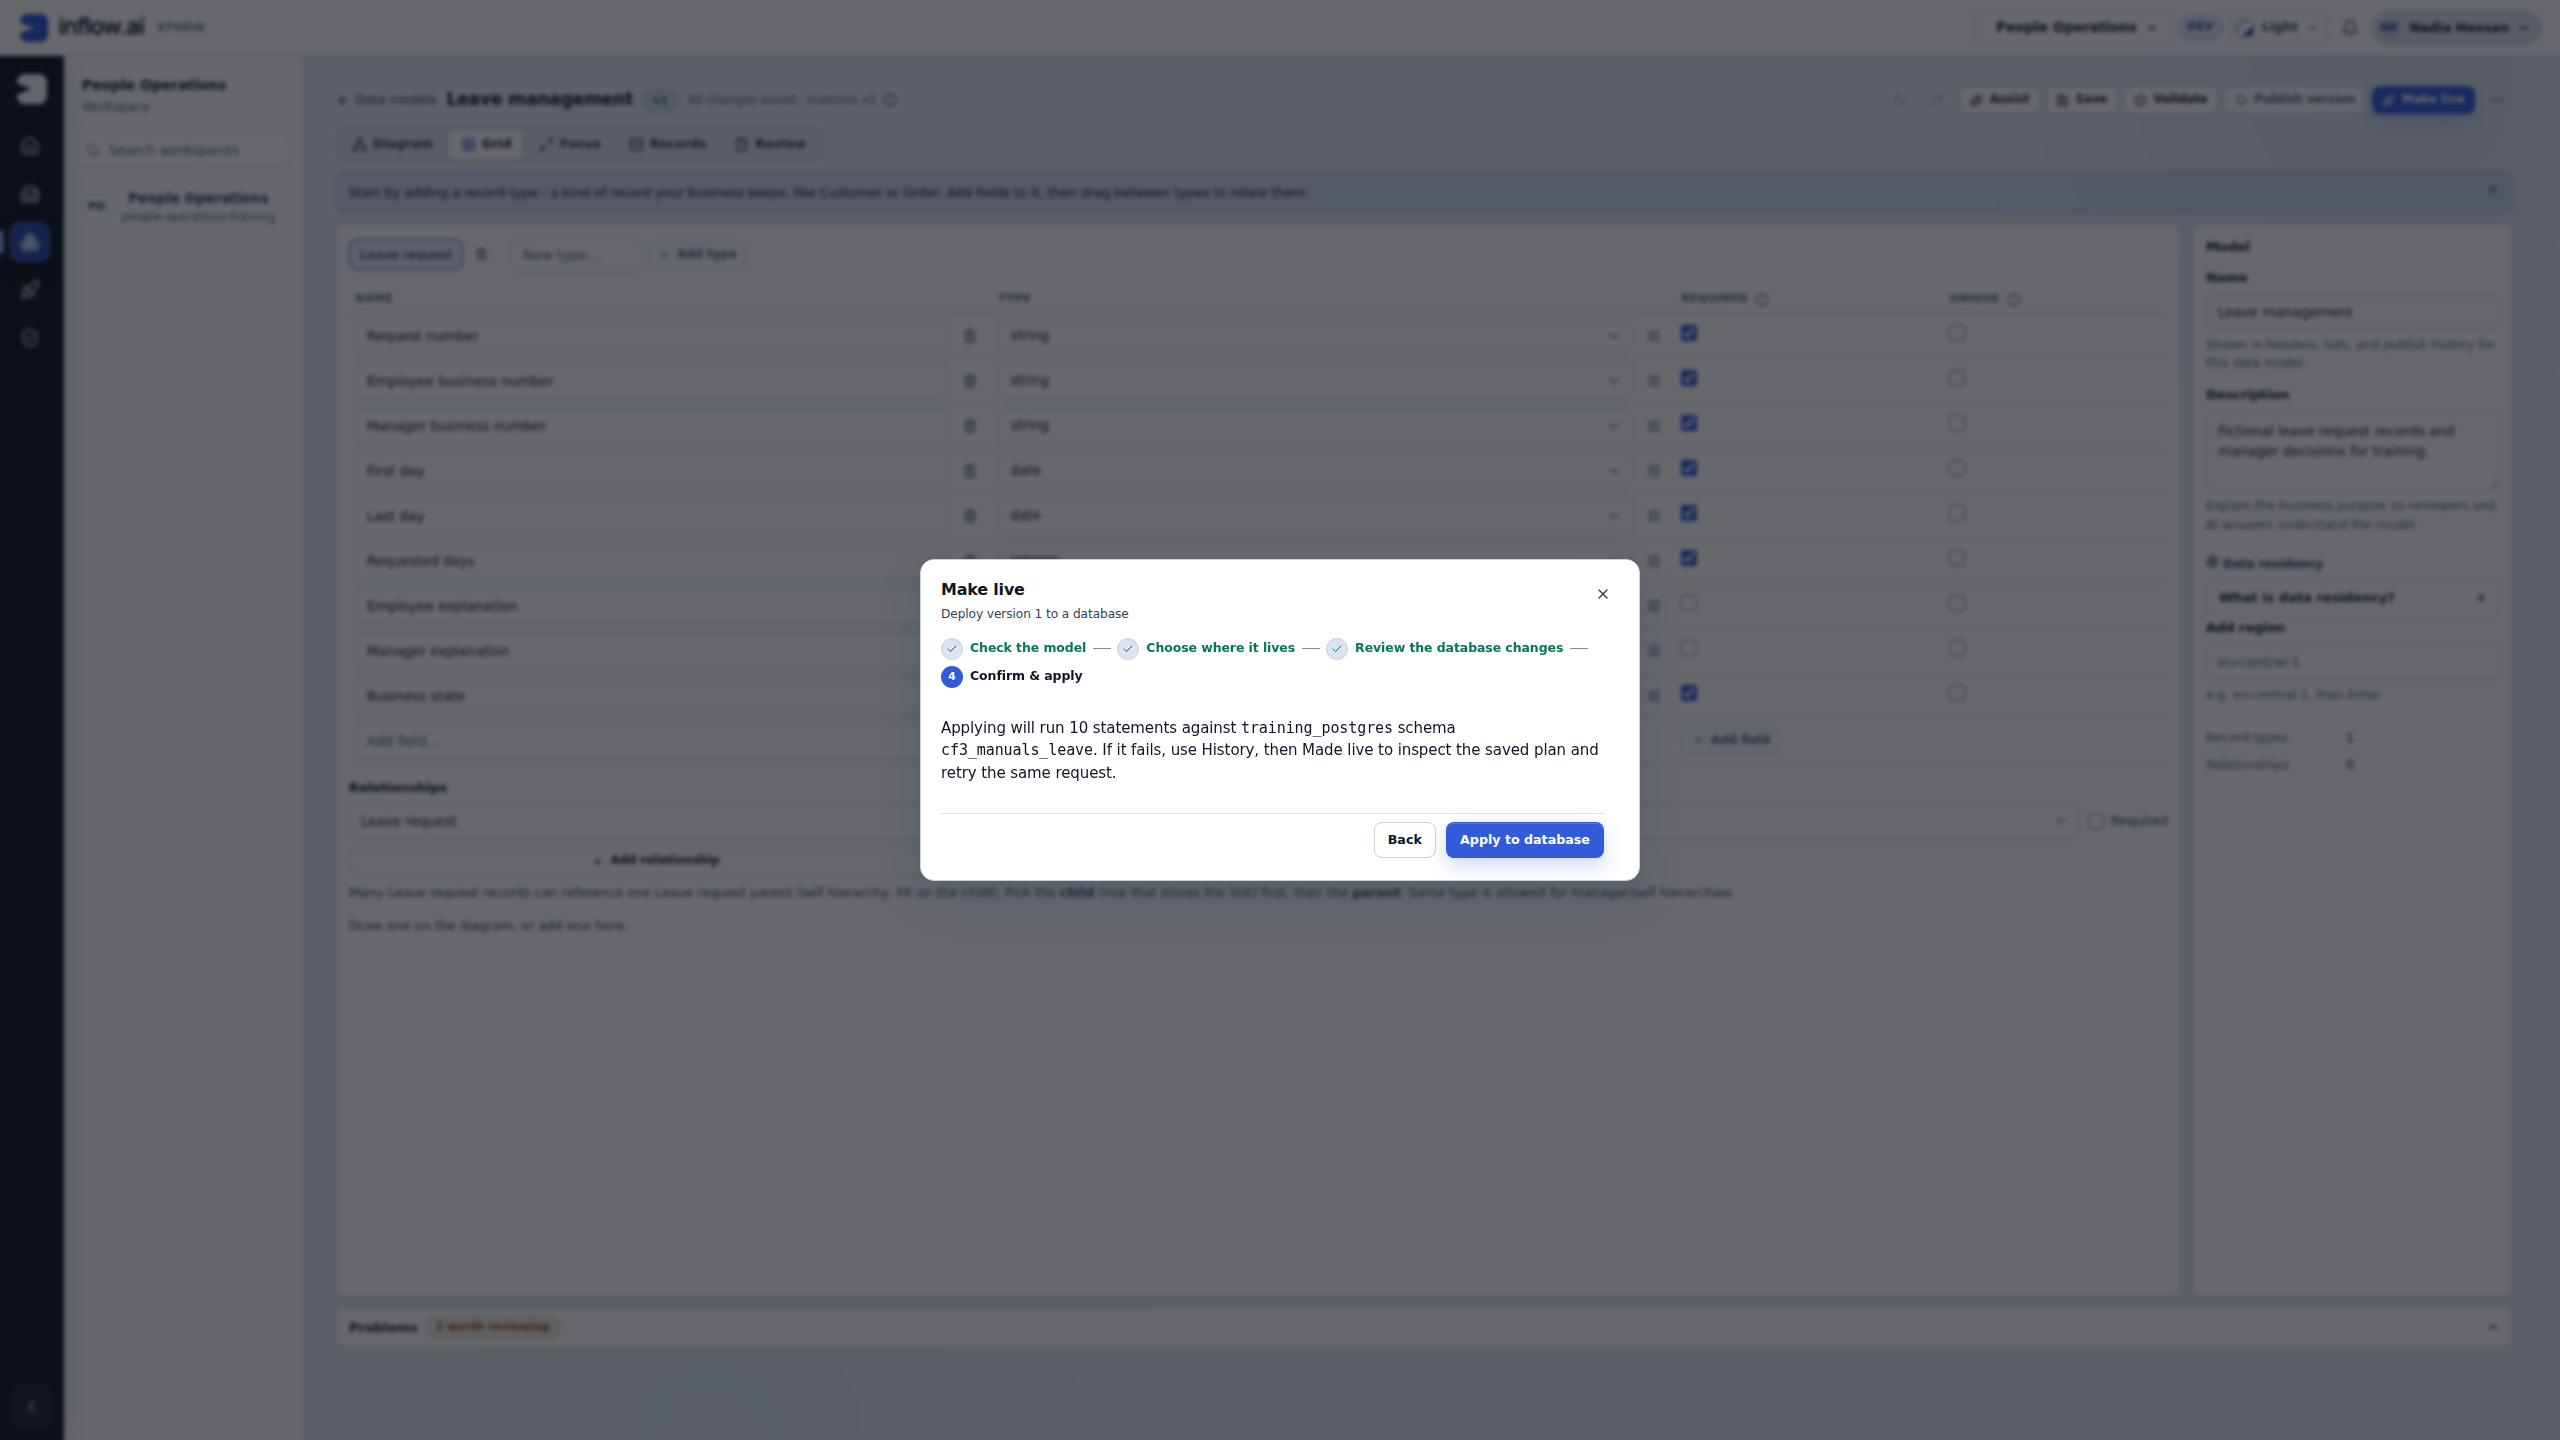
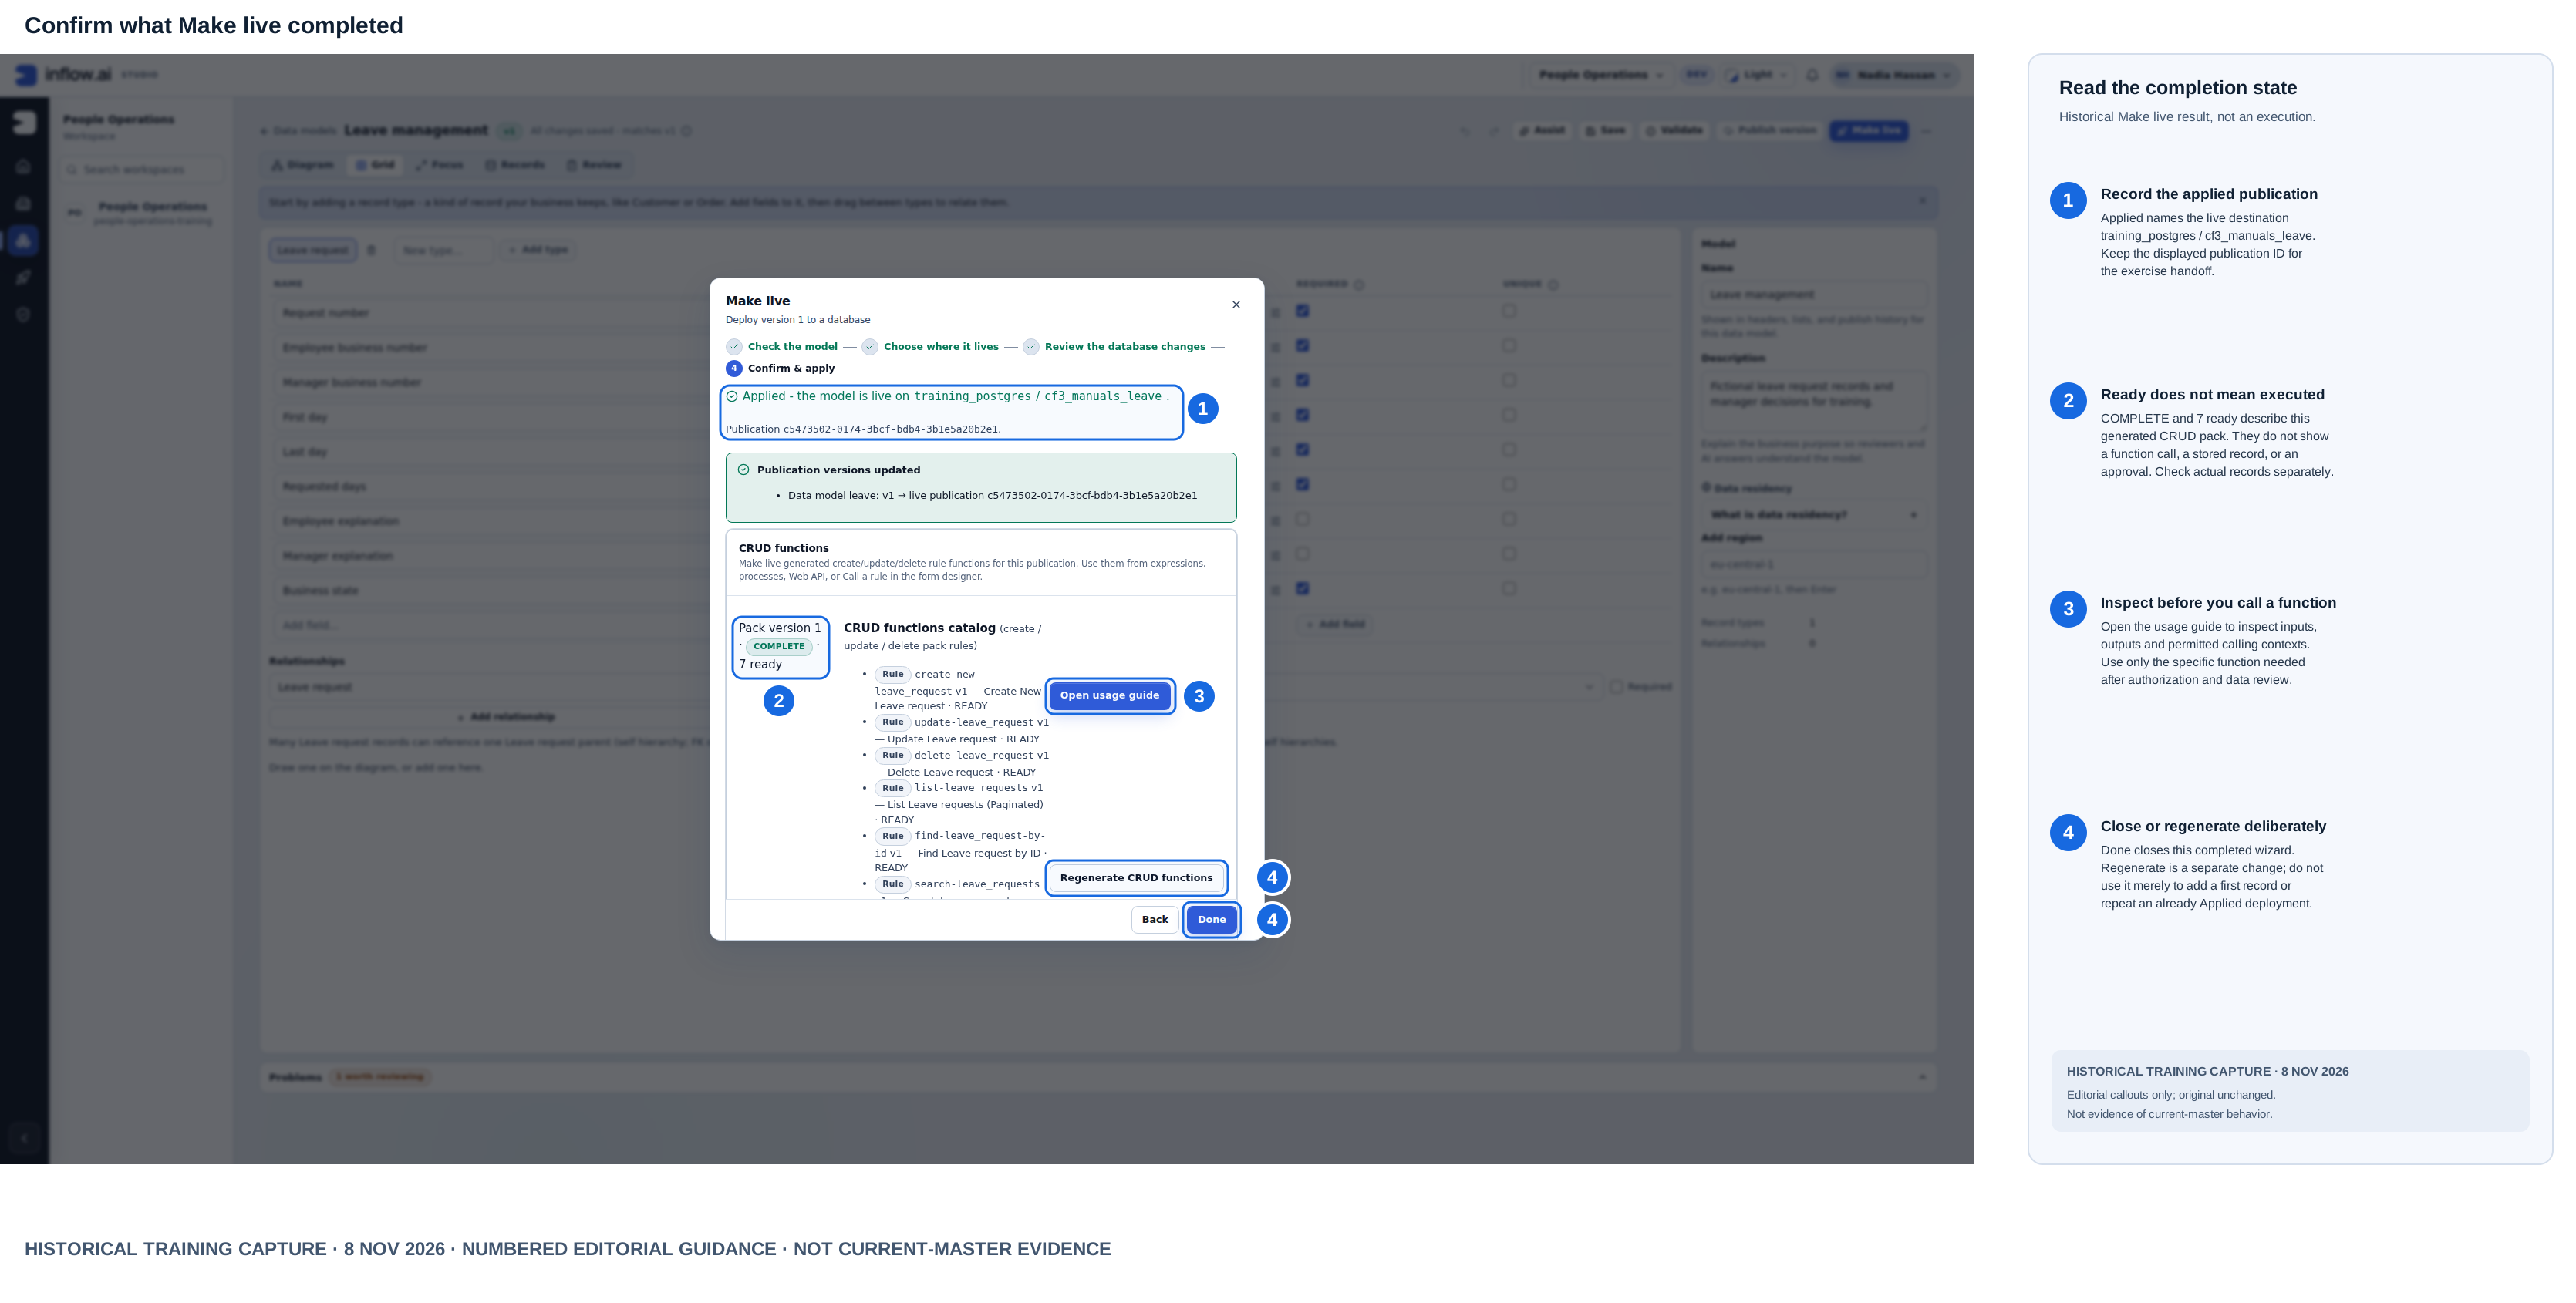
Pause at the actual apply decision: Confirm the step says Confirm & apply. This fixture shows training_postgres, cf3_manuals_leave, and ten statements; verify the actual current dialog and reviewed plan instead of assuming those values apply to another deployment. Apply to database performs the change. Wait for its result and then read the separate publication/dependency review. If an attempt fails, inspect the saved attempt before deciding whether to retry; do not treat a failure as proof that nothing changed. 5. Read the additional Publication review after the SQL plan. This fresh training model reports Nothing else changes: no screens, rules, or pinned versions are flagged, and nothing is rewritten. Treat these as findings for this fixture only. Compare the actual review with the intended change; if a dependency or rewrite is listed, understand it with its owner. Cancel or wait when the impact is unexpected, and use Refresh analysis if the design or dependencies changed while reviewing. 6. Wait for Applied and check the named live destination. The result also shows the generated functions pack. Choose Done; deployment does not create a leave request.
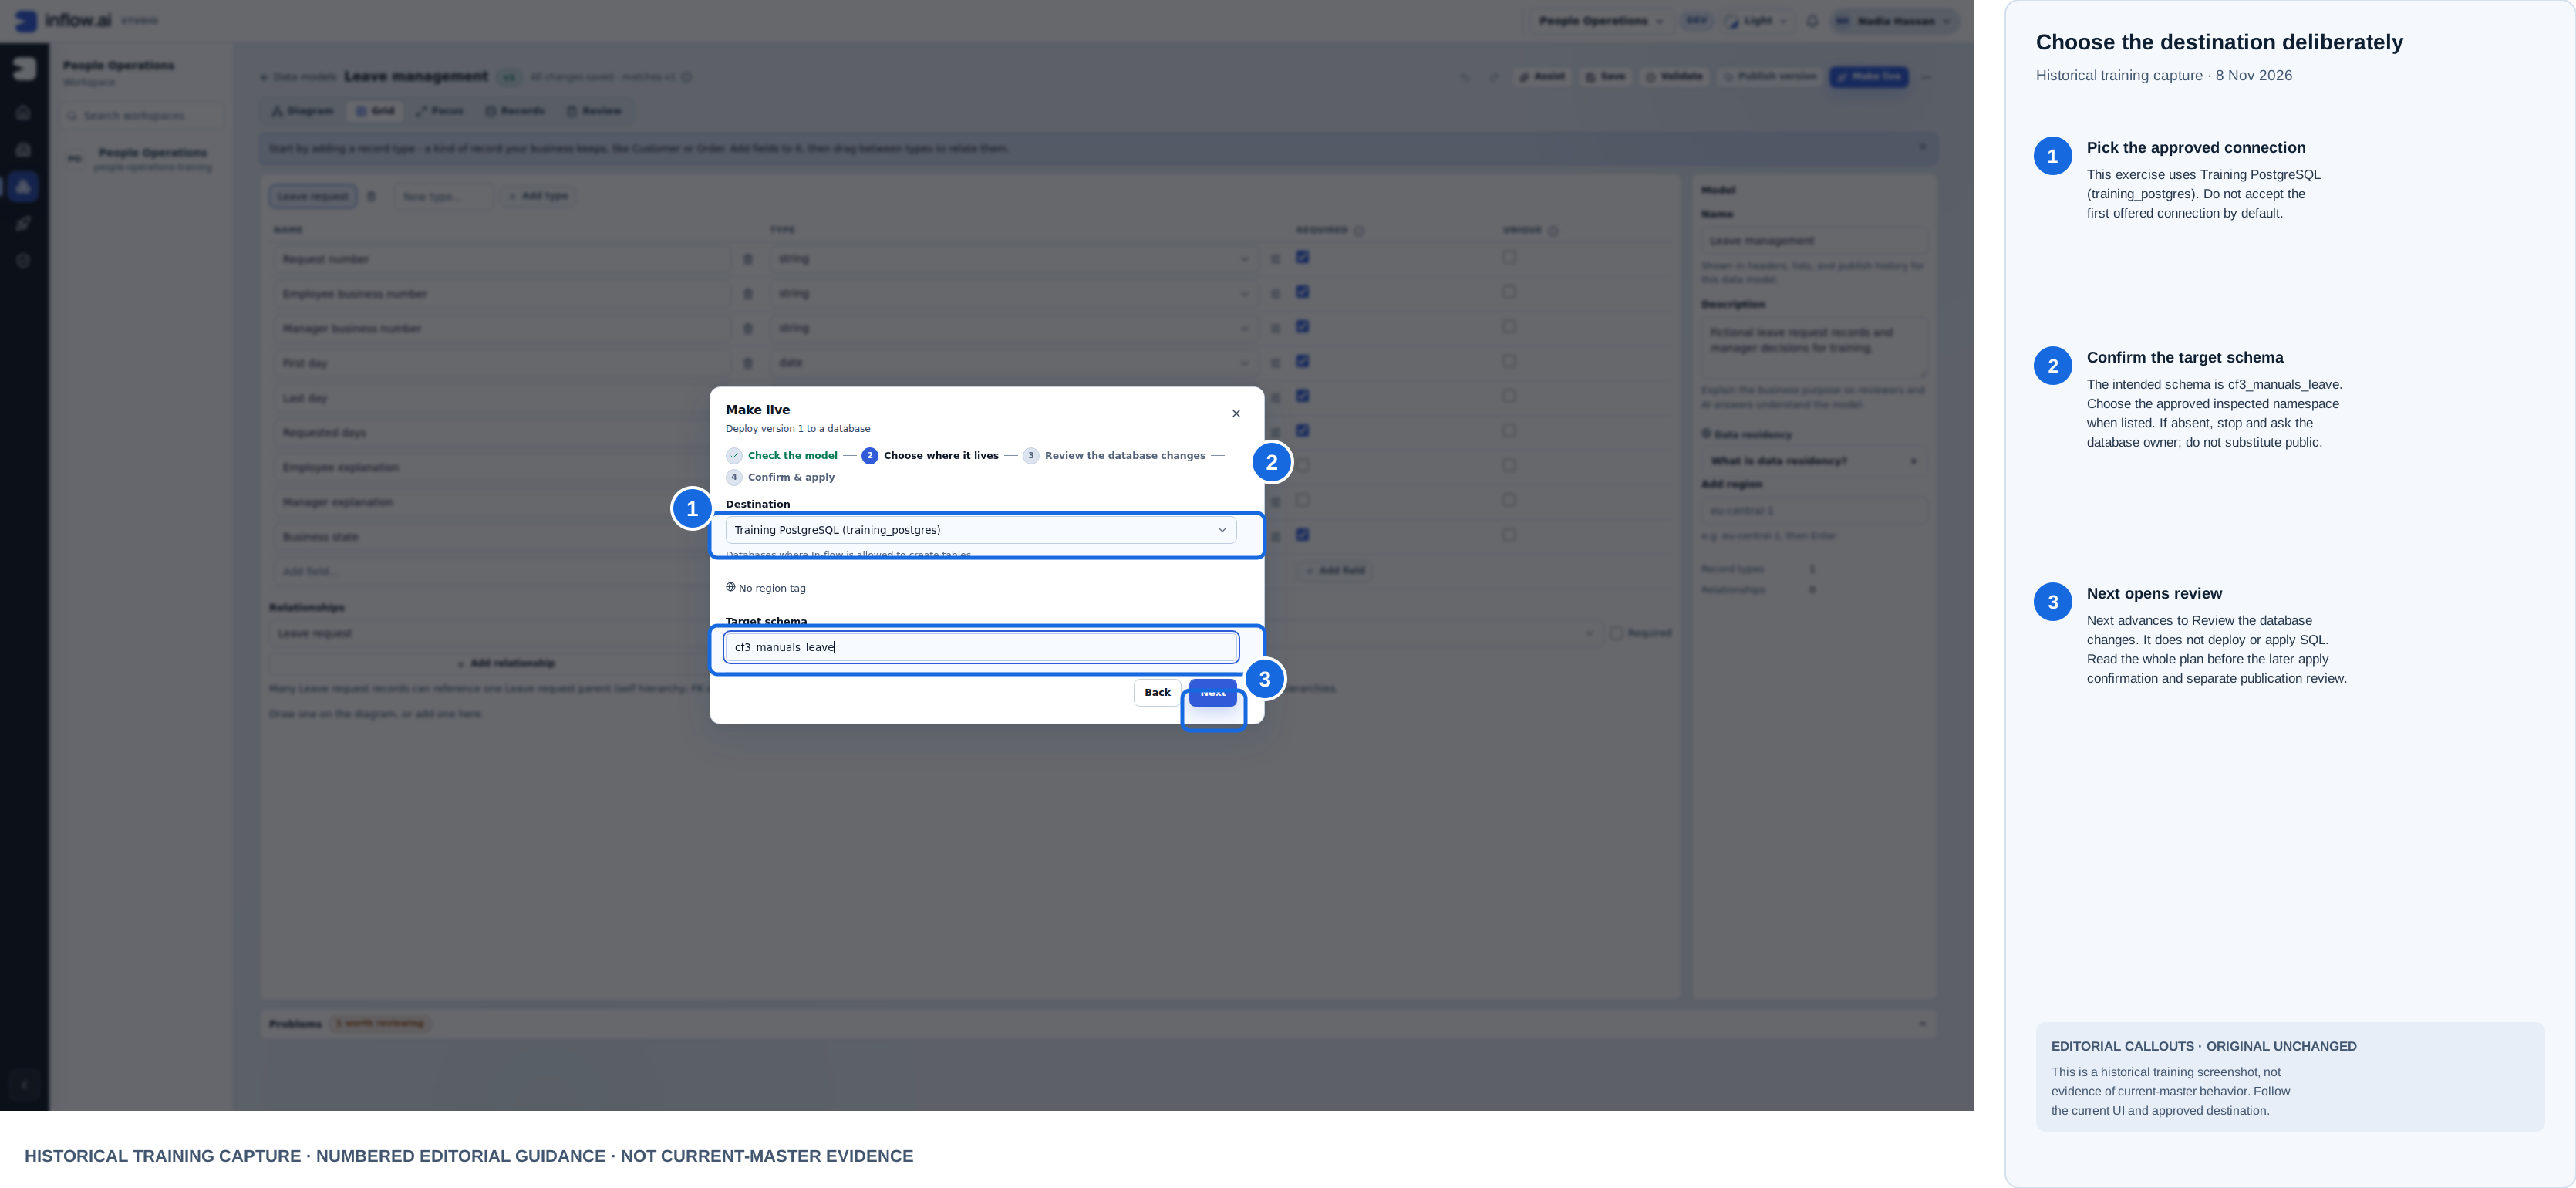
Historical training capture from 8 November 2026. Blue outlines and numbered labels are editorial guidance; the raw screenshot is unchanged here. This composite is not current-master evidence.
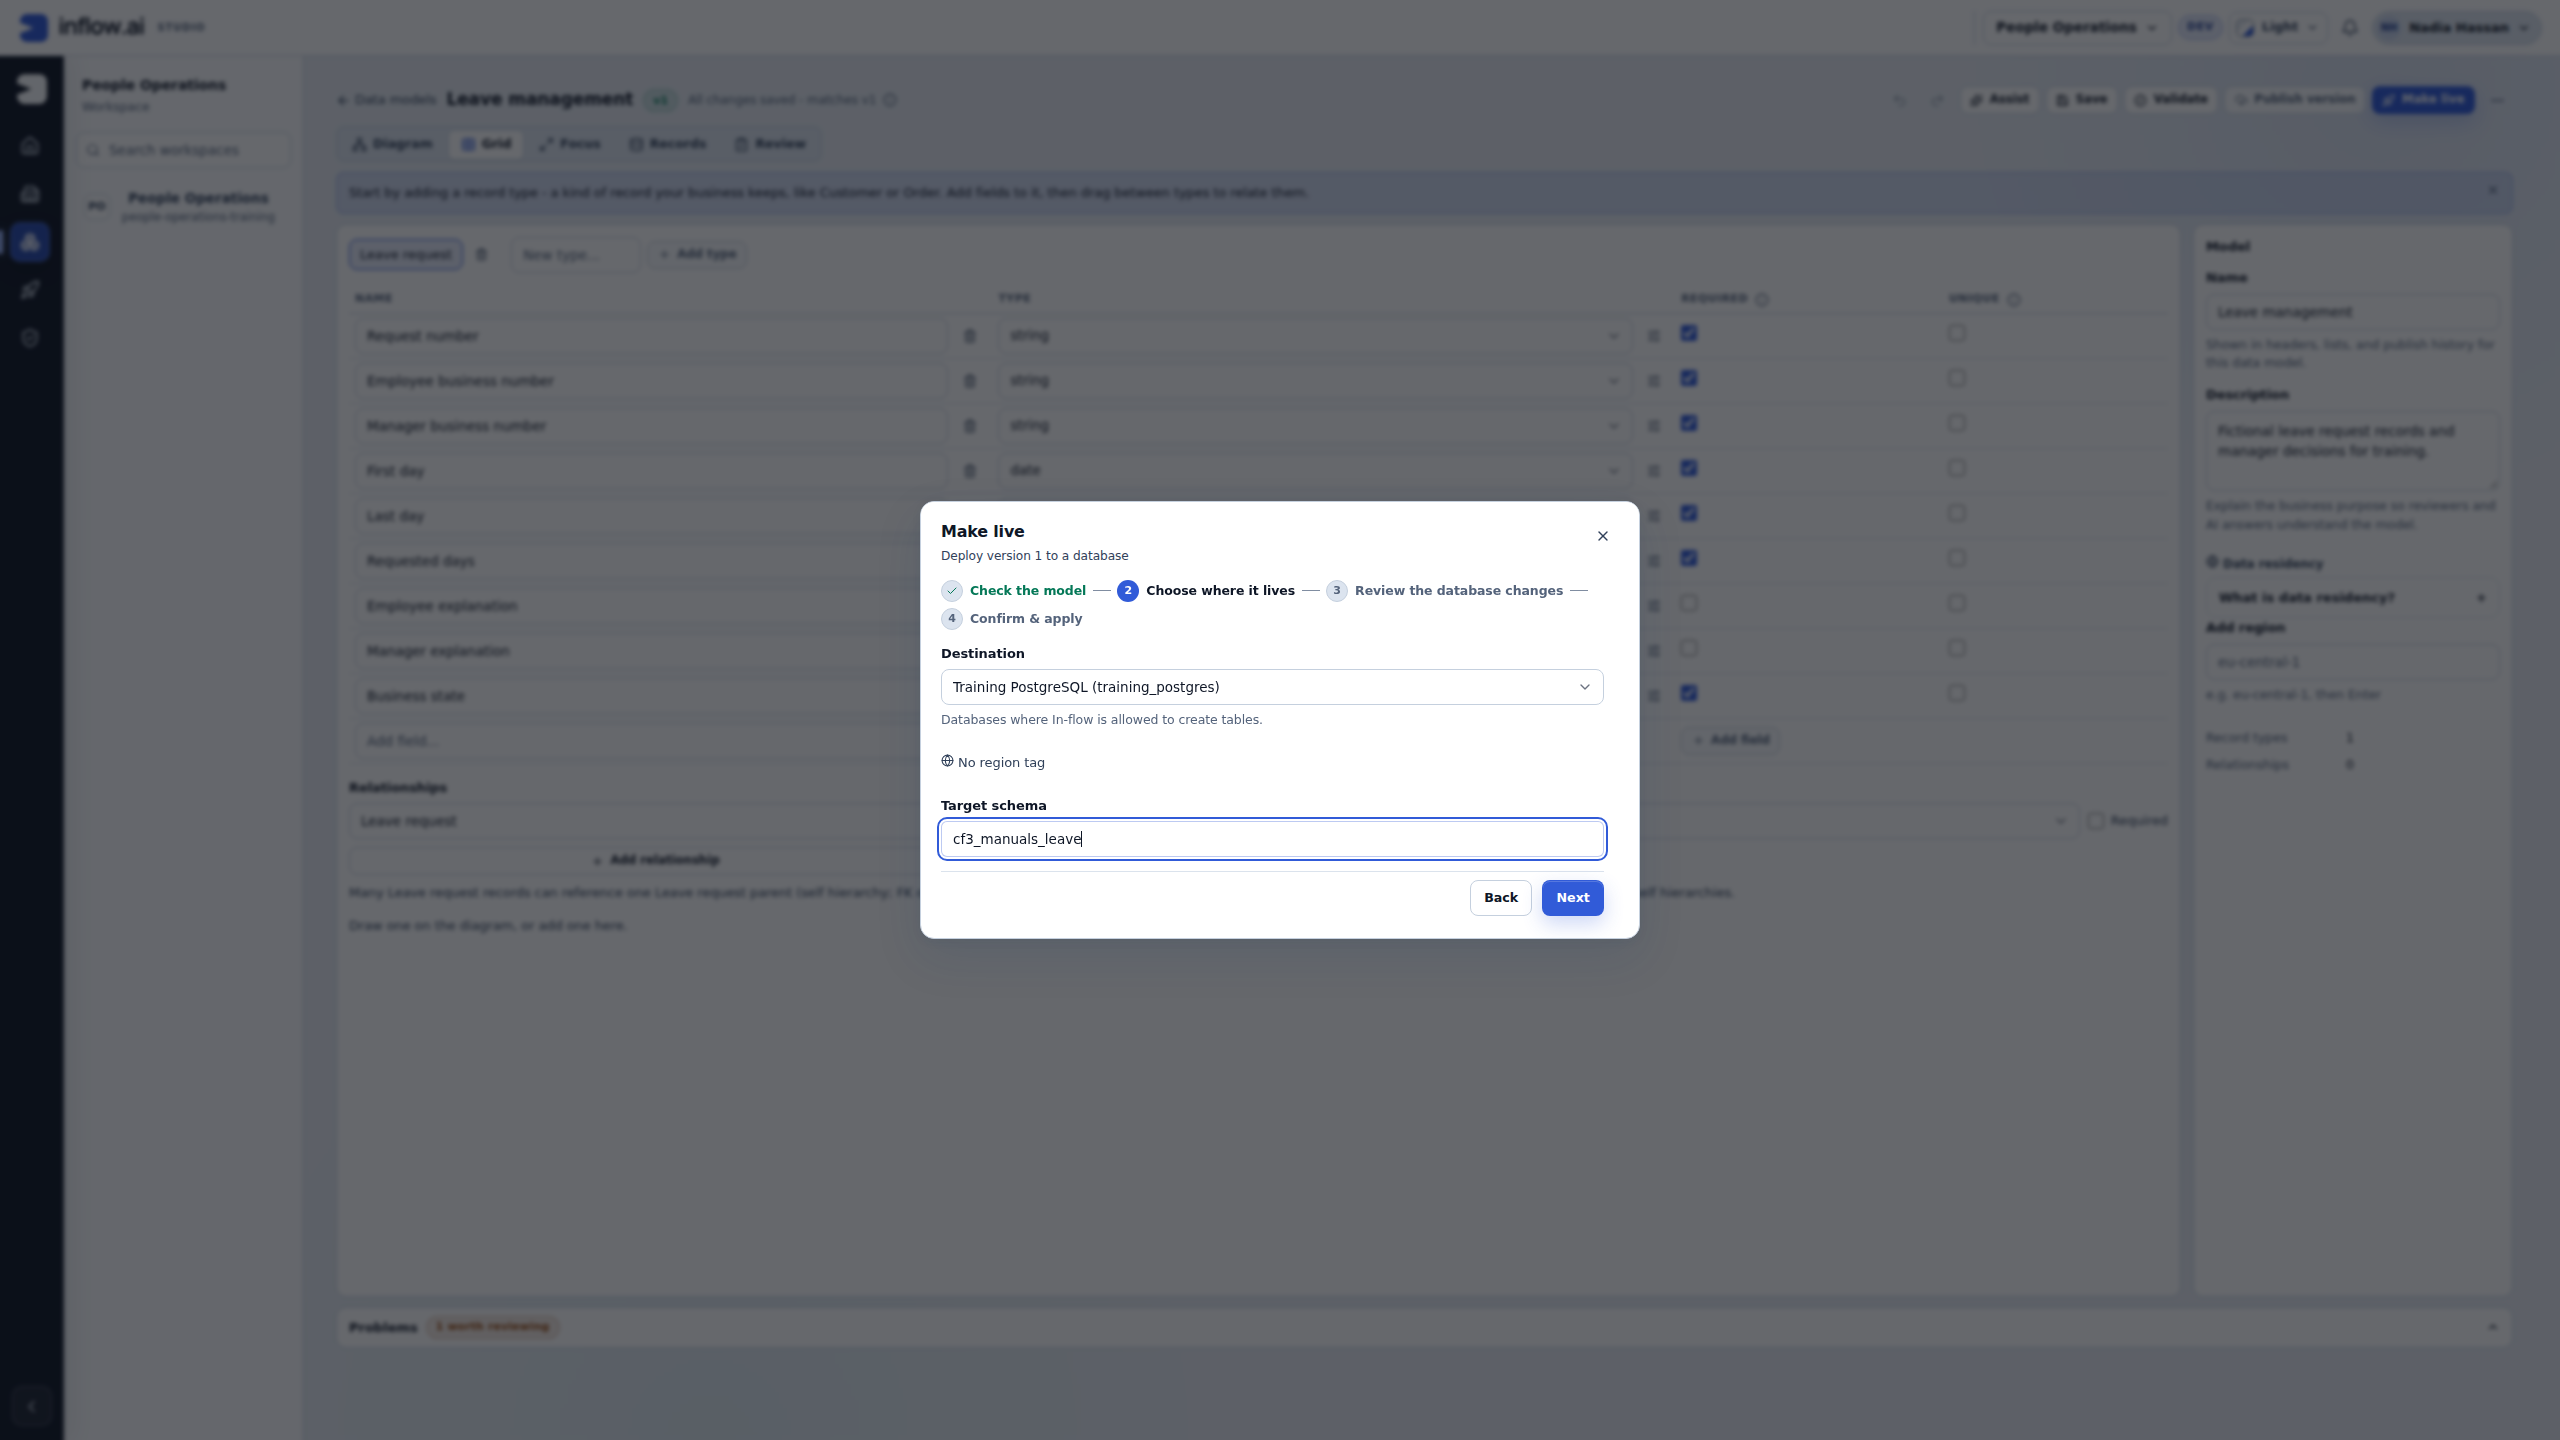
Check these three things: (1) Select Training PostgreSQL (training_postgres) for this exercise; do not accept the first offered connection automatically. (2) Confirm the approved cf3_manuals_leave schema. Choose it from the inspected namespace list when offered. If it is absent, stop and ask the database owner to prepare and authorize it, then reopen this step; do not substitute public or another schema. The connection's saved Schema value is not a substitute for the explicit deployment target. (3) Next opens Review the database changes only. It does not apply anything. Scroll through the full plan before the later confirmation and separate publication review.
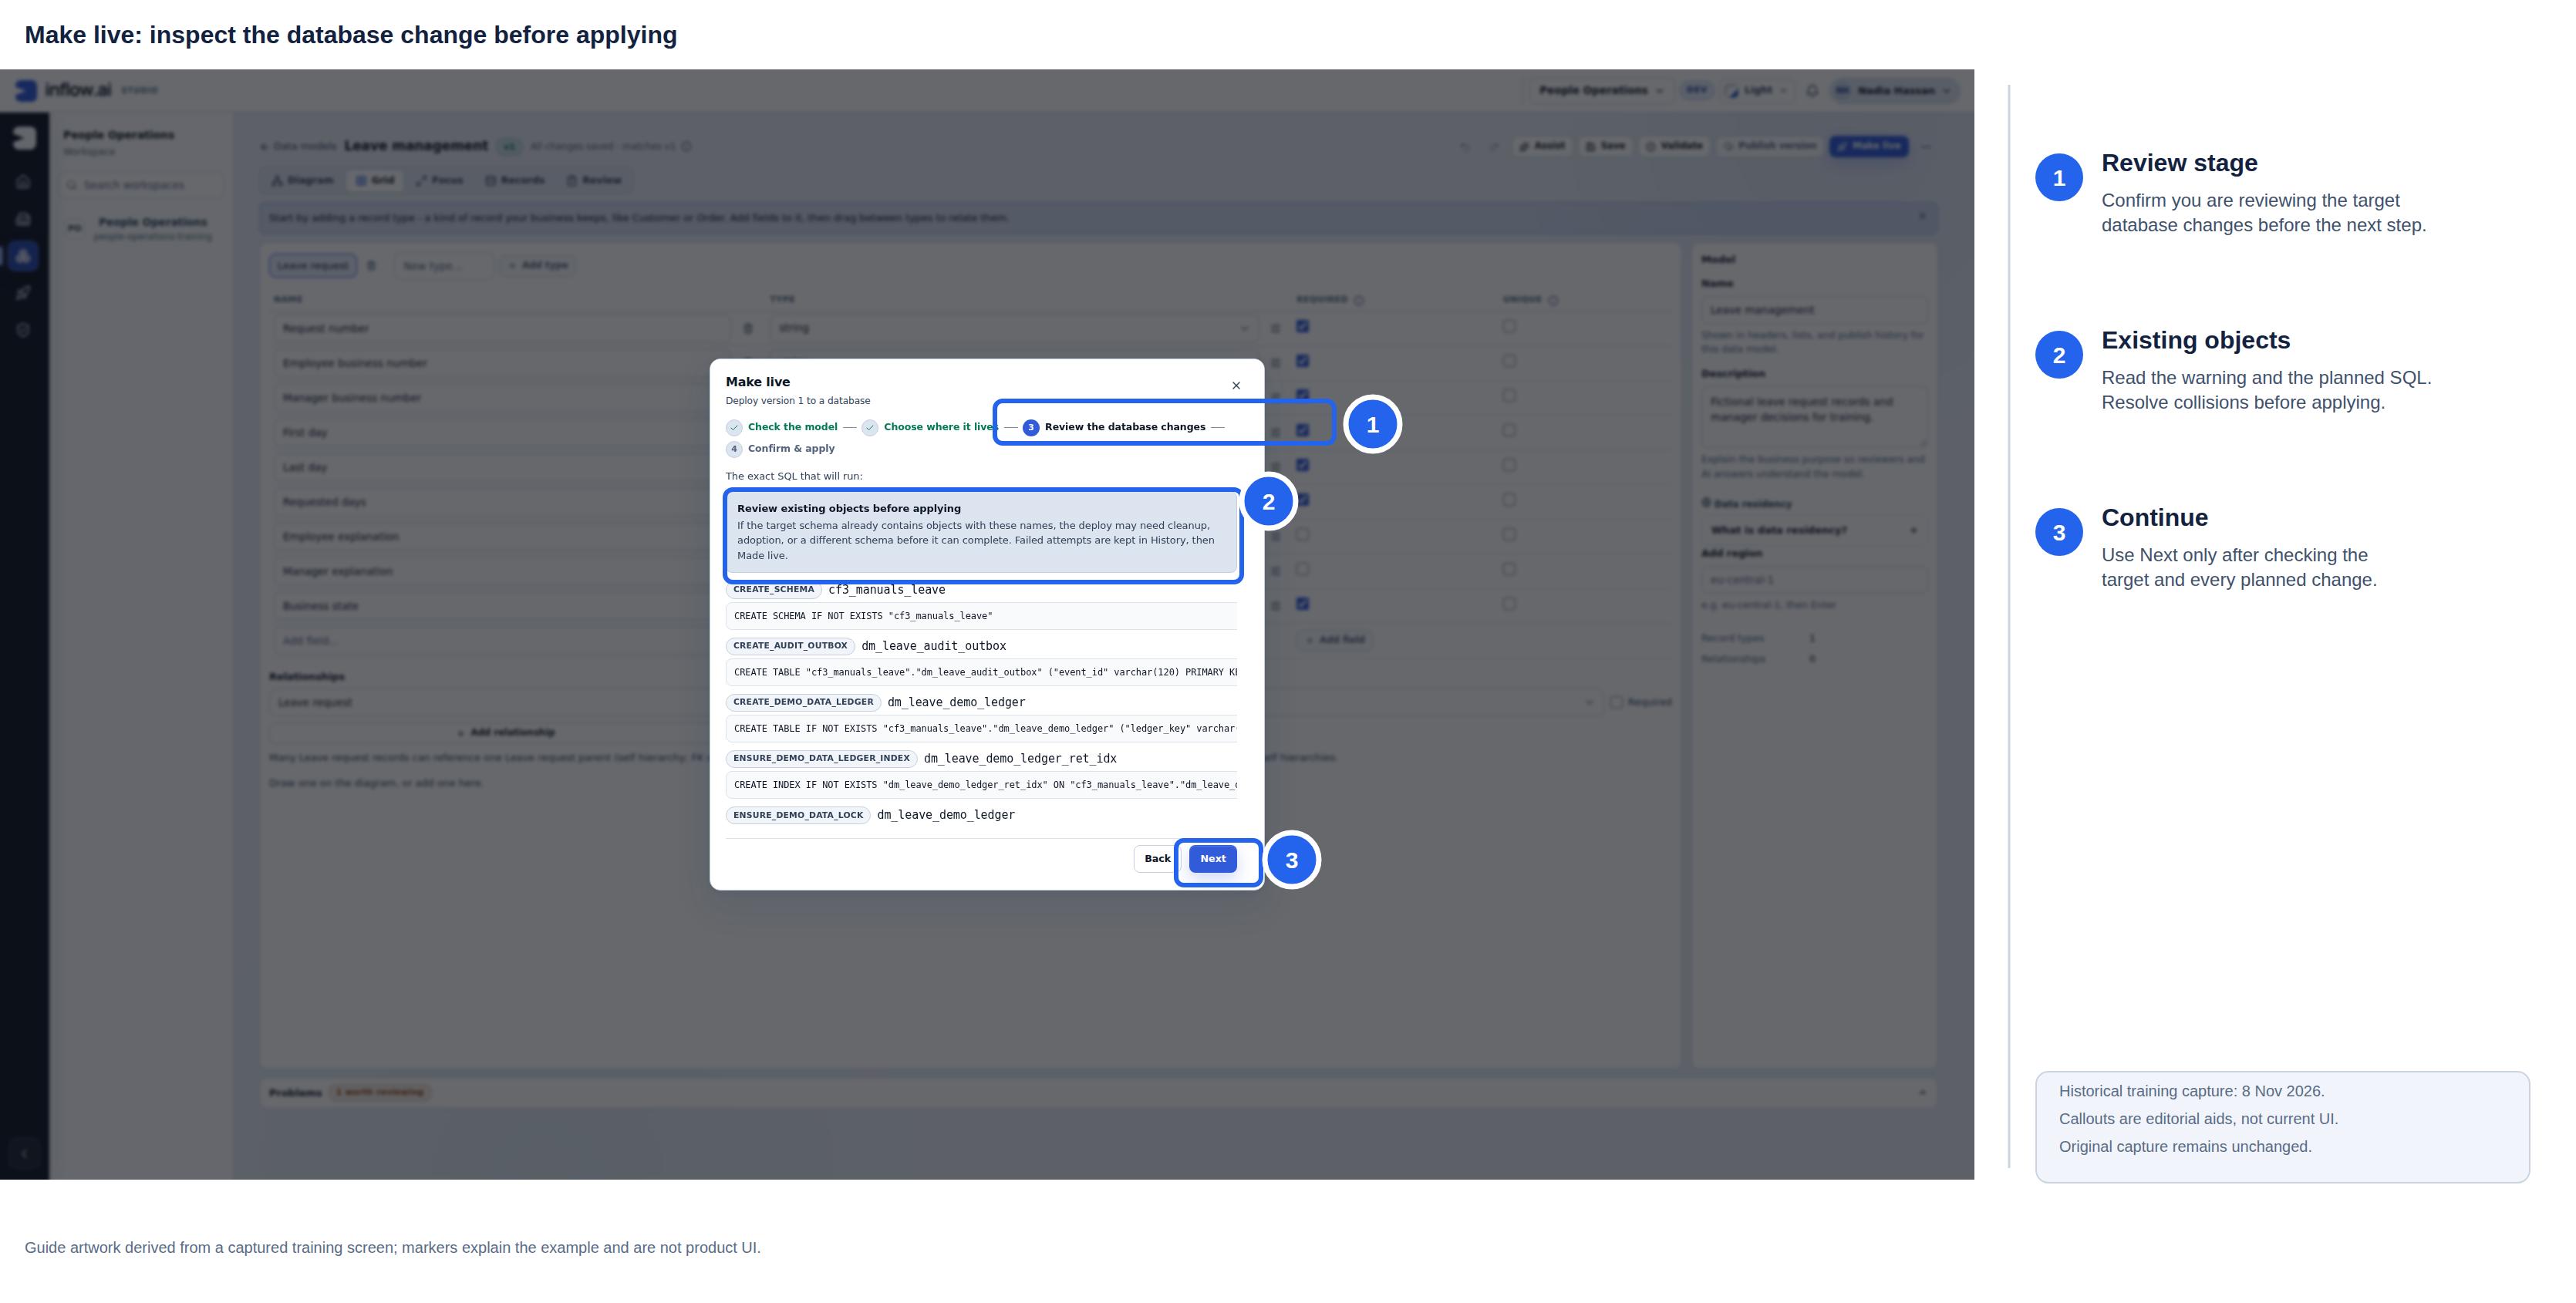
Historical capture from 8 November 2026. Blue outlines and numbered labels are editorial guidance; the raw screenshot remains unchanged here. This image is not evidence for the current UI.
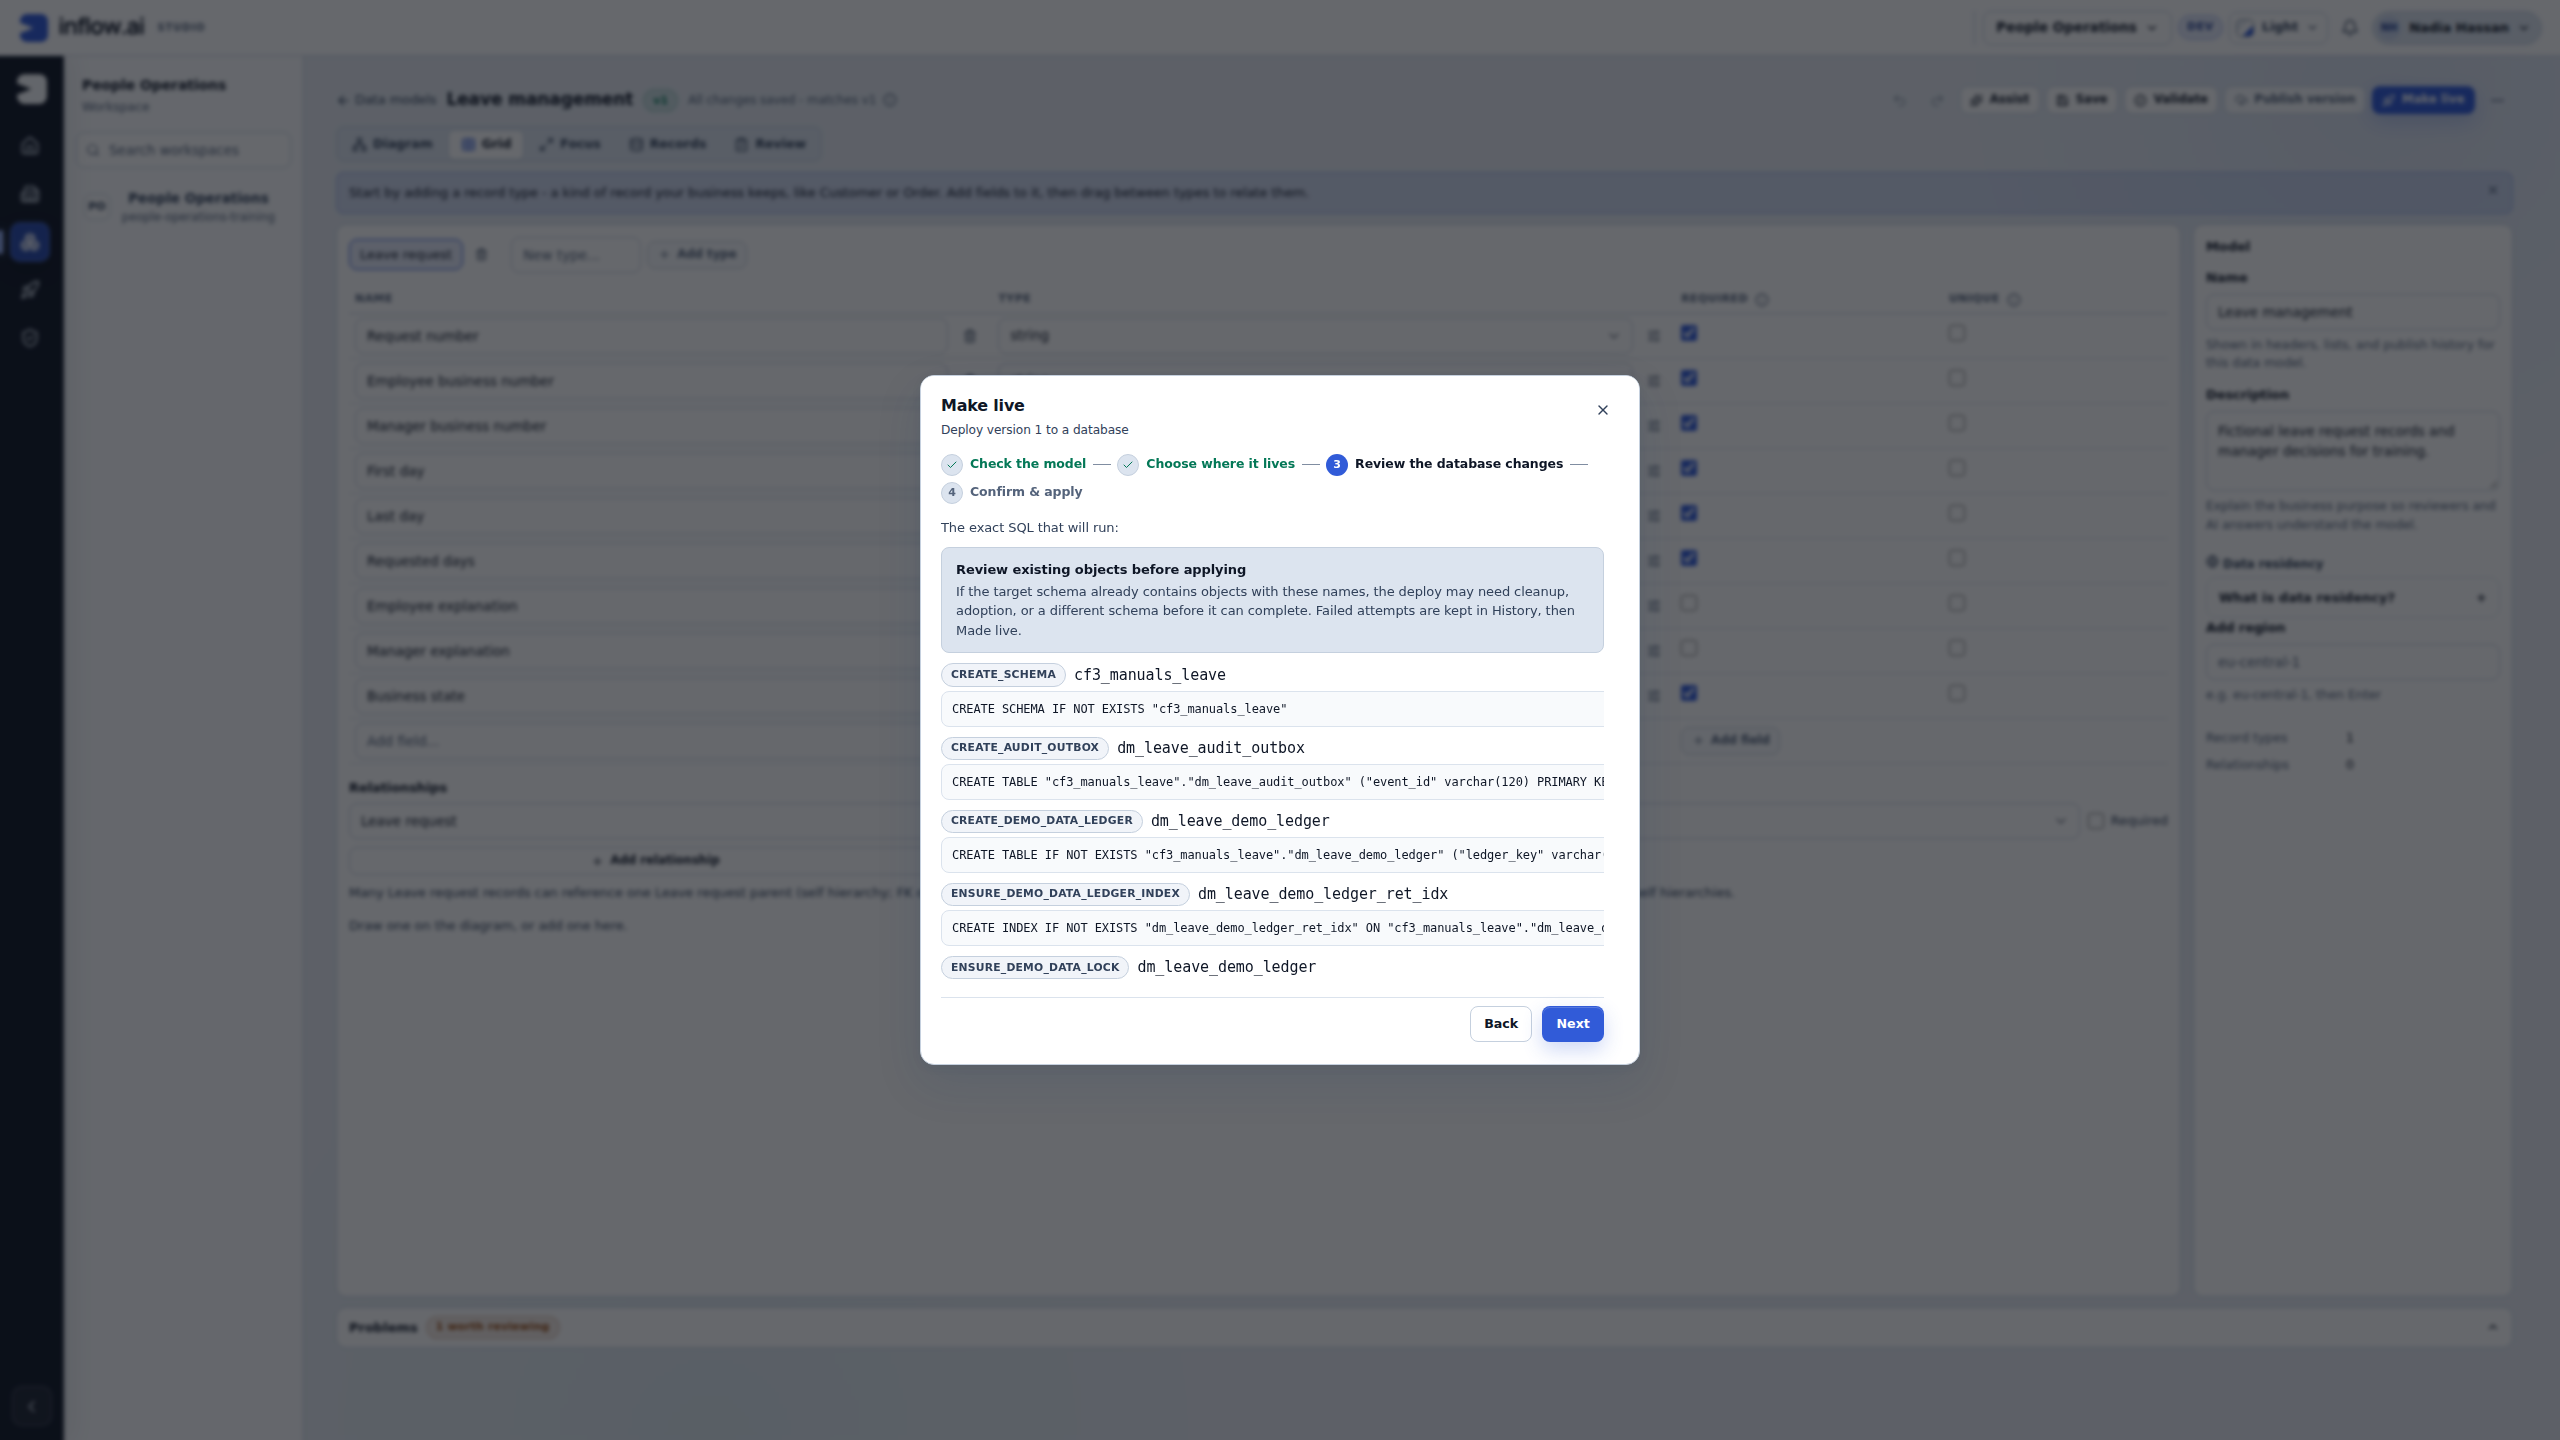
Check the full plan: The screenshot shows the first portion. Scroll to the business table as well. Leave the audit outbox and sample-data bookkeeping under Inflow's management. Continue only after the destination and each planned change match the approved training exercise.
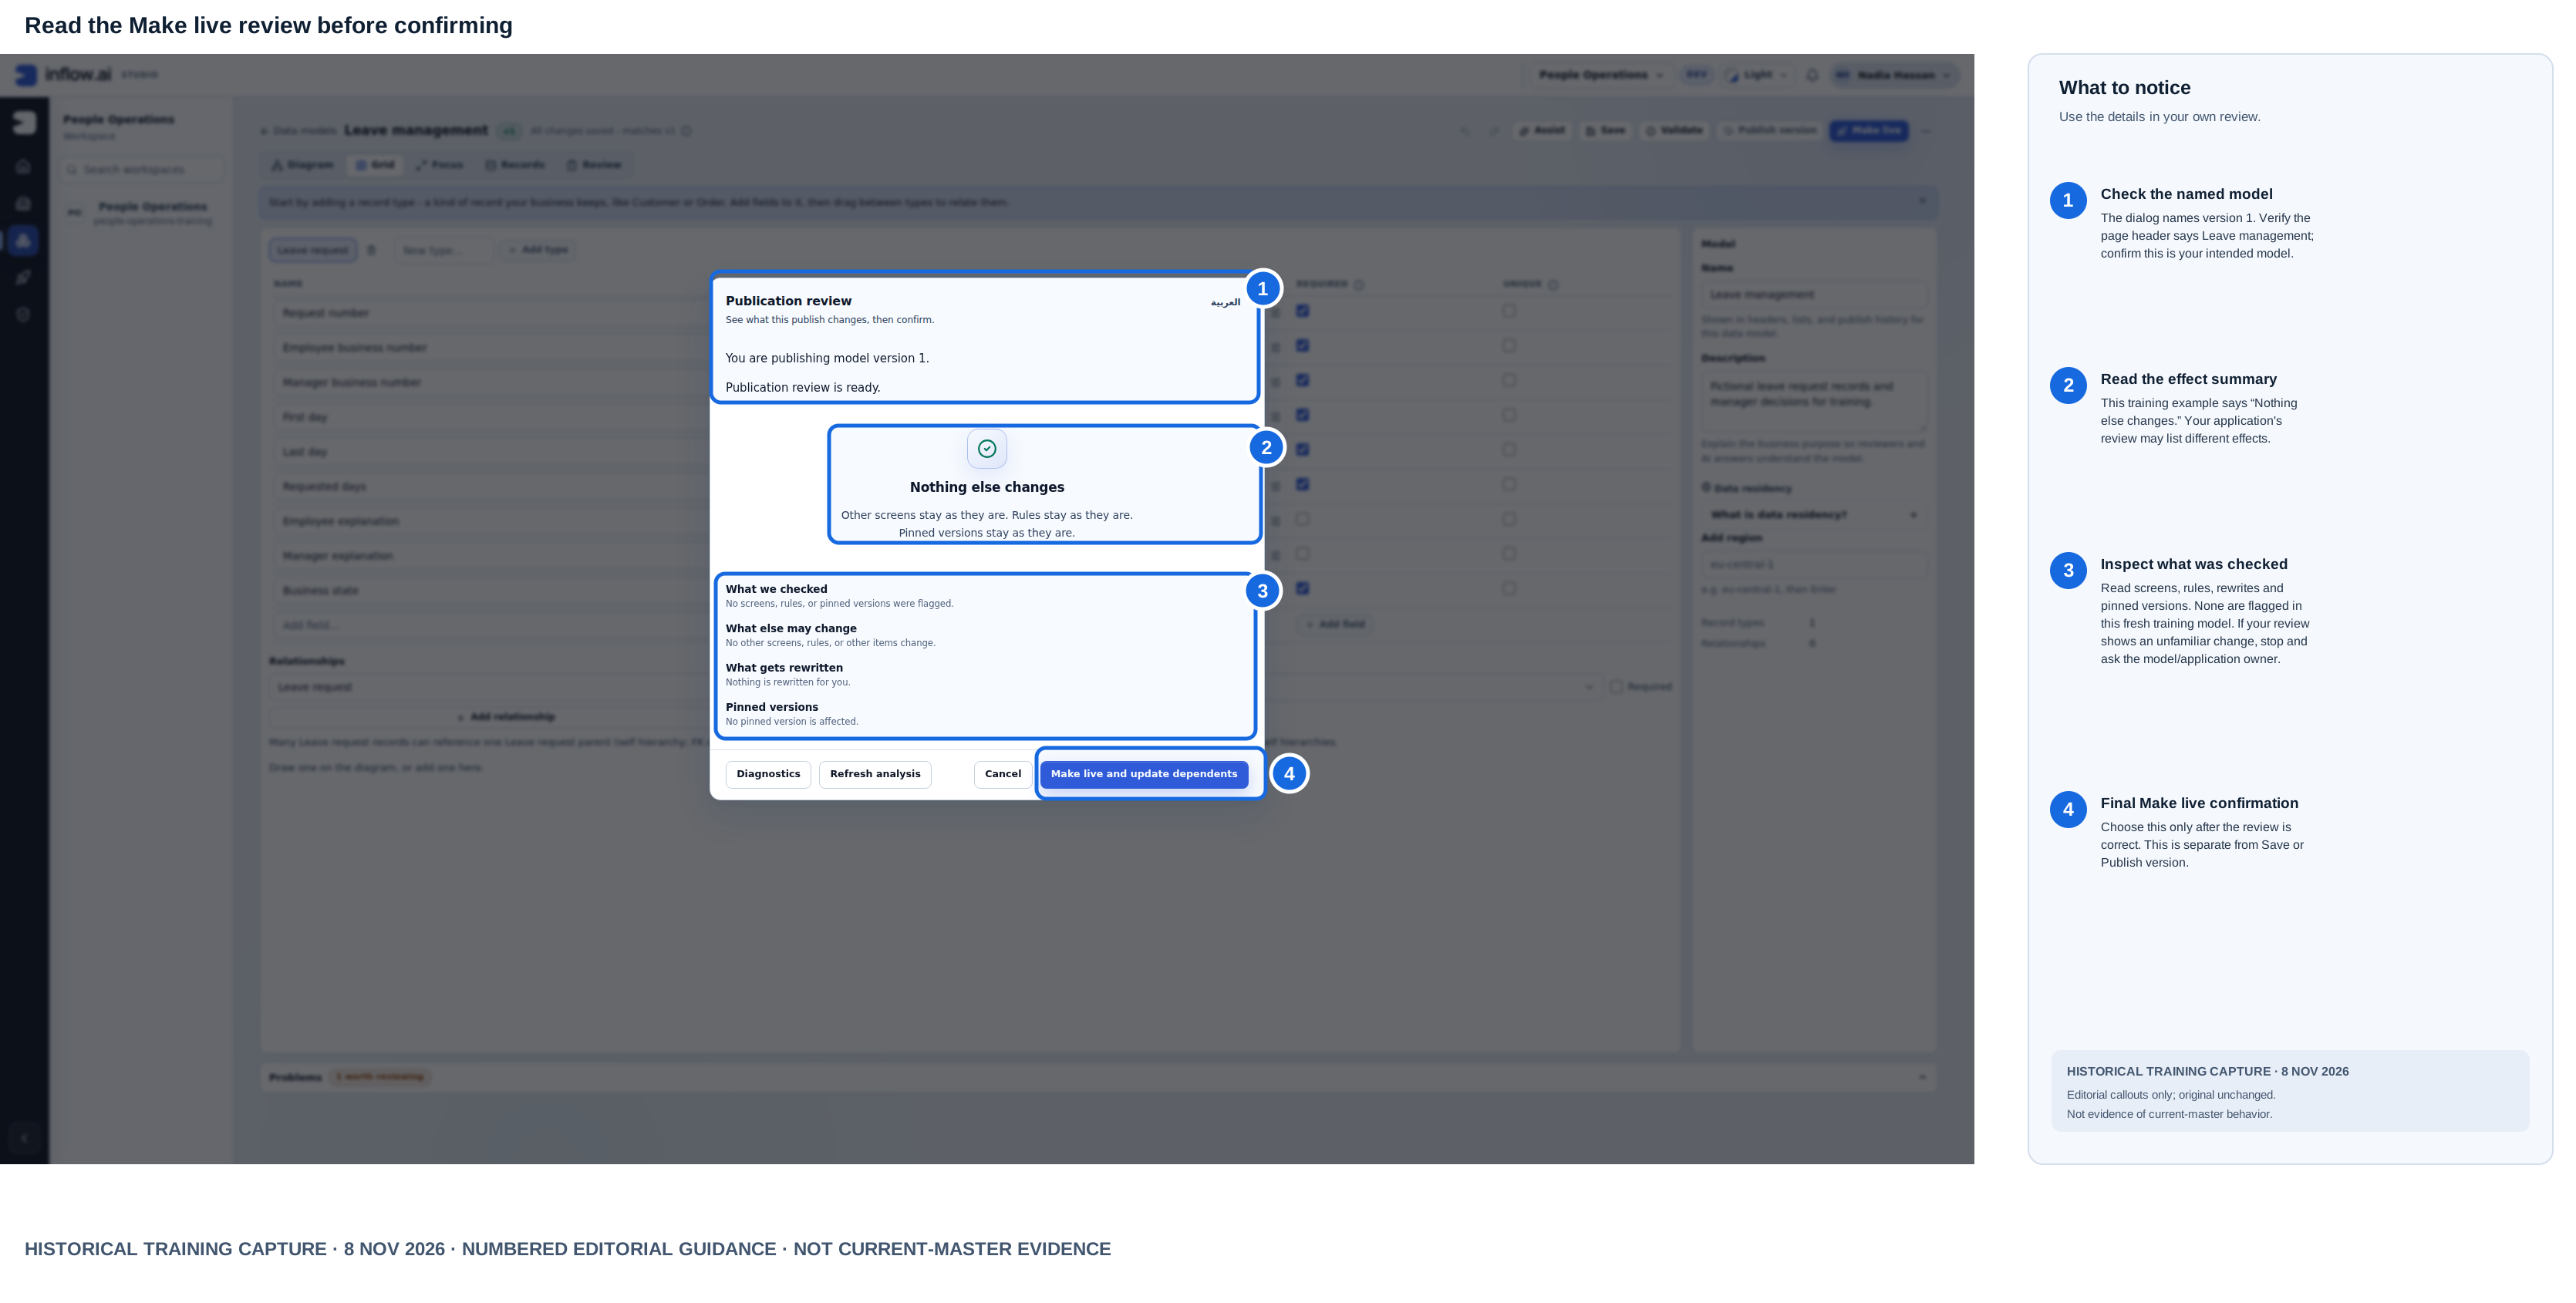
Historical training capture from 8 November 2026. Numbered outlines and the right-hand key are editorial guidance; the raw screenshot is unchanged. This composite is not current-master evidence.
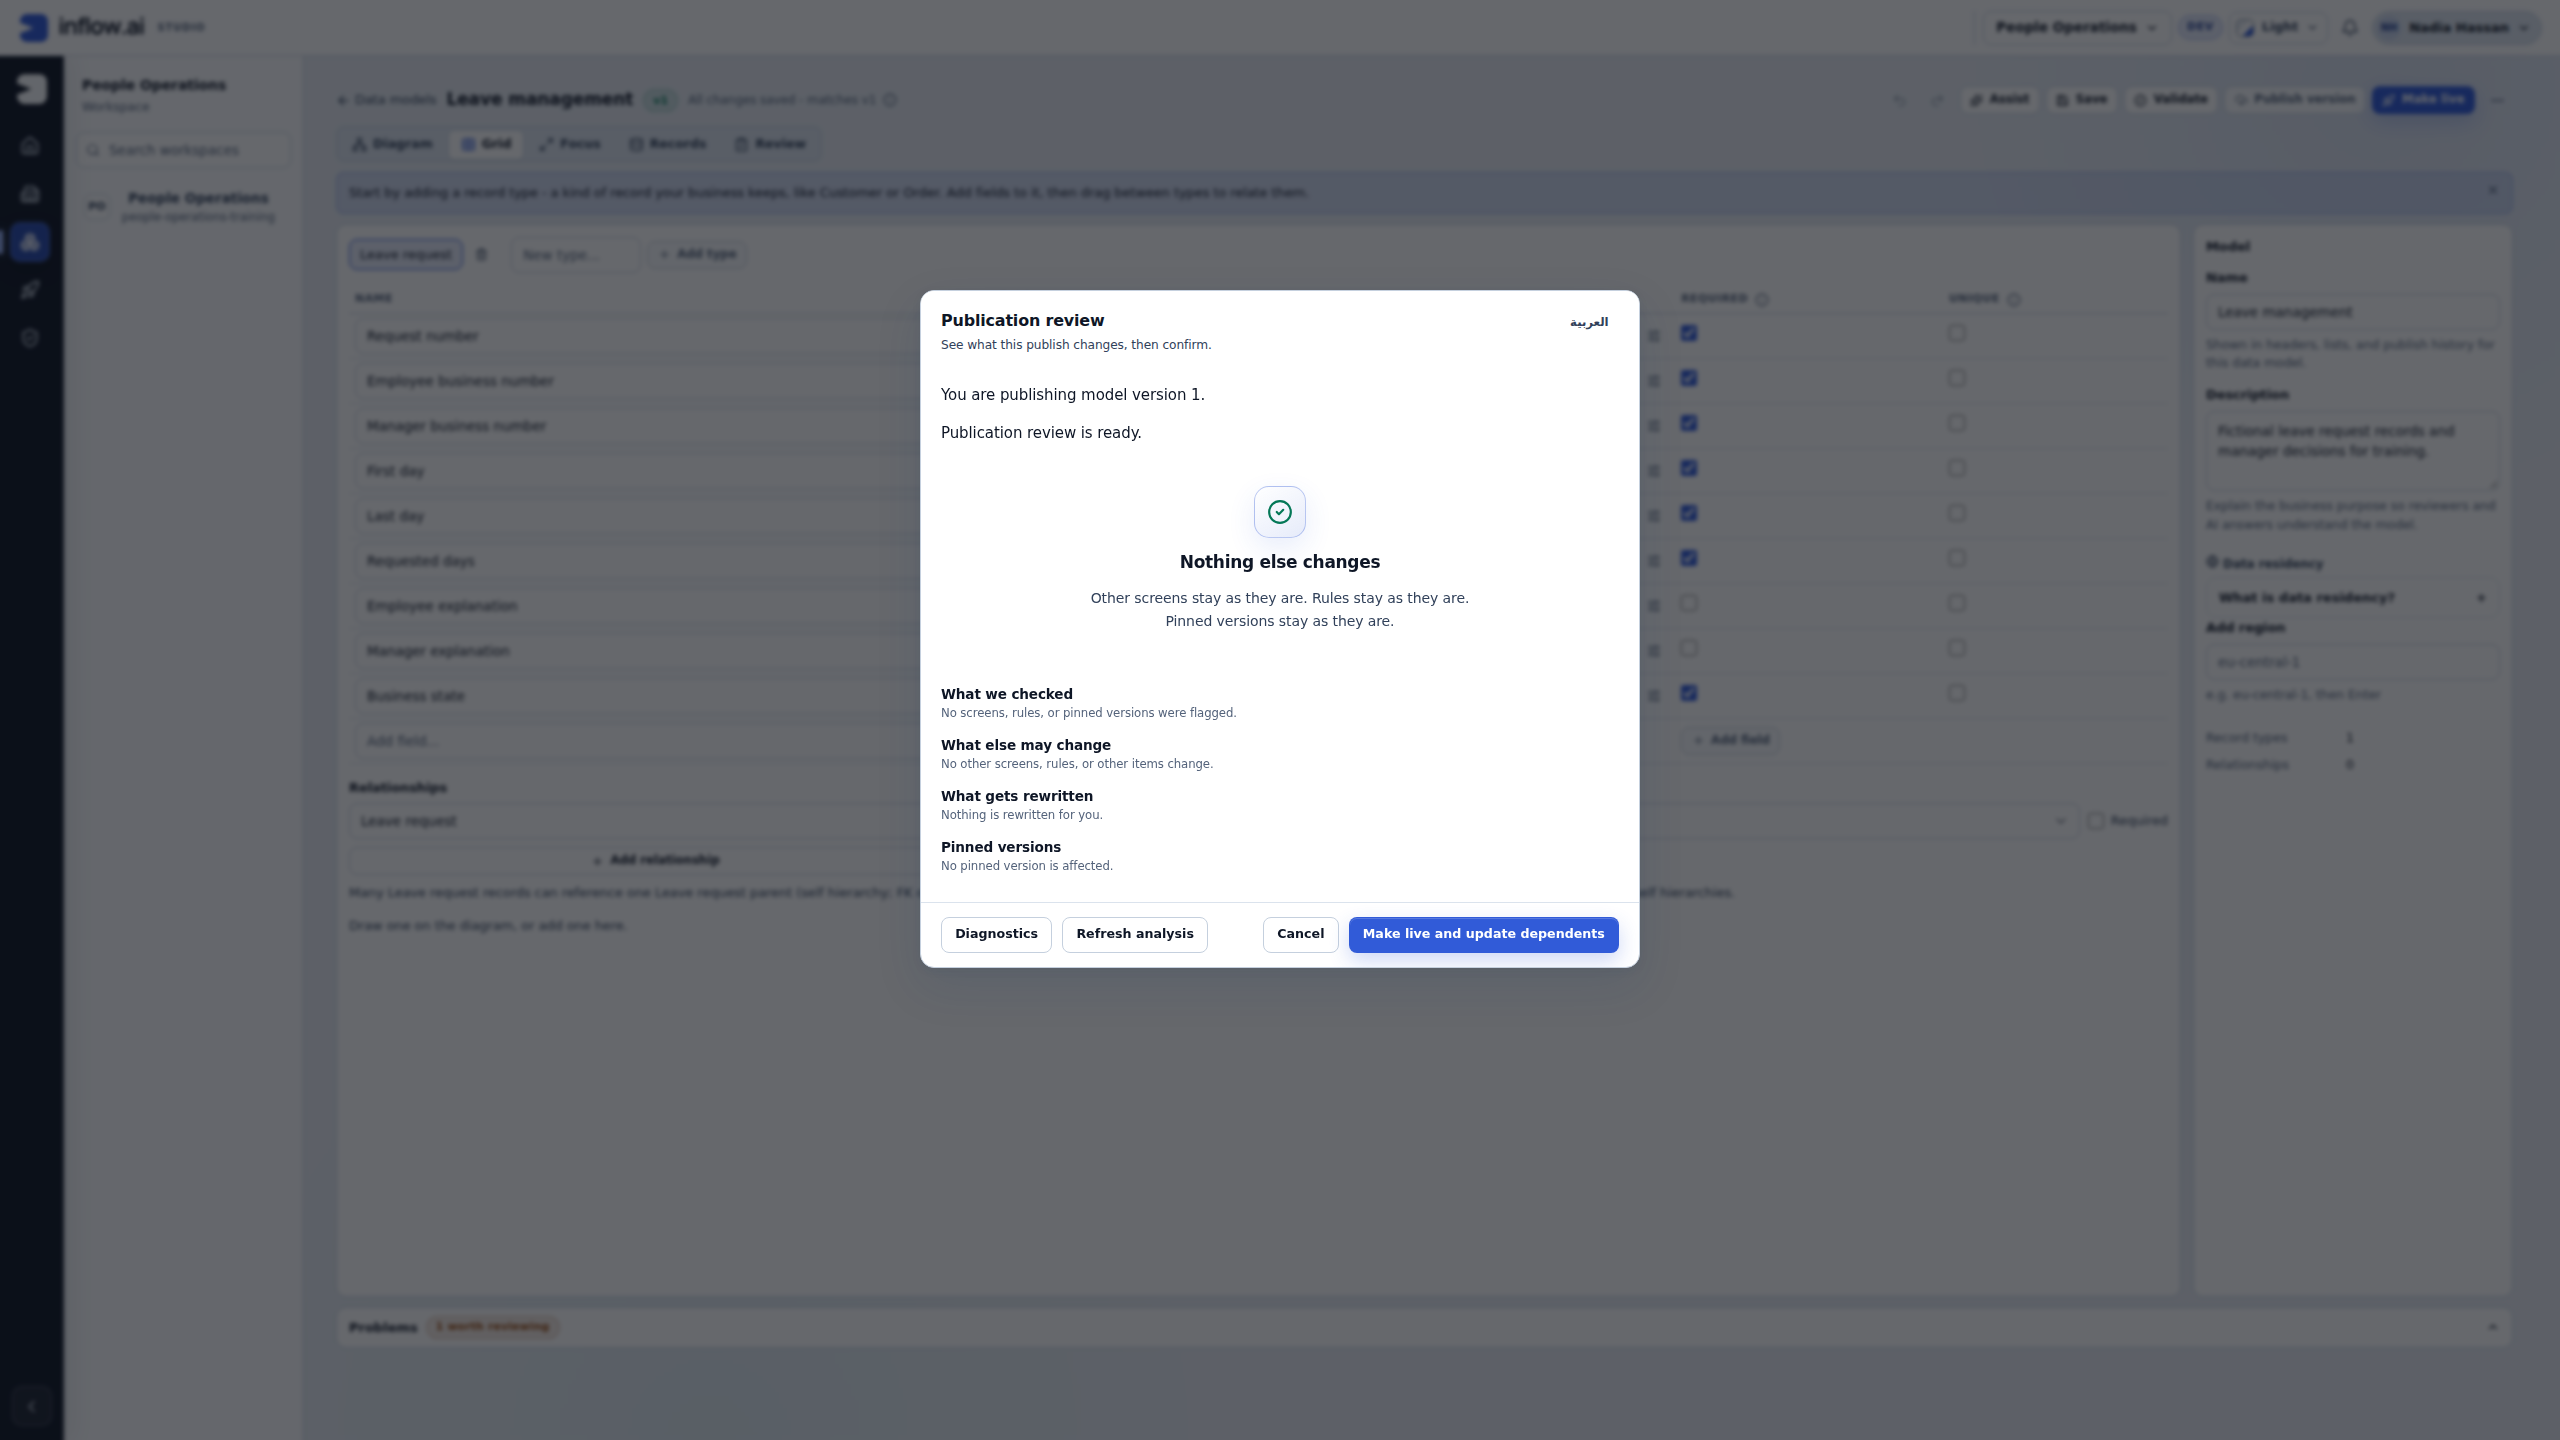
Make the final decision from this review: Confirm (1) the model/version, (2) the summary, and (3) every dependency section, including What we checked, What else may change, What gets rewritten, and Pinned versions. In this capture, no dependencies are flagged and nothing is rewritten; another application may show a different impact. If it does, identify the affected owner and resolve the change before continuing. The SQL plan and dependency review cover separate effects. Only then use (4) Make live and update dependents. This applies the reviewed change; it is not a harmless “Done” button.
Historical training capture from 8 November 2026. Numbered outlines and the right-hand key are editorial guidance; the raw screenshot is unchanged. This composite is not current-master evidence.
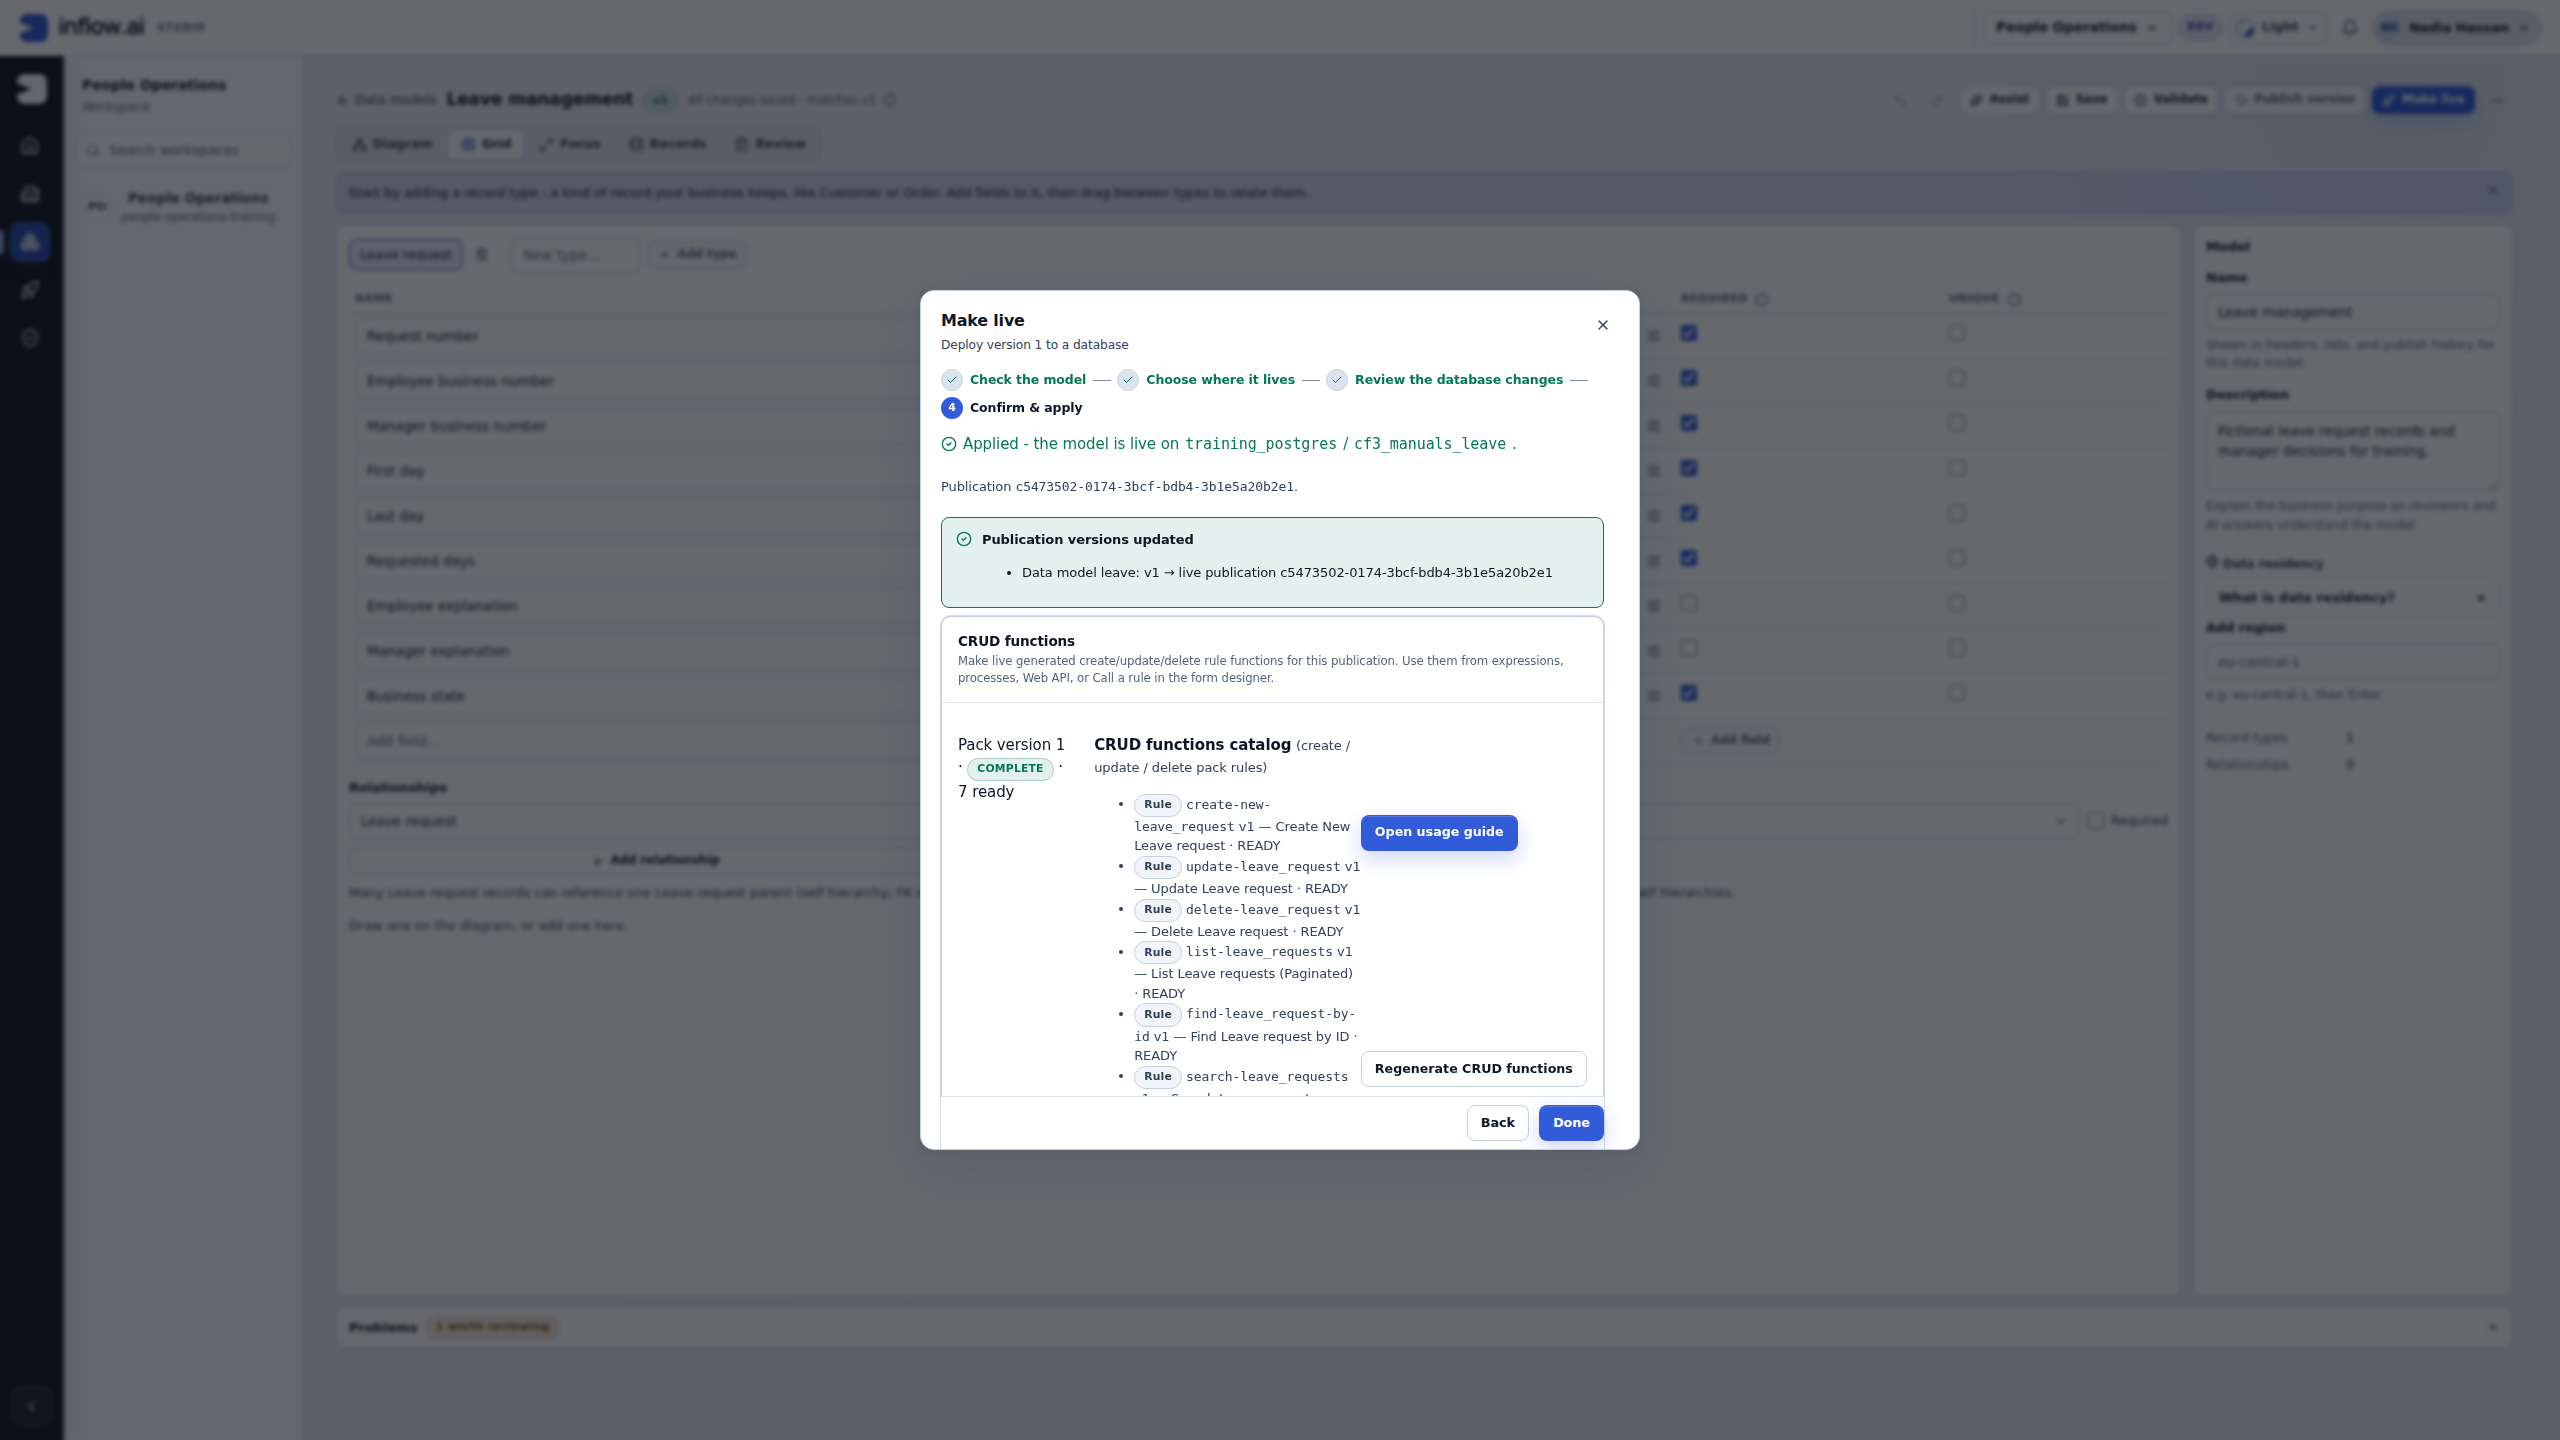
Check the outcome: Applied confirms this database deployment. The complete pack contains create, update, delete, list, find by ID, search and count functions. Their presence does not mean those operations or a manager approval have run. Open Usage guide to inspect function details before configuring a permitted caller. Regenerate CRUD functions is a separate control, not the way to add a row or execute the catalog. Choose Done to close the completed wizard; continue in Records for the sample rows.
If it fails: open History → Made live and give the model/database owner the safe visible failure and intended destination. Inspect the saved attempt before any retry. Do not continue as if the records table is ready, and do not repair the database manually.
Step 4 — Enter a small known data set
- Open Records, choose Leave request, and read Active destination. It must be training_postgres / cf3_manuals_leave for this exercise. Before creating anything, inspect which of requests 014, 015 and 016 already exist. Open each existing row through Edit, compare it with the worksheet below, then Cancel without saving. Reuse matching samples. If a sample differs or appears more than once, resolve that difference with the exercise owner first.
- If you followed the data-model manual, request 014 already exists: skip its create steps 3–5 and continue to step 6. Otherwise, only when leave-2026-014 is absent, choose Create record and enter Mohammad's values from the worksheet. The readable fields are Request Number, Employee Business Number, Manager Business Number, First Day, Last Day, Requested Days, Employee Explanation, Manager Explanation and Business State.
- Enter both actual dates in the date controls. Set Business State to Pending for the first request; that friendly option stores PENDING. Enter Family trip as the employee explanation, leaving the manager explanation blank.
- Choose Save record. If Fix these fields appears, follow its field links and correct the same dialog. A missing date is a validation problem; do not create a second record to fix it.
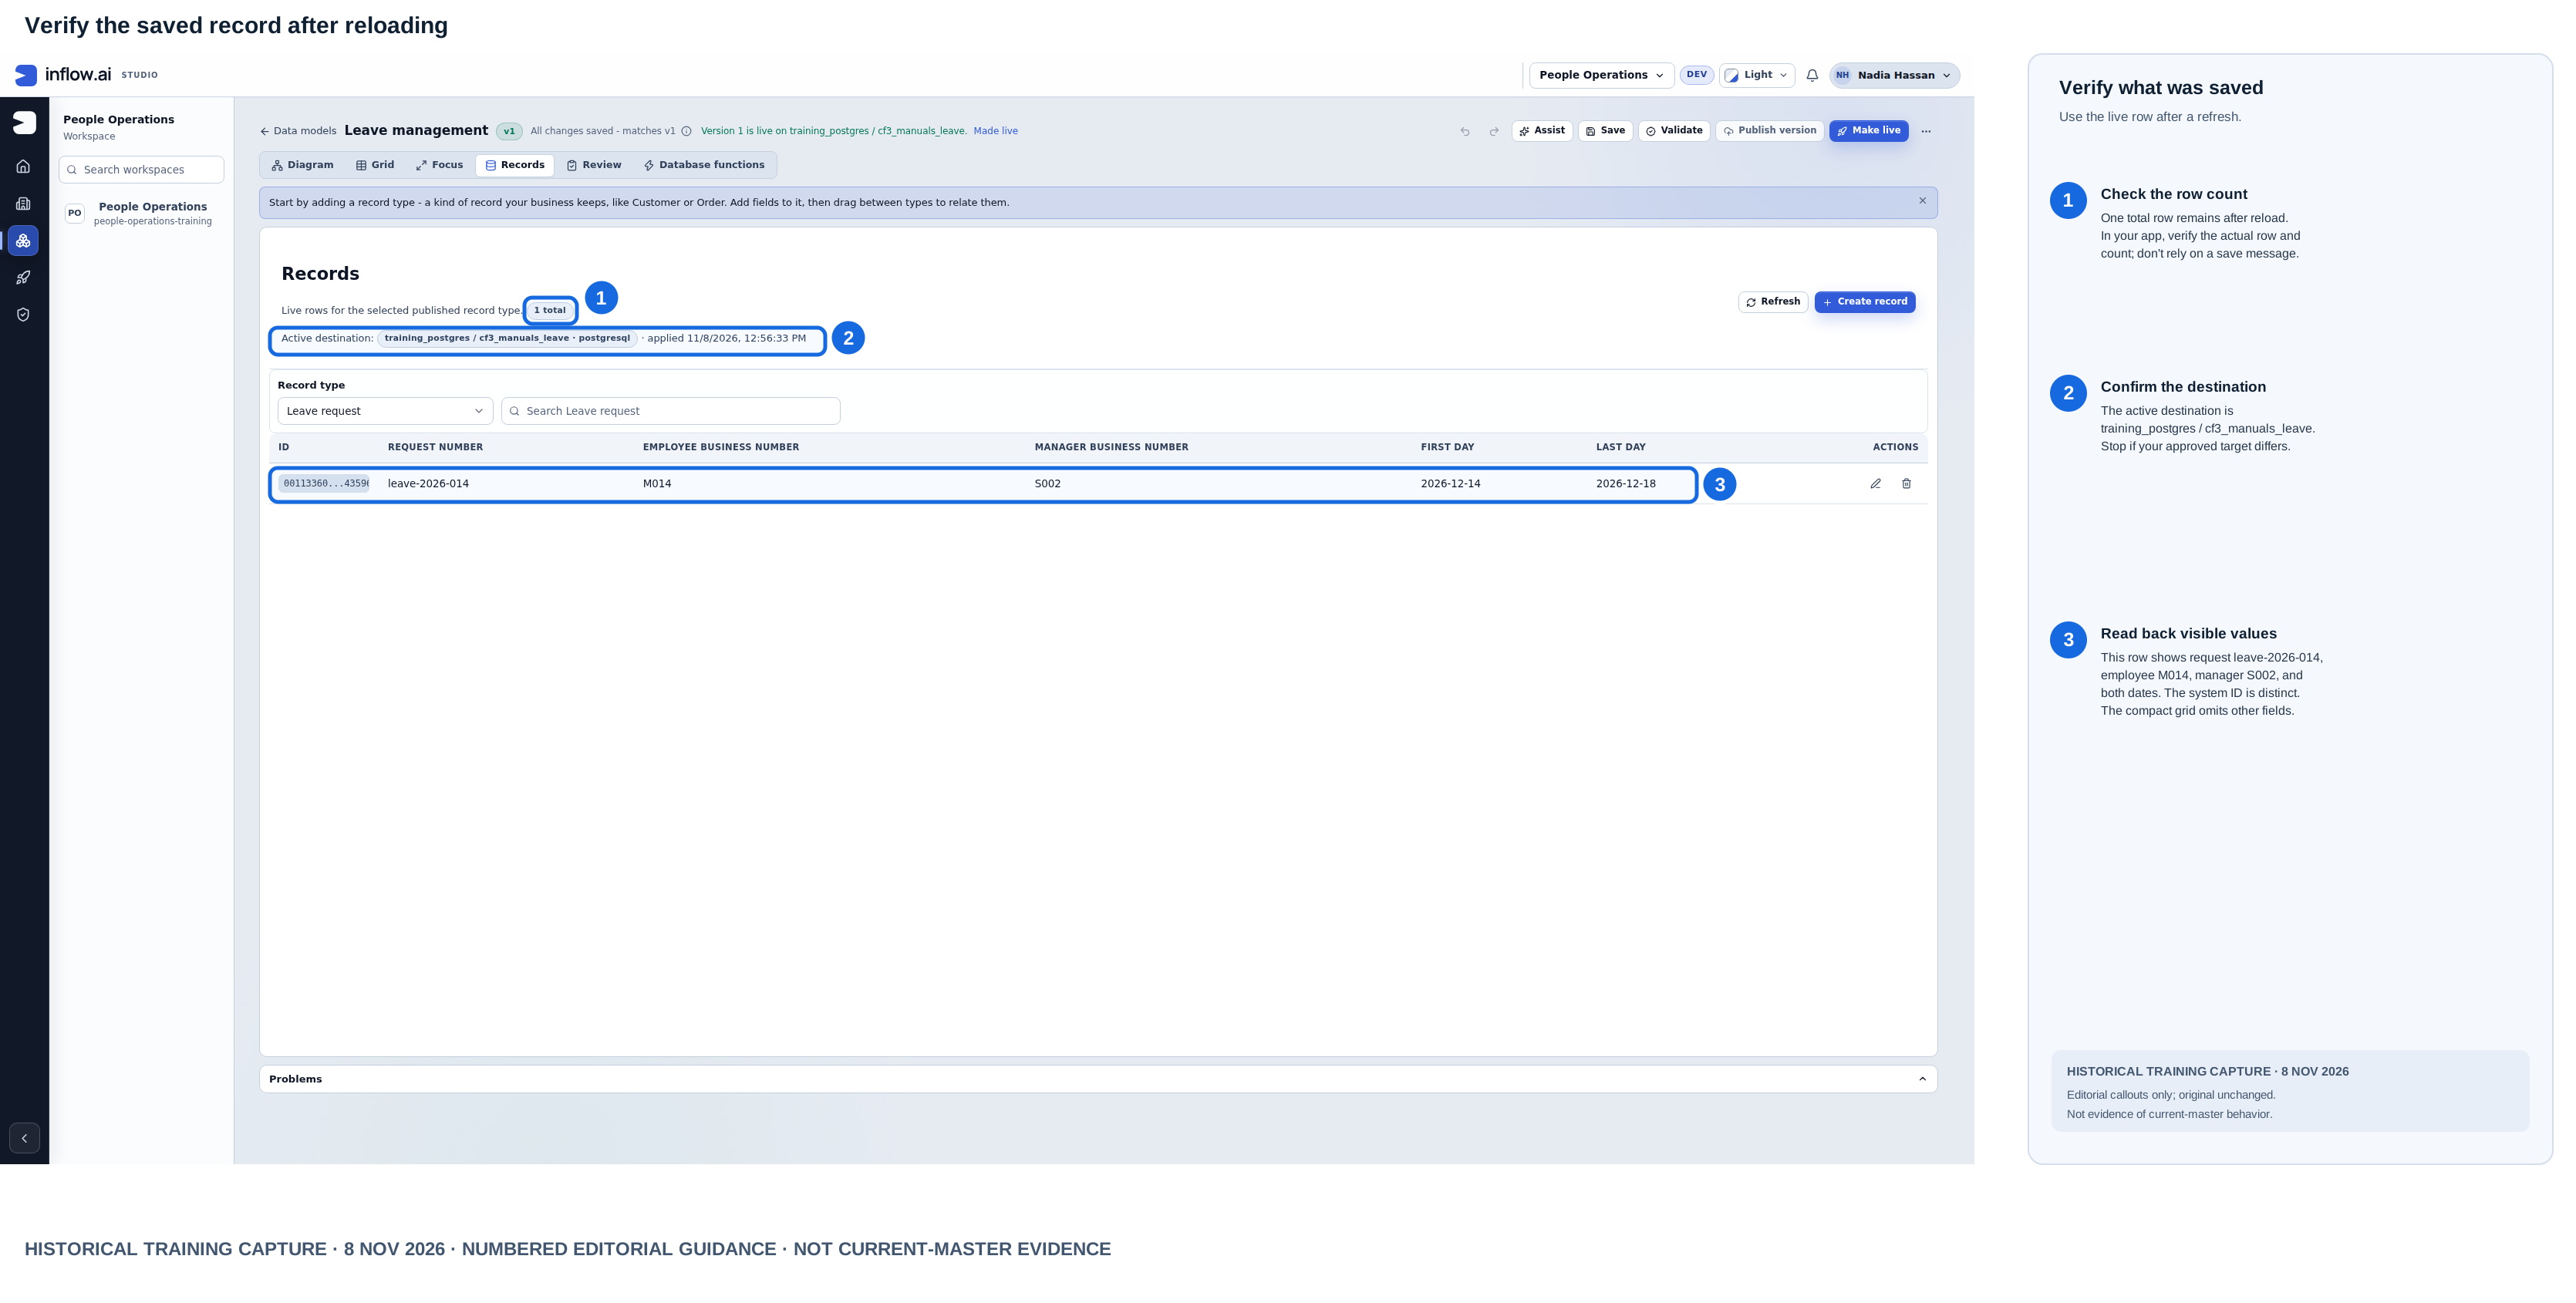
- After the dialog closes, reload Records and check the first row. The system-generated ID differs from the business request number.
- For each missing comparison record, 015 or 016, choose Create record, enter its worksheet values and choose Save record once. Keep an existing matching 015 or 016 rather than creating it again. Both use manager business reference S002. Supply the remaining optional values only when they are meaningful.
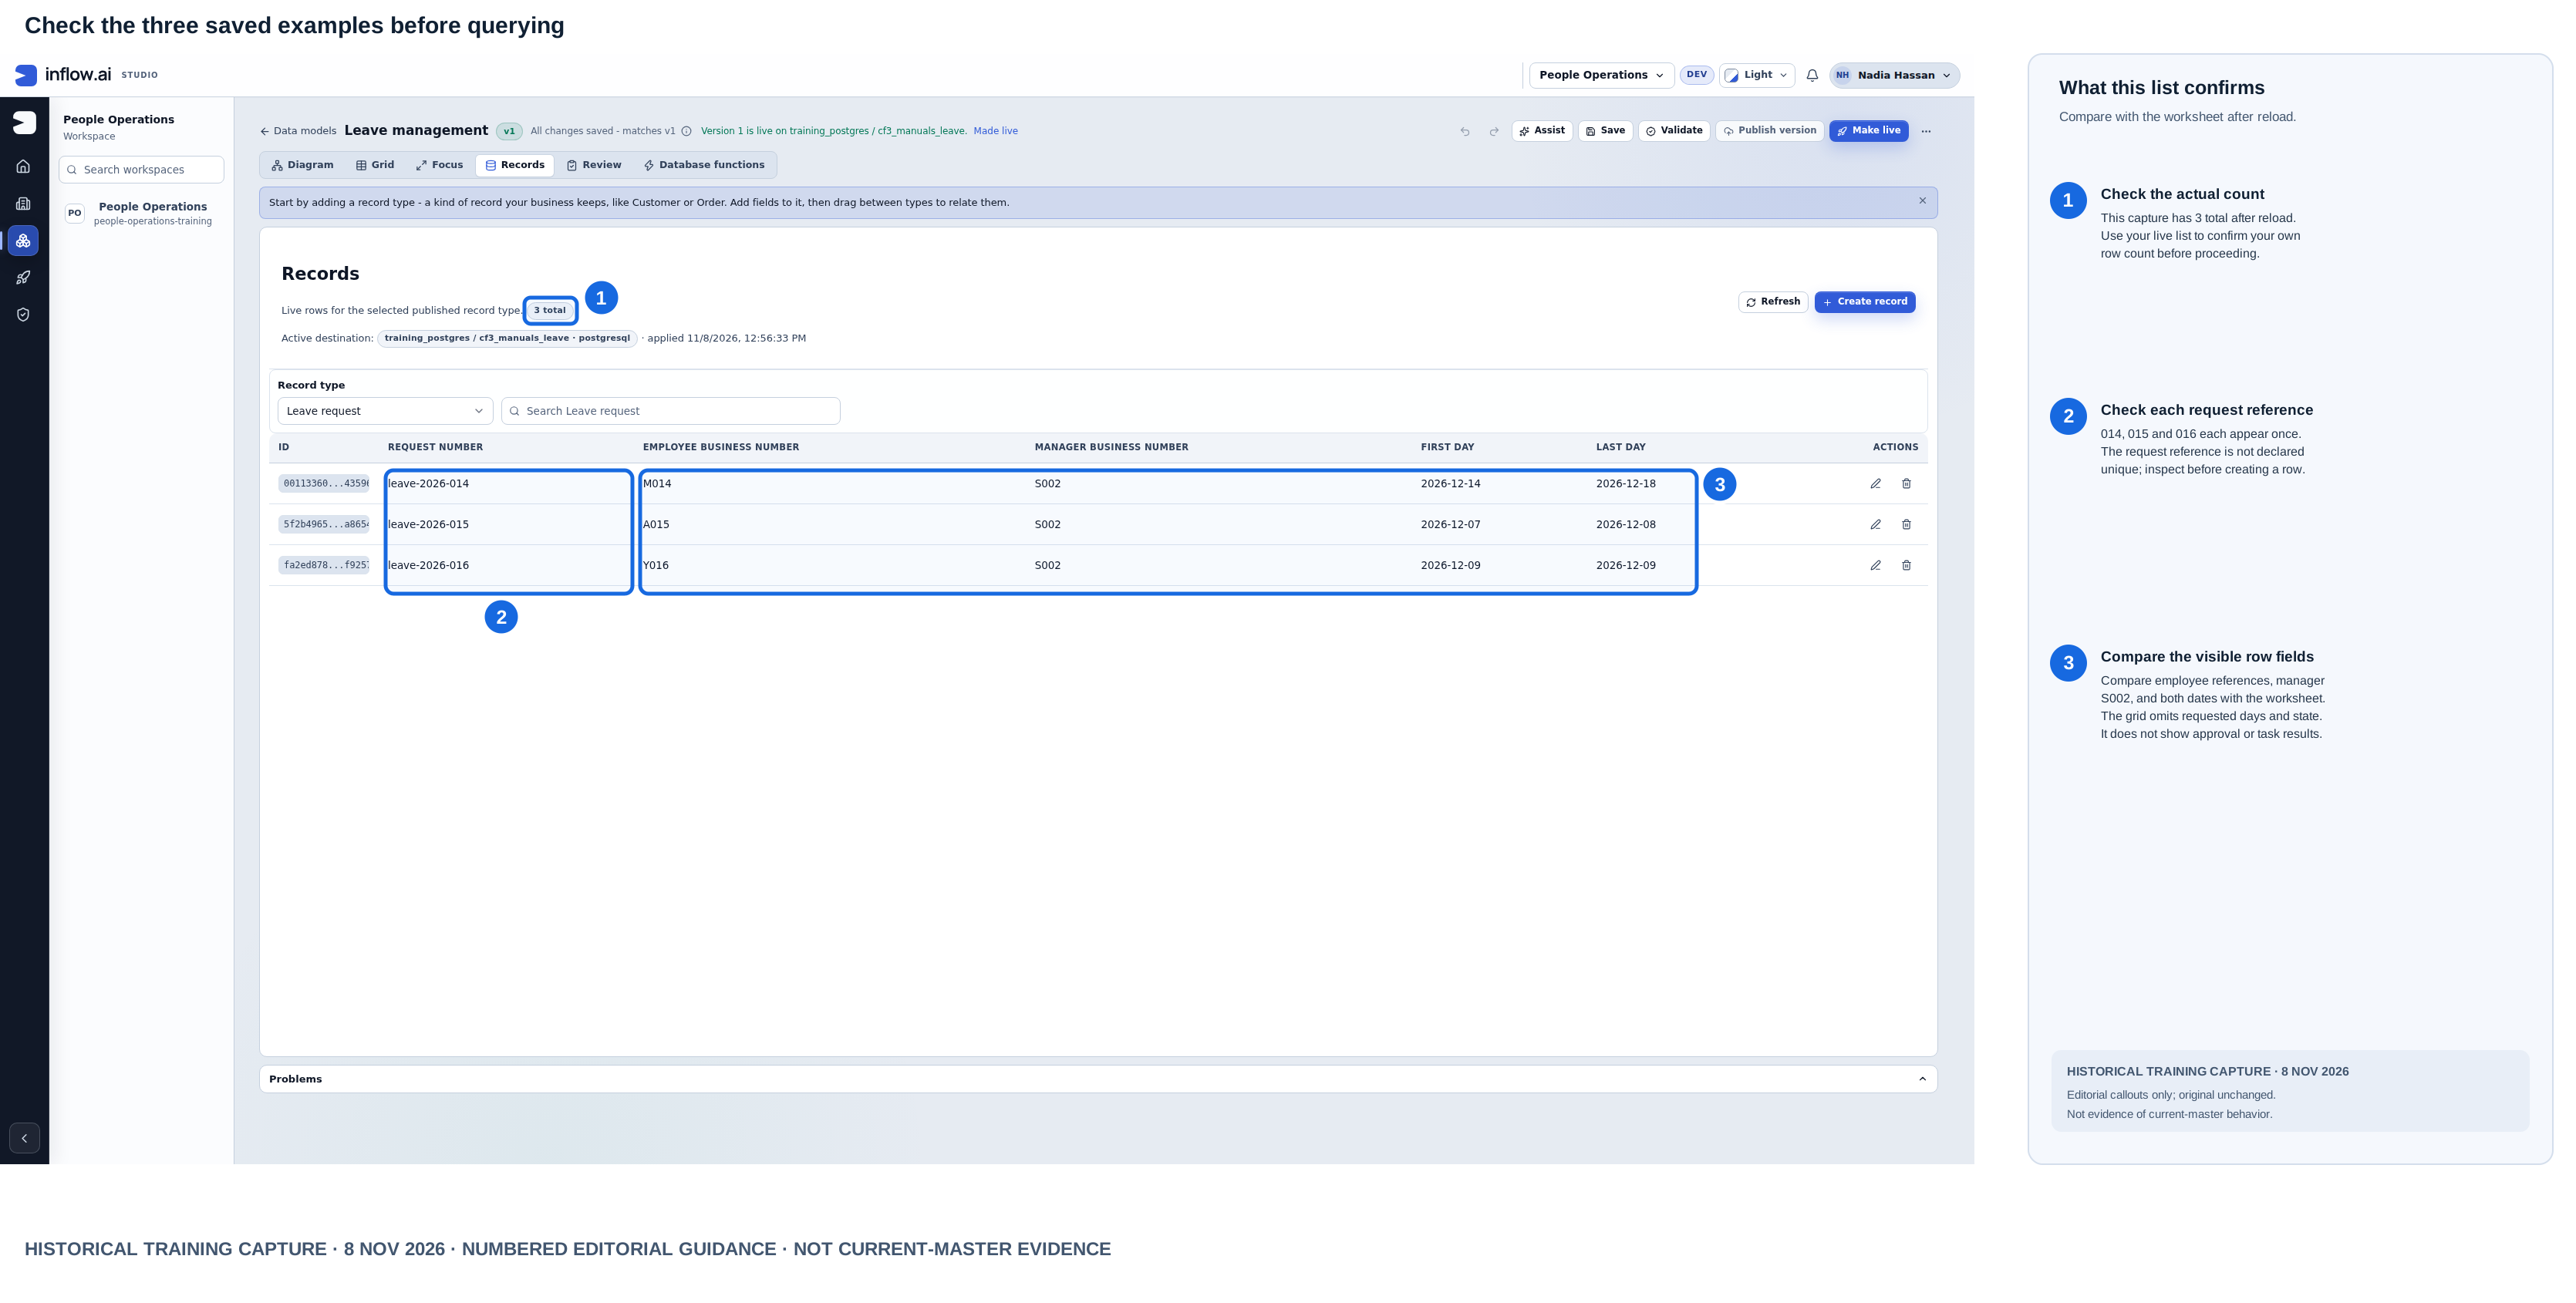
- Reload and read all three saved rows back. An existing matching sample should be inspected and reused; request_id was not declared unique, so a repeated business reference could create a duplicate.
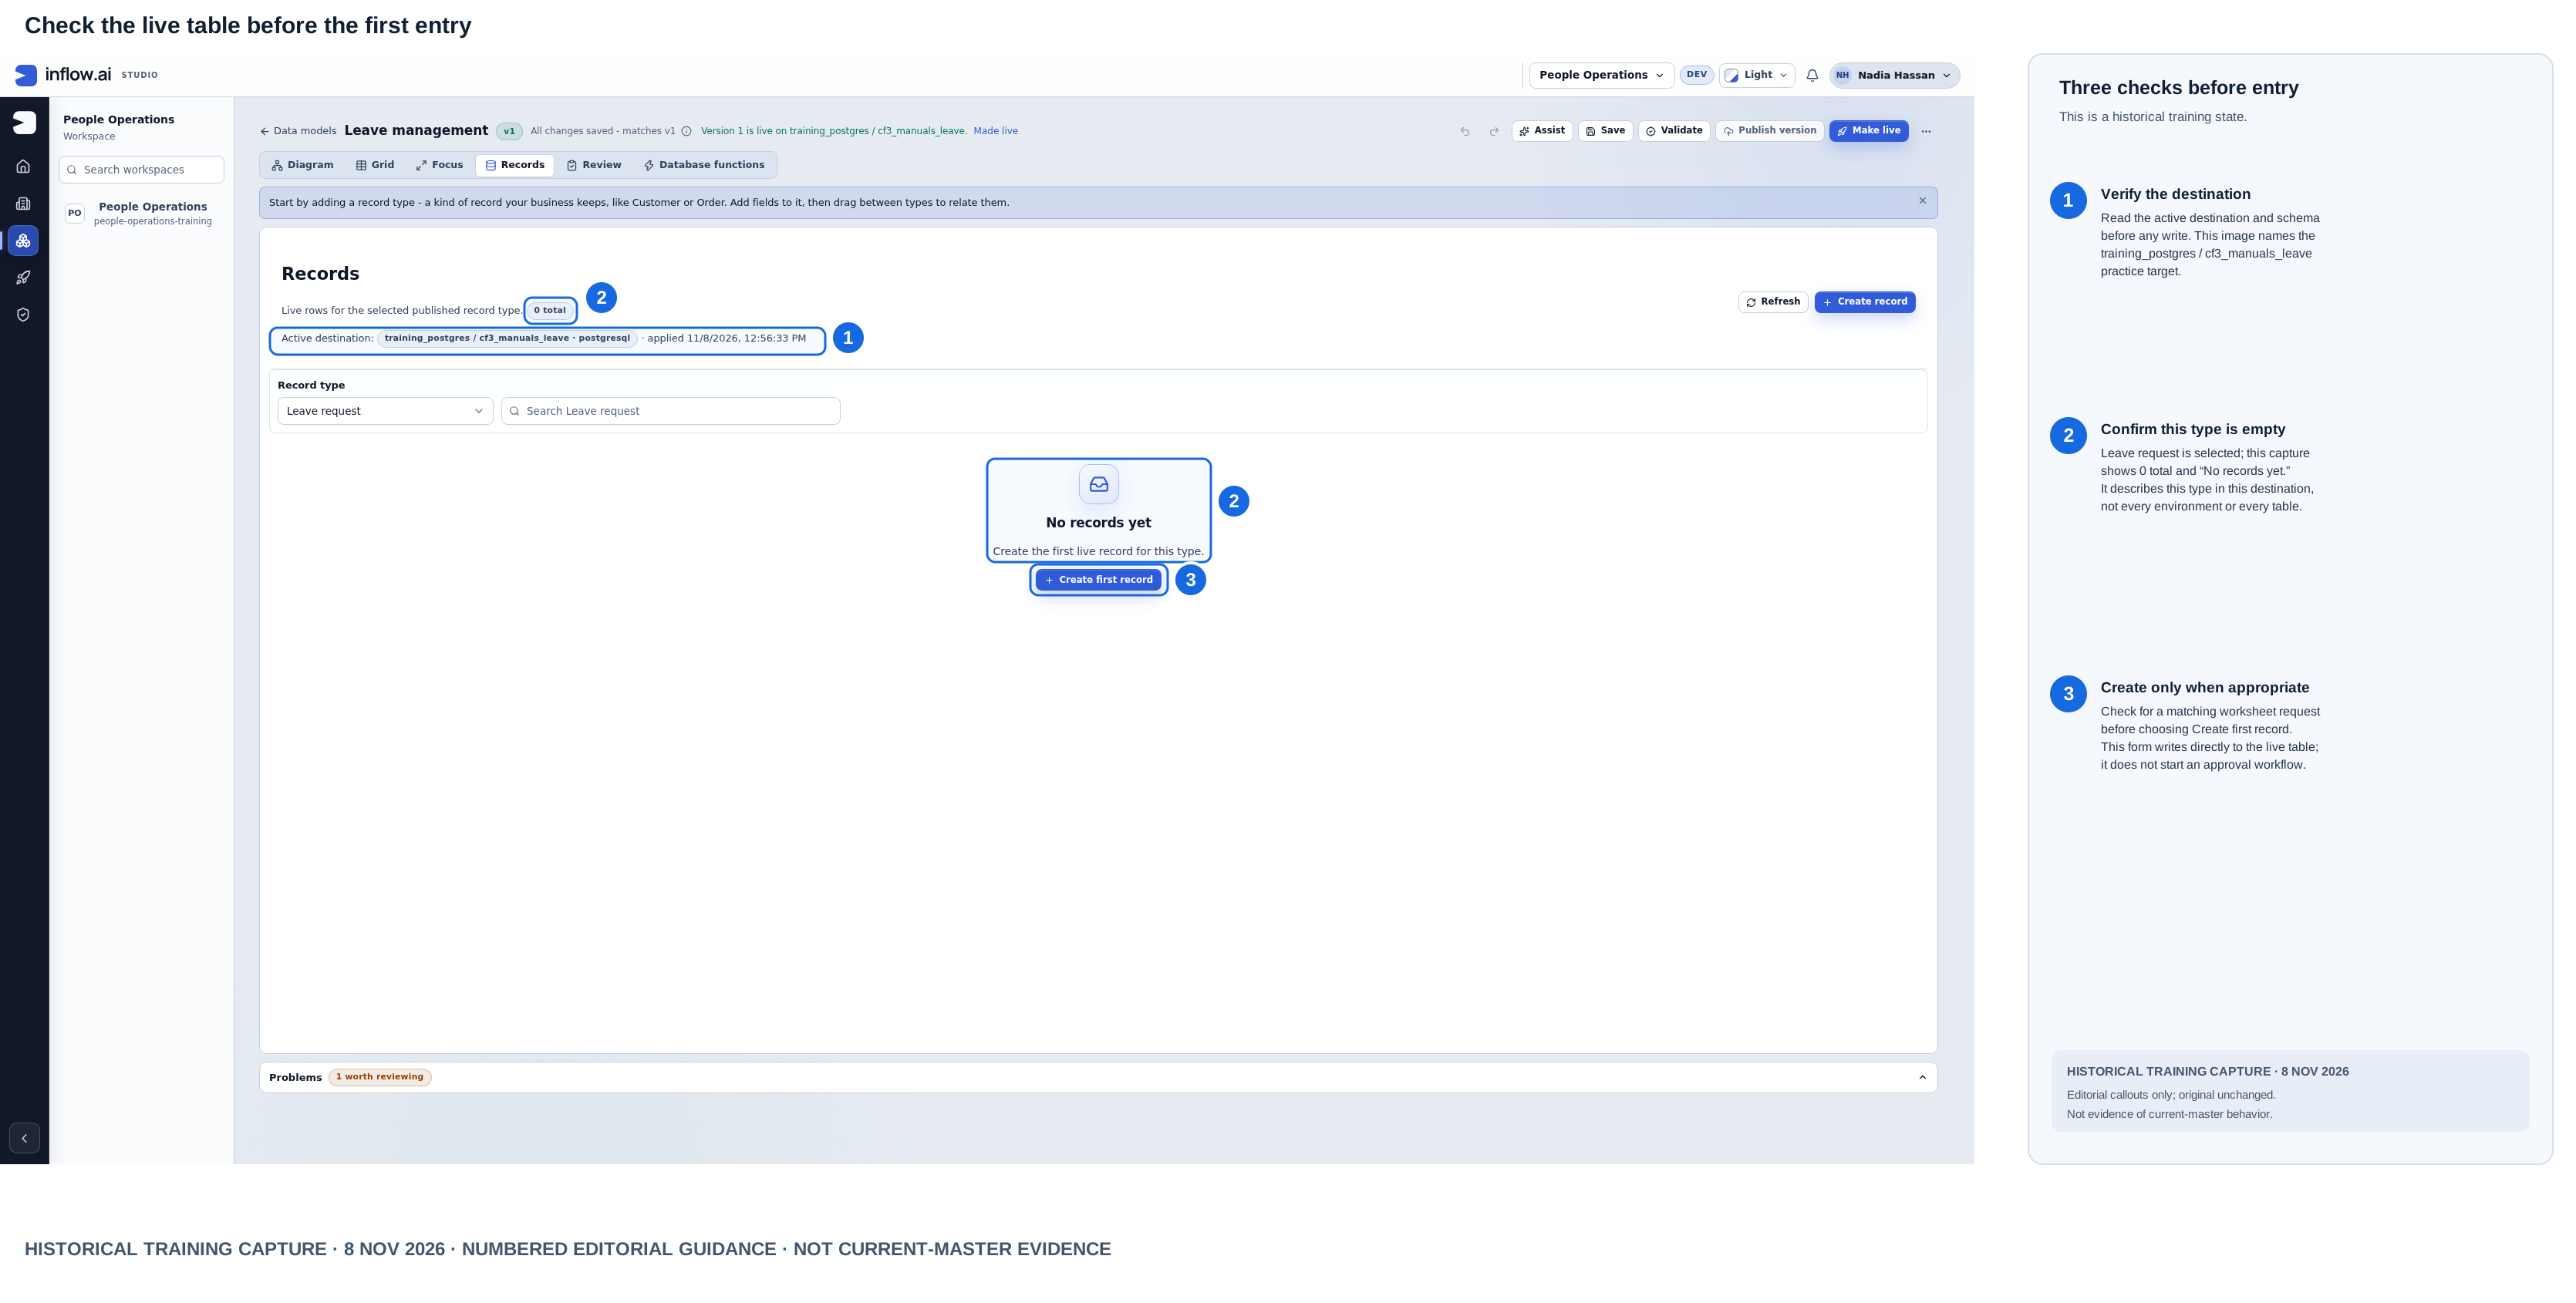
Historical training capture from 8 November 2026. Numbered outlines and the right-hand key are editorial guidance; the raw screenshot is unchanged. This composite is not current-master evidence.
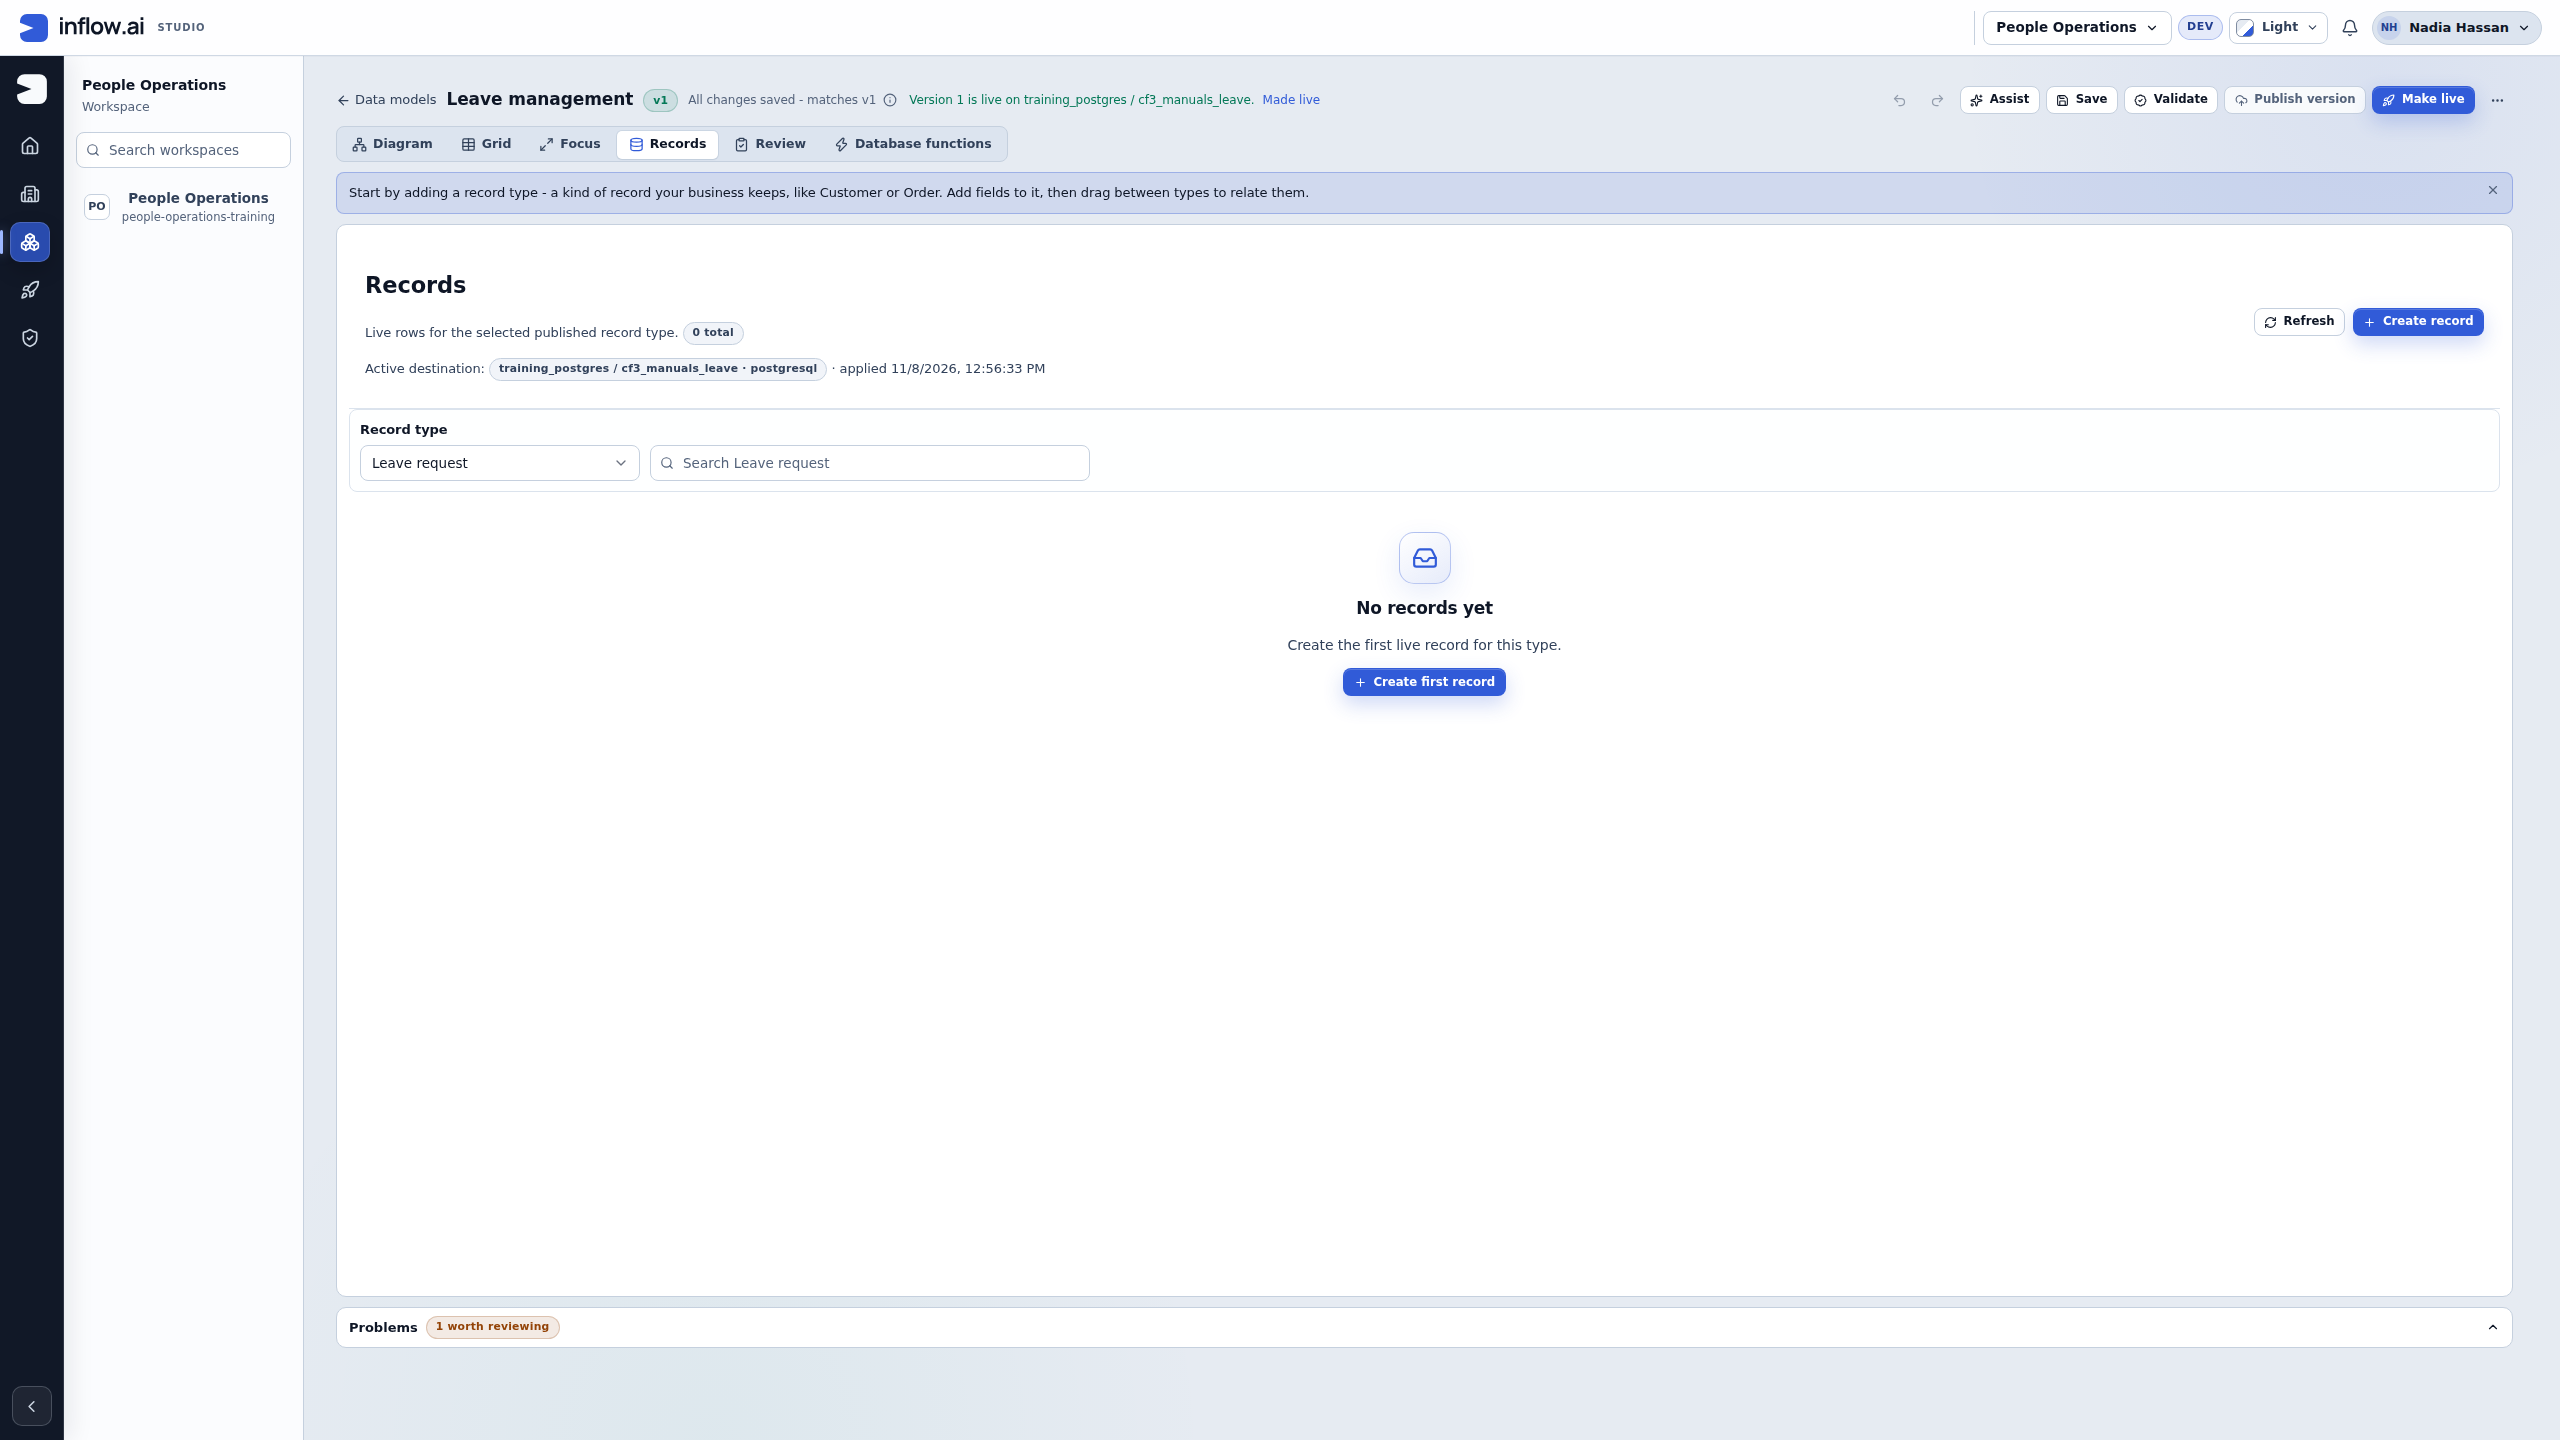
Check the starting point: Published and made live does not mean any sample data has already been entered.
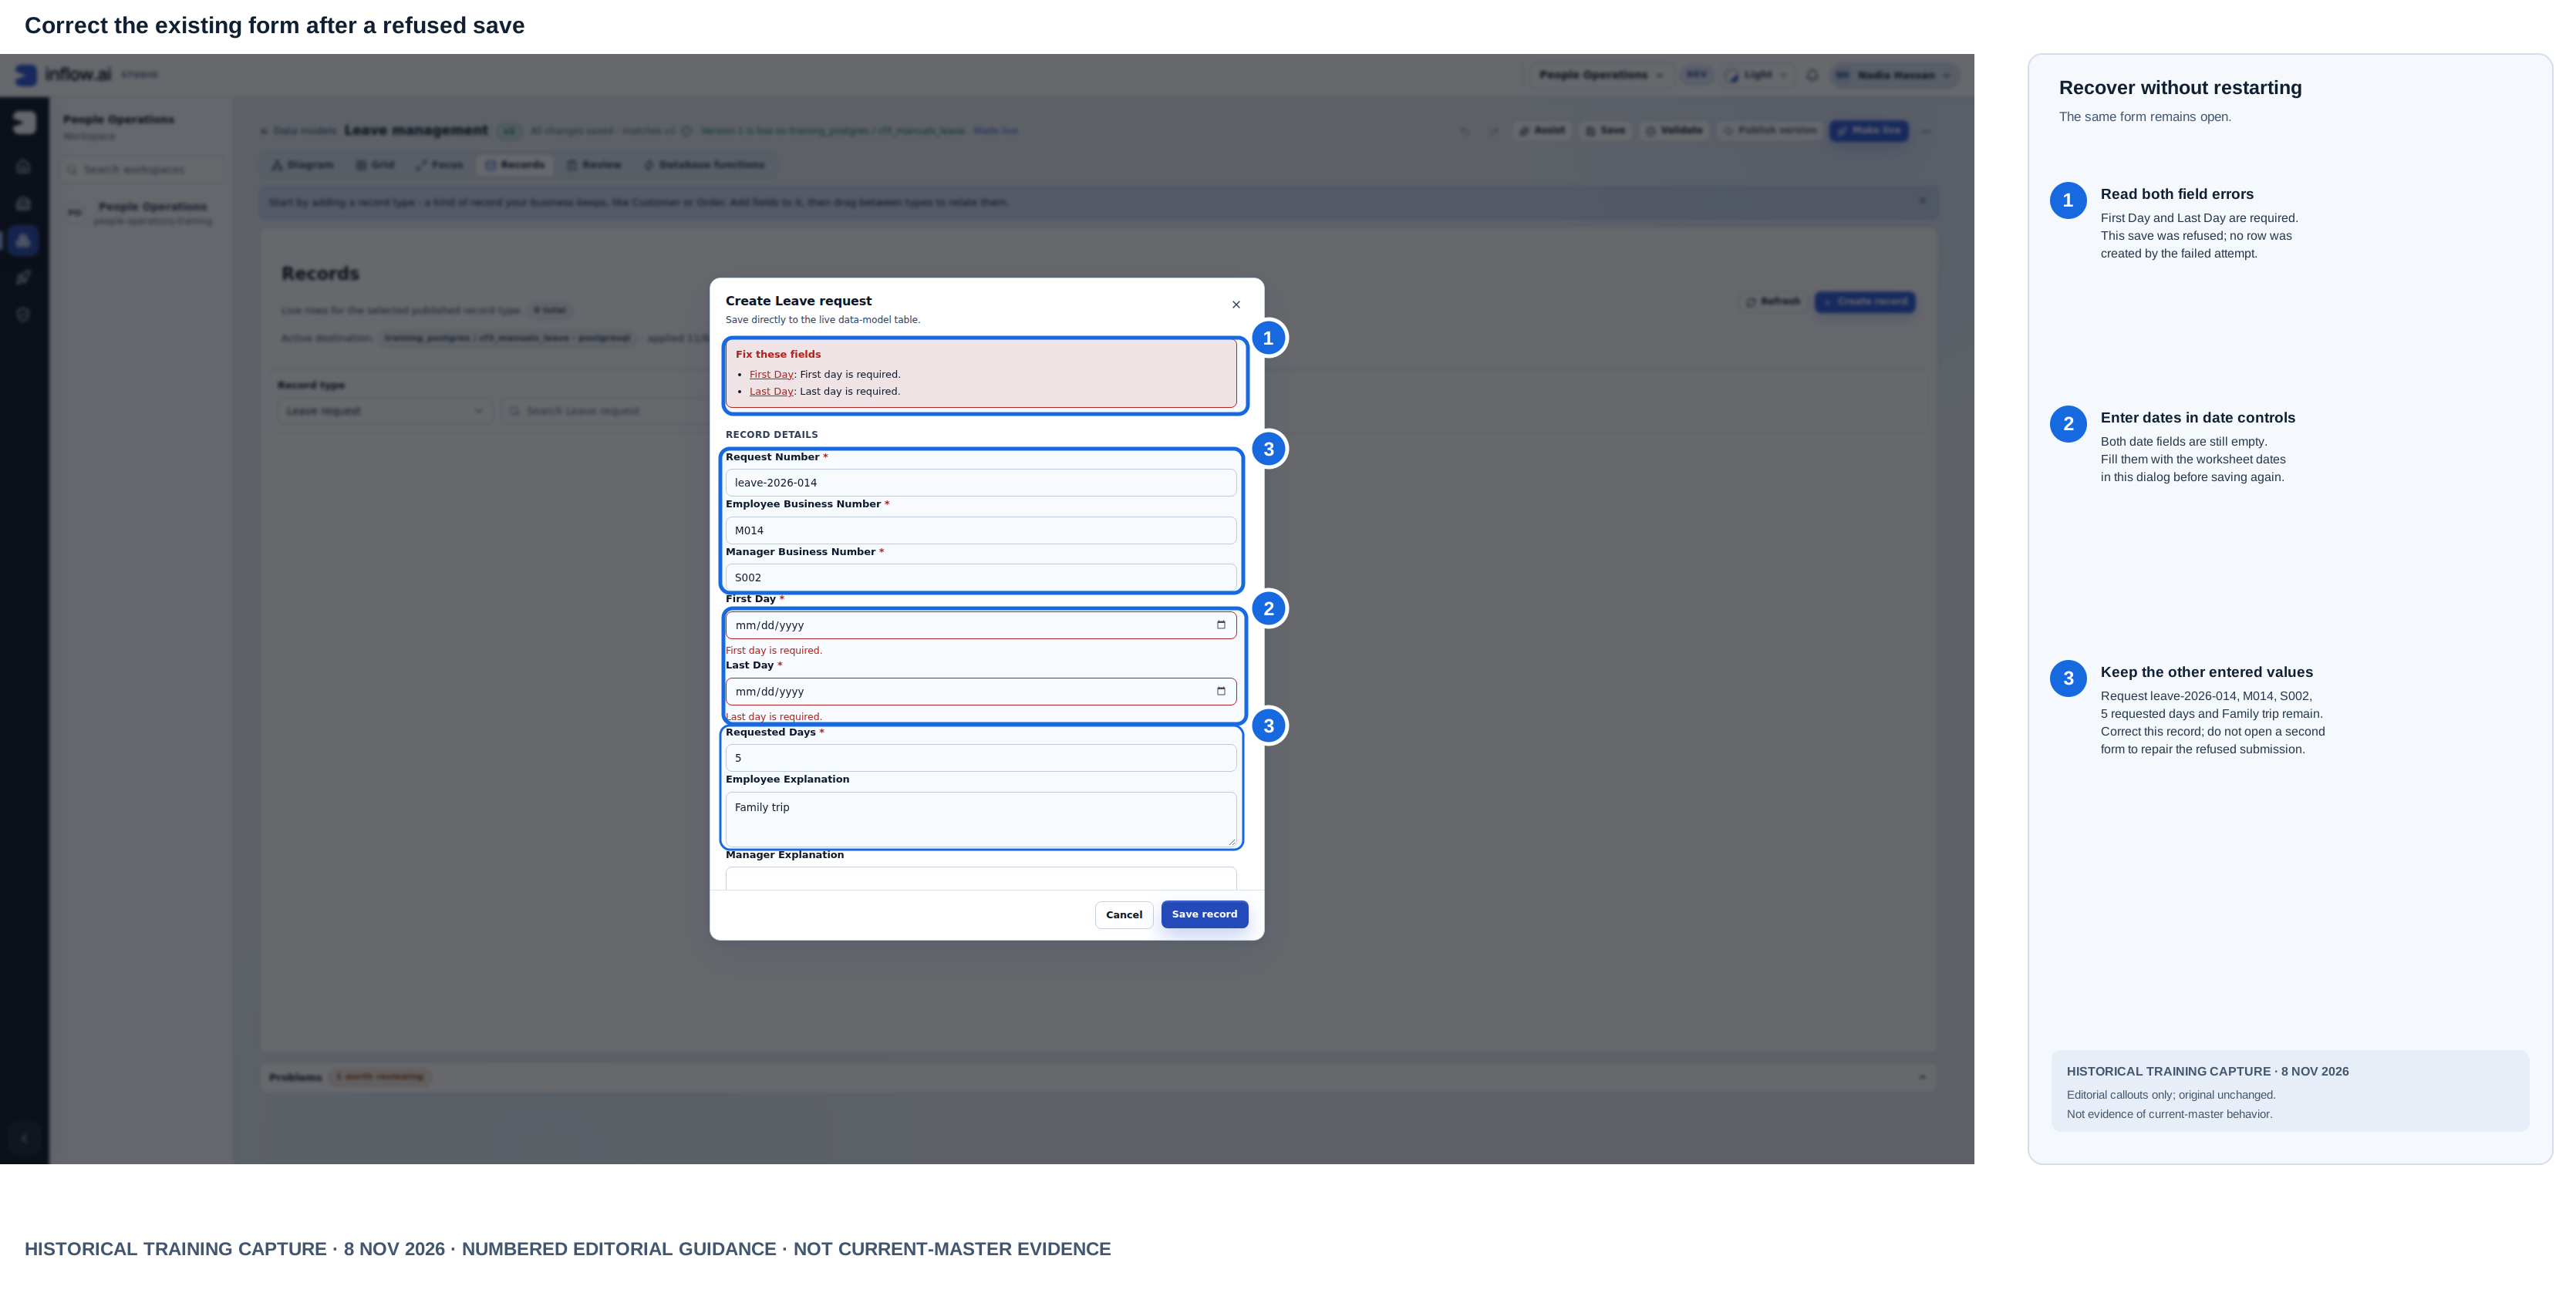
Historical training capture from 8 November 2026. Numbered outlines and the right-hand key are editorial guidance; the raw screenshot is unchanged. This composite is not current-master evidence.
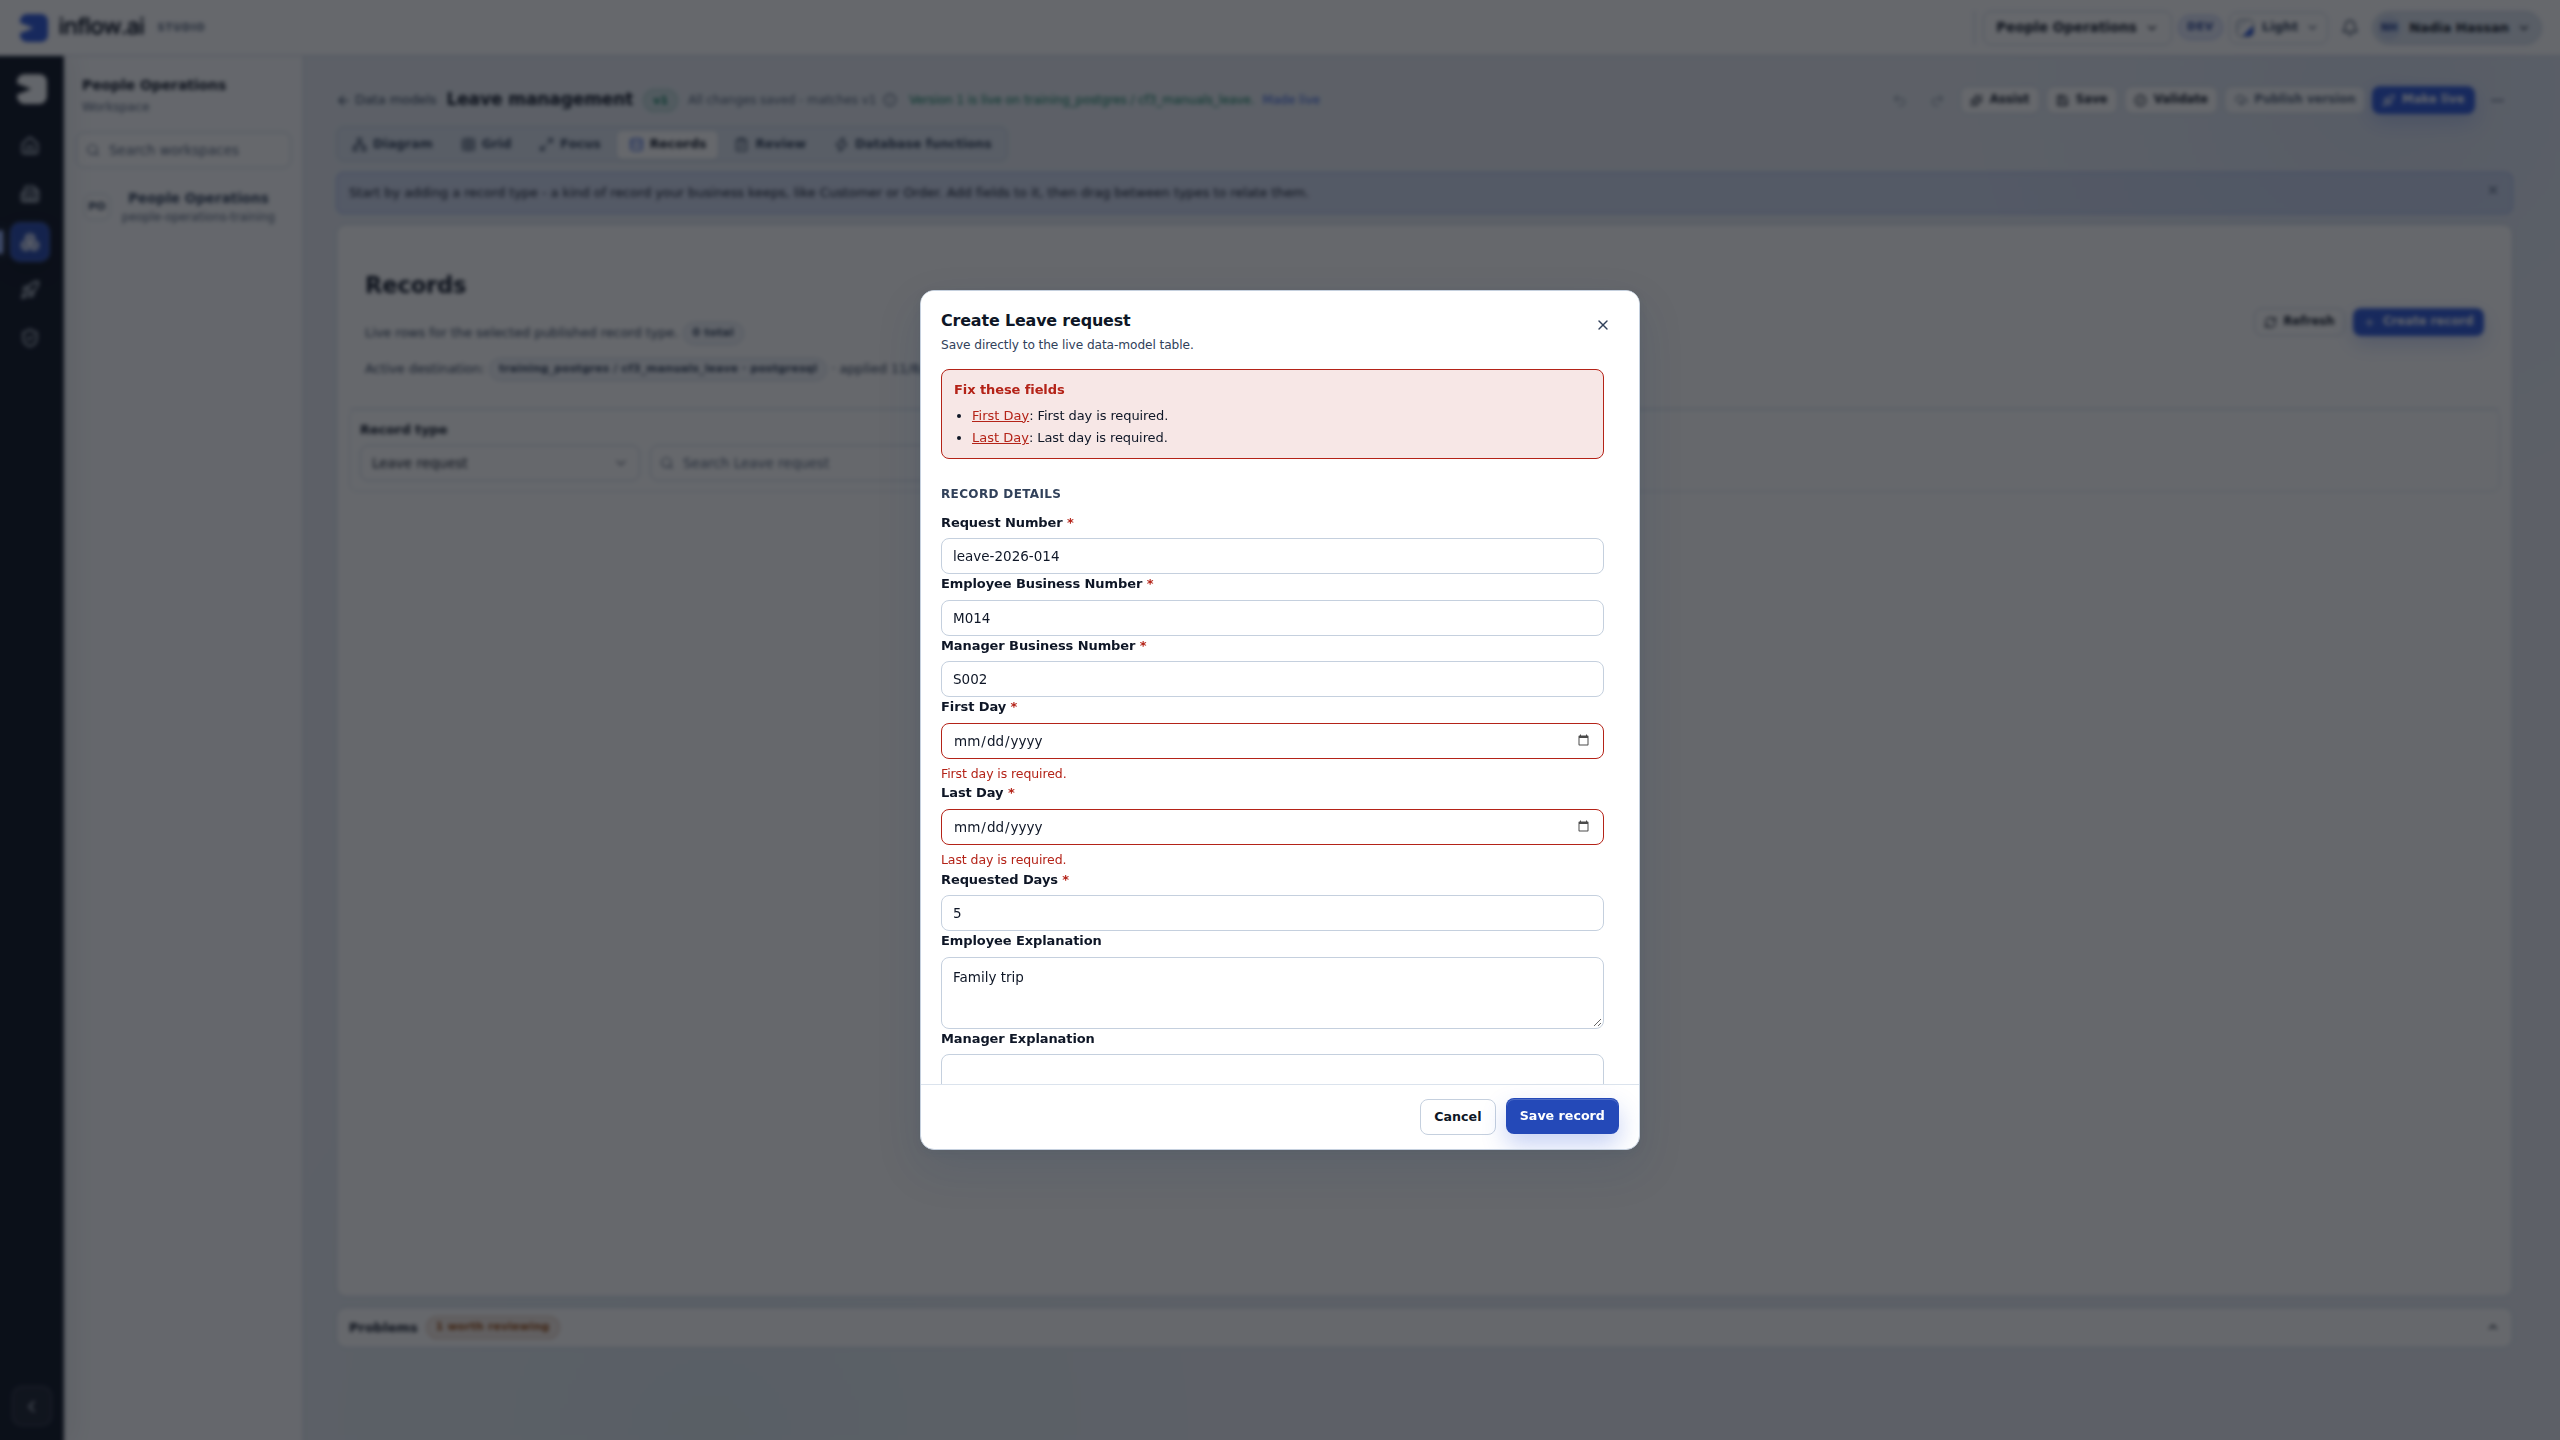
Check recovery: Both empty date fields were refused. Enter the worksheet dates in these controls and continue in the same dialog. The request number, employee/manager references, requested days and explanation remain available; a refused save did not create a row. Do not start another record to correct the first one.
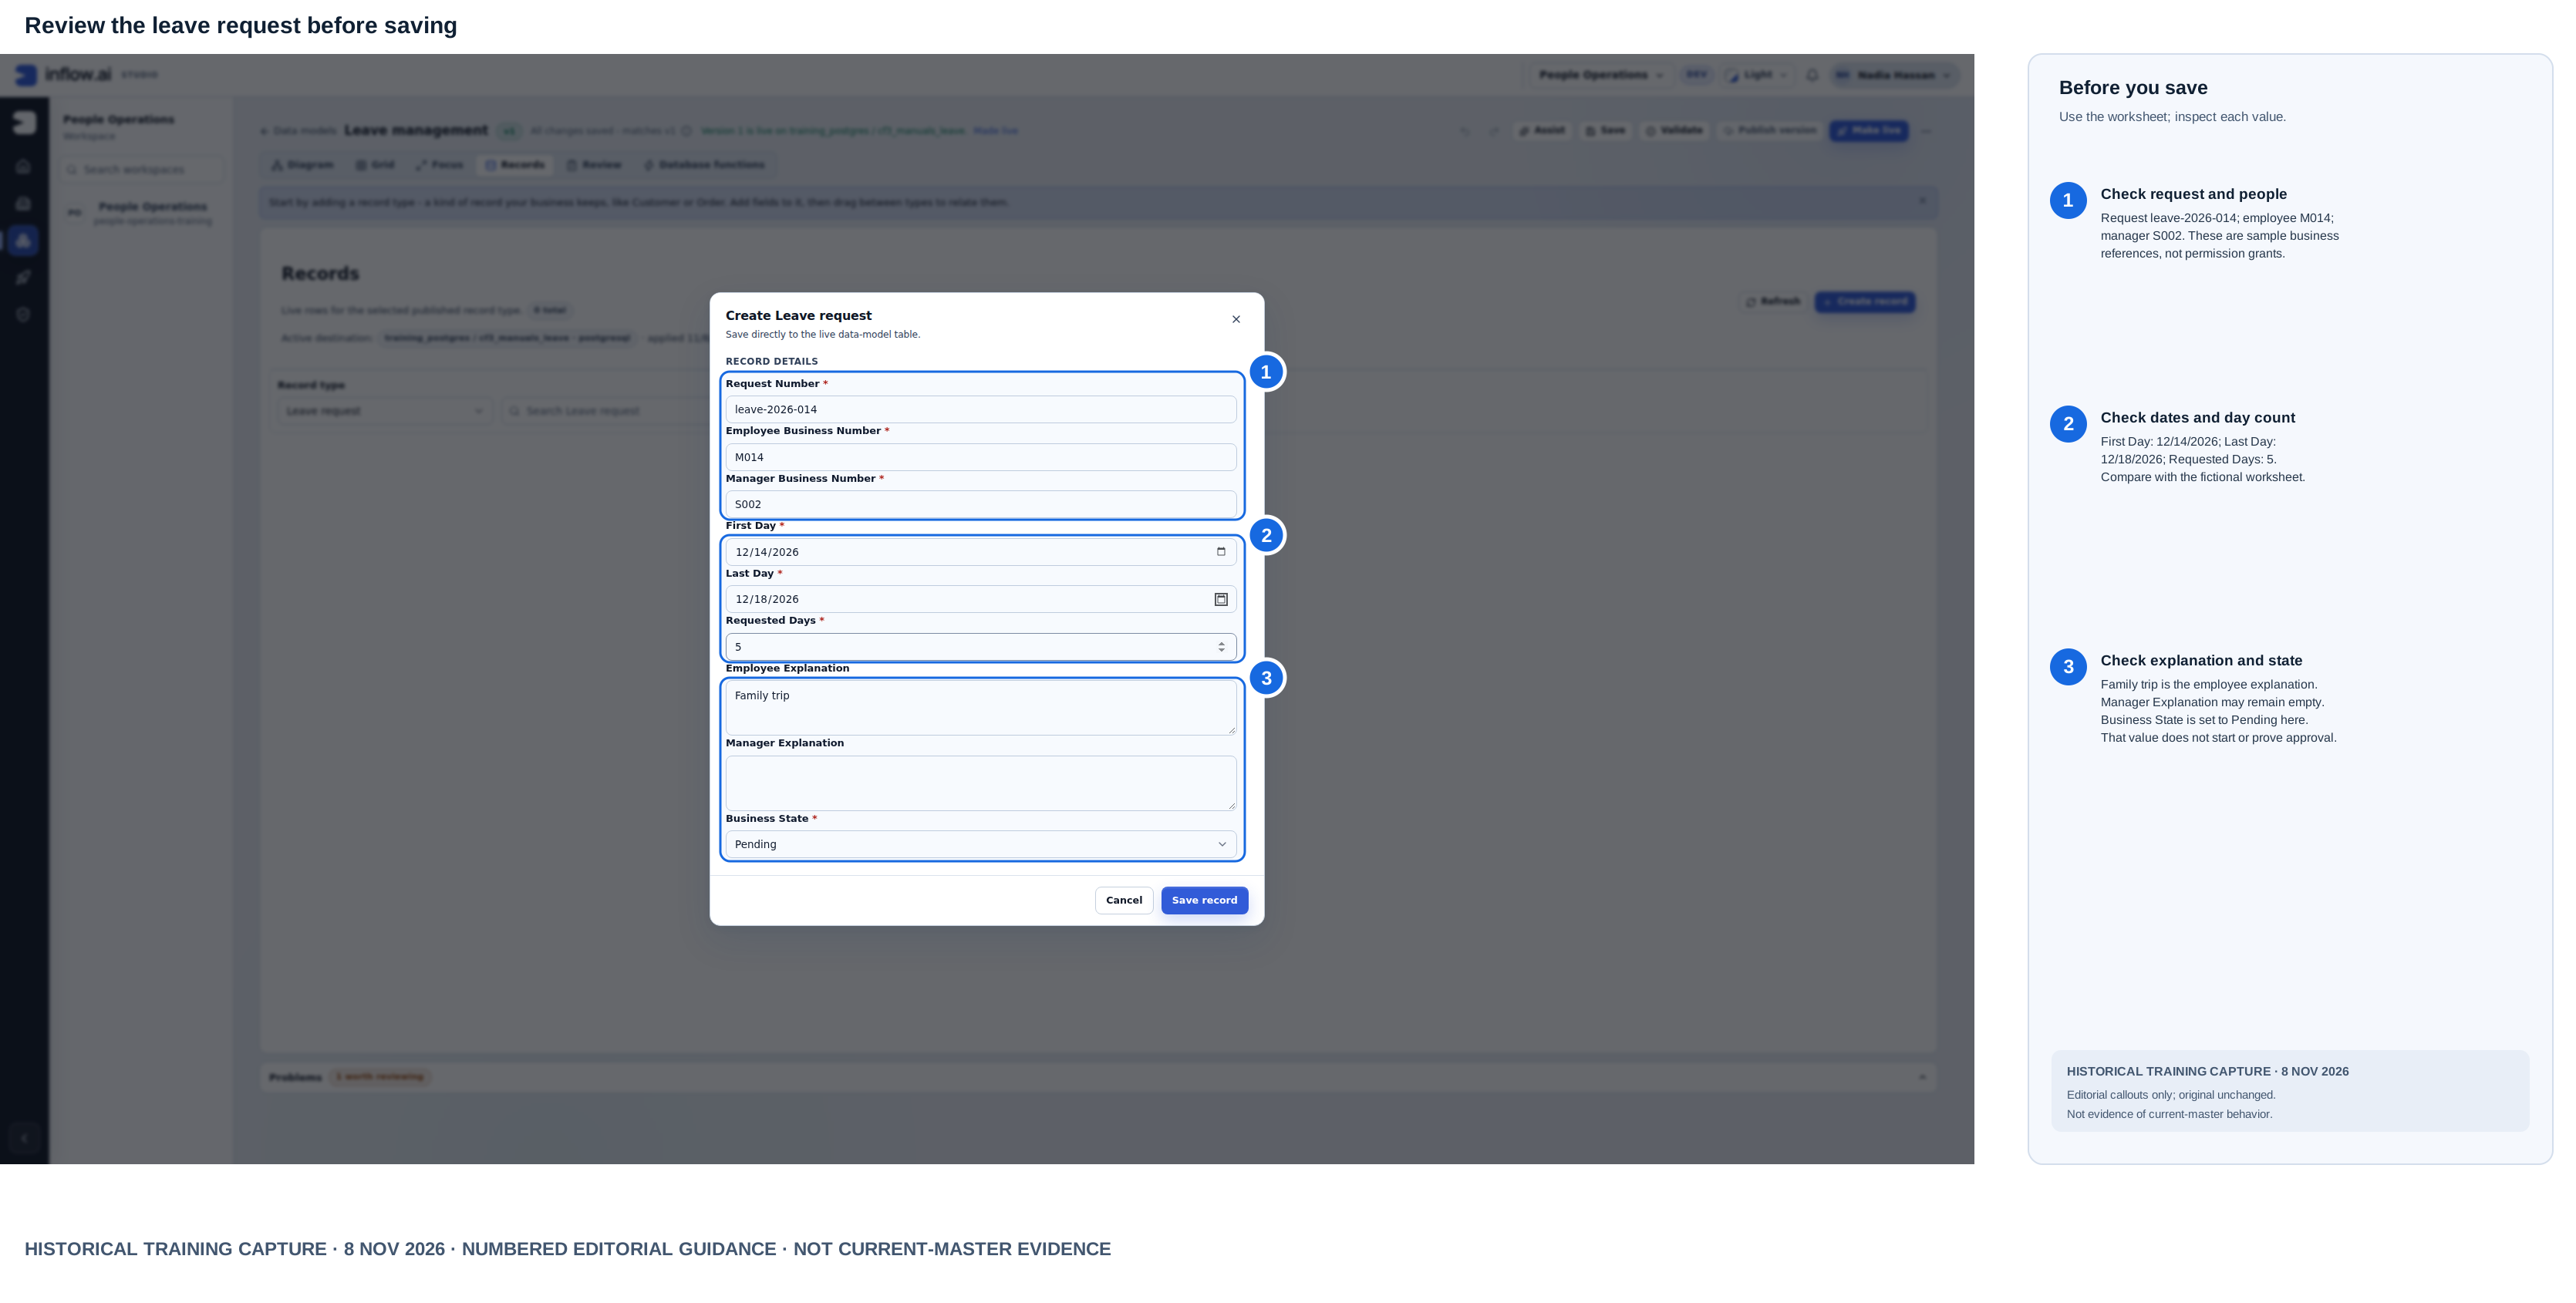
Historical training capture from 8 November 2026. Numbered outlines and the right-hand key are editorial guidance; the raw screenshot is unchanged. This composite is not current-master evidence.
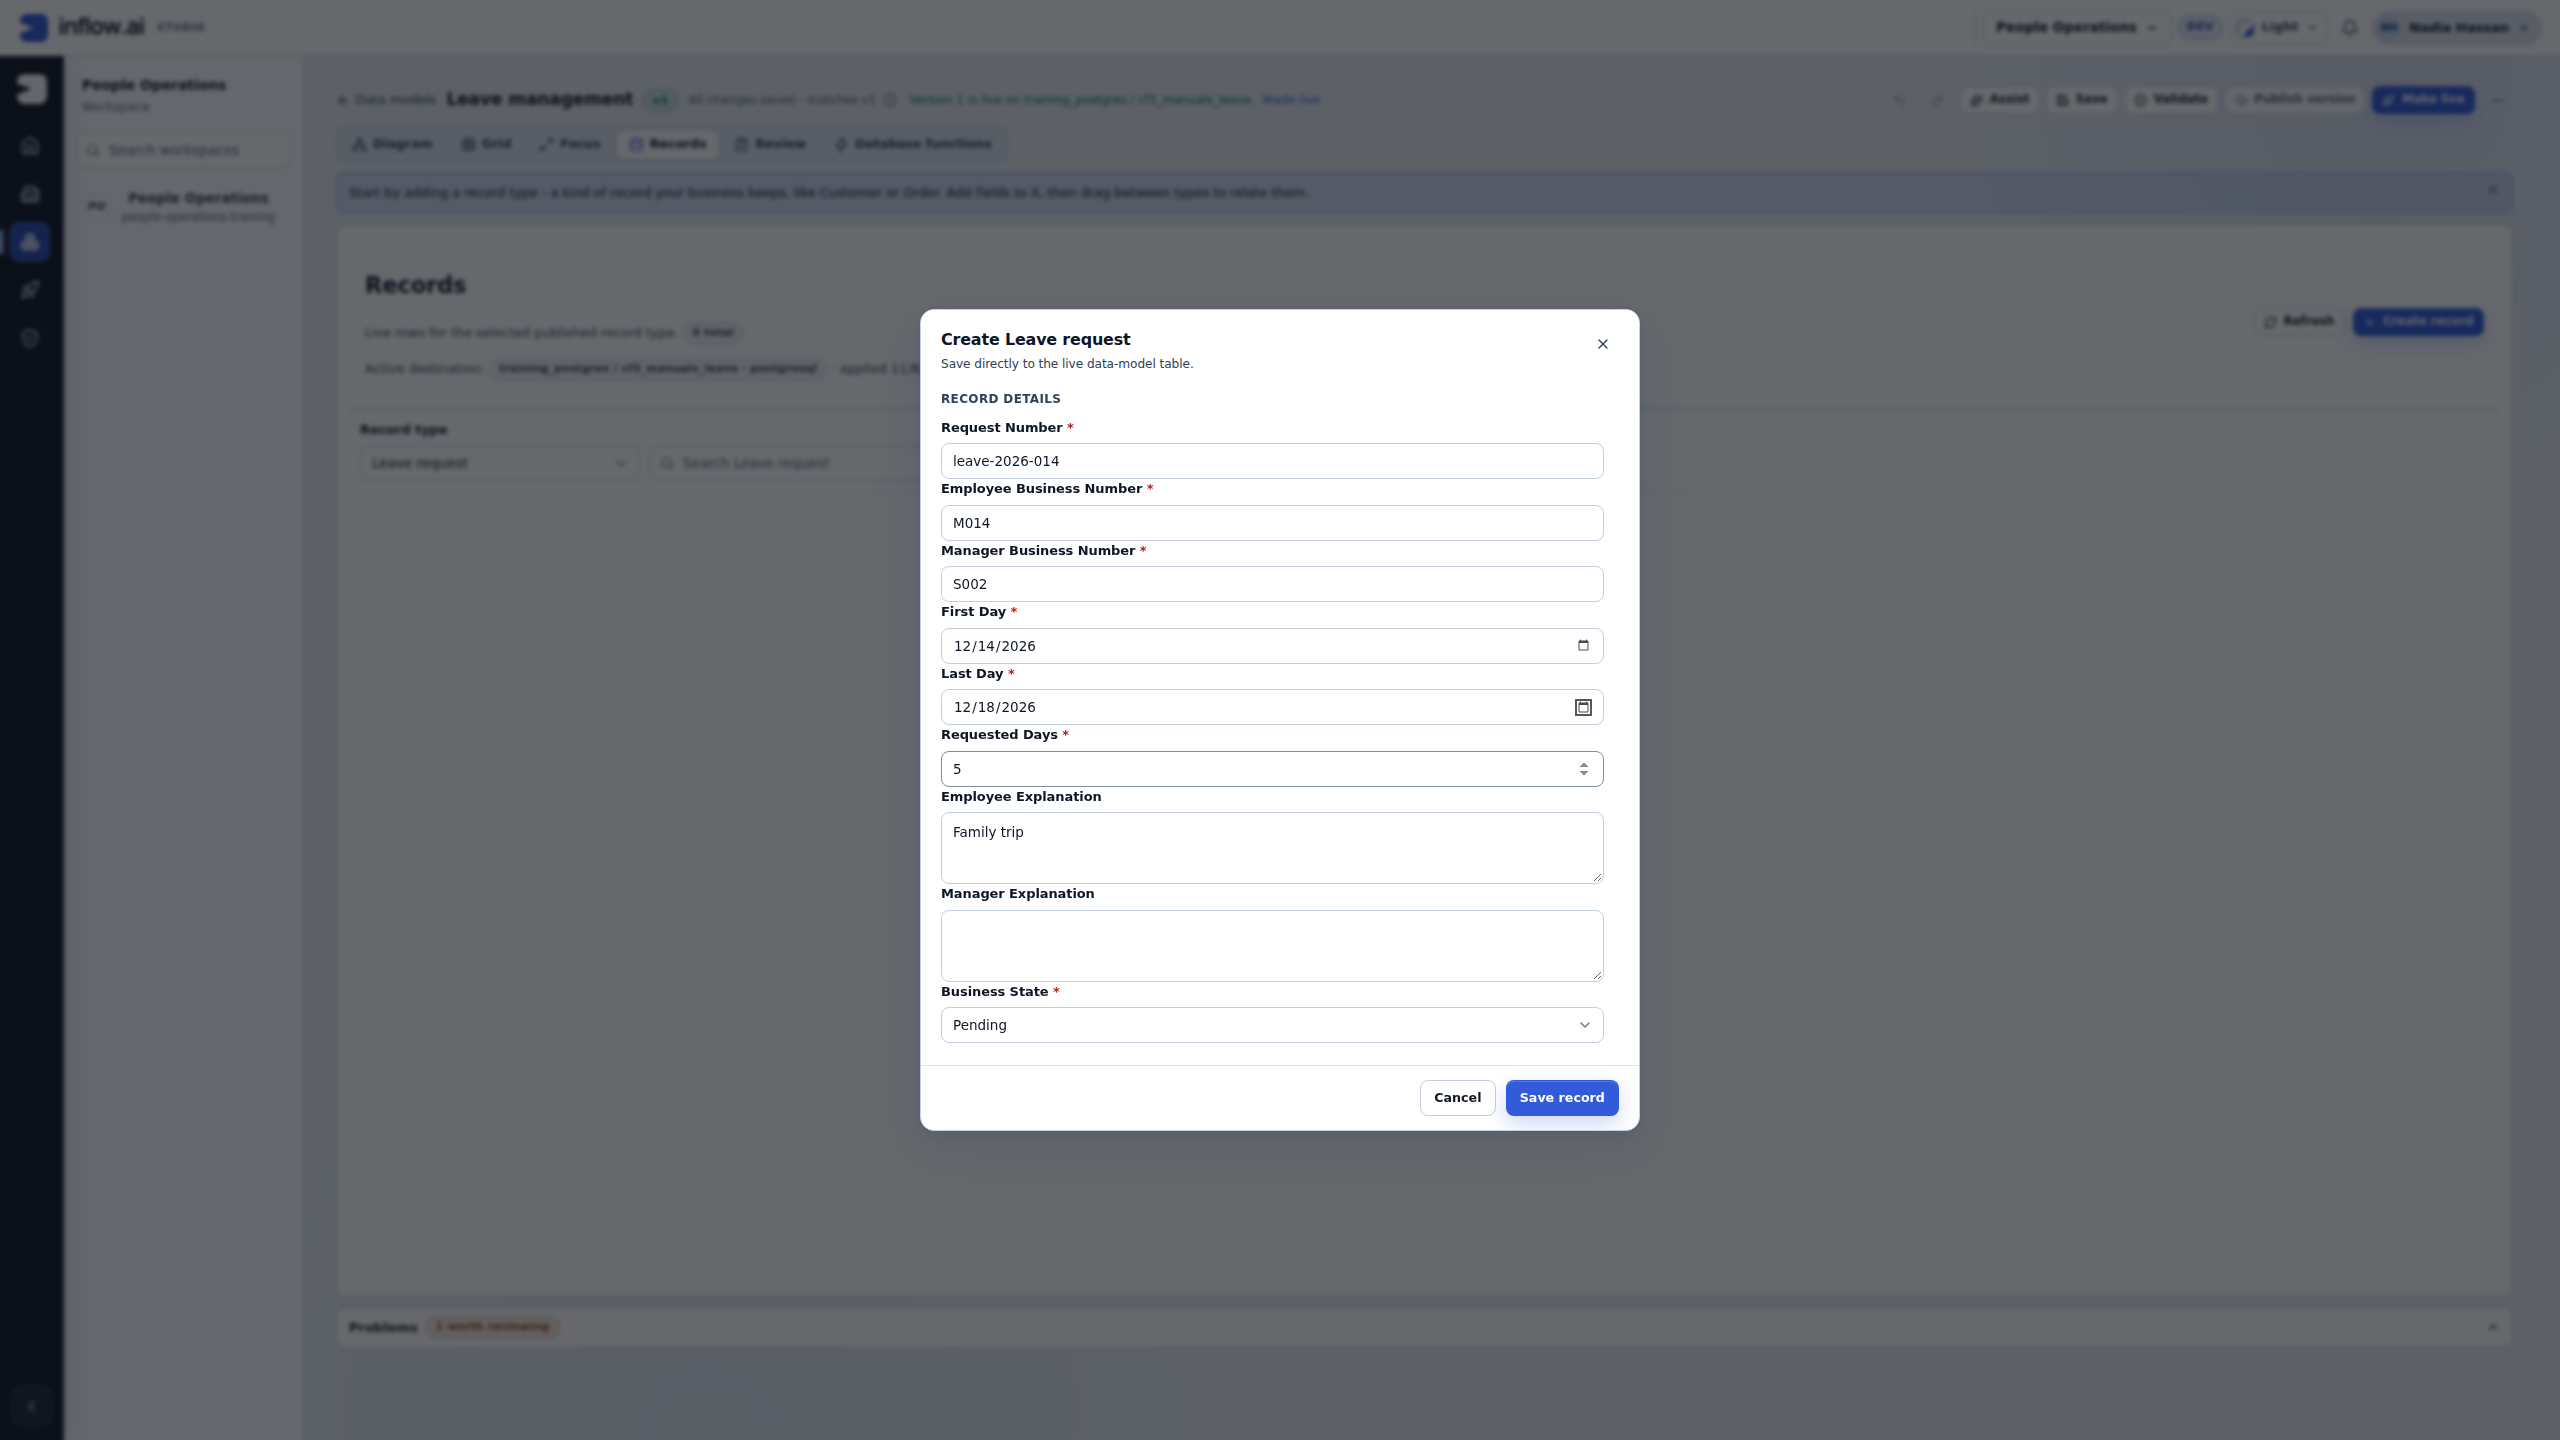
Check the values: Read the actual dates displayed in the controls before saving. Saving here writes directly to the live practice table; it does not start the approval workflow.
Historical training capture from 8 November 2026. Numbered outlines and the right-hand key are editorial guidance; the raw screenshot is unchanged. This composite is not current-master evidence.
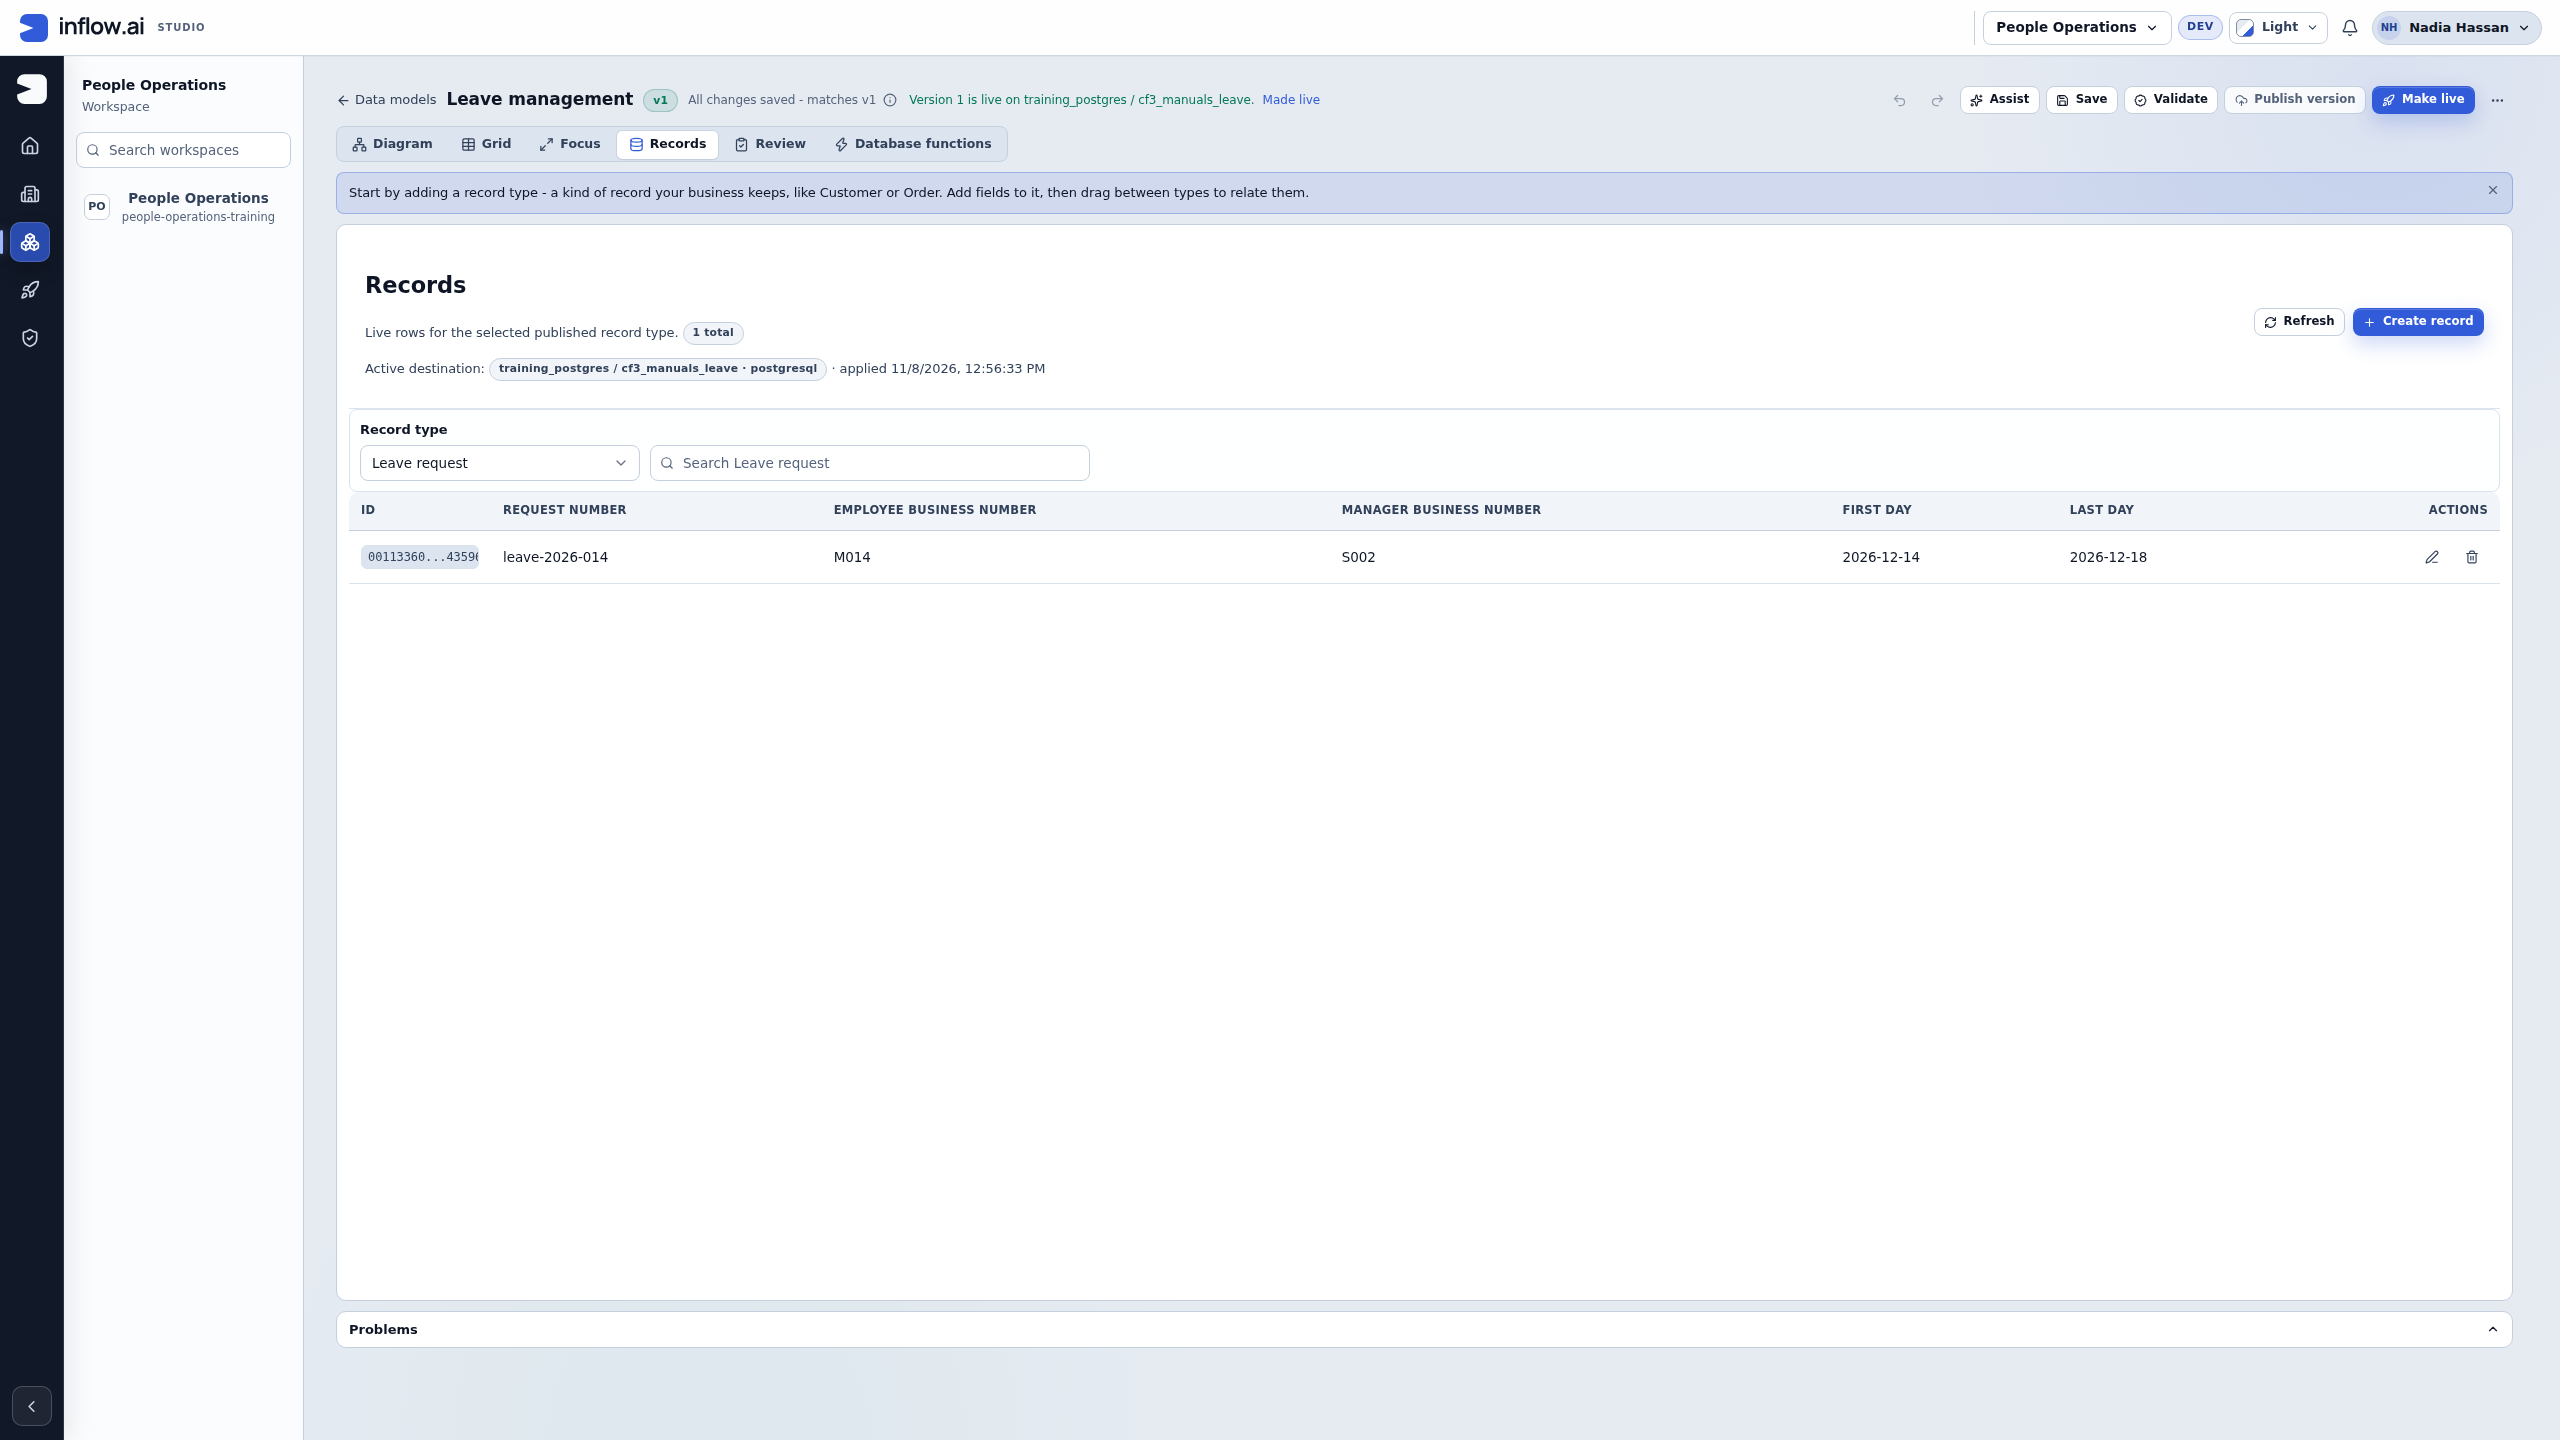
Verify the first saved row: Refresh or reload, then compare the row count, approved connection/schema, business request number, employee/manager references, and both dates with the worksheet. The generated system ID is not the request number; the compact grid also omits requested days and status. If you need those fields, open Edit to inspect the row and choose Cancel without saving. This read-back proves record persistence only; it does not prove an approval task or notification occurred.
| Request number | Employee reference | Manager reference | First day | Last day | Requested days | Status |
|---|---|---|---|---|---|---|
| leave-2026-014 | M014 | S002 | 14 December 2026 | 18 December 2026 | 5 | PENDING |
| leave-2026-015 | A015 | S002 | 7 December 2026 | 8 December 2026 | 2 | PENDING |
| leave-2026-016 | Y016 | S002 | 9 December 2026 | 9 December 2026 | 1 | APPROVED |
For 015, use Family appointments as the reason. For 016, use Personal day and the manager comment Fictional previously approved comparison record. APPROVED on 016 is deliberately entered comparison data; no approval task has run to produce it. These dates and quantities are a controlled lesson, not an automatic working-day or holiday calculation.
Historical training capture from 8 November 2026. Numbered outlines and the right-hand key are editorial guidance; the raw screenshot is unchanged. This composite is not current-master evidence.
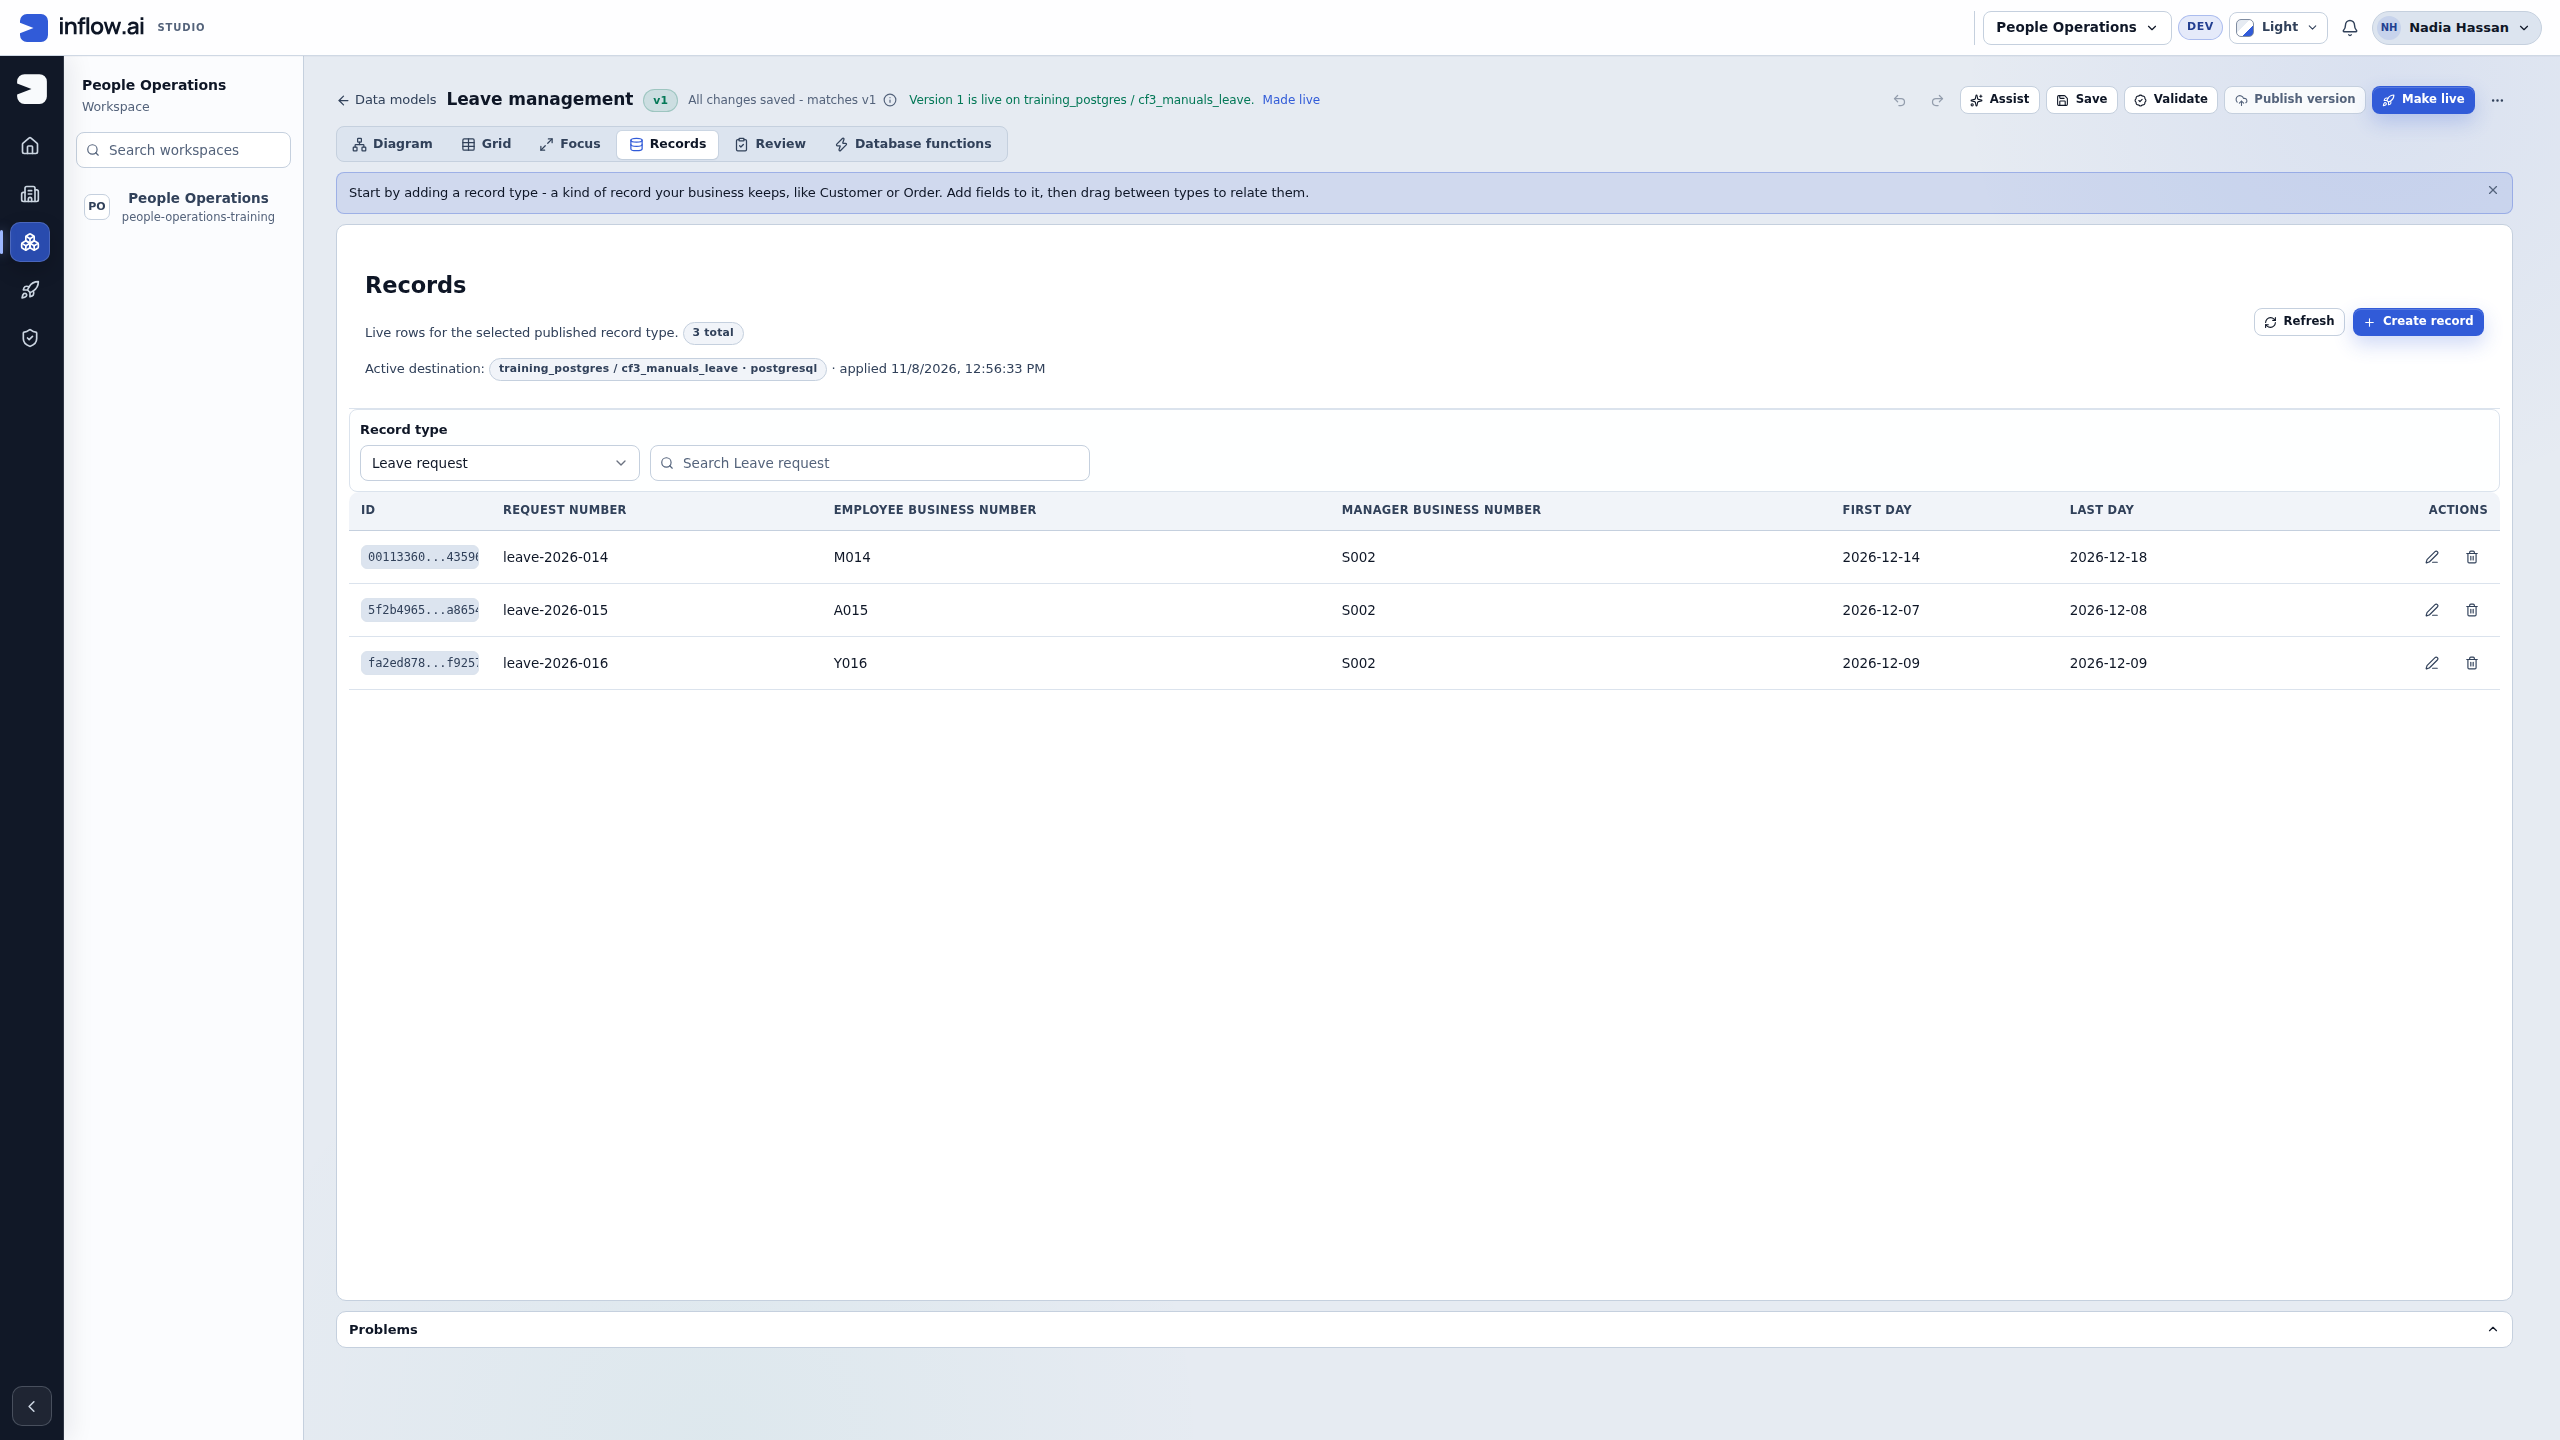
Check all three read-backs: The capture shows three total rows after reload. Confirm your own count, then compare each request reference with the worksheet before creating anything else: this example's 014, 015 and 016 each appear once, but request_id is not declared unique. The visible employee/manager references and date columns should match their worksheet rows. The compact list omits requested days and state; inspect a row with Edit only when necessary, then choose Cancel without saving. Two records are Pending and one is Approved in the worksheet, but this list alone does not show those states or prove that approval, a task, or a notification occurred. Business employee/manager references do not grant record access or assign tasks.
Step 5 — Publish an allowance and an eligibility rule
Keep an existing matching rule when continuing from another manual. Inspect its name, kind, key, business function and published version before creating or publishing anything again.
Prepare the named allowance
- In Build → Rules, open the matching Leave allowance if it exists. Otherwise choose New rule → Constant, enter Name Leave allowance, check Key leave_allowance, select Leave management as Business function and choose Create Constant.
- Set Value type to Integer, leave Multiple values off and enter Value 10. This is the fictional policy quantity for the lesson, not a text identifier or an approved organization-wide policy.
- Choose Validate and read Constant preview 10 and the saved state.
- If the current draft already matches the intended published value, reuse that version. Otherwise choose Publish and check the resulting published-version row.
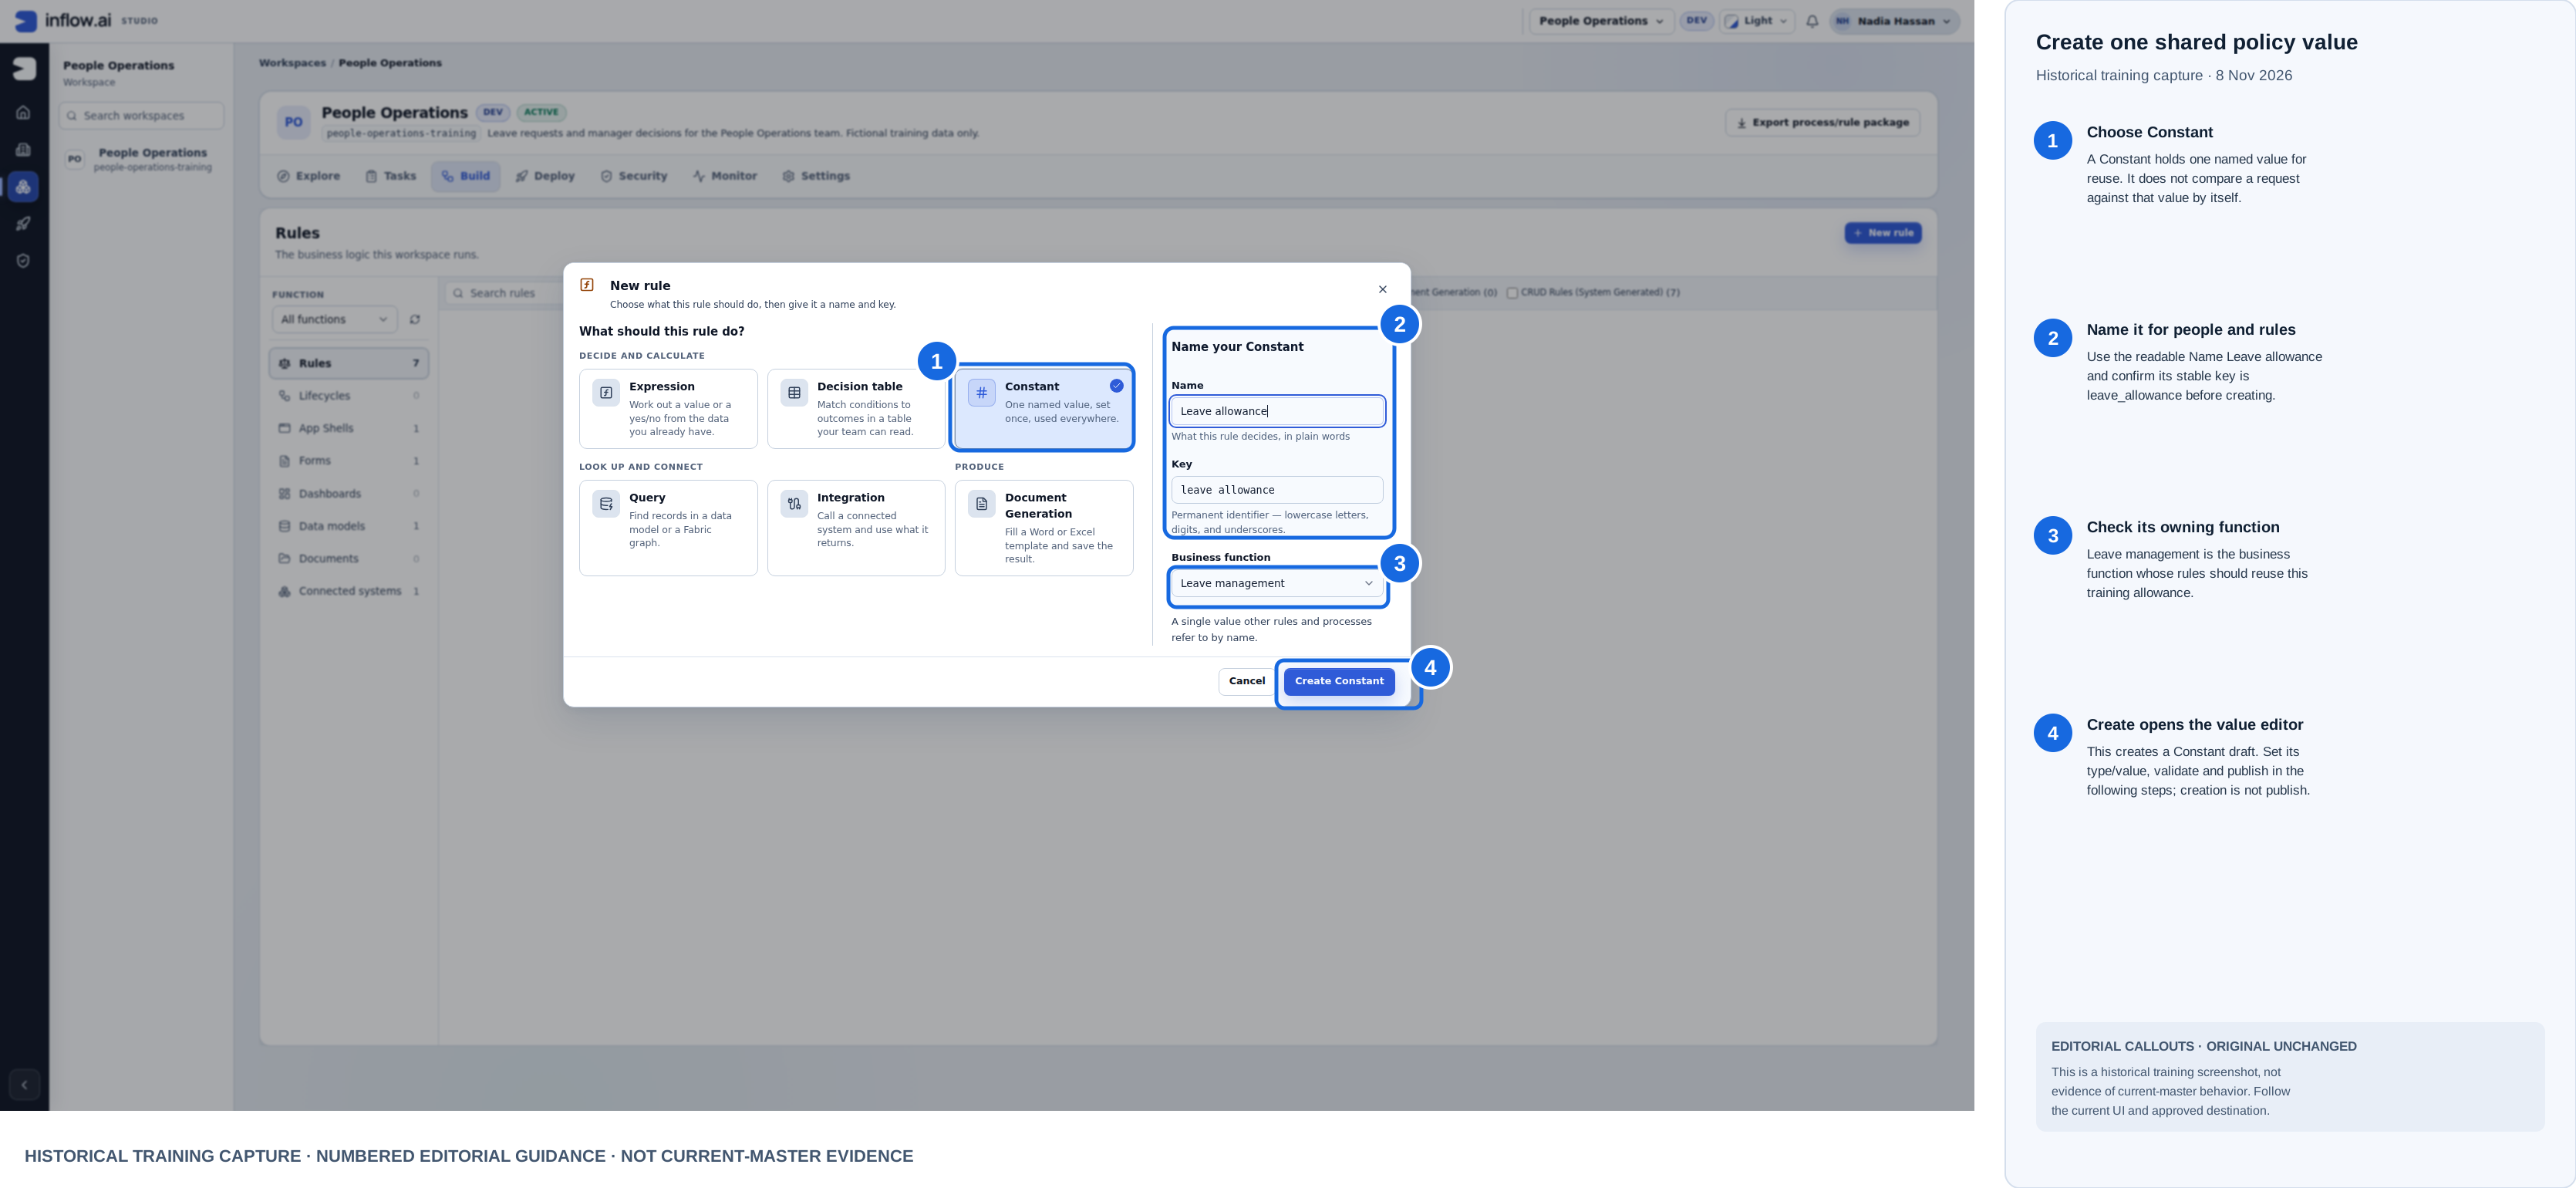
Historical training capture from 8 November 2026. Blue outlines and numbered labels are editorial guidance; the raw screenshot is unchanged here. This composite is not current-master evidence.
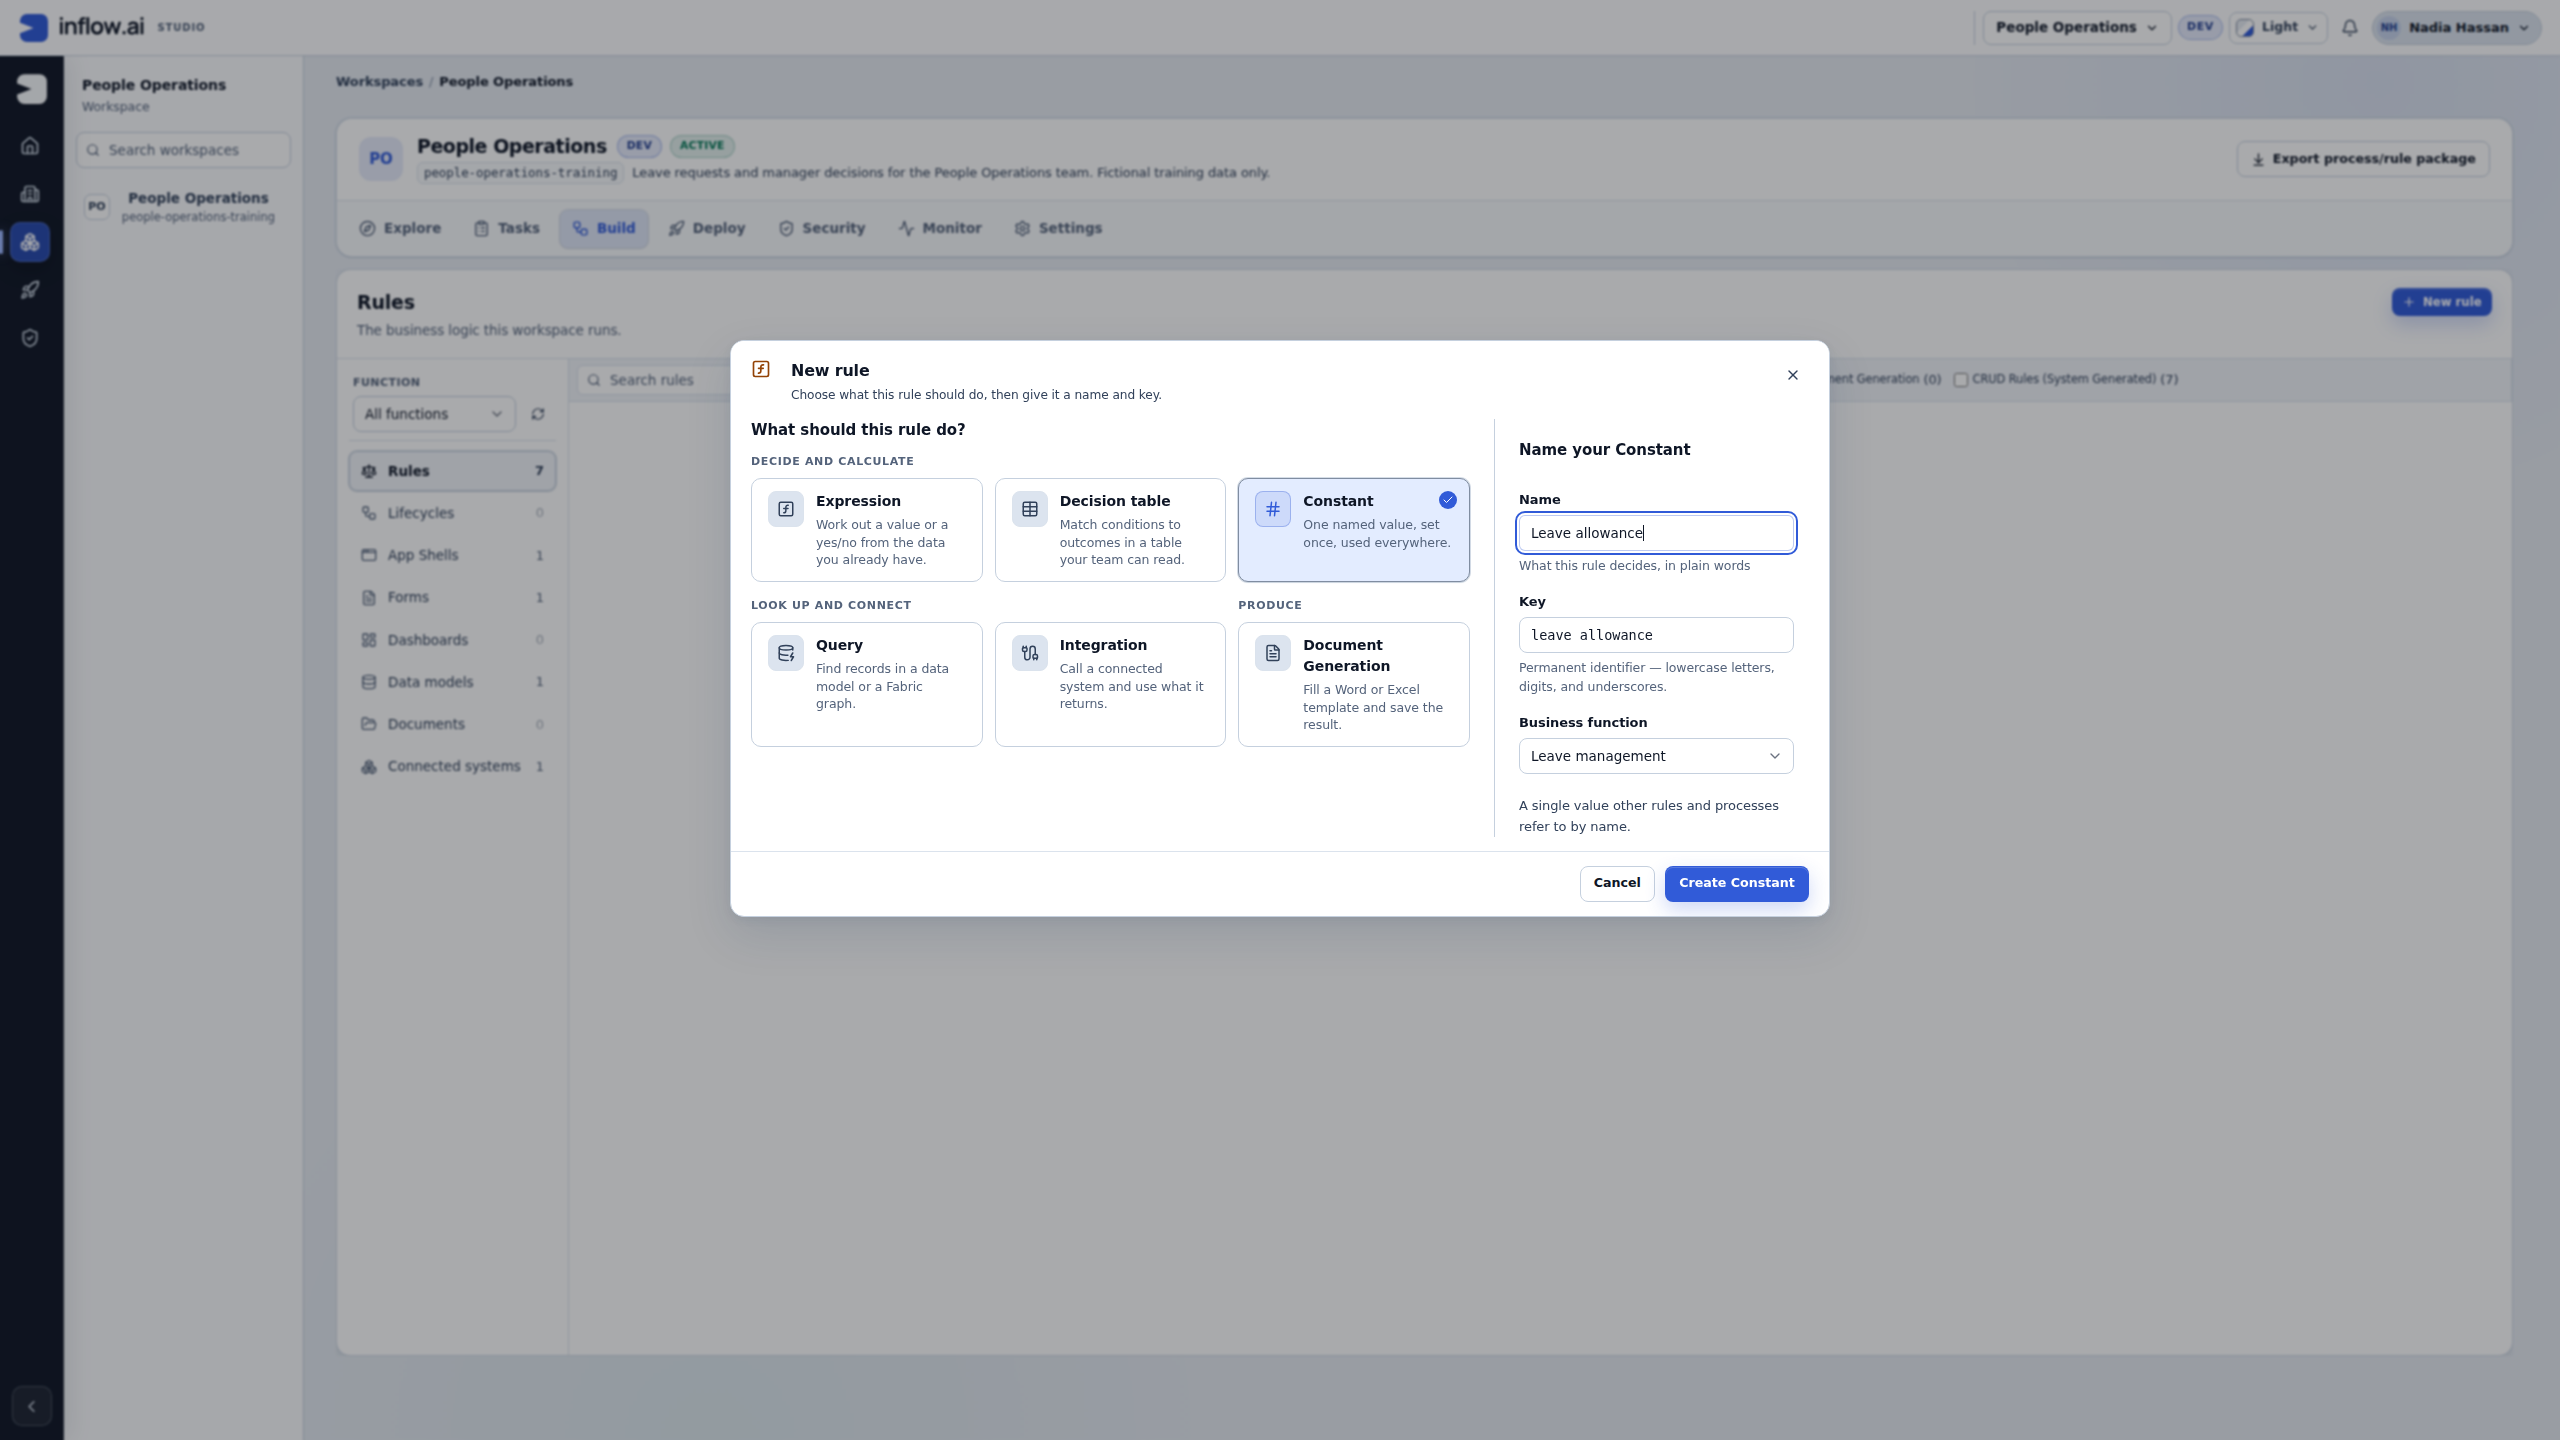
Check the rule kind: Constant stores one named policy value. It does not compare a request with that policy. Use Leave allowance / leave_allowance in the Leave management function. Creating the Constant opens its draft; you still set the type/value, validate and publish it below.
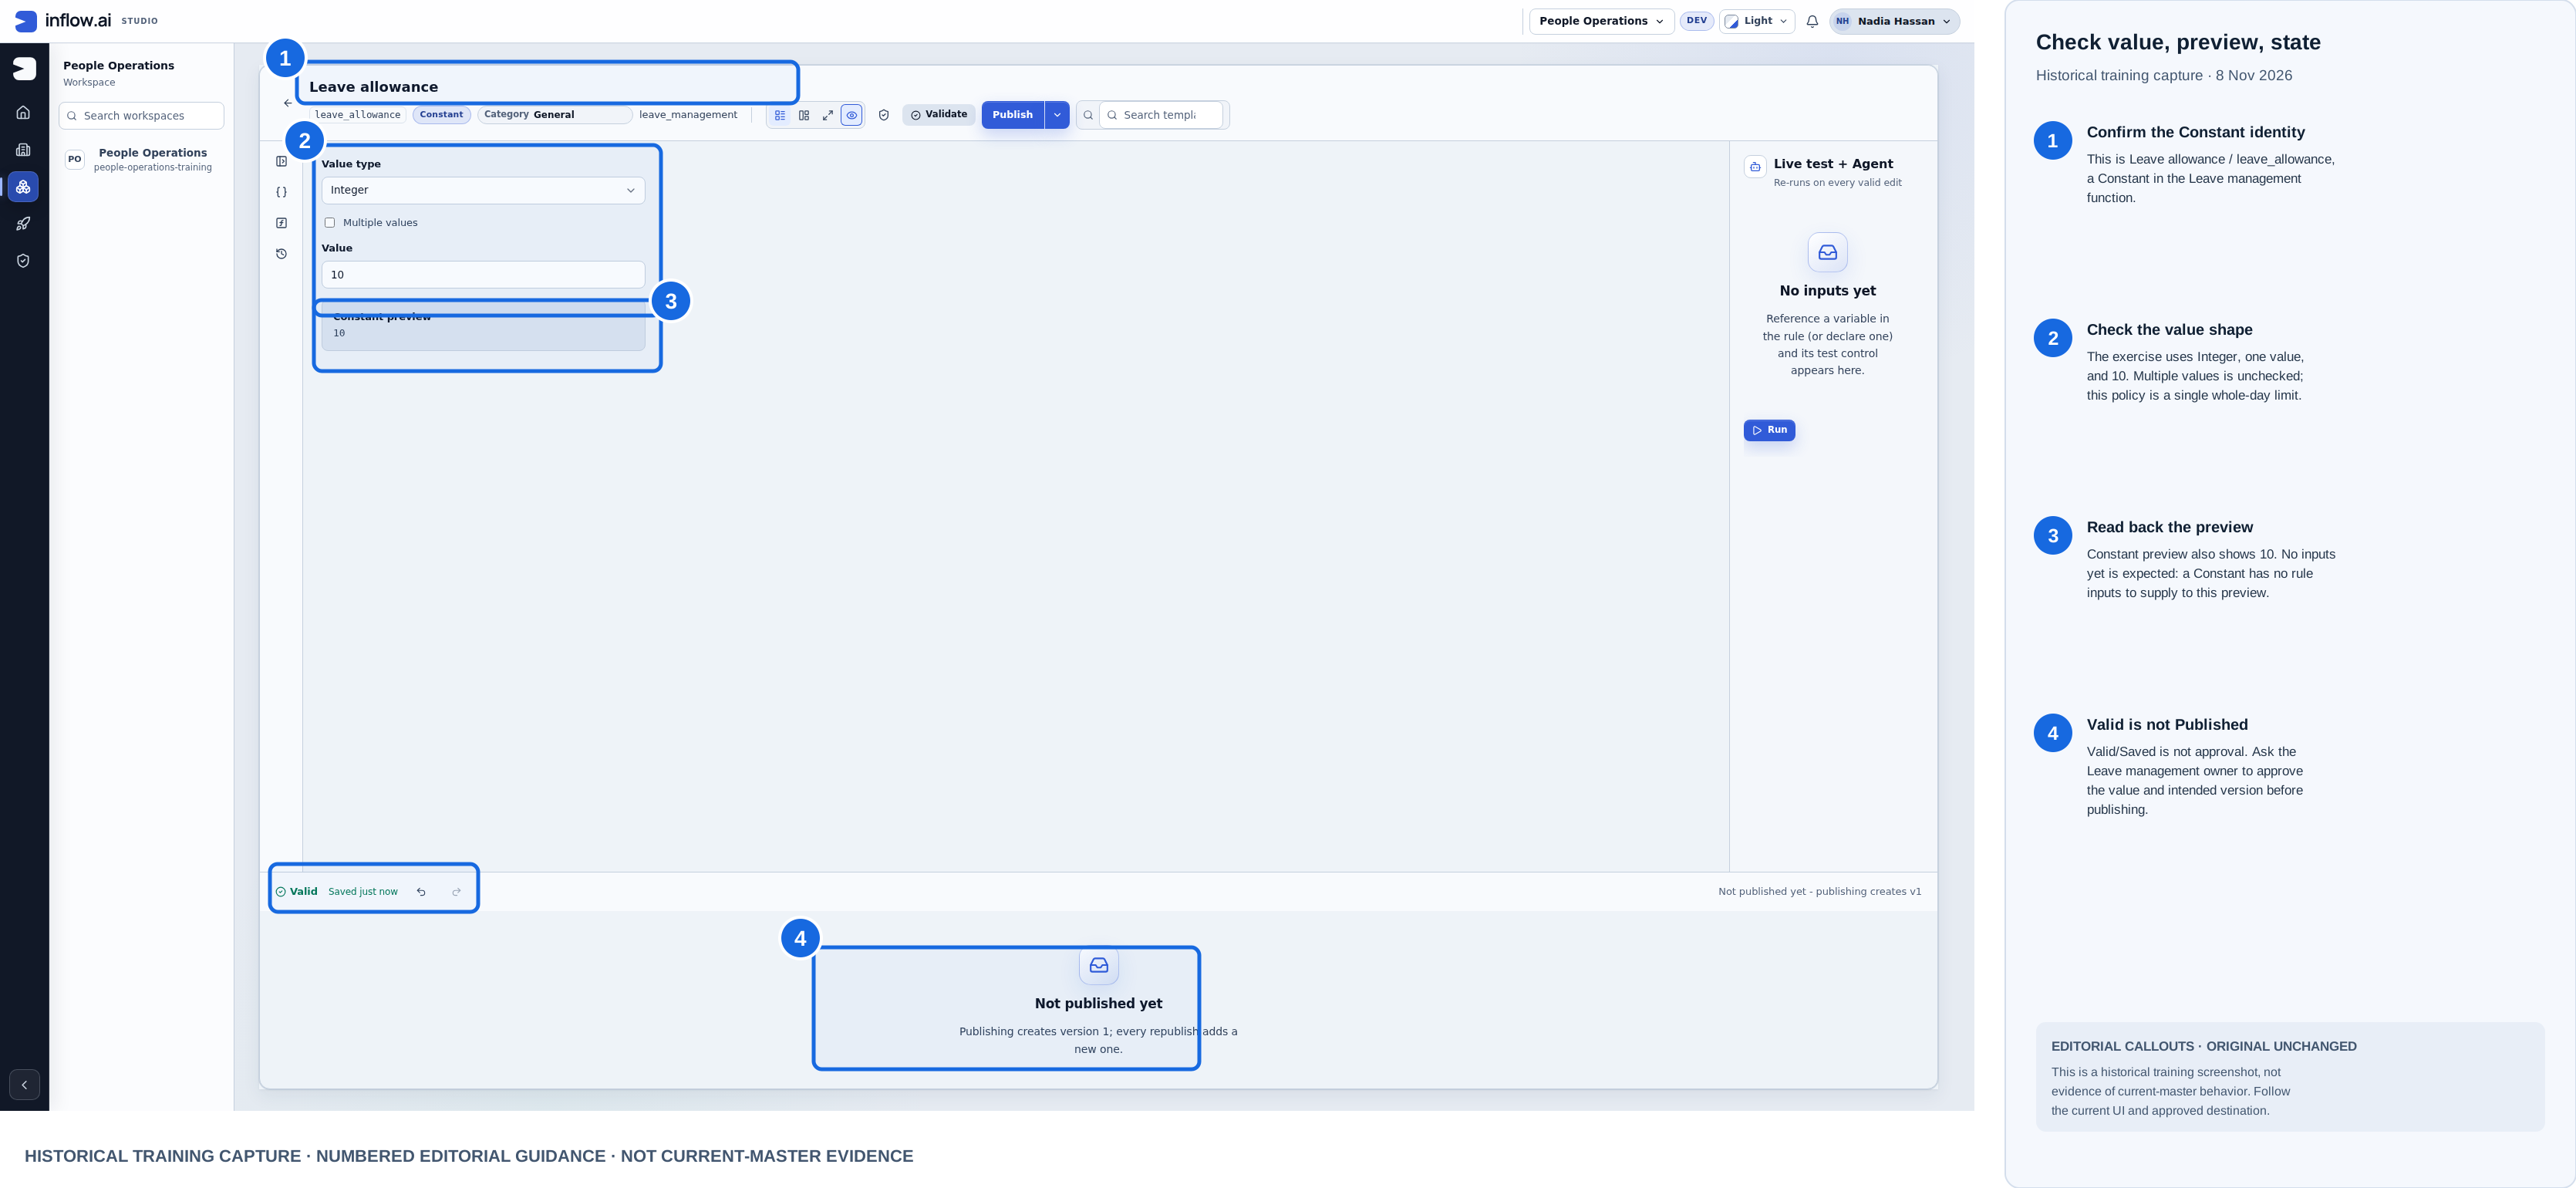
Historical training capture from 8 November 2026. Blue outlines and numbered labels are editorial guidance; the raw screenshot is unchanged here. This composite is not current-master evidence.
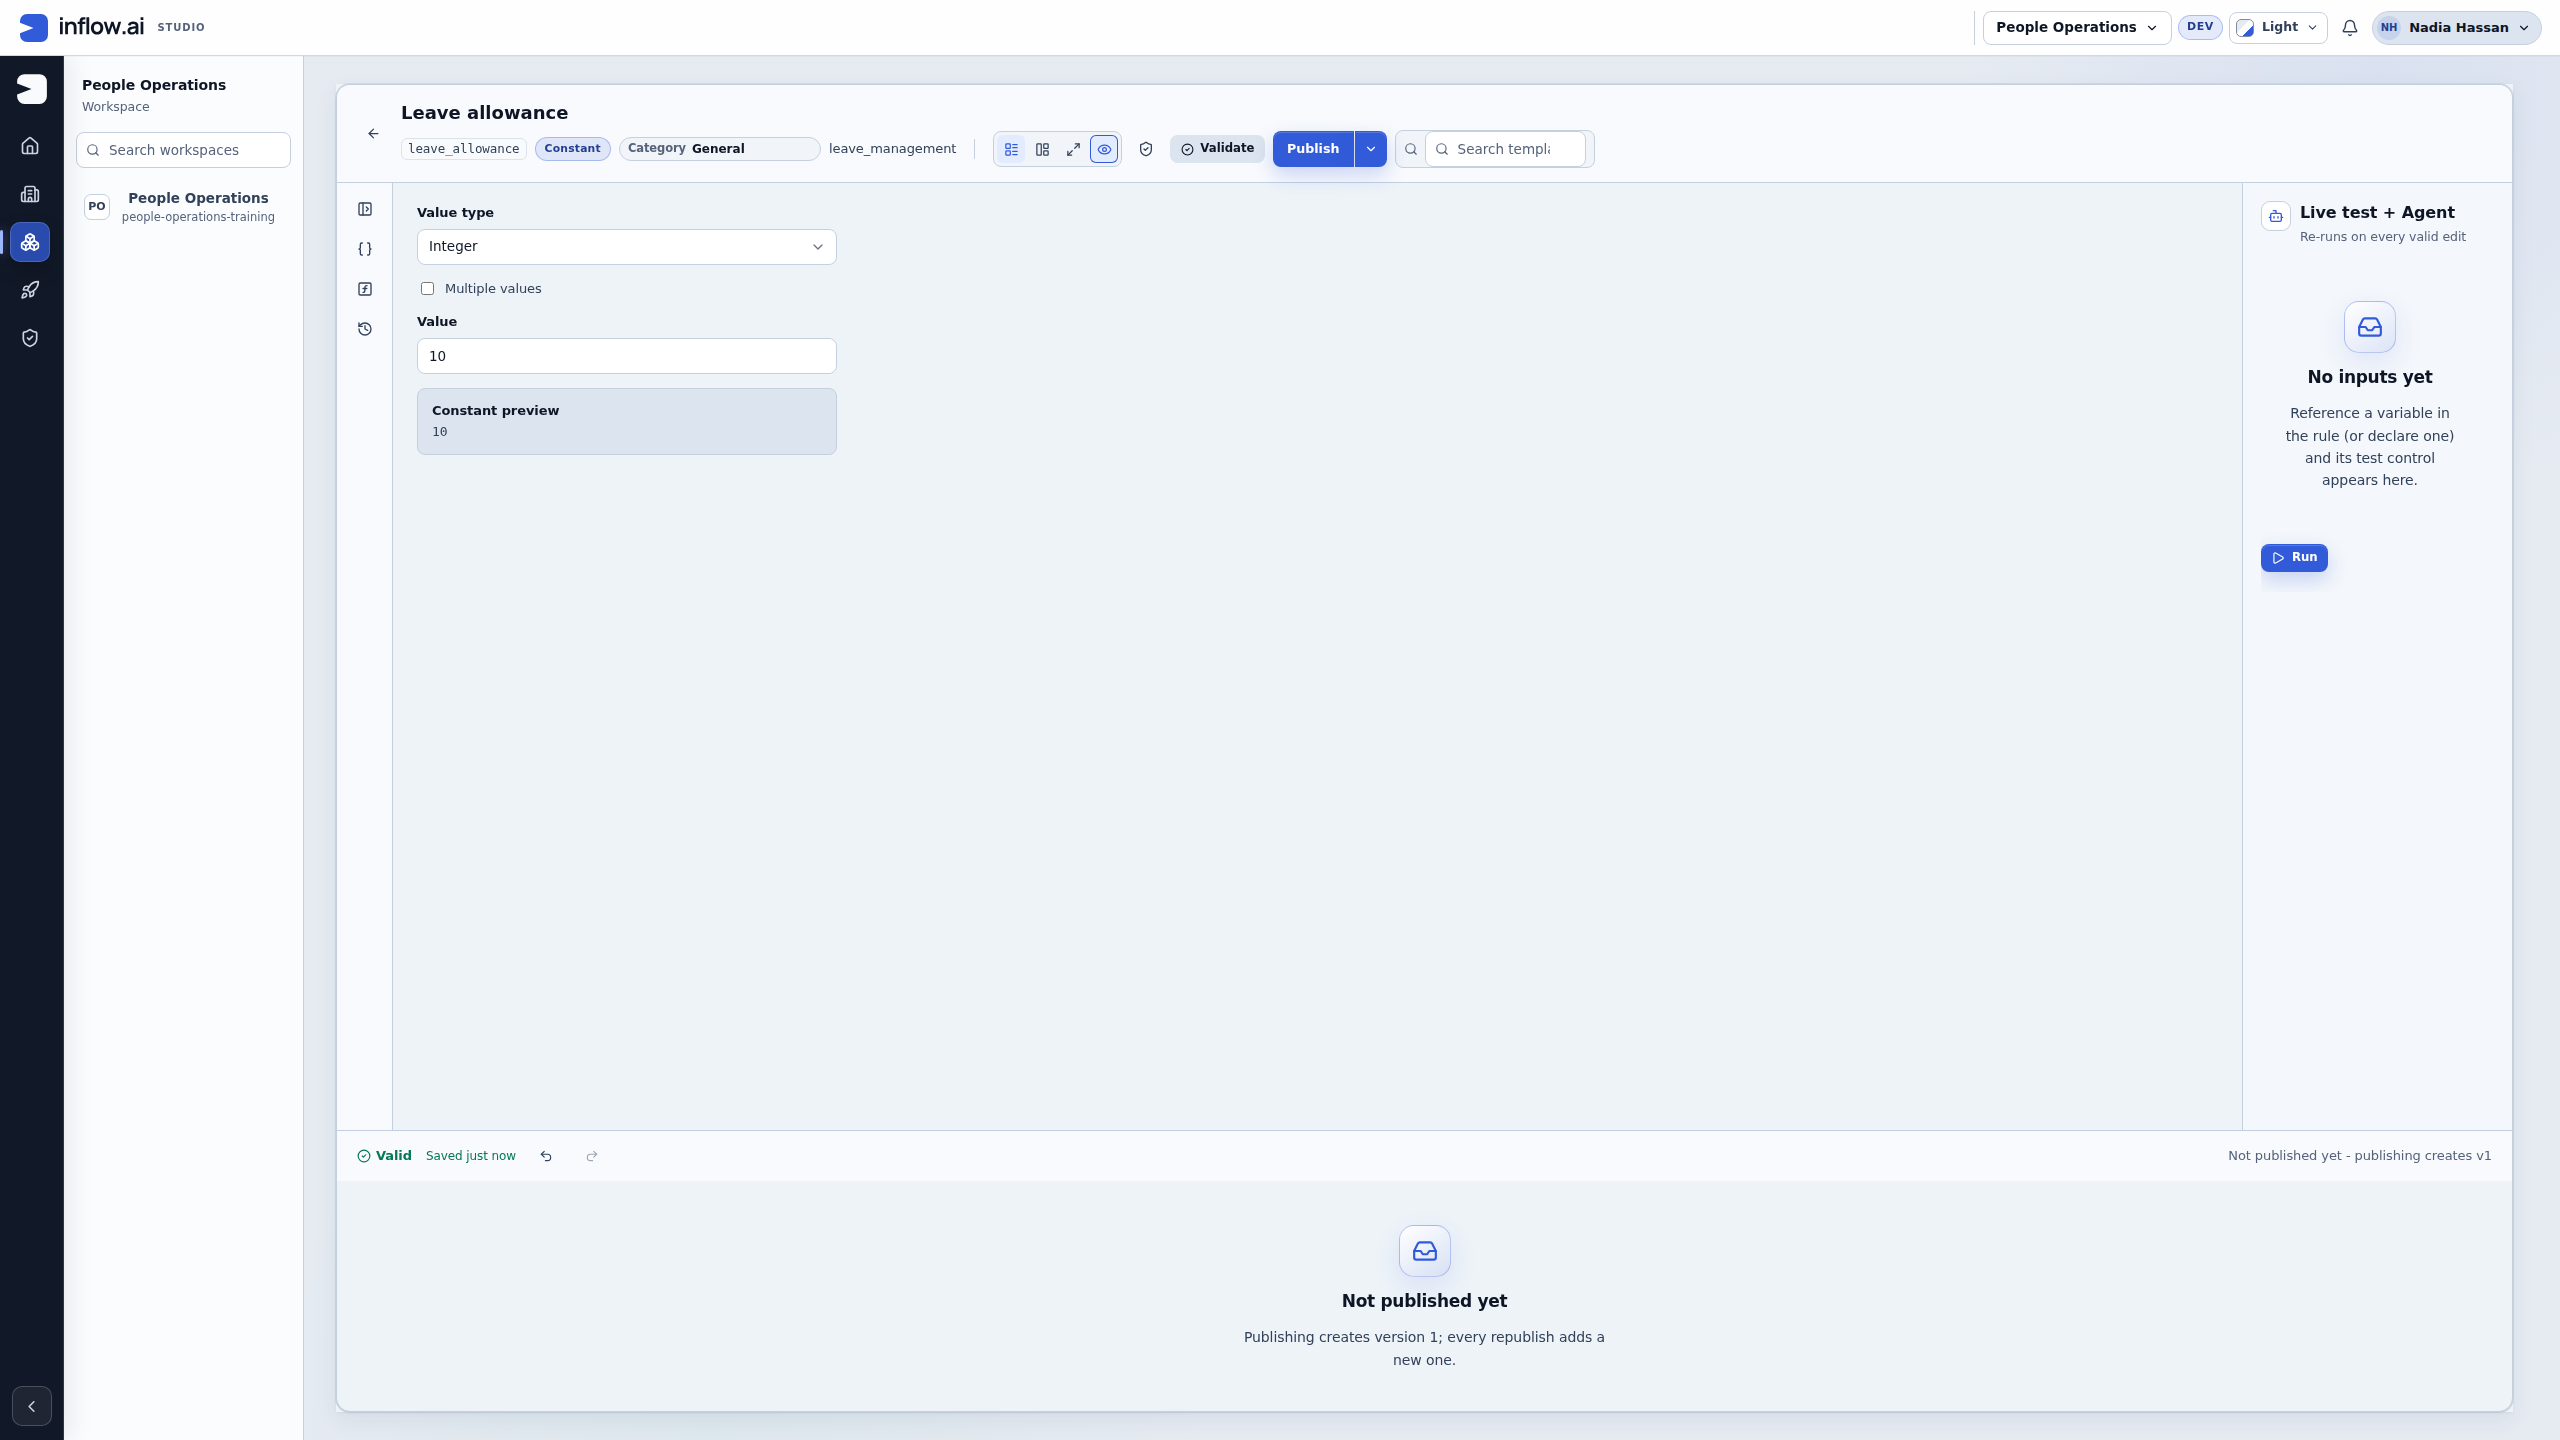
Check the value: Leave allowance uses one Integer value, 10, and the preview also reads 10. With no variable inputs, No inputs yet is expected. The editor shows Valid / Saved, while the footer still says Not published yet. Publish the intended version separately after checking it; validation alone does not make a rule available to consumers.
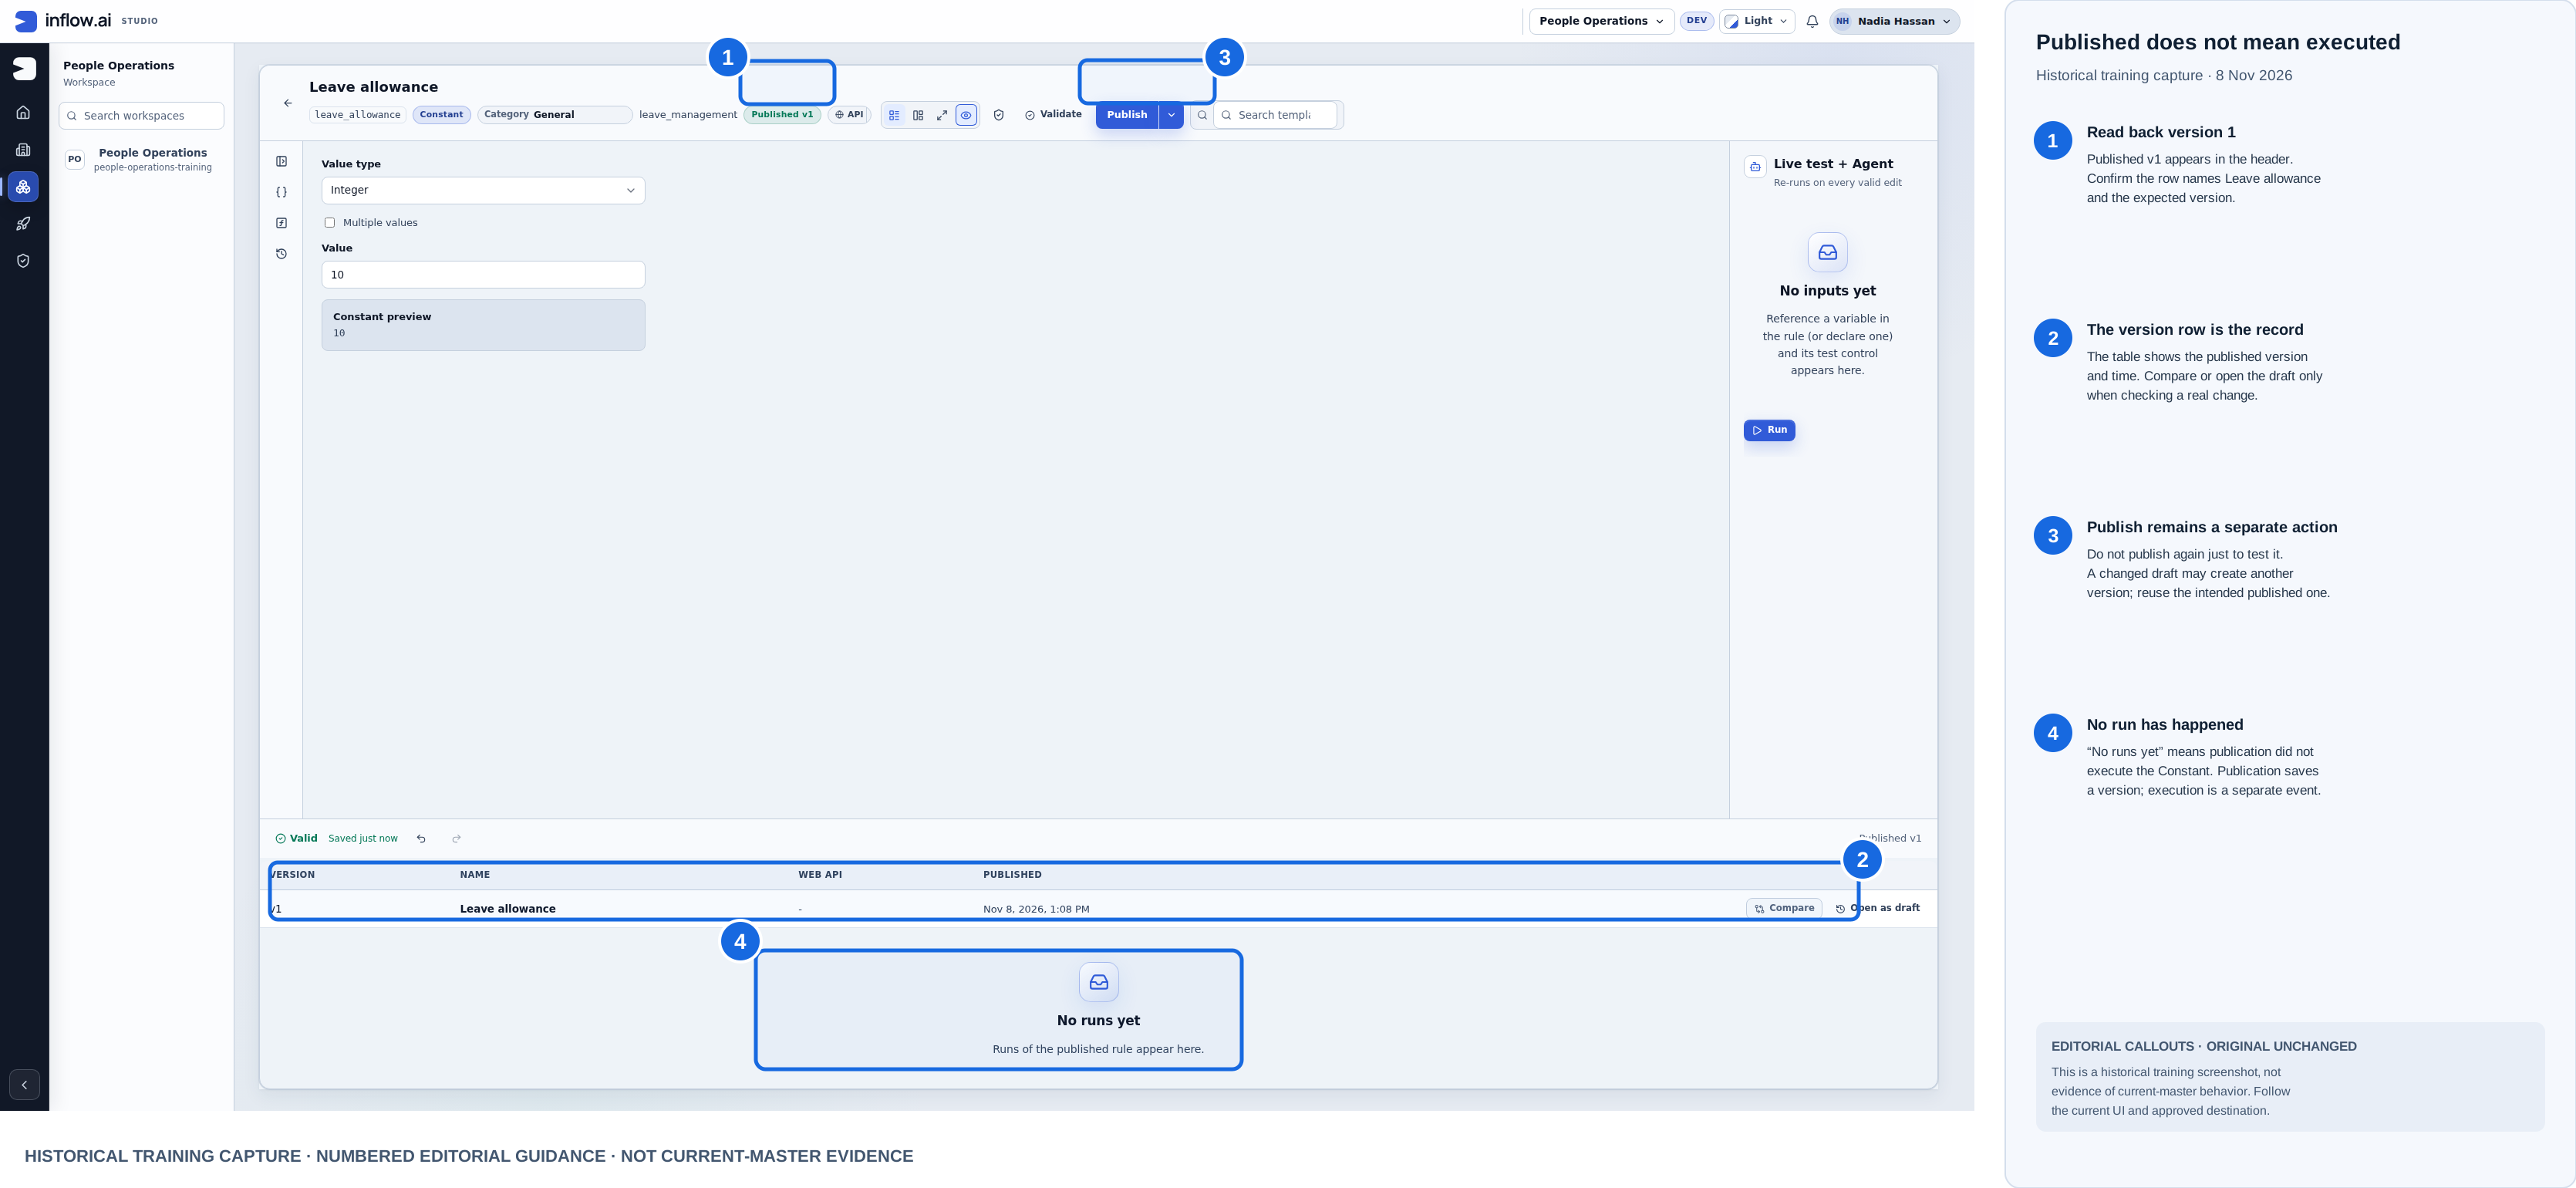
Historical training capture from 8 November 2026. Blue outlines and numbered labels are editorial guidance; the raw screenshot is unchanged here. This composite is not current-master evidence.
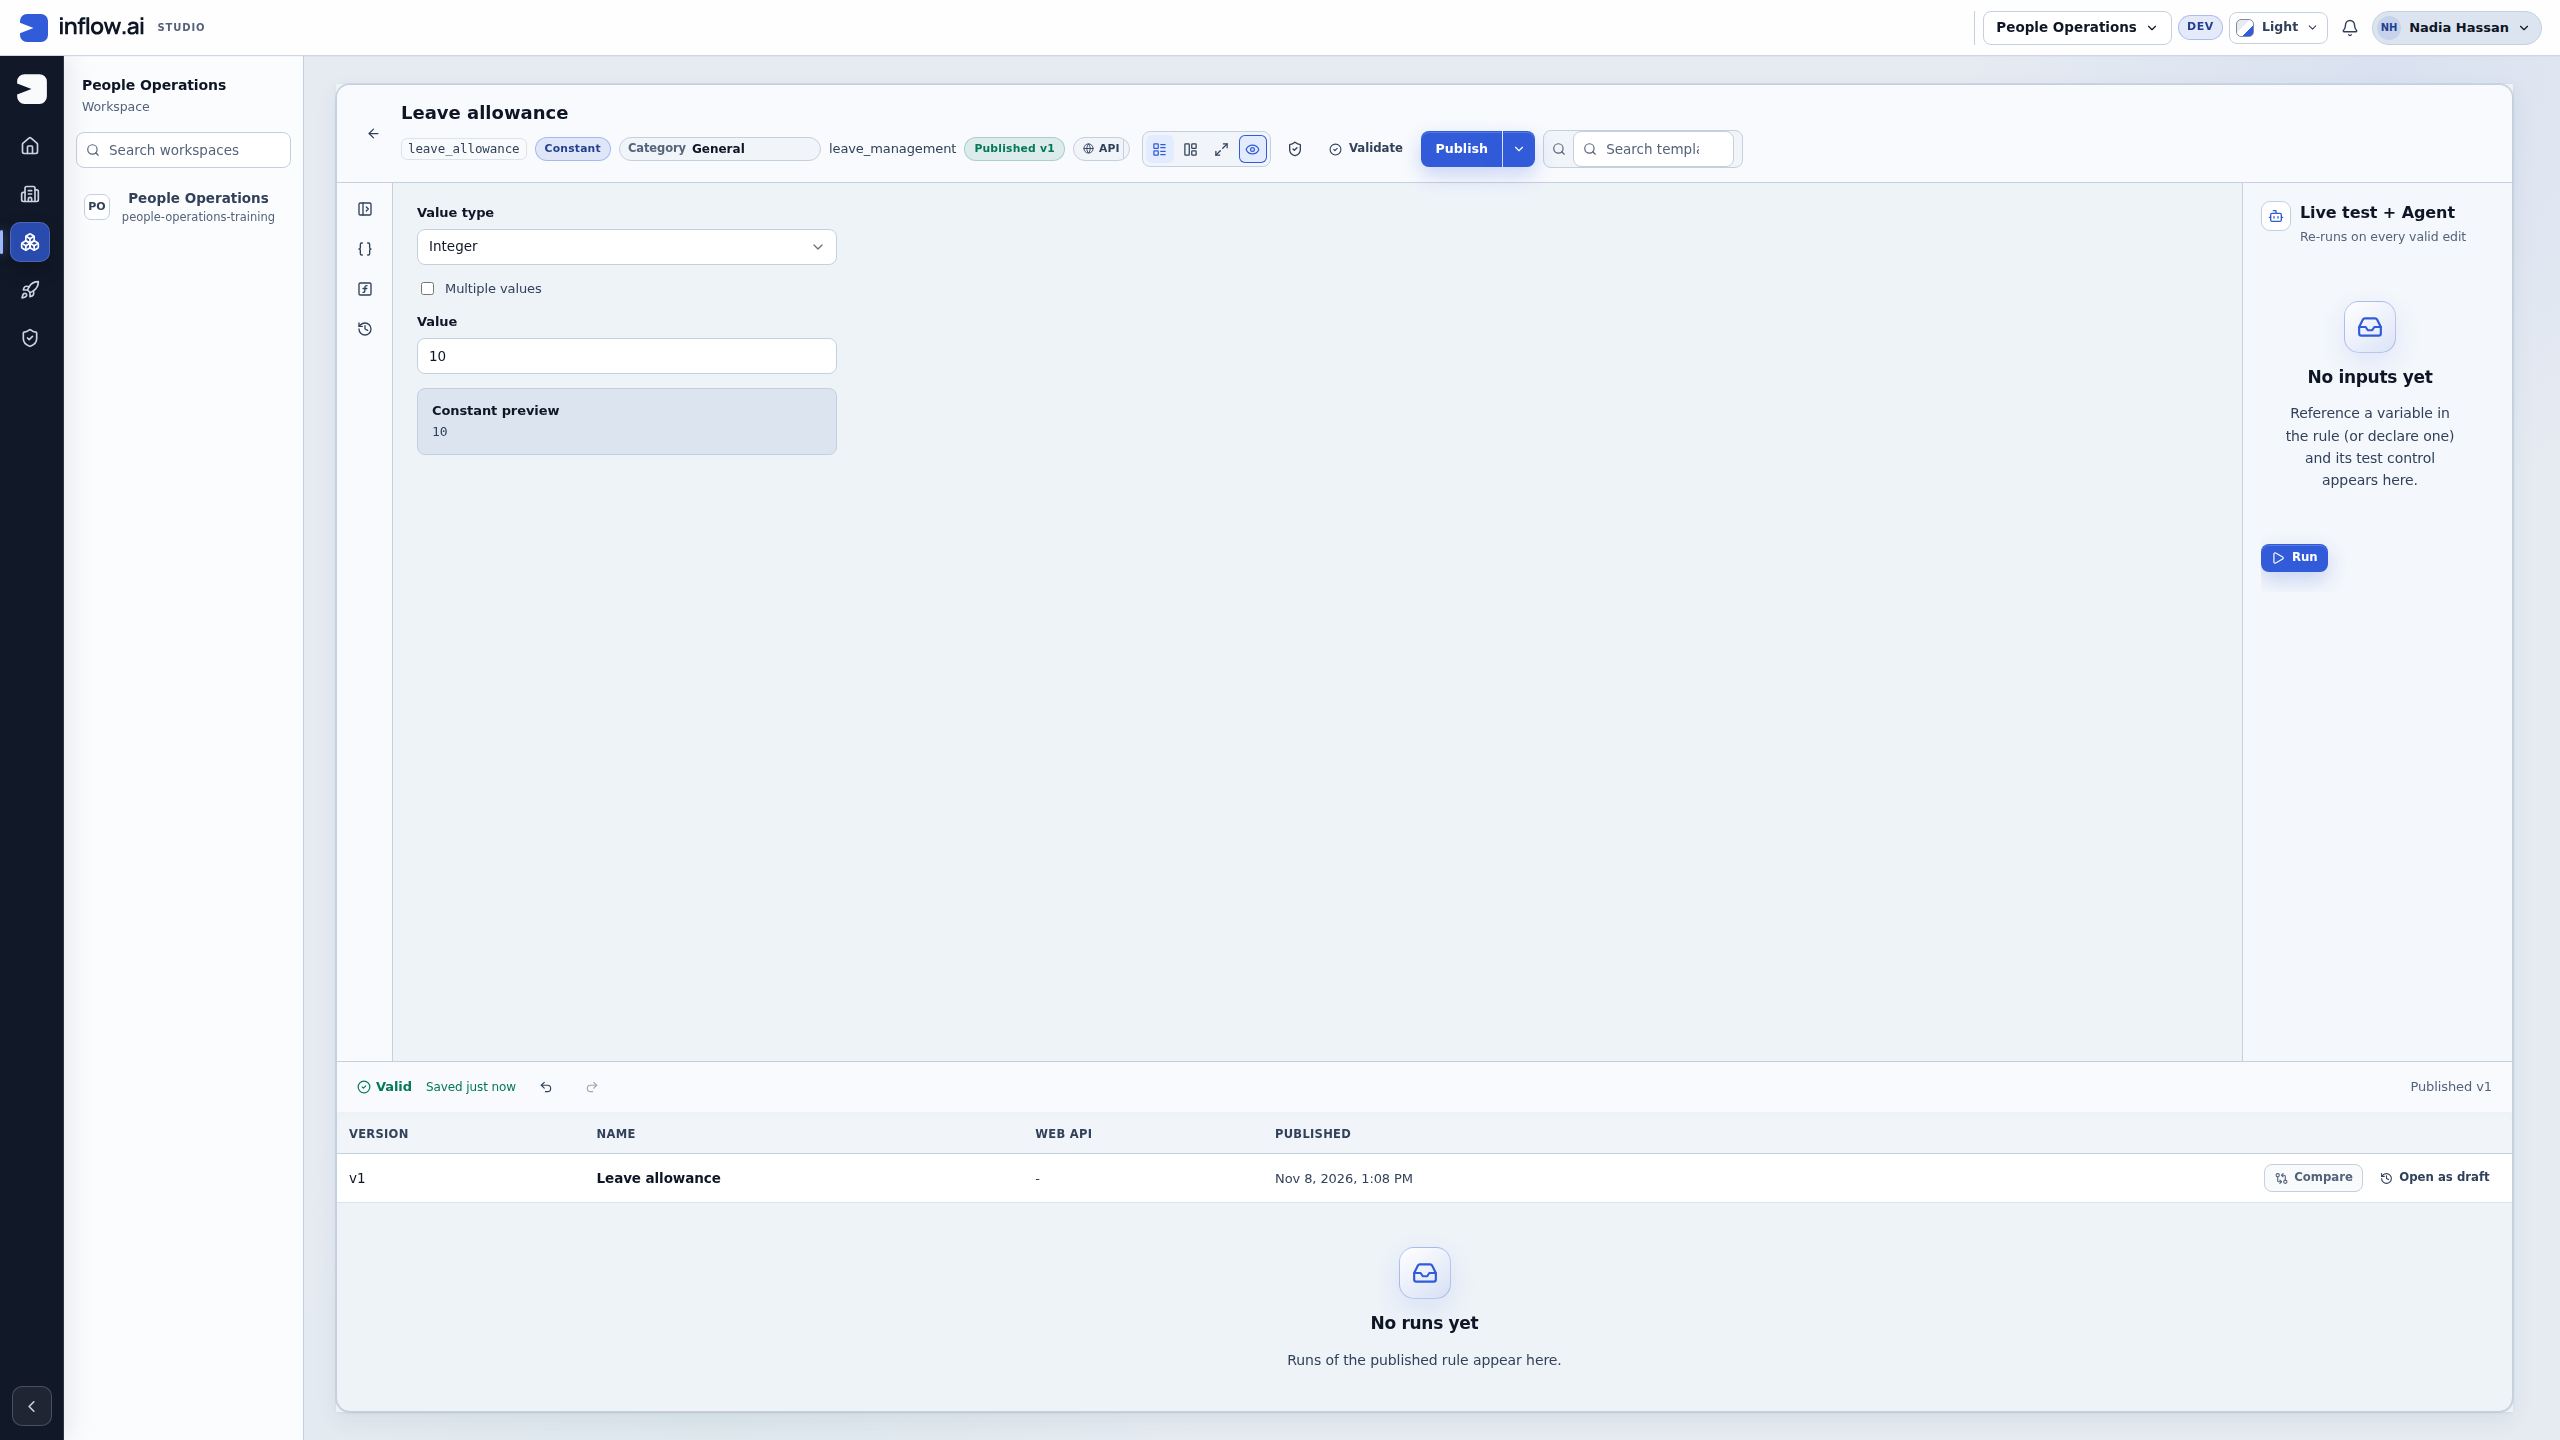
Check publication separately from execution: Confirm Published v1 and the Leave allowance row. The editor still offers Publish, but do not create another version just to test the value. No runs yet means the Constant has not executed; publishing saves a reusable version and is separate from any later execution.
Declare and test the comparison
- Open the matching Leave eligibility rule if it exists. Otherwise choose New rule → Expression, enter Name Leave eligibility, check Key leave_eligibility, select Business function Leave management, then choose Create Expression.
- Open Variables in the outline, using Open variables if collapsed. Choose Declare and enter Name requestedDays, Type Number, Cardinality Single value, Required input on, and a description of the requested quantity. Choose the inline Declare button. Inspect an existing declaration rather than adding it again.
- Declare or inspect a second required single Number input called allowance. Its value will be supplied deliberately by the consuming application, using the approved policy.
- In the Code editor, enter:
inputs:requestedDays <= inputs:allowance
It reads: the supplied requested days are less than or equal to the supplied allowance. The formula answers a question; it does not approve a task. The rule input requestedDays and the modeled field requested_days have different names, so the later form/workflow must map them explicitly.
- Choose Validate and wait for Valid. In Live test + Agent, enter requestedDays 5 and allowance 10, then choose Run.
- Read Exact value true and the Matched / Pass result. Repeat with requestedDays 10 and allowance 10; exactly the allowance also returns true.
- If an existing published rule already matches this checked contract and formula, reuse its version. Otherwise choose Publish and read Published v1 for an initial release. Saved just now keeps the draft; it does not itself publish it.
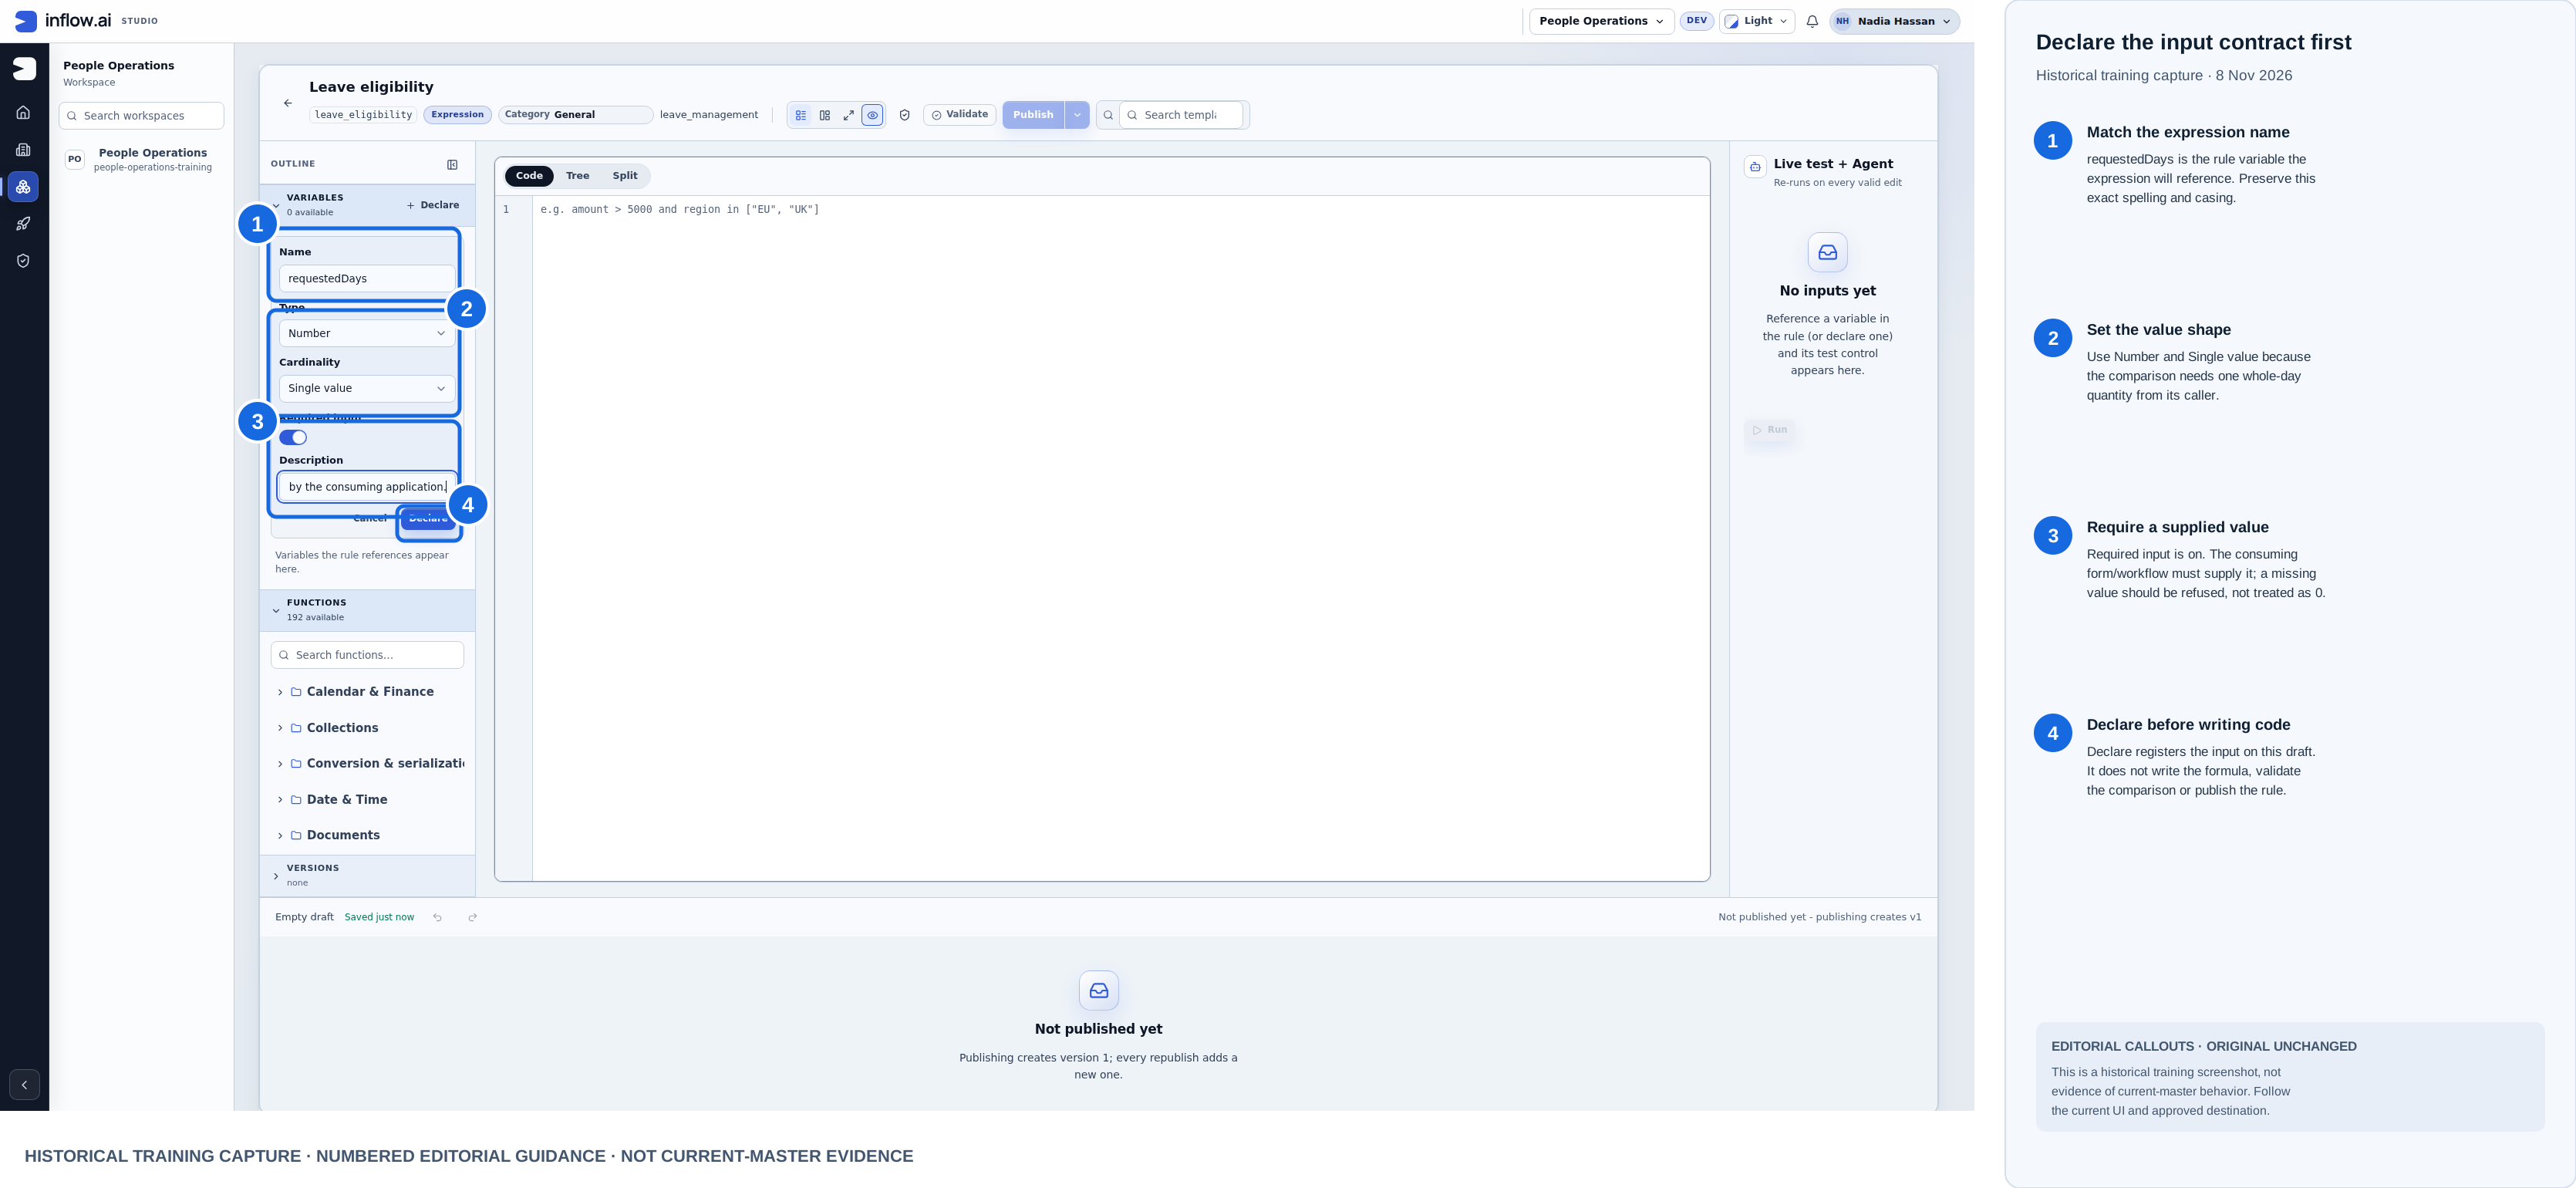
Historical training capture from 8 November 2026. Blue outlines and numbered labels are editorial guidance; the raw screenshot is unchanged here. This composite is not current-master evidence.
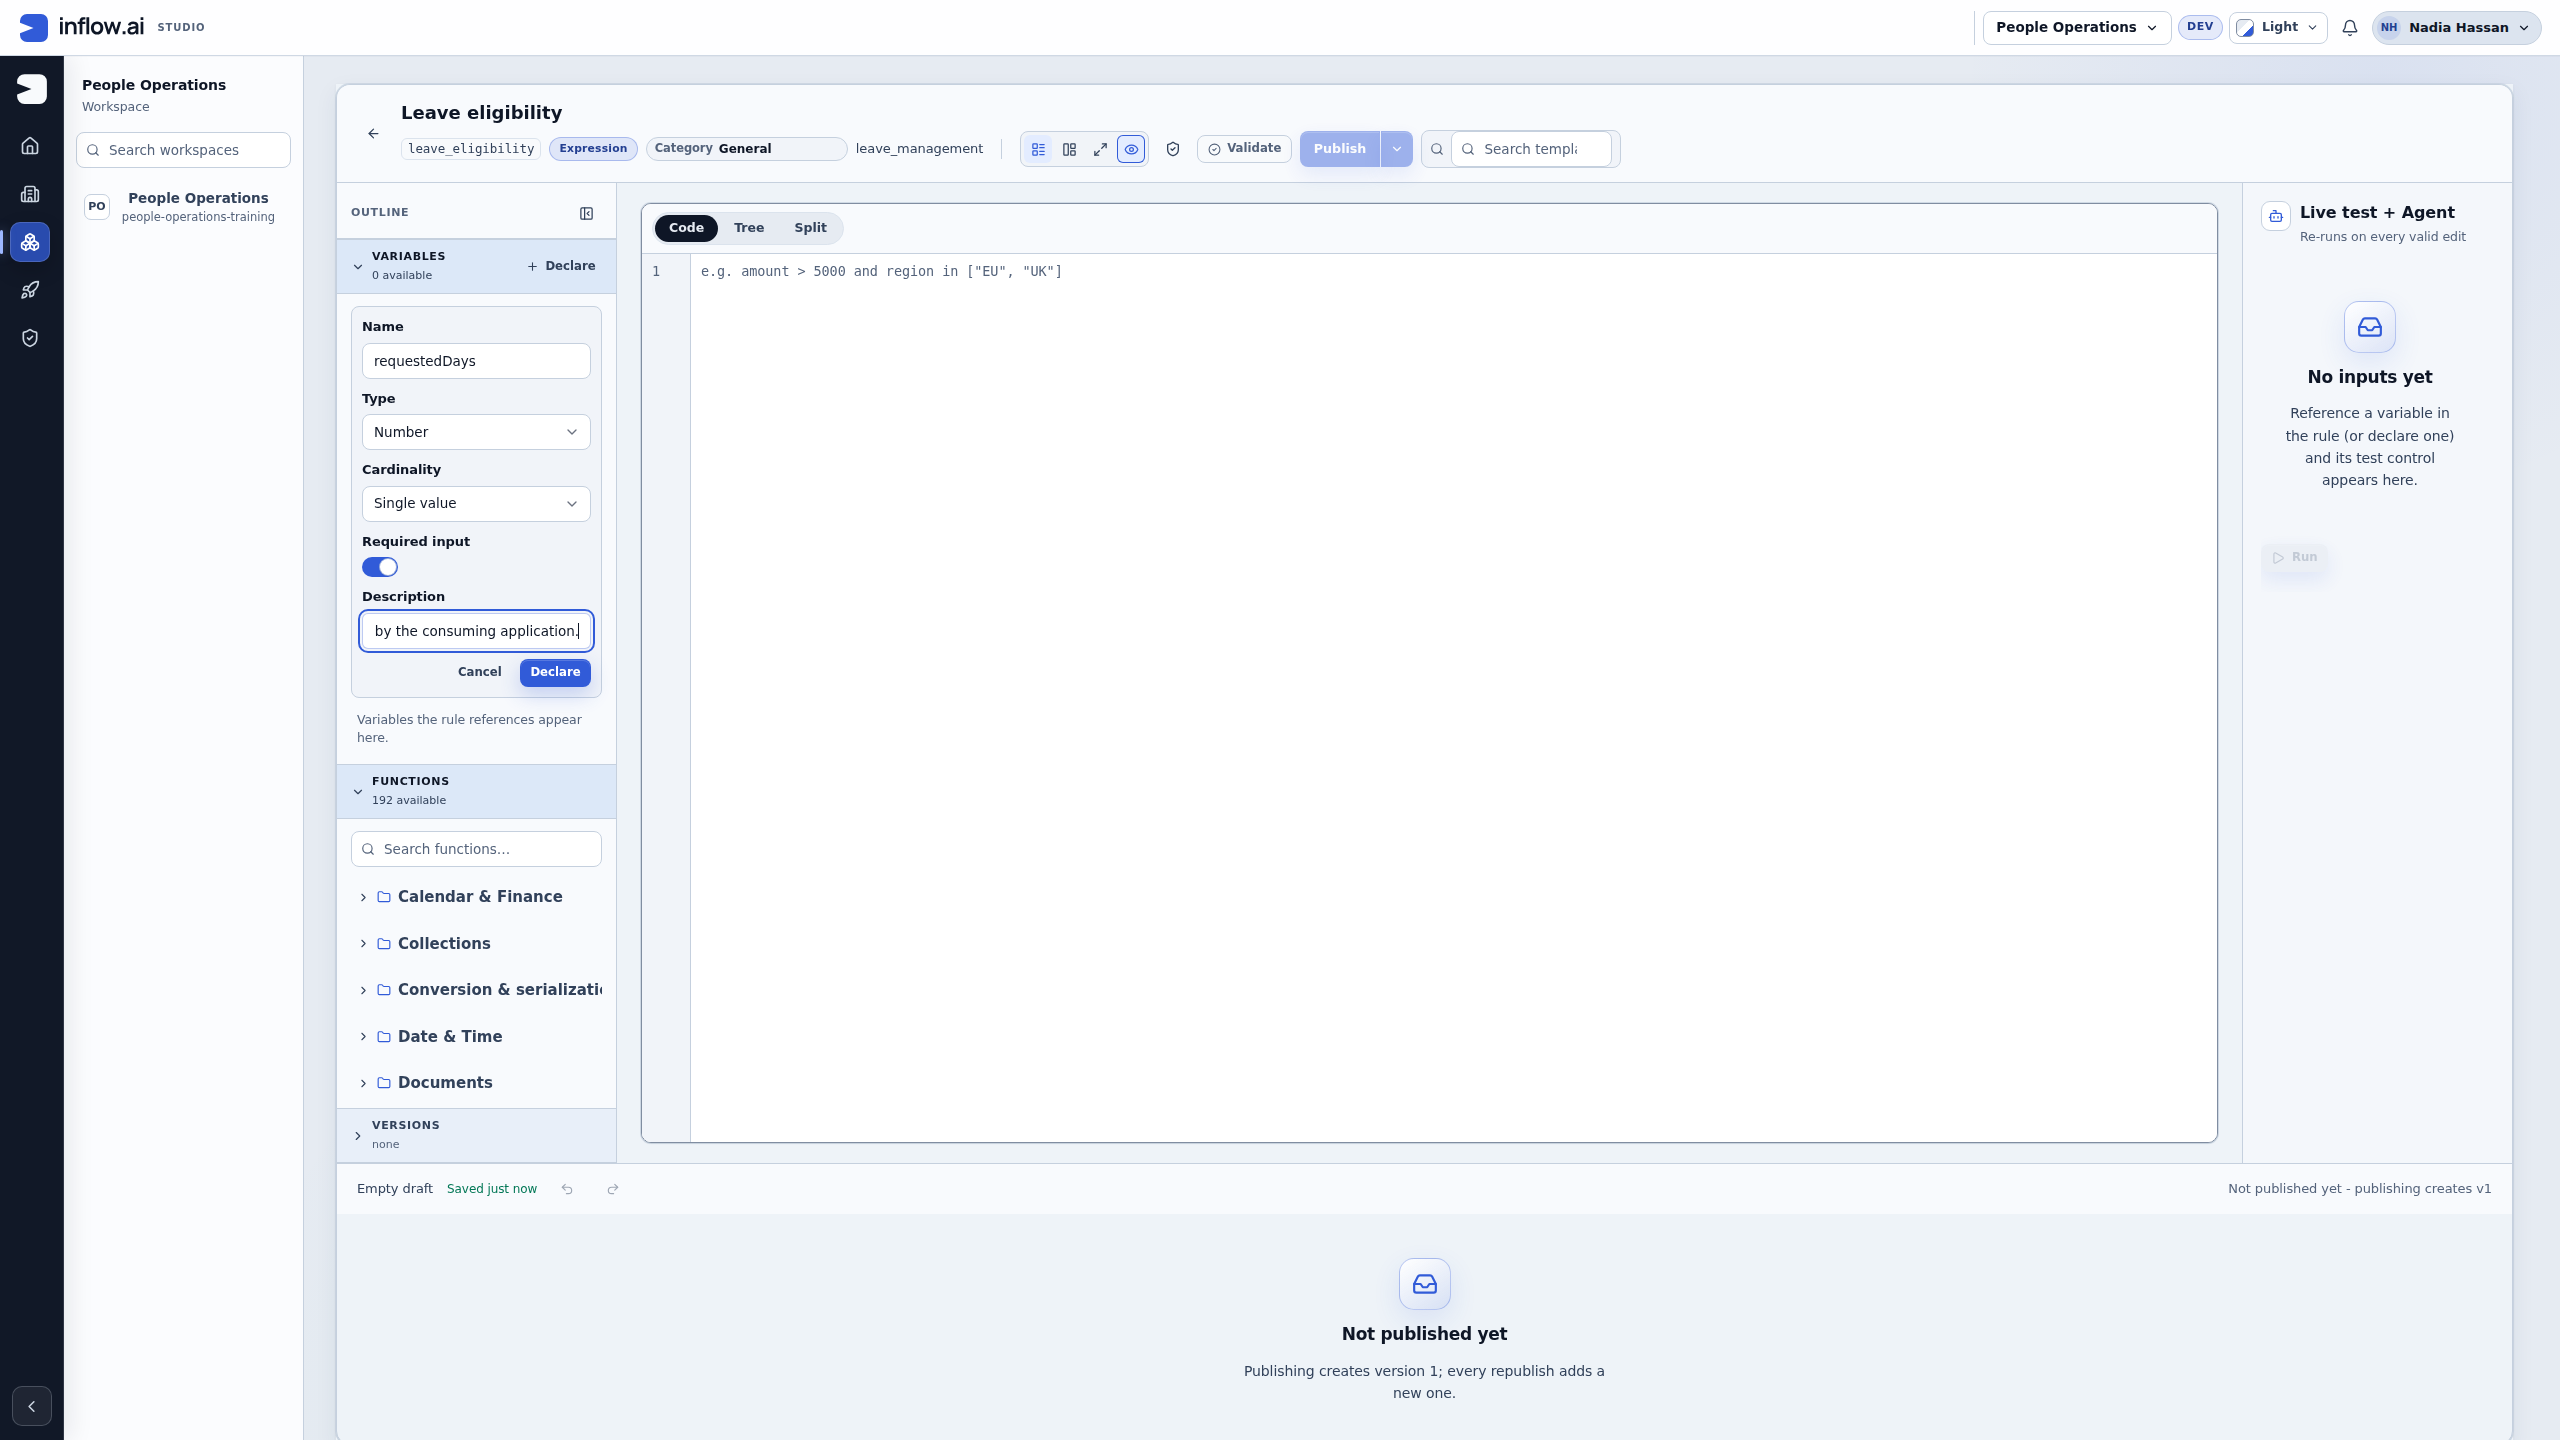
Check the contract: Declare requestedDays exactly as the expression will refer to it: Number, Single value, and Required input. The consuming form/workflow supplies it; missing input is not a zero-day request. Declare the allowance input separately. A Constant and an input do not connect automatically because their names are similar. In the model, the field requested_days is a different identifier; map it explicitly in the consumer.
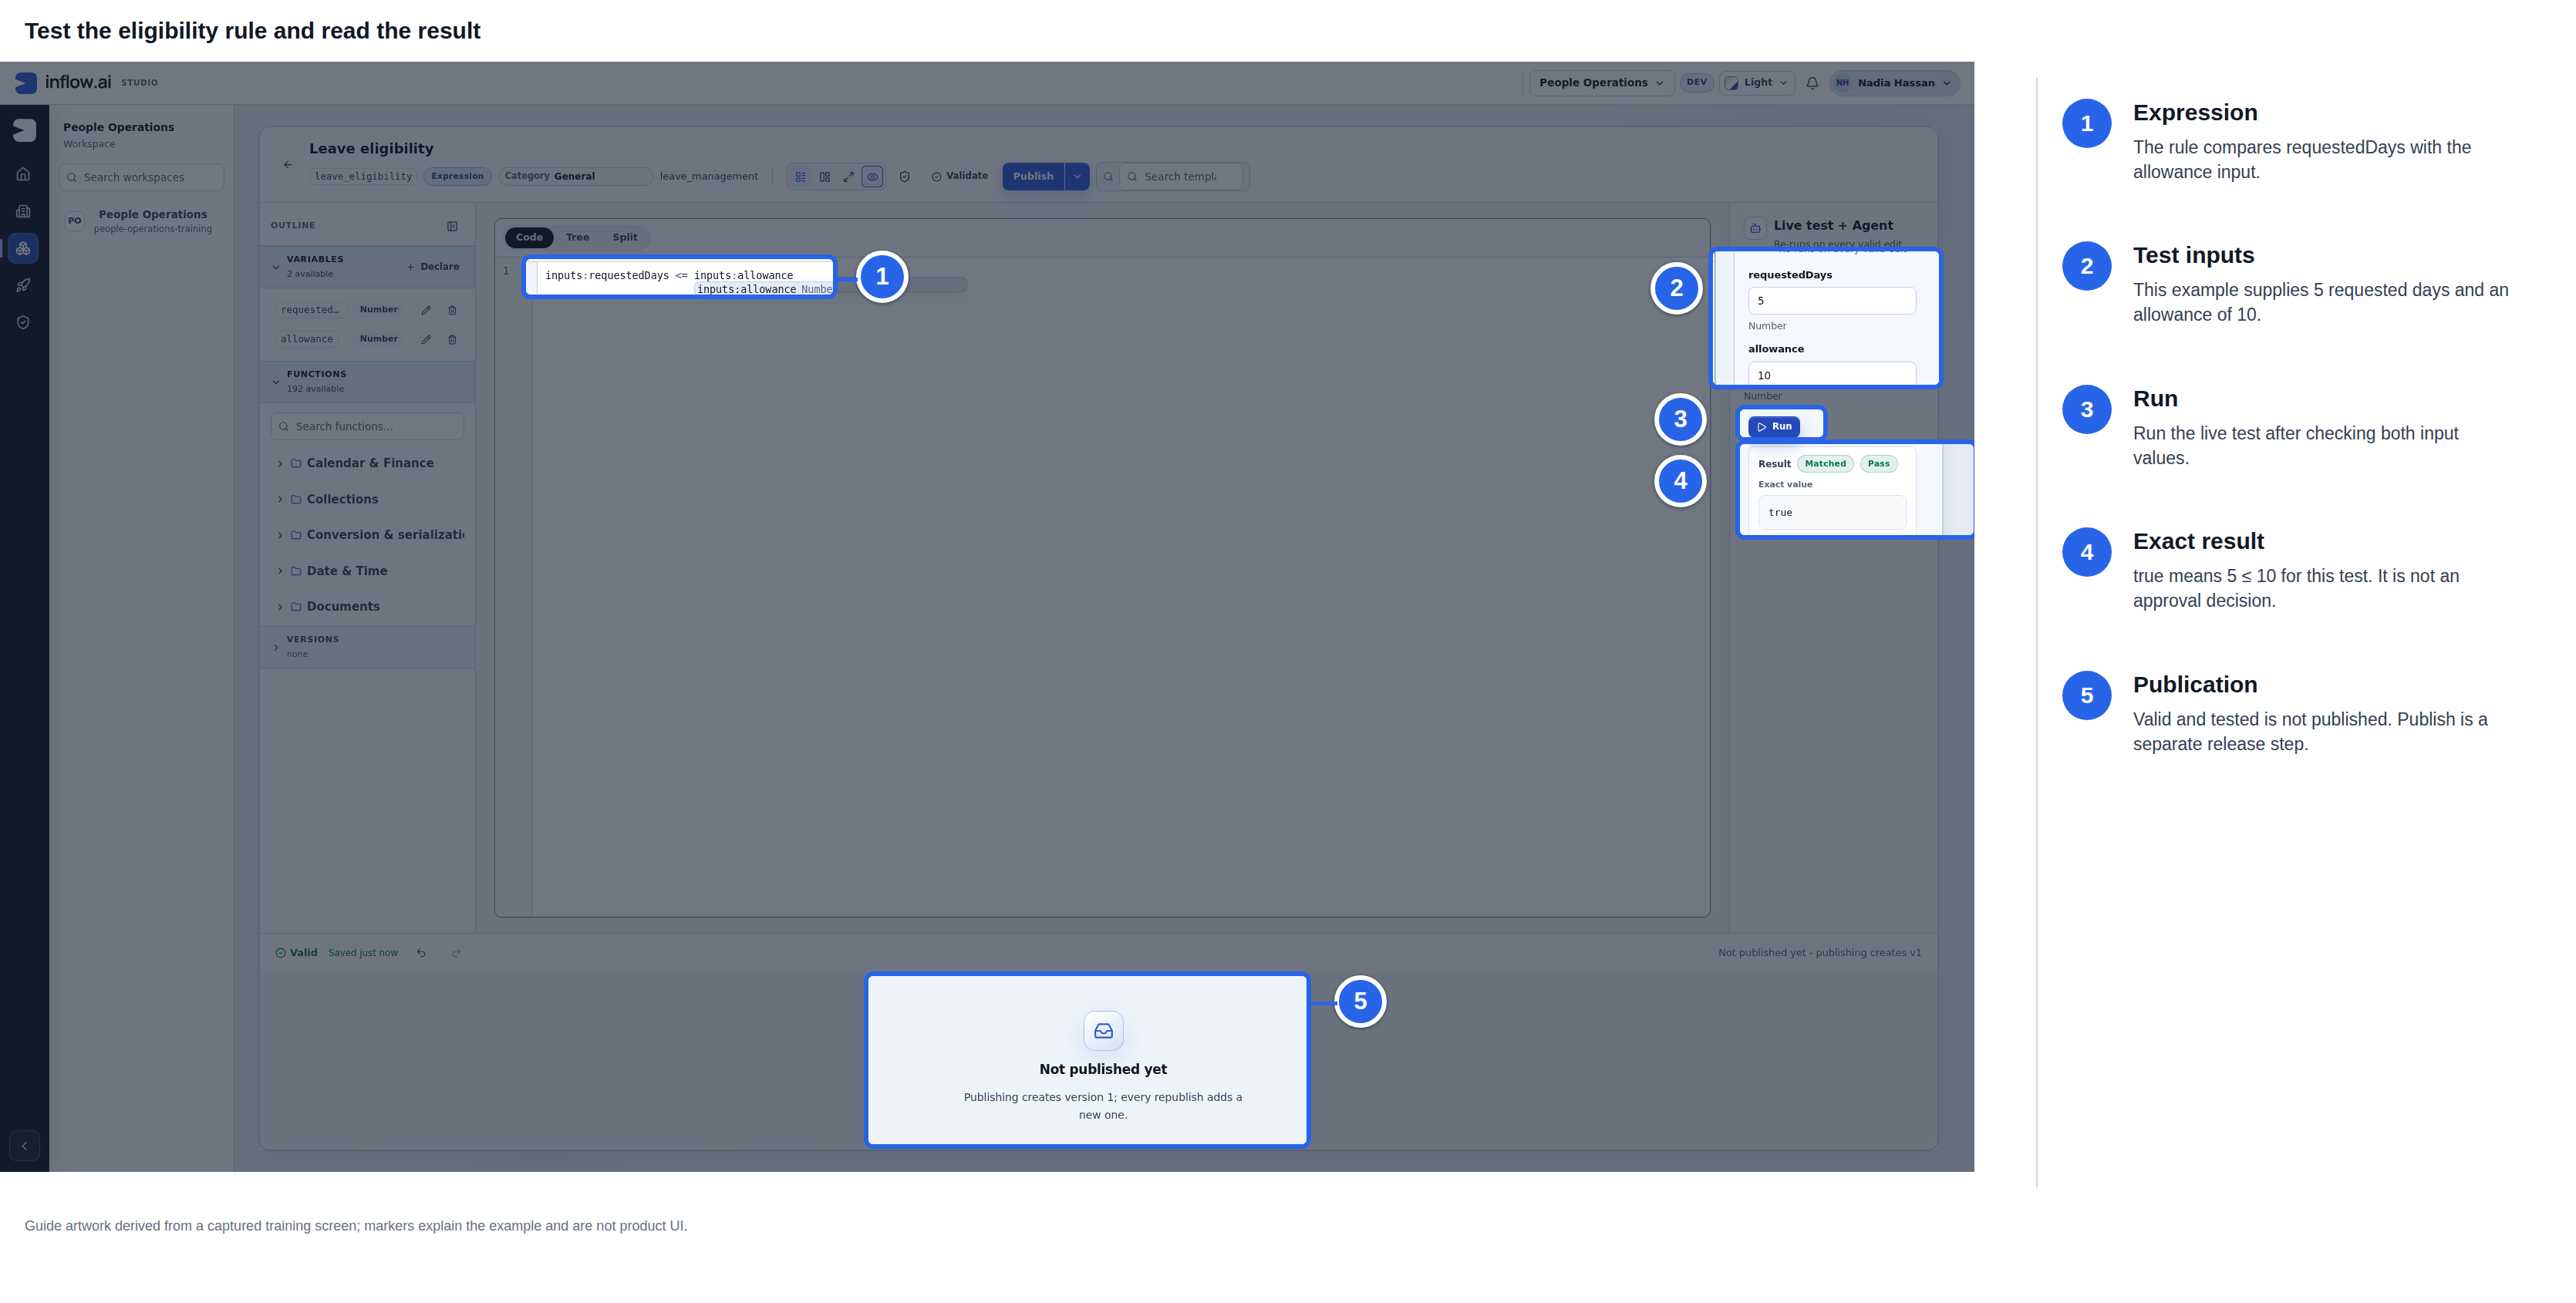
Historical capture from 8 November 2026. Blue outlines and numbered labels are editorial guidance; the raw screenshot remains unchanged here. This image is not evidence for the current UI.
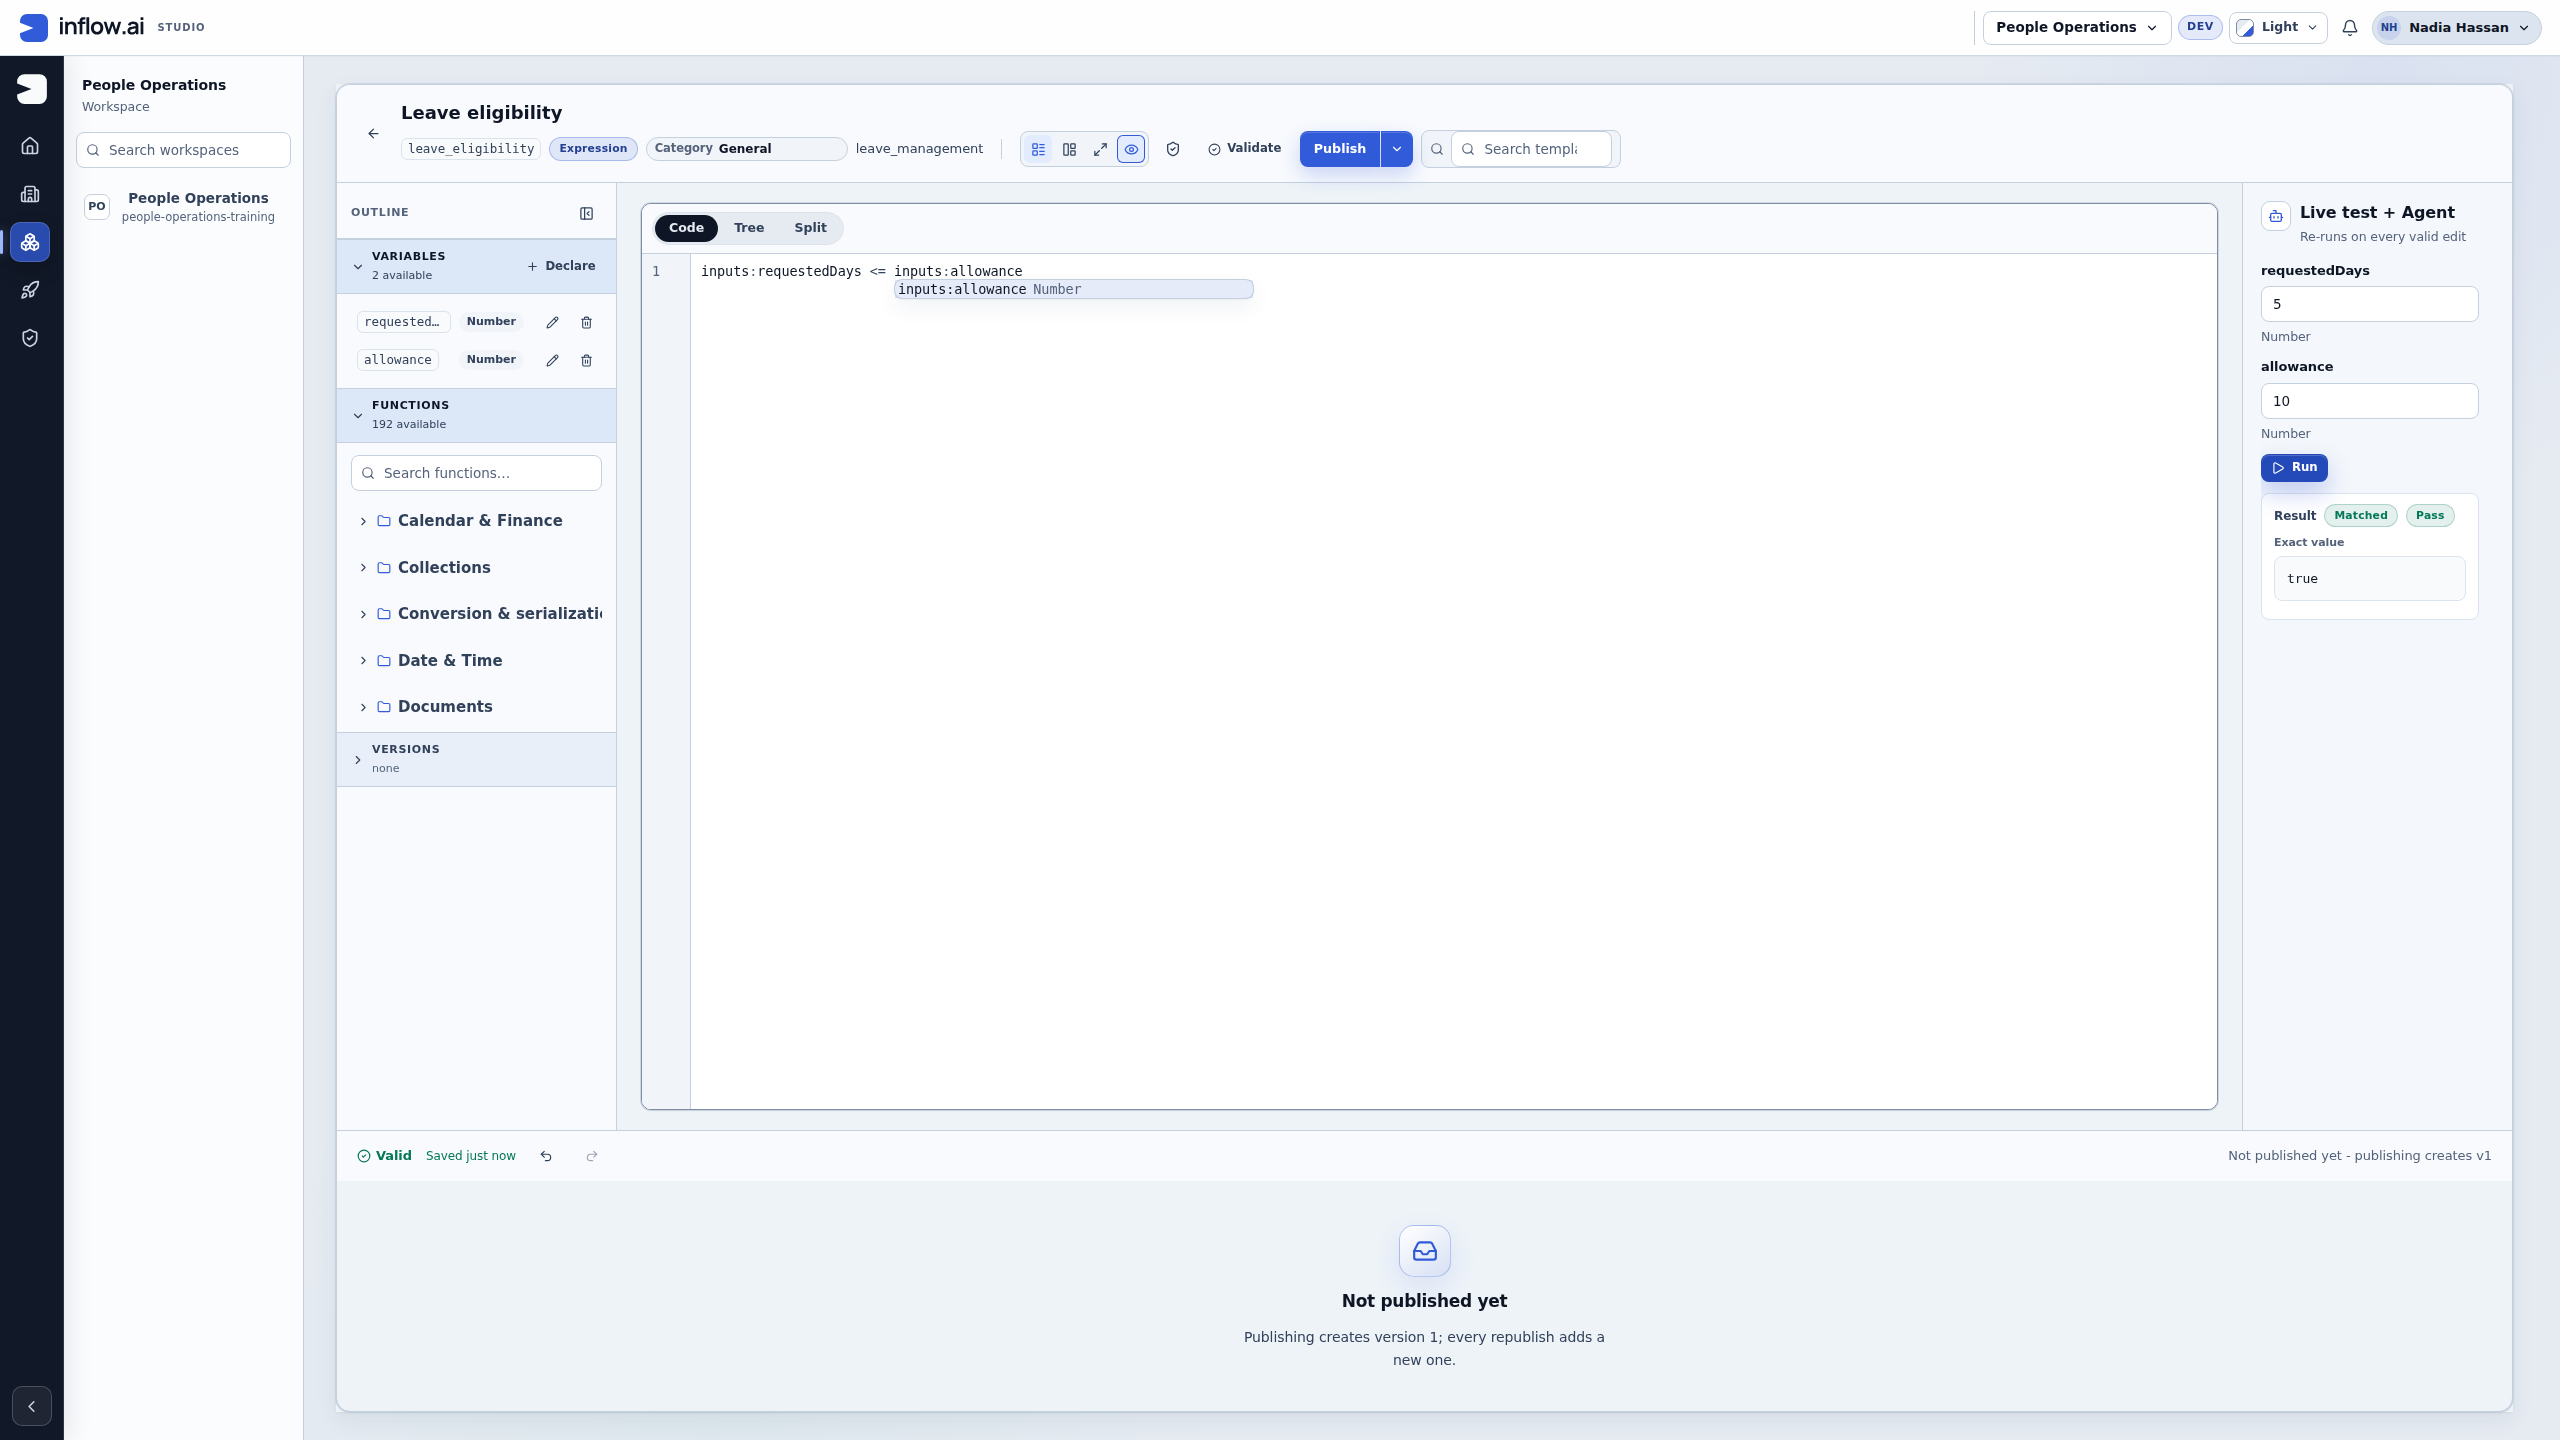
Check the normal case: The pictured inputs are 5 requested days and an allowance of 10; true is the exact result of that comparison. This is a live rule test, not an approval task, and Valid does not mean published. When designing the consuming form/workflow, map the approved policy value rather than letting an employee choose their own limit.
See simple formulas for the complete editor, missing-input recovery and notation.
Example — A request exceeds the allowance
Change requestedDays to 11 while keeping allowance 10, then choose Run. Expect No match / Fail with Exact value false. The unchanged formula remains Valid.
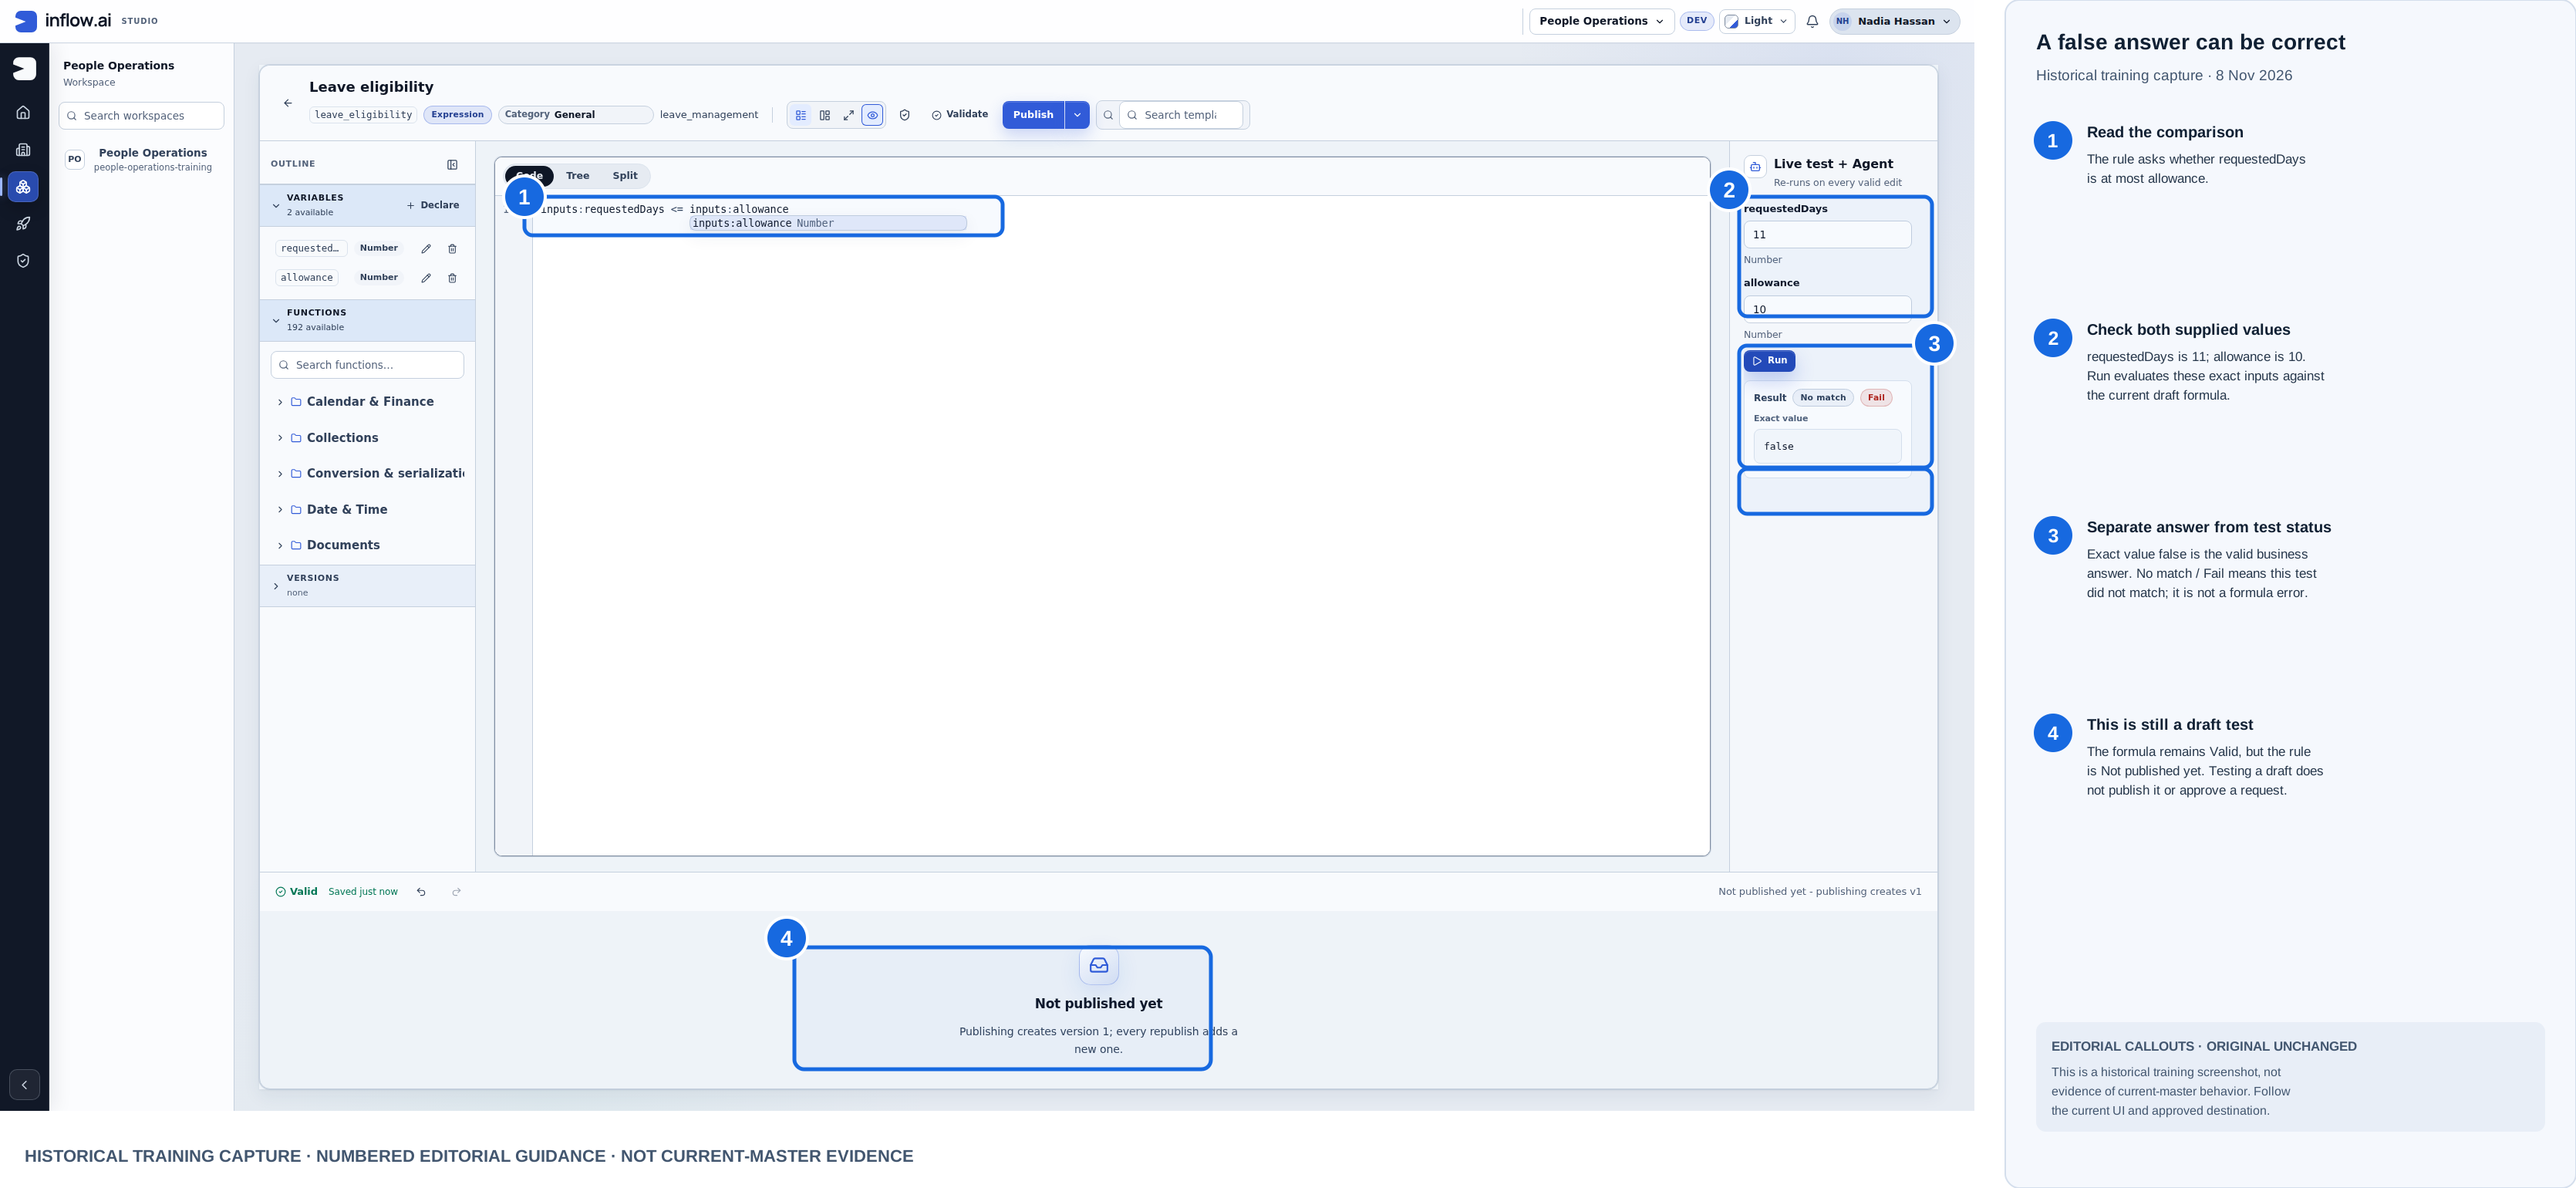
Historical training capture from 8 November 2026. Blue outlines and numbered labels are editorial guidance; the raw screenshot is unchanged here. This composite is not current-master evidence.
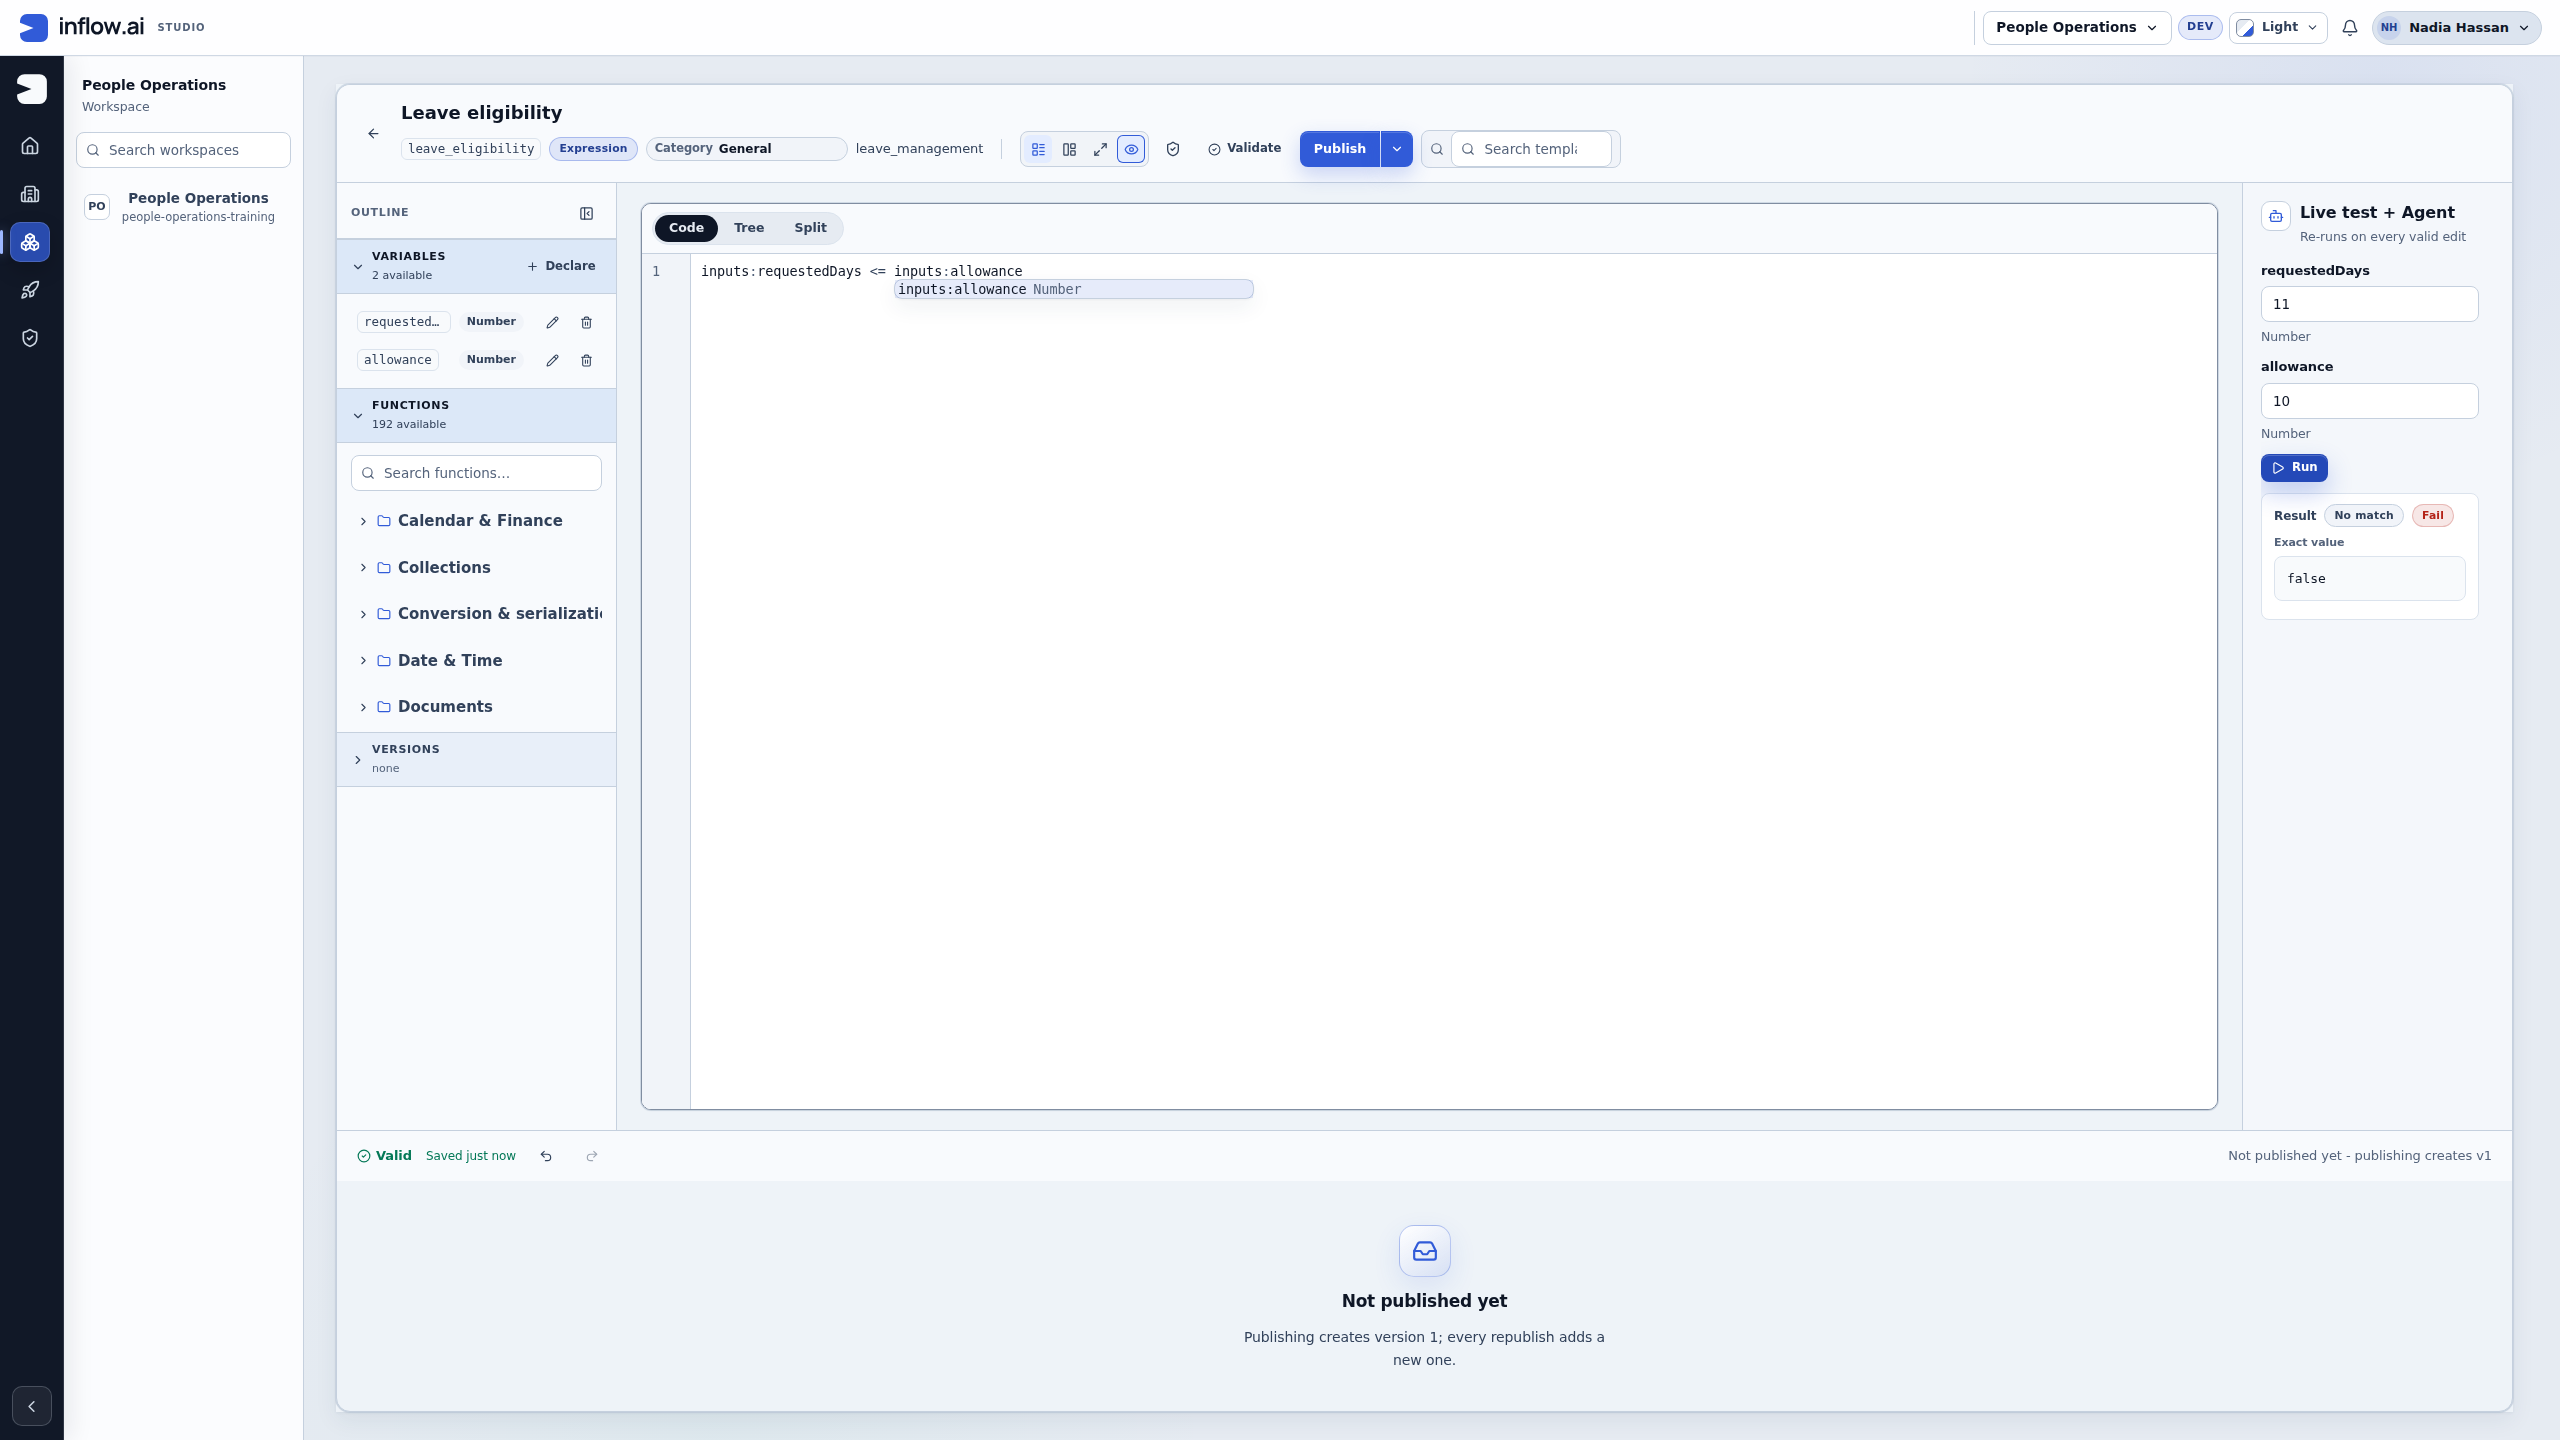
Check the meaning: The request exceeds this example allowance, so Exact value false is the correct business result. No match / Fail describes the test outcome; it is not a formula/runtime failure. The rule remains Valid and this draft is Not published yet. Decide with the business owner whether an over-limit request should be refused, reviewed specially or handled another way.
For a separate missing-input test, clear requestedDays and move focus. The previous false result becomes Previous result — outdated. Choose Run: this example reports Evaluation failed and Required rule input is missing: requestedDays. Restore 5, check that the control displays it, and Run again to obtain true. Do not treat a missing value as the same thing as a legitimate false answer.
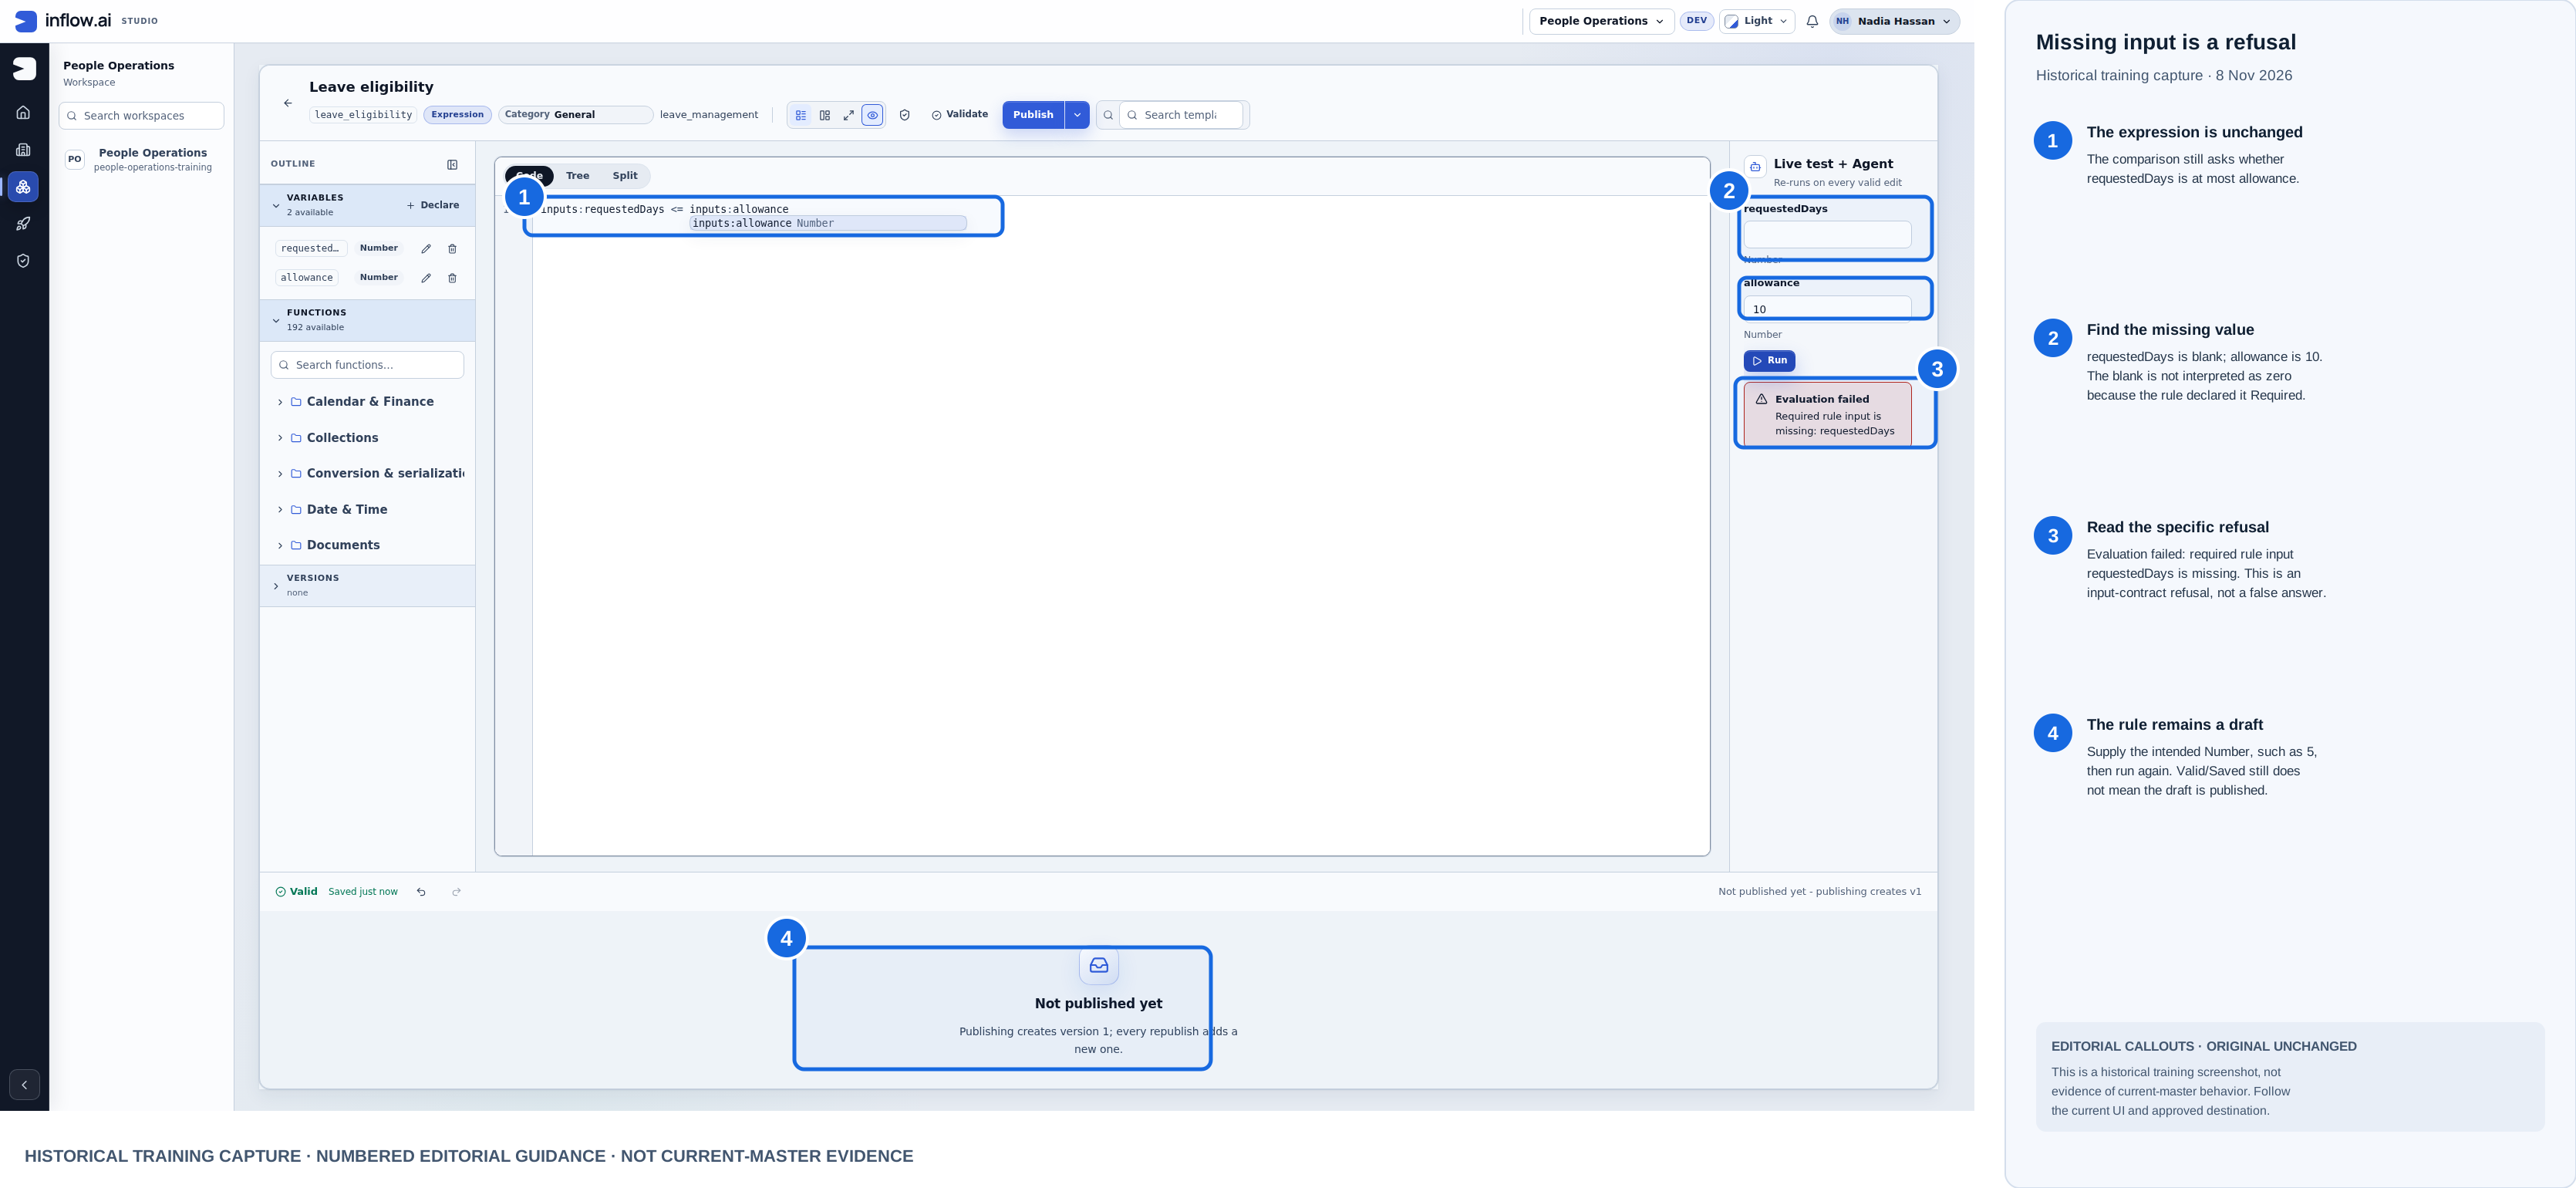
Historical training capture from 8 November 2026. Blue outlines and numbered labels are editorial guidance; the raw screenshot is unchanged here. This composite is not current-master evidence.
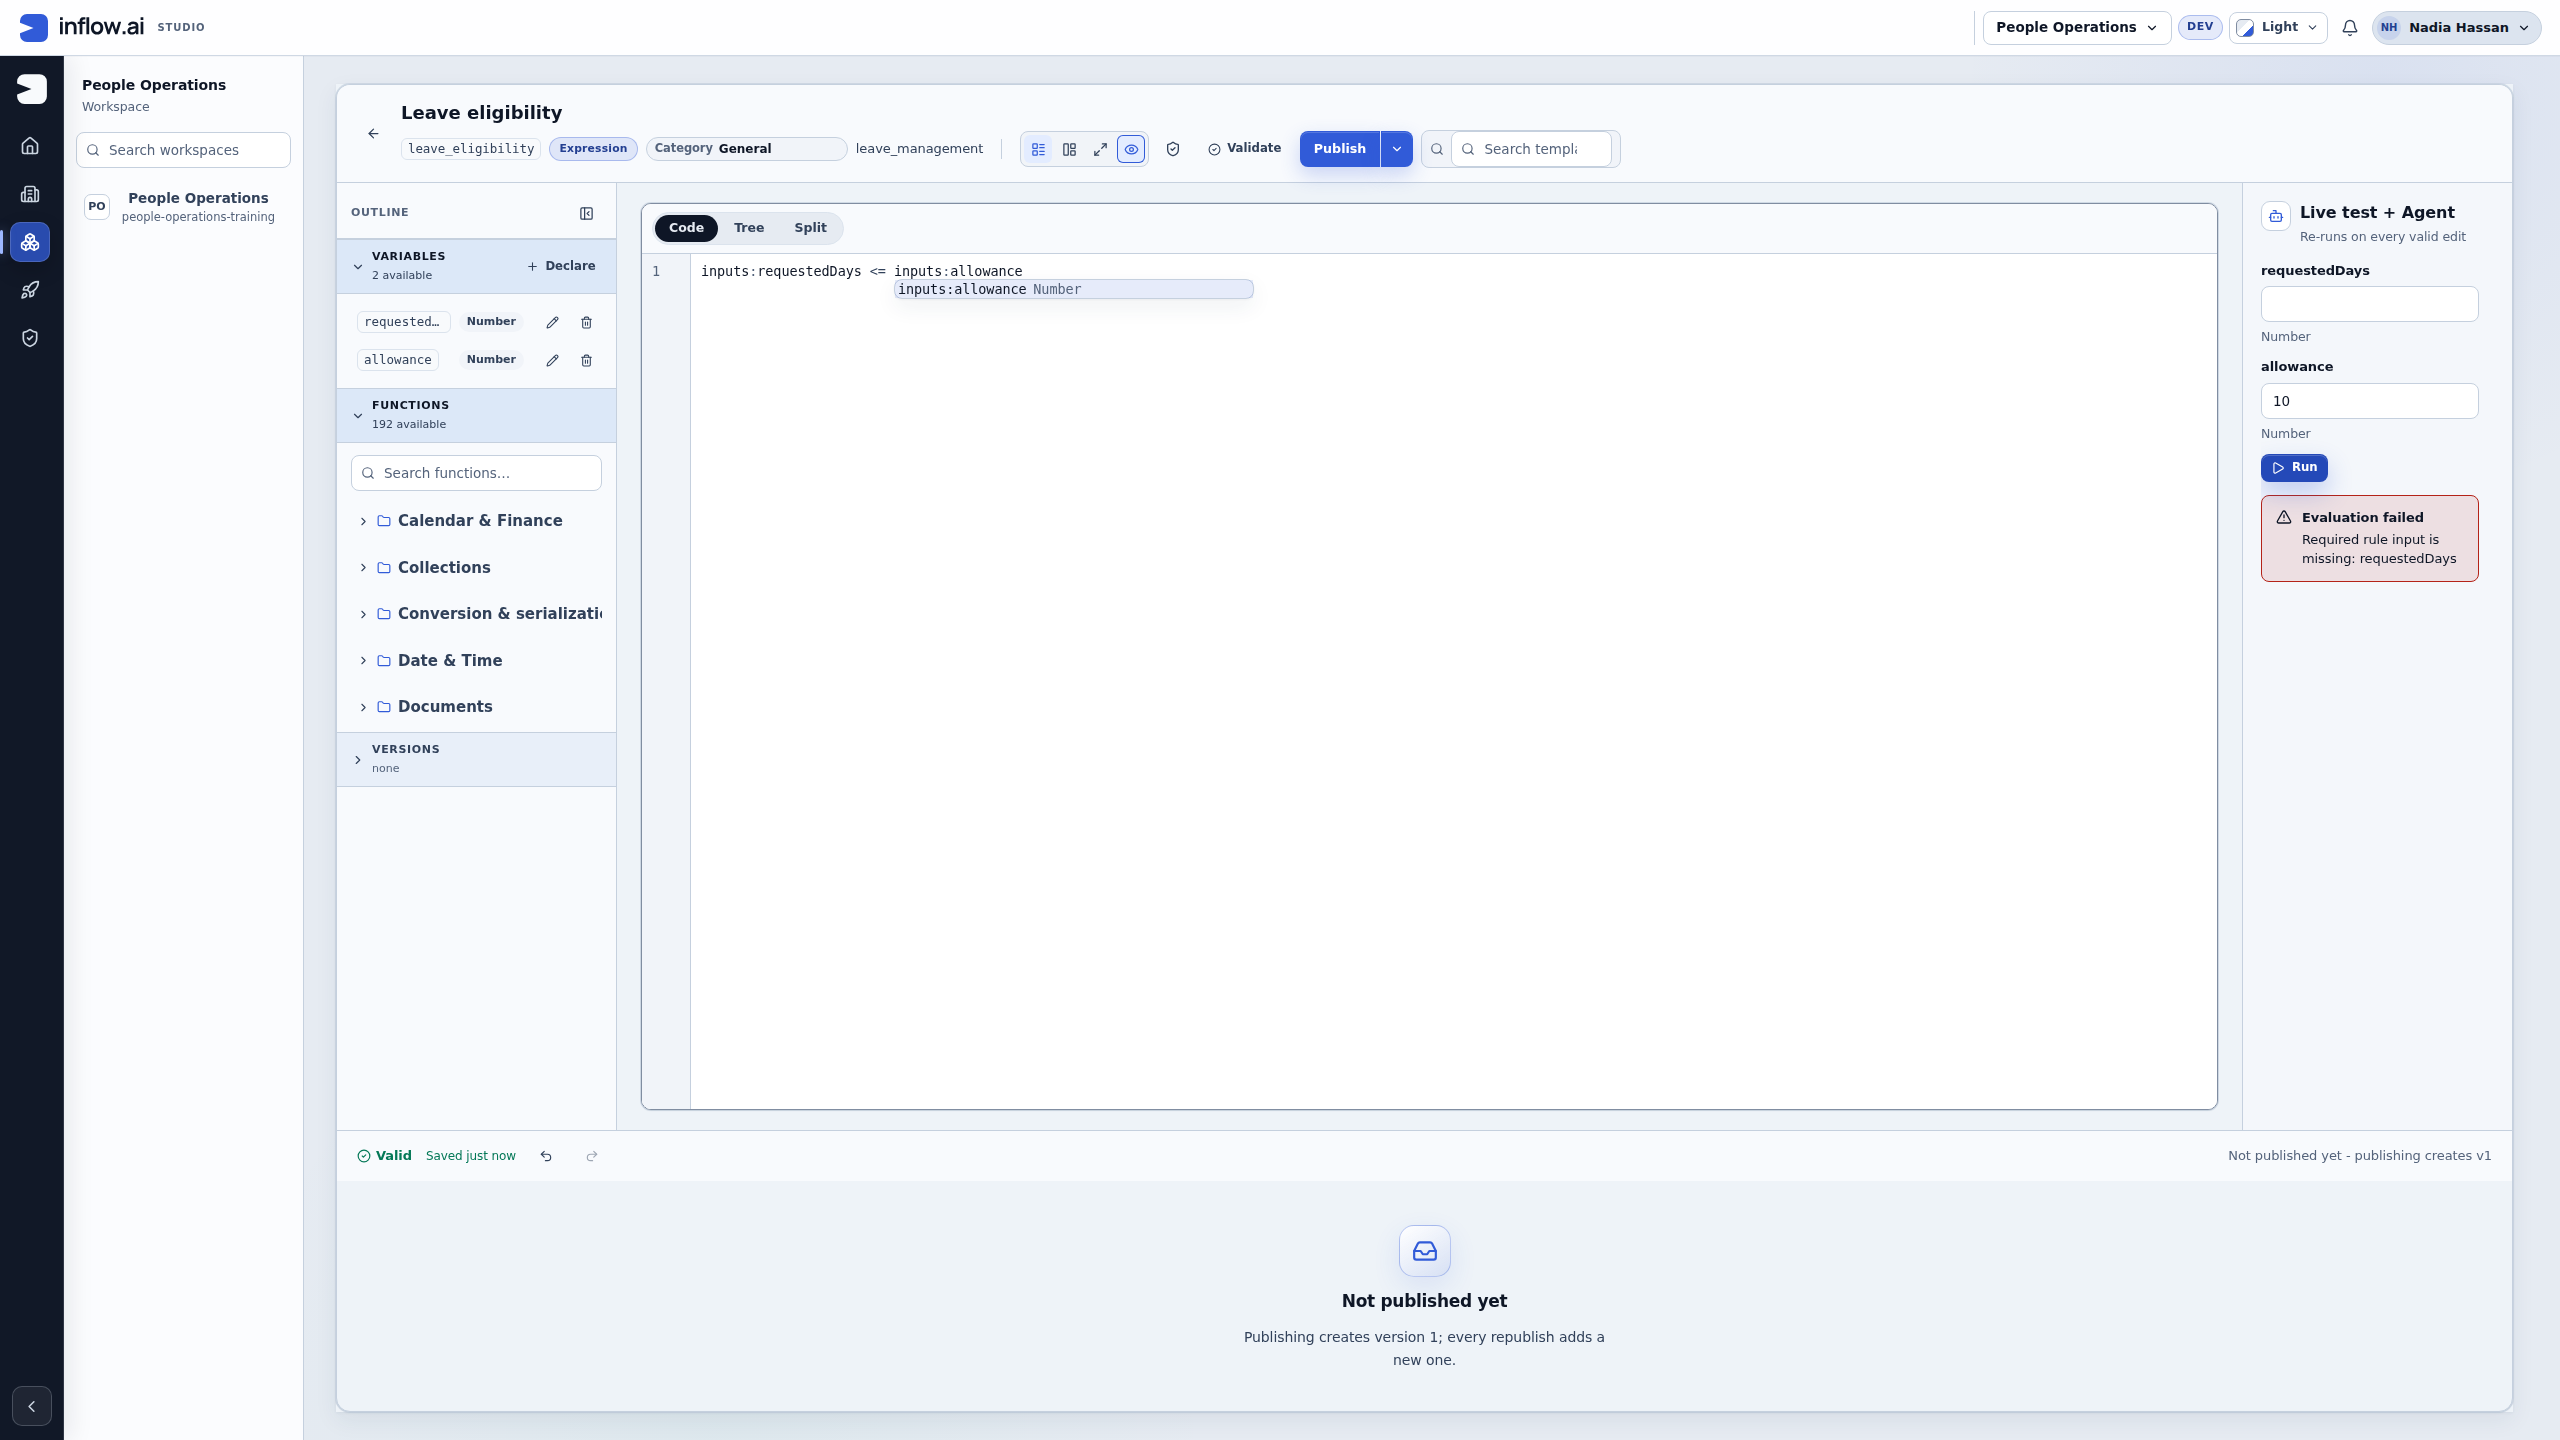
Check recovery: The exact refusal says required rule input requestedDays is missing while allowance is 10. Supply the intended Number (5 for this case) and run again. Do not convert missing input to zero, treat it as a valid false answer, or edit the comparison to hide the refusal. This is an input-contract failure; the expression remains Valid and the draft remains unpublished.
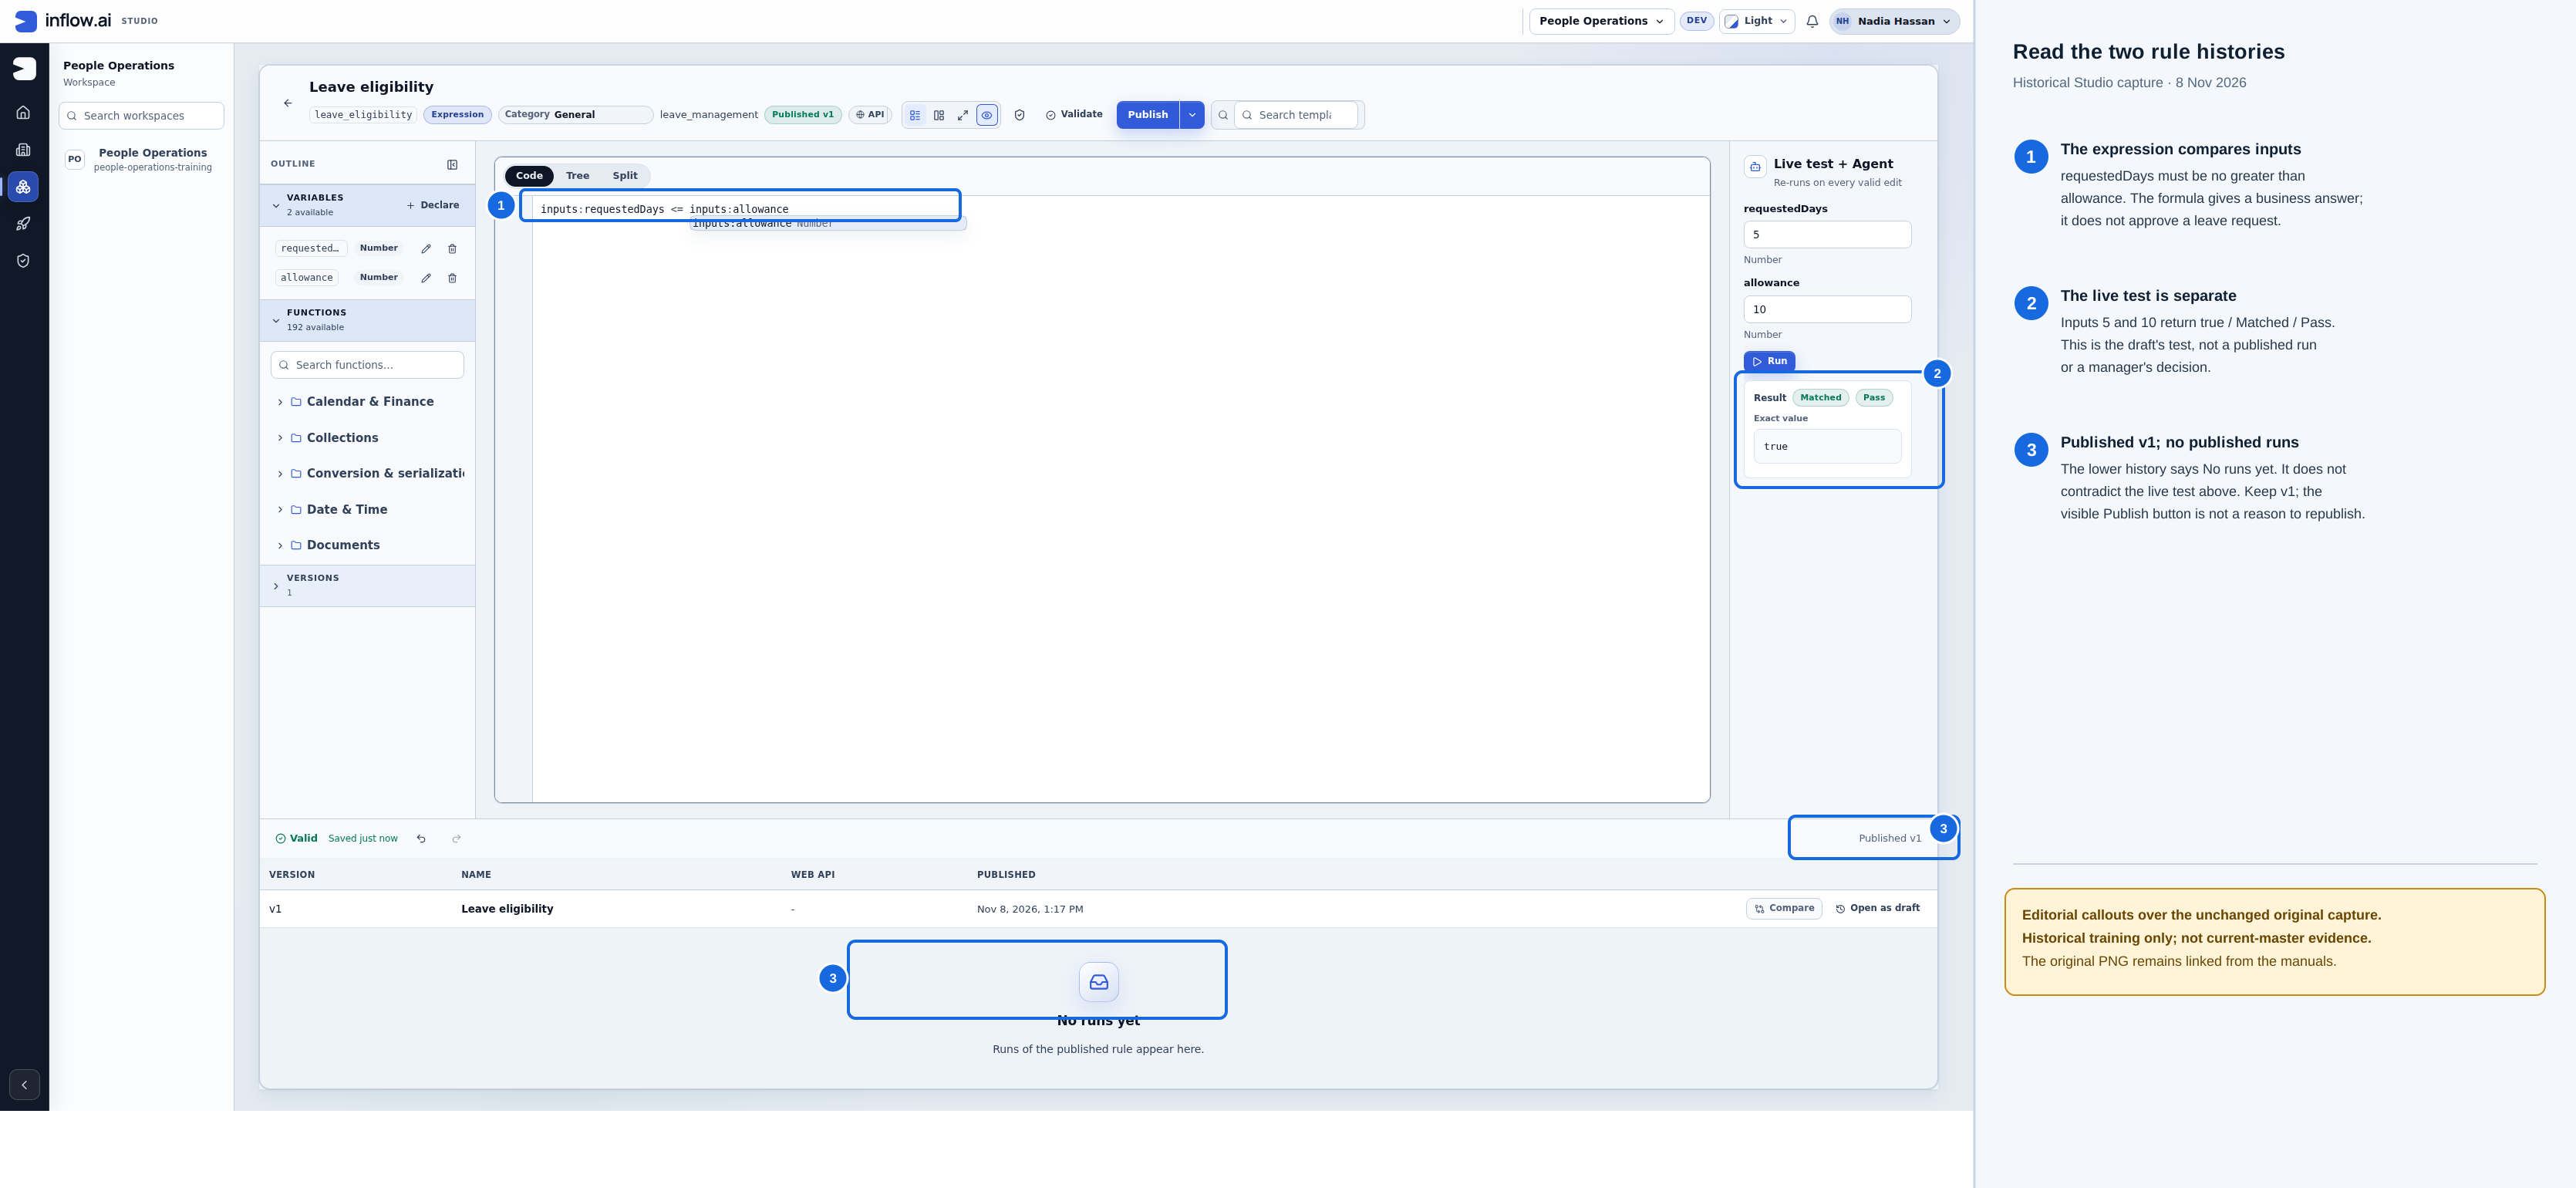
- The live test returned true for the checked 5-day request and 10-day allowance; that is a rule result, not an approval.
- Published v1 is the released rule. No runs yet refers to executions of that published version, not the separate draft live test. Keep the existing version; do not publish it again to reproduce this capture.
Historical training capture from 8 November 2026. The callouts are editorial, the original PNG is unchanged, and this is not current-master evidence. Open the original PNG.
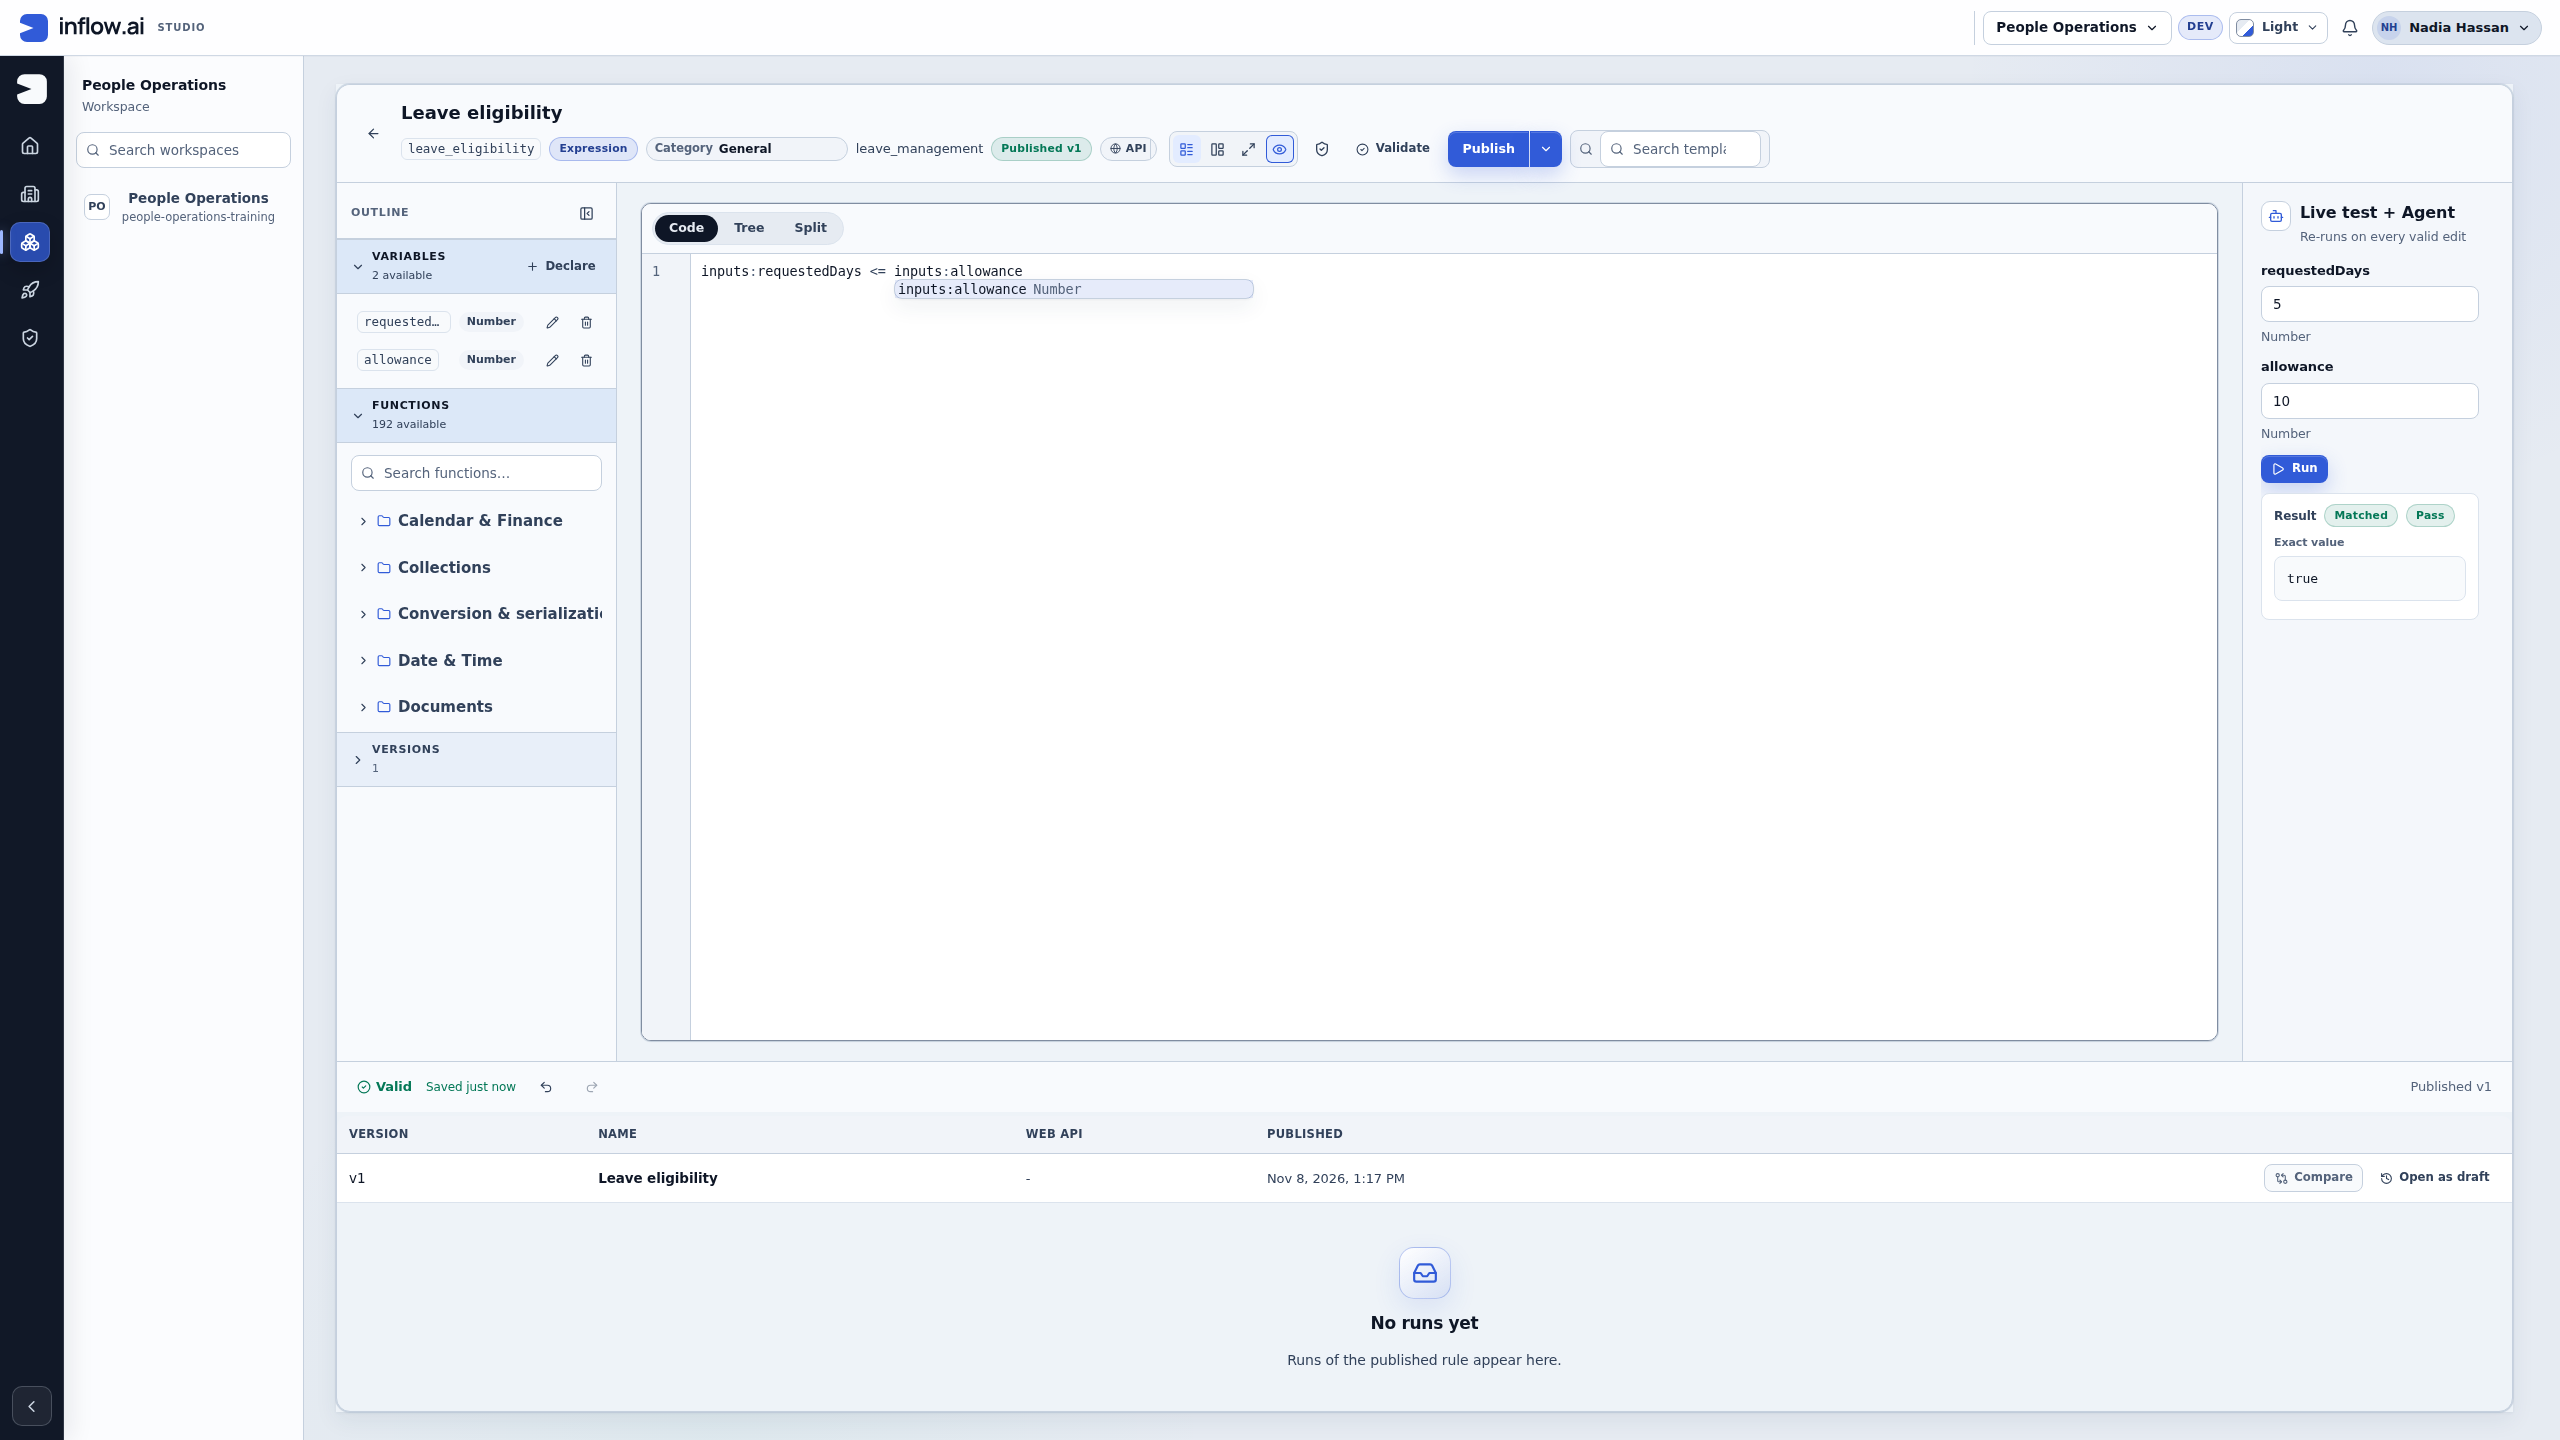
Check the histories: No runs yet under the published-version history refers to published executions; the separate draft live test can still show true. No leave record or approval task has been created by these rule tests.
Step 6 — Publish the pending-request query
- Open the matching Pending leave requests query if it already exists. Otherwise choose New rule → Query, enter Name Pending leave requests, check Key pending_leave_requests, choose Business function Leave management, then Create Query.
- In Guided mode, inspect and retain an existing Data model type / Leave request source. Select that source for a new query before configuring its fields.
- Under Fields, keep the selected request_id, employee_id, status and requested_days chips. Select only a missing field; clicking one that is already selected toggles it off. For a new query, select each once.
- Under Filters, keep the existing status is 'PENDING' condition. Use Add filter only if missing, then set Field status, Operator is, Value 'PENDING'. The quotes make PENDING literal text; retain All filters (AND) and do not add a duplicate condition.
- Keep an existing request_id / Ascending sort, or add it once if missing. Inspect Result size → First N records → Page size 10 and Transformations / Return Shape → Records. Use the visible cards/buttons to correct a genuinely different draft; retain already matching settings.
- Choose Validate, wait for Valid, then choose Run in Live query test. The prepared data has two matching PENDING requests, 014 and 015, subject to the current user's access. APPROVED comparison 016 is excluded.
- Open Sources in the result. This exercise uses the ready published Leave request source in the platform's governed published record store. Read its Preview source explanation before treating the result as a fresh external-database read.
- Keep an existing matching published version. Otherwise publish the checked Records query and read the resulting version. This makes a reusable list question; it does not grant users permission to the underlying records.
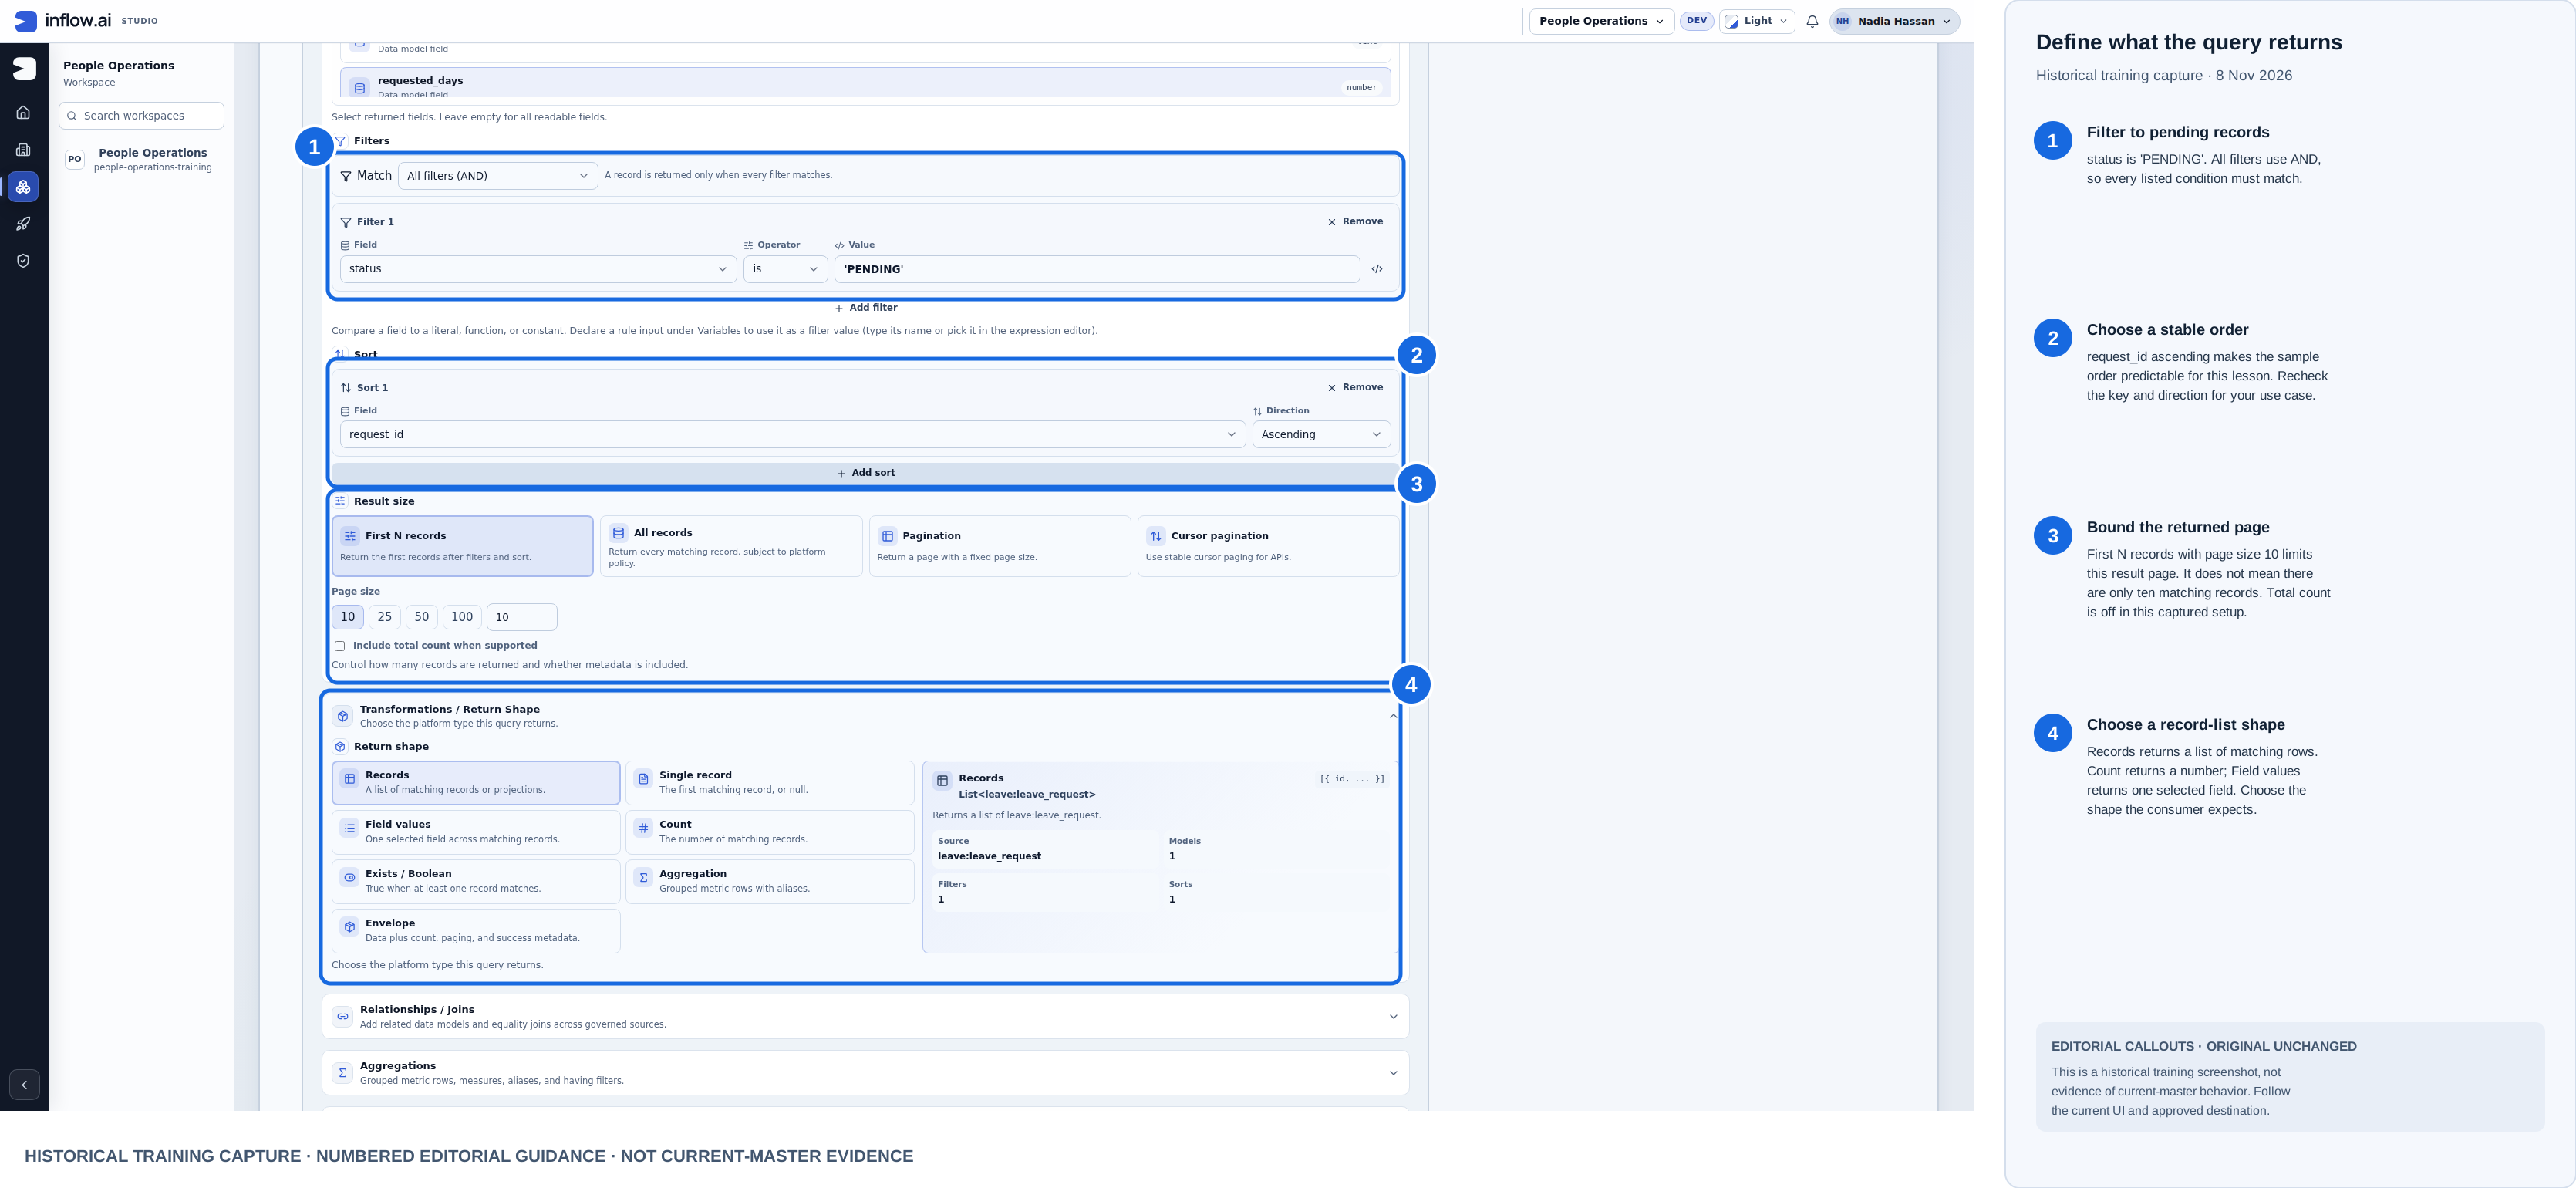
Historical training capture from 8 November 2026. Blue outlines and numbered labels are editorial guidance; the raw screenshot is unchanged here. This composite is not current-master evidence.
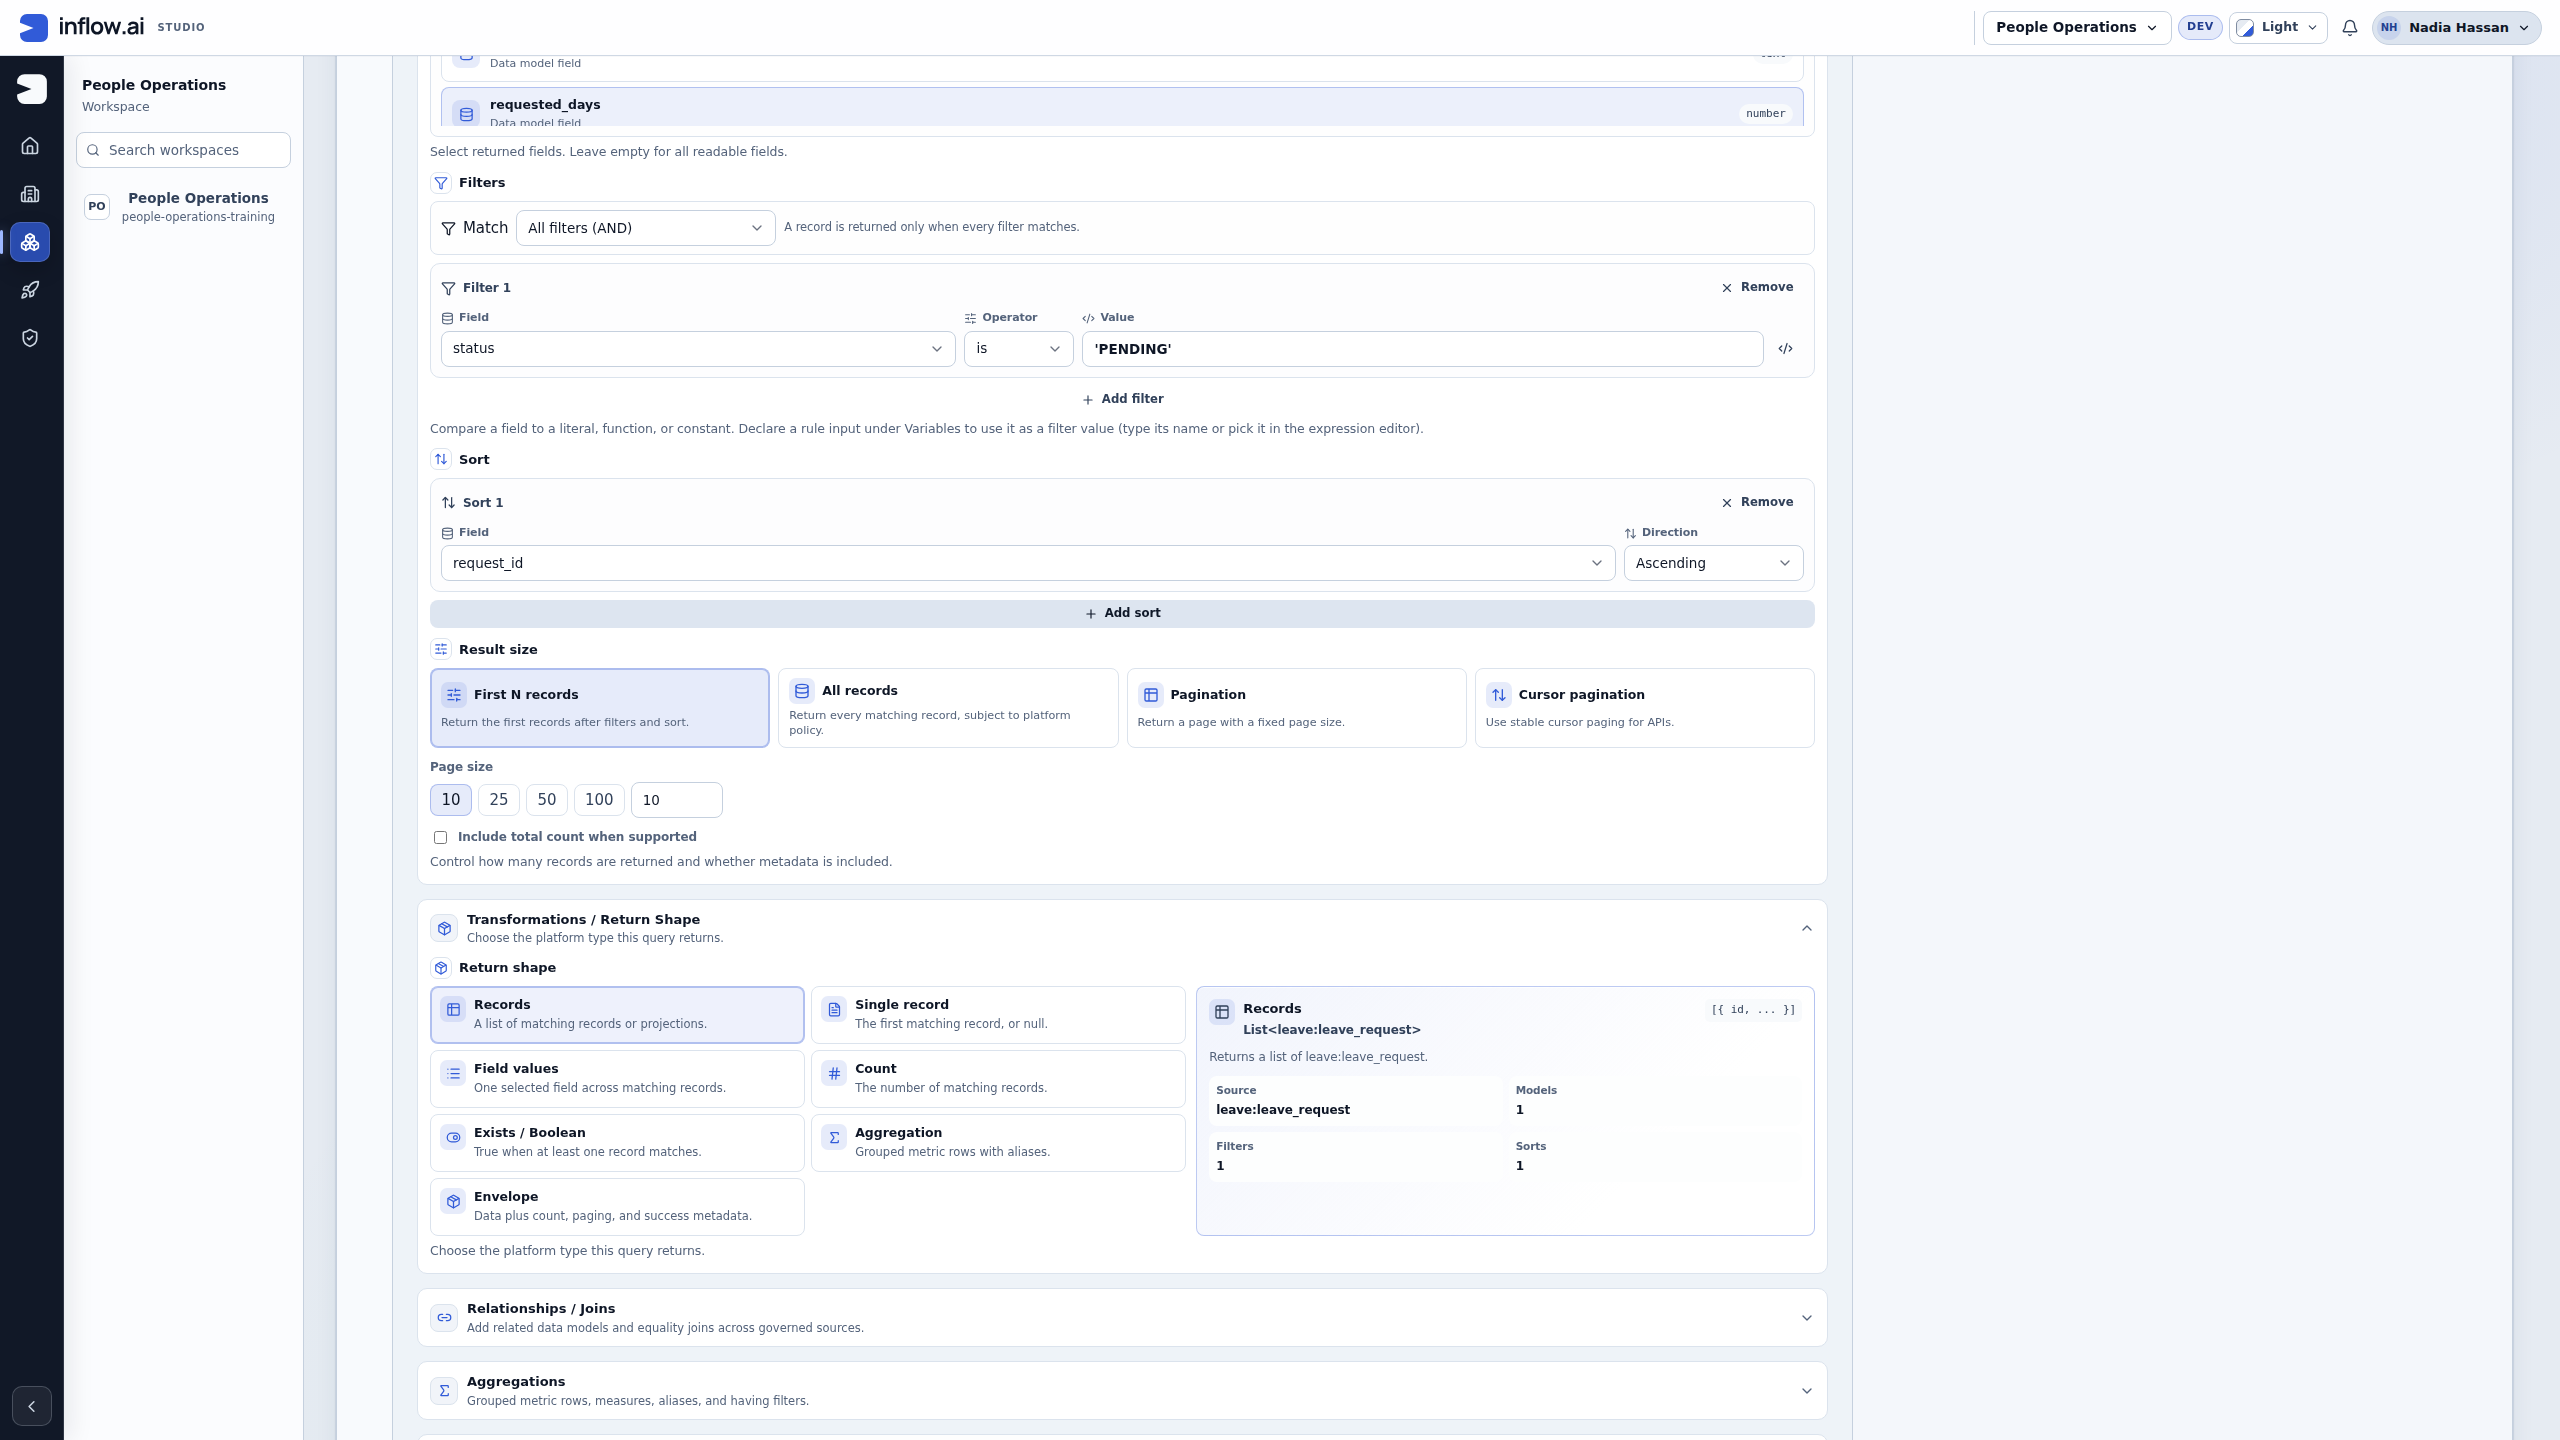
Check the bounded list contract: The captured setup filters status to PENDING, sorts by request_id ascending, and returns the first 10 records. Ten is a page limit, not a claim that only ten records match; total count is off in this capture. Records returns matching rows, while Count returns a number and Field values returns one selected field. Choose the shape the consuming page expects.
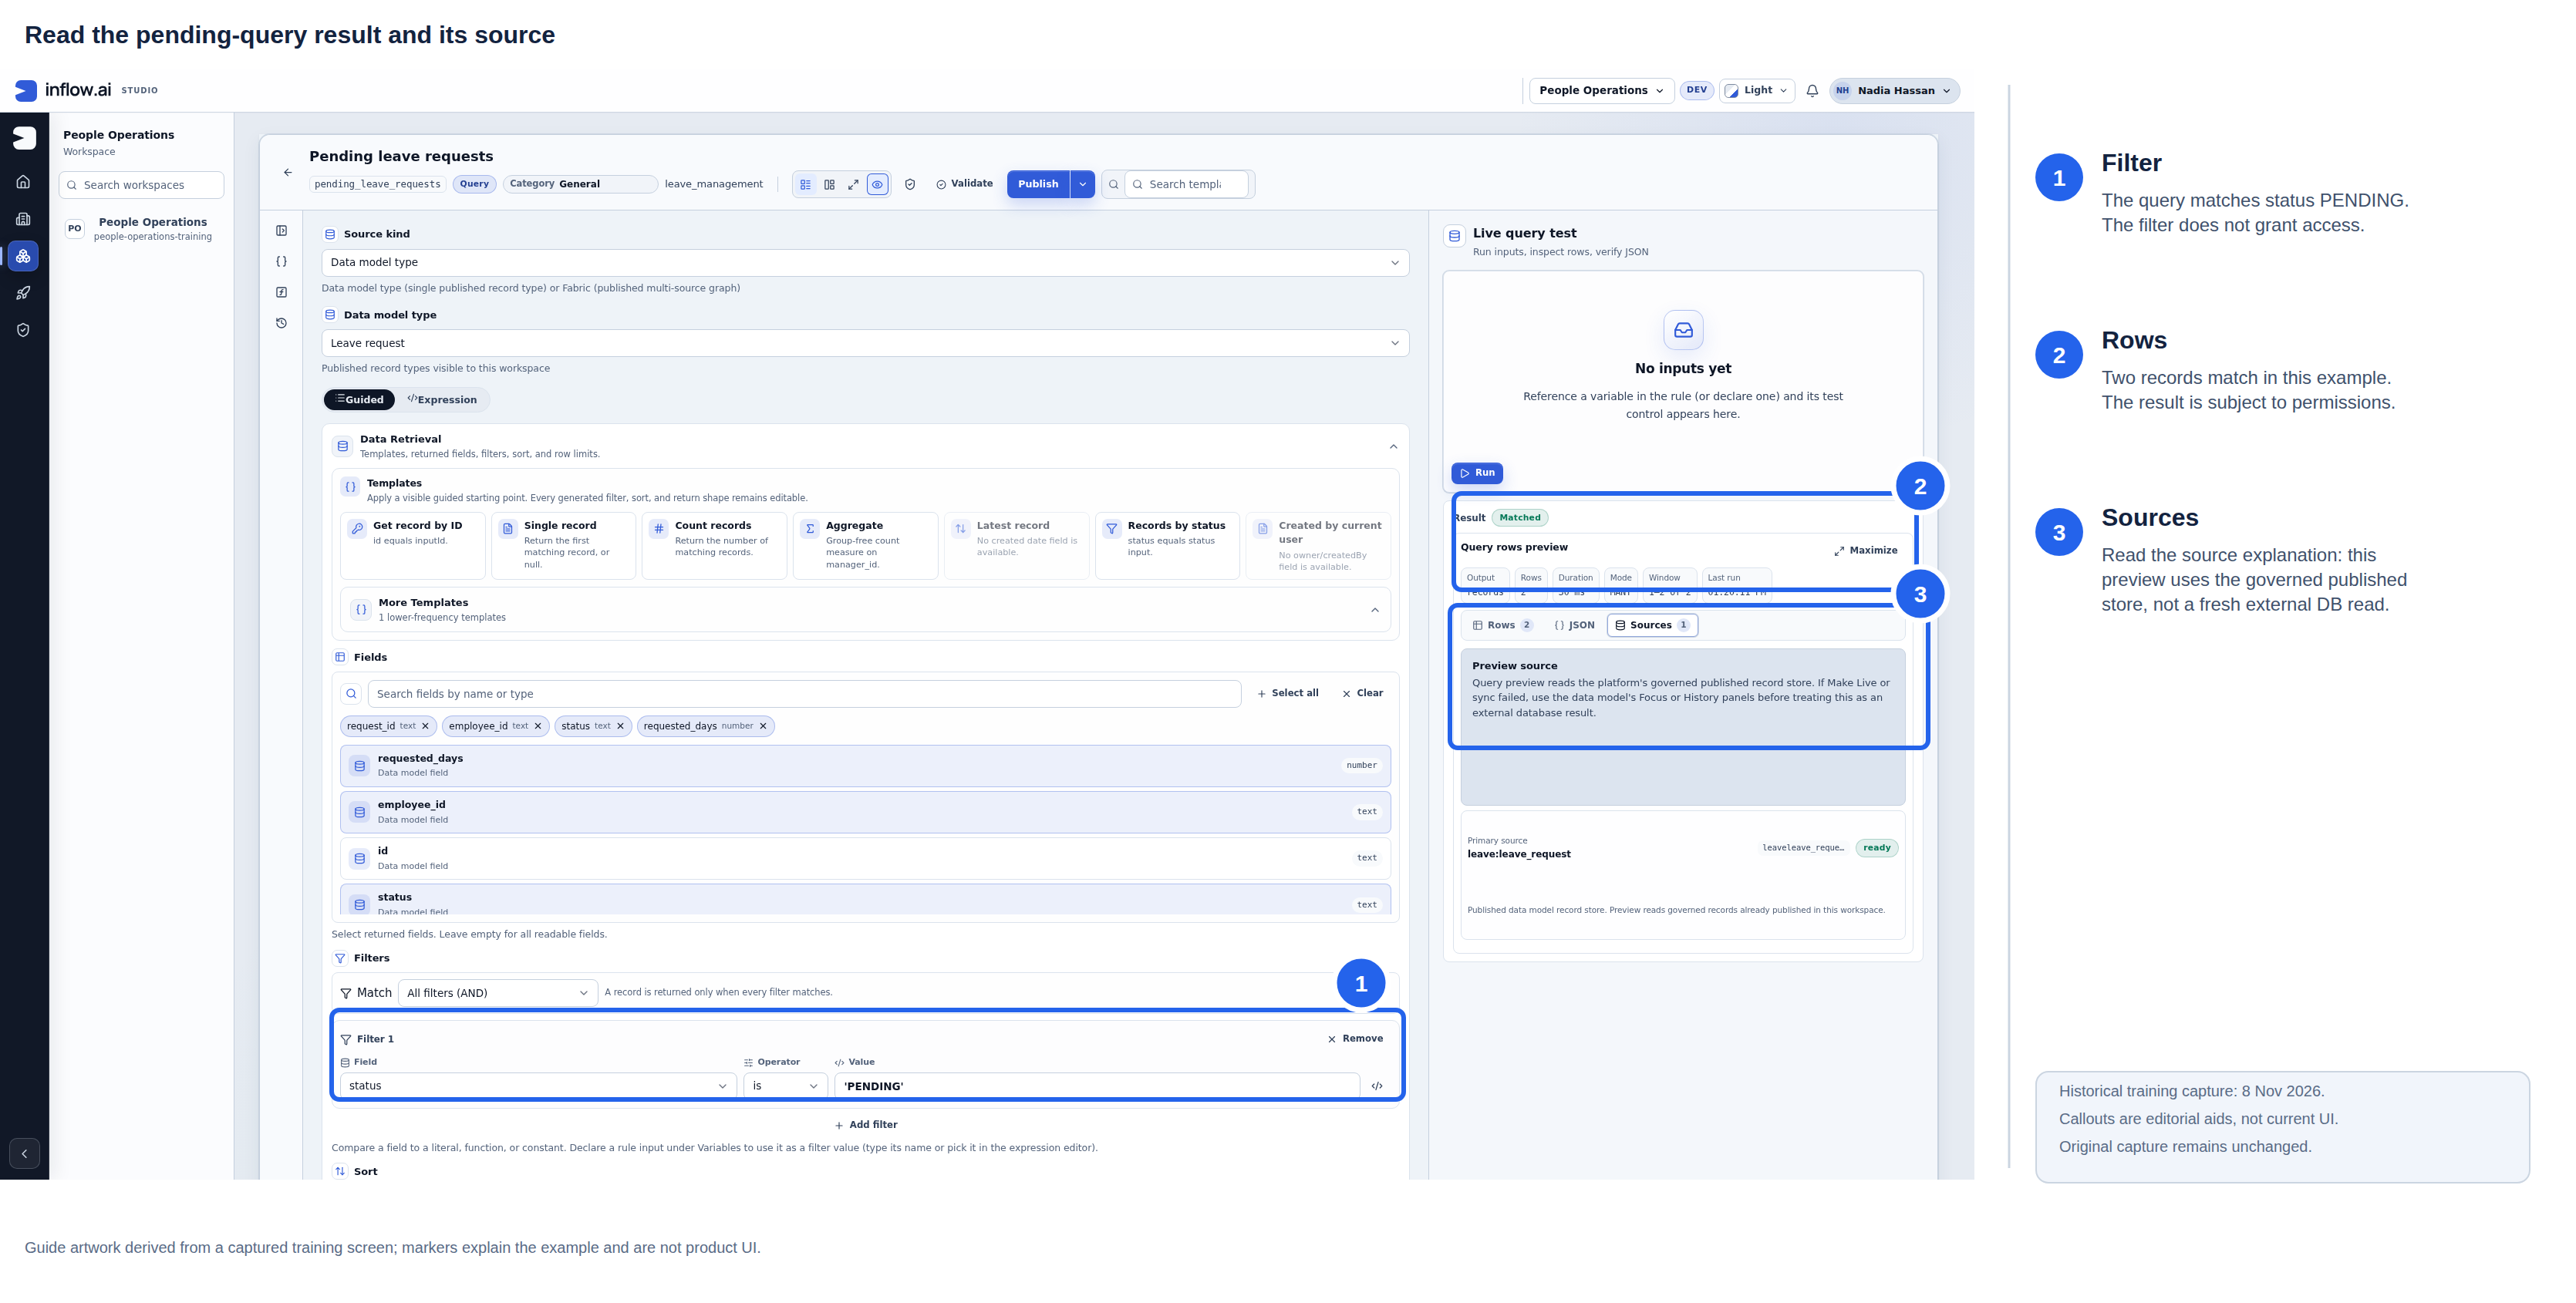
Historical capture from 8 November 2026. Blue outlines and numbered labels are editorial guidance; the raw screenshot remains unchanged here. This image is not evidence for the current UI.
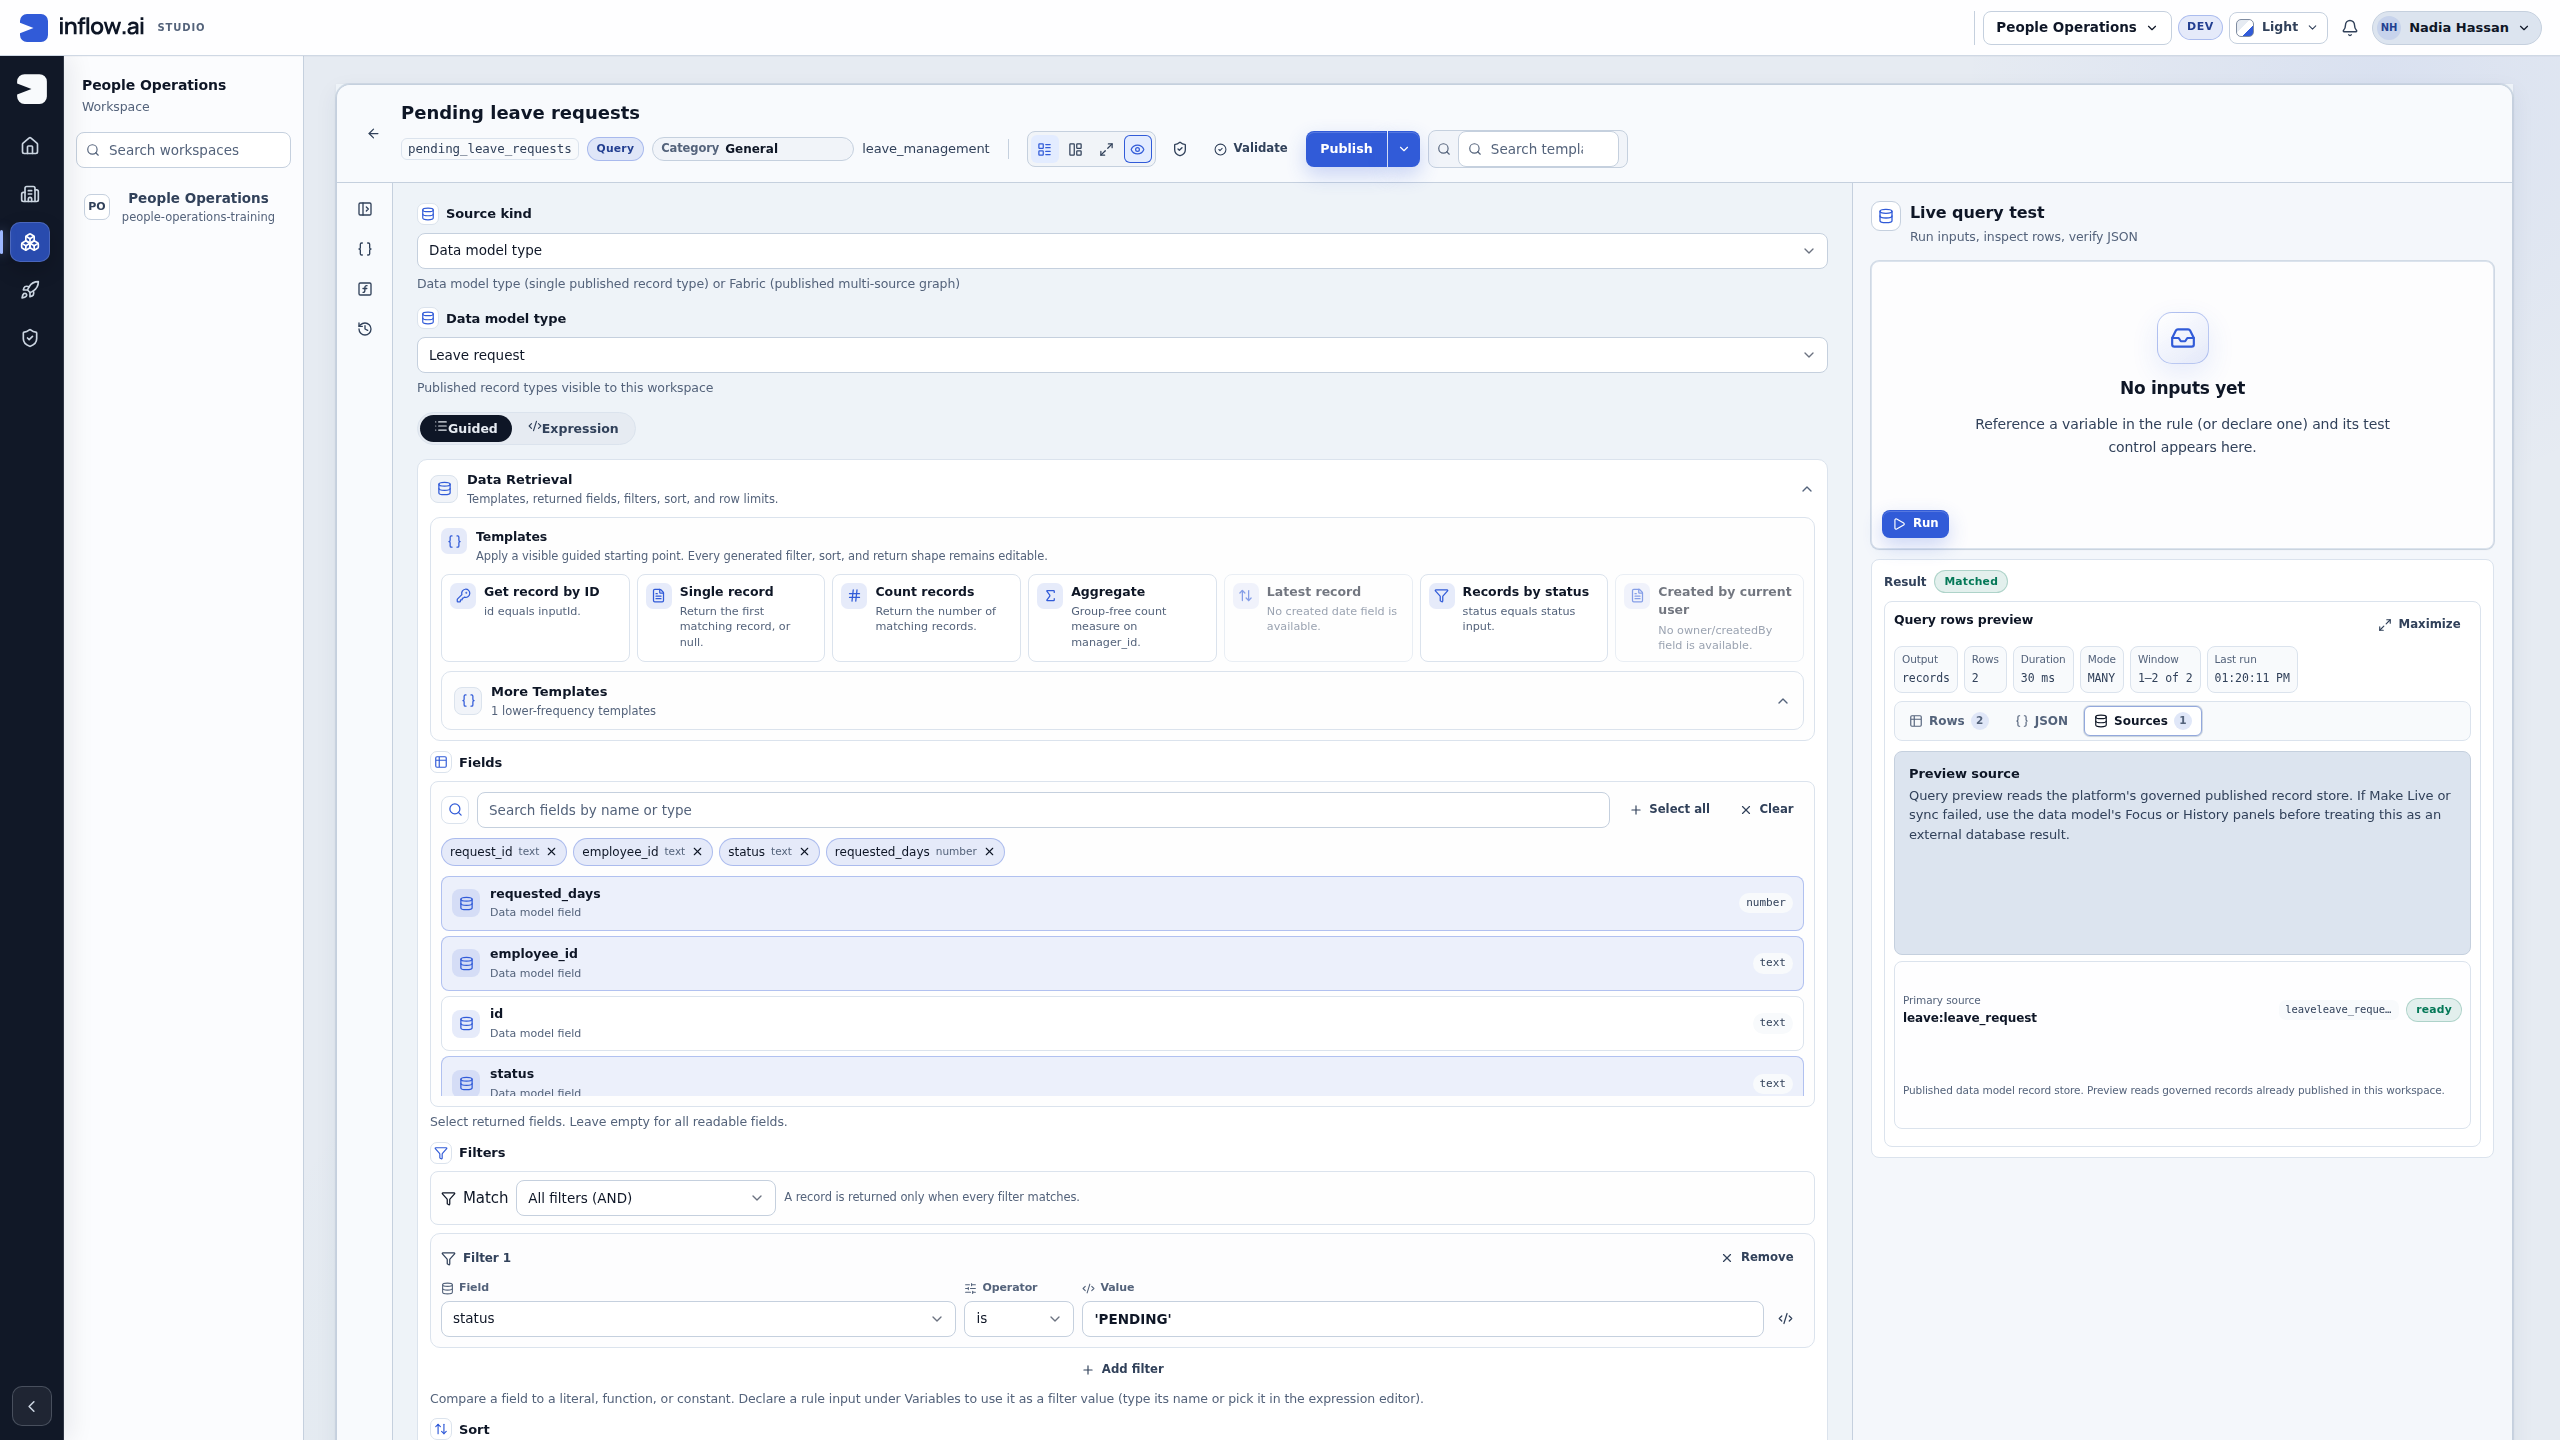
Check the answer and source: The example result has two records. Read the Sources explanation: this preview reads the governed published store; it is not proof of a fresh external-database read. Inspect the model's Focus/History if Make live or synchronization failed. A business filter does not substitute for record permissions.
For a summary number, open the separate matching Pending leave count Query if present, or create it only when missing. Retain the same source and PENDING filter, adding the filter only when absent, and use Count under Transformations / Return Shape. Keep a matching published count version rather than republishing it for another test. Its actual practice result is Value 2, while the Records query remains a separate list. See Query Builder for that illustrated count lesson, source diagnostics, return shapes and reusable inputs.
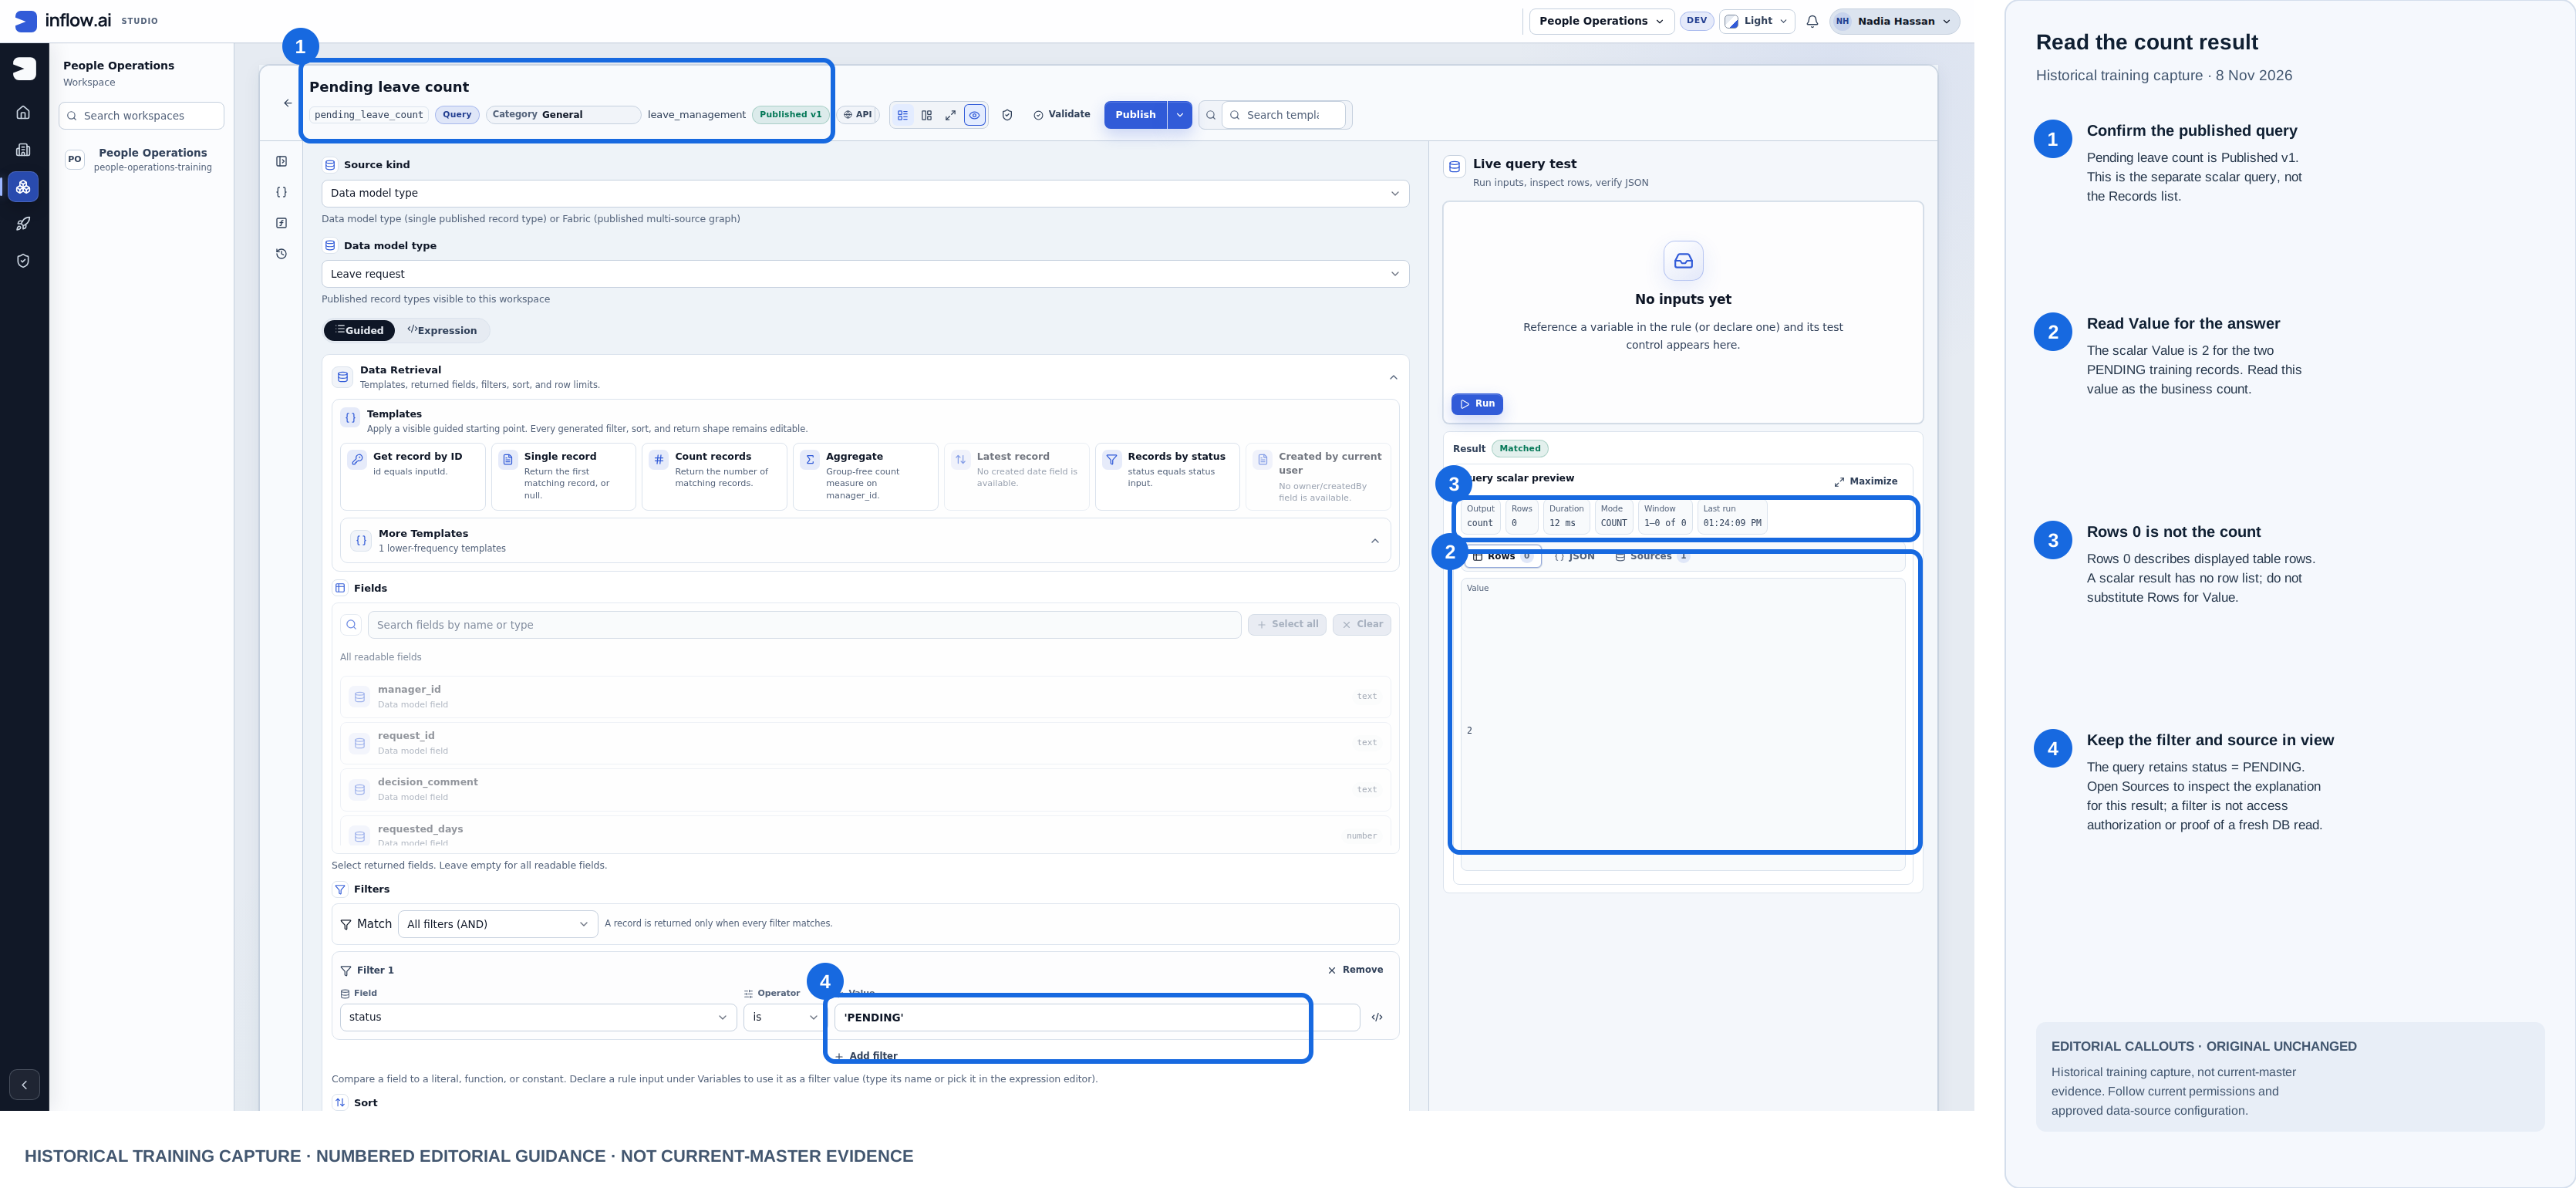
Historical capture from 8 November 2026. Callouts are editorial, the raw screenshot is unchanged, and this is not current-master evidence.
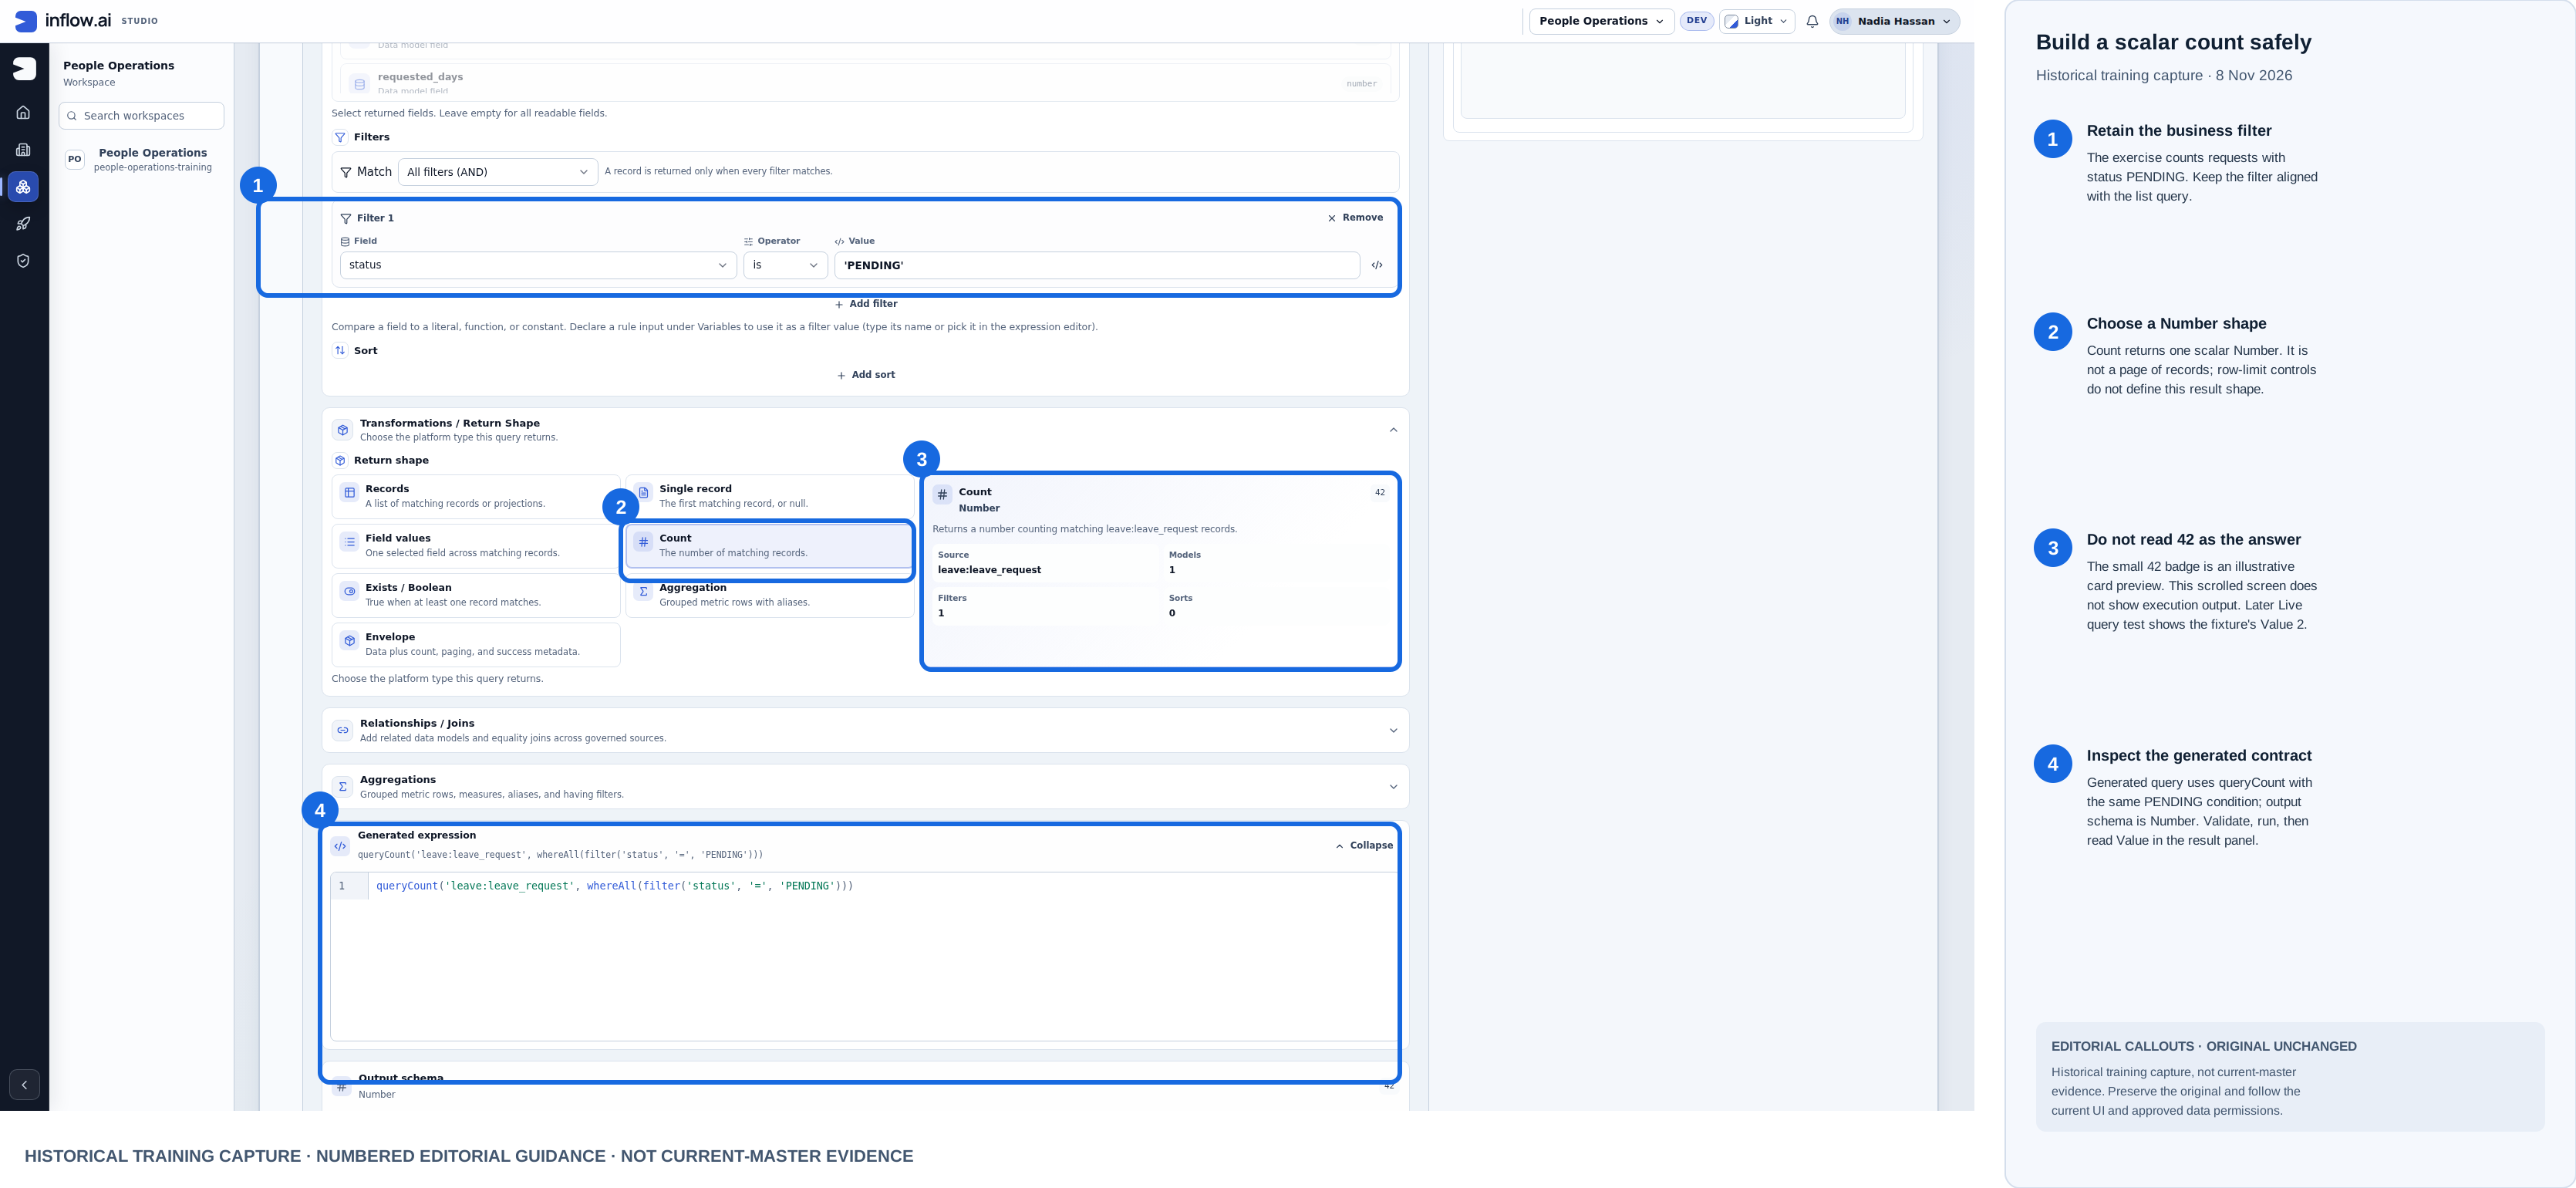
Historical capture from 8 November 2026. Callouts are editorial, the original PNG is unchanged, and this is not current-master evidence.
Handoff to forms and workflow
Keep a small application worksheet with the model/record-type names, published-version labels, field meanings and the allowance/eligibility/query names. The next consultant should be able to find the objects in Studio without guessing.
Continue with App Shells and interfaces, then the approval workflow, following the staged tutorial order. The sample 014 already exists: if a later form creates a new request, use a fresh request number such as 017; if it opens 014, treat that as the existing-record path.
The optional technical data-and-rule walkthrough preserves the developer detail.